Table of Contents
Advertisement
Quick Links
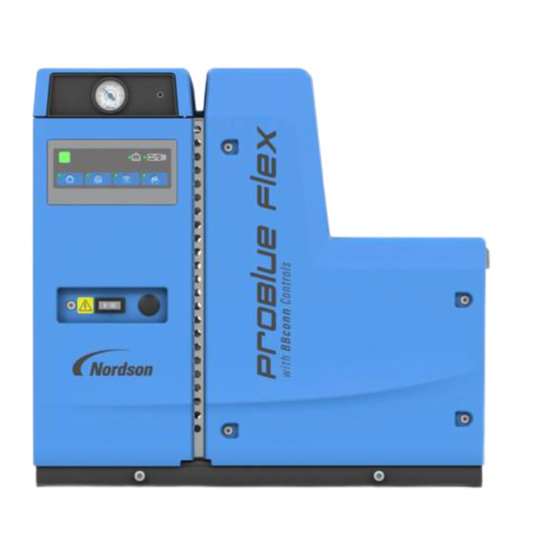
ProBlue Flex Adhesive Melter
Using the OLED User Interface
Customer Product Manual
Part 1128351_02
Issued 6/20
This document contains important safety information.
Be sure to read and follow all safety information in this
document and any other related documentation.
NORDSON CORPORATION DULUTH, GEORGIA USA
www.nordson.com
Advertisement
Table of Contents
Troubleshooting

Related Manuals for Nordson ProBlue Flex


Summary of Contents for Nordson ProBlue Flex
- Page 1 Using the OLED User Interface Customer Product Manual Part 1128351_02 Issued 6/20 This document contains important safety information. Be sure to read and follow all safety information in this document and any other related documentation. NORDSON CORPORATION DULUTH, GEORGIA USA www.nordson.com...
- Page 2 This is a Nordson Corporation publication which is protected by copyright. Original copyright date 2020. No part of this document may be photocopied, reproduced, or translated to another language without the prior written consent of Nordson Corporation. The information contained in this publication is subject to change without notice. Trademarks 4800 INTEGRA, Allegro, Apogee, Artiste, Asymtek, Automove, Avex, BaitGun, BKG, Blue Box, BM-32, BM-58, BM-63, Bowtie, Build‐A‐Part, CF, Century, CleanSleeve, CleanSpray, Color‐on‐Demand, ColorMax, Conexis, Connections to Life, Contour, Control Coat,...
-
Page 3: Table Of Contents
............Part 1128351_02 E 2020 Nordson Corporation... - Page 4 Defining Temperature Setback ....... . E 2020 Nordson Corporation Part 1128351_02...
- Page 5 Importing and Exporting .PLC File ......Part 1128351_02 E 2020 Nordson Corporation...
- Page 6 Electronic Pressure Adjust Alarms ......E 2020 Nordson Corporation Part 1128351_02...
-
Page 7: Oled User Interface
CAUTION! Indicates a potentially hazardous situation that, if not avoided, can result in minor or moderate personal injury. CAUTION! (Used without the safety alert symbol) Indicates a potentially hazardous situation that, if not avoided, can result in damage to equipment or property. Part 1128351_02 E 2020 Nordson Corporation... -
Page 8: Responsibilities Of The Equipment Owner
Provide appropriate emergency and first aid equipment. Conduct safety inspections to ensure required practices are being followed. Re‐evaluate safety practices and procedures whenever changes are made to the process or equipment. E 2020 Nordson Corporation Part 1128351_02... -
Page 9: User Qualifications
Do not modify the equipment. Do not use incompatible materials or unapproved auxiliary devices. Contact your Nordson representative if you have any questions on material compatibility or the use of non‐standard auxiliary devices. Part 1128351_02 E 2020 Nordson Corporation... -
Page 10: Instructions And Safety Messages
Familiarize yourself with the location and meaning of the safety warning labels and tags affixed to the equipment. Refer to Safety Labels and Tags at the end of this section. If you are unsure of how to use the equipment, contact your Nordson representative for assistance. Installation Practices Install the equipment in accordance with the instructions provided in this document and in the documentation provided with auxiliary devices. -
Page 11: Maintenance And Repair Practices
Read and comply with the manufacturer's instructions and the SDS supplied with equipment cleaning compounds. NOTE: SDSs for cleaning compounds that are sold by Nordson are available at www.nordson.com or by calling your Nordson representative. Confirm the correct operation of all safety devices before placing the equipment back into operation. -
Page 12: Equipment Shutdown
2. Disconnect the input signal wiring to the applicator solenoid valve(s). 3. Reduce the air pressure to the applicator solenoid valve(s) to zero; then relieve the residual air pressure between the regulator and the applicator. E 2020 Nordson Corporation Part 1128351_02... -
Page 13: General Safety Warnings And Cautions
General Safety Warnings and Cautions Table 1 contains the general safety warnings and cautions that apply to Nordson hot melt and cold adhesive equipment. Review the table and carefully read all of the warnings or cautions that apply to the type of equipment described in this manual. - Page 14 WARNING! Risk of fire or explosion! Nordson adhesive equipment is not rated for use in explosive environments and has not been certified for the ATEX directive or as nonincendive. In addition, this equipment HM, CA, PC should not be used with solvent‐based adhesives that can create an...
- Page 15 CAUTION! Nordson hot melt equipment is factory tested with Nordson Type R fluid that contains polyester adipate plasticizer. Certain hot melt materials can react with Type R fluid and form a solid gum that can clog the equipment.
-
Page 16: Other Safety Precautions
3. Do NOT attempt to remove the solidified hot melt from your skin. 4. In case of severe burns, treat for shock. 5. Seek expert medical attention immediately. Give the SDS for the hot melt to the medical personnel providing treatment. E 2020 Nordson Corporation Part 1128351_02... -
Page 17: Safety Labels And Tags
Table 2 provides an illustration of the hazard identification symbols that appear on each safety label and tag, the meaning of the symbol, or the exact wording of any safety message. Figure 1 Location of Safety Labels Part 1128351_02 E 2020 Nordson Corporation... - Page 18 178475 SURFACE TAG, WARNING, HAZARDOUS VOLTS, 1025795 DURABLUE TAG,MAXIMUM AIR 90 P.S.I 6.2 BAR 1024721 PRESSURE,1.55X.287 1127475 TAG, WARNING, BURN HAZARD. HOT ADHESIVE. POWER OFF FILL SYSTEM BEFORE SERVICING 1087951 TAG,WARNING,HYD PRESSURE, TRIANGLE ONLY E 2020 Nordson Corporation Part 1128351_02...
-
Page 19: Basic Operations
Procedural variations or special considerations are explained in the additional information table that follows most procedures. Where applicable, some table entries also contain cross‐reference information. Additional information tables are indicated by the symbol shown to the left. Part 1128351_02 E 2020 Nordson Corporation... -
Page 20: About The Home Screen
NOTE: You can order your melter with additional options from the factory, but you can also upgrade your melter at any time. See Figure 2 for the location of the Navigation controls. Figure 2 Navigation buttons E 2020 Nordson Corporation Part 1128351_02... - Page 21 Navigates to the previous menu Moves up to the previous selection in a list Moves down to the next selection in a list Part 1128351_02 E 2020 Nordson Corporation...
-
Page 22: Using The Master Controls
OLED User Interface Using the Master Controls Use the Master Controls to operate the melter. Refer to the table below for additional details. Figure 3 Master Control buttons E 2020 Nordson Corporation Part 1128351_02... - Page 23 PLC. Read only access is allowed. You have read and write access if you access the melter with the touch screen or WiFi. Default is Enabled, meaning read/write access is available using discrete inputs and PLC. Part 1128351_02 E 2020 Nordson Corporation...
-
Page 24: About The System Status And Led Indicators
OLED User Interface About the System Status and LED Indicators Refer to the table below for additional details. Figure 4 System LED indicators E 2020 Nordson Corporation Part 1128351_02... - Page 25 WiFi, touch screen or from your laptop. Wireless LED Optional The LED illuminates when the WiFi is enabled and at least one device is connected. The LED flashes when the WiFi is enabled, but no device is connected. Part 1128351_02 E 2020 Nordson Corporation...
-
Page 26: About The System Status Colors
A Fault condition exists, caused by a failure of either the system itself or a component. The Master Heater and Pump Fault controls are automatically toggled Off. Production is halted until the Fault condition is resolved. E 2020 Nordson Corporation Part 1128351_02... - Page 27 The Master Heater control Flashing Stop remains on, but the Master Pump control is automatically toggled Off. The optional Master Fill control remains On. When the melter is powered Off. Offline White Part 1128351_02 E 2020 Nordson Corporation...
-
Page 28: Common Operator Tasks
Starting/Shutting down the Melter Switching the Master Heater and Pump Control On/Off Monitoring the Tank Adhesive Level Manually Filling the Tank Managing Heated Zones Managing System Air Pressure About Loading and Saving Recipes Viewing the Event Log E 2020 Nordson Corporation Part 1128351_02... -
Page 29: Starting The Melter
The Automatic Pressure Discharge (APD) valve relieves the hydraulic pressure back to the tank. 2. Disable the applicators as follows: Air‐operated applicators: Turn Off the air supply to the applicators. Electric applicators: Turn Off the applicator driver, pattern controller, or timer. Part 1128351_02 E 2020 Nordson Corporation... -
Page 30: Switching The Master Heater And Pump Controls On/Off
If you press the Master Pump control button with AutoPump disabled and before the system is not at Temperature Ready, AutoPump is momentarily Enabled and the Pump button flashes. E 2020 Nordson Corporation Part 1128351_02... -
Page 31: Monitoring The Tank Adhesive Level
If you have a Melt-on-Demand system, or a tank with an optional Fill system, then from the Home screen, then Fill Level is displayed. If you do not have a Fill system, then Tank Level is displayed NOTE: These are read-only values. Part 1128351_02 E 2020 Nordson Corporation... -
Page 32: Manually Filling The Melter Tank
Filling above the sensor may cause charring to occur on the sensor, as well as adhesive build-up. 3. Close the tank lid when you are finished filling the tank. E 2020 Nordson Corporation Part 1128351_02... -
Page 33: Manually Initiating The Automatic Fill System
Using either Continuous Force Fill or Timed Force Fill overrides the overfill protection and could allow adhesive to enter the exhaust section of the melter. The Fill Activity LED illuminates when the Fill system is actively filling. Part 1128351_02 E 2020 Nordson Corporation... -
Page 34: Managing Heated Zones
Internal zones (tank and manifold) cannot be disabled. You can only change their set point temperatures. Although there are two internal zones (tank and manifold), changing one internal zone automatically changes the other. You cannot have two different internal zone set point temperatures. E 2020 Nordson Corporation Part 1128351_02... - Page 35 Fault conditions. Select Event Log to view all melter events (alerts, faults, parameter changes, etc.) in the order they occurred, with the most recent on top. Refer to the Troubleshooting section for more information. Part 1128351_02 E 2020 Nordson Corporation...
- Page 36 NOTE: Go to Tools | Reports/Logs to export the Event Log to a USB Acknowledges the message and removes the alert pop up message from view. Although the condition still exists, attention is needed. You can view the message again from the Event Log. E 2020 Nordson Corporation Part 1128351_02...
-
Page 37: Managing System Air Pressure
Using a 6mm Hex wrench, turn clockwise to increase pressure and counterclockwise to decrease pressure to best suit your production requirements. Refer to Figure 6. Optional pressure gauge Manual pressure adjustment Picture shown with optional Fill System Figure 6 Manual Pressure Adjustment Part 1128351_02 E 2020 Nordson Corporation... -
Page 38: Electronically Adjusting System Air Pressure
Navigation pad to accept changes and return to the Home screen. ## PSI NOTES: If you are using a recipe, any changes made are not automatically saved to the currently loaded recipe. E 2020 Nordson Corporation Part 1128351_02... -
Page 39: Defining Manual And Electronic Pressure Monitor And Adjust Settings
Defining Manual and Electronic Pressure Monitor and Adjust Settings You can order manual or electronic pressure adjust from the factory, otherwise, you can order the appropriate kit. Contact your local Nordson representative for more information. For manual pressure monitoring, you will need part number 1128344. -
Page 40: Defining Electronic Pressure Settings And Monitoring Alert Settings
Pressure Mode (-)0.69 from (-)0.34 from (-)4.83 from set point set point set point (-)69 from (-)34 from (-) 483 from Electronic set point set point set point E 2020 Nordson Corporation Part 1128351_02... -
Page 41: Electronic Pressure Control Settings
Minimum Maximum 4.83 1.38 6.90 3. Go to the next page to optionally define pressure alerts. Otherwise, press < to return to the Pressure Control Settings menu or to return to the Home screen. Part 1128351_02 E 2020 Nordson Corporation... -
Page 42: Defining Pressure Runup Settings And Monitoring Alert Settings
1. Select Output Setting, press > and enter the following information: Pressure Low Speed Pressure Setting: Pressure Default Minimum Maximum Pressure Settings 1.38 6.21 Pressure Mode Runup Low Line Speed Pressure Default Minimum Maximum Meter/ 298.7 Minute Feet/ Minute E 2020 Nordson Corporation Part 1128351_02... - Page 43 3.45 0.69 6.90 High Line Speed Pressure Default Minimum Maximum Meter/ 30.5 300.2 Minute Feet/ Minute 2. When done, press < to return to the Runup Settings menu or return to the Home screen. Part 1128351_02 E 2020 Nordson Corporation...
-
Page 44: Pressure Runup Alert Threshold Settings
Pressure Default Minimum Maximum 4.83 0.69 4.83 Low Pressure: Pressure Default Minimum Maximum 0.69 0.69 4.83 2. When done, press < to return to the Runup Settings menu or return to the Home screen. E 2020 Nordson Corporation Part 1128351_02... -
Page 45: Pressure Runup Pressure Limits
Minimum Pressure setting Disabled Allows the system pressure to drop to 0 (zero) 2. When done, press < to return to the Pressure Control Settings menu or to return to the Home screen. Part 1128351_02 E 2020 Nordson Corporation... -
Page 46: About Loading And Saving A Recipe
If you disable recipes, then the current settings will be used each time you power cycle the melter. Recipes must be enabled if you want to make use of Remote Recipe Inputs. Refer to About Remote Recipe Inputs in the System Settings chapter. E 2020 Nordson Corporation Part 1128351_02... - Page 47 Recipe management is controlled through the Inputs. NOTES: You cannot load a new recipe while in Remote Recipe Management. Although you can save any changes you have made, any changes will not become part of the active or loaded recipe. Part 1128351_02 E 2020 Nordson Corporation...
-
Page 48: Loading A Recipe
3. When done, press the on the Navigation pad. NOTE: Load When the melter has completed the Save or SaveAs, that recipe is automatically loaded as the current or active recipe. Delete Export Import Save SaveAs E 2020 Nordson Corporation Part 1128351_02... -
Page 49: Viewing The Event Log
USB and view the event log on your PC. Go to Tools | Reports/Logs to export the Event Log to a USB so you can send it to Nordson Technical support. -
Page 50: System Settings
Procedural variations or special considerations are explained in the additional information table that follows most procedures. Where applicable, some table entries also contain cross‐reference information. Additional information tables are indicated by the symbol shown to the left. E 2020 Nordson Corporation Part 1128351_02... -
Page 51: Defining Tank-Only Level Sensing Settings
Home screen, or press < to return to the System Settings menu. Low Level Alert Low Level Threshold NOTE: Press on the OLED panel to clear and reset any Alert, Fault, or Stop condition. Part 1128351_02 E 2020 Nordson Corporation... -
Page 52: Enabling/Disabling Empty Stop
Navigation pad to toggle Empty Stop to Enabled or Disabled. The default is Enabled. 2. Press to return to the Home screen, or press < to return to the System Settings menu. System Settings Level Sensing Settings Empty Stop E 2020 Nordson Corporation Part 1128351_02... -
Page 53: Enabling/Disabling Lid Open Alerts And Settings
Home screen, or press < to return to the System Settings menu. Lid Open Alert Lid Open Alert Time NOTE: Press on the OLED panel to clear and reset any Alert, Fault, or Stop condition. Part 1128351_02 E 2020 Nordson Corporation... -
Page 54: Defining Level And Fill Settings
3. Press to return to the Home screen, or press < to return to the System Settings menu. NOTE: Press on the OLED panel to clear and reset any Alert, Fault, or Stop condition. E 2020 Nordson Corporation Part 1128351_02... -
Page 55: Defining Temperature Settings
Home screen, or press < to return to the System Settings | Temperature menu SmartMelt NOTE: Press on the OLED panel to clear and reset any Alert, Fault, or Stop condition. Part 1128351_02 E 2020 Nordson Corporation... -
Page 56: Defining Setback Settings
5 degrees of set point and the Master Pump Control is switched On. Press on the OLED panel to clear and reset any Alert, Fault, or Stop condition. E 2020 Nordson Corporation Part 1128351_02... -
Page 57: Defining Automatic System Setback
Press the Master control button to toggle Off (exit) Automatic Setback. While in Setback, the System Status indicator is Blue. Press on the OLED panel to clear and reset any Alert, Fault, or Stop condition. Part 1128351_02 E 2020 Nordson Corporation... -
Page 58: Defining Manual Setback - Auto Exit Time
Master control button to toggle Off (exit) Automatic Auto Exit Time Setback. While in Setback, the System Status indicator is Blue. Press on the OLED panel to clear and reset any Alert, Fault, or Stop condition. E 2020 Nordson Corporation Part 1128351_02... -
Page 59: Defining Ready Delay
System Settings | Temperature Settings and viewing the Ready Delay option. The countdown timer appears until the Ready Delay time elapses. Part 1128351_02 E 2020 Nordson Corporation... -
Page 60: Defining Global Temperature Settings
Enabled or Disabled. The default is Disabled. 2. When done, press < to return to the Global Settings menu or System Settings return to the Home screen. Temperature Settings Global Settings Heaters On Upon Startup E 2020 Nordson Corporation Part 1128351_02... -
Page 61: Defining The Over/Under Temperature Thresholds
OLED panel to clear and reset any Alert, Fault, or Stop condition. Regardless of the defined setback temperature, the temperature set point for any heated zone can only be reduced to 40C (100F). Part 1128351_02 E 2020 Nordson Corporation... -
Page 62: Enabling And Disabling Auto Pump
1. Select Auto Pump and press the on the Navigation pad to toggle Auto Pump to Enabled or Disabled. The default is Enabled. 2. Press or < to return to the Home screen. System Settings Auto Pump E 2020 Nordson Corporation Part 1128351_02... -
Page 63: About Adhesive Tracking System (Ats)
Data logs are maintained and stored for retrieval as follows: Every 24 hours (updated every minute) Every week (updated every hour) Quarterly (3 months, updated every hour) Production can be Stopped if dispensing deviates beyond user-specified upper and lower threshold limits. Part 1128351_02 E 2020 Nordson Corporation... -
Page 64: Theory Of Operation
Step 1: Calibrate the flow meter Step 2: Define Product Settings Step 3: Either “Teach” or manually enter the Target Add-on value Step 4: Defining ATS Alarms The following sections detail each step in greater detail. E 2020 Nordson Corporation Part 1128351_02... -
Page 65: Calibrating The Flow Meter
Home screen. If the two values are not close, then you need to calculate a new Calibration Constant Setting as follows. ‐ Current Constant Calibration Factor * Displayed Adhesive Usage / the weight you measured. Part 1128351_02 E 2020 Nordson Corporation... -
Page 66: Defining Product And Trigger Settings
Startup Skip Count is added to the products to skip. Under these conditions, the number of products to skip and Startup Skip Count must be met before a Teach operation begins. E 2020 Nordson Corporation Part 1128351_02... - Page 67 Upon detecting the leading edge of a product, the falling edge can Start-to- be either the beginning of the next product (Start-to-Start) or the end Start of the current product (Start-to-End). 3. Refer to Using Teach Mode to complete setting up Flow Monitoring. Part 1128351_02 E 2020 Nordson Corporation...
-
Page 68: Using The Teach Mode
8 grams of adhesive or 10 products, whichever is greater. The system then calculates the Target Add-On value 3. Refer to the Defining Adhesive Flow Monitoring Alarms to complete Flow Monitoring. E 2020 Nordson Corporation Part 1128351_02... -
Page 69: Defining Adhesive Flow Monitoring Alarms
Alert alarm. Stop Alarm Enables or disables the system from Disabled monitoring and generating flow Stop alarms. Note: When a Stop alarm is generated, production is halted. Immediate attention is required. Part 1128351_02 E 2020 Nordson Corporation... -
Page 70: Monitoring And Viewing Adhesive Flow Output
Total amount of adhesive measured through the flow meter Adhesive / Hour Total amount of adhesive measured through the flow meter within the hour. Adhesive Usage Total amount of adhesive measured through the flow meter E 2020 Nordson Corporation Part 1128351_02... -
Page 71: Exporting Flow Report
(.CSV) files. NOTE: When transferring files between the melter and BBconn Cloud, the USB drive must be formatted using FAT or FAT32. No other format, such as NTFS and exFAT are supported. Part 1128351_02 E 2020 Nordson Corporation... -
Page 72: Troubleshooting Adhesive Flow Monitoring
This section covers only the most common problems you may encounter. If you cannot solve a problem with the information given here, contact your local Nordson representative for help. Understanding the ATS PCA Board LEDs WARNING! Allow only personnel with appropriate training and experience to operate or service the equipment. - Page 73 OLED User Interface Figure 3: ATS PCA Board Part 1128351_02 E 2020 Nordson Corporation...
- Page 74 For single phase encoder inputs or the state of a single phase encoders will toggle between off and green. encoder input. DS12 Ejector State Amber: Ejector active Off: Ejector inactive E 2020 Nordson Corporation Part 1128351_02...
-
Page 75: General And Flow Control Alarms
. adhesive pattern, line speed, carton size, or an ATS setting Failed solenoid, module, or nozzle Refer to the applicator manual to troubleshoot applicator problems. Repair or replace failed components as needed. Part 1128351_02 E 2020 Nordson Corporation... - Page 76 Press the CLEAR ALARM key to exit mode detector when the system is in Skip the skip or Teach modes. mode, or the system is in Teach mode and Products to Skip is zero (0) E 2020 Nordson Corporation Part 1128351_02...
-
Page 77: About User Management
Password codes are numeric only, and can be from one-digit up to four-digits long. When resetting passwords, both the Operator and Technician password codes are done at the same time. You cannot reset one password code without the other. Part 1128351_02 E 2020 Nordson Corporation... -
Page 78: Setting Up User Management
30 seconds, and the maximum is 600 seconds (120 minutes). System Settings 2. When done, press < to return to the User Management menu or User Management return to the Home screen. E 2020 Nordson Corporation Part 1128351_02... -
Page 79: About System I/O
You cannot assign the same input selection to multiple inputs. An input assigned for System Enable that is NOT inverted prevents or stops the Master Heater control from switching On. Typically, you would use this setup for an Emergency Stop. Part 1128351_02 E 2020 Nordson Corporation... - Page 80 OLED User Interface The default input selections for the Legacy I/O expansion kit are as follows: ‐ Input #1: Automatic Setback ‐ Input #2: Setback Control ‐ Input #3: Heater Control ‐ Input #4: Hose1/Applicator1 E 2020 Nordson Corporation Part 1128351_02...
-
Page 81: About Remote Recipe Inputs
You must have the Legacy I/O expansion kit, part number 1127717. A recipe must be saved as a number. Alphanumeric or custom names will be ignored. The LED illuminates when using Remote Recipe Input. Part 1128351_02 E 2020 Nordson Corporation... - Page 82 The actual order of the recipe on the melter determines the bit sequence (high or low) as to which recipe will get loaded on the melter. You cannot Invert an input selected for Remote Recipe. E 2020 Nordson Corporation Part 1128351_02...
-
Page 83: Assigning Remote Recipe Inputs
Navigation pad to scroll through the list. Press to assign the input System Settings selection you want. When done, press < to return to the Input/Output menu. System I/O Press to return to the Home screen. Input Part 1128351_02 E 2020 Nordson Corporation... -
Page 84: Assigning Outputs
You can assign light tower outputs using standard outputs. The default output selections for the with the Legacy I/O expansion kit are as follows: ‐ Output #1: Temperature Ready ‐ Output #2: System Fault ‐ Output #3: Tank Low E 2020 Nordson Corporation Part 1128351_02... -
Page 85: Assigning Light Tower Outputs
Green - System Ready ‐ Red - Any Fault Alarm or Flashing Red for any Stop Alarm ‐ Amber - Any Alert Alarm ‐ Blue - Idle condition (Setback, Heating, Pump Off, Ready Delay) Part 1128351_02 E 2020 Nordson Corporation... -
Page 86: Setting Up Shift Schedules
Shift schedules cannot overlap each other. If you remove a Shift schedule, then all shift settings (day or days of week as well as Beginning/Ending times) are automatically deleted. Heat or Setback Events cannot cross into the next day. E 2020 Nordson Corporation Part 1128351_02... -
Page 87: Viewing And Modifying An Existing Shift Schedules
Select which shift you want to view or modify, then press > Press > to Delete or Modify. Press Done, then press < twice to get back to the System Settings Shift Schedule menu. Shift Schedule 3. Press to return to the Home screen. Part 1128351_02 E 2020 Nordson Corporation... -
Page 88: About Managing Recipes
Load a recipe. Manage Recipes 4. Select Export to place recipes from this ProBlue Flex melter on to a USB drive, so it can be imported to another melter. 5. Press to return to the Home screen. -
Page 89: Setting Up Heat Schedule
You can have multiple Setback Events within a single Heat Event. If you remove a Heat Event, then all Setback Events contained within that Heat Event are automatically deleted as well. Heat or Setback Events cannot cross into the next day. Part 1128351_02 E 2020 Nordson Corporation... -
Page 90: Viewing And Modifying An Existing Heat Schedule
Select Setback Events, then press > to view the Enter and Exit Heat Schedule setback events. Press > to Delete or Modify. Press Done, then press < twice to get back to the Heat Schedule menu. . 3. Press to return to the Home screen. E 2020 Nordson Corporation Part 1128351_02... -
Page 91: About System Preferences
Enable/Disable Remote Recipe Management Enable/Disable Heat Schedule Screen Saver Delay Change Contrast Restart Wizard NOTE: Since ounces is not supported, mg (milligrams) is displayed and used, even if you select lb for Mass Unit. Part 1128351_02 E 2020 Nordson Corporation... -
Page 92: Defining Network Access
If you enable DHCP, the other networking settings disappear, as they are not needed. If you are not using DHCP, continue to the next step. Changes to any IP address requires you to reboot the melter. E 2020 Nordson Corporation Part 1128351_02... -
Page 93: Setting Up Wifi
WiFi you are using. myNordsonAP SSID Read only Note: If you have more than one ProBlue Flex melter in the same location, make sure each melter has a unique SSID name and that they are using different WiFi channel numbers. Part 1128351_02... -
Page 94: Accessing The Graphical User Interface
Home screen. Accessing the Graphical User Interface You can access the ProBlue Flex graphical user interface if you have: A Nordson Touch Screen (Web Server license is included when you purchase the touch screen from Nordson, otherwise you will need to purchase a Web Server license from Nordson.) - Page 95 Access through a WiFi or Ethernet connection External Enforce read only Disabled Disabled means remote remote access to users can view and make Access the melter changes. Enabled Read Only means read only access. Part 1128351_02 E 2020 Nordson Corporation...
-
Page 96: Defining Plc Access
BBconn Cloud or to this file. import this PLC file into another similar From BBconn unit. Cloud, save file to the \PLC folder on the USB drive. If the folder does not exist, you must first create E 2020 Nordson Corporation Part 1128351_02... -
Page 97: Defining Plc Communications
Cannot begin with the character string "port-xyz" (x, y, z = 0 to 9) ‐ Cannot have the form of an IP address n.n.n.n (n = 0 - 255) 2. When done, press < to return to the Network Settings menu or return to the Home screen. Part 1128351_02 E 2020 Nordson Corporation... -
Page 98: Connecting Profinet, Ethernet/Ip And Modbus Tcp
3. (Refer to Figure 2.) Do the following to continue: Using a 3mm hex wrench, remove the eBox enclosure side panel (shown with panel removed) (b). Select the appropriate size a knockout (c) that you want to use. E 2020 Nordson Corporation Part 1128351_02... - Page 99 7. Using a 3mm hex wrench, secure the eBox enclosure side panel (shown with panel removed) (b). Connect power to the melter at the local power disconnect switch and switch the melter On to resume normal operation. Part 1128351_02 E 2020 Nordson Corporation...
-
Page 100: Importing And Exporting .Plc File
1. Select Import/Export Flexible Map, then press > to continue. System Settings 2. Do the following to continue: Select Import to allow ProBlue Flex to make use of the flexible map Networking you created using BBconn Cloud. Select Export to place the .PLC file into the \PLC folder on the USB drive, so you can modify the .PLC file in BBconn Cloud. -
Page 101: Tool Settings
Procedural variations or special considerations are explained in the additional information table that follows most procedures. Where applicable, some table entries also contain cross‐reference information. Additional information tables are indicated by the symbol shown to the left. Part 1128351_02 E 2020 Nordson Corporation... -
Page 102: Backing Up And Restoring The Melter
Tools menu. Backup Restore NOTE: When transferring files between the melter and BBconn Cloud, the USB drive must be formatted using FAT or FAT32. No other format, such as NTFS and exFAT are supported. E 2020 Nordson Corporation Part 1128351_02... -
Page 103: Resetting To Factory Defaults
Zones that were AutoTuned are not reset. If the Recipes option (System Settings | Preferences) was disabled, then this setting remains disabled. Furthermore, upon restarting, the last or current settings before rebooting are also retained. Part 1128351_02 E 2020 Nordson Corporation... -
Page 104: Setting Up Maintenance Reminders
The following sections detail how to: Enable or disable the Maintenance System Enable or disable maintenance reminders on a per-component basis Reset or Snooze Maintenance Notifications View maintenance history Export the maintenance report E 2020 Nordson Corporation Part 1128351_02... -
Page 105: Managing The Maintenance System
2. When done, press < to return the Maintenance Schedule menu, or Tools press to return to the Home screen. NOTE: Maintenance Schedule Press the > navigation button to select individual Hose, Module and Solenoid components. Part 1128351_02 E 2020 Nordson Corporation... -
Page 106: Resetting And Snoozing Maintenance Notifications
See Resetting or Snoozing Maintenance Notifications for more information. System Maintenance must be enabled to receive maintenance notifications, as well as to view maintenance status and history reports. See Managing the Maintenance System for more information. E 2020 Nordson Corporation Part 1128351_02... -
Page 107: Viewing Maintenance History
2. When done, press < to return the Maintenance Schedule menu, or Tools press to return to the Home screen. Maintenance Schedule Part 1128351_02 E 2020 Nordson Corporation... -
Page 108: Managing System Configuration
Viewing and Adding Licenses Viewing System information, such as software version and system configuration View Factory Nameplate information, such as the Configuration Code, Serial Number, and other related information View installed Accessories Modify your current Configuration Code. E 2020 Nordson Corporation Part 1128351_02... -
Page 109: Changing The Melter Software Version
Off, or if there is a loss of power. When the process is interrupted for any of the above reasons, upon reboot, the software version remains as it was before the interruption. Part 1128351_02 E 2020 Nordson Corporation... -
Page 110: Restoring To A Previous Version
You can upgrade the melter with additional features and options. Licenses can be purchased, or a trial license can be obtained. Contact your local System Configuration service representative for additional information. Manage Software Restore to Previous Version E 2020 Nordson Corporation Part 1128351_02... -
Page 111: Adding A New License
A confirmation message briefly appears indicating if Tools the activation was successful or not. System Configuration 3. Press to return to the Home screen, or press < to return to the Tools | System Configuration menu. Manage Licenses Add License Part 1128351_02 E 2020 Nordson Corporation... -
Page 112: Viewing System And Configuration Information
2. Press > on the Navigation pad to view additional information if available. Tools 3. Press to return to the Home screen, or press < to return to the Tools | System Configuration menu. System Configuration Original Factory Nameplate E 2020 Nordson Corporation Part 1128351_02... -
Page 113: Viewing Accessory Information
Press the > button and ü select the appropriate selection. When done, press Tools 2. Press to return to the Home screen, or press < to return to the System Settings menu. System Configuration Modify Configuration Code Part 1128351_02 E 2020 Nordson Corporation... -
Page 114: Performing Basic Melter Maintenance
Preparing to Drain 1. Using a 4mm Hex driver, remove the front panel (a). 2. Extend the drain pathway (b), and use a large enough pan to collect the adhesive from the tank. Draining the melter E 2020 Nordson Corporation Part 1128351_02... - Page 115 If you have a fill system and if the master Fill was switched On, then it is automatically disabled while Drain is active. You must use the Fill Master Control to switch it back On. Part 1128351_02 E 2020 Nordson Corporation...
-
Page 116: Forcing The Fill System To Activate Automatic Fill System
Using either Continuous Force Fill or Timed Force Fill overrides the overfill protection and could allow adhesive to enter the exhaust section of the melter. The Fill Activity LED illuminates when the Fill system is actively filling. E 2020 Nordson Corporation Part 1128351_02... -
Page 117: Autotuning Heated Zones
You can do one at a time, or you can select the All Zones option. Press ü Maintenance on the Navigation pad to start the tuning process. AutoTune PIDS 3. Press to return to the Home screen, or press < to return to the Tools | Maintenance menu. Part 1128351_02 E 2020 Nordson Corporation... -
Page 118: Calibrating The Tank Level Sensor
Navigation pad. A confirmation message quickly appears indicating that the full calibration is done. 3. Press to return to the Home screen, or press < to return to the System Settings menu. E 2020 Nordson Corporation Part 1128351_02... -
Page 119: Troubleshooting
Procedural variations or special considerations are explained in the additional information table that follows most procedures. Where applicable, some table entries also contain cross‐reference information. Additional information tables are indicated by the symbol shown to the left. Part 1128351_02 E 2020 Nordson Corporation... -
Page 120: Viewing The Event Log
Event Log to a USB. When transferring files between the melter and BBconn Cloud, the USB drive must be formatted using FAT or FAT32. No other format, such as NTFS and exFAT are supported. E 2020 Nordson Corporation Part 1128351_02... -
Page 121: Exporting The Event Log
3. Remove the USB drive from the melter and use a computer or most any Tools device that can import and read a .csv file to troubleshoot issues or include the files into an email and send to Nordson Technical Support. Reports/Logs 4. Press to return to the Home screen, or press <... -
Page 122: Heater Sub System Alarms
100 and 300 ohms. For example, Zone RTD Open 32_ C (90_ F): 143.59 ohms The RTD resistance 49_ C (120_ F): 156.94 exceeds the open circuit time threshold. ohms Fault 177_ C (351_ F): 277.48 ohms E 2020 Nordson Corporation Part 1128351_02... - Page 123 Make You must power cycle the sure manifold and reservoir melter to clear this fault. RTDs were not interchanged. Zone Runaway Temperature A zone runaway temperature Replace hose/applicator Fault Limit condition exists. cordset. Part 1128351_02 E 2020 Nordson Corporation...
-
Page 124: Troubleshooting Heated Zone Alerts And Faults
Fault condition. When a Fault condition occurs, both the Master Heater and Pump controls automatically switch OFF. Press on the OLED panel to clear and reset any zone Alert or Fault conditions. E 2020 Nordson Corporation Part 1128351_02... - Page 125 NOTE: Go to Tools | Reports/Logs to export the Event Log to a USB Acknowledges the message and removes the alert pop up message from view. Although the condition still exists, attention is needed. You can view the message again from the Event Log. Part 1128351_02 E 2020 Nordson Corporation...
-
Page 126: Fill System Alarms
The system has detected a Replace Low Voltage failure in the level sensor Alert Level Sensor Circuit Failure Controller (PB Flex specific) circuit. and/or level sensor/cable. The Fill System is disabled. E 2020 Nordson Corporation Part 1128351_02... - Page 127 Clogged adhesive Stop Tank Empty storage container, hose, and exhaust air filter Both the Fill and Pump are automatically switched Off. Check for low air pressure at the adhesive storage container. Part 1128351_02 E 2020 Nordson Corporation...
-
Page 128: Electronic Pressure Adjust Alarms
System pressure is below Alert the minimum required Minimum System Pressure Increase input air pressure. Fault system pressure. System pressure is above Alert the maximum required Maximum System Pressure Reduce input air pressure Fault system pressure. E 2020 Nordson Corporation Part 1128351_02...
Need help?
Do you have a question about the ProBlue Flex and is the answer not in the manual?
Questions and answers