Sign In
Upload
Manuals
Brands
Paradyne Manuals
Measuring Instruments
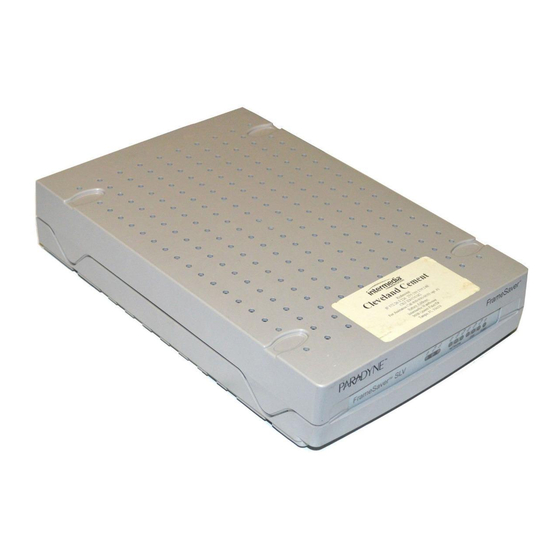
FrameSaver SLV 9124
Paradyne FrameSaver SLV 9124 Manuals
Manuals and User Guides for Paradyne FrameSaver SLV 9124. We have
5
Paradyne FrameSaver SLV 9124 manuals available for free PDF download: Technical Reference, User Manual, Installation Instructions Manual
Paradyne FrameSaver SLV 9124 Technical Reference (346 pages)
Network monitoring device
Brand:
Paradyne
| Category:
Network Hardware
| Size: 3 MB
Table of Contents
Table of Contents
3
About this Guide
11
H Conventions Used
13
H Product-Related Documents
14
1 About the Framesaver SLV
15
H Overview
15
H Features Summary
15
H the Openlane Management Solution
15
Openlane 5 Service Level Management Solution
19
Openlane DCE Manager
20
Netscout Probes
21
2 Management Control
23
H Customer End User Management Overview
23
H Service Provider Management Overview
23
Using the TS Management Link Feature
26
Creating a Management DLCI between the Router and Unit Via the DTE Port
28
Creating a Separate Management Link Via the COM Port
29
Management Control Using PVC Multiplexing (EDLCI)
30
Management Control Using a Dedicated DLCI
31
Transparent Remote Management Control Using RFC 1490 Routers
32
3 Typical Applications
33
H SLV Frame Relay Monitoring
33
H Access to the Frame Relay Network
33
H Multinational Framesaver Application
33
H Mixing Framesaver Units in Applications
33
Using All 9624 Framesaver Units at Remote Sites
33
Mixing Framesaver Units at Remote Sites
41
H PVC Multiplexing Application
42
4 User Interface and Basic Operation
45
H Logging on
45
H Main Menu
45
H Screen Work Areas
45
H Navigating the Screens
45
Keyboard Keys
50
Function Keys
51
Selecting from a Menu
52
Switching between Screen Work Areas
52
Selecting a Field
53
Entering Information
53
5 Using the Openlane NMS
55
H the Openlane Advantage
55
Using an Openlane NMS Application
56
H Installation and Setup of DCE Manager
56
H Installation and Setup of Performance Wizard
56
Installing and Starting Openlane Performance Wizard
57
Adding Framesaver SLV Units to Your Network
58
Setting up for Collection of Historical Data
59
Accessing Netscout Manager Plus
60
Creating PVC Connections
61
Setting Frame and Burst Ranges
62
Getting Error Messages
63
H Viewing Openlane Performance Wizard Graphs
64
Frame Relay Access Channel Aggregated Summary
65
Frame Relay Physical Link Integrity
67
DS1 Physical Link Integrity (T1 Only)
69
DS1 Physical Link Diagnostics (T1 Only)
71
PVC Throughput
72
Frame Relay DLCI Congestion
74
PVC Data Delivery Analysis
76
H Creating Openlane Service Level Management (SLM) Reports
80
Web Browsers Supported
80
Installation and Setup of SLM Reports
81
Displaying the Log-In Screen
81
Reports Administration
81
Viewing Reports
82
6 Using Netscout Manager Plus
83
H the Netscout Advantage
83
Using a Netscout Manager Plus NMS Application
84
H Installing Netscout Manager Plus
84
H Configuring Netscout Manager Plus
85
Before You Get Started
85
Adding Framesaver SLV Units to the Netscout Manager Plus Network
86
Verifying Domains and Groups
87
Correcting Domains and Groups
88
Adding SLV Alarms Using a Template
90
Editing Alarms
91
Adding SLV Alarms Manually
93
Creating History Files
95
Installing the User-Defined History Files
96
Monitoring a Dlci's History Data
98
Monitoring the Agent Using Netscout Manager Plus
101
Statistical Windows Supported
102
7 Concord's Network Health
103
H Installation and Setup of Network Health
104
Discovering Framesaver Elements
105
Configuring the Discovered Elements
106
Grouping Elements for Reports
107
Generating Reports for a Group
108
H Viewing Network Health Charts and Tables
109
About Service Level Reports
110
About the At-A-Glance Reports
110
About Trend Reports
110
Printed Reports
110
H Reports Applicable to SLV Units
111
Exceptions Reports
111
Network Summary Report
112
Leaders Summary Report
113
Elements Summary Report
114
Supplemental Report
115
Executive Service Level Report
116
IT Manager Service Level Report
117
Customer Service Level Report
118
At-A-Glance Reports
120
Trend Reports
122
8 Configuration
123
H Setting up the Unit
125
Considerations When Setting up
126
Selecting a Management Interface
126
Minimal Configuration before Deploying Remote Units
127
Entering and Displaying System Information
127
H Basic Configuration
128
Configuration Option Areas
128
Accessing and Displaying Configuration Options
130
Changing Configuration Options
130
Saving Configuration Options
131
H Setting up Auto-Configuration
132
Changing the Frame Relay Discovery Mode
133
H Setting up for Trap Dial-Out
138
Entering Modem Directory Phone Numbers
139
H Setting up Management
140
H Setting up so the Router Can Receive RIP
141
H Setting up Service Provider Connectivity
142
H Setting up for Back-To-Back Operation
143
Changing Operating Mode
143
H Configuring the System
144
H Configuring System Options
144
Configuring System Frame Relay and LMI Options
145
Configuring Service Level Verification Options
147
Configuring General System Options
148
H Setting up each Physical Interface
150
Configuring the Framesaver T1 Network Interface Physical Options
150
Configuring the DSX-1 Interface Physical Options
153
Configuring Data Port Physical Options
155
H Assigning Time Slots/Cross Connections
157
Assigning Frame Relay Time Slots to the Network Interface
157
Assigning DSX-1 Time Slots to the Network Interface
158
DSX-1 Signaling Assignments and Trunk Conditioning
160
Clearing Assignments
163
H Configuring Frame Relay LMI for an Interface
163
H Configuring DLCI Records for each Interface
167
H Configuring PVC Connections
172
H Setting up Management and Communication Options
174
Configuring Node IP Information
175
Configuring Management Pvcs
178
Configuring General SNMP Management
182
Configuring Telnet And/Or FTP Session Support
183
Configuring SNMP NMS Security
186
Configuring SNMP Traps and Trap Dial-Out
187
Configuring the Communication Port
193
Configuring the COM Port to Support an External Modem
197
9 Security
201
H Limiting Access
201
H Controlling Asynchronous Terminal Access
202
H Controlling Telnet or FTP Access
203
Limiting Telnet Access
203
Limiting FTP Access
204
Limiting Telnet or FTP Access over the TS Management Link
205
H Controlling SNMP Access
206
Disabling SNMP Access
206
Assigning SNMP Community Names and Access Levels
207
Limiting SNMP Access through IP Addresses
208
H Controlling External COM Port Device Access
210
H Creating a Login
211
H Modifying a Login
212
H Deleting a Login
212
10 Operation and Maintenance
213
H Displaying System Information
213
LED Descriptions
213
H Device Messages H Status Information
213
System and Test Status Messages
224
Self-Test Results Messages
224
Health and Status Messages
225
Test Status Messages
230
Network LMI-Reported Dlcis Status
232
PVC Connection Status
233
Time Slot Assignment Status
234
H Performance Statistics
237
Clearing Performance Statistics
238
Service Level Verification Performance Statistics
239
DLCI Performance Statistics
240
Frame Relay Performance Statistics
242
ESF Line Performance Statistics
245
H FTP File Transfers
248
Upgrading System Software
250
Determining Whether a Download Is Completed
251
Changing Software
251
Transferring Collected Data
252
11 Troubleshooting
253
H Problem Indicators
253
H Resetting the Unit
253
Resetting the Unit from the Control Menu
255
Resetting the Unit by Cycling the Power
255
Restoring Communication with a Misconfigured Unit
256
H Troubleshooting Tables
263
Device Problems
263
Frame Relay PVC Problems
265
H Tests Available
266
H Test Timeout
267
Changing the Test Timeout from Openlane Diagnostic Wizard
268
H Starting and Stopping a Test
269
Aborting All Tests
270
H Determining Test Status and Results
270
H PVC Tests
270
PVC Loopback
271
Send Pattern
272
Monitor Pattern
272
Connectivity
272
H Physical Tests
273
Line Loopback
273
Payload Loopback
274
Repeater Loopback
275
Send Line Loopback
276
Send and Monitor Pattern Tests
277
DTE Loopback
278
H IP Ping Test
279
H Lamp Test
281
H LMI Packet Capture Utility
282
Menu Hierarchy
283
IP Addressing
287
H Selecting an IP Addressing Scheme
287
H Customer Management
287
Using Multiplexed Pvcs
287
H Service Provider Management
287
H Joint Customer and Service Provider Management
287
Direct Pvcs to Remote Framesaver Units
293
Routing to Remote Framesaver Units on the same Subnet
294
Routing to Remote Framesaver Units Using Different Subnets
295
Routing to Remote Framesaver Units Using Routers
296
Assigning IP Addresses and Subnet Masks
298
SNMP Mibs and Traps, and RMON Alarm Defaults
299
H Downloading Mibs and SNMP Traps
299
H Standards Compliance for SNMP Traps
299
Trap: Warmstart
299
Trap: Authenticationfailure
302
Traps: Linkup and Linkdown
302
Traps: Enterprise-Specific
305
Traps: RMON-Specific
309
H RMON Alarm and Event Defaults
310
Event Defaults
310
Rising Event Operation
311
Static Frame Relay Interface Alarm Defaults
312
Dynamic Frame Relay Interface Alarm Defaults
314
DLCI Alarm Defaults - Paradyne Area
315
Static DLCI Alarm Defaults - Netscout Area
316
Dynamic DLCI Alarm Defaults - Netscout Area
317
H Object ID Cross-Reference (Numeric Order
318
Cables, Connectors, and Pin Assignments
321
H Rear Panel
321
LAN Adapter Converter and Cable
323
Standard EIA-232-D Crossover Cable
324
Standard V.35 Straight-Through Cable
327
Standard V.35 Crossover Cable
327
Canadian T1 Line Interface Cable (3100-F1-510)
328
Adapter (9008-F1-560)
329
Technical Specifications
331
Equipment List
333
H Equipment
333
H Cables
334
Index
335
Advertisement
Paradyne FrameSaver SLV 9124 User Manual (270 pages)
Brand:
Paradyne
| Category:
Adapter
| Size: 1 MB
Table of Contents
Table of Contents
3
About this Guide
9
Purpose and Intended Audience
9
Document Organization
9
Product-Related Documents
11
Conventions Used
12
About the Framesaver SLV 9124
13
SLM Overview
13
Framesaver SLV 9124 Features
14
User Interface and Basic Operation
19
Logging on
20
Main Menu
22
Screen Work Areas
23
Navigating the Screens
24
Keyboard Keys
24
Function Keys
25
Selecting from a Menu
26
Switching between Screen Areas
26
Selecting a Field
27
Entering Information
27
Configuration
29
Basic Configuration
31
Configuration Option Areas
32
Accessing and Displaying Configuration Options
33
Changing Configuration Options
34
Saving Configuration Options
35
Minimal Configuration before Deploying Remote Units
36
Entering System Information and Setting the System Clock
36
Setting up for Trap Dial-Out
37
Setting up an External Modem for Trap Dial-Out
37
Setting up Call Directories for Trap Dial-Out
37
Setting up Auto-Configuration
38
Selecting a Frame Relay Discovery Mode
39
Automatically Removing a Circuit
41
Setting up Management
42
Setting up Local Management at the Central Site
42
Setting up so the Router Can Receive RIP
43
Setting up Service Provider Connectivity at the Central Site
43
Setting up Back-To-Back Operation
44
Changing Operating Mode
44
Configuration Option Tables
45
Configuring the Overall System
45
Configuring Frame Relay and LMI for the System
46
Configuring Service Level Verification Options
48
Configuring General System Options
50
Configuring the Physical Interfaces
52
Configuring the Network Interface
52
Configuring the User Data Port
56
Configuring the DSX-1 Interface
58
Assigning Time Slots/Cross Connections
60
Assigning Frame Relay Time Slots to the Network Interface
60
Assigning DSX-1 Time Slots to the Network Interface
62
Clearing Assignments
67
Configuring Frame Relay for an Interface
68
Manually Configuring DLCI Records
71
Configuring PVC Connections
74
Setting up Management and Communication Options
76
Configuring Node IP Information
76
Configuring Management Pvcs
79
Configuring General SNMP Management
82
Configuring Telnet And/Or FTP Session Support
83
Configuring SNMP NMS Security Options
86
Configuring SNMP Traps and Trap Dial-Out
87
Configuring the Communication Port
91
Configuring the COM Port to Support an External Modem
95
Security and Logins
97
Limiting Access
98
Controlling Asynchronous Terminal Access
98
Controlling External COM Port Device Access
100
Controlling Telnet or FTP Access
100
Limiting Telnet Access
101
Limiting FTP Access
102
Limiting Telnet or FTP Access over the TS Management Link
103
Controlling SNMP Access
104
Disabling SNMP Access
104
Assigning SNMP Community Names and Access Levels
105
Limiting SNMP Access through IP Addresses
106
Creating a Login
107
Modifying a Login
108
Deleting a Login
108
Operation and Maintenance
109
Displaying System Information
110
Viewing Leds and Control Leads
111
LED Descriptions
112
Control Lead Descriptions
114
Device Messages
115
Status Information
120
System and Test Status Messages
121
Network LMI-Reported Dlcis Status
127
PVC Connection Status
129
Time Slot Assignment Status
131
Performance Statistics
133
Clearing Performance Statistics
134
Service Level Verification Performance Statistics
135
DLCI Performance Statistics
137
Frame Relay Performance Statistics
139
ESF Line Performance Statistics
142
FTP File Transfers
145
Upgrading System Software
147
Determining Whether a Download Is Completed
148
Changing Software
148
Transferring Collected Data
149
Troubleshooting
151
Problem Indicators
152
Resetting the Unit and Restoring Communication
153
Resetting the Unit from the Control Menu
153
Resetting the Unit by Cycling the Power
153
Restoring Communication with a Misconfigured Unit
154
Troubleshooting Management Link Feature
155
LMI Packet Capture Utility Feature
155
Viewing Captured Packets from the Menu-Driven User Interface
156
Alarms
157
Troubleshooting Tables
163
Device Problems
163
Frame Relay PVC Problems
165
Tests Available
166
Test Timeout Feature
166
Starting and Stopping a Test
167
Aborting All Tests
168
PVC Tests
169
PVC Loopback
170
Send Pattern
170
Monitor Pattern
171
Connectivity
171
Physical Tests
172
Line Loopback
173
Payload Loopback
174
Repeater Loopback
175
DTE Loopback
176
Send Line Loopback
177
Data Channel Loopbacks on a Frame Relay Link
178
Send Remote Line Loopback
179
Send and Monitor Pattern Tests
180
IP Ping Test
181
Lamp Test
182
Setting up Openlane for Framesaver Devices
183
Openlane Support of Framesaver Devices
183
Setting up the Openlane SLM System
184
Setting up Framesaver SLV Support
184
Setting up Netscout Manager Plus for Framesaver Devices
185
Before Getting Started
186
Configuring Netscout Manager Plus
187
Adding Framesaver SLV Units to the Netscout Manager Plus Network
188
Verifying Domains and Groups
189
Correcting Domains and Groups
190
Adding SLV Alarms Using a Template
192
Editing Alarms
193
Adding SLV Alarms Manually
195
Creating History Files
197
Installing the User-Defined History Files
199
Monitoring a Dlci's History Data
200
Monitoring the Agent Using Netscout Manager Plus
202
Statistical Windows Supported
204
Setting up Network Health for Framesaver Devices
205
Installation and Setup of Network Health
206
Discovering Framesaver Elements
207
Configuring the Discovered Elements
208
Grouping Elements for Reports
209
Generating Reports for a Group
210
About Service Level Reports
210
About At-A-Glance Reports
210
About Trend Reports
211
Printed Reports
211
Reports Applicable to SLV Devices
211
Menu Hierarchy
215
Menus
215
BSNMP Mibs and Traps, and RMON Alarm Defaults
219
MIB Support
220
Downloading Mibs and SNMP Traps
220
System Group (Mib-2
221
Framesaver Unit's Sysdescr (System 1
221
Framesaver Unit's Sysobjectid (System 2
221
Interfaces Group (Mib-2
222
Paradyne Indexes to the Interface Table (Iftable
222
Netscout Indexes to the Interface Table (Iftable
223
Standards Compliance for SNMP Traps
224
Trap: Warmstart
225
Trap: Authenticationfailure
225
Traps: Linkup and Linkdown
226
Traps: Enterprise-Specific
229
Traps: RMON-Specific
232
RMON Alarm and Event Defaults
233
Physical Interface Alarm Defaults
234
Frame Relay Link Alarm Defaults
235
DLCI Alarm Defaults - Paradyne Area
237
DLCI Alarm Defaults - Netscout Area
238
Object ID Cross-References (Numeric Order
240
C Connectors, Cables, and Pin Assignments
247
Rear Panel
247
COM Port Connector
248
LAN Adapter Converter and Cable
249
Standard EIA-232-D Crossover Cable
250
Port 1 Connector
252
Standard V.35 Straight-Through Cable
253
Standard V.35 Crossover Cable
253
T1 Network Cable (Feature No. 3100-F1-500)
254
Canadian T1 Line Interface Cable (Feature No. 3100-F1-510)
254
DSX-1 Connector
255
Adapter (Feature No. 9008-F1-560
255
Technical Specifications
257
Equipment List
259
Equipment
259
Cables
260
Index
261
Paradyne FrameSaver SLV 9124 Installation Instructions Manual (40 pages)
1-Slot Unit
Brand:
Paradyne
| Category:
Measuring Instruments
| Size: 0 MB
Table of Contents
Before You Begin
1
Package Checklist
2
Cables You May Need to Order
3
Safety Instructions
3
Installing the Power Supply and Cord
4
Connecting the COM Port to an Async Terminal
5
Troubleshooting Power and COM Port Connections
6
A Quick Guide to Configuration
7
Installing and Setting up the Framesaver SLV
8
Configuring the Framesaver Unit
9
Setting up the Modem
12
Setting up the ISDN DBM
13
Setting up Management
15
Setting up Auto-Configuration
16
Connecting to the Network
17
Entering Trap Managers
19
Setting up Service Provider Connectivity
19
Verifying the End-To-End Path
20
Troubleshooting the Network Connection
21
Connecting to the DTE
23
Check PVC Connections
24
Connecting to the Modem
25
Data Port Leds
29
Technical Specifications
30
Pin Assignments
33
EMI Warnings
34
Important Safety Instructions
34
Government Requirements
36
Warranty, Sales, and Service Information
39
Document Feedback
39
Advertisement
Paradyne FrameSaver SLV 9124 Installation Instructions Manual (29 pages)
1-Slot Unit
Brand:
Paradyne
| Category:
Measuring Instruments
| Size: 0 MB
Table of Contents
Before You Begin
1
Safety Instructions
2
Package Checklist
2
Cables You May Need to Order
3
Installing the Power Supply and Cord
4
Connecting the COM Port to an Async Terminal
5
Troubleshooting Power and COM Port Connections
6
A Quick Guide to Configuration
7
Installing and Setting up the Framesaver SLV
8
Verifying that Self-Test Passed
8
Configuring the Framesaver Unit
8
Entering Time Slot Assignments (9124 Only)
9
Setting up for Management
10
Setting up Auto-Configuration
11
Connecting to the Network
12
Chapter 11, Displaying System Information , of the User's Guide
13
Entering Trap Managers
14
Setting up Service Provider Connectivity
15
Verifying the End-To-End Path
16
Troubleshooting the Network Connection
17
Connecting to the DSX (9124 Only)
18
Connecting to the DTE
19
Check that Data Is Being Received
20
Check PVC Connections
20
Technical Specifications
21
Pin Assignments
23
Important Safety Instructions
24
EMI Warnings
25
Government Requirements
25
Warranty, Sales, and Service Information
27
Document Feedback
28
Paradyne FrameSaver SLV 9124 Installation Instructions Manual (20 pages)
Brand:
Paradyne
| Category:
Measuring Instruments
| Size: 0 MB
Table of Contents
Before You Begin
2
Cables You May Need to Order
2
Safety Instructions
3
Installing the Power Supply and Cord
3
Connecting the COM Port to an Asynchronous Terminal
4
A Quick Guide to Configuration
5
Verifying that Self-Test Passed
6
Setting the System Clock
6
Time Slot Assignment
7
Setting up Management
8
Automatic Configuration
8
Connecting to the Network
9
Setting up Service Provider Connectivity at the Central Site
10
Configuring SNMP Trap Managers and Trap Dial-Out
10
Verifying the End-To-End Path
11
Connecting to the DTE
13
Check PVC Connections
14
Check that Data Is Being Received
14
Important Safety Instructions
15
EMI Warnings
16
Government Requirements
17
Warranty, Sales, Service, and Training Information
19
Document Feedback
19
Patent Notification
19
Advertisement
Related Products
Paradyne FrameSaver SLV 9x24 Series
Paradyne FrameSaver SLV 9624
Paradyne FrameSaver SLV Series
Paradyne iMarc SLV 9126
Paradyne FrameSaver SLV 9126-II CSU
Paradyne FrameSaver SLV 9128-II CSU
Paradyne FrameSaver SLV 9126 DSU
Paradyne FrameSaver SLV 9126-II DSU
Paradyne FrameSaver SLV 9123
Paradyne FrameSaver SLV 9128-II
Paradyne Categories
Network Hardware
Modem
Network Router
Adapter
Network Card
More Paradyne Manuals
Login
Sign In
OR
Sign in with Facebook
Sign in with Google
Upload manual
Upload from disk
Upload from URL