Sign In
Upload
Manuals
Brands
Codan Manuals
Transceiver
Envoy
User Manuals: Codan Envoy HF Radio
Manuals and User Guides for Codan Envoy HF Radio. We have
4
Codan Envoy HF Radio manuals available for free PDF download: Reference Manual, Getting Started Manual, Control Getting Started Manual, Manual
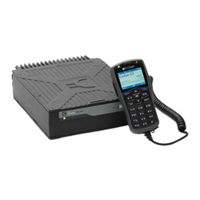
Codan Envoy Reference Manual (537 pages)
RADIO COMMUNICATIONS
Brand:
Codan
| Category:
Transceiver
| Size: 22 MB
Table of Contents
Table of Contents
3
Introduction
25
Standards and Icons
25
The Envoy™ Transceiver
26
Overview of the Envoy™ Transceiver
26
Figure 1: Typical Transceiver System
26
The 2220 Handset
27
Figure 2: 2220 Handset
27
The 2221 Handset
28
Figure 3: 2221 Handset
28
The 2230 Desk Console
29
Figure 4: 2230 Desk Console
29
The 2210 RFU
30
Figure 5: 2210 RFU
30
Using the Wizard
31
Overview of the Wizard
32
Figure 6: Steps in the Wizard
32
Using the Wizard
34
Figure 7: Wizard Startup Screen
34
Selecting a Language
35
Setting the Location of the Desk Console
36
Selecting an Antenna
42
Selecting a Peripheral Device
43
Operating the Transceiver
46
Switching the Transceiver on and off
46
Switching on the Transceiver
46
Switching off the Transceiver
46
The Channel Screen
47
Figure 8: Channel Screen
47
Figure 9: Scanning Screen
48
Selecting a Channel
49
Figure 10: Status Areas
50
Selecting Information to be Shown in a Status Area
50
Table 1: Information that May be Shown in the Status Areas
50
Figure 11: Available Themes for the Display in the Control Point
53
Selecting a Theme
53
Scanning Channels
55
Switching Scanning on or off
56
Pausing Scanning
56
Muting the Transceiver
57
Switching Mute on or off
57
Selecting the Mute Type
58
Using the Microphone
59
Manually Tuning the Antenna
60
Selecting a Language
61
Figure 12: Select Language Screen
61
Setting the Time and Date
62
Setting the Brightness of the Display
63
Setting the Display Timeout
64
Setting the Location of the Desk Console
65
Figure 13: Connection between RFU and Desk Console Using
65
Figure 14: Connection between RFU and Desk Console Using Ethernet Cables and Optional Switch
66
Calling
67
Making a Call to a Contact
67
Adding a Contact
68
Making a Call from the Call History
68
Making a Call from the Emergency Key
69
General Calling
70
Figure 15: Call Screen with Call Log
70
Figure 16: Available Status Types for a Get Status Call in a Selcall
83
Using the Clarifier
89
Reducing Background Noise with Easitalk
90
Viewing Information about Your Transceiver
91
Overview of Information in the Transceiver
91
Using GPS
95
Overview of GPS
95
Figure 17: GPS Screen
95
Distance and Bearing
96
Figure 18: Distance and Bearing
96
Viewing GPS Information
97
Table 2: GPS Information
97
Using Encryption
99
Switching the Secure Feature on or off
99
Selecting a Secure Key
102
Changing the Privacy Code
103
Using a Crosspatch
104
Overview of the 3031 Crosspatch
104
Figure 19: Crosspatch Status
104
Changing the Operating Mode of the Crosspatch
105
Upgrading the Transceiver Via a USB Stick
106
Entering a Password for an Option
107
Performing a Self-Test
108
Finding an RFU
109
Menu Structure
112
Figure 20: Typical Menu Screen
112
Figure 21: Menu Structure (Admin Level)
113
Navigating the Menu Structure
114
Figure 22: Navigation Indicator Showing Navigation Keys that
114
Overview of Basic and Advanced Views
116
Basic View
116
Advanced View
116
Figure 23: Basic View (no Advanced View Indicator)
116
Figure 24: Advanced View
116
Switching between Basic and Advanced Views
117
Overview of User and Admin Levels
118
User Level
118
Admin Level
118
Figure 25: User Level (no Admin Level Indicator)
118
Figure 26: Admin Level
118
Logging in to Admin Level
119
Figure 27: Locked, Hidden and Advanced Indicators
119
Logging out of Admin Level
120
Finding a Word or Value
121
Figure 28: Find Function
121
Selecting an Icon
123
Figure 29: Highlighted Icon
123
Selecting a Function from the Menu Bar
124
Figure 30: Functions on the Menu Bar
124
Entering Text in a Field
125
Figure 31: Example of an Editable Text Field
125
Figure 32: Character-Entry Mode Indicator
126
Table 3: Character-Entry Mode
126
Entering a Special Character (2220/2230)
127
Entering Text with the 2221 Handset
128
Selecting a Value from a List
129
Figure 33: List of Entries, with and Without Focus
129
Selecting/Deselecting a Check Box
130
Figure 34: Entry with a Check Box
130
Moving a Slider
131
Figure 35: a Slider Value
131
Changing the Order of Items in a List
132
Saving Your Changes
133
Figure 36: Screen that Has Changes to be Saved
133
Structure of Information
135
Structure of User Information
136
Structure of Contact and Call Information
137
Figure 38: Structure of Call Information for a Contact in the
137
Channels
139
Overview of Channels
140
Figure 39: Information for a Channel
140
Entries for a Channel
141
Channel Name
141
Frequency
141
Modes
142
Preferred Mode
142
Power
142
Antenna
143
Figure 40: Connection Diagram for Dual Antennas
143
Working with Channels
145
Adding a Channel
145
Editing a Channel
147
Moving a Channel
148
Deleting a Channel
148
Scan Tables
150
Overview of Scan Tables
150
Figure 41: Information for a Scan Table
151
Entries for a Scan Table
152
Scan Table Name
152
Scanning a Scan Table
152
Scan Channels
152
Voice Detect
152
Channel Dwell Time
152
HF Network
153
Table 4: Default Channel Dwell Time for each Type of HF Network or Detection Requirement
153
Data
154
Working with Scan Tables
155
Adding a Scan Table
155
Editing a Scan Table
159
Moving a Scan Table
159
Deleting a Scan Table
159
HF Networks
162
Overview of HF Networks
162
Figure 42: Information for an HF Network
162
Entries for an HF Network
164
HF Network Name
164
Call System
164
Self Address
165
Scan Tables
165
Global
166
Preamble
166
Sounding Interval
167
Privacy Mode
167
Privacy Password
168
Rx Only
168
Working with HF Networks
169
Adding an HF Network
169
Editing an HF Network
171
Moving an HF Network
171
Deleting an HF Network
171
Phone Links
174
Overview of Phone Links
174
Figure 43: Information for a Phone Link
174
Entries for a Phone Link
175
Phone Link Name
175
HF Network
175
Ale|Selcall Address
175
Preferred Channel
175
Working with Phone Links
176
Adding a Phone Link
176
Editing a Phone Link
177
Moving a Phone Link
177
Deleting a Phone Link
177
Contacts
179
Overview of Contacts
180
Figure 44: Information for a Contact
180
Chain Call
181
Entries for a Contact
182
Contact Name
182
Calls for a Contact
182
HF Network
182
Call Type
182
Ale|Selcall Address
183
Phone Link
183
Phone Number
183
Message|Status Type
183
Preferred Channel
184
Call Description
184
Base
184
Working with Contacts
185
Adding a Contact
185
Editing a Contact
192
Moving a Contact
193
Moving a Call for a Contact
193
Deleting a Contact
193
Adding a Contact from the Call Log, Call History, or Last Heard Log
194
Figure 45: Call Log, Call History and Last Heard Log
194
Nets
197
Overview of Nets
198
Figure 46: Information for a NET
198
Entries for a NET
200
NET Name
200
Address
200
HF Network
200
NET Members
201
Out Calls
201
In Calls
201
Link
202
Response
203
Tune Time
203
LQA Exchange
203
Slot Width
204
Working with Nets
205
Adding a NET
205
Editing a NET
208
Moving a NET
208
Deleting a NET
208
Overview of Messages
210
Entering a Message
211
Peripherals
213
Overview of Peripherals
214
Table 5: Peripherals
214
Selecting an Antenna
216
Selecting a Peripheral Device
217
Selecting a Power Amplifier
218
Entries for a Peripheral
219
RFU 15Way Mode
219
RFU 15Way Speed
220
RFU 15Way Startup
220
RFU Average ALC
220
RFU ALC Rate
220
RFU Audio Type
220
Rfu Agc
221
RFU PTT Beep
221
RFU Mute Extend
221
RFU Mute off after PTT
221
RFU Sidetone Volume
222
RFU Secure Audio
222
RFU Quiet Line
222
RFU 15Way MIL/STANAG 2G Data Interface
222
RFU 15Way 2.4 Kbit/S Data Modem Interface
223
RFU 6Way Mode
223
RFU 6Way Speed
223
RFU 6Way Startup
223
RFU 6Way MIL/STANAG 2G Data Interface
224
Settings
225
Overview of Settings
226
Settings > Control Point > General
227
Welcome Image
227
Welcome Text
228
USB User Access
228
Channel Scroll
228
Show Channel Frequency
229
Frequency Format
229
Call Key Options
229
Night Display Brightness
230
Night Display Start
230
Night Display Stop
230
Local Welcome Text
230
Brightness
231
Custom Brightness
231
Auto DIM Time
231
Key Beeps
231
Beeps and Tones
232
Theme
232
Night Theme
232
Show Background Image
232
Logging
233
Logging Level
233
Settings > Control Point > Status Area
234
Status Area 1
234
Status Area 2
234
Figure 47: Status Areas
234
Status Area 3
235
Status Area 4
235
Status Area 5
235
Status Area 6
235
User-Defined Text 1
235
User-Defined Text 2
236
Settings > Control Point > Time and Date
237
Time Zone
237
Daylight Saving
237
Clock Type
237
Time Format
237
Date Format
238
Settings > Control Point > Console
239
Console Location
239
Internal Speaker
239
Console PTT
240
Foot-Switch PTT
240
Console External Alarm
240
Console Easitalk Start State
240
Settings > Configuration > General
241
Admin PIN
241
Noise Limiter
241
Voice Detect Sensitivity
242
Power down Timeout
242
Power down Time
242
Easitalk Mode
242
RF Pre-Amp
242
Tx Power
243
Low Power
243
Medium Power
243
High Power
244
Easitalk Start State
244
Default Selcall
244
Handset AGC
244
Handset PTT Beep
245
System Lock Override
245
Morse Timeout
245
PTT Timeout
245
Units
246
Abandon Mode
246
Command Line
246
RFU Logging
246
Settings > Configuration > Factory
247
Settings > Connectors > RFU 15Way
248
RFU Secure Audio
248
Settings > Connectors > RFU 6Way
249
RFU 6Way Speed
249
Settings > Scan
250
Auto Resume Mode
250
Auto Resume Time
250
Scan Mute
251
Scan Voice Extend
251
Scan Voice Max Pause
251
Settings > Calling > General
252
Call Types for Contacts
252
Call Types for New Call
253
Show Phone Link Address
253
Emergency Call Alarm
253
Message Call Alarm
254
Selective Call Alarm
254
External Alarm
254
Alert Tones
255
Call Status Time
255
Chain Call Pause
255
In Call Timeout
256
LBT Mode
256
LBT Period
257
LBT Data Sensitivity
257
LBT Waveform
257
Respond GPS
258
Respond OTA
259
Settings > Calling > ALE
260
ALE LQA Average
261
ALE LQA Decay
261
ALE Site Manager
262
Table 6: Values for the ALE Site Manager Entry
263
ALE Accept ALL Call
264
ALE Accept any Call
264
ALE Accept Wildcard Call
265
ALE AMD Position
265
Ale Ber
266
ALE Call Scan
266
ALE Scan Cycles
267
ALE Call Threshold
267
ALE Call Weighting
268
ALE Golay
268
ALE Hangup ALL Call
269
ALE Hangup Phone Call
269
ALE Hangup Voice Call
269
ALE LQA Exchange
270
ALE LQA Mapping
270
ALE Retries
270
ALE Selective Message
271
ALE Silent Mode
271
ALE Soundings
271
Settings > GPS
272
GPS Detection Timeout
272
GPS Show Options
272
GPS Format Options
273
Table 7: GPS Formats
273
My Position
274
Table 8: Format of My Position Information
274
Settings > Audio
275
Ring Sidetone Volume
275
Call Sidetone Volume
275
Settings > Security
276
CES-128 Mode
276
Privacy Code
276
Standby after Selcall
277
Secure User Access
277
General Options
278
Secure Start State
278
CES Options
278
CES Key Prefix
279
Digital Key Prefix
279
Digital Voice Options
279
Digital Mute Start State
279
Settings > Connectivity
280
IP Address
280
Alias
280
Network Mask
280
DHCP Client
281
Default Gateway
281
USB IP Address
281
USB Network Mask
281
USB DHCP Server
281
RFU IP Address
282
RFU Alias
282
RFU Network Mask
282
RFU DHCP Client
282
RFU Default Gateway
282
Access Rights
283
Overview of Access Rights
284
Keys and Macros
286
Overview of the Keypad and Macros
286
Figure 48: Power and Emergency Keys
286
Figure 49: Navigation Keys
286
Figure 50: Alphanumeric Keys
286
Figure 51: Function Keys (Desk Console Only)
286
Keypad
287
Table 9: Keys and Their Function
287
Macros
290
Entries for a Macro
291
Macro Name
291
Key
291
Steps
291
Figure 52: Length of Key Press for Hot Key
291
Table 10: Available Actions for a Macro Step
292
Working with Macros
293
Adding a Macro
293
Editing a Macro
298
Moving a Macro
299
Moving a Macro Step
300
Deleting a Macro
300
Examples of Macros
301
Creating a Macro to Toggle a Setting
301
Overview of Modes
304
Available Modes
304
Table 11: Modes
304
Free Tune
305
Overview of Free Tune
306
Table 12: Amateur Band Frequencies
306
Selecting a Free-Tune Frequency
307
Adding a Channel in Free Tune
309
IP Remote Control
312
Direct Ethernet Connection
312
Figure 53: Direct Ethernet Connection
313
LAN Connection
314
Figure 54: LAN Connection
315
Point-To-Point WAN Connection
316
Figure 55: Point-To-Point WAN Connection
316
Point-To-Multipoint/Multipoint-To-Point WAN Connection
317
Connection
318
Data Options
320
Overview of Data Options
320
2.4 Kbit/S Data Modem
321
Typical 2.4 Kbit/S Data Station
321
Figure 57: Envoy™ X2 Transceiver with 2.4 Kbit/S Data Modem
322
Setting up the Serial Connection
323
Setting up the USB Connection
325
Using the 2.4 Kbit/S Data Station
327
Table 13: Status of the 2.4 Kbit/S Data Modem
328
MIL/STANAG 2G Data
330
Typical MIL/STANAG 2G Data Station
330
Figure 58: Envoy™ X2 Transceiver with MIL/STANAG 2G
331
Data
331
Setting up the Serial Connection
332
Sending Email Via RC50-C
333
G Data Call
334
Rm50E HF Data Modem
335
Typical Rm50E Data Station
335
Modem
336
Sending Email Via RC50-C
337
Encryption
339
Overview of Encryption
340
Table 14: Features Available with CIVS Scrambling, and
340
Secure Key
341
Table 15: Properties of a Secure Key in CES-128 and AES-256
342
Using Encryption
343
Switching the Secure Feature on or off
343
Selecting an Encryptor
346
Adding a Secure Key
347
Selecting a Secure Key
348
Editing a Secure Key
349
Deleting a Secure Key
350
Setting up Encryption
352
Setting User Access to Encryptor Features
352
Enabling Encryptor Selection
353
Enabling a Hot-Key Sequence for Erasing Secure Keys
354
Setting the Encryptor to be Secure at All Times
355
Setting the Secure State of Scrambler/Encryptors at Power up
356
Programming Secure Keys
357
CIVS Voice Scrambler
359
Figure 63: Channel Screen Showing Transmit/Receive Status for CIVS Voice Scrambler
359
Setting the Privacy Code for CIVS
360
Changing the Privacy Code
361
CES-128 Voice Encryption
362
Figure 64: Channel Screen Showing Secure/Standby/Clear Status for CES-128 Voice Encryption
362
Figure 65: Channel Screen Showing Transmit/Receive Status for CES-128 Voice Encryption
362
Secure Mode
363
Setting the CES Key Prefix
365
PIN for Secure Session
365
Standby Mode
368
Base Key
372
AES-256 Encryption
374
Setting the Digital Key Prefix
374
AES-256 Digital Voice Encryption
375
Figure 66: Channel Screen Showing Secure/Clear Status for AES
375
Figure 67: Channel Screen Showing Transmit/Receive Status for
375
Figure 68: Channel Screen Showing AES-256 Secure Key and
376
Figure 69: Digital Voice Mute Indicator
378
AES-256 Data Encryption
379
Figure 70: Channel Screen Showing Secure/Clear Status for AES-256 Data Encryption
380
Figure 71: Channel Screen Showing Transmit/Receive Status for AES-256 Data Encryption
380
Figure 72: Transmit and Receive Screens During an AES-256
382
Connectors on the RFU
384
Figure 73: Back Panel of the 2210 RFU
384
Antenna Control Connector
385
Figure 74: Front View of the Antenna Control Connector
385
Table 16: Pinouts of the Antenna Control Connector
385
DC Supply Connector
386
Fan Connector
386
Figure 75: Front View of the Fan Connector
386
RF Connector
386
Table 17: Pinouts of the DC Supply Connector
386
Table 18: Pinouts of the Fan Connector
386
10-Way Connector
387
Figure 76: Front View of the 10-Way Connector
387
Table 19: Pinouts of the 10-Way Connector
387
6-Way Serial Data Connector
388
Figure 77: Front View of the 6-Way Connector
388
Table 20: Pinouts of the 6-Way Connector
388
Figure 78: Front View of the Handset and Speaker Connector
389
Handset and Speaker Connector
389
Table 21: Pinouts of the Handset Connector
389
Table 22: Pinouts of the Speaker Connector
389
15-Way GPIO Connector
390
Figure 79: Front View of the 15-Way Connector
390
Table 23: Pinouts of the 15-Way Connector
390
Connectors on the Desk Console
394
DC Supply Connector
394
Figure 80: Back Panel of the 2230 Desk Console
394
15-Way GPIO Connector
395
Figure 81: Front View of the 15-Way GPIO Connector
395
Ethernet Connector
396
Transceiver Connector
396
Figure 82: Front View of the Transceiver Connector
396
Table 24: Pinouts of the Transceiver Connector
396
USB Connector
397
Foot-Switched PTT Connector
397
Table 25: Pinouts of the Foot-Switched PTT Connector
397
8-Way Connector
398
Figure 83: Front View of the 8-Way Connector
398
Table 26: Pinouts of the 8-Way Connector
398
Headphone Connector
399
Table 27: Pinouts for the Headphone Connector
399
Specifications
402
General Specifications
402
Table 28: General Specifications
402
Transmit Specifications
404
Table 29: Transmit Specifications
404
Receive Specifications
406
Table 30: Receive Specifications
406
Environmental Specifications
408
Table 31: Environmental Specifications
408
Mechanical Specifications
409
Table 32: Mechanical Specifications
409
IP Specifications
410
Table 33: IP Specifications
410
Advertisement
Codan Envoy Getting Started Manual (219 pages)
Brand:
Codan
| Category:
Transceiver
| Size: 51 MB
Table of Contents
Table of Contents
3
Introduction
14
Overview of this Guide
14
The 2220 Handset
15
Figure 1: 2220 Handset
15
The 2221 Handset
17
Figure 2: 2221 Handset
17
The 2230 Desk Console
19
Figure 3: 2230 Desk Console
19
Keypad
20
Table 1: Keys and Their Function
20
Standards and Icons
24
Using the Wizard
25
Overview of the Wizard
26
Figure 4: Steps in the Wizard
26
Using the Wizard
28
Figure 5: Wizard Startup Screen
28
Selecting a Language
29
Setting the Time and Date
29
Setting the Types of Connections between Modules
30
Adding a Channel
31
Adding Channels to a Scan Table
33
Entering a Self Address
33
Adding a Contact
34
Adding a Simple Call
35
Adding a Message Call
36
Adding a Phone Call
38
Completing the Contact
38
Selecting an Antenna
39
Selecting a Peripheral Device
40
Switching the Transceiver on and off
42
Switching on the Transceiver
42
Switching off the Transceiver
42
The Channel Screen
43
Figure 6: Channel Screen
44
Figure 7: System Lock and Connected Data Application Icons
45
Figure 8: Scanning Screen
46
Selecting a Channel
47
Selecting a Channel from a Channel Group
48
Scanning Channels
51
Switching Scanning on or off
52
Pausing Scanning
52
Muting the Transceiver
54
Switching Mute on or off
54
Selecting the Mute Type
55
Using the Microphone
56
Setting the Basics
57
Setting the Time and Date
57
Setting the Brightness of the Display
58
Calling
59
Making a Call to a Contact
60
Making a Call from the Call History
61
Making a Call from the Emergency Key
63
Making a Selective Call
64
Figure 9: Chain Call
64
Making a Message Call
66
Receiving a Call
70
Figure 10: Incoming Call Pop-Up
71
Viewing Missed Calls
72
Figure 11: Missed Call Pop-Up for a Single Call
72
Figure 12: Missed Call Pop-Up for Multiple Calls
72
Figure 13: Example of a Missed Call Icon in the Status Bar
73
Table 2: Missed Call Icons that May be Shown in the Status Bar of
73
Making a Call When Multiple Control Points Are Connected to the same RFU
75
Figure 14: Calling Information When Multiple Control Points
75
Using Digital Voice
77
Overview of Digital Voice Options
77
Table 3: Digital Voice Options
77
Digital Voice Rate
78
Table 4: Digital Voice Rates
79
Digital Voice Mute
80
Figure 15: Channel Screen Showing the Digital Voice Rate
80
Switching the Digital Voice Feature on or off
81
Figure 16: Digital Voice Mute Indicator
81
Figure 17: Channel Screen Showing On/Off Status for a DV Option (Without Encryption)
82
Figure 18: Channel Screen Showing Transmit/Receive Status for a DV Option (Without Encryption)
82
Figure 19: Channel Screen Showing Secure/Clear Status for All
83
Selecting the Digital Voice Rate
84
Figure 20: Channel Screen Showing Transmit/Receive Status for All Encrypted Digital Voice
84
Selecting Digital Voice Mute
85
Using GPS
87
Saving Your Current GPS Position as a Waypoint
87
Selecting a Waypoint
87
Updating a Waypoint from the Call History
88
Updating a Waypoint from a Contact
89
Adding a Waypoint
91
Finding a Waypoint
93
Viewing the Details of a Waypoint
94
Viewing GPS Information
95
Table 5: GPS Information
97
Data Options
98
2.4 Kbit/S Data Modem
98
Typical 2.4 Kbit/S Data Station
98
Figure 21: Envoy X2 Transceiver with 2.4 Kbit/S Data Modem
99
Using the 2.4 Kbit/S Data Station
100
MIL/STANAG 2G Data
104
Table 6: Status of the 2.4 Kbit/S Data Modem
104
Typical MIL/STANAG 2G Data Station
105
Figure 22: Envoy X2 Transceiver with MIL/STANAG 2G Data
106
Figure 23: Envoy X2 Transceiver with MIL/STANAG 2G Data
107
Figure 24: Envoy X2 Transceiver with MIL/STANAG 2G Data
108
Sending Email Via RC50-C
109
Figure 25: Transmit and Receive Screens During a MIL/STANAG 2G Data Call
110
Rm50E HF Data Modem
111
Typical Rm50E Data Station
111
Figure 26: Envoy X2 Transceiver with Rm50E HF Data Modem
112
Sending Email Via RC50-C
113
Figure 27: Transmit and Receive Screens During an Rm50E
114
Using Encryption
115
Switching the Secure Feature on or off
115
Entering a PIN for a Secure Session
120
Selecting a Secure Key
121
Changing the Privacy Code
122
Adding a Secure Key
123
Using a Crosspatch
126
Overview of the 3031 Crosspatch
126
Figure 28: Crosspatch Status
127
Changing the Operating Mode of the Crosspatch
128
Using Codan Convoy
129
Overview of Codan Convoy
129
Using an External Power Amplifier
130
Overview of the 3061 & 3062 Power Amplifiers
130
Inspecting the Status of the Power Amplifier
130
Displaying the Power Amplifier Status in the Status Areas
131
Viewing the Power Amplifier Status in the HPA Status Screen
131
Viewing the Fault State of the Power Amplifier
132
Clearing the Fault State of the Power Amplifier
132
Checking the Power Amplifier's Control Board
133
Firmware Version
133
Upgrading the Transceiver Via a USB Stick
134
Using GPS Plotter
137
Overview of GPS Plotter
137
Using VCOM Services
138
Adding a Contact
142
Adding a Simple Call
143
Adding a Message Call
144
Adding a Phone Call
146
Completing the Contact
147
Or Last Heard Log
150
Figure 29: Call Log, Call History, and Last Heard Log
150
Adding a Contact from the Call Log, Call History
152
Navigating the Menu Structure
153
Appendix A Navigating the Menu Structure
154
The Basic Menu Structure
154
Figure 30: Typical Menu Screen
154
Figure 31: Menu Structure (User Level, Basic View)
155
Navigating the Menu Structure
156
Figure 32: Navigation Indicator Showing Navigation Keys that
156
Overview of Basic and Advanced Views
158
Basic View
158
Advanced View
158
Figure 33: Basic View (no Advanced View Indicator)
158
Switching between Basic and Advanced Views
159
Figure 34: Advanced View
159
Finding a Word or Value
161
Figure 35: Find Function
161
Selecting an Icon
164
Figure 36: Highlighted Icon
164
Selecting a Function from the Menu Bar
165
Figure 37: Functions on the Menu Bar
165
Entering Text in a Field
167
Figure 38: Example of an Editable Text Field
167
Figure 39: Character-Entry Mode Indicator
168
Table 7: Character-Entry Mode
168
Entering a Special Character (2220/2230)
169
Entering Text with the 2221 Handset
170
Entering Text with a USB Keyboard
171
Editing Text with a USB Keyboard
172
Entering a Special Character with a USB Keyboard
174
Table 8: USB Keyboard Special Keys
174
Selecting a Value from a List
176
Figure 40: List of Entries, with and Without Focus
176
Selecting/Deselecting a Check Box
177
Figure 41: Entry with a Check Box
177
Moving a Slider
178
Figure 42: a Slider Value
178
Changing the Order of Items in a List
179
Saving Your Changes
180
Figure 43: Screen that Has Changes to be Saved
180
Structure of Information
181
Structure of User Information
182
Figure 44: Basic Structure of Information in the Envoy Transceiver
182
Structure of Contact and Call Information
184
Figure 45: Structure of Call Information for a Contact in the Envoy Transceiver
184
Appendix B Structure of Information
187
Installing the Transceiver
187
Codan Envoy Control Getting Started Manual (197 pages)
Brand:
Codan
| Category:
Transceiver
| Size: 4 MB
Table of Contents
Table of Contents
3
Introduction
13
Overview of this Guide
13
The 2220 Handset
15
Figure 1: 2220 Handset
15
The 2221 Handset
17
Figure 2: 2221 Handset
17
The 2230 Desk Console
19
Figure 3: 2230 Desk Console
19
Keypad
20
Table 1: Keys and Their Function
20
Standards and Icons
25
Using the Wizard
27
Overview of the Wizard
28
Figure 4: Steps in the Wizard
29
Using the Wizard
30
Figure 5: Wizard Startup Screen
30
Selecting a Language
31
Setting the Time and Date
31
Adding a Channel
33
Setting the Types of Connections between Modules
33
Entering a Self Address
35
Adding a Contact
36
Selecting an Antenna
41
Selecting a Peripheral Device
42
Operating the Transceiver
43
Switching the Transceiver on and off
44
Switching on the Transceiver
44
Switching off the Transceiver
44
The Channel Screen
45
Figure 6: Channel Screen
46
Figure 7: System Lock and Connected Data Application Icons
47
Figure 8: Scanning Screen
48
Selecting a Channel
49
Selecting a Channel from a Channel Group
50
Scanning Channels
53
Switching Scanning on or off
54
Pausing Scanning
54
Muting the Transceiver
56
Switching Mute on or off
56
Selecting the Mute Type
57
Using the Microphone
58
Setting the Basics
59
Setting the Time and Date
59
Setting the Brightness of the Display
60
Calling
61
Making a Call to a Contact
62
Making a Call from the Call History
63
Making a Call from the Emergency Key
65
Making a Selective Call
66
Figure 9: Chain Call
66
Making a Message Call
68
Receiving a Call
72
Figure 10: Incoming Call Pop-Up
72
Viewing Missed Calls
73
Figure 11: Missed Call Pop-Up for a Single Call
74
Figure 12: Missed Call Pop-Up for Multiple Calls
74
Figure 13: Example of a Missed Call Icon in the Status Bar of the Channel Screen
74
Table 2: Missed Call Icons that May be Shown in the Status Bar of the Channel Screen
75
Making a Call When Multiple Control Points Are Connected to the same RFU
76
Figure 14: Calling Information When Multiple Control
77
Using Digital Voice
78
Overview of Digital Voice Options
78
Table 3: Digital Voice Options
78
Table 4: Digital Voice Rates
79
Figure 15: Channel Screen Showing the Digital Voice Rate
80
Switching the Digital Voice Feature on or off
81
Figure 16: Digital Voice Mute Indicator
81
Figure 17: Channel Screen Showing On/Off Status for a DV Option (Without Encryption)
82
Figure 18: Channel Screen Showing Transmit/Receive Status for a DV Option (Without Encryption)
82
Figure 19: Channel Screen Showing Secure/Clear Status for All Encrypted Digital Voice
83
Figure 20: Channel Screen Showing Transmit/Receive Status for All Encrypted Digital Voice
83
Selecting the Digital Voice Rate
84
Selecting Digital Voice Mute
85
Using GPS
87
Saving Your Current GPS Position as a Waypoint
87
Selecting a Waypoint
87
Updating a Waypoint from the Call History
88
Updating a Waypoint from a Contact
89
Adding a Waypoint
91
Finding a Waypoint
93
Viewing the Details of a Waypoint
94
Viewing GPS Information
94
Table 5: GPS Information
95
Data Options
97
2.4 Kbit/S Data Modem
97
Figure 21: Envoy X2 Transceiver with 2.4 Kbit/S Data Modem Option and Computer
98
Table 6: Status of the 2.4 Kbit/S Data Modem
100
MIL/STANAG 2G Data
103
Figure 22: Envoy X2 Transceiver with MIL/STANAG
104
Figure 23: Envoy X2 Transceiver with MIL/STANAG 2G Data Via VCOM over USB Cable
105
Figure 24: Envoy X2 Transceiver with MIL/STANAG 2G Data Via VCOM over Ethernet Cable
106
Rm50E HF Data Modem
108
Figure 25: Transmit and Receive Screens During a MIL
108
Figure 26: Envoy X2 Transceiver with Rm50E HF Data
109
Figure 27: Transmit and Receive Screens During an Rm50E
111
Using Encryption
112
Switching the Secure Feature on or off
112
Selecting a Secure Key
118
Changing the Privacy Code
119
Adding a Secure Key
120
Using a Crosspatch
123
Overview of the 3031 Crosspatch
123
Figure 28: Crosspatch Status
124
Changing the Operating Mode of the Crosspatch
125
Upgrading the Transceiver Via a USB Stick
126
Adding a Contact
130
Adding a Simple Call
131
Adding a Message Call
132
Adding a Phone Call
134
Completing the Contact
135
Adding a Contact from the Call Log, Call History, or Last Heard Log
137
Figure 29: Call Log, Call History, and Last Heard Log
137
Appendix A Navigating the Menu Structure
140
The Basic Menu Structure
140
Figure 30: Typical Menu Screen
140
Figure 31: Menu Structure (User Level, Basic View)
141
Navigating the Menu Structure
142
Figure 32: Navigation Indicator Showing Navigation Keys
142
Overview of Basic and Advanced Views
144
Basic View
144
Advanced View
144
Figure 33: Basic View (no Advanced View Indicator)
144
Switching between Basic and Advanced Views
145
Figure 34: Advanced View
145
Finding a Word or Value
146
Figure 35: Find Function
146
Selecting an Icon
149
Figure 36: Highlighted Icon
149
Selecting a Function from the Menu Bar
150
Figure 37: Functions on the Menu Bar
150
Entering Text in a Field
152
Figure 38: Example of an Editable Text Field
152
Figure 39: Character-Entry Mode Indicator
153
Table 7: Character-Entry Mode
153
Entering a Special Character (2220/2230)
155
Entering Text with the 2221 Handset
156
Selecting a Value from a List
158
Figure 40: List of Entries, with and Without Focus
158
Figure 41: Entry with a Check Box
159
Selecting/Deselecting a Check Box
159
Figure 42: a Slider Value
160
Moving a Slider
160
Changing the Order of Items in a List
161
Figure 43: Screen that Has Changes to be Saved
162
Saving Your Changes
162
Structure of Information
163
Structure of User Information
164
Figure 44: Basic Structure of Information in the Envoy
165
Structure of Contact and Call Information
166
Figure 45: Structure of Call Information for a Contact in
166
Appendix B Structure of Information
167
Installing the Transceiver
167
Advertisement
Codan Envoy Manual (3 pages)
Red Button
Brand:
Codan
| Category:
Radio
| Size: 0 MB
Table of Contents
Config Check & Changes
1
Admin Mode Warning
1
User Data Access
2
Emergency Contacts Setup
2
Austravel EMERGENCY Screen
3
Setting Emergency Call Parameters
3
Testing Emergency Settings
3
Advertisement
Related Products
Codan Envoy 2220
Codan Envoy 2230
Codan Envoy 2221
Codan 2110 series
Codan 2110v
Codan 5700 series
Codan 5705
Codan 5710
Codan 5712H
Codan 5720
Codan Categories
Transceiver
Radio
Receiver
Antenna
Modem
More Codan Manuals
Login
Sign In
OR
Sign in with Facebook
Sign in with Google
Upload manual
Upload from disk
Upload from URL