Sign In
Upload
Manuals
Brands
AGFA Manuals
Printer
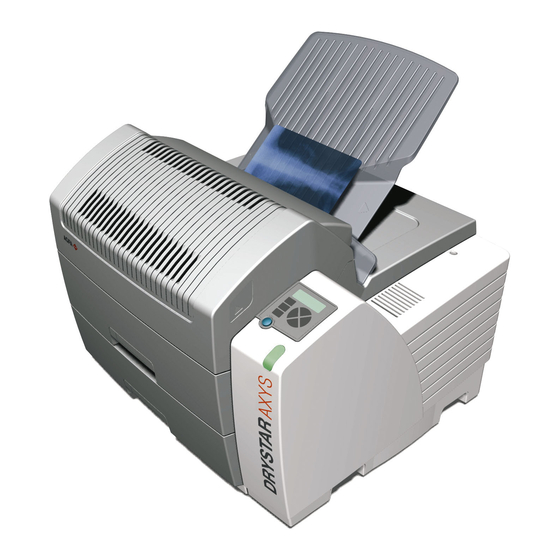
DRYSTAR AXYS
AGFA DRYSTAR AXYS Manuals
Manuals and User Guides for AGFA DRYSTAR AXYS. We have
6
AGFA DRYSTAR AXYS manuals available for free PDF download: Service Manual, User Manual, Reference Manual, Manual
AGFA DRYSTAR AXYS Service Manual (461 pages)
Type 5367/100
Brand:
AGFA
| Category:
Printer
| Size: 17 MB
Table of Contents
Table of Contents
11
Service Manual
1
About this Manual
6
Disclaimer
13
Used Icons
14
Labels
15
CE Mark
15
System Labels
15
System Labels Concerning Laser Radiation
16
Product Complaints
18
References
18
Intended Use
19
Intended User
19
Qualifications for Operation and Service Tasks
19
Environmental and Occupational Safety Instructions
20
Connections to Other Equipment
21
Accessories and Spare Parts
22
Compliance
22
Safety Directions for Operation
25
Radiation Protection
26
Safety Directions for Cleaning and Disinfection
26
General Safety Directions for Service Activities
27
Safety Directions for Installation Planning Activities
28
Safety Directions for Installation Activities
30
Safety Directions for Maintenance and Repair Activities
31
Safety Directions for Remote Service Activities
34
Generic Safety Directions for Healthcare Imaging Products
35
Recycling
35
Safety Directions Concerning Hazardous Materials
35
Safety Directions Concerning Modifications
35
Safety Directions for Transport and Shipment of Spare Parts, Accessories and Devices
35
Erasing Protected Health Information (Phi)
36
Waste Disposal
36
Table of Contents
39
Installation Checklist
40
Executing the Printer Installation Wizard
42
Adapting the Printer Settings
44
Setting Film Calibration Parameters
45
Setting the Default Densitometer
46
Setting the Film View
47
Setting Beeps on Empty Tray
48
Setting Behavior for Unreadable RF Tags
49
Activating the Mammo License
50
Entering Site Data
51
Film Calibration
52
Printer - Modality Connection
54
Modality Set-Up
54
Logical Printers Set-Up
55
Printing of Diagnostic and / or Test Images
59
Image Adjustments
59
Mammography Specific Image Adjustments
60
Image Adjustments as Described in the Connectivity Release Document
62
Image Adjustments at the Modality
62
Basic Image Adjustment at the Printer Via Key-Operator Menu
64
Default Value
67
Acceptance Test
68
Completion of Installation
69
Customer Instruction
69
Backup of Printer Settings
70
Table of Contents
73
Introduction
74
Chapter 1 Technical Data Compared to Drystar 5300 and Drystar 5503
75
Comparison to Other Agfa B&W Printers
75
Detailed Comparison Drystar 5302 - Drystar Axys
76
Film Run
77
Backside Printing Recognition
83
Left / Right Shift Print Algorithm
84
Mammo Printing Functionality
86
Calibrations
88
Modules
89
Printer Modules
89
Hardware
91
Modules and E-Labels
93
Diagnostic Software
95
Thermal Model
97
Safety Notes for Service Actvities
101
Safety Notes for Service Actvities
102
Safety Notes for Installation Planning and Installation
102
Safety Notes for Preventive and Corrective Maintenance Work
102
General Safety Note for All Service Actvities
103
Safety Switch
103
Electrical Check after Power Supply Replacements
104
Table of Contents
109
Machine Specific Tools
111
Mandatory Tools
111
Optional Tools
112
Basic Requirements for a Service PC
113
Recommended Configuration of the Service PC
113
Connection of the Service Pc to the Printer
114
Software Tools
115
Key-Operator Menu on the Local Keypad
116
Infocounter
116
Infocounter Analysis Via Printed Infocounter on Film
117
Infocounter Analysis Via Printers Infocounters Report
118
Infocounter Analysis Via Service Command Session
118
How to Evaluate the Infocounter
118
Test Images
121
Testimage STI1
122
Testimage STI2
124
Testimage SMPTE
125
Testimage Medical_Image
127
Testimage Lincheck
128
Testimage Medicalimage 'Mammo
129
Show Error Codes
129
Printer Browser
130
Operator Tools
130
Key-Operator Tools
130
Service Engineer Tools
130
Connection to the Printer Browser
137
Usage of the Printer Browser
141
Printer Logging
149
Required Information for the Support Center
149
Printer Bootup-Message
151
Advp
155
ADVP as DICOM Print SCU
156
ADVP as DICOM Print SCP (Print Emulator)
156
ADVP as Communication Recorder
158
Software Installation
161
SW Update: Loading a SW Patch
161
Software Update Via CF Card
162
Software Update Via a Remote Computer
162
Emergency SW Installation on a New, Empty Hard Drive
163
Emergency SW Installation on a Printer in "Error - System Failure" State
165
General Troubleshooting Procedure
170
Table of Contents
241
Codings
242
Jumper Setting 73 GB Maxtor Hard Disk
242
Jumper Setting 73 GB Hitachi Hard Disk
243
Fuses
244
Leds
244
DEVIL Board
244
THANOS Board (Plugged Onto the DEVIL Board)
246
Power Supply
247
Front Panel
248
Rear Panel
249
Table of Contents
255
Adjustments
256
Horizontal Film Alignment Procedure
256
Calibrations
259
Film Calibration
260
CDM (Internal Densitometer) Calibration
262
Print Head (TH) Calibration
264
Smart Profile Calibration
266
Checking the Densitometer Calibration
273
Checking the Densitometer Configuration in the Printer
273
Resetting the Compliance Film Calibration, Internal Densitometer Calibration and Thermal Print Head Calibration
274
Performing Internal Densitometer Calibration, Film Calibrations and Thermal Print Head Calibration
274
Performing a Density Reproduction Check
279
Performing the Afssaps / EUREF Calibration Check
280
Performing a Compliance Film Calibration
281
Checks
284
Density Reproduction Check
284
Check for Dust Stripes / TPH Cleaning Procedure
285
Resistor Check
288
DD+Dis033.07E
293
Printer Controls
294
Controls at the Local Keypad
295
Key-Operator Menu Via Local Keypad
296
Key-Operator Browser
297
Service Browser
301
Table of Contents
317
Software Release 1.6.0_C1
318
Supported Features
318
Limitations
318
Known Problems
319
Software Patch 1.6.1_C1
320
Solved Software Bugs
320
Software Patch 1.6.2_C1
322
Solved Bugs
322
New Features
323
New Feature: Compliance Film Calibration
324
New Feature: Activation of a New 10X12" Layout for GE Modalities
325
New Feature: Possibility to Read out Future ISO-Format RF-Tags
326
Software Patch 1.6.3_C1
326
Solved Bug
326
Software Release 2.0.0_C2
327
New Features of Software 2.0.0_C2
327
Solved Bug in Software 2.0.0_C2
328
Known Software Issue
328
Software Release 2.0.0_C3
329
New Feature of Software 2.0.0_C3
329
Software Release 2.1.0_C2
330
New Feature of Software 2.1.0_C2
330
Software Release 2.1.0_C3
330
New Feature of Software 2.1.0_C3
330
Wiring Diagrams
343
Power Unit
368
Table of Contents
382
Introduction
384
Maintenance Frequency
384
Required Time
384
Required Tools
384
Required Cleaning Material
385
Required Spare Parts
385
Diagnostics
386
Questioning of the Customer
386
Infocounter Analysis
386
Infocounter Analysis Via Printed Infocounter on Film
386
Infocounter Analysis Via Printers Infocounters Report
387
Infocounter Analysis Via Service Command Session
387
How to Evaluate the Infocounter
387
Image Quality Check
390
Maintenance Points - Power off
391
Check of General Condition
391
Check of Condition of Belts and Gears
391
Visual Check of the Cables
392
Cleaning of the Suction Cups
392
Cleaning of Electronics Compartment
392
Cleaning of Power Supply Air Inlet
393
Check and Cleaning of Drum
393
Cleaning of Thermal Print Head
394
Electrical Check
395
Basic Protective Earth Test
395
Electrical Check According to National Regulations
396
Maintenance Points - Power on
397
Smart Profile Calibration
397
Check of Safety Switch
399
Please Note
411
Table of Contents
416
Installation Planning Checklist
418
System Overview
419
Scope of Delivery and Accessories
420
Scope of Delivery
420
Accessories
421
Machine Dimensions
422
Minimum Free Space for Operation and Maintenance
423
System Integration
424
Network Integration Parameters
424
Modality Setup Parameters
425
Setup of Security and Privacy (Optional)
428
List of Key-Operator, Service People and Specialists with Access Rights
428
Audit Logging Server and NTP Server Parameters
428
Availability of Certificates
428
Service Host Parameters
430
Example for System Integration
431
Ambient Conditions
431
During Operation
431
During Transport and Storage
432
Electrical Connections
433
Electrical Connections at the Printer
434
Specifications
435
Type Overview
435
Functional Data
435
Pixel Matrices
436
Electrical Data
437
Climatic Data
437
Sound Emission Data
437
Adding Comments
460
Advertisement
AGFA DRYSTAR AXYS User Manual (168 pages)
Brand:
AGFA
| Category:
Printer
| Size: 12 MB
Table of Contents
Table of Contents
2
Legal Notice
5
About the Safety Notices in this Document
6
Drystar AXYS
7
Scope
8
Intended Use
9
Available Software Versions
10
Film Types
11
Labeling the Input Trays
11
Specifications
13
Product Complaints
17
Disclaimer
18
Introduction
19
Intended User
20
Features
21
Network Features
23
Options and Accessories
23
Equipment Classification
24
Safety Precautions
25
Labels
27
Transport after Installation
30
Environmental Protection
32
Restriction of the Use of Certain Hazardous Substances (Rohs)
33
For U.S.A
34
Security Precautions
35
Installation
36
Training
37
Compliance
38
General
39
Safety
39
Electromagnetic Compatibility
39
Seismic (Earthquake) Requirements
40
Connectivity
41
Safety Compliance
41
Labels
42
Viewing the System Info Area on a Film
42
Patient Data Security
44
Storage Media
45
Node Authentication, Certificates and Certification Authority
46
Requirements on the Operating Environment
47
Operating Modes
49
Control Modes (Local and Remote)
50
Operator Mode
51
Key-Operator Mode
52
Service Mode
53
Specialist Mode
54
Administrator Mode
55
The Local User Interface
56
Messages
58
The Status Indicator LED
59
The Control Buttons
60
Rear Panel
61
Audio Signals
62
The Keypad
63
The Display
65
Switching on the Printer
68
Cooling down the Printer
70
Switching off the Printer
71
Basic Operation (Operator Mode)
72
Managing the Print Queue
73
Checking the Print Queue
74
The Local Print Queue Screen
75
Pausing the Print Queue
76
Viewing the Film Count Info
77
Viewing the Printer Status
78
Deleting Print Jobs
79
Changing the Film Format of the Trays
80
Loading Films
83
When the Printer Is Printing or Calculating and an Input Tray Is Empty
84
When the Printer Is in the Ready State and an Input Tray Is Empty
85
Film Loading Procedure
86
Checking the Correct Position of a Film in the Input Tray
90
Advanced Operation (Key-Operator Mode)
91
The Menu Structure
92
Quality Control for General Radiography Applications
93
Establishing the Reference Values and Verifying Image Quality
94
QC Test Image
95
Establishing the Daily Operating Reference Density Levels
97
Establishing the Image Geometry Reference Values
100
Verifying Acceptable Spatial Resolution, Artifact Levels and Low Contrast Visibility
101
Performing Quality Control (QC) Tests
102
Quality Control for Mammography Application
106
Establishing the Reference Values and Verifying
108
QC Test Image for Mammography Application
109
Establishing the Daily Operating Reference Density Levels for Mammography Application
111
Establishing the Image Geometry Reference Values for Mammography Application
114
Verifying Acceptable Spatial Resolution, Artifact Levels and Low Contrast Visibility for Mammography Application
115
Performing Quality Control (QC) Tests for Mammography Application
116
Preventive Maintenance Schedule
120
Safety Guidelines
121
Recurrent Safety Tests
121
Cleaning and Disinfection
122
Cleaning the Print Head
123
Calibrating the Touchscreen
126
Remarks for HF-Emission and Immunity
129
Immunity to RF Wireless Communication Equipment
135
Precautions on EMC
136
Cables, Transducers and Accessories
137
Quality Control Charts
138
Charts for General Radiography QC
139
Charts for Mammography QC
144
Plug & Play Installation Manual
149
Contents of the Packages
150
Remove the Packing Materials
151
Remove the Printer from the Pallet
153
Unpack the Accessories
155
Environment Specifications
156
Remove the Transport Protections
157
Connect the Cables
162
Verify Film Position Tabs
163
Load Film in the Input Trays
165
Startup the Printer
167
Configure Network Settings
168
AGFA DRYSTAR AXYS User Manual (157 pages)
Brand:
AGFA
| Category:
Printer
| Size: 14 MB
Table of Contents
Table of Contents
2
Legal Notice
5
About the Safety Notices in this Document
6
Drystar AXYS
7
Scope
8
Intended Use
9
Available Software Versions
10
Film Types
11
Labeling the Input Trays
11
Specifications
13
Disclaimer
17
Introduction
18
Intended User
19
Features
20
Network Features
22
Options and Accessories
22
Equipment Classification
23
Safety Precautions
24
Labels
26
Transport after Installation
29
Environmental Protection
31
Restriction of the Use of Certain Hazardous Substances (Rohs)
32
For U.S.A
33
Security Precautions
34
Installation
35
Training
36
Product Complaints
37
Compliance
38
General
39
Safety
40
Electromagnetic Compatibility
41
Seismic (Earthquake) Requirements
42
Connectivity
43
Safety Compliance
43
Labels
44
Viewing the System Info Area on a Film
44
Patient Data Security
46
Privacy and Security
47
Node Authentication, Certificates and Certification Authority
48
Operating Modes
49
Control Modes (Local and Remote)
50
Operator Mode
51
Key-Operator Mode
52
Service Mode
53
Specialist Mode
54
Administrator Mode
55
The Local User Interface
56
Messages
58
The Status Indicator LED
59
The Control Buttons
60
Rear Panel
61
Audio Signals
63
The Keypad
64
The Display
66
Switching on the Printer
69
Cooling down the Printer
71
Switching off the Printer
72
Basic Operation (Operator Mode)
73
Managing the Print Queue
74
Checking the Print Queue
75
The Local Print Queue Screen
76
Pausing the Print Queue
77
Viewing the Film Count Info
78
Viewing the Printer Status
79
Deleting Print Jobs
80
Changing the Film Format of the Trays
81
Loading Films
84
When the Printer Is Printing or Calculating and an Input Tray Is Empty
85
When the Printer Is in the Ready State and an Input Tray Is Empty
86
Film Loading Procedure
87
Checking the Correct Position of a Film in the Input Tray
91
Advanced Operation (Key-Operator Mode)
92
The Menu Structure
93
Quality Control for General Radiography Applications
94
Establishing the Reference Values and Verifying Image Quality
95
QC Test Image
96
Establishing the Daily Operating Reference Density Levels
98
Establishing the Image Geometry Reference Values
101
Verifying Acceptable Spatial Resolution, Artifact Levels and Low Contrast Visibility
102
Performing Quality Control (QC) Tests
103
Quality Control for Mammography Application
107
Establishing the Reference Values and Verifying
109
Establishing the Daily Operating Reference Density Levels for Mammography Application
112
Establishing the Image Geometry Reference Values for Mammography Application
115
Verifying Acceptable Spatial Resolution, Artifact Levels and Low Contrast Visibility for Mammography Application
116
Performing Quality Control (QC) Tests for Mammography Application
117
Preventive Maintenance Schedule
121
Safety Guidelines
122
Recurrent Safety Tests
122
Cleaning and Disinfection
123
Cleaning the Print Head
124
Quality Control Charts
127
Charts for General Radiography QC
128
Charts for Mammography QC
133
Plug & Play Installation Manual
138
Contents of the Packages
139
Remove the Packing Materials
140
Remove the Printer from the Pallet
142
Unpack the Accessories
144
Environment Specifications
145
Remove the Transport Protections
146
Connect the Cables
151
Verify Film Position Tabs
152
Load Film in the Input Trays
154
Startup the Printer
156
Configure Network Settings
157
Advertisement
AGFA DRYSTAR AXYS Reference Manual (137 pages)
Brand:
AGFA
| Category:
Printer
| Size: 2 MB
Table of Contents
Table of Contents
2
Legal Notice
5
About the Safety Notices in this Document
6
Scope
7
Advanced Operation (Key-Operator Mode)
8
The Menu Structure
9
Accessing the Key-Operator Menus
10
Data Entry
12
Viewing Printer Information
13
Accessing the Show Settings Menu
14
Viewing General Information
15
Viewing Input Tray Information
16
Viewing Network (DICOM) Information
17
Viewing General Image Quality Information
18
Viewing Image Quality Information for a Modality
19
Viewing the Logical Printers Configuration
20
Viewing Installed Datasets Information
21
Changing the Configuration Settings
22
Accessing the Change Settings Menu
23
Changing the General Settings
25
Changing the Input Tray Settings
28
Changing Network (DICOM) Configuration
29
Changing the Image Quality Settings
38
Printing Images
46
Accessing the Print Images Menu
47
Printing Test Images
48
Saving the Configuration Settings
49
Accessing the Save Configuration Menu
50
General Save Configuration Procedure
51
Network Only Save Configuration Procedure
53
Restoring the Configuration Settings
55
Accessing the Restore Configuration Menu
56
Restoring the Printer Settings
57
Restoring the Network Settings
60
Performing the Calibration Procedures
62
Accessing the Calibration Menu
63
Film Calibration
64
Service Actions
67
Overview of Service Actions
68
Accessing the Service Actions Menu
69
Installation
70
Installing New or Upgrading Existing Software
71
Using the Installation Wizard
73
Controlling the Printer Via a Remote PC (with Browser)
82
Features
83
Setup
84
Configuration with Direct Network Cable
85
Configuration over a Network
86
Setting up the Connection
87
Setting up a Direct Link
88
Setting up a Link through a Network
91
Starting the Remote Session
92
Starting the Remote Session
93
Entering the Operator Level
94
Entering the Key-Operator Level
95
System Description
97
Main Components
98
Front View
99
Rear Panel
100
Functional Description
101
Network Configuration
102
Problem Solving
103
Checking the Status Indicator LED
104
The Printer Does Not Print
105
Reset of the Printer
106
Checking the Connections
107
Checking Error Messages
108
Checking USB Flash Drive Error Messages
109
Checking the Print Queue
110
Clearing of Film Jams
111
Film Input Tray Jams
112
Film Transport Jams (Clearing from the Top)
114
Unauthorized Opening of the Printer
117
Film Identification Problems
118
No Identification Code Detected
119
Invalid Content of Film Identification Tag
121
Film Overrun from Current Pack
122
Start-Up Errors
123
Error Messages While the Printer Starts up
124
Display Self Test Failed
125
System Self Test Failed
126
Software Self Test Failed
127
Maintaining Image Quality and Resolving Image Quality Problems
128
Maintaining Optimal Image Quality
129
Persistent White Dots or Lines Appear in the Transport Direction
130
Warning Messages
131
Maintenance Messages
132
AGFA DRYSTAR AXYS User Manual (53 pages)
Brand:
AGFA
| Category:
Printer
| Size: 1 MB
Table of Contents
User Manual
1
Table of Contents
3
1 Introduction
7
Introduction to this Manual
8
Scope of this Manual
8
Warnings, Cautions, Instructions and Notes
9
Disclaimer
10
Introduction to Drystar AXYS
11
Intended Use
11
Intended User
11
Configuration
12
Main Components
12
Functional Description
13
Film Formats
14
Operation Controls
15
Overview of User Interface Controls
15
The Status Indicator LED
16
The Control Buttons
16
System Documentation
17
Options and Accessories
18
Training
20
Product Complaints
20
Compatibility
21
Compliance
22
Directive
22
Quality Control
22
Standards
23
Additional Standards for Documentation
25
Harmonization
25
Performance
26
Connectivity
27
Network Features
27
Network Configuration
28
Installation
29
Connections
30
Transport after Installation
31
Changing the Film Format of the Trays
32
Messages
35
Labels
36
Patient Data Security
39
Node Authentication, Certificates and Certification Authority
39
Maintenance
40
Environmental Protection
41
Waste Disposal and Environmental Regulations
41
Restriction of the Use of Certain Hazardous Substances (Rohs)
42
Safety Directions
43
2 Getting Started
45
Drystar AXYS Basic Features
46
Switching on the Drystar AXYS
48
Drystar AXYS Basic Workflow
50
Controlling the Working of the Drystar AXYS
50
Operator Mode
50
Operator Mode
51
Key-Operator Mode
51
Service Mode
51
Specialist Mode
52
Administrator Mode (also Known as Security)
52
Working with the Keypad
53
AGFA DRYSTAR AXYS Manual (55 pages)
Brand:
AGFA
| Category:
Medical Equipment
| Size: 1 MB
Table of Contents
Basic Operation
12
Table of Contents
13
Managing the Print Queue
14
Pausing the Print Queue
16
Viewing the Film Count Info
17
Viewing the Printer Status
18
Deleting Print Jobs
19
Loading Films
23
Advanced Operation
32
Warning
48
Quality Problems" on Page
49
Warning
49
Base+Fog
54
Hi D
54
Lo D
54
Max D
54
MID D
54
Advertisement
Related Products
AGFA Drystar AXYS XL
AGFA d-lab.3
AGFA DRY 1.4
AGFA DRY 2.4
AGFA DRY 3.4
AGFA Dry 2.4M
AGFA DD+DIS150.05E
AGFA DR 14s
AGFA DR 24M
AGFA DR 10s
AGFA Categories
Medical Equipment
Printer
Scanner
Digital Camera
Measuring Instruments
More AGFA Manuals
Login
Sign In
OR
Sign in with Facebook
Sign in with Google
Upload manual
Upload from disk
Upload from URL