Sign In
Upload
Manuals
Brands
Brother Manuals
Sewing Machine
Computerized Embroidery Sewing Machine
Brother Computerized Embroidery Sewing Machine Manuals
Manuals and User Guides for Brother Computerized Embroidery Sewing Machine. We have
3
Brother Computerized Embroidery Sewing Machine manuals available for free PDF download: Operation Manual
Brother Computerized Embroidery Sewing Machine Operation Manual (276 pages)
Computerized Sewing and Embroidery Machine
Brand:
Brother
| Category:
Sewing Machine
| Size: 9.95 MB
Table of Contents
10
Table of Contents
3
Important Safety Instructions
8
What You Can Do with This Machine
9
How to Use This Manual
10
Table of Contents
11
Adjustments During the Embroidery
13
Machine
13
Names of Machine Parts and Their Functions
14
Needle and Presser Foot Section
15
Embroidery Unit
15
Operation Buttons
16
Included Accessories
19
Options
21
Chapter 1 Getting Ready
22
Turning the Machine On/Off
23
Lcd Screen
24
I Key Functions
26
I Clicking a Key
27
I Changing Pages
28
Using the Machine Setting Mode Key
31
I Adjusting Screen Brightness
32
I Choosing the Display Language
33
Using the Machine Operation Mode Key
34
Using the Pattern Explanation Key
35
Lower Threading
35
Winding the Bobbin
35
I Using the Supplemental Spool Pin
37
I Using the Spool Pin
38
Setting the Bobbin
40
Pulling Up the Bobbin Thread
41
Threading Using the "Automatic Threading" Button
41
Upper Threading
43
Threading Manually
46
Using the Twin Needle Mode
48
Using Threads That Unwind Quickly
48
I Using the Spool Net
48
I Using the Vertical Spool Pin
49
Attaching the Presser Foot
49
Changing the Presser Foot
49
Removing the Presser Foot
50
Attaching the Walking Foot
51
Changing the Needle
53
I about the Needle
53
I Fabric/Thread/Needle Combinations
55
Chapter 2 Sewing Basics
56
Sewing
56
Sewing a Stitch
57
I Using the Foot Controller
58
Changing Sewing Direction
58
I Sewing a Seam Allowance of 0.5 CM or Less
58
Sewing Curves
58
Sewing Reinforcement Stitches
59
Sewing Heavyweight Fabrics
59
I if the Fabric Does Not Fit Under the Presser Foot
59
I if the Fabric Does Not Feed
60
Sewing Lightweight Fabrics
60
Sewing Stretch Fabrics
61
Setting the Stitch Length
61
Setting the Stitch Width
61
Stitch Settings
62
Setting the Thread Tension
62
I Proper Thread Tension
62
I Upper Thread Is Too Tight
62
I Upper Thread Is Too Loose
63
Automatic Reinforcement Stitching
63
Useful Functions
64
Automatic Thread Cutting
65
Pivoting
65
I Using the Knee Lifter
67
Automatic Fabric Sensor System (Automatic Presser Foot Pressure)
67
Locking the Screen
69
Chapter 3 Utility Stitches
70
Selecting Utility Stitches
70
I Stitch Selection Screens
71
Selecting a Stitch
71
I Using the Mirror Image Key
71
I Using the Image Key
72
Saving Your Stitch Settings
72
I Saving Settings
73
Using the Sewing Type Selection Key
73
I Retrieving Saved Settings
75
Sewing the Stitches
75
Straight Stitches
77
I Changing the Needle Position (Left or Middle Needle Position Stitches Only)
77
I Needle Plate and Needle Plate Cover Marks
77
I Using the Straight Stitch Needle Plate and the Straight Stitch Foot
79
Dart Seam
79
I Basting
80
Gathering
81
Flat Fell Seam
81
Pintuck
83
Zigzag Stitches
83
I Overcasting (Using a Zigzag Stitch)
83
I Appliqué (Using a Zigzag Stitch)
84
I Patchwork (For Crazy Quilt)
84
I Sewing Curves (Using a Zigzag Stitch)
84
I Cord Guide Bobbin Cover (Using a Zigzag Stitch)
85
Elastic Zigzag Stitches
85
I Tape Attaching
85
I Overcasting
86
Overcasting
86
I Overcasting Using Presser Foot "G
87
I Overcasting Using Presser Foot "J
88
I Overcasting Using the Side Cutter
90
I When Sewing Straight Stitches While Using the Side Cutter
91
Quilting
92
I Piecing
92
I Quilting
93
I Appliqué
94
I Quilting with Satin Stitches
95
I Free-Motion Quilting
98
I Echo Quilting Using the Free-Motion Echo Quilting Foot "E
101
Blind Hem Stitches
102
Appliqué
102
I if the Needle Does Not Catch the Fold
102
I if the Needle Catches Too Much of the Fold
103
Shelltuck Stitches
103
I Sewing Sharp Curves
104
Scallop Stitches
104
Top Stitching
105
Fagoting
105
Smocking Stitches
106
Tape or Elastic Attaching
107
Heirloom
107
I Hemstitching (1) (Daisy Stitch)
107
I Hemstitching (2) (Drawn Work (1))
108
I Hemstitching (3) (Drawn Work (2))
109
One-Step Buttonholes
112
I Odd Shaped Buttons/Buttons That Do Not Fit Into the Button Holder Plate
112
I Sewing Stretch Fabrics
113
Four-Step Buttonholes
115
I Darning
117
Bar Tacks
118
I Bar Tacks On Thick Fabrics
119
Button Sewing
120
I Attaching 4 Hole Buttons
120
I Attaching a Shank to the Button
121
Eyelet
122
Multi-Directional Sewing (Straight Stitch and Zigzag Stitch)
123
I Centered Zipper
123
Zipper Insertion
124
I Inserting a Side Zipper
127
Chapter 4 Character/ Decorative Stitches
128
Selecting Stitch Patterns
129
I Stitch Selection Screens
130
Alphabet Characters
131
I Deleting Characters
130
Selecting Decorative Stitch Patterns/7Mm Decorative Stitch Patterns/Satin Stitch Patterns/7Mm Satin Stitch Patterns/Cross Stitch/Utility Decorative Stitch Patterns
132
Basic Sewing
132
Sewing Attractive Finishes
132
Sewing Stitch Patterns
133
Making Adjustments
135
Editing Stitch Patterns
135
I Key Functions
136
Changing the Size
137
Changing the Length (For 7Mm Satin Stitch Patterns Only)
137
Creating a Horizontal Mirror Image
137
Creating a Vertical Mirror Image
137
Sewing a Pattern Continuously
138
Changing Thread Density (For Satin Stitch Patterns Only)
138
Returning to the Beginning of the Pattern
139
Checking the Image
140
Before Combining
140
Combining Stitch Patterns
140
Combining Various Stitch Patterns
142
Combining Horizontal Mirror Image Stitch Patterns
142
Combining Large and Small Stitch Patterns
143
Combining Stitch Patterns of Different Length
144
Making Step Stitch Patterns (For 7Mm Satin Stitch Patterns Only)
145
I More Examples
146
Stitch Data Precautions
146
I Types of Stitch Data That Can Be Used
146
I Types of USB Devices/Media That Can Be Used
146
I Computers and Operating Systems with the Following Specifications Can Be Used
146
I Precautions On Using the Computer to Create and Save Data
147
I Trademarks
146
Using the Memory Function
148
Saving Stitch Patterns in the Machine's Memory
148
I if the Memory Is Full
150
Saving Stitch Patterns to USB Media (Commercially Available)
151
Saving Stitch Patterns in the Computer
152
Retrieving Stitch Patterns From the Machine's Memory
153
Recalling From USB Media
154
Recalling From the Computer
155
Chapter 5 Embroidery
156
Before Embroidering
156
Embroidery Step By Step
157
Attaching Embroidery Foot "W
158
Attaching the Embroidery Unit
158
I about the Embroidery Unit
159
I Removing the Embroidery Unit
161
Selecting Patterns
161
I Copyright Information
162
I Pattern Selection Screens
163
Selecting Embroidery Patterns/Heirloom Patterns/Border Patterns/Cross Stitch Patterns/Floral Alphabet Patterns
164
Selecting Alphabet Character Patterns
165
Selecting Frame Patterns
166
Selecting Patterns From Embroidery Cards
166
Selecting Patterns From USB Media/Computer
166
I about Embroidery Cards (Sold Separately)
167
Viewing the Sewing Screen
168
I Key Functions
169
Attaching Iron-On Stabilizers (Backing) to the Fabric
169
Preparing the Fabric
170
Hooping the Fabric in the Embroidery Frame
170
I Types of Embroidery Frames
171
I Inserting the Fabric
172
Embroidering Small Fabrics or Fabric Edges
172
I Using the Embroidery Sheet
172
I Embroidering Small Fabrics
172
I Embroidering Edges or Corners
173
I Embroidering Ribbons or Tape
174
Attaching the Embroidery Frame
174
I Removing the Embroidery Frame
175
Checking the Pattern Position
175
Confirming the Pattern Position
176
Previewing the Completed Pattern
177
Sewing an Embroidery Pattern
177
Sewing Attractive Finishes
177
I Embroidery Needle Plate Cover
178
Sewing Embroidery Patterns
179
I When Threading Manually
180
Sewing Embroidery Patterns Which Use Appliqué
182
Adjustments During the Embroidery Process
182
If the Bobbin Runs Out of Thread
183
If the Thread Breaks During Sewing
184
Restarting From the Beginning
184
Resuming Embroidery After Turning Off the Power
186
Adjusting Thread Tension
186
I Correct Thread Tension
186
I Upper Thread Is Too Tight
186
I Upper Thread Is Too Loose
186
Making Embroidery Adjustments
187
Using the Automatic Thread Cutting Function (END COLOR TRIM)
187
Using the Thread Trimming Function (JUMP STITCH TRIM)
188
Adjusting the Embroidery Speed
188
I Selecting the Length of JUMP STITCH Not to Trim
189
Changing the Thread Color Display
190
Changing the Embroidery Frame Display
191
Changing the Pattern Position
191
Revising the Pattern
192
Aligning the Pattern and the Needle
193
Changing the Size
194
Rotating the Pattern
195
Changing the Density (Alphabet Character and Frame Patterns Only)
195
Creating a Horizontal Mirror Image
196
Changing the Colors of Alphabet Character Patterns
197
Embroidery Data Precautions
197
I Types of Embroidery Data That Can Be Used
197
I Types of USB Devices/Media That Can Be Used
198
I Computers and Operating Systems with the Following Specifications Can Be Used
198
I Precautions On Using the Computer to Create and Save Data
198
I Tajima (.Dst) Embroidery Data
198
I Trademarks
197
Using the Memory Function
199
Saving Embroidery Patterns in the Machine's Memory
199
I if the Memory Is Full
201
Saving Embroidery Patterns to USB Media (Commercially Available)
202
Saving Embroidery Patterns in the Computer
203
Recalling From USB Media
203
Retrieving Patterns From the Machine's Memory
204
Recalling From the Computer
206
Embroidery Applications
206
Using a Frame Pattern to Make an Appliqué (1)
207
Using a Frame Pattern to Make an Appliqué (2)
209
Chapter 6 Embroidery Edit
210
Explanation of Functions
211
Selecting Patterns to Edit
212
Selecting Alphabet Character Patterns
212
Selecting Embroidery Patterns/Heirloom Patterns/Border Patterns/Cross Stitch Patterns/Floral Alphabet Patterns/Frame Patterns
215
Editing Patterns
216
I Key Functions
217
Moving the Pattern
217
Rotating the Pattern
218
Changing the Size of the Pattern
219
Changing Alphabet Character Spacing
219
Changing the Configuration of Alphabet Character Patterns
219
Deleting the Pattern
220
Reducing Character Spacing
221
Changing the Color of Each Alphabet Character in a Pattern
221
Changing the Thread Color
222
Creating a Custom Thread Table
223
I Adding a Color to the Custom Thread Table From the List
224
Choosing a Color From the Custom Thread Table
225
Designing Repeated Patterns
225
I Sewing Repeated Patterns
227
I Repeating One Element of a Repeated Pattern
228
I Assigning Thread Marks
229
After Editing
230
I Color Sorting Repeated Patterns
231
Combining Patterns
231
Editing Combined Patterns
233
I Selecting Combined Embroidery Patterns
234
Sewing Combined Patterns
235
Using the Memory Function
237
Chapter 7 My Custom Stitch
238
Designing a Stitch
240
Entering Stitch Data
240
I Key Functions
242
I Moving a Point
243
I Moving Part or All of the Design
244
I Inserting New Points
245
Storing Custom Stitches in Your List
245
I if the Memory Is Full
245
Using Stored Custom Stitches
246
Retrieving Stored Stitches
247
Chapter 8 Appendix
248
Care and Maintenance
248
Cleaning the LCD Screen
248
Cleaning the Machine Casing
248
Cleaning the Race
250
Adjusting the Screen
250
Screen Visibility Is Low
250
Touch Panel Is Malfunctioning
252
Troubleshooting
255
Error Messages
260
I Alarm Sounds
261
Specifications
262
Upgrade Procedure Using USB Media
262
Upgrading Your Machine's Software
263
Upgrade Procedure Using Computer
265
Stitch Setting Chart
272
Index
Advertisement
Brother Computerized Embroidery Sewing Machine Operation Manual (225 pages)
computerized sewing and embroidery machine
Brand:
Brother
| Category:
Sewing Machine
| Size: 8.59 MB
Table of Contents
2
Important Safety Instructions
6
How to Use this Manual
7
Table of Contents
10
Names of Machine Parts and Their Functions
10
Machine
11
Needle and Presser Foot Section
11
Embroidery Unit
12
Operation Buttons
12
Included Accessories
15
Options
16
Chapter 1 Getting Ready
17
Turning the Machine On/Off
18
Lcd Screen
18
Display Precautions
19
Key Functions
21
Using the Machine Setting Mode Key
23
Using the Machine Operation Mode Key
23
Contents of each Category
24
Using the Pattern Explanation Key
25
Lower/Upper Threading
25
Winding the Bobbin
25
Using the Supplemental Spool Pin
27
Winding the Bobbin Using the Spool Pin
28
Setting the Bobbin
28
Pulling up the Bobbin Thread
29
Upper Threading
32
Using the Twin Needle
34
Changing the Presser Foot
34
Removing the Presser Foot
34
Attaching the Presser Foot
35
Changing the Needle
35
Checking the Needle
37
About the Needle
37
Fabric/Thread/Needle Combinations
38
Chapter 2 Sewing Basics
39
Sewing
39
Sewing a Stitch
40
Using the Foot Controller
41
Sewing Reinforcement Stitches
41
Sewing Curves
41
Changing Sewing Direction
41
Using the Knee Lifter
41
Sewing a Seam Allowance of 0.5 CM or Less
42
Sewing Heavyweight Fabric
42
Sewing Lightweight Fabric
42
If the Fabric Does Not Fit under the Presser Foot
42
If the Fabric Does Not Feed
43
Adjusting Stitch Settings
43
Adjusting the Stitch Width
43
Adjusting the Stitch Length
44
Adjusting the Thread Tension
44
Useful Functions
44
Automatic Reinforcement Stitching
44
Correct Thread Tension
44
Upper Thread Is too Tight
44
Upper Thread Is too Loose
45
Automatic Thread Cutting
46
Locking the Screen
48
Chapter 3 Utility Stitches
49
Selecting a Utility Stitch
49
Stitch Selection Screens
50
Selecting a Stitch Pattern
50
Saving Stitch Settings
50
Using the Mirror Image Key
51
Using the Sewing Type Selection Key
52
Sewing the Stitches
52
Straight Stitches
53
Changing the Needle Position (Left or Middle Needle Position Stitches Only)
54
Darts Seams
54
Basting
55
Gathering
55
Flat Fell Seams
56
Pintucks
57
Zigzag Stitches
57
Overcasting
57
Appliqués
58
Elastic Zigzag Stitches
58
Patchwork (Crazy Quilts)
58
Sewing Curves
58
Tape Attaching
58
Overcasting
59
Overcasting
59
Overcasting Using Presser Foot "G
60
Overcasting Using Presser Foot "J
61
Overcasting Using the Side Cutter
63
Quilting
63
Piecing
64
Quilting
64
Appliqués
65
Satin Stitching
66
Free-Motion Quilting
67
Blind Hem Stitches
68
Appliqués
68
If the Needle Does Not Catch the Fold
68
If the Needle Catches too Much of the Fold
69
Shell Tuck Stitching
69
Scalloping
69
Sewing Sharp Curves
70
Top Stitching
70
Smocking
71
Fagoting
72
Tape or Elastic Attaching
73
Heirloom Stitching
73
Hemstitching (1) (Daisy Stitch)
73
Hemstitching (2) (Drawn Work (1))
74
Hemstitching (3) (Drawn Work (2))
75
Buttonhole Stitches
78
Sewing Stretch Fabrics
78
Buttons that Do Not Fit into the Button Holder Plate
79
Darning
80
Bar Tacks
81
Bar Tacks on Thick Fabrics
82
Button Sewing
83
Eyelets
83
Attaching a 4-Hole Button
83
Attaching a Button with a Shank
84
Multi-Directional Sewing (Straight Stitch and Zigzag Stitch)
85
Zipper Insertion
85
Centered Zipper
86
Side Zipper
88
Chapter 4 Character/Decorative Stitches
89
Selecting Stitch Patterns
89
Stitch Selection Screens
90
Selecting Decorative Stitch Patterns/7 MM
90
MM Satin Stitch Patterns/Cross Stitch Patterns/Utility Decorative Stitch Patterns
90
Alphabet Patterns
92
Sewing Stitch Patterns
92
Sewing Attractive Finishes
92
Basic Sewing
93
Adjusting Patterns
95
Editing Stitch Patterns
95
Key Functions
96
Changing the Pattern Size
96
Changing the Pattern Length (7 MM Satin Stitch Patterns Only)
96
Creating a Vertical Mirror Image
96
Creating a Horizontal Mirror Image
97
Selecting a Single/Repeating Pattern
97
Changing the Thread Density (Satin Stitch Patterns Only)
98
Combining Stitch Patterns
98
Before Combining Patterns
98
Combining Patterns from Different Categories
99
Combining Stitch Patterns of Different Sizes
100
Combining Stitch Patterns of Different Orientations
101
Combining Stitch Patterns of Different Lengths
102
Creating Step Patterns (7 MM Satin Stitch Patterns Only)
103
Examples of Pattern Combinations
104
Using the Memory Function
104
Stitch Data Precautions
104
Saving Stitch Patterns in the Machine's Memory
104
Types of Stitch Data that Can be Used
104
Computers and Operating Systems with the Following Specifications Can be Used
104
Precautions on Using the Computer to Create and Save Data
105
If the Memory Is Full
106
Saving Stitch Patterns to the Computer
107
Retrieving Stitch Patterns from the Machine's Memory
108
Retrieving Stitch Patterns from the Computer
110
Chapter 5 Embroidery
111
Before Embroidering
112
Attaching Embroidery Foot "U
113
Attaching the Embroidery Unit
114
Removing the Embroidery Unit
115
Selecting Embroidery Patterns
115
Copyright Information
115
Pattern Selection Screens
116
One-Point Patterns/Floral Patterns
117
Alphabet Patterns
118
Frame Patterns
119
Embroidery Cards
119
Selecting Patterns from the Machine's Memory/Computer
119
About Embroidery Cards (Sold Separately)
120
Viewing the Sewing Screen
120
Key Functions
121
Preparing the Fabric
121
Attaching Stabilizer to Fabric
122
Hooping Fabric in the Embroidery Frame
122
Types of Embroidery Frames
123
Inserting the Fabric
123
Using the Embroidery Sheet
124
Embroidering Small Fabrics and Fabric Edges
124
Embroidering Small Fabrics
124
Embroidering Edges or Corners
124
Embroidering Ribbons or Tape
125
Attaching the Embroidery Frame
125
Removing the Embroidery Frame
126
Editing the Pattern
126
Changing the Embroidery Frame Display
126
Changing the Pattern Position
127
Rotating the Pattern
127
Changing the Pattern Size
128
Creating a Horizontal Mirror Image
129
Changing the Stitching Density (Alphabet and Frame Patterns Only)
129
Changing the Color of Single Characters
130
Checking the Pattern
130
Checking the Embroidering Position
131
Previewing the Pattern
132
Sewing an Embroidering Pattern
132
Sewing Attractive Finishes
132
Embroidery Needle Plate Cover
133
Sewing Embroidery Patterns
134
Embroidering Appliqué Patterns
135
If the Bobbin Runs out of Thread
136
If the Thread Breaks During Sewing
137
Restarting from the Beginning
137
Adjusting the Thread Tension
137
Correct Thread Tension
138
Automatic Thread Cutting
138
If the Upper Thread Is too Tight
138
If the Upper Thread Is too Loose
138
Automatic Thread Cutting (End Color Trim)
139
Changing the Embroidering Speed
139
Changing the Thread Color Display
141
Using the Memory Function
141
Embroidery Data Precautions
141
Types of Embroidery Data that Can be Used
141
Computers and Operating Systems with the Following Specifications Can be Used
141
Precautions on Using the Computer to Create and Save Data
141
Tajima (.Dst) Embroidery Data
142
Saving Embroidery Patterns in the Machine's Memory
142
If the Memory Is Full
143
Saving Embroidery Patterns to the Computer
144
Retrieving Patterns from the Machine's Memory
145
Retrieving Patterns from the Computer
147
Embroidery Applications
147
Using a Frame Pattern to Make an Appliqué (1)
148
Using a Frame Pattern to Make an Appliqué (2)
150
Chapter 6 Embroidery Edit
151
Available Editing Functions
151
Combined Patterns
151
Move Patterns
151
Rotate Patterns
151
Enlarge or Reduce Patterns
151
Create Mirror Images
152
Selecting Patterns to Edit
152
Selecting One-Point Patterns/Floral Patterns/Frame Patterns
153
Alphabet Patterns
155
Editing Patterns
155
Key Functions
156
Moving the Pattern
156
Rotating the Pattern
157
Changing the Size of the Pattern
157
Deleting the Pattern
158
Changing the Configuration of Character Patterns
158
Changing the Character Spacing
159
Changing the Color of each Character in a Pattern
159
After Editing
160
Combining Patterns
160
Editing Combined Patterns
163
Sewing Combined Patterns
163
Using the Memory Function
164
Chapter 7 MY CUSTOM STITCH
165
Designing a Stitch
166
Examples of Custom Stitches
167
Entering Stitch Data
167
Key Functions
169
Moving a Point
170
Moving Part or All of the Design
171
Inserting New Points
172
Using Stored Custom Stitches
172
Saving Custom Stitches in the Machine's Memory
172
If the Memory Is Full
173
Saving Custom Stitches to the Computer
174
Retrieving Custom Stitches from the Machine's Memory
174
Retrieving Custom Stitches from the Computer
176
Chapter 8 Appendix
177
Care and Maintenance
177
Cleaning the LCD
177
Cleaning the Machine Casing
177
Cleaning the Race
179
Adjusting the Screen
179
Screen Visibility Is Low
179
Touch Panel Is Malfunctioning
181
Troubleshooting
184
Error Messages
188
Alarm
189
Specifications
190
Upgrading Your Machine'ssoftware
190
Upgrading Your Machine's Software
192
Stitch Setting Chart
198
Index
205
Bobinage de la Canette
205
Avvolgimento Della Spolina
205
Devanado de la Bobina
209
Selezione Degli Schemi Punto
212
Summary of Stitch Patterns
212
Overzicht Van de Steekpatronen
212
Sommario Degli Schemi Punto
214
Sommario Degli Schemi DI Ricamo
214
Resumen de Patrones de Bordado
217
Embroidery Pattern Color Change Table
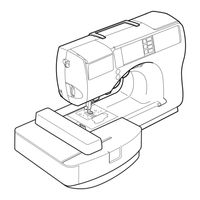
Brother Computerized Embroidery Sewing Machine Operation Manual (166 pages)
Easy Thread Cassette System
Brand:
Brother
| Category:
Sewing Machine
| Size: 3.6 MB
Table of Contents
2
Included Accessories
3
Names of Machine Parts and Their Functions
3
Front View
4
Needle and Presser Foot Section
4
Right-Side/Rear View
5
Operation Buttons
6
Operation Panel
7
Introduction
7
Sewing Machine Features
8
Table of Contents
11
Important Safety Instructions
15
Getting Ready
16
Turning the Machine On/Off
16
Power Supply Precautions
17
Turning On the Machine
17
Turning Off the Machine
18
LCD (Liquid Crystal Display) Operation
18
Viewing the LCD
19
Changing the Machine Settings
21
Checking Machine Operating Procedures
22
Winding/Installing the Bobbin
22
Bobbin Precautions
22
Winding the Bobbin
25
Installing the Bobbin
27
Upper Threading
27
About the Spool of Thread
28
Loading the Spool Into the Thread Cassette
31
Threading the Needle
33
Using the Extra Spool Pin
34
Thread the Needle Manually (Without Using the Needle Threader)
35
Using the Twin Needle
37
Pulling Up the Bobbin Thread
39
Replacing the Needle
39
Needle Precautions
40
Needle Types and Their Uses
41
Checking the Needle
41
Replacing the Needle
44
Replacing the Presser Foot
44
Presser Foot Precautions
46
Removing the Presser Foot Holder
47
Sewing Cylindrical Pieces
47
Free-Arm Sewing
49
Sewing Basics
50
Sewing
50
General Sewing Procedure
51
Selecting Stitching
52
Positioning the Fabric
53
Starting to Sew
55
Securing the Stitching
56
Cutting the Thread
58
Adjusting the Thread Tension
58
Thread Tension
59
Changing the Upper Thread Tension
60
Adjusting the Stitch Width and Length
60
Adjusting the Stitch Width
61
Adjusting the Stitch Length
62
Useful Functions
62
Automatically Sewing Reverse/Reinforcement Stitches
63
Automatically Cutting the Thread
64
Mirroring Stitches
65
Useful Sewing Tips
65
Trial Sewing
65
Changing the Sewing Direction
65
Sewing Curves
66
Sewing Thick Fabrics
66
Sewing Thin Fabrics
66
Sewing Stretch Fabrics
67
Sewing an Even Seam Allowance
69
Utility Stitches
70
Stitch Settings
70
Utility Stitches
73
Stitch Settings
75
Overcasting Stitches
75
Sewing Overcasting Stitches Using Overcasting Foot "G
76
Sewing Overcasting Stitches Using Zigzag Foot "J
77
Sewing Overcasting Stitches Using the Optional Side Cutter
79
Basic Stitching
79
Basting
81
Blind Hem Stitching
83
Buttonhole Stitching
84
Buttonhole Sewing
88
Button Sewing
90
Zipper Insertion
90
Inserting a Centered Zipper
92
Inserting a Side Zipper
95
Sewing Stretch Fabrics and Elastic Tape
95
Stretch Stitching
95
Elastic Attaching
97
Appliqué, Patchwork and Quilt Stitching
97
Appliqué Stitching
99
Patchwork (Crazy Quilt) Stitching
99
Piecing
100
Quilting
102
Free-Motion Quilting
103
Satin Stitching
104
Reinforcement Stitching
104
Triple Stretch Stitching
104
Bar Tack Stitching
106
Darning
108
Eyelet Stitching
109
Decorative Stitching
110
Fagoting
111
Scallop Stitching
111
Smocking
112
Shell Tuck Stitching
113
Joining
114
Heirloom Stitching
117
Embroidery
118
Embroidering Neatly
118
What to Prepare
120
Embroidery Step By Step
121
Attaching the Embroidery Foot
123
Removing the Embroidery Foot
124
Attaching the Embroidery Unit
124
Embroidery Unit Precautions
126
Removing the Embroidery Unit
128
Preparing the Fabric
128
Attaching a Stabilizer Material to the Fabric
129
Setting the Fabric in the Embroidery Frame
132
Attaching the Embroidery Frame
133
Removing the Embroidery Frame
134
Selecting Embroidery Patterns
134
Copyright Information
134
Embroidery Pattern Types
135
LCD (Liquid Crystal Display) Operation
136
Selecting Characters
137
Selecting Embroidery Patterns
138
Selecting a Frame Pattern
139
Using an Embroidery Card
140
Embroidering
140
Embroidering a Pattern
142
Appliquéing
144
Convenient Functions
144
Adjusting the Layout
145
Storing Characters
147
Adjusting the Thread Tension
147
Resewing
148
Thread Runs Out Partway Through a Design
148
Stopping While Embroidering
151
Appendix
152
Maintenance
152
Cleaning the Machine Surface
152
Cleaning the Shuttle
154
Troubleshooting
159
Error Messages
161
Nothing Appears in the LCD
161
Operation Beep
162
Cancelling the Operation Beep
163
Index
Advertisement
Share and save
Advertisement
Related Products
Brother Computerized Sewing and Quilting Machine
Brother Computerized Embroidery Machine
Brother Computerized Sewing Machine
Brother Cover Stitch
Brother COMPACT OVERLOCK MACHINE
Brother CE-4000
Brother CS-8150
Brother CB3-B917
Brother CB3-B917-BA-10
Brother CB3-B913
Brother Categories
Sewing Machine
All in One Printer
Printer
Label Maker
Fax Machine
More Brother Manuals
×
Login
Sign In
OR
Sign in with Facebook
Sign in with Google
×
Upload manual
Upload from disk
Upload from URL