Table of Contents
Advertisement
Quick Links
Advertisement
Table of Contents
Troubleshooting

Related Manuals for Intermec IF5


Summary of Contents for Intermec IF5
- Page 1 User’s Manual IF5 Fixed Reader...
- Page 2 Intermec. Information and specifications contained in this document are subject to change without prior noticed and do not represent a commitment on the part of Intermec Technologies Corporation. © 2004-2006 by Intermec Technologies Corporation. All rights reserved.
- Page 3 • Support for EPCglobal Class 1 Gen 2 RFID tags 11/2006 Added information supporting Release 2.20 firmware: • Minor changes to the IF5 web browser interface • Descriptions of data processors for the SAP device controller RFID edgeware • Description of the J2SE option •...
- Page 4 IF5 Fixed Reader User’s Manual...
-
Page 5: Table Of Contents
How the IF5 Fits in Your Network ........9 Configuring the IF5 (Setting the IP Address) ......10 Using a Communications Program . - Page 6 Creating RFID Applications for the IF5 ....... . . 67...
- Page 7 IF5 JavaScript Support ........
- Page 8 Calling Intermec Product Support ........
- Page 9 IF5 Powered Input ........
- Page 10 Options for TagBitsFilter........163 IF5 Fixed Reader User’s Manual...
- Page 11 ............. . . 165 IF5 Fixed Reader User’s Manual...
- Page 12 IF5 Fixed Reader User’s Manual...
-
Page 13: Before You Begin
Global Services and Support Warranty Information To understand the warranty for your Intermec product, visit the Intermec web site at Support. The Intermec Global Sales & Service page appears. From the Service & Support menu, move your pointer over Support, and then click Warranty. -
Page 14: Web Support
Intermec manuals, contact your local Intermec representative or distributor. Visit the Intermec technical knowledge base (Knowledge Central) at information or to request technical support for your Intermec product. Telephone Support These services are available from Intermec Technologies Corporation. -
Page 15: Who Should Read This Manual
IF5, and how to install, configure, operate, maintain, and troubleshoot it. Before you work with the IF5, you should be familiar with your network and general networking terms, such as IP address. You should also be familiar with your RFID system. -
Page 16: Patent Information
5,850,181; 5,850,187; 5,862,171; 5,940,771; 5,942,987; 5,960,344; 5,995,019; 6,078,251; 6,121,878; 6,122,329; 6,172,596; 6,195,053; 6,249,227; 6,280,544; 6,286,762; 6,286,763; 6,288,629; 6,360,208; 6,384,712; 6,404,325; 6,429,775; 6,486,769; 6,501,807; 6,525,648; 6,639,509; 6,645,327; 6,677,852; 6,768,414; 6,784,789; 6,816,063. There may be other U.S. and foreign patents pending. IF5 Fixed Reader User’s Manual... -
Page 17: Getting Started
Getting Started This chapter introduces the IF5 Fixed Reader, explains the ports and LEDs, and explains how the reader fits into your network. It contains these topics: • Overview of the IF5 • What’s New? • Unpacking the IF5 • Learning About the IF5 •... -
Page 18: Overview Of The If5
This manual supports Release 2.20 of the IF5, which includes these new features: • RFID module support for Dense Reader Mode and Listen Before Talk. • You can order the IF5 with the Java J2SE option. For more information, contact your Intermec sales representative. IF5 Fixed Reader User’s Manual... -
Page 19: Unpacking The If5
Unpacking the IF5 When you unpack the IF5, save the box and shipping material in case you need to ship or store the IF5. The reader comes with a documentation packet that includes a quick start guide and radio safety compliance statements. -
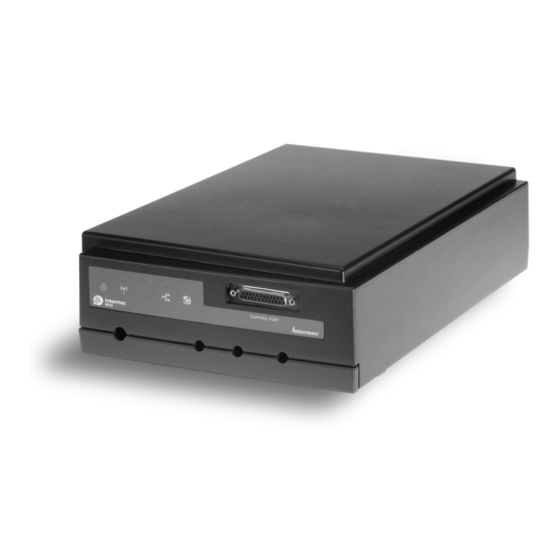
Page 20: Learning About The If5
This section explains the ports and LEDs on the IF5. Understanding the Front Panel Ports The IF5 front panel has four ports. To access three of the ports, you need to remove the cable access door. To remove the access door •... - Page 21 The port includes optically-isolated inputs, optically-isolated low voltage DC outputs, and access to 12 VDC. For more information on the IF5 GPIO interfaces, see “About the GPIO Interfaces” on page 126. “Port Pin Assignments” on page 137.
-
Page 22: Understanding The Leds
Chapter 1 — Getting Started Understanding the LEDs The IF5 has four LEDs that show you the operating status of the reader. LEDs LED Descriptions LED Icon LED Name Description Power Remains on after the IF5 boots. Wireless Flashes when a frame is transmitted communications or received on the 802.11g radio. -
Page 23: About The Intermec Ready-To-Work Indicator
About the Intermec Ready-To-Work Indicator The blue Ready-To-Work Indicator shows when an application is communicating with the data collection engine (DCE) on the IF5. The next table explains the different states of the Ready-To- Work indicator. Ready-to-Work Indicator Status Descriptions... -
Page 24: Understanding The Rear Panel Ports
The ports on the rear panel are used for connecting the IF5 to RFID and 802.11g radio antennas. IF5 Rear Panel Ports: This illustration shows the ports on the rear panel. The IF5 ships with antenna terminators mounted on RFID antenna ports 2, 3, and The IF5 RFID antenna ports use these connectors: •... -
Page 25: How The If5 Fits In Your Network
IF5 in a Wired Ethernet Network Container with RFID tag This illustration shows the IF5 in a wired Ethernet network. The IF5 sends and receives RFID tag data to the RFID server through the wired network. IF5 Fixed Reader User’s Manual Chapter 1 —... -
Page 26: Configuring The If5 (Setting The Ip Address)
Using a Communications Program You can use a communications program (such as HyperTerminal) to set the initial IP address for the IF5 and to enable the 802.11g radio. After you configure the IP address, you can continue to use the communications program to set other parameters or you can use a web browser to complete the configuration. - Page 27 Data bits Parity Stop bit Flow control 3 Connect the IF5 to AC power. The IF5 boots as soon as you apply power. 4 Press Enter when the message “Starting system” appears on your screen. The Username field appears. IF5 Fixed Reader User’s Manual Chapter 1 —...
- Page 28 5 In the Username field type the default user name and then press Enter. 6 In the Password field type the default password and then press Enter. The IF5 RFID Reader Configuration menu appears. To configure the IF5 for a wired Ethernet connection, continue with the next procedure.
-
Page 29: Configuring The If5 For An Ethernet Connection
Configuring the IF5 for an Ethernet Connection Follow this procedure to configure the IF5 for a wired Ethernet connection that does not use a DHCP server. If your wired network uses a DHCP server, continue with to Your Network” on page 25. - Page 30 DHCP server. If the DHCP server supports it, this value is used for dynamic DNS (DDNS) updates. IP address of a domain name server that the IF5 uses to resolve DNS names. IF5 Fixed Reader User’s Manual...
-
Page 31: Configuring The If5 For A Wireless Network
8 Disconnect the null-modem cable and AC power cable from the IF5. The IF5 is now ready to be connected to your network. See “Connecting the IF5 to Your Network” on page 25. Configuring the IF5 for a Wireless Network Follow this procedure to configure the IF5 for connection to a wireless network. - Page 32 3 Press the right arrow key. The Node Type list appears. 4 Press the up arrow key to choose Enabled from the list and then press Enter. The 802.11g Radio screen appears with the complete list of radio settings. IF5 Fixed Reader User’s Manual...
- Page 33 Network Services and press Enter. The Network Settings screen appears. IF5 Fixed Reader User’s Manual Chapter 1 — Getting Started Name of the DHCP server. The IF5 will accept DHCP lease offers from this server only. (Optional) User class for this DHCP server.
- Page 34 DHCP server. If the DHCP server supports it, this value is used for dynamic DNS (DDNS) updates. IP address of a domain name server that the IF5 uses to resolve DNS names. IP address of a domain name server that the IF5 uses to resolve DNS names if the DNS server at DNS Address 1 is not responding.
-
Page 35: Using The Web Browser Interface
15 minutes. Note: If you access the Internet using a proxy server, add the IF5 IP address to your Exceptions list. The Exceptions list contains the addresses that you do not want to use with a proxy server. - Page 36 The secure login screen appears. Note: If a security alert message appears: • Click Yes to continue to the secure login screen. • Click No to cancel. • Click View certificate to see the security certificate before continuing. IF5 Fixed Reader User’s Manual...
- Page 37 Up Logins” on page 45. 5 Click Login. The Ethernet screen appears. Ethernet Screen: Different settings appear in this screen depending on DHCP settings. These settings appear when the IF5 is configured to use a DHCP server. Your web browser session is established.
-
Page 38: Saving Configuration Changes
If you choose to activate the changes later, they will become active the next time the IF5 is booted. Note: If you made changes to RFID module settings, you need to reboot the IF5 to activate those changes. - Page 39 3 Verify that all your configuration changes appear in the Pending Changes list. 4 Click Save Changes and Reboot to reboot the IF5 and immediately use your new active configuration. Or, click Save Changes without Reboot. The IF5 saves the changes to its current configuration and continues to run its active configuration.
-
Page 40: Installing The If5
Choosing a Mounting Location You can place the IF5 horizontally or vertically on a stable surface. You can also mount the IF5 to a wall or a beam using one of these mounting bracket kits: • Mounting bracket kit (P/N 068918) •... -
Page 41: Connecting The If5 To Your Network
4. You can connect a secondary 802.11g antenna to port 3. 4 Connect the AC power cord to the power port on the IF5. Note: The IF5 does not support power over Ethernet (POE). 5 Install the cable access door and route the cables through the openings in the door seam. -
Page 42: Positioning 802.11G Antennas
Chapter 1 — Getting Started 6 Place the IF5 in its mounting location. For more information, 7 For a wired Ethernet network, connect the Ethernet cable to your network. For a wireless network, continue with the next step. 8 Connect the AC power cord to an AC outlet. As soon as you apply power, the IF5 boots and the green Power LED turns The IF5 is now ready to communicate in your network. -
Page 43: Setting The Date And Time
Setting the Date and Time After you have installed the IF5, you can set the date and time via the web browser interface. To set the date and time 1 Connect to the IF5 via the web browser interface. For help, 2 In the web browser screen, click the date and time in the upper right-hand corner. -
Page 44: Using The If5 Securely
5 Click Set. The IF5 date and time are set. Using the IF5 Securely To help protect the integrity and security of your data, the IF5 supports a variety of secure access methods. You can: • use a secure web browser session (HTTPS) to access the IF5. -
Page 45: Configuring Network Settings
This chapter describes how to configure network settings for the IF5 and includes these topics: • Configuring Settings For Your Network • Configuring Ethernet Settings • Configuring Network Services • Configuring the 802.11g Radio • Configuring Security • About Certificates... -
Page 46: Configuring Settings For Your Network
Chapter 2 — Configuring Network Settings Configuring Settings for Your Network This chapter assumes that you are using the IF5 web browser interface to configure network settings on the IF5. For help, see “Using the Web Browser Interface” on page 19. - Page 47 2 Configure the Ethernet settings. For help, see the next table. Note: Different settings appear in this screen depending on the current DHCP mode for the IF5. If you need to configure DNS/Network Services settings such as DNS addresses or suffixes, or a SYSLOG destination, see “Configuring Network Services”...
- Page 48 Sets the DHCP mode for this IF5: • Choose Always Use DHCP if you want the IF5 to get its IP address from a DHCP server. • Choose Use DHCP if IP Address is Zero you want the IF5 to use DHCP whenever its IP address is set to 0.0.0.0.
-
Page 49: Enabling Ipv6
IPv6 Setting Descriptions Parameter IPv6 Address IPv6 Subnet Mask IPv6 Router (Gateway) IF5 Fixed Reader User’s Manual Chapter 2 — Configuring Network Settings IPv6 configuration settings. Description A unique 128-bit IPv6 address. The IPv6 subnet mask. Range is 1 to 128 bits. -
Page 50: Configuring Network Services
3 Click Submit Changes to save your changes. To activate your changes, from the menu bar click Save/Discard Changes, and then click Save Changes and Reboot. For help, see “Saving Configuration Changes” on page 22. IF5 Fixed Reader User’s Manual... - Page 51 IF5 uses to resolve DNS names. Enter the IP address of a domain name server that the IF5 uses to resolve DNS names if the DNS server at DNS Address 1 is not responding. Enter a domain name suffix that will be appended to DNS names that cannot be resolved.
-
Page 52: Configuring Sntp Client Settings
Coordinated Universal Time (UTC). A positive integer represents a location east of the zero meridian and a negative integer indicates a location west of the zero meridian. IF5 Fixed Reader User’s Manual... -
Page 53: Configuring The 802.11G Radio
4 (Optional) If you need to configure Internet Protocol version 6, see 5 (Optional) If you need to configure security, see Security” on page 41. IF5 Fixed Reader User’s Manual Chapter 2 — Configuring Network Settings “Configuring Network Services” on page 34. “Enabling IPv6” on page 33. - Page 54 IP Address is set to 0.0.0.0 • Choose Disable DHCP if you want to assign a static IP address to the IF5. If you choose this option, be sure you set a static IP address in the IP Address field.
-
Page 55: Configuring Advanced Parameters
Name) Configuring Advanced Parameters You can change these settings to enable better radio performance. Note: Intermec recommends that you keep the default settings for these parameters. To configure advanced radio parameters 1 From the menu, click 802.11g Radio > Advanced Configuration. - Page 56 Chapter 2 — Configuring Network Settings Parameters marked with an asterisk (*) are considered “hot settings,” meaning that their values can be changed and immediately applied without rebooting the IF5. 2 Configure the advanced parameters. For help, see the next table.
-
Page 57: Configuring Security
Note: Before you configure security settings for this IF5, you should be familiar with the type of security implemented for your network. The IF5 supports a variety of security features to help maintain the integrity of your secure network. You can: • change default network parameters. For help, see “Configuring the 802.11g Radio”... -
Page 58: Controlling Access To If5 Menus
WPA2-PSK Security” on page 57. • configure WPA2-802.1x security. For help, see WPA2-802.1x Security” on page 58. For general information on securely using the IF5, see IF5 Securely” on page 28. Controlling Access to IF5 Menus There are two access methods you can enable or disable... - Page 59 2 Enable or disable the access methods that users can use to connect to the IF5. For help, see the next table. 3 Click Submit Changes to save your changes. To activate your changes, from the menu bar click Save/Discard Changes, and then click Save Changes and Reboot.
-
Page 60: Controlling Developer Access
Chapter 2 — Configuring Network Settings Controlling Developer Access You can control how developers access the IF5 by enabling or disabling these three access methods: • Via Telnet sessions • Via FTP server • Via mounting a Common Internet File System (CIFS) •... -
Page 61: Setting Up Logins
This login is sent to the RADIUS server, which compares the login to its list of authorized logins. If a match is found, the user can log in to the IF5 with read/write privileges. If no RADIUS server is available when the user tries a login and the Allow Service Password check box is checked, the IF5 Fixed Reader User’s Manual... -
Page 62: Configuring The If5 To Use A Password Server
Configuring the IF5 to Use a Password Server If you use a password server to manage users who can log in to this IF5, you need to tell the IF5 how to communicate with the password server and then you need to configure the password server. - Page 63 For help, see the next table. Note: If you enter more than one password server, the other password servers act as backup servers. The IF5 uses the first password server (starting with Server 1) whose IP address/ DNS name and secret key are the same as one in the list.
-
Page 64: Changing The Default Login
Port Changing the Default Login If you are not using a password server to authorize user logins, Intermec recommends that you change the default user name and password and create a read-only password. To set up logins 1 From the main menu, click Security > Passwords. The Passwords screen appears. - Page 65 Enter the user name you need to use to log in to this IF5. The user name can be from 0 to 32 characters long. If you leave the user name and password fields blank, a user will not need to log in to the IF5.
-
Page 66: Configuring Static Wep Security
Chapter 2 — Configuring Network Settings Configuring Static WEP Security Note: If you configure static WEP security for the IF5, you cannot enable 802.1x authentication for that IF5. To use static WEP keys, your network must support WEP encryption. All access points and wireless end devices (including this IF5) must use the same WEP encryption type and WEP transmit key. - Page 67 4 Click Submit Changes to save your changes. To activate your changes, from the menu bar click Save/Discard Changes, and then click Save Changes and Reboot. For help, see “Saving Configuration Changes” on page 22. IF5 Fixed Reader User’s Manual Chapter 2 — Configuring Network Settings...
-
Page 68: Configuring Dynamic Wep/802.1X Security
WEP Method Enable mixed cell Configuring Dynamic WEP/802.1x Security Note: If you enable dynamic WEP security for the IF5, you cannot also enable static WEP keys. To configure dynamic WEP/802.1x security 1 From the menu, click Security > 802.11g Radio. The Security/802.11g Radio screen appears. - Page 69 5 Configure the 802.1x client settings. For help, see “Configuring 802.1x Client Settings” on page 60. 6 Click Submit Changes to save your changes. To activate your changes, from the menu bar click Save/Discard Changes, IF5 Fixed Reader User’s Manual Chapter 2 — Configuring Network Settings...
-
Page 70: Configuring Wpa-Psk Security
Dynamic WEP Parameter Descriptions Parameter Authentication Method Enable mixed cell Enable this mode to allow the IF5 to communicate Configuring WPA-PSK Security 1 From the menu, click Security > 802.11g Radio. The Security/802.11g Radio screen appears. 2 Choose WPA-PSK from the Security Level drop-down list, and then click Submit Changes. -
Page 71: Configuring Wpa-802.1X Security
1 From the menu, click Security > 802.11g Radio. The Security/802.11g Radio screen appears. ‘ 2 Choose WPA-802.1x from the Security Level drop-down list, and click Submit Changes. This screen appears: IF5 Fixed Reader User’s Manual Chapter 2 — Configuring Network Settings... - Page 72 Specifies whether encryption will be used as part of the authentication. Choose Network EAP to require encryption, or choose Open System to require no encryption. Check this check box to enable fast roaming using Cisco’s CCKM protocol. IF5 Fixed Reader User’s Manual...
-
Page 73: Configuring Wpa2-Psk Security
4 Click Submit Changes to save your changes. To activate your changes, from the menu bar click Save/Discard Changes, and then click Save Changes and Reboot. For help, see “Saving Configuration Changes” on page 22. IF5 Fixed Reader User’s Manual Chapter 2 — Configuring Network Settings... -
Page 74: Configuring Wpa2-802.1X Security
CCMP(TSN): Use Counter Mode - CBC MAC Protocol for multicast/group keying. The pre-shared key for WPA. You can enter an ASCII passphrase, and the key will be derived from the passphrase using the PBKDF2 algorithm. IF5 Fixed Reader User’s Manual... - Page 75 6 Click Submit Changes to save your changes. To activate your changes, from the menu bar click Save/Discard Changes, and then click Save Changes and Reboot. For help, see “Saving Configuration Changes” on page 22. IF5 Fixed Reader User’s Manual Chapter 2 — Configuring Network Settings...
-
Page 76: Configuring 802.1X Client Settings
Enables/disables Transport Layer Security (TLS) authentication. If you enable TLS with WPA or 802.1x security, you must have a unique client certificate on the IF5 and a trusted root certificate authority (CA) certificate. For more information, see the next section, “About Certificates.”... -
Page 77: About Certificates
(TLS) with WPA-802.1x, WPA2-802.1x, or Dynamic WEP security, you need to have a unique client certificate on the IF5 and a trusted root certificate authority (CA) certificate. You can use a third-party CA to issue unique client certificates and a root certificate. -
Page 78: Installing And Uninstalling Certificates
You will need to contact your local Intermec representative to purchase new certificates. Note: To install or uninstall certificates, you need to access the IF5 via a secure web browser. For help, see Browser Interface” on page 19. To install or uninstall certificates 1 From the main menu, click Security >... - Page 79 Note: If you are not using a secure web browser, you will be prompted to log in again. Click A secure session is available and log in to the IF5. If a Security Alert dialog box appears, click Yes to proceed. Repeat steps 1 through 3.
-
Page 80: Rejecting Expired Certificates
Chapter 2 — Configuring Network Settings Rejecting Expired Certificates By default, when you install a certificate the IF5 does not validate the certificate dates against the date currently set in the IF5 operating system. Follow the next procedure to set the IF5 to reject expired certificates. -
Page 81: Developing And Using Rfid Applications
This chapter explains how you can develop and test RFID applications for the IF5 and includes these topics: • RFID Applications and the IF5 • Creating RFID Applications for the IF5 • Running Applications at Boot Time • About IF5 Edgeware •... -
Page 82: Rfid Applications And The If5
• You can run the application on a remote server. In this case, all processing is performed by the server. • You can run the application locally on the IF5. In this case, the application resides on the IF5, and much of the processing occurs on the IF5 and not remotely on the server. -
Page 83: About The J2Se Option
001) includes a set of plug-in components to IBM’s WebSphere Studio Device Developer (WSDD) version 5.7.1. These include a sample WRDI application with the required driver bundles to support the IF5, as well as documentation about the sample and plug-in subsystems. For more information, contact your Intermec sales representative. -
Page 84: If5 Java Support
The IF5 supports the CDC/Foundation profile, which is a subset of J2SE version 1.3.1. The IF5 also comes with a SQL Server JDBC driver, located in /usr/local/jdbc. Use this driver to create applications that write data directly from the IF5 to a remote SQL Server database. -
Page 85: Java Support For Microsoft Sql Servers
Always use this variable for simplicity and to insure that the correct runtime files are used. is the name of the Java runtime executable installed in the IF5. -jcl:foun10 used. To use additional class paths not defined in the Foundation 1.0 classes (such as components from the Intermec Developer... -
Page 86: If5 Javascript Support
• copy your executables or scripts to the /home/developer/ startup directory on the IF5. Follow the next procedure to set up the IF5 to run executables or scripts at boot time. For help with running a JavaScript file at boot time, see Boot Time”... -
Page 87: Handling Command Line Arguments At Boot Time
IF5 is not required to run your software at boot time. For help with disabling FTP access, see Access” on page 44. The IF5 is now ready to run the executable or script at boot time. Handling Command Line Arguments at Boot Time If your application does not require command line arguments, you can simply place the application into the startup directory as described in the previous section. - Page 88 IF5. for developing your own application. includes the IBM WRDI software option. This option does not appear in the list if your IF5 does not include the WRDI option. edgeware. Note: To use the SAP edgeware, the SAP-AII backend module must be installed on your server.
-
Page 89: About The If5 Rfid Architecture
DCE using the BRI protocol. For more information, see “Configuring the Data Collection Engine” on page 80. You can also use JavaScript applications with the IF5 RFID Resource Kit components to communicate with the DCE. For more information, see the RFID Resource Kit documentation. -
Page 90: Configuring Rfid Settings
RFID settings for best system performance. When you use the Diagnostics tool to display tags, the IF5 RFID module uses settings from the RFID Module screen. For help, see “Displaying Tags” on page 85. -
Page 91: About Rfid Module Settings
Save Changes and Reboot. For help, see “Saving Configuration Changes” on page 22. Note: If you make changes to RFID settings, you need to reboot the IF5 to activate the changes. About RFID Module Settings This section explains the module settings. Most settings have BRI attribute equivalents. -
Page 92: Lbt Channel
Timeout Configuration Mode Enables a timeout mode. Instead specifying the number of antenna or ID tries, you specify a timeout value. If the IF5 does not find any tags after an antenna or ID try, the reader waits this long before starting the next antenna or ID try. -
Page 93: Id Tries
(default is 50). This setting is visible only if Timeout Configuration mode has been enabled. For help, see “Timeout Configuration Mode” in this section. This setting is equivalent to the ANTTIMEOUT BRI attribute. IF5 Fixed Reader User’s Manual Chapter 3 — Developing and Using RFID Applications... -
Page 94: Read Tries
This setting is equivalent to the SELTRIES BRI attribute. Unselect Tries (Not supported by EPCglobal Class 1 Gen 2 tags) Sets the number of times a group unselect is attempted. Valid range is 1 (default) to 254. IF5 Fixed Reader User’s Manual... -
Page 95: Initial Queue
If more than one antenna is enabled, the antennas always fire in sequence numerically (1, 2, 3, 4). To change this sequence, you need to set the ANTS BRI attribute. For more information, see the BRI programmer’s reference manual. IF5 Fixed Reader User’s Manual... -
Page 96: Configuring The Data Collection Engine
You can configure many settings for the DCE. For help, see the next procedure. Note: You need to disable the IF5 Developer Tools and the SAP device controller edgeware before your application can communicate with the DCE. For help, see on page 71. - Page 97 Specifies the TCP port used for incoming EPC Reader Protocol connections to the DCE. This port number must be unique for all TCP services running on the IF5. Valid range is 0 to 65535 (default is 4684). Enables/disables logging of commands sent and...
-
Page 98: Viewing The Dce Events Log
Save Changes and Reboot. For help, see “Saving Configuration Changes” on page 22. 4 After the IF5 reboots, click Refresh in the browser menu. The login screen appears. 5 Enter your user name and password, and then click Login. -
Page 99: Viewing Dce Statistics
The DCE Configuration screen appears. 2 Click Display Statistics. The DCE Configuration/Display Statistics screen appears with a list of DCE statistics. IF5 Fixed Reader User’s Manual Chapter 3 — Developing and Using RFID Applications Description Time and date of the event. -
Page 100: Using The Diagnostics Tool
“Displaying Tags.” • General purpose input/output (GPIO) testing. For help, see “Testing the GPIO Interfaces” on page 86. • Sending BRI commands or BRI script files to the IF5 from an interactive browser interface. For help, see Window” on page 87. -
Page 101: Displaying Tags
Displaying Tags You can use the Diagnostics tool to continuously execute a read cycle on the IF5. For example, this procedure may be useful when you are testing antenna locations or tag placement. Note: The read cycle is based on the settings listed in the RFID Module screen. -
Page 102: Testing The Gpio Interfaces
GPIO. The GPIO screen appears. When this screen appears, the IF5 GPIO interfaces are turned off (equivalent to sending the BRI command The IF5 has four interfaces, numbered 1 to 4 from left to right on the screen. WRITEGPIO=0 IF5 Fixed Reader User’s Manual... -
Page 103: Using The Bri Window
4 Click Refresh to show the current interface state. Using the BRI Window You can send BRI commands to the IF5 or load and run a BRI script through the web browser interface. For more information on BRI commands and syntax, see the BRI programmer’s reference manual. -
Page 104: Measuring Tag Read Performance
Measuring Tag Read Performance You can run a tag read performance test to measure the efficiency of your RFID system. When you run the test, the IF5 executes a read cycle. You can configure the length (in seconds) of the cycle and the number of times the cycle is run. - Page 105 • # Times read: Number of times each tag was read during • Total tags read: Total number of times all tags were read IF5 Fixed Reader User’s Manual Chapter 3 — Developing and Using RFID Applications length field. The default is two seconds.
-
Page 106: About The Performance Test
Note: These instructions assume you understand how to create and edit JavaScript files. The JavaScript tool supports these functions: • Editing and sending JavaScript to the IF5 from the web browser interface. For help, see the next section, “Using the JavaScript Workbench.”... -
Page 107: Using The Javascript Workbench
Using the JavaScript Workbench You can create and edit a JavaScript file, load the file on the IF5, and run the file from the Workbench. To create and run a JavaScript file 1 From the menu, click Developer Tools > JavaScript >... -
Page 108: Configuring A Javascript File To Auto-Run At Boot Time
This section explains how to configure a JavaScript file to be automatically run when the IF5 is rebooted. The startup file can be located on the IF5, or hosted on a remote server. When you set the file URL, a copy of the file is cached on the IF5 and executed if the server is unavailable at boot time. - Page 109 2 To specify a different startup file, enter the path to and name of the file in the Startup URL field. • For a startup file that will reside on the IF5, use this • For a startup file on a remote server, enter the URL as you http://www.mycompany.com/if5startup/myfilename.js...
-
Page 110: Editing Remote Startup Files
The path to and name of the file appear in the Client filename field. 3 Click Upload to Reader. The file is uploaded to the IF5. 4 In the left-hand pane, click Workbench. The Workbench screen appears. -
Page 111: Configuring Wedm Settings
To download the file from the IF5 to another location, click Download work.js from Reader. Follow the prompts to save the file. Note: Before you can set the saved file as the startup file or download it from the reader, you need to save the file as described in Step 6. - Page 112 Note: When WRDI is active, some RFID module settings are changed from the default settings: • Timeout Configuration Mode is enabled. • Enable Antenna Port 2, 3, and 4 are enabled. • Tag Type is set to EPCglobal Class 1 Gen 2. IF5 Fixed Reader User’s Manual...
-
Page 113: Managing, Troubleshooting, And Upgrading The If5
This chapter includes information on managing the IF5 and includes these topics: • Managing the IF5 • Using Simple Network Management Protocol (SNMP) • Using Wavelink Avalanche • Using the Intermec SmartSystems Console • Importing and Exporting Files • Maintaining the IF5 •... -
Page 114: Managing The If5
Chapter 4 — Managing, Troubleshooting, and Upgrading the IF5 Managing the IF5 There are several methods you can use to manage the IF5. You can use: • a web browser. For help, see Interface” on page 19. method for all procedures. - Page 115 Chapter 4 — Managing, Troubleshooting, and Upgrading the IF5 2 Configure the SNMP community parameters. For help, see the next table. 3 If you did not enable SNMPv3, continue with Step 5. If you enabled SNMPv3, click Network Management >...
- Page 116 Chapter 4 — Managing, Troubleshooting, and Upgrading the IF5 SNMP Community Parameter Descriptions Parameter Enable SNMPv3 Enable SNMPv1/ SNMPv2c SNMP Community (Read-Only) SNMP Community (Read/Write) SNMP Community (Secret) SNMPv3 Read-Only User SNMPv3 Read-Write User Authentication Protocol Data Privacy Protocol Description Enables/disables SNMPv3.
-
Page 117: Using Wavelink Avalanche
Chapter 4 — Managing, Troubleshooting, and Upgrading the IF5 Using Wavelink Avalanche The Wavelink Avalanche client management system uses three main components to help you easily manage your wireless network. Avalanche Component Descriptions Component Enabler Agent Console The enabler is already installed on IF5s with firmware release 2.0 and later. - Page 118 Enables/disables the Avalanche client management system. Specifies the IP address or DNS name of the Avalanche console. Or, leave this field blank and the IF5 sends out a broadcast request looking for any available agent. IF5 Fixed Reader User’s Manual...
-
Page 119: Using The Intermec Smartsystems Console
In the Console, right-click an IF5 and choose Intermec Settings from the menu. The Intermec Settings browser appears. Intermec Settings: If you use the SmartSystems Console to manage the IF5, you can use Intermec Settings to configure the IF5. For help with using Intermec Settings, in the Intermec Settings browser choose Help >... -
Page 120: Importing And Exporting Files
For help, see Using the Web Browser to Import and Export Files You can use the web browser to move files to and from the IF5, and to browse the IF5 directories. Browsing the IF5 and Importing Files to Your PC This section explains how to use the web browser interface to browse directories and import files from the IF5 to your PC. - Page 121 Chapter 4 — Managing, Troubleshooting, and Upgrading the IF5 To browse the IF5 directories 1 From the menu, click File Import/Export. The File Import and Export screen appears. 2 Click View the file system directory and read files from this device using your browser.
-
Page 122: Importing Files To The If5
Chapter 4 — Managing, Troubleshooting, and Upgrading the IF5 If a file cannot be viewed in the browser, a File Download message appears. Follow the prompts to copy the file from the IF5 to your desktop PC. Importing Files to the IF5 1 From the menu, click File Import/Export. - Page 123 4 (Optional) In the What name should the file be given on this device (optional) entry field, enter the path to and new filename for the file that will be imported to the IF5. • If your IF5 includes the Compact Flash memory option, •...
-
Page 124: Using The Ftp Server To Import And Export Files
Chapter 4 — Managing, Troubleshooting, and Upgrading the IF5 Using the FTP Server to Import and Export Files You can move files to and from the IF5 by using its resident FTP server. The IF5 FTP server is disabled by default. To enable the... - Page 125 Chapter 4 — Managing, Troubleshooting, and Upgrading the IF5 To access the FTP directory from the IF5 web browser interface 1 In the web browser interface, click File Import/Export. The File Import and Export screen appears. 2 Click Transfer files to or from this device using FTP. The IF5 FTP directory appears in a new browser window.
-
Page 126: Maintaining The If5
Chapter 4 — Managing, Troubleshooting, and Upgrading the IF5 Maintaining the IF5 The Maintenance menu lets you view IF5 parameters and statistics, including: • connections to access points (for wireless networks). • access point neighbors (for wireless networks). • port statistics. -
Page 127: Viewing Access Point Neighbors
Chapter 4 — Managing, Troubleshooting, and Upgrading the IF5 Viewing Access Point Neighbors The AP Neighbors screen provides information on all the access points (even hidden access points) in the area. This screen shows information gathered by the radio receiving beacons from other sources as it operates on a specific channel. - Page 128 Chapter 4 — Managing, Troubleshooting, and Upgrading the IF5 AP Neighbors Screen Fields Field Address Channel Signal(dBm) SSID Age (sec) Capabilities Description Displays the MAC address of the access point. Shows the channel advertised in the beacon. Indicates power level of reception measured in dBm.
-
Page 129: Viewing Port Statistics
Chapter 4 — Managing, Troubleshooting, and Upgrading the IF5 Viewing Port Statistics The Port Statistics screen shows the total number of frames and bytes that the IF5 has received and transmitted since it was last booted. To view port statistics •... -
Page 130: Viewing The About This If5 Rfid Reader Screen
Viewing the About This IF5 RFID Reader Screen The About This IF5 RFID Reader screen summarizes the configuration settings for the IF5 and includes a list of software versions, serial numbers, and other IF5-specific information. Any changes from the default configuration that have been made to this IF5 appear as blue. -
Page 131: Using The Leds To Locate The If5
Chapter 4 — Managing, Troubleshooting, and Upgrading the IF5 Using the LEDs to Locate the IF5 You can use the LEDs to help locate a specific IF5 in your location. To locate an IF5 • In the About This IF5 RFID Reader screen, click Find This IF5. -
Page 132: Viewing The If5 Configuration Summary
Chapter 4 — Managing, Troubleshooting, and Upgrading the IF5 Viewing the IF5 Configuration Summary The About This IF5 RFID Reader screen includes a summary that shows basic parameter settings. Parameters that have been changed from the default configuration appear in blue. - Page 133 Chapter 4 — Managing, Troubleshooting, and Upgrading the IF5 To view all IF5 configuration settings • In the About This IF5 RFID Reader screen, click Display All Configuration Settings. The screen refreshes and shows a complete list of settings. IF5 Fixed Reader User’s Manual...
-
Page 134: Restoring The If5 To The Default Configuration
2 Click Restore Factory Defaults. A list of the parameters that will be changed appears in the Pending Changes list. 3 Click Save Changes and Reboot. The IF5 reboots and the default configuration is restored. IF5 Fixed Reader User’s Manual... -
Page 135: Troubleshooting The If5
Chapter 4 — Managing, Troubleshooting, and Upgrading the IF5 Troubleshooting the IF5 This section includes lists of problems and possible solutions. Problems While Working With RFID Many problems you may encounter when working with your RFID system can be solved by carefully checking the RFID settings and changing them accordingly. -
Page 136: Problems With Connectivity
“Configuring the IF5 (Setting the IP Address)” on page 10. You may need to move the IF5 so its 802.11g radio antenna is in a better position for the IF5 mounting location and your network. Make sure the antenna is connected to antenna port 4. - Page 137 Security screen. 3 If you access the Internet through a proxy server, be sure you have added the IP address of the IF5 to the Exceptions list. 4 Depending on the security configuration of your network, the IF5 may need to be on the same subnet as the nearest access point.
-
Page 138: Problems With Copying Files
Problems With Copying Files When copying files, there are two main problems that may occur: • If the IF5 seems to be locked up when you try to copy files, the directory on the IF5 may be full. To check the available disk space, open a Telnet connection to the IF5. -
Page 139: Upgrading Firmware
Intermec. Be sure to contact your Intermec RFID system consultant before upgrading. Make sure the IF5 is connected to a reliable AC power source before you upgrade the firmware. Do not cycle power to the IF5 during the upgrade. If AC power is lost during the upgrade, the IF5 may require factory repair. - Page 140 The Rebooting screen appears, the IF5 reboots, and the upgrade begins. This process can take several minutes. Do not cycle power to the IF5 during the upgrade. When the upgrade process is complete, the IF5 reboots. Or, to cancel the upgrade, click Discard Pending Changes.
-
Page 141: Using The If5 Gpio Interfaces
Using the IF5 GPIO Interfaces This chapter explains how to access the IF5 general purpose input/output (GPIO) interfaces and how to connect industrial controls such as motion sensors or indicator lamps to the IF5. IF5 Fixed Reader User’s Manual... -
Page 142: About The Gpio Interfaces
GPIO interfaces, which can then trigger IF5 operations. Each interface is electrically isolated from the IF5 and designed for low voltage DC loads. The IF5 can also supply 12VDC at 0.5A to external devices. How the inputs and outputs are used depends on the RFID application software being used in the system. -
Page 143: Using The Input Interfaces
For more information, see the next examples. IF5 Powered Input This is the simplest way to connect a control to an IF5 input interface. If the external control device is a switch, you can connect one side of the switch to an IF5 +Input pin, and the other side of the switch to one of the +12 VDC sources. -
Page 144: Isolated Input Interface
Isolated Input Interface Use this method to minimize noise induced by distance or grounding characteristics. The isolated input avoids induced noise by referencing a remote input to chassis return of the IF5. The next illustration shows how this method is wired. +Input... -
Page 145: Using The Output Interfaces
Using the Output Interfaces Each IF5 output interface is optically isolated from the IF5, polarized, and rated for 5 to 48 VDC at 0.25A. All IF5 outputs include internal thermal fuses that trip if the load exceeds 0.25A, and the fuses are self-recovering once the excessive load is removed. -
Page 146: Switching The High Side Using If5 Power
Chapter 5 — Using the IF5 GPIO Interfaces Switching the High Side Using IF5 Power In this example, an external indicator lamp (0.25A maximum current) is connected to the -Output and Ground pins, and the corresponding +Output pin is connected to the +12 VDC source. -
Page 147: Switching The High Side Using External Power
Switching the High Side With External Power Driving a DC Relay to Control an AC Load While the IF5 outputs are designed to switch DC loads, they can drive relays that control AC loads. The next illustration shows how to connect such a system to an IF5 output. -
Page 148: Using The Power Interface
Using the Power Interface The IF5 GPIO interface provides 12 VDC at 0.5A for powering external inputs and loads, eliminating the need for an external DC supply and simplifying the system installation. -
Page 149: Specifications
Specifications This appendix includes physical and electrical specifications for the IF5 and information about the port pin assignments. IF5 Fixed Reader User’s Manual... -
Page 150: If5 Specifications
-25ºC to +55ºC (-13ºF to +131ºF) -40ºC to +70ºC (-22ºF to +158ºF) 10 to 90% 10BaseT/100BaseTx (twisted-pair) Ethernet frame types and Ethernet addressing 10 Mbps/100 Mbps 802.11g 115,200 bps RFC 1213 (MIB-2), RFC 1398 (dot3), 802.11, 802.1x 2.6.11.5 IF5 Fixed Reader User’s Manual... -
Page 151: 802.11G Radio Specifications
Channels Range (Maximum power output, 11 Mbps) Receiver sensitivity (11 Mbps) Security IF5 Fixed Reader User’s Manual Appendix A — Specifications 2.4 to 2.5 GHz worldwide Direct sequence, spread spectrum (CCK, DQPSK, DBPSK) 63 mW (18 dBm) 11, 5,5, 2, and 1 Mbps... -
Page 152: Rfid Specifications
Up to 70% of the read distance under similar conditions 90% amplitude modulation index <±100 ppm from -25°C to +55°C (-13°F to 131°F) Up to 4, electronically switched 22 dB 865-867 MHz: SMA 915 MHz: Reverse SMA IF5 Fixed Reader User’s Manual... -
Page 153: Port Pin Assignments
Port Pin Assignments Control Port Pin 14 Pin 1 Control Port Pin Assignments IF5 Fixed Reader User’s Manual Appendix A — Specifications Pin 13 Description Active Polarity -Input 1 Low-RTN -Input 2 Low-RTN -Input 3 Low-RTN -Input 4 Low-RTN Ground... -
Page 154: Serial Port
Appendix A — Specifications Serial Port Pin 9 Serial Port Pin Assignments Ethernet Port Ethernet Port Pin Assignments Note: The IF5 does not support power over Ethernet (POE). Pin 1 Description Active Polarity Receive data (RXD) High Transmit data (TXD) -
Page 155: Configuring And Using The Sap Device Controller
This appendix explains how to use the SAP device controller edgeware on the IF5. It includes a section that explains how to use the SAP data processors with tag data. IF5 Fixed Reader User’s Manual Configuring and Using the SAP Device Controller... -
Page 156: Enabling The Sap Device Controller
1 Start the web browser interface. For help, see Browser Interface” on page 19. 2 Assign a static IP address to the IF5. For help, see “Configuring the IF5 (Setting the IP Address)” on page 10. 3 (Optional) If actual time should be used in messages reported by the SAP device controller, set SNTP parameters. -
Page 157: Opening A Telnet Session To The If5
Starting and Stopping the Device Controller Manually To start the device controller manually, open a Telnet session to the IF5 and send this command at the $-prompt: /usr/local/dc/sapdc & To stop the device controller manually, open a Telnet session to the IF5 and send this command at the $-prompt: /usr/local/dc/dccontrol SHUTDOWN <port>... -
Page 158: Stopping Or Reconfiguring The Device Controller Over The Network
The script is located at /usr/local/dc/configsapdc and its syntax is as follows: configsapdc <Aii-node-URL><port> <device controller name><device name><DCE port> is the directory where the configuration file is located. is the name of the configuration file. IF5 Fixed Reader User’s Manual... -
Page 159: About The Sap-Dc Configuration Files
For more information on logging, see Logging” on page 151. • Config/FieldMap.xml IF5 Fixed Reader User’s Manual is the URL of the SAP-AII node. is the TCP port on which the device controller accepts SAP communications. -
Page 160: Changing Settings In The Configuration Files
For help with importing and exporting files, see Browser to Import and Export Files” on page 104. If you have enabled FTP access on the IF5, you can import and export files via FTP. For help, see Import and Export Files” on page 108. -
Page 161: Receiverlist
<MessageTransformer> <APIImplementationClass>com.sap.device.controller.messaging. XMLTransformer</APIImplementationClass> </MessageTransformer> </Receiver> </ReceiverList> IF5 Fixed Reader User’s Manual Description Name of the receiver. This name will be displayed in logs. URL that receives tag event data when transmitted by the controller. For SAP-AII nodes, this is usually... -
Page 162: Reader List
Reader id attribute defines the name of the IF5 in the SAP system. The LogicalName value is the name assigned to the reader in the RfidReader.properties file. In the sample XML below, the IF5 name in the SAP system is “Fixed_Reader_18”: <ReaderList retryInterval=”10”>... - Page 163 The device controller default configuration specifies a sample pipeline. Make sure that ReaderIDs specified in ProcessorChainList match the Reader ids of the reader definitions in ReaderList as shown in the next example. IF5 Fixed Reader User’s Manual Description data processor. Data processor implementations are generally in the com.sap.devicecontroller.core.dataprocessors...
-
Page 164: About The Rfidreader.properties File
<opt:TimerInterval>500</opt:TimerInterval> </OptionList> </DataProcessor> About the RfidReader.properties File This .xml file defines properties specific to the IF5 RFID module. RfidReader.properties.xml must reside in the /home/ developer/dc directory on the IF5. The next table lists properties you can set for BRI implementation. For more information on reader-specific properties, see the Basic Reader Interface Programmer’s Reference... - Page 165 IF5 Fixed Reader User’s Manual Description (Optional) Sets the interval in ms between READ commands sent by the reader. The polling loop can run continuously, or can be started by a trigger and run for a period set by trigger.time.
- Page 166 (Optional) Sets the antennas to be used and the firing sequence for those antennas. G1: ISO Class 1 Gen 1 tags G2: ISO Class 1 Gen 2 tags UCODE119: Phillips v1.19 tags EPCC1G2: EPC Class 1 Gen 2 tags MIXED: Mixed groups of tags IF5 Fixed Reader User’s Manual...
-
Page 167: Setting Parameters For Logging
You can also log to a rotating set of files instead of a single file. For the IF5 SAP device controller, Intermec recommends using the /tmp directory (or a subdirectory thereof ) for best performance. -
Page 168: Using The Data Processors
Required only if LOC_TYPE is set to FILE or BOTH. Sets the format for the logfile entries: XML, LIST, or TRACE. XML and TRACE supported only if you are running the controller with the J2SE engine. IF5 Fixed Reader User’s Manual... - Page 169 Commands Device Controller Commands Data Processor Flow Chart: This diagram shows how data processors are integrated into SAP command and data flow. IF5 Fixed Reader User’s Manual SAP-AII Node Message Transport Services (HTTP) Sender Command Queuing Lowpass Reader...
-
Page 170: Data Processor Types
The next illustration shows a simple data processor chain as specified in the default configuration: Aggregator EventTypeFilter Lowpass Filter Default data processor chain Send IF5 Fixed Reader User’s Manual... - Page 171 This example assumes you have a tag data scheme set up so you can differentiate palettes and cases using the tag data. Send Aggregator Light Control DataEnricher StateBuffer CaseFilter PalletFilter Lowpass Filter Nonlinear data processing IF5 Fixed Reader User’s Manual...
-
Page 172: Standard Data Processors
EPC value. Used with non-EPC tags. . If the call does not throw an identify() (except the check tag ID) identify() IF5 Fixed Reader User’s Manual... -
Page 173: Equalizetimestamp
• When a “disappeared” event for the same container is received, the building of the current container is finished. The data is transformed into a message by the assigned transformer object and sent out. IF5 Fixed Reader User’s Manual... -
Page 174: Simplepacksend
Filters tag events based on the contents of the tag fields. You can specify a bit mask and value used to filter tags. TagBitsFilters can filter on the contents of any tag field defined in the field map including the EPC ID. IF5 Fixed Reader User’s Manual... -
Page 175: Timefixedsizeaggregator
Similar to EPCMLTransformer, where the tag IDis given in the EPC URN-notation. Non-valid EPCs are removed from the message and not reported. If no valid tags are in the event structure, no message is sent. IF5 Fixed Reader User’s Manual... -
Page 176: About Data Processor Options
The ID of the reader to be checked (optionally, an ID of a check tag). The two values are separated by a comma, as in “ReaderID, CheckTagID”. The CheckTagID is a hex string. TimerInterval The time (in seconds) between two reader checks. Default is 10. IF5 Fixed Reader User’s Manual... -
Page 177: Options For Epcenricher
Defines when to trigger the sending of the packing message. If set to “Container”, the message is sent as soon as the container tag disappears. If set to “All”, then the message is sent when no more tags are seen. Default is Container. IF5 Fixed Reader User’s Manual... -
Page 178: Options For Lowpassfilter
Removes a logical field name from the data fields that should be read. This option can be repeated multiple times. Not necessary in complete configuration files. Retries The number of read retries performed if there was an error reading a data field. IF5 Fixed Reader User’s Manual... -
Page 179: Options For Tagbitsfilter
The maximum number of events for the aggregation. All events are counted until this number is reached or until the maximum time interval since the first event has passed. Aggregated events within the message keep their original timestamp. Default is 100. IF5 Fixed Reader User’s Manual 00110000XXXX00101111 H30x2F... - Page 180 The length of the time window (in milliseconds) for the aggregation. All events within this window are aggregated into a single message, unless the maximum number of events is reached first. Aggregated events within the message keep their original timestamp. Default is 10000. IF5 Fixed Reader User’s Manual...
- Page 181 Index IF5 Fixed Reader User’s Manual...
- Page 182 Power Output Level, screen, illustrated, settings, described, specifications, troubleshooting problems, 802.1x client settings, described, About This IF5 RFID Reader screen, AC power port described, location, access point MAC address, viewing, access point neighbors, viewing in Maintenance menu, access via menus, controlling,...
- Page 183 IF5 RFID architecture, script files, loading and running with Diagnostics tool, sending commands with Diagnostics tool, TCP Port setting, for DCE, used in IF5 RFID architecture, illustrated, window, in Diagnostics tool, blue LED, described, booting the IF5 applications, starting at boot time,...
- Page 184 Index ContainerReader option, for SAP data processors, control port location, pin assignments, Controller ID element, controlling access to IF5 menus, data collection engine Allow External BRI Connection, Allow External EPC Connection, BRI Heartbeat, BRI TCP Port, configuring, Enable Logging, EPC TCP Port,...
- Page 185 EPCglobal Class 1 Gen 2 certification, tags, choosing in RFID Module settings, EPCPML transformer, EqualizeTimeStamp, Ethernet connection, configuring, IF5 in wired network, illustrated, link speed, configuring, port described, pin assignments, settings configuring with web browser interface, described, troubleshooting problems,...
- Page 186 AC load, WRITEGPIO equivalents, GPIO. See general purpose input/output interfaces HierarchyBuilderSend, options, hot settings, defined, HyperTerminal, using to configure IF5, Services Management Framework (SMF), WebSphere Everyplace MicroEnvironment (WEME), ICMP access, enabling or disabling, ID Report check box,...
- Page 187 IF5, port statistics, viewing, using LEDs to locate the IF5, managing the IF5 access to configuration menus, controlling, defaults, restoring, developer access, controlling, firmware, upgrading, methods,...
- Page 188 Index managing the IF5 (continued) SmartSystems Console, SNMP, using securely, manuals, Intermec, how to download from web, MappingTable option, for SAP data processors, MaxCount option, for SAP data processors, menu access, controlling, Minimum Multicast Encryption Type WPA2-802.1x, WPA2-PSK, described, WPA-802.1x,...
- Page 189 Resource Kit, described, SAP device controller, using, specifications, tags, reading and displaying with Diagnostics tool, troubleshooting problems, IF5 Fixed Reader User’s Manual RFID Edgeware screen, illustrated, RFID Module screen, illustrated, RfidReader.properties elements, defined, file, described, running Java applications on IF5,...
- Page 190 IF5, security 802.1x client settings, described, certificates, described, configuring, controlling menu access, default login, changing, developer access, controlling, dynamic WEP, password server, using with IF5, static WEP, configuring, supported methods, WPA2-802.1x, WPA2-PSK, WPA-802.1x, WPA-PSK, SelectedFieldEnricher, options, Send,...
- Page 191 Authentication Protocol, Data Privacy Protocol, enabling, settings, described, specifications 802.11g radio, electrical and physical, RFID, SQL server, driver for IF5, SSID field, in AP Neighbors screen, startup file configuring JavaScript, editing, uploading from PC, support, calling Intermec, SYSLOG destination configuring,...
- Page 192 Enable CCKM, Minimum Multicast Encryption Type, Network EAP, described, Open System, described, parameters, described, TKIP (RSN), WEP (TSN), WPA-PSK security configuring, pre-shared key, WRDI option described, enabling, SuperFeature CD, described, Write Tries setting, WRTRIES equivalent, IF5 Fixed Reader User’s Manual...
Need help?
Do you have a question about the IF5 and is the answer not in the manual?
Questions and answers