Intermec IP30 User Manual
Handheld rfid reader
Hide thumbs
Also See for IP30:
- User manual (42 pages) ,
- Instructions manual (36 pages) ,
- Supplementary manual (6 pages)
Table of Contents
Advertisement
Quick Links
Download this manual
See also:
Instruction Manual
Advertisement
Table of Contents
Troubleshooting

Related Manuals for Intermec IP30


Summary of Contents for Intermec IP30
- Page 1 IP 30 Handheld RFID Reader IP30, IP30NI User’s Guide...
- Page 2 Intermec Technologies Corporation. Information and specifications contained in this document are subject to change without prior notice and do not represent a commitment on the part of Intermec Technologies Corporation. © 2008-2010 by Intermec Technologies Corporation. All rights reserved.
- Page 3 Revised specifications for new read and write ranges. 2/2009 Revised specifications for new 865 MHz EU standard. 8/2008 Revised to support the CK3 Mobile Computer. 4/2008 Revised to include correct part numbers for the CK61 power supply. IP30 Handheld RFID Reader User’s Guide...
- Page 4 IP30 Handheld RFID Reader User’s Guide...
-
Page 5: Table Of Contents
Understanding the LEDs ..........4 About the Intermec Ready-to-Work Indicator ....... 5 Understanding the Ports. - Page 6 Upgrading the IP30 Firmware ........... . . 30 Upgrading the IP30 Firmware Using a Media Card ......30 Upgrading the IP30 Using SmartSystems Foundation.
-
Page 7: Before You Begin
Global Services and Support Warranty Information To understand the warranty for your Intermec product, visit the Intermec web site at www.intermec.com and click Support > Returns and Repairs > Warranty. -
Page 8: Service Location Support
This document is for the person who is responsible for installing, configuring, and maintaining the IP30. This document provides you with information about the features of the IP30, and how to install, configure, operate, maintain, and troubleshoot it. IP30 Handheld RFID Reader User’s Guide... -
Page 9: Related Documents
Before You Begin Related Documents Here are some related Intermec documents that you might find useful: • Basic Reader Interface Programmer’s Reference Manual • Intermec Computer Command Reference Manual The Intermec web site at www.intermec.com contains our documents (as .pdf files) that you can download for free. - Page 10 Before You Begin IP30 Handheld RFID Reader User’s Guide...
-
Page 11: Getting Started
Getting Started Use this chapter to familiarize yourself with the IP30 Portable RFID Reader. This chapter covers these topics: • Introducing the IP30 • Learning About the IP30 • Using the Battery • Attaching the IP30 • Establishing a Connection With the IP30... -
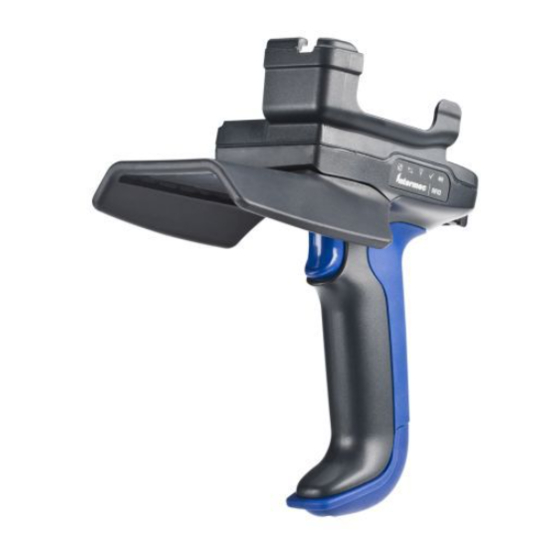
Page 12: Introducing The Ip30
Chapter 1 — Getting Started Introducing the IP30 The IP30 allows you to connect via Bluetooth or USB. Together, the IP30 and your mobile computer provide a high-performance mobile RFID solution that allows you to bring the read/write device to the tagged product rather than moving tagged products past a fixed reader. -
Page 13: Unpacking The Ip30
Chapter 1 — Getting Started Unpacking the IP30 When you unpack the IP30, these items are included: • IP30 RFID Handle • Product documentation • Mounting plates (for CK3 and CK61 Series Mobile Computers only) What You Need To use the IP30, you need these items: •... -
Page 14: Learning About The Ip30
Chapter 1 — Getting Started Learning About the IP30 This section explains the LEDs and ports on the IP30. Understanding the LEDs The IP30 has five LEDs that show you the operating status of the reader. LED Icon Descriptions LED Icon LED Name... -
Page 15: About The Intermec Ready-To-Work Indicator
Ready-to-Work indicator. Ready-To-Work Indicator Descriptions Description The IP30 is not yet ready for operation, or the IP30 is in low power mode. Blinking The IP30 is not associated with or connected to the mobile computer. -
Page 16: Understanding The Ports
Chapter 1 — Getting Started Understanding the Ports The USB version of the IP30 for the CK61 has two ports located on the IP30 adapter. To access these ports, you must remove the port cover. To remove the port cover •... -
Page 17: Using The Battery
Chapter 1 — Getting Started Using the Battery The IP30 uses the Model AB3 and Model AB19 batteries as a main power source. You must use the Model AB19 (P/N 318-037-001) battery for NI environments where flammable and explosive gases and vapors may be present. - Page 18 To install the battery 1 Insert the battery into the IP30. Battery release button 2 Once the battery is in the IP30, push the battery release button and slide the battery in until the battery is secure. IP30 Handheld RFID Reader User’s Guide...
-
Page 19: Attaching The Ip30
Attaching the IP30 to the CN3B or CN3F Mobile Computer This section explains how to connect the IP30 to the CN3 using a Bluetooth connection, a USB connection, or a USB connection connected to the Model AR6 Common Access Card Reader. - Page 20 “Establishing a Connection With the IP30” on page Otherwise, continue to the next step. If you are using the USB version of the IP30, insert the IP30 USB adapter into the docking connector until it snaps into place. IP30 Handheld RFID Reader User’s Guide...
-
Page 21: Attaching The Ip30 To The Cn4 Series Mobile Computer
Attaching the IP30 to the CN4 Series Mobile Computer This section explains how to connect the IP30 to the CN4 using a Bluetooth connection, a USB connection, or a USB connection connected to the Model AR6 Common Access Card Reader. - Page 22 Chapter 1 — Getting Started 2 Insert the CN4 into the IP30. 3 Lock the CN4 into place by lowering it into the IP30 locking bracket. 4 If you are using the Bluetooth version of the IP30, go to “Establishing a Connection With the IP30” on page Otherwise, continue to the next step.
- Page 23 Chapter 1 — Getting Started b Configure the IP30. For help, see “Configuring RFID Settings” on page 27. If the USB adapter has captive screws: a Remove the side fasteners from the CN4 by unscrewing the two screws located on the bottom of the CN4.
- Page 24 Insert the right-angle USB cable into the USB port located on the bottom of the AR6. c Wrap the Velcro strap around the AR6 to secure the USB cable. d Configure the IP30. For help, see “Configuring RFID Settings” on page 27. IP30 Handheld RFID Reader User’s Guide...
-
Page 25: Attaching The Ip30 To The Ck3 Series Mobile Computer
1 Remove the CK3 handstrap by removing the Phillips head screw. 2 Attach the mounting plate onto the CK3 by using the Phillips head screw provided with your IP30. Turn the screw clockwise to secure it onto the mobile computer. - Page 26 Chapter 1 — Getting Started 3 Lock the CK3 into place by lowering it into the IP30’s locking bracket. 4 If you are using the Bluetooth version of the IP30, go to “Establishing a Connection With the IP30” on page 22 establish a connection between your mobile computer and the IP30.
- Page 27 Chapter 1 — Getting Started b Configure the IP30. For help, see “Configuring RFID Settings” on page 27. If you are using the AR7 Common Access Card Reader: a Insert the AR7 into the docking connector until it snaps into place.
-
Page 28: Attaching The Ip30 To The Ck61 Series Mobile Computer
Attaching the IP30 to the CK61 Series Mobile Computer This section explains how to attach the Bluetooth and USB versions of the IP30 to your CK61. Before you attach the IP30, make sure you are using the correct mounting plates. CK61 mounting... - Page 29 2 Attach the correct mounting plate onto the CK61 and turn the quarter screw or screws clockwise to secure it onto the mobile computer. Attaching the CK61 Mounting Plate Attaching the CK61ex Mounting Plate IP30 Handheld RFID Reader User’s Guide...
- Page 30 Chapter 1 — Getting Started 3 Lock the CK61 into place by lowering it into the IP30 locking bracket. 4 If you are using the Bluetooth version of the IP30, establish a connection between your mobile computer and the IP30. For help, “Establishing a Connection With the IP30”...
- Page 31 Chapter 1 — Getting Started b Configure the IP30. For help, see “Configuring RFID Settings” on page 27. If you are using the Model AR5 Common Access Card Reader: a Insert the AR5 into the docking connector until it snaps into place.
-
Page 32: Establishing A Connection With The Ip30
Chapter 1 — Getting Started Establishing a Connection With the IP30 To use the IP30, you must first establish a connection between the IP30 and mobile computer using the Wireless Reader Wizard applet. Note: The USB version of the IP30 establishes a connection with your mobile computer once the IP30 USB adapter is plugged in. - Page 33 8 Tap Next. The computer connects to the reader and displays the remote device information. 9 Tap Finish. 10 Refresh Intermec Settings to see the Bluetooth reader under RFID. You can now configure and modify your device. For help, see “Configuring RFID Settings” on page...
- Page 34 Chapter 1 — Getting Started IP30 Handheld RFID Reader User’s Guide...
-
Page 35: Creating And Using Rfid Applications
Creating and Using RFID Applications This chapter explains how you can use RFID applications for the IP30 and includes these topics: • RFID Applications and the IP30 • Creating Applications for the IP30 • Configuring RFID Settings • Configuring the BRI Server... -
Page 36: Rfid Applications And The Ip30
Products > Applications and Software > Development Tools > Developer Resource Kits. Creating Applications for the IP30 You must create an application for the IP30 before it can read and write tags. Intermec recommends this general outline for developing your RFID application: •... -
Page 37: Configuring Rfid Settings
Chapter 2 — Creating and Using RFID Applications If you do not have an application but want to verify that your IP30 can read and write tags, you can download the Intermec demo application from the Intermec web site. To download the Intermec RFID demo application 1 Go to www.intermec.com... -
Page 38: Configuring The Bri Server
Computer Command Reference Manual. 4 Save your settings. Configuring the BRI Server The IP30 BRI server handles communications between your application and the RFID module. You can configure many settings for the BRI server. To configure BRI server settings 1 Go to Intermec Settings on your mobile computer. -
Page 39: Upgrading And Troubleshooting
Upgrading and Troubleshooting This chapter includes information on upgrading the IP30 and includes these topics: • Upgrading the IP30 Firmware • Troubleshooting the IP30 • Calling Intermec Product Support... -
Page 40: Upgrading The Ip30 Firmware
Chapter 3 — Upgrading and Troubleshooting Upgrading the IP30 Firmware This section explains how to upgrade the IP30 firmware using your mobile computer. There are two ways to upgrade your IP30: • Use a media card. Use SmartSystems Foundation. •... -
Page 41: Upgrading The Ip30 Using Smartsystems Foundation
Upgrading the IP30 Using SmartSystems Foundation You can use the SmartSystems Console to upgrade the firmware on your IP30. The console is part of SmartSystems Foundation, which is available from the Intermec web site. To upgrade firmware using SmartSystems Foundation 1 Make sure you have an active USB or Bluetooth connection with your mobile computer and IP30. -
Page 42: Calling Intermec Product Support
• What is the IP30 serial number? • What versions of the IP30 and RFID software are you using? For help viewing software versions, refer to your mobile computer user’s manual. When you have gathered this information, call Intermec Product Support at 1-800-755-5505. - Page 43 IP30. • Check to see if the mobile computer is working properly. If the device is busy, the IP30 will not be able to work as well if there are too many applications running in the background. •...
-
Page 44: Problems With Connectivity
Intermec Computer Command Reference value of 500. See the Manual. • Check your IP30 battery to see if it still has power. For help, see “Understanding the LEDs” on page 4. • You cannot connect to the Make sure that you have secured the USB adapter to your mobile IP30 via USB. -
Page 45: Specifications
Specifications This appendix includes physical and electrical specifications for the IP30 and information about the port pin assignments. -
Page 46: Ip30 Specifications
Read range (typical maximum) 915 MHz 457 cm (15 ft) 865-867 MHz, 869 MHz 198 cm (6.5 ft) Write range (typical maximum) 915 MHz 228 cm (7.5 ft) 865-867 MHz, 869 MHz 100 cm (3.3 ft) IP30 Handheld RFID Reader User’s Guide... -
Page 47: Port Pin Assignments
IP30 for the CK61. Serial Port (COM1) Pin 1 Pin 9 Serial Port Pin Assignments Description Active Polarity Receive data (RXD) High Transmit data (TXD) High Signal ground 5.0 V (up to 500 mA) IP30 Handheld RFID Reader User’s Guide... -
Page 48: Adapter Port
Appendix A — Specifications Adapter Port Pin 1 Ground Adapter Port Pin Assignment Description 12 V IP30 Handheld RFID Reader User’s Guide... - Page 50 Worldwide Headquarters 6001 36th Avenue West Everett, Washington 98203 U.S.A. tel 425.348.2600 fax 425.355.9551 www.intermec.com © 2010 Intermec Technologies Corporation. All rights reserved. IP30 Handheld RFID Reader User’s Guide *934-018-006* P/N 934-018-006...
Need help?
Do you have a question about the IP30 and is the answer not in the manual?
Questions and answers