
Related Manuals for Xerox PrimeLink B9100


Summary of Contents for Xerox PrimeLink B9100
- Page 1 Version 1.0 March 2020 702P07760 Xerox PrimeLink B9100/B9110/ ® ® B9125/B9136 Copier/Printer User Guide...
- Page 2 , and CentreWare ® are trademarks of Xerox Corporation in the United States and/or other countries. Product status, build status, and/or specifications are subject to change without notice. Microsoft, Windows, Windows XP, Windows Vista, Internet Explorer, and Word are registered trademarks of Microsoft Corporation in the United States and/or other countries.
-
Page 3: Table Of Contents
Table of Contents 1 Product Symbols for Xerox ® PrimeLink ® B9100/B9110/B9125/B9136 Copier/ Printer ..........................13 2 Safety ............................19 Notices and Safety......................... 20 Electrical Safety ........................21 General Guidelines ......................21 Power Cord ........................21 Emergency Power Off....................... 22 Electrical Supply....................... 22 Disconnect Device...................... - Page 4 Tab Margin Shift ......................68 Face Up/Down Output ..................... 68 ID Card Copy ........................69 Job Assembly Tab ........................70 Build Job.......................... 70 Sample Job ........................71 Combine Original Sets...................... 72 Form Overlay ........................72 Xerox ® PrimeLink ® B9100/B9110/B9125/B9136 Copier/Printer User Guide...
- Page 5 Email Print ........................101 Send from Folder........................103 Folder Types........................103 Copy & Print Jobs Tab ....................103 Printing Files from a Folder..................... 110 Scan & Other Jobs Tab ....................115 Job Flow ..........................118 Xerox ® PrimeLink ® B9100/B9110/B9125/B9136 Copier/Printer User Guide...
- Page 6 10 Paper and Media....................... 157 Supported Media ......................... 158 Recommended Media ....................158 Media That Can Damage Your Printer ................158 Supported Paper Types and Weights ................158 Supported Standard Paper Sizes..................160 Xerox ® PrimeLink ® B9100/B9110/B9125/B9136 Copier/Printer User Guide...
- Page 7 Problems with Sending Email ..................203 Paper Jams .......................... 204 Information About Paper Jams ..................204 Document Feeder Jams....................204 Document Jams Under the Document Feeder Belt ............207 Paper Jams in Trays 1–4....................208 Xerox ® PrimeLink ® B9100/B9110/B9125/B9136 Copier/Printer User Guide...
- Page 8 All Countries ........................246 North America ........................247 European Union........................248 Domestic and Household Environment................248 Professional and Business Environment ................248 Collection and Disposal of Equipment and Batteries............248 Battery Symbol ......................249 Xerox ® PrimeLink ® B9100/B9110/B9125/B9136 Copier/Printer User Guide...
- Page 9 G Interface Decurler Modules....................299 Interface Decurler Module Overview..................300 Finishing Accessories Requiring an Interface Decurler Module ..........301 Interface Decurler Module Components ................302 Control Panel on the Interface Decurler Module ............. 303 Xerox ® PrimeLink ® B9100/B9110/B9125/B9136 Copier/Printer...
- Page 10 Emptying the Crease and Two-Sided Trimmer Waste Container........351 Crease and Two-Sided Trimmer Troubleshooting ..............353 Crease and Two-Sided Trimmer Paper Jams ..............353 Crease and Two-Sided Trimmer Fault Messages ............. 368 Crease and Two-Sided Trimmer Specifications ..............370 Xerox ® PrimeLink ® B9100/B9110/B9125/B9136 Copier/Printer...
- Page 11 Trimmer Module Overview ................434 ® SquareFold ® Trimmer Components ..................435 SquareFold ® Trimmer Circuit Breaker ................435 Output Trays........................436 Control Panel ......................... 436 SquareFold ® Trimmer Paper Path ................... 437 Xerox ® PrimeLink ® B9100/B9110/B9125/B9136 Copier/Printer User Guide...
-
Page 12: User Guide
Trimmer Troubleshooting................. 444 SquareFold Trimmer Paper Jams .................. 444 ® SquareFold ® Trimmer Fault Messages ................447 Guidelines for Using the SquareFold ® Trimmer Device............ 447 SquareFold Trimmer Specifications ..................449 ® Xerox ® PrimeLink ® B9100/B9110/B9125/B9136 Copier/Printer User Guide... -
Page 13: Product Symbols For Xerox Primelink B9100/B9110/B9125/B9136 Copier/Printer
Product Symbols for Xerox PrimeLink ® ® B9100/B9110/B9125/B9136 Copier/ Printer Symbol Description Warning: Indicates a hazard that can cause serious injury or death if not avoided. Hot Warning: Hot surface on or in the printer. Use caution to avoid personal injury. -
Page 14: User Guide
Product Symbols for Xerox ® PrimeLink ® B9100/B9110/B9125/ B9136 Copier/Printer Symbol Description Do not burn the waste cartridge. Do not touch the surface of the drum cartridge. To avoid damage to the printer, do not open the document feeder wider than 40°... - Page 15 Product Symbols for Xerox ® PrimeLink ® B9100/B9110/B9125/ B9136 Copier/Printer Symbol Description Do not use transparencies or overhead projector sheets. Do not copy money. Add paper or media. Paper Jam Lock Unlock Paper Clip Cooling Elapsed Time Supply Paper Supply Paper Face Down...
-
Page 16: User Guide
Product Symbols for Xerox ® PrimeLink ® B9100/B9110/B9125/ B9136 Copier/Printer Symbol Description Indicates the direction to feed paper. Envelope print side up, flap down and closed. Heavy weight paper is equal to or greater than 117 g/m Toner Waste Container... - Page 17 Product Symbols for Xerox ® PrimeLink ® B9100/B9110/B9125/ B9136 Copier/Printer Symbol Description Job Status Button Printer Status Button Language Button Power Saver Button Sleep Mode Clear All Button Dial Pause Button This item can be recycled. Xerox ® PrimeLink ®...
-
Page 18: User Guide
Product Symbols for Xerox ® PrimeLink ® B9100/B9110/B9125/ B9136 Copier/Printer Xerox ® PrimeLink ® B9100/B9110/B9125/B9136 Copier/Printer User Guide... -
Page 19: Safety
This chapter contains: • Notices and Safety........................20 • Electrical Safety ......................... 21 • Laser Safety ..........................24 • Operational Safety........................25 • Maintenance Safety........................27 • Environmental, Health, and Safety Contact Information............. 28 Xerox ® PrimeLink ® B9100/B9110/B9125/B9136 Copier/Printer User Guide... -
Page 20: Notices And Safety
Safety requirements include safety agency evaluation and certification, and compliance with electromagnetic regulations and established environmental standards. The safety and environment testing and performance of this product have been verified using Xerox ® materials only. -
Page 21: Electrical Safety
These include safety agency evaluation and certification, and compliance with electromagnetic regulations and established environmental standards. The safety and environment testing and performance of this product have been verified using Xerox ® materials only. -
Page 22: Power Cord
E E m m e e r r g g e e n n c c y y P P o o w w e e r r O O f f f f If any of the following conditions occur, turn off the printer immediately and disconnect the power cord from the electrical outlet. Contact an authorized Xerox service representative to correct the problem if: •... -
Page 23: Disconnect Device
D D i i s s c c o o n n n n e e c c t t D D e e v v i i c c e e The power cable is the disconnect device for this equipment. To remove all electrical power from the machine, disconnect the power cable from the electrical outlet. Xerox ® PrimeLink ®... -
Page 24: Laser Safety
This product contains laser warning labels. These labels are intended for use by the Xerox Service Representative and are placed on or near panels or shields that require special tools for removal. Do not remove any of the panels. -
Page 25: Operational Safety
Ozone is heavier than air and is not produced in amounts large enough to harm anyone. Install the printer in a well-ventilated room. For more information in the United States and Canada, go to www.xerox.com/environment. In other markets, please contact your local Xerox representative or go to www.xerox.com/environment_europe. - Page 26 Agreement, and Total Satisfaction Guarantee do not cover damage, malfunction, or degradation of performance caused by use of non-Xerox supplies, or the use of Xerox supplies not specified for this printer. The Total Satisfaction Guarantee is available in the United States and Canada.
-
Page 27: Maintenance Safety
Safety requirements include safety agency evaluation and certification, and compliance with electromagnetic regulations and established environmental standards. Refer to these instructions to ensure the continued safe operation of your printer. For details, contact your Xerox ® representative. -
Page 28: Europe (Eu)
Safety Environmental, Health, and Safety Contact Information For more information on Environment, Health, and Safety in relation to this Xerox product and supplies, contact: • United States and Canada: 1-800-ASK-XEROX (1-800-275-9376) • Europe: EHS-Europe@xerox.com For product safety information in the United States and Canada, go to www.xerox.com/environment. -
Page 29: Getting Started
Getting Started This chapter contains: • Parts of the Printer ........................30 • Accessories ..........................34 • Power Options..........................40 • Print Server Overview ......................... 42 • More Information ........................43 Xerox ® PrimeLink ® B9100/B9110/B9125/B9136 Copier/Printer User Guide... -
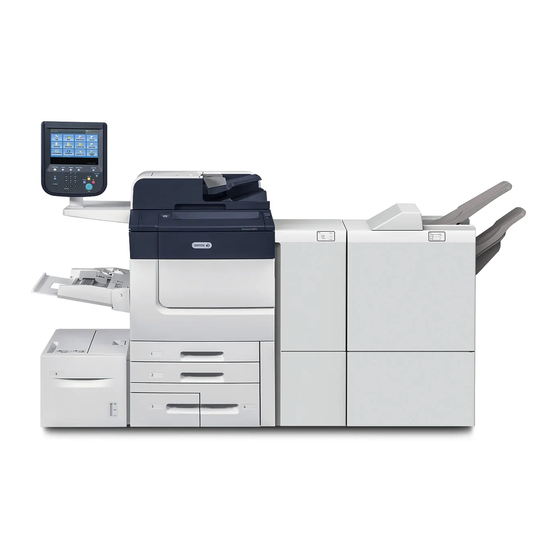
Page 30: Parts Of The Printer
5. Document glass 16. Optional Crease and Two-Sided Trimmer 6. User Interface (UI); Control Panel 17. Optional C/Z Folder 7. Optional Production Ready Finisher 8. Front cover 9. Left cover for toner Xerox ® PrimeLink ® B9100/B9110/B9125/B9136 Copier/Printer User Guide... -
Page 31: User Guide
3. Confirmation indicator 10. Waste toner container 4. Document guides 11. Fusing unit 5. Document feeder tray 12. Handle 6. Document output tray 13. Transfer module 7. Document stopper 14. Toner cartridge Xerox ® PrimeLink ® B9100/B9110/B9125/B9136 Copier/Printer User Guide... - Page 32 Press this button to verify the machine status, usage meters, the status of consumables, and to print reports. Job Status Press this button to verify or cancel the current job, to verify or print stored jobs, or to verify completed jobs. Xerox ® PrimeLink ® B9100/B9110/B9125/B9136 Copier/Printer...
- Page 33 Copy, Email, Network Scanning, Store to Folder, and Send from Folder. A system administrator can change the Services Home screen to display a specific feature, such as Copy. For more information, refer to the Xerox ® PrimeLink ®...
-
Page 34: Accessories
Getting Started Accessories Various optional feeding and finishing devices are available with your Xerox printer. The devices are discussed briefly on the following pages, along with where to find specific information on each device. F F e e e e d d i i n n g g A A c c c c e e s s s s o o r r i i e e s s The following optional feeding accessories are compatible with your printer. -
Page 35: Finishing Accessories
Getting Started Note: • The 2-Tray Oversized High Capacity Feeder (OHCF) is not available with Xerox ® PrimeLink ® B9100 Copier/Printer configuration. • The 1-Tray Oversized High Capacity Feeder (OHCF) is not available with Xerox ® PrimeLink ® B9136 Copier/Printer configuration. -
Page 36: User Guide
• Full-bleed processing for common sizes, including SRA4, oversized LTR, and more • A die set detection control panel shows the die type and cycle count • User die set options include comb, wire, coil, and 3–7 hole varieties to enable the most popular binding formats Xerox ® PrimeLink ®... - Page 37 ™ Pro, refer to the guide on the customer documentation disk that shipped with the device, or go to www.xerox.com and in the Search box, type GBC AdvancedPunch Pro. H H i i g g h h C C a a p p a a c c i i t t y y S S t t a a c c k k e e r r The High Capacity Stacker is an optional finishing device that provides large-capacity stacking and offsetting capabilities for production output to a stacker tray and cart.
- Page 38 • The Production Ready (PR) Booklet Maker Finisher provides all the same features as the PR Finisher. In addition, the PR Booklet Maker Finisher creates saddle-stitched booklets automatically of up to 30 sheets, and performs bi-folding, also called single-folding. Xerox ® PrimeLink ®...
- Page 39 ® Trimmer module flattens the spine of a booklet and performs a face trim of the booklet. The SquareFold ® Trimmer module is available only with the Production Ready Booklet Maker Finisher. Xerox ® PrimeLink ® B9100/B9110/B9125/B9136 Copier/Printer User Guide...
-
Page 40: Power Options
1. Press the power switch on top of the printer. The printer powers off. 2. To continue to power off the main power, ensure that the control panel touch screen is blank and the Power Saver indicator is not illuminated. 3. Open the front cover. Xerox ® PrimeLink ®... -
Page 41: Power Saver
E E x x i i t t i i n n g g t t h h e e P P o o w w e e r r S S a a v v e e r r M M o o d d e e 1. To exit the Power Saver mode, at the control panel, press the Power Saver button. 2. Send a print job to the printer or make copies at the printer. Xerox ® PrimeLink ®... -
Page 42: Print Server Overview
Getting Started Print Server Overview Xerox EX Print Server, Powered by Fiery is an optional device. When available, the Xerox EX Print ® ® ® Server can be used with your Xerox printer. Note: For detailed information, refer to the documentation that was shipped with your print server. -
Page 43: More Information
Before you contact Xerox for support, ensure that you have the serial number of your Xerox device. The serial number is on the Machine Information tab. To access the Machine Information tab, at the device control panel, press the Machine Status button, then touch Device Information. From the General Information area, note the serial number of your Xerox device. -
Page 44: User Guide
Getting Started Xerox ® PrimeLink ® B9100/B9110/B9125/B9136 Copier/Printer User Guide... -
Page 45: Printing
Printing This chapter contains: • Network Printing ........................46 • Network Tab Printing........................48 Xerox ® PrimeLink ® B9100/B9110/B9125/B9136 Copier/Printer User Guide... -
Page 46: Network Printing
6. On the Printing Options tab, select the appropriate settings for Job Type, Paper, 2–Sided or 1– Sided Printing, Finishing, Print Quality, and Output Destination. 7. Click the Image Options tab, then select the appropriate settings for Image Shift. Xerox ® PrimeLink ®... -
Page 47: Xerox ® Primelink ® B9100/B9110/B9125/B9136 Copier/Printer
10. To save and close the Properties window, click OK. 11. Select the needed copies, then click Print. Note: For additional information, in the print driver screen, click Help (?), then review the feature information. Xerox ® PrimeLink ® B9100/B9110/B9125/B9136 Copier/Printer... -
Page 48: Network Tab Printing
12. To save and close the Properties window, click OK. 13. Select the needed copies. To print the job, click Print. Note: For additional information, in the print driver screen, click Help (?), then review the feature information. Xerox ® PrimeLink ® B9100/B9110/B9125/B9136 Copier/Printer... -
Page 49: Copying
• Copying a Job with Tabs......................53 • Using the Copy Option....................... 54 • Image Quality..........................56 • Layout Adjustment ........................58 • Output Format ........................... 62 • Job Assembly Tab........................70 Xerox ® PrimeLink ® B9100/B9110/B9125/B9136 Copier/Printer User Guide... -
Page 50: Copying Using The Duplex Automatic Document Feeder
Note: The features that appear on the main Copy screen vary depending on how the system administrator configured the main Copy screen. 6. Enter the copy quantity. 7. Press the Start button. Xerox ® PrimeLink ® B9100/B9110/B9125/B9136 Copier/Printer User Guide... -
Page 51: Copying Using The Document Glass
The features that appear on the main Copy screen vary depending on how the system administrator configured the main Copy screen. 6. Enter the copy quantity using the numeric keypad. 7. Press the Start button. Xerox ® PrimeLink ® B9100/B9110/B9125/B9136 Copier/Printer... -
Page 52: Selecting Copy Options For A Dfa Finishing Device
You can select a job profile from the print server, the print driver on your computer, or the control panel touch screen on your Xerox PrimeLink device. Depending on the DFA device, a maximum of 12 profiles are available. Set up the DFA device with Paper Size, Staple, Cover, Staple Position, Fold Position, and other specifications that are required for your print job. -
Page 53: Copying A Job With Tabs
Touch Shift to Tab, then follow the tab-loading instructions. Review your tab stock selections. b. Touch Save. 8. Enter the required output quantity using the numeric keypad. 9. To begin copying, press Start. Xerox ® PrimeLink ® B9100/B9110/B9125/B9136 Copier/Printer... -
Page 54: Using The Copy Option
You can copy one or both sides of 1-sided and 2-sided documents. 1. From the Copy screen, in the 2 Sided Copying area, select the copy options for your job. 2. If you want Side 2 rotated head-to-foot, select the check box for Rotate Side 2. Xerox ® PrimeLink ®... - Page 55 D D a a r r k k e e n n / / L L i i g g h h t t e e n n You can adjust the copy density to one of seven levels from the Copy screen, in the Darken/Lighten area. To adjust the density, you can touch the left or right arrows on the touch screen. Xerox ® PrimeLink ®...
-
Page 56: Image Quality
To produce an image with a smooth, uniform appearance, and soften the image, move down the slider control. This setting is suited ideally for photographic scanned images. – To produce an image with better quality text or line art, and sharpen the image, move up the slider control. Xerox ® PrimeLink ® B9100/B9110/B9125/B9136 Copier/Printer... - Page 57 1. From the Copy screen, touch the Image Quality option. 2. Touch Background Suppression. 3. For no background suppression, touch Off. For automatic background suppression, touch Auto Suppression. 4. To save the changes, touch Save. Xerox ® PrimeLink ® B9100/B9110/B9125/B9136 Copier/Printer...
-
Page 58: Layout Adjustment
3. To specify the copy start page and copy end page, touch Starting & Ending Page. • For Starting Page: Touch Left Page or Right Page. • For Ending Page: Touch Left Page or Right Page. Xerox ® PrimeLink ®... - Page 59 7. To cancel edge erase, touch Print to Edge. 8. If you saved the preset values such as Hole Punch Erase or Header/Footer Erase, you can select the preset in the lower-left corner of the screen. 9. Touch Save. Xerox ® PrimeLink ®...
- Page 60 1. On the Services Home screen, touch Copy, then touch the Layout Adjustment tab. 2. Touch Invert Image. The default is Normal Image, which does not mirror the images. Xerox ® PrimeLink ®...
- Page 61 • Sideways Images 4. Touch Save. Note: If the Original Orientation setting differs from the physical document orientation, the printer can mistakenly detect the wrong side as the head or top of the document. Xerox ® PrimeLink ® B9100/B9110/B9125/B9136 Copier/Printer...
-
Page 62: Output Format
Subset, touch the Plus (+) or Minus (–) icons, then touch Save. 8. Offset Stacking places each stack of printed pages slightly to the left or right of the previous stack for easier separation. To set the offset stacking options: Xerox ® PrimeLink ®... - Page 63 P P a a g g e e L L a a y y o o u u t t The Page Layout feature has two options: • Pages per Side • Repeat Image Xerox ® PrimeLink ® B9100/B9110/B9125/B9136 Copier/Printer...
-
Page 64: User Guide
You can specify how the repeated copies of the image are arranged. Note: When making repeat copies at the same size as the document image, you can specify a number of repeated images that fit on the paper. Xerox ® PrimeLink ®... - Page 65 F F o o l l d d i i n n g g If the Xerox device is equipped with a Folding option, you can select folds for your job. For example, if a C-fold or Z-fold type is available, the device can fold your job in thirds. For information about each...
- Page 66 Auto Assign, then touch Save. h. To select a specific number of digits, touch Manual Assign. To insert up to nine leading zeros, touch the Plus (+) or Minus (–) icons. Touch Save. i. Touch Save. Xerox ® PrimeLink ®...
- Page 67 S S e e c c u u r r e e W W a a t t e e r r m m a a r r k k Secure Watermark, sometimes called a hybrid watermark, is an optional feature and requires the purchase of an optional package. For information, contact Xerox Technical Customer Support. Secure Watermark is a security-management feature that embeds a copy-protection digital code into a document to restrict the document from being copied.
- Page 68 Secure Watermark kit is not installed on the Xerox device. T T a a b b M M a a r r g g i i n n S S h h i i f f t t You can copy images to a tab location on tabbed paper.
- Page 69 • Face Up (Reverse Order): This option delivers all output face up, with the last page on the top of the output stack. The availability of the Face Up (Reverse Order) option depends on how your system administrator configured the Xerox device. 4. Touch Save.
-
Page 70: Job Assembly Tab
To scan the next set of original documents, at the control panel, press the green Start button. 4. For each additional segment that you want to copy, repeat Step 3. 5. When all segments are scanned, on the Copy screen, touch Last Original. Xerox ® PrimeLink ®... - Page 71 5. Press the green Start button. The sample set prints. 6. To print the remaining copies of the job, touch Start, or press the green Start button on the control panel. 7. If the sample copy is unsatisfactory, touch Delete. Xerox ® PrimeLink ®...
- Page 72 D D e e l l e e t t e e O O u u t t s s i i d d e e / / D D e e l l e e t t e e I I n n s s i i d d e e 1. At the control panel, on the Services Home screen, touch Copy, then touch the Job Assembly tab. 2. Touch Delete Outside/Delete Inside. 3. Touch Delete Outside or Delete Inside. Xerox ® PrimeLink ®...
- Page 73 If you change the values of the Watermark feature when a watermark is used in a stored program, the stored program becomes invalid. – After the program is stored, if you change the password to the folder that is used in the stored program, the stored program becomes invalid. Xerox ® PrimeLink ® B9100/B9110/B9125/B9136 Copier/Printer...
-
Page 74: User Guide
Copying • The following options cannot be used with the Stored Programming feature: – System Settings – Job Flow Sheets – Network Scanning – Address Book – Browse – Scan to PC Xerox ® PrimeLink ® B9100/B9110/B9125/B9136 Copier/Printer User Guide... -
Page 75: Scanning
• Send from Folder........................103 • Job Flow ..........................118 Features for the Scanning device are explained in this section. There are various ways to scan a job as well as where the scanned output should reside when finished. Xerox ® PrimeLink ®... -
Page 76: Basic Scanning
• Document feeder: Load the document face up, then adjust the document guides to match the size of the document that you loaded. • Document glass: Load the document face down, position the document using the rulers and size guides, then close the scanner cover. Xerox ® PrimeLink ®... -
Page 77: Scan Methods
Place the document that you want to scan in the document feeder or on the document glass, then touch Start. 6. When scanning the last original document, touch Save (Last Original), then touch Start. 7. To view the status of the scanned job, press the Job Status button. Xerox ® PrimeLink ®... - Page 78 Options. • Original Orientation • 2 Sided Scanning: Refer to 2-Sided Scanning. • Original Size 4. After you have adjusted the settings, touch Save. 5. To resume scanning the job, touch Start. Xerox ® PrimeLink ® B9100/B9110/B9125/B9136 Copier/Printer User Guide...
-
Page 79: Scan Settings
• Quality / File Size • Photographs • Shadow Suppression Layout Adjustment Options on this tab include: • Original Orientation • Book Scanning • Original Size • Reduce / Enlarge • Edge Erase Xerox ® PrimeLink ® B9100/B9110/B9125/B9136 Copier/Printer User Guide... -
Page 80: Filing Options
4. After the document scans, touch Preview. 5. To specify display and rotation options, select the appropriate icons. Note: Rotation options are not available for all scan methods. 6. To close the preview screen, touch Close. Xerox ® PrimeLink ® B9100/B9110/B9125/B9136 Copier/Printer... - Page 81 The device identifies text and photo areas automatically, then scans each area for optimum quality. • Text: When you scan a document that contains clear text, select this option. • Photo: When you scan a photo, select this option. Xerox ® PrimeLink ®...
- Page 82 1. From the Services Home window, select a scan method. 2. Select the Advanced Settings tab. 3. Select options, as needed: • Image Options • Image Enhancement • Resolution • Quality / File Size • Photographs • Shadow Suppression Xerox ® PrimeLink ® B9100/B9110/B9125/B9136 Copier/Printer User Guide...
- Page 83 • For Contrast, on the bar, select a contrast level. More contrast makes the difference between light and dark areas greater so that light areas become lighter and dark areas become darker. Less contrast makes the difference between light and dark areas smaller. 3. Touch Save. Xerox ® PrimeLink ®...
- Page 84 S S h h a a d d o o w w S S u u p p p p r r e e s s s s i i o o n n You can use the Shadow Suppression feature to hide background colors and image bleed-through. 1. From the Advanced Settings tab, select Shadow Suppression. 2. Select Off or Auto Suppression. 3. Select Save. Xerox ® PrimeLink ® B9100/B9110/B9125/B9136 Copier/Printer...
- Page 85 If the Original Orientation setting differs from the physical document orientation, the Xerox device can mistakenly detect the wrong side as the top of the document. O O r r i i g g i i n n a a l l S S i i z z e e When you scan standard-sized and custom-sized documents or when you make copies at a size that is different than the currently loaded document, you can specify the size of the document.
-
Page 86: User Guide
R R e e d d u u c c e e / / E E n n l l a a r r g g e e The Reduce/Enlarge feature allows you specify a reduction or enlargement value for the scanned document. 1. From the Layout Adjustments tab, select Reduce/Enlarge. 2. Select the appropriate options for your job: Xerox ® PrimeLink ® B9100/B9110/B9125/B9136 Copier/Printer... - Page 87 • PDF: This option saves scanned data in PDF format. • PDF/A: This option saves scanned data in PDF/A format. The PDF/A format is used primarily for archiving and long-term file preservation. • XPS: This option saves scanned data in XPS format. Xerox ® PrimeLink ®...
- Page 88 • Overwrite Existing File: This option deletes the existing file with the duplicate file name, then saves the new file with the specified file name in the same directory. 3. Touch Save. Xerox ® PrimeLink ®...
- Page 89 HTML links to the PDF documents and keep path names or URLs to the files at fewer than 256 characters. • Single File for Each Page: This option saves each page as a single file in the specified format. 3. To save your settings, touch Save. Xerox ® PrimeLink ®...
- Page 90 R R e e a a d d R R e e c c e e i i p p t t s s To allow email read receipts to be sent to the sender: 1. At the control panel, on the Email Options tab, touch Read Receipts. 2. Touch On. 3. Touch Save. Xerox ® PrimeLink ® B9100/B9110/B9125/B9136 Copier/Printer...
-
Page 91: Network Scanning
• To view a description of the selected template, touch Template Description. After viewing the description, touch Close. Template descriptions are optional. • To refresh the template list, touch Update Templates. 5. Adjust scan settings as needed. Refer to Scan Settings. 6. Press the Start button. Xerox ® PrimeLink ® B9100/B9110/B9125/B9136 Copier/Printer User Guide... -
Page 92: Scan To Pc
• SMB: This option transfers files using the SMB protocol. • SMB (UNC Format): This option transfers files using the SMB protocol, with the Universal Naming Convention (UNC) format. The UNC format is as follows: \\host name\shared name\directory name 3. Touch Save. Xerox ® PrimeLink ® B9100/B9110/B9125/B9136 Copier/Printer... -
Page 93: User Guide
2. For Shared Name, type a shared name. When the save location is in the DFS namespace on Windows, type a root name of up to 64 characters. The Shared Name field appears only when SMB is the selected transfer protocol. Xerox ® PrimeLink ®... - Page 94 4. For User Name, type the user name of the computer to which you are forwarding. When a user name is not required for the destination, you can skip this field. 5. For Password, type the password for the user name. Up to 32 characters are allowed. Xerox ® PrimeLink ®...
-
Page 95: Store To Folder
11. If a stored file is no longer needed, select the file. In the upper right corner of the page, click Delete. When prompted, click OK. Additional File Retrieve Options The following options are available when using the Embedded Web Server to retrieve a stored file: Xerox ® PrimeLink ®... - Page 96 From the Language of the Original menu, select the language. – To apply text compression, from the Text Compression menu, select Enabled. Note: Not all the file retrieval settings can be enabled. For assistance, contact your system administrator. Xerox ® PrimeLink ® B9100/B9110/B9125/B9136 Copier/Printer User Guide...
-
Page 97: Store To Usb
4. Select a folder for saving the data. 5. Touch Save. 6. Adjust scan settings, as needed. For details, refer to Scan Settings. 7. To start the scan job, press the Start button. Xerox ® PrimeLink ® B9100/B9110/B9125/B9136 Copier/Printer User Guide... - Page 98 D D i i s s p p l l a a y y i i n n g g S S t t o o r r a a g g e e D D e e t t a a i i l l s s 1. At the control panel, on the Services Home screen, touch Store to USB. 2. Touch Details. The folder and file names to be saved appear. 3. Touch Close. Xerox ® PrimeLink ® B9100/B9110/B9125/B9136 Copier/Printer...
-
Page 99: Web Services On Devices (Wsd)
4. Load the document onto the document glass or into the document feeder. 5. Press the Start button. The scanned data is forwarded to the specified destination. 6. On the destination computer, check the forwarded data. Xerox ® PrimeLink ®... -
Page 100: Email
• Search Network: This option searches recipients in the remote address list. 5. Specify the To, CC, or BCC fields. 6. To navigate the Name list, use the scroll-bar. 7. If necessary, to view the Details screen, touch Details. 8. Touch Close. Xerox ® PrimeLink ® B9100/B9110/B9125/B9136 Copier/Printer... -
Page 101: Subject
E E m m a a i i l l P P r r i i n n t t You can send email with TIFF, JPEG, or PDF documents attached from a computer to the Xerox device. Received email is printed automatically. This feature is called Email Print. -
Page 102: User Guide
• The number of files that you can attach to an email depends on the file-size limit allowed on the server. 2. For the email recipient, enter the email address of the Xerox printer. Note: You can view the email address of the printer on the printer Configuration Report. -
Page 103: Send From Folder
• Edit Pages: Insert a file or separator pages. • Merge / Batch Print: Merge multiple files in the folder, then batch-print the files. • Change Settings / Print: Change the file settings before you print the files. Xerox ® PrimeLink ®... - Page 104 3. Select the Copy & Print Jobs tab. From the list, select the folder that contains the file to be moved. 4. Select a file, then touch Copy / Move. 5. Touch Move. 6. Select the destination folder for the file, then touch Save. Xerox ® PrimeLink ® B9100/B9110/B9125/B9136 Copier/Printer...
- Page 105 3. Select the Copy & Print Jobs tab. From the list, select the folder that contains the file to be inserted. 4. Select a file, then touch Insert File. 5. Select the file that you want to insert, then touch Save. Xerox ® PrimeLink ®...
- Page 106 1. At the control panel, press the Services Home button. 2. Touch Send from Folder. 3. Select the Copy & Print Jobs tab, then select a folder. 4. Select a file. 5. Touch Review. The file settings appear. Xerox ® PrimeLink ® B9100/B9110/B9125/B9136 Copier/Printer...
- Page 107 1. At the control panel, press the Services Home button. 2. Touch Send from Folder. 3. Select the Copy & Print Jobs tab. From the list, select a folder. 4. Select a file, then touch Change Settings / Print. 5. Touch Covers. Xerox ® PrimeLink ® B9100/B9110/B9125/B9136 Copier/Printer...
-
Page 108: User Guide
After merging files, use this option to program stapling, hole-punching, and Z-fold settings. 1. At the control panel, press the Services Home button. 2. Touch Send from Folder. 3. Select the Copy & Print Jobs tab. From the list, select a folder. Xerox ® PrimeLink ®... - Page 109 1. At the control panel, press the Services Home button. 2. Touch Send from Folder. 3. Select the Copy & Print Jobs tab, then select a folder. 4. Select a file, then select an option. Xerox ® PrimeLink ® B9100/B9110/B9125/B9136 Copier/Printer...
- Page 110 1. At the control panel, press the Services Home button. 2. Touch Send from Folder. 3. Select the Copy & Print Jobs tab. From the list, select a folder. 4. Select a file, then touch Change Settings / Print. 5. Touch Output. Xerox ® PrimeLink ® B9100/B9110/B9125/B9136 Copier/Printer...
- Page 111 4. Select a file, then touch Change Settings / Print. 5. Touch Folding. 6. Touch Fold / Crease. 7. Select an option: • Last Saved Settings • Off • Fold Only • Crease Only Xerox ® PrimeLink ® B9100/B9110/B9125/B9136 Copier/Printer User Guide...
- Page 112 1. At the control panel, press the Services Home button. 2. Touch Send from Folder. 3. Select the Copy & Print Jobs tab, then select a folder. 4. Select a file, then touch Change Settings / Print. 5. Touch Image Shift. Xerox ® PrimeLink ® B9100/B9110/B9125/B9136 Copier/Printer...
- Page 113 5. Touch Annotations. 6. Touch Last Saved Settings or Change Settings. 7. If you selected Change Settings, select an option: • Format & Style • Comment • Date • Page Numbers • Bates Stamp Xerox ® PrimeLink ® B9100/B9110/B9125/B9136 Copier/Printer User Guide...
-
Page 114: User Guide
1. At the control panel, press the Services Home button. 2. Touch Send from Folder. 3. Select the Copy & Print Jobs tab, then select a folder. 4. Select a file, then touch Change Settings / Print. 5. Touch Add Tab Stock. Xerox ® PrimeLink ® B9100/B9110/B9125/B9136 Copier/Printer... -
Page 115: Job Flow Overview
C C h h e e c c k k i i n n g g F F i i l l e e D D e e t t a a i i l l s s 1. At the control panel, press the Services Home button. 2. Touch Send from Folder. 3. On the Folder - File List screen, select a file. Xerox ® PrimeLink ®... -
Page 116: Folders
Machine Status menu. For details, refer to Linking a Job Flow Sheet to a Folder. 1. At the control panel, press the Services Home button. 2. Touch Send from Folder. 3. Select the Scan & Other Jobs tab. Xerox ® PrimeLink ® B9100/B9110/B9125/B9136 Copier/Printer User Guide... - Page 117 6. Select a job flow sheet to link to the folder. 7. Touch Save. Job Flow Restrictions A job flow sheet can be used by only one user, can be shared by multiple users, or can be used for only certain folders. Xerox ® PrimeLink ® B9100/B9110/B9125/B9136 Copier/Printer...
-
Page 118: Job Flow
• The job flow sheet feature is available only when the Network Scanning Kit is installed on the device. Note: For additional job flow sheet information, including authentication and folders, refer to the Xerox ® PrimeLink ® B9100/B9110/B9125/B9136 Copier/Printer System Administrator Guide. - Page 119 Remove: You can delete all information for the selected recipients. – Edit: You can confirm or change information for the selected recipients. • File Format: You can specify the file format for the scanned output. Xerox ® PrimeLink ® B9100/B9110/B9125/B9136 Copier/Printer...
-
Page 120: User Guide
• Address Book: When the server address is registered in the address book, you can use the address book to specify the address. The address appears on the SMB Transfer screen. • Resend Attempts: You can set the number of times and the frequency that the device attempts to resend the information. Xerox ® PrimeLink ®... - Page 121 • To delete the settings for the selected item, touch Delete. At the prompt, touch Delete. 7. To save the changes to the job flow sheet, touch Save. 8. To exit the Create Job Flow Sheet screen, touch Close. Xerox ® PrimeLink ®...
- Page 122 If your administrator has not defined any keywords, the Select Keyword option is not available. To search for a job flow sheet: 1. At the control panel, press the Machine Status button. 2. On the Tools tab, touch Setup→Setup→Create Job Flow Sheet Xerox ® PrimeLink ® B9100/B9110/B9125/B9136 Copier/Printer...
- Page 123 C C r r e e a a t t i i n n g g a a F F o o l l d d e e r r To create a folder: 1. At the control panel, press the Machine Status button. 2. On the Tools tab, touch Setup→Setup→Create Folder. 3. Select an available folder. Xerox ® PrimeLink ® B9100/B9110/B9125/B9136 Copier/Printer...
- Page 124 7. To set the job flow sheet to execute automatically when a new document is saved to the folder, select Auto Start. If you do not select Auto Start, you are required to execute the job flow manually. For details, refer to Starting a Job Flow Manually. Xerox ® PrimeLink ® B9100/B9110/B9125/B9136 Copier/Printer...
- Page 125 If there are no files in the folder, scan and store a file to the folder. For details, refer Store to Folder. 6. After selecting files, you can view the file settings or make changes to the way that the files are processed. Xerox ® PrimeLink ® B9100/B9110/B9125/B9136 Copier/Printer...
-
Page 126: User Guide
7. To execute the job flow, touch Job Flow Settings, then touch Start Current Job Flow. The job flow sheet executes the job flow on the files that you selected in the folder. 8. To close the folder, touch Close. Xerox ® PrimeLink ®... -
Page 127: Stored Programming
• Naming or Renaming a Stored Program ................... 131 • Notes and Restrictions on Registering Stored Programs ............132 • Calling a Stored Program ......................134 • Deleting Stored Programs ......................136 • Stored Program Icons....................... 137 Xerox ® PrimeLink ® B9100/B9110/B9125/B9136 Copier/Printer... -
Page 128: Stored Programming Overview
System Settings, Job Flow Sheets, Network Scanning, Address Book and the Browse feature for Scan to PC cannot be used with Stored Programming. For a complete list of notes and restrictions, refer to Notes and Restrictions on Registering Stored Programs. Xerox ® PrimeLink ® B9100/B9110/B9125/B9136 Copier/Printer... -
Page 129: Storing A Program
To cancel registration, press the Interrupt button. Note: At the time the program is stored, the assigned program name is (No Name). To rename a stored program, refer to Naming or Renaming a Stored Program. Xerox ® PrimeLink ® B9100/B9110/B9125/B9136 Copier/Printer User Guide... -
Page 130: Storing A Program For Build Job
• The Build Job icon is assigned automatically to the stored program and cannot be changed. 7. Load the first original document into the document feeder or on the document glass. 8. Set the feature options for this document, as needed. After changing each setting, touch Save. Xerox ® PrimeLink ®... -
Page 131: Naming Or Renaming A Stored Program
To return to the previous screen or to advance to the next screen, touch the up and down arrows. 5. Type the new name for the stored program, then touch Save. 6. Touch Close. Xerox ® PrimeLink ® B9100/B9110/B9125/B9136 Copier/Printer... -
Page 132: Notes And Restrictions On Registering Stored Programs
The Custom button to which the Network Scanning or Job Flow Sheets service is assigned. – Buttons that cannot be selected – The Language button on the Services Home screen – The Screen Brightness button on the Services Home screen Xerox ® PrimeLink ® B9100/B9110/B9125/B9136 Copier/Printer User Guide... -
Page 133: User Guide
• A stored program registration is canceled in the following cases: – When the Interrupt button is pressed – When the Auto Clear feature causes a time-out – When a pop-up window, such as a paper jam window, appears Xerox ® PrimeLink ® B9100/B9110/B9125/B9136 Copier/Printer User Guide... -
Page 134: Calling A Stored Program
9. From the list of stored Build Job programs, select the stored Build Job program that contains the features that you want to use for the next segment of the job. 10. If necessary, change the settings, then press the Start button. Xerox ® PrimeLink ®... - Page 135 After the last set of original documents scans, touch Last Original. As the job processes, for each segment, the settings from the stored Build Job program that you selected for that segment are applied. 12. To exit, press the Clear All button. Xerox ® PrimeLink ® B9100/B9110/B9125/B9136 Copier/Printer...
-
Page 136: Deleting Stored Programs
2. Touch the Tools tab, then touch Stored Programming. 3. Touch Delete. 4. Select the stored program that you want to delete. 5. To confirm the deletion, touch Delete. 6. Touch Close. Note: Deleted stored programs cannot be restored. Xerox ® PrimeLink ® B9100/B9110/B9125/B9136 Copier/Printer User Guide... -
Page 137: Stored Program Icons
To return to the previous screen or to advance to the next screen, touch the up and down arrows. 5. Select an icon, then touch Save. The icon is added to the stored program and appears on the button for the stored program. Xerox ® PrimeLink ®... - Page 138 Stored Programming Xerox ® PrimeLink ® B9100/B9110/B9125/B9136 Copier/Printer User Guide...
-
Page 139: Media Print - Text
• Supported File Formats ......................141 • Notes and Restrictions ......................142 • Selecting Media Files from a USB Memory Device ..............143 • Printing a Password-Protected PDF ................... 144 • Setting the Printing Options ..................... 145 Xerox ® PrimeLink ® B9100/B9110/B9125/B9136 Copier/Printer... -
Page 140: Media Print - Text Overview
• When powering off or powering on the printer, or disconnecting or connecting the USB memory device • When receiving the effect of electrical noise or an electrical discharge • When a failure or repair occurs • When damage results from a natural calamity Xerox ® PrimeLink ® B9100/B9110/B9125/B9136 Copier/Printer... -
Page 141: Supported File Formats
– If a filename contains characters that are not supported by the printer, the filename does not appear onscreen. – Filenames can be 1–240 characters. Xerox ® PrimeLink ® B9100/B9110/B9125/B9136 Copier/Printer User Guide... -
Page 142: Notes And Restrictions
USB memory device. • To print a password-protected PDF, ensure that the printer is configured with the password that opens the PDF. Refer to Printing a Password-Protected PDF. Xerox ® PrimeLink ® B9100/B9110/B9125/B9136 Copier/Printer User Guide... -
Page 143: Selecting Media Files From A Usb Memory Device
7. Adjust the settings as needed. For details, refer to Setting the Printing Options. Depending on the types of files stored in the USB memory device or the directory configuration, all files selected may not print. 8. Press Start. Xerox ® PrimeLink ® B9100/B9110/B9125/B9136 Copier/Printer User Guide... -
Page 144: Printing A Password-Protected Pdf
1. At the control panel, press Machine Status. 2. Touch Others →Print Mode→PDF→Password. The Print Mode option is set to Online by default. 3. Type a password, then touch Save. If prompted to confirm, type the password again, then touch Save. Xerox ® PrimeLink ® B9100/B9110/B9125/B9136 Copier/Printer... -
Page 145: Setting The Printing Options
Paper Type: From the list, select the required paper type. 2 Sided Printing 1 Sided Long Edge Flip Short Edge Flip Output Staple • 1 Staple • 2 Staples Hole Punch • 2 Holes • 3 Holes Xerox ® PrimeLink ® B9100/B9110/B9125/B9136 Copier/Printer User Guide... -
Page 146: Index Print
• A4: 210 x 297 mm (8.5 x 11 in.) • A4 (8.5 x 11 in.) Short Edge Feed (SEF) 2 Sided Printing Off: Only 1 Sided printing is available Output Pages per Side Xerox ® PrimeLink ® B9100/B9110/B9125/B9136 Copier/Printer User Guide... -
Page 147: Job And Machine Status
Job and Machine Status This chapter contains: • Job Status..........................148 • Machine Status........................152 Xerox ® PrimeLink ® B9100/B9110/B9125/B9136 Copier/Printer User Guide... -
Page 148: Job Status
6. To print a report for the selected job, select an option: • Print this Job History Report: This option prints a detailed history report for the selected job. • Print this Job Report: This option prints a report for the selected job. Xerox ® PrimeLink ®... -
Page 149: Secure Print Jobs & More Tab
8. Select an option: • To delete the selected job, touch Delete. To confirm the deletion, touch Delete. • To print the selected job, using the numeric keypad, type the number of sets to print, then touch Print. Xerox ® PrimeLink ®... -
Page 150: User Guide
Preview feature is not available. 5. Select an option: • To delete the selected job, touch Delete. To confirm the deletion, touch Delete. • To print the selected Delayed Print job immediately, touch Print. Xerox ® PrimeLink ® B9100/B9110/B9125/B9136 Copier/Printer... - Page 151 7. From the list that appears, select a document. 8. Select an option: • To print the selected document, touch Print. • To delete the selected document, touch Delete. 9. Touch Close. Xerox ® PrimeLink ® B9100/B9110/B9125/B9136 Copier/Printer User Guide...
-
Page 152: Machine Status
Device Serial Number: The device serial number appears in the General Information area. Use the serial number when you call Xerox for technical information or assistance. Current System Software: In the General Information area, you can view the version of the system software that is installed on the printer. -
Page 153: Faults Tab
Overwrite Hard Disk The Overwrite Hard Disk feature prevents the document image and registered data that is recorded on the Xerox device hard disk from being retrieved illegally. The number of overwrites is set by the system administrator. Overwriting the device hard disk is performed after every copy job that includes more than one set, and after each scan job is transferred to the print server. -
Page 154: Supplies Tab
Impression Counters This option displays the total number of impressions. An impression is the image on one side of one sheet of media. This counter shows the total impression amount for copied, printed, and large impressions. Xerox ® PrimeLink ®... -
Page 155: Tools Tab
B4 (8.5 x 14 in.). Sheet Counters This option provides information on the total number of sheets that the Xerox device feeds to the output area. Each sheet counts as one click on the counter, regardless of whether the sheet is a one-sided or two-sided copy or print job. -
Page 156: User Guide
6. If the settings are correct, touch Save. If the settings are not correct, select the correct Paper Type, then touch Save. The previous screen appears. 7. Touch Confirm. The Paper Tray Attributes screen appears. 8. Touch Close. Xerox ® PrimeLink ® B9100/B9110/B9125/B9136 Copier/Printer User Guide... -
Page 157: Paper And Media
Paper and Media This chapter contains: • Supported Media ........................158 • Guidelines for Loading, Printing, and Storing Media..............162 • Loading Media......................... 164 Xerox ® PrimeLink ® B9100/B9110/B9125/B9136 Copier/Printer User Guide... -
Page 158: Supported Media
R R e e c c o o m m m m e e n n d d e e d d M M e e d d i i a a A complete list of recommended media types is available at: • North America: www.xerox.com/rmlna. Select PrimeLink ®... - Page 159 Specifications. • For paper types and weights for Trays 6 and 7, refer to High Capacity Feeder Specifications OHCF Specifications. • To optimize image quality, change the weight range. Refer to the Xerox ® PrimeLink ® B9100/ B9110/B9125/B9136 Copier/Printer System Administrator Guide, in the Paper Tray Settings section.
- Page 160 Letter (216 x 279 mm, 8.5 x 11 in.) Special A4 (226 x 310 mm, 8.9 x 12.2 in.) 16K (Taiwan) (194 x 267 mm, 7.64 x 10.51 in.) 16K (Mainland China) (195 x 270 mm, 7.68 x 10.63 in.) Xerox ® PrimeLink ®...
- Page 161 Short Edge Feed (SEF) landscape orientation • Trays 3 and 4 have automatic size-detection capability Note: Before using the automatic size-detection feature, ask your system administrator to change the NVM settings for automatic size detection. Xerox ® PrimeLink ® B9100/B9110/B9125/B9136 Copier/Printer...
-
Page 162: Guidelines For Loading, Printing, And Storing Media
P P r r i i n n t t i i n n g g o o r r C C o o p p y y i i n n g g o o n n G G l l o o s s s s y y P P a a p p e e r r You can print glossy, or coated, paper from the Oversized High Capacity Feeder (OHCF) Trays 6, and 7. Xerox ®... -
Page 163: User Guide
• Some special paper is packaged inside resealable plastic bags. Store the media inside the bag until you are ready to use the media. Keep unused media in the bag, then reseal it for protection. Xerox ® PrimeLink ®... -
Page 164: Loading Media
For Paper Type / Paper Weight, Paper Size, and Paper Color, select options as needed. b. If necessary, make the desired changes to paper curl and alignment adjustment. Note: For detailed information on the paper curl and alignment adjustment options, refer to the Xerox® ® PrimeLink® ®... - Page 165 For Paper Type / Paper Weight, Paper Size, and Paper Color, select options as needed. b. If necessary, make changes to the paper curl and alignment adjustment options. Note: For detailed information on the paper curl and alignment adjustment options, refer to the Xerox® PrimeLink® B9100/B9110/B9125/B9136 Copier/Printer System ®...
- Page 166 For Paper Type / Paper Weight, Paper Size, and Paper Color, select options as needed. b. If necessary, make changes to the paper curl and alignment adjustment options. Note: For detailed information on the paper curl and alignment adjustment options, refer to the Xerox® ® PrimeLink® ®...
- Page 167 For Paper Type / Paper Weight, Paper Size, and Paper Color, select options as needed. b. If necessary, make changes to the paper curl and alignment adjustment options. Note: For detailed information on the paper curl and alignment adjustment options, refer to the Xerox® PrimeLink® B9100/B9110/B9125/B9136 Copier/Printer System ®...
- Page 168 Paper and Media Xerox ® PrimeLink ® B9100/B9110/B9125/B9136 Copier/Printer User Guide...
-
Page 169: Maintenance
Maintenance This chapter contains: • Cleaning the Printer ......................... 170 • Replacing Consumable Supplies ....................176 Xerox ® PrimeLink ® B9100/B9110/B9125/B9136 Copier/Printer User Guide... -
Page 170: Cleaning The Printer
The document glass consists of two parts: the document glass and the glass strip. The document glass is the glass on which you place your document to copy it. The glass strip is a 2.54 cm (1 in.) wide strip of document glass to the left of the document glass. Xerox ® PrimeLink ®... -
Page 171: User Guide
2. To clean any excess water from the exterior, use a soft cloth. 3. Clean the touch screen with a soft cloth moistened with a neutral detergent or alcohol. Xerox ® PrimeLink ®... - Page 172 • The printer cannot detect document sizes. Clean the document cover and the document glass once a month with the cloth provided in the document feeder. 1. To clean the document cover: a. Raise the document feeder. Xerox ® PrimeLink ® B9100/B9110/B9125/B9136 Copier/Printer...
- Page 173 1. Slightly dampen a soft, lint-free cloth with water. 2. Remove any paper or other media from the output tray. 3. Open the document cover. Xerox ® PrimeLink ®...
- Page 174 4. Wipe the surfaces of the document glass and Constant Velocity Transport (CVT) glass until they are clean and dry. Note: For best results, to remove marks and streaks, use Xerox ® Glass Cleaner. 5. Wipe the white underside of the document cover until it is clean and dry.
- Page 175 3. Close the top cover of the document feeder until you hear it click into place. 4. Close the left cover of the document feeder until you hear it click into place. Xerox ® PrimeLink ®...
-
Page 176: Replacing Consumable Supplies
Contact Us. To enter or select your printer family and model type, click Supplies. Store supply items and Xerox parts in their original packages in a convenient location. Note: Always refer to www.xerox.com/office/supplies... -
Page 177: User Guide
4. Pull out the toner cartridge slowly, while holding the bottom of the cartridge. 5. Dispose of the used toner cartridge as normal office waste or recycle the cartridge. 6. Remove the new cartridge from the packaging. Xerox ® PrimeLink ®... - Page 178 Never use a vacuum cleaner to remove spilled toner. Sparks inside the vacuum cleaner can cause a fire or explosion. To remove spilled toner, use a broom, brush, or a cloth moistened with a neutral detergent. Xerox ® PrimeLink ®...
-
Page 179: Replacing The Waste Toner Container
1. Ensure that the printer has stopped copying or printing. Open the front cover on the printer. 2. Open the waste toner container cover, then push down the lever. 3. With one hand, grasp the handle of the waste toner container, then pull the container halfway out of the printer. Xerox ® PrimeLink ®... - Page 180 8. Close the waste toner container cover. 9. Close the front cover. If the front cover is open even slightly, a message appears on the printer touch screen, and the printer cannot operate. Xerox ® PrimeLink ® B9100/B9110/B9125/B9136 Copier/Printer...
-
Page 181: Troubleshooting
• General Troubleshooting ......................182 • Image Quality Troubleshooting....................186 • Copy Troubleshooting ......................193 • Print Troubleshooting....................... 197 • Scan Troubleshooting....................... 200 • Paper Jams ..........................204 • Fault Information........................219 Xerox ® PrimeLink ® B9100/B9110/B9125/B9136 Copier/Printer User Guide... -
Page 182: General Troubleshooting
For information about network settings, refer to print. Xerox ® PrimeLink ® B9100/B9110/B9125/B9136 Copier/Printer System Administrator Guide. Is the environment correctly set... -
Page 183: User Guide
Replace with paper from a new ream. Is the paper curled? Either turn the paper so that the curl faces down in the paper tray, or replace with paper from a new ream. Xerox ® PrimeLink ® B9100/B9110/B9125/B9136 Copier/Printer User Guide... - Page 184 Remedy Check Are the paper and paper tray Ensure that the paper and paper tray selected match settings correct? the paper size settings. Refer to Paper Tray Settings in Xerox ® PrimeLink ® B9100/B9110/B9125/B9136 Copier/Printer System Administrator Guide. Are there any torn pieces of...
- Page 185 Mixed Size Originals feature is in use? A corner of the Is the document curled? Flatten out the curl, then load the document again. document is folded. Xerox ® PrimeLink ® B9100/B9110/B9125/B9136 Copier/Printer User Guide...
-
Page 186: Image Quality Troubleshooting
Troubleshooting Image Quality Troubleshooting When output image quality is poor, review the following table for solutions. If image quality does not improve after you perform the relevant remedy, contact Xerox Technical Customer Support. Symptoms Check Action The copy is dirty. - Page 187 Printing is faint, Is the paper damp? Replace with paper from a new ream. smudged, or The drum cartridge is depleted Contact Xerox Technical Customer Support. unclear. or damaged. Black dots are The drum cartridge is depleted Contact Xerox Technical Customer Support.
- Page 188 Troubleshooting Symptoms Check Action The drum cartridge is depleted Contact Xerox Technical Customer Support. or damaged. White dots appear The paper in use is unsuitable. Load suitable paper. in black filled areas. The drum cartridge is depleted Contact Xerox Technical Customer Support.
-
Page 189: User Guide
Two or more sheets of paper Fan the paper, then reset the paper. are feeding simultaneously, known as double feed. High-voltage power supply Contact Xerox Technical Customer Support. malfunction. White areas or Is the paper damp? Replace with paper from a new ream. - Page 190 Check Action Text is blurred. White patches The drum cartridge is depleted Contact Xerox Technical Customer Support. appear vertically. or damaged. Text or images are The paper guide in the paper Set the horizontal and vertical paper guides to the printed at an angle.
- Page 191 The image is not the needed Cause The document glass or the document cover is dirty. size Action Clean the document glass or the document cover. Xerox ® PrimeLink ® B9100/B9110/B9125/B9136 Copier/Printer User Guide...
- Page 192 If the problem is not solved, go to the next Cause and Action. Cause The document is folded or bent. Action Straighten and reset the document properly. The image is coarse Cause Resolution is too low. Action Set a higher resolution. Xerox ® PrimeLink ® B9100/B9110/B9125/B9136 Copier/Printer User Guide...
-
Page 193: Copy Troubleshooting
Cause and Action The copy is dirty Cause The document glass or the document cover is dirty. If No, go to the next Action Clean the document glass or the document cover. symptom. Xerox ® PrimeLink ® B9100/B9110/B9125/B9136 Copier/Printer User Guide... - Page 194 The paper is damp. on the copy Action Replace with paper from a new ream. If No, go to the next symptom. If the problem is not solved, go to the next Cause and Action. Xerox ® PrimeLink ® B9100/B9110/B9125/B9136 Copier/Printer User Guide...
-
Page 195: User Guide
The document is made of highly transparent material, such as a transparency. Action Place a white sheet of paper on the document before copying. If the problem is not solved, go to the next Cause and Action. Xerox ® PrimeLink ® B9100/B9110/B9125/B9136 Copier/Printer User Guide... - Page 196 Enter the document size, then copy. If the problem is not solved, go to the next Cause and Action. Cause The document is folded or bent. Action Straighten and properly reset the document. Xerox ® PrimeLink ® B9100/B9110/B9125/B9136 Copier/Printer User Guide...
-
Page 197: Print Troubleshooting
Action. Cause The network cable is disconnected from the printer. Action Connect the network cable to the printer. For information about network settings, refer to Xerox ® PrimeLink ® B9100/B9110/B9125/B9136 Copier/Printer System Administrator Guide. If the problem is not solved, go to the next Cause and Action. - Page 198 Troubleshooting Symptoms Yes/No Cause and Action For information about network settings, refer to Xerox ® PrimeLink ® B9100/B9110/B9125/B9136 Copier/Printer System Administrator Guide. If the problem is not solved, go to the next Cause and Action. Cause The network connection between the computer and printer is incorrect.
- Page 199 Check the error details. If the problem still persists, contact Xerox Technical Customer Support. T T h h e e P P r r i i n n t t e e d d R R e e s s u u l l t t i i s s n n o o t t a a s s E E x x p p e e c c t t e e d d...
-
Page 200: Scan Troubleshooting
If the problem is not solved, go to the next Cause and Action. Cause Documents of different sizes are set. Action When you load documents of different sizes, specify Mixed Size Originals, otherwise, a paper jam results. Xerox ® PrimeLink ® B9100/B9110/B9125/B9136 Copier/Printer User Guide... -
Page 201: User Guide
Cause No mailbox is created. If No, go to the next Action Create a mailbox. symptom. Refer to Local Disk/Mailbox in the Xerox ® PrimeLink ® B9100/B9110/B9125/B9136 Copier/Printer System Administrator Guide. If the problem is not solved, go to the next Cause and Action. - Page 202 Troubleshooting Symptoms Yes/No Cause and Action Refer to Local Disk/Mailbox in the Xerox PrimeLink ® ® B9100/B9110/B9125/B9136 Copier/Printer System Administrator Guide. Scanner unable to scan data Cause The scan driver is not installed. due to TWAIN transmission Action Install the scan driver.
- Page 203 If the problem is not solved, go to the next Cause and Action. Cause The maximum sending email size is exceeded. Action Change the maximum sending email size, or reduce the resolution. For maximum email size, refer to Xerox ® PrimeLink ® B9100/B9110/B9125/B9136 Copier/Printer System Administrator Guide. Xerox ®...
-
Page 204: Paper Jams
A piece of paper that remains in the printer can cause a fire. If a piece of paper is stuck in a hidden area, or paper is wrapped around the fuser unit or rollers, do not remove the paper forcefully. To prevent injury, power off the printer immediately, then contact Xerox Technical Customer Support. - Page 205 6. Close the following covers until they click into place. Close the covers in the following order: • Inner cover • Top cover • Left cover 7. If you cannot find a paper jam, slowly raise the document feeder. If the document is there, remove it. Xerox ® PrimeLink ® B9100/B9110/B9125/B9136 Copier/Printer User Guide...
- Page 206 Ensure that there is no torn, wrinkled, or folded paper in the document set. To scan torn, wrinkled, or folded documents, use the document glass only. The scanned document sheets are skipped automatically, and scanning resumes from the document sheet last scanned before the jam occurred. Xerox ® PrimeLink ®...
-
Page 207: User Guide
Ensure that there are no torn, wrinkled, or folded documents in the document set. To scan torn, wrinkled, or folded documents, use the document glass, only. The scanned document sheets are skipped automatically, and scanning resumes from the document sheet last scanned before the jam occurred. Xerox ® PrimeLink ®... - Page 208 To avoid tearing paper, before pulling out a tray, review where the paper jam occurred. Torn paper that remains inside the machine can cause machine malfunction. 2. Remove the jammed paper and any torn pieces. 3. Push in the tray gently until it comes to a stop. Xerox ® PrimeLink ®...
- Page 209 2. Remove the jammed paper and any paper that is loaded from the Bypass Tray. Note: If paper is torn, check inside the machine and remove it. 3. Open the tray cover, then remove the jammed paper. Xerox ® PrimeLink ®...
- Page 210 • Always ensure that the bypass tray guides are against the edges of the envelopes. • Verify that the attributes of the paper tray are set correctly. • Some wrinkle is expected on the back of the fed envelope. Xerox ® PrimeLink ®...
- Page 211 3. Pull out Transport Unit 4. Tray 2 comes out as you pull out Transport Unit 4. 4. Lift lever 4a, then remove the jammed paper. Note: If paper is torn, check inside the machine and remove it. Xerox ® PrimeLink ®...
- Page 212 6. Push in Tray 2 gently until it comes to a stop. Transport Unit 4 is inserted simultaneously. 7. Push in Tray 1 gently until it comes to a stop. 8. Close the front cover completely. If the front cover is open even slightly, the machine does not operate. Xerox ® PrimeLink ®...
-
Page 213: User Guide
2. Rotate the green lever at the center of the transfer module to the right, until it is in the horizontal position. Pull out the transfer module to the end. 3. Lift lever 2b to remove jammed paper. Rotate knob 2a to remove the jammed paper. Xerox ® PrimeLink ®... - Page 214 If you cannot remove the paper, lift lever 2c, then try to remove the paper. 5. Lift lever 2c as necessary, move lever 2d, then remove the jammed paper. 6. Rotate knob 2f as necessary, then remove the jammed paper. Xerox ® PrimeLink ®...
- Page 215 If the lever cannot be turned, pull out the transfer module to the middle, then insert it again. 10. Close the front cover completely. If the front cover is open even slightly, the machine does not operate. Xerox ® PrimeLink ®...
- Page 216 If paper is torn, check inside the machine, then remove it. 3. Close the lower left cover. Note: If the lower left cover is open, a message appears on the user interface, and the printer cannot operate. Xerox ® PrimeLink ® B9100/B9110/B9125/B9136 Copier/Printer...
- Page 217 1. Ensure that the machine has stopped printing before you open the front door of the Interface Decurler Module. 2. Slide the door latch downward and open the bottom-right door. 3. Remove the jammed paper. Note: If paper is torn, check inside the machine, then remove it. Xerox ® PrimeLink ® B9100/B9110/B9125/B9136 Copier/Printer User Guide...
- Page 218 If the bottom-right cover is open, a message appears on the user interface, and the printer cannot operate. 5. Close the front door of the Interface Decurler Module completely. If the door is open, a message appears on the user interface, and the printer cannot operate. Xerox ® PrimeLink ®...
-
Page 219: Fault Information
Note: For detailed information and instructions for clearing a fault, on the printer control panel, touch Faults. At the bottom of the fault screen, note the fault code. Xerox ® PrimeLink ® B9100/B9110/B9125/B9136 Copier/Printer... -
Page 220: User Guide
Troubleshooting Xerox ® PrimeLink ® B9100/B9110/B9125/B9136 Copier/Printer User Guide... -
Page 221: Specifications
Specifications This appendix contains: • Copy Specifications........................222 • Print Specifications ........................224 • Scan Specifications ........................227 • Duplex Automatic Document Feeder (DADF) Specifications ............. 228 Xerox ® PrimeLink ® B9100/B9110/B9125/B9136 Copier/Printer User Guide... -
Page 222: Copy Specifications
Values can differ depending on the printer configuration. Copy Reduction 100%: 1:1 ± 0.7% Enlargement Ratio Preset %: 1:0.500, 1:0.707, 1:0.816, 1:0.866, 1:1.154,1:1.225, 1:1.414, 1:1.632, 1:2.000 Variable %: 1:0.25 to 1:4.00 in 1% increments Xerox ® PrimeLink ® B9100/B9110/B9125/B9136 Copier/Printer User Guide... - Page 223 A3: 297 x 420 mm (11 x 17 in.): 1-sided: 68 ppm; 2-sided: 68 ppm Continuous Copy Pages 9999 sheets The printer can pause temporarily to perform an image stabilization. Note: The Fax feature is available only on the Xerox ® PrimeLink ® B9100 Copier/Printer.
-
Page 224: Print Specifications
Built-in type Continuous Print Speed • Xerox PrimeLink B9100 Copier/Printer: A4: 210 x 297 mm; A: 8.5 x 11 in.: 1-sided: 100 ppm; 2-sided: 100 A3: 297 x 420 mm (11 x 17 in.): 1-sided: 50 ppm; 2-sided: 50 ppm •... - Page 225 – Windows Server ® 2008 (64 bit) – Mac OS X Driver – macOS 10.12 Sierra – OS X 10.11 El Capitan – OS X 10.10 Yosemite – OS X 10.9 Mavericks Xerox ® PrimeLink ® B9100/B9110/B9125/B9136 Copier/Printer User Guide...
-
Page 226: User Guide
Windows Server ® 2008 (64 bit) – macOS 10.12 Sierra – OS X 10.11 El Capitan – OS X 10.10 Yosemite – OS X 10.9 Mavericks – OS X 10.8 Mountain Lion Xerox ® PrimeLink ® B9100/B9110/B9125/B9136 Copier/Printer User Guide... -
Page 227: Scan Specifications
Supported protocol: TCP/IP: SMTP Output format: • For scanning color documents: monochrome, two colors, TIFF: compression types MR (Modified Huffman) and MMR (Modified Modified Read) • DocuWorks ® documents and PDF ® Xerox ® PrimeLink ® B9100/B9110/B9125/B9136 Copier/Printer User Guide... -
Page 228: Duplex Automatic Document Feeder (Dadf) Specifications
A4: 210 x 297 mm; A: 8.5 x 11 in. portrait, 1-sided • For scanning 1-sided: 135 ppm 2-sided: 270 ppm Note: If you select the Store to Folder option for A4 documents, the scan speed is 200 dpi. Xerox ® PrimeLink ® B9100/B9110/B9125/B9136 Copier/Printer User Guide... -
Page 229: Regulatory Information
Regulatory Information This appendix contains: • Basic Regulations ........................230 • Copy Regulations ........................236 • Fax Regulations........................239 • Safety Data Sheets ........................243 Xerox ® PrimeLink ® B9100/B9110/B9125/B9136 Copier/Printer User Guide... -
Page 230: Basic Regulations
• Connect the equipment into an outlet on a circuit different from that to which the receiver is connected. Consult the dealer or an experienced radio/TV technician for help. Changes or modifications to this equipment not approved by Xerox can void the authority of the user to operate this equipment. WARNING: To ensure compliance with Part 15 of the FCC rules, use shielded interface cables. - Page 231 C C e e r r t t i i f f i i c c a a t t i i o o n n s s i i n n E E u u r r o o p p e e The CE mark applied to this product symbolizes a declaration of conformity by Xerox with the following applicable Directives of the European Union as of the date indicated: •...
-
Page 232: User Guide
Reducing product energy consumption helps combat smog, acid rain, and long-term changes to the climate by decreasing the emissions that result from generating electricity. ENERGY STAR settings are preset on Xerox ® equipment at the factory to switch to Power Saver modes after 15 minutes from the last copy or print. - Page 233 60 minutes. The default value is set at 45 minutes. The total transition time from Ready mode to Sleep mode can take up to 60 minutes. To change the Power Saver settings, contact your System Administrator, or refer to Xerox ®...
-
Page 234: Information
5 5 3 3 / / E E U U User Information Hereby, Xerox declares that the radio equipment is in compliance with Directive 2014/53/EU. The full text of the EU declaration of conformity is available at the following internet address: www.xerox. - Page 235 RFID approval process. Notified Body involvement is not mandatory. B B r r a a z z i i l l A Radio Frequency Identification Device model name must be listed on the device. Xerox ® PrimeLink ®...
-
Page 236: Copy Regulations
“fair use” or library reproduction rights provisions of the copyright law. Further information of these provisions may be obtained from the Copyright Office, Library of Congress, Washington, D.C. 20559. Ask for Circular R21. Xerox ® PrimeLink ®... -
Page 237: Canada
Canada or a department, board, Commission, or agency established by the Government of Canada or of a province or of a government of a state other than Canada Xerox ® PrimeLink ®... -
Page 238: User Guide
• Copyright material or trademarks without the consent of the owner • Postage stamps and other negotiable instruments This list is not inclusive and no liability is assumed for either its completeness or accuracy. In case of doubt, contact your legal counsel. Xerox ® PrimeLink ®... -
Page 239: Fax Regulations
Ask your local Telephone Company for the modular jack type installed on your line. Connecting this machine to an unauthorized jack can damage telephone company equipment. You, not Xerox, assume all responsibility and/or liability for any damage caused by the connection of this machine to an unauthorized jack. - Page 240 Telephone Company may request you to disconnect the equipment until the problem is resolved. Only a Xerox Service Representative or an authorized Xerox Service provider are authorized to make repairs to the printer. This applies at any time during or after the service warranty period. If unauthorized repair is performed, the remainder of the warranty period is null and void.
- Page 241 2/3 technical specifications for terminal equipment for use on analog-switched telephone networks in the European Economic Area. If you have problems with your product, contact your local Xerox representative. This product can be configured to be compatible with other country networks. Before reconnecting the device to a network in another country, contact your Xerox representative for assistance.
- Page 242 S S o o u u t t h h A A f f r r i i c c a a This modem must be used in conjunction with an approved surge protection device. Xerox ® PrimeLink ®...
-
Page 243: European Union
Regulatory Information Safety Data Sheets For Material Safety Data information regarding your printer, go to: • North America: www.xerox.com/msds • European Union: www.xerox.com/environment_msdseu For the Customer Support Center phone numbers, go to www.xerox.com/office/worldcontacts. Xerox ® PrimeLink ® B9100/B9110/B9125/B9136 Copier/Printer User Guide... -
Page 244: User Guide
Regulatory Information Xerox ® PrimeLink ® B9100/B9110/B9125/B9136 Copier/Printer User Guide... -
Page 245: Recycling And Disposal
Recycling and Disposal This appendix contains: • All Countries..........................246 • North America ......................... 247 • European Union ........................248 • Other Countries........................250 Xerox ® PrimeLink ® B9100/B9110/B9125/B9136 Copier/Printer User Guide... -
Page 246: All Countries
Recycling and Disposal All Countries If you are managing the disposal of your Xerox product, please note that the printer may contain lead, mercury, perchlorate, and other materials whose disposal may be regulated due to environmental considerations. The presence of these materials is fully consistent with global regulations applicable at the time that the product was placed on the market. -
Page 247: North America
North America Xerox operates an equipment take-back and reuse/recycle program. Contact your Xerox representative (1-800-ASK-XEROX) to determine if this Xerox product is part of the program. For more information about Xerox environmental programs, visit www.xerox.com/gwa, or for recycling and disposal information, contact your local authorities. -
Page 248: European Union
In accordance with European legislation, end of life electrical and electronic equipment subject to disposal must be managed within agreed procedures. Prior to disposal, please contact your local reseller or Xerox representative for end of life take-back information. C C o o l l l l e e c c t t i i o o n n a a n n d d D D i i s s p p o o s s a a l l o o f f E E q q u u i i p p m m e e n n t t a a n n d d B B a a t t t t e e r r i i e e s s... - Page 249 B B a a t t t t e e r r y y R R e e m m o o v v a a l l Batteries should only be replaced by a manufacturer-approved service facility. Xerox ®...
-
Page 250: Other Countries
Recycling and Disposal Other Countries Please contact your local waste management authority to request disposal guidance. Xerox ® PrimeLink ® B9100/B9110/B9125/B9136 Copier/Printer User Guide... -
Page 251: Tray 5 (Bypass)
Tray 5 (Bypass) This appendix contains: • Tray 5 (Bypass) Overview ......................252 • Loading Media in Tray 5 (Bypass)..................... 253 • Tray 5 (Bypass) Specifications ....................262 Xerox ® PrimeLink ® B9100/B9110/B9125/B9136 Copier/Printer User Guide... -
Page 252: Tray 5 (Bypass) Overview
You can load all media that is supported by your Tray 5 configuration into either Tray 5 model, but when sheets are longer than 488 mm (19.21 in.), for the best results, use the optional XLS Bypass Tray mounted to the Oversized High Capacity Feeder. Xerox ® PrimeLink ®... -
Page 253: Loading Media In Tray 5 (Bypass)
7. From the Tray Properties window, verify that the correct paper information such as size, type, and weight are selected and match the stock that is loaded in the tray. 8. To save the information and close the Tray Properties window, touch OK. Xerox ® PrimeLink ®... -
Page 254: User Guide
6. Insert the media into Tray 5. Note: To reduce the risk of multiple sheets feeding into the printer, for sheets with a length over 488 mm (19.21 in.), load each sheet separately. The maximum stack size is 20 sheets. Xerox ® PrimeLink ®... - Page 255 9. On the Tray Properties window, verify that the correct paper information such as size, type and weight, are selected and match the media that is loaded in the XLS Bypass tray. 10. To save the information and close the Tray Properties window, touch OK. Xerox ® PrimeLink ®...
- Page 256 3. Adjust the front-edge guides on the XLS Bypass tray and the rear-edge guides on the XLS Feeder so that the guides are as parallel to the printer as possible. 4. Run the Auto Alignment Adjustment procedure. Refer to the Xerox ®...
- Page 257 Right side is lower. Left side is higher. 7. Tighten the four screws on the front-edge guide. To match the paper size, adjust the rear-edge guide. 8. Rerun the Auto Alignment Adjustment procedure. Refer to the Xerox ® PrimeLink ®...
- Page 258 Tray. Load the tab stock long-edge feed (LEF), with the side to be printed facing up. Align the straight edge of the tab stock against the right edge of the tray, with the tabs to the left. Xerox ® PrimeLink ®...
- Page 259 If you are using the XLS Bypass tray, before proceeding, loosen the four locking screws on the paper guides. For details, refer to Loading Media in the Optional Extra Long Sheets (XLS) Bypass Tray. Xerox ® PrimeLink ® B9100/B9110/B9125/B9136 Copier/Printer...
-
Page 260: Loading Envelopes In Tray 5 (Bypass)
Loading Envelopes in Tray 5 in the LEF Direction When loading envelopes in the LEF direction, ensure that the flaps are closed and face down. Position the envelope flaps along the right side of the tray. Xerox ® PrimeLink ®... - Page 261 Tray 5 (Bypass) Xerox ® PrimeLink ® B9100/B9110/B9125/B9136 Copier/Printer User Guide...
-
Page 262: Tray 5 (Bypass) Specifications
Reply-paid Postcard (148 x 200 mm, 5.83 x 7.87 in.) Postcard (101.6 x 152.4 mm, 4 x 6 in.) Postcard (2L Size Photo) (127 x 177.8 mm, 5 x 7 in.) A5 (148 x 210 mm, 5.8 x 8.3 in.) Xerox ® PrimeLink ®... - Page 263 Preprinted Heavyweight 4: 301-350 g/m ² Tray capacity 250 sheets of 80 g/m of plain paper Note: For information on paper types and weights for Trays 1–4, refer to Supported Paper Types and Weights. Xerox ® PrimeLink ® B9100/B9110/B9125/B9136 Copier/Printer User Guide...
- Page 264 Tray 5 (Bypass) Xerox ® PrimeLink ® B9100/B9110/B9125/B9136 Copier/Printer User Guide...
-
Page 265: Letter-Size, High-Capacity Feeder
This appendix contains: • High Capacity Feeder, Trays 6 and 7 ..................266 • Loading Media in the High Capacity Feeder ................267 • High Capacity Feeder Troubleshooting ..................269 • High Capacity Feeder Specifications..................277 Xerox ® PrimeLink ® B9100/B9110/B9125/B9136 Copier/Printer... -
Page 266: High Capacity Feeder, Trays 6 And 7
• 10.5 in. • 11 in. • A4 The High Capacity Feeder (HCF) has one variable LEF custom position 297–330.2 mm (11.69–13 in.). The HCF supports Short Edge Feed (SEF) from 182–241 mm (7.2–9.5 in.). Xerox ® PrimeLink ® B9100/B9110/B9125/B9136 Copier/Printer... -
Page 267: Loading Media In The High Capacity Feeder
Adjust the paper guides to fit the new paper size, then retighten the two screws. 4. Open the ream of paper with the seam side facing up. 5. Before you load paper into the tray, fan the sheets of paper. Xerox ® PrimeLink ®... -
Page 268: User Guide
Select options for Paper Type/Paper Weight, Paper Size, and Paper Color features. b. If needed, make changes to Paper Curl and Alignment Adjustment options. c. Touch Save until you are returned to the Paper Tray settings screen. 9. To close the screen, touch Confirm. Xerox ® PrimeLink ®... -
Page 269: High Capacity Feeder Troubleshooting
This section describes how to remove paper jams that occur at the following locations: • Paper jams in the lower left cover • Paper jams at lever 1a and knob 1c • Paper jams at lever 1b and knob 1c Xerox ® PrimeLink ®... - Page 270 Before proceeding with your copy and print jobs, ensure that all paper jams are cleared, and any small, torn pieces of paper are removed. 1. Open the front cover of the High Capacity Feeder (HCF). 2. Grip the release lever and open the lower left cover. Xerox ® PrimeLink ®...
- Page 271 Before proceeding with your copy and print jobs, ensure that all paper jams are cleared, and any small, torn pieces of paper are removed. 1. Open the front cover of the High Capacity Feeder (HCF). 2. To remove the jammed paper, do the following: Xerox ® PrimeLink ®...
- Page 272 If paper is torn, check inside the printer, then remove the torn paper. 3. Return lever 1a to the original position. 4. Close the front cover of the HCF. Note: The printer does not operate if the cover is open even slightly. Xerox ® PrimeLink ® B9100/B9110/B9125/B9136 Copier/Printer...
- Page 273 If paper is torn, check inside the printer, then remove the torn paper. 3. Return lever 1b to the original position. 4. Close the front cover of the HCF. Note: The printer does not operate if the cover is open even slightly. Xerox ® PrimeLink ® B9100/B9110/B9125/B9136 Copier/Printer...
-
Page 274: User Guide
Remove the jammed paper. Note: If paper is torn, check inside the printer, then remove the torn paper. 3. If the paper cannot be removed in step 2, do the following steps: a. Rotate knob 1c clockwise. Xerox ® PrimeLink ® B9100/B9110/B9125/B9136 Copier/Printer... - Page 275 • If all paper jams are not cleared, an error message continues to appear on the printer control panel. To clear any remaining jams, refer to the printer control panel for instructions and information. Xerox ® PrimeLink ® B9100/B9110/B9125/B9136 Copier/Printer...
- Page 276 Note: For detailed information and instructions for clearing a fault, on the printer control panel, touch Faults. At the bottom of the fault screen, note the fault code. Xerox ® PrimeLink ® B9100/B9110/B9125/B9136 Copier/Printer...
-
Page 277: High Capacity Feeder Specifications
Media and paper weight Weight: 52–216 g/m or 16 lb. Bond–80 lb. Cover paper Tray capacity Each tray holds 2000 sheets for a total of 4000 sheets when using 80 g/ or Xerox 20 lb. paper. Xerox ® PrimeLink ®... - Page 278 Letter-Size, High-Capacity Feeder Xerox ® PrimeLink ® B9100/B9110/B9125/B9136 Copier/Printer User Guide...
-
Page 279: Oversized High Capacity Feeder, 1 Or 2 Trays (Trays 6 And 7)
• Oversized High Capacity Feeder Overview ................280 • Postcard Bracket ........................281 • Loading Media in the 1-Tray or 2-Tray OHCF ................284 • Oversized High Capacity Feeder (OHCF) Troubleshooting ............288 • OHCF Specifications......................... 296 Xerox ® PrimeLink ® B9100/B9110/B9125/B9136 Copier/Printer... -
Page 280: Oversized High Capacity Feeder Overview
330.2 x 488 mm (13 x 19.2 in.). Each tray holds 2000 sheets. Note: • The 2-Tray Oversized High Capacity Feeder (OHCF) is not available with Xerox ® PrimeLink ®... -
Page 281: Postcard Bracket
Use the following procedure for installing and using the Postcard bracket when printing on smaller media, 101.6 x 152.4 mm (4 x 6 in.). 1. Pull out the tray slowly until it stops. 2. Move the paper guides out to the farthest positions. Xerox ® PrimeLink ®... -
Page 282: User Guide
Place the bracket on the locating pins on the upper frame and in the grooves on the bottom of the tray. b. To lock the postcard bracket in place, tighten the thumbscrew. 5. Load the postcard stock SEF (short-edge feed) and against the right side of the tray. Xerox ® PrimeLink ®... - Page 283 9. Upon completion of your print job, remove the postcard stock and the postcard bracket from the tray. 10. To store the postcard bracket, place the bracket in the storage area on the left side of the tray. Tighten the thumbscrew. Xerox ® PrimeLink ®...
-
Page 284: Loading Media In The 1-Tray Or 2-Tray Ohcf
Select options for Paper Type/Paper Weight, Paper Size, and Paper Color. b. If needed, make changes to Paper Curl and Alignment Adjustment. Note: For detailed information on the Paper Curl and Alignment Adjustment options, refer to the Xerox ® PrimeLink ®... - Page 285 Select options for Paper Type/Paper Weight, Paper Size, and Paper Color features. b. If needed, make changes to the Paper Curl and Alignment Adjustment options. Note: For detailed information on the Paper Curl and Alignment Adjustment options, refer to the Xerox PrimeLink B9100/B9110/B9125/B9136 Copier/Printer System ®...
- Page 286 Select options for the Paper Type/Paper Weight, Paper Size, and Paper Color features. b. If needed, make changes to the Paper Curl and Alignment Adjustment options. Note: For detailed information on the Paper Curl and Alignment Adjustment options, refer to the Xerox ® PrimeLink ®...
- Page 287 Oversized High Capacity Feeder, 1 or 2 Trays (Trays 6 and 7) c. Touch Save until you are returned to the Paper Tray settings screen. 10. To close the screen, touch Confirm. Xerox ® PrimeLink ® B9100/B9110/B9125/B9136 Copier/Printer User Guide...
-
Page 288: Oversized High Capacity Feeder (Ohcf) Troubleshooting
7. Pull out the tray until it stops. 8. Return the rear skew adjustment lever to the left, default position. 9. Slide the right-side skew adjustment lever toward the front of the paper tray. 10. Gently push in the tray until it stops. Xerox ® PrimeLink ®... -
Page 289: User Guide
15. Return the right-side skew adjustment lever toward the rear of the paper tray. This is the default position of right-side skew adjustment lever. 16. Gently push in the tray until it stops. 17. If you are still having skew adjustment problems, refer to the Advanced Stock Setup information located in the Xerox ® PrimeLink ®... - Page 290 O O H H C C F F P P a a p p e e r r J J a a m m s s a a t t L L e e v v e e r r 1 1 a a a a n n d d K K n n o o b b 1 1 c c 1. Open the front cover of the OHCF. 2. To remove the jammed paper, do the following steps: a. Pull the lever 1a to the right. Xerox ® PrimeLink ®...
- Page 291 3. Return lever 1a to the original position. 4. Close the front cover of the OHCF. Note: If the front cover of the OHCF is not closed completely, a message appears on the printer touch screen, and the printer cannot operate. Xerox ® PrimeLink ® B9100/B9110/B9125/B9136 Copier/Printer...
- Page 292 2. To remove the jammed paper, do the following steps: a. Move lever 1b to the right. b. Rotate knob 1c clockwise. c. Remove the jammed paper. Note: If paper is torn, check inside the printer, then remove the torn paper. Xerox ® PrimeLink ® B9100/B9110/B9125/B9136 Copier/Printer User Guide...
- Page 293 O O H H C C F F P P a a p p e e r r J J a a m m s s a a t t L L e e v v e e r r 1 1 d d a a n n d d K K n n o o b b 1 1 c c 1. Open the front cover of the OHCF. 2. To remove the jammed paper, do the following steps: a. Lift lever 1d. b. Remove the jammed paper. Xerox ® PrimeLink ® B9100/B9110/B9125/B9136 Copier/Printer...
- Page 294 • If a fault occurs with an optional device, an indicator illuminates on the optional device control panel, and shows the corresponding area on the device where the fault occurred. Xerox ® PrimeLink ®...
-
Page 295: User Guide
Note: For detailed information and instructions for clearing a fault, on the printer control panel, touch Faults. At the bottom of the fault screen, note the fault code. Xerox ® PrimeLink ® B9100/B9110/B9125/B9136 Copier/Printer... -
Page 296: Ohcf Specifications
16K (Mainland China) (195 x 270 mm, 7.68 x 10.63 in.) Custom sizes Width: 182–330 mm (7.2–13 in.) Length: 182–488 mm (7.2–19.2 in.) With postcard bracket: 100 x 181–181 x 181 mm (3.94 x 7.13–7.13 x 7.13 in.) Xerox ® PrimeLink ® B9100/B9110/B9125/B9136 Copier/Printer User Guide... - Page 297 Preprinted HW 3S1: 254–300 g/m ² Preprinted HW 4S1: 301–350 g/m ² Preprinted HW Card: 254–300 g/m ² Preprinted XHW Card: 301–350 g/m ² ** Only the 2-tray OHCF supports paper weights of 301–350 g/m ² Xerox ® PrimeLink ® B9100/B9110/B9125/B9136 Copier/Printer User Guide...
- Page 298 • For information about paper types and weights for Trays 1–4, refer to Supported Paper Types and Weights. • For information about paper types and weights for Tray 5 (Bypass), refer to Tray 5 (Bypass) Specifications. Xerox ® PrimeLink ® B9100/B9110/B9125/B9136 Copier/Printer User Guide...
-
Page 299: Interface Decurler Modules
• Interface Decurler Module Overview..................300 • Finishing Accessories Requiring an Interface Decurler Module ..........301 • Interface Decurler Module Components ................... 302 • Curl Correction on the Interface Decurler Module ..............304 • Interface Decurler Module Troubleshooting................307 Xerox ® PrimeLink ® B9100/B9110/B9125/B9136 Copier/Printer... -
Page 300: Interface Decurler Module Overview
• Communication between the press and the attached finishing device. • Alignment of the paper path between the press and the attached finishing device. • Cooling and decurling of the paper as it exits the press. Xerox ® PrimeLink ®... -
Page 301: Finishing Accessories Requiring An Interface Decurler Module
Interface Decurler Modules Finishing Accessories Requiring an Interface Decurler Module The following finishing accessories require the Interface Decurler Module: • GBC ® AdvancedPunch ® • High Capacity Stacker (HCS) Xerox ® PrimeLink ® B9100/B9110/B9125/B9136 Copier/Printer User Guide... -
Page 302: Interface Decurler Module Components
Interface Decurler Modules Interface Decurler Module Components 1. Paper Jam and Error Indicator Panel 2. Interface Decurler Module Front Cover Xerox ® PrimeLink ® B9100/B9110/B9125/B9136 Copier/Printer User Guide... -
Page 303: User Guide
C C o o n n t t r r o o l l P P a a n n e e l l o o n n t t h h e e I I n n t t e e r r f f a a c c e e D D e e c c u u r r l l e e r r M M o o d d u u l l e e 1. Paper Jam and Error Indicator 4. Manual Curl Down Button 2. Curl Up and Curl Down Indicators 5. Auto Curl Button and Indicator 3. Manual Curl Up Button Xerox ® PrimeLink ® B9100/B9110/B9125/B9136 Copier/Printer User Guide... -
Page 304: Curl Correction On The Interface Decurler Module
I I n n t t e e r r f f a a c c e e D D e e c c u u r r l l e e r r M M o o d d u u l l e e Note: When you select an Interface Decurler Module (IDM) curl-correction mode, the new mode is applied to the next sheet that is delivered to the IDM. Xerox ® PrimeLink ®... - Page 305 When the Off indicator is illuminated, for either the Auto or Manual modes, no curl correction is applied to the printed output. Xerox ® PrimeLink ® B9100/B9110/B9125/B9136 Copier/Printer User Guide...
- Page 306 Pressing the curl-up button changes the curl-correction levels as shown: Pressing the curl-down button changes the curl-correction levels as shown: Xerox ® PrimeLink ® B9100/B9110/B9125/B9136 Copier/Printer...
-
Page 307: Interface Decurler Module Troubleshooting
• If all paper jams are not cleared, an error message continues to appear on the printer touch screen. To clear any remaining jams, refer to the printer touch screen for instructions and information. Xerox ® PrimeLink ® B9100/B9110/B9125/B9136 Copier/Printer... - Page 308 Remove the jammed paper. Important: Remove the jammed paper by carefully pulling it out of the area. 3. Return lever 1a to the original position. 4. If you encounter difficulty when removing jammed paper, do the following. Xerox ® PrimeLink ® B9100/B9110/B9125/B9136 Copier/Printer...
-
Page 309: User Guide
The touch screen displays a Faults button that provides information about the fault and detailed instructions for correcting the fault. Note: Interface Decurler Module faults start with the three-digit number 048. Xerox ® PrimeLink ® B9100/B9110/B9125/B9136 Copier/Printer... - Page 310 Interface Decurler Modules Xerox ® PrimeLink ® B9100/B9110/B9125/B9136 Copier/Printer User Guide...
-
Page 311: Inserter Module
Inserter Module This appendix contains: • Inserter Module Overview ......................312 • Inserter Components ....................... 313 • Paper and Media for Inserter Tray T1 ..................315 • Inserter Troubleshooting ......................318 Xerox ® PrimeLink ® B9100/B9110/B9125/B9136 Copier/Printer User Guide... -
Page 312: Inserter Module Overview
When using 20–lb, 75 g/m paper, the media holds a maximum of 200 sheets. You can load the paper in the LEF or SEF direction. Note: Other names for the inserter include post-process inserter or interposer. Xerox ® PrimeLink ® B9100/B9110/B9125/B9136 Copier/Printer... -
Page 313: Inserter Components
Inserter Module Inserter Components 1. Tray T1 or Inserter Tray 3. Inserter Front Cover 2. Inserter Control Panel Xerox ® PrimeLink ® B9100/B9110/B9125/B9136 Copier/Printer User Guide... - Page 314 Manual Curl Down Button When the printed output is curled down, select the curl-down button. Auto Curl Button Automatically corrects the paper curl by selecting the curl direction and amount. Xerox ® PrimeLink ® B9100/B9110/B9125/B9136 Copier/Printer User Guide...
-
Page 315: Paper And Media For Inserter Tray T1
• To use the saddle stitch or bi-fold options, ensure that the paper loaded in the main feeding tray is the same size as the paper loaded in tray T1. • For supported paper information, refer to Supported Paper for Inserter Tray Xerox ® PrimeLink ®... -
Page 316: User Guide
When the inserter tray is filled with 8.5 inch wide (SEF) media, its default size is 8.5" x 14". If you are inserting 8.5" x 11" media, you must adjust the default of NVM 769-503 using Admin Mode Tools. For additional instruction, refer to Xerox ®... - Page 317 Load hole-punched paper into tray T1, LEF (long-egde feed), and with the holes on the right side, as shown. Tab Stock Load tab stock paper in tray T1, LEF (long-egde feed), and with the tabs on the left side, as shown. Xerox ® PrimeLink ®...
-
Page 318: Inserter Troubleshooting
• If all paper jams are not cleared, an error message continues to appear on the printer control panel. To clear any remaining paper jams, refer to the printer control panel for instructions and information. Xerox ® PrimeLink ®... - Page 319 C C l l e e a a r r i i n n g g P P a a p p e e r r J J a a m m s s f f r r o o m m t t h h e e I I n n s s e e r r t t e e r r E E 2 2 A A r r e e a a 1. Open the inserter front cover. 2. To clear paper jams from the inserter E2 area, do the following steps: a. Lift lever 1a. b. Rotate knob 1b counterclockwise. Xerox ® PrimeLink ® B9100/B9110/B9125/B9136 Copier/Printer...
- Page 320 3. Return lever 1a to the original position. 4. If you have difficulty when you remove the jammed paper, do the following steps: a. Push lever 1c to the right. b. Rotate knob 1b counterclockwise. c. Remove the jammed paper. Xerox ® PrimeLink ® B9100/B9110/B9125/B9136 Copier/Printer...
- Page 321 2. To remove paper jams from the inserter E3 area: Note: The jammed paper can be hidden behind the upper-left cover area. a. Push down lever 1d. b. Rotate knob 1e counterclockwise. c. Remove any jammed paper. Xerox ® PrimeLink ® B9100/B9110/B9125/B9136 Copier/Printer User Guide...
-
Page 322: User Guide
4. If you have difficulty when removing jammed paper, do the following: a. Lift lever 1a. b. Rotate knob 1e counterclockwise. c. Remove any jammed paper. 5. Return lever 1a to the original position. 6. Close the inserter front cover. Xerox ® PrimeLink ® B9100/B9110/B9125/B9136 Copier/Printer User Guide... - Page 323 The touch screen displays a Faults button that provides information about the fault and detailed instructions for correcting the fault. Tip: Inserter faults are identified by the codes that start with the three-digit numbers 012, 013, and 024. Xerox ® PrimeLink ® B9100/B9110/B9125/B9136 Copier/Printer...
- Page 324 Inserter Module Xerox ® PrimeLink ® B9100/B9110/B9125/B9136 Copier/Printer User Guide...
-
Page 325: I Gbc ® Advancedpunch ™ Pro
For detailed information and instructions for using the GBC ® AdvancedPunch ™ Pro, refer to the guide on the customer documentation disk that shipped with the device, or go to www.xerox.com and in the Search box, type GBC AdvancedPunch Pro. Xerox ® PrimeLink ®... - Page 326 ® AdvancedPunch ™ Xerox ® PrimeLink ® B9100/B9110/B9125/B9136 Copier/Printer User Guide...
-
Page 327: High Capacity Stacker (Hcs)
High Capacity Stacker (HCS) This appendix contains: • High Capacity Stacker Overview ....................328 • High Capacity Stacker (HCS) Components................329 • HCS Troubleshooting........................ 333 • HCS Specifications ........................345 Xerox ® PrimeLink ® B9100/B9110/B9125/B9136 Copier/Printer User Guide... -
Page 328: High Capacity Stacker Overview
The High Capacity Stacker is an optional finishing device that provides large-capacity stacking and offsetting capabilities for production output to a stacker tray and cart. The stacker provides a top tray that is convenient for short stack runs. Xerox ® PrimeLink ®... -
Page 329: High Capacity Stacker (Hcs) Components
Stacker tray or cart Collated sets, up to a total of 5000 sheets are transported to the stacker tray that is on a movable stacker cart. Front door Open this door to remove paper or printed output. Xerox ® PrimeLink ® B9100/B9110/B9125/B9136 Copier/Printer... -
Page 330: Output Trays
The High Capacity Stacker (HCS) has two output trays. 1. Top Tray 2. Stacker Tray or Cart The top tray offers the following: • Convenience for short-stack runs, holding up to 500 sheets without offsetting. • Delivery of purged sheets. Xerox ® PrimeLink ® B9100/B9110/B9125/B9136 Copier/Printer User Guide... -
Page 331: User Guide
C C o o n n t t r r o o l l B B u u t t t t o o n n s s 1. Sample button: Press this button to output 2. Unload button: Press this button to stop a sample sheet to the top tray. printing, then remove the paper. Xerox ® PrimeLink ® B9100/B9110/B9125/B9136 Copier/Printer... - Page 332 6. Remove the paper from the stacker tray. 7. Push the empty stacker cart straight into the HCS. 8. Position the securing bar on the fixed area inside the HCS. 9. Close the front door. The tray rises to the operate position. Xerox ® PrimeLink ®...
-
Page 333: Hcs Troubleshooting
• If all paper jams are not cleared, an error message continues to appear on the printer touch screen. To clear any remaining jams, refer to the printer touch screen for instructions and information. Xerox ® PrimeLink ® B9100/B9110/B9125/B9136 Copier/Printer... - Page 334 3. Return lever 1b to the original position. 4. Close the HCS top cover. 5. If the printer indicates that there are more paper jams, follow the instructions to clear the paper jams and to resume printing. Xerox ® PrimeLink ®...
- Page 335 3. Return lever 1b to the original position. 4. Close the HCS top cover. 5. If the printer indicates that there are more paper jams, follow the instructions to clear the paper jams and to resume printing. Xerox ® PrimeLink ®...
- Page 336 1. Open the HCS top cover. 2. Do the following: a. Lift lever 1b. b. Rotate knob 1a counterclockwise. c. Remove the jammed paper. 3. Return lever 1b to the original position. 4. Do the following: Xerox ® PrimeLink ® B9100/B9110/B9125/B9136 Copier/Printer User Guide...
-
Page 337: User Guide
C C l l e e a a r r i i n n g g P P a a p p e e r r J J a a m m s s f f r r o o m m H H C C S S A A r r e e a a E E 4 4 1. Open the HCS top cover. 2. Do the following: Xerox ® PrimeLink ®... - Page 338 C C l l e e a a r r i i n n g g P P a a p p e e r r J J a a m m s s f f r r o o m m H H C C S S A A r r e e a a E E 5 5 1. Open the HCS top cover. 2. Do the following: Xerox ® PrimeLink ®...
- Page 339 3. Return lever 2b to the original position. 4. Close the HCS top cover. 5. If the printer indicates that there are more paper jams, follow the instructions to clear the paper jams and to resume printing. Xerox ® PrimeLink ®...
- Page 340 4. Push the stacker cart back into the original position. 5. Close the HCS front door. 6. If the printer indicates that there are more paper jams, follow the instructions to clear the paper jams and to resume printing. Xerox ® PrimeLink ®...
- Page 341 C C l l e e a a r r i i n n g g P P a a p p e e r r J J a a m m s s f f r r o o m m H H C C S S A A r r e e a a E E 7 7 1. Remove any output delivered to the top tray. 2. Open the HCS top cover. 3. Do the following: a. Lift lever 1b. b. Remove the jammed paper. Xerox ® PrimeLink ® B9100/B9110/B9125/B9136 Copier/Printer User Guide...
- Page 342 6. Return lever 2a to the original position. 7. Close the HCS top cover. 8. If the printer indicates that there are more paper jams, follow the instructions to clear the paper jams and to resume printing. Xerox ® PrimeLink ®...
-
Page 343: User Guide
1. Open the HCS top cover. 2. Do the following: a. Lift lever 3b. b. Rotate knob 3a clockwise. c. Remove jammed papers. 3. Return lever 3b to the original position. 4. Close the HCS top cover. Xerox ® PrimeLink ® B9100/B9110/B9125/B9136 Copier/Printer User Guide... - Page 344 2. To correct the paper curl, use the paper curl-correction controls on top of the Interface Decurler Module (IDM). 3. If the output has not improved, adjust the paper curl again. 4. If the output still has not improved, call Xerox Technical Customer Support. Xerox ®...
-
Page 345: Hcs Specifications
• Transparencies can deliver to the top tray, the stacker tray, or the cart. Stack height is limited to 100 transparencies. • Coated paper that is lighter than 100 g/m does not run as reliably as coated paper that is heavier than 100 g/m Xerox ® PrimeLink ® B9100/B9110/B9125/B9136 Copier/Printer... - Page 346 • Non-standard papers that are longer than 305 mm (12 in.) in the feed direction require a 210 mm (8.3 in.) minimum measurement across the feed direction. • Non-standard papers that are shorter than 254 mm (10 in.) in the cross-feed direction require a 330 mm (13 in.) minimum measurement in the feed direction. Xerox ® PrimeLink ®...
-
Page 347: Crease And Two-Sided Trimmer
• Crease and Two-Sided Trimmer Components ................349 • Crease and Two-Sided Trimmer Configuration................350 • Crease and Two-Sided Trimmer Maintenance................351 • Crease and Two-Sided Trimmer Troubleshooting ..............353 • Crease and Two-Sided Trimmer Specifications................370 Xerox ® PrimeLink ® B9100/B9110/B9125/B9136 Copier/Printer... -
Page 348: Crease And Two-Sided Trimmer Overview
When this device is paired with the SquareFold® ® Trimmer, all sides of booklets can be trimmed, except the binding, which enables the creation of full-bleed booklets. For more information, refer to SquareFold Trimmer Module. ® Xerox ® PrimeLink ® B9100/B9110/B9125/B9136 Copier/Printer User Guide... -
Page 349: Crease And Two-Sided Trimmer Components
The indicator blinks when the waste container is full. Upper cover To clear paper jams, open the upper cover. Lower cover To empty the trimmer waste container, open the lower cover. Xerox ® PrimeLink ® B9100/B9110/B9125/B9136 Copier/Printer User Guide... -
Page 350: Crease And Two-Sided Trimmer Configuration
The Registration adjusts media skew and detects the position of the media. Bypass The Bypass transports media through the remaining modules without providing finishing. Buffer The Buffer overlaps two sheets of the media. Xerox ® PrimeLink ® B9100/B9110/B9125/B9136 Copier/Printer User Guide... -
Page 351: Crease And Two-Sided Trimmer Maintenance
• A message appears on the printer control panel that indicates that the waste container is full. To empty the trimmer waste container, perform the following steps: 1. Open the lower cover of the Crease and Two-Sided Trimmer. Xerox ® PrimeLink ®... -
Page 352: User Guide
Use the cleaning rod to remove any remaining waste from inside the trimmer. 5. Return the cleaning rod to its original position on the inside of the lower cover. 6. Reinsert the waste container and push it in until it stops. 7. Close the lower cover. Xerox ® PrimeLink ®... -
Page 353: Crease And Two-Sided Trimmer Troubleshooting
• If all paper jams are not cleared, an error message continues to appear on the printer control panel. To clear any remaining paper jams, refer to the printer control panel for instructions and information. Xerox ® PrimeLink ®... - Page 354 Lift lever 1d. d. Remove the jammed paper. 3. If you have difficulty removing any paper jams, perform the following steps: a. Rotate knob 1c clockwise. b. Remove the jammed paper. Xerox ® PrimeLink ® B9100/B9110/B9125/B9136 Copier/Printer User Guide...
- Page 355 4. Return the levers to the original positions. 5. Close the trimmer upper cover. 6. If the printer control panel message indicates that there are more paper jams, follow the instructions to clear the paper and to resume printing. Xerox ® PrimeLink ®...
- Page 356 Push down lever 1a. b. Push down lever 1b. 4. If you cannot remove the jammed paper, perform the following steps: a. Rotate knob 1c clockwise. b. Remove the jammed paper. Xerox ® PrimeLink ® B9100/B9110/B9125/B9136 Copier/Printer User Guide...
- Page 357 6. If you have difficulty removing any jammed paper, perform the following steps: a. Lift lever 1d. b. Move lever 2a to the left. 7. To remove the jammed paper, perform the following steps: a. Rotate knob 2b counterclockwise. b. Remove the jammed paper. Xerox ® PrimeLink ® B9100/B9110/B9125/B9136 Copier/Printer User Guide...
-
Page 358: User Guide
8. Return the levers to the original positions. 9. Close the trimmer upper cover. 10. If a printer control panel message indicates that there are more paper jams, follow the instructions to remove the paper jams and to resume printing. Xerox ® PrimeLink ®... - Page 359 2. Rotate knob 2 counterclockwise and align the mark on the knob with the open padlock icon. 3. To remove the jammed paper, perform the following steps: Note: Check behind the upper cover for any hidden jammed paper. a. Push down lever 2c. b. Remove the jammed paper. Xerox ® PrimeLink ® B9100/B9110/B9125/B9136 Copier/Printer User Guide...
- Page 360 1. Open the trimmer upper cover. 2. To remove the jammed paper, do the following steps: a. Push down lever 2c. b. Lift lever 2d. c. Move lever 2e to the right. Xerox ® PrimeLink ® B9100/B9110/B9125/B9136 Copier/Printer User Guide...
- Page 361 5. Return the levers to the original positions. 6. Close the trimmer upper cover. 7. If a printer control panel message indicates that there are more paper jams, follow the instructions to clear the paper jam and to resume printing. Xerox ® PrimeLink ®...
- Page 362 3. To remove the jammed paper, perform the following steps: a. Rotate knob 3c clockwise. b. Remove the jammed paper. 4. To remove the jammed paper, perform the following steps: a. Rotate knob 2f counterclockwise. Xerox ® PrimeLink ® B9100/B9110/B9125/B9136 Copier/Printer...
- Page 363 C C l l e e a a r r i i n n g g P P a a p p e e r r J J a a m m s s f f r r o o m m T T r r i i m m m m e e r r A A r r e e a a E E 6 6 1. Open the trimmer upper cover. 2. To remove the jammed paper, perform the following steps: a. Move lever 3a to the right. b. Push down lever 4b. Xerox ® PrimeLink ® B9100/B9110/B9125/B9136 Copier/Printer...
-
Page 364: User Guide
4. To remove the jammed paper, perform the following steps: a. Move lever 4a to the right. b. While holding lever 4a, rotate knob 2f counterclockwise. c. Remove the jammed paper. 5. To remove the jammed paper, perform the following steps: Xerox ® PrimeLink ® B9100/B9110/B9125/B9136 Copier/Printer... - Page 365 C C l l e e a a r r i i n n g g P P a a p p e e r r J J a a m m s s f f r r o o m m T T r r i i m m m m e e r r A A r r e e a a E E 7 7 1. Open the trimmer upper cover. 2. Move lever 3a to the right. Xerox ® PrimeLink ®...
- Page 366 3. Rotate knob 2f counterclockwise five or more times. 4. Pull out and push in the trimmer waste container continuously three or more times. 5. Return the lever to the original position. 6. If indicator E7 remains illuminated, perform the following steps: Xerox ® PrimeLink ®...
- Page 367 Crease and Two-Sided Trimmer a. Open the lower cover. b. From the location inside the lower cover, remove the supplied cleaning rod. c. Move lever 3a to the right, then move lever 3d to the right. Xerox ® PrimeLink ®...
- Page 368 The printer control panel displays a Faults button that provides information about the fault and detailed instructions to correct the fault. The E code in the upper-left part of the Fault message shows which error indicator E1–E7 is illuminated on the Crease and Two-Sided Trimmer indicator panel. Xerox ® PrimeLink ®...
- Page 369 The control panel displays a Faults button that provides information about the fault and detailed instructions for correcting the fault. Tip: Crease and Two-Sided Trimmer faults are identified by the codes that start with the three- digit numbers 012, 013, 014, 024, and 028. Xerox ® PrimeLink ® B9100/B9110/B9125/B9136 Copier/Printer...
-
Page 370: Crease And Two-Sided Trimmer Specifications
• For sheets, scores all folds for offline folding so that sheets exit flat The Crease and Two–Sided Trimmer contains a Buffer Assembly to regulate the booklet processing and keep pace with print engine productivity. Xerox ® PrimeLink ® B9100/B9110/B9125/B9136 Copier/Printer... -
Page 371: C/Z Folder
C/Z Folder This appendix contains: • C/Z Folder Overview ......................... 372 • C/Z Fold Types.......................... 373 • C/Z Folder Components......................374 • C/Z Folder Troubleshooting ...................... 375 • C/Z Folder Specifications ......................382 Xerox ® PrimeLink ® B9100/B9110/B9125/B9136 Copier/Printer User Guide... -
Page 372: C/Z Folder Overview
• To use the fold feature, ensure that the orientation of the document is Short Edge Feed (SEF). Ensure that you select a tray that contains SEF media. • There are three types of folds available: – C–Fold – Z–Fold – Z–Fold Half Sheet Xerox ® PrimeLink ® B9100/B9110/B9125/B9136 Copier/Printer User Guide... -
Page 373: C/Z Fold Types
Sheet is not folded in two equal folds. The two folds are unequal which allows one edge of the Z- Fold Half Sheet to have a longer edge, and the longer edge allows for stapling or hole punching. Xerox ®... -
Page 374: C/Z Folder Components
C/Z Folder C/Z Folder Components Note: For detailed information about the folding feature, refer to Adjust Fold Position in the Xerox ® PrimeLink ® B9100/B9110/B9125/B9136 Copier/Printer System Administrator Guide. Component Description Number C/Z fold output tray Receives output sheets. C/Z fold output tray button Press this button to open the output tray. -
Page 375: C/Z Folder Troubleshooting
• If all paper jams are not cleared, an error message continues to appear on the printer control panel. To clear any remaining jams, refer to the printer control panel for instructions and information. Xerox ® PrimeLink ® B9100/B9110/B9125/B9136 Copier/Printer... - Page 376 3. Return levers 2a and 2b to their original positions. 4. Close the folder front cover. 5. If the printer indicates that there are more paper jams, follow the instructions to clear the paper and to resume printing. Xerox ® PrimeLink ®...
- Page 377 3. Return lever 2g to its original position. 4. Close the folder front cover. 5. If the printer indicates that there are more paper jams, follow the instructions to clear the paper and to resume printing. Xerox ® PrimeLink ®...
- Page 378 2. Pull open the C/Z fold output tray 2d. 3. To remove jammed paper, do the following: a. Pull lever 2e to the right. b. Rotate knob 2c counterclockwise. c. Remove the jammed paper. Xerox ® PrimeLink ® B9100/B9110/B9125/B9136 Copier/Printer...
- Page 379 5. If you have difficulty removing any paper jams, do the following: a. Pull lever 2f to the right. b. Rotate knob 2c counterclockwise. c. Remove the jammed paper. 6. Return lever 2f to the original position. Xerox ® PrimeLink ® B9100/B9110/B9125/B9136 Copier/Printer...
- Page 380 The touch screen displays a Faults button that provides information about the fault and detailed instructions for correcting the fault. Tip: C/Z Folder faults are identified by codes that start with the three-digit numbers 012 and 013. Xerox ® PrimeLink ® B9100/B9110/B9125/B9136 Copier/Printer...
- Page 381 C/Z Folder Xerox ® PrimeLink ® B9100/B9110/B9125/B9136 Copier/Printer User Guide...
-
Page 382: C/Z Folder Specifications
Tri-fold (C or Z) Paper size A4, Letter: 210 x 297 mm (8.5 x 11 in.) Paper weight 52–105 g/m (Uncoated) Tray capacity 30 sheets Xerox ® PrimeLink ® B9100/B9110/B9125/B9136 Copier/Printer User Guide... -
Page 383: Production Ready Finishers
This appendix contains: • Overview of the Production Ready Finishers................384 • Production Ready Finisher Components..................386 • PR Finisher Maintenance......................391 • PR Finisher Troubleshooting ..................... 402 • PR Finisher Specifications......................428 Xerox ® PrimeLink ® B9100/B9110/B9125/B9136 Copier/Printer User Guide... -
Page 384: Overview Of The Production Ready Finishers
P P r r o o d d u u c c t t i i o o n n R R e e a a d d y y ( ( P P R R ) ) F F i i n n i i s s h h e e r r The PR Finisher consists of the following components: • Two output trays: Top Tray and Stacker Tray • Stapler Xerox ® PrimeLink ®... - Page 385 The Production Ready (PR) Finisher Plus includes the same features and functions as the PR Finisher. The PR Finisher Plus serves as an interface to transfer paper between the printer and any third-party finishing device that is attached to the printer. Xerox ® PrimeLink ®...
-
Page 386: Production Ready Finisher Components
8. Basic Staple Cartridge for Side Stitch 4. Booklet Tray* 9. Two Booklet Staple Cartridges for Saddle Stitch* 5. Booklet Output Button* 10. Hole Punch Waste Container Note: * Available only with the PR Booklet Maker Finisher. Xerox ® PrimeLink ® B9100/B9110/B9125/B9136 Copier/Printer User Guide... - Page 387 Lightweight, 106 g/m or lighter, coated paper – Coated paper whose edges are 364 mm (14.3 in.) or longer – Long paper Note: If sheets are curled, changing the tray angle has no effect. Xerox ® PrimeLink ® B9100/B9110/B9125/B9136 Copier/Printer User Guide...
- Page 388 Finishers. Booklet Tray Note: The booklet tray is attached to the PR Booklet Maker Finisher. If the SquareFold ® Trimmer is installed, the booklet tray is attached to the SquareFold ® Trimmer. Xerox ® PrimeLink ® B9100/B9110/B9125/B9136 Copier/Printer User Guide...
- Page 389 • Bi-Fold Single Sheet • Bi-Fold Multiple Sheets • Bi-Fold Multiple Sheets Stapled Note: For detailed information about fold types, refer to the System Administrator Guide and the Adjust Fold Positions topic. Xerox ® PrimeLink ® B9100/B9110/B9125/B9136 Copier/Printer User Guide...
- Page 390 5. Finishing Transport option 6. Finishing Transport Paper Jam or Error Indicators Note: For details on the functions of your third-party finishing device, refer to the manual that was supplied with the device. Xerox ® PrimeLink ® B9100/B9110/B9125/B9136 Copier/Printer User Guide...
-
Page 391: Pr Finisher Maintenance
F F i i n n i i s s h h e e r r C C o o n n s s u u m m a a b b l l e e S S u u p p p p l l i i e e s s You can order Xerox supplies, including staples, staple cartridges, and staple waste containers at www. - Page 392 S S t t i i t t c c h h i i n n g g Note: Before performing this procedure, ensure that the printer is not printing. 1. Open the finisher front cover. 2. Pull out R1, then remove it from the printer. Xerox ® PrimeLink ® B9100/B9110/B9125/B9136 Copier/Printer...
- Page 393 R R e e p p l l a a c c i i n n g g t t h h e e B B o o o o k k l l e e t t S S t t a a p p l l e e C C a a r r t t r r i i d d g g e e f f o o r r S S a a d d d d l l e e S S t t i i t t c c h h i i n n g g Note: Before performing this procedure, ensure that the printer is not printing. Xerox ® PrimeLink ®...
- Page 394 3. To remove the staple cartridge, hold the tabs on the cartridge, then pull the cartridge out of the printer. Note: There are two booklet staple cartridges provided. The message on the printer control panel touch screen indicates which cartridge needs replacement. Xerox ® PrimeLink ® B9100/B9110/B9125/B9136 Copier/Printer...
- Page 395 4. While holding the tabs on the new staple cartridge, push in the cartridge until it stops. Note: Ensure that the marks are aligned. 5. Push the Saddle Stitch Unit 3 into the finisher gently, until the unit stops. 6. Close the finisher front cover. Xerox ® PrimeLink ® B9100/B9110/B9125/B9136 Copier/Printer...
- Page 396 2. To open the staple cartridge, squeeze the small tabs on either side of the cartridge. The staple cartridge opens. 3. To prepare the cartridge for the removal of the empty staple cassette, position the top part of the cartridge under the lower part of the cartridge. Xerox ® PrimeLink ®...
- Page 397 • Before performing this procedure, ensure that the printer is not printing. • Ensure that the printer remains powered on when replacing the staple waste container. If powered off, the printer does not recognize the replacement of the waste container, and the message remains displayed. Xerox ® PrimeLink ®...
- Page 398 A staple waste container is shipped with the basic staple cartridge. 1. Open the finisher front cover. 2. Move the lock lever under R5 toward the left, to the opened-lock icon. 3. Pull out R5, then remove the finisher staple waste container from the printer. Xerox ® PrimeLink ®...
- Page 399 4. Place the used staple waste container into the supplied plastic bag. Note: Do not disassemble used waste containers. Return the used staple waste containers to the Xerox Customer Support Center. 5. Lower the new staple waste container into position, then gently push in the container until it stops.
- Page 400 • After you replace the waste container, close the finisher front cover. Ensure that the printer can print a test page. 1. Open the finisher front cover. 2. Pull out R4, then remove it from the printer. Xerox ® PrimeLink ®...
- Page 401 4. Return R4 to the original position in the printer. 5. Close the finisher front cover. Xerox ® PrimeLink ®...
-
Page 402: Pr Finisher Troubleshooting
• After you clear a paper jam, printing resumes automatically from the state before the paper jam occurred. • If you do not clear all paper jams, an error message continues to appear on the printer touch screen. To clear any remaining jams, follow the instructions on the printer touch screen. Xerox ® PrimeLink ®... - Page 403 • After you clear a paper jam, printing resumes automatically from the state before the paper jam occurred. • If you do not clear all paper jams, an error message continues to appear on the printer touch screen. To clear any remaining jams, follow the instructions on the printer touch screen. Xerox ® PrimeLink ®...
- Page 404 Grasp the leading edge of the jammed sheet of paper, then pull out the sheet. a. Push lever 1a to the left. b. Remove the jammed paper. 3. If you have difficulty removing any paper jams, do the following: a. Rotate knob 1b clockwise. Xerox ® PrimeLink ® B9100/B9110/B9125/B9136 Copier/Printer...
- Page 405 2. To remove the jammed paper, do the following: Note: The jammed paper can be hidden behind the upper cover. a. Pull lever 1c to the right. b. Rotate knob 1e clockwise. Xerox ® PrimeLink ® B9100/B9110/B9125/B9136 Copier/Printer User Guide...
- Page 406 C C l l e e a a r r i i n n g g P P a a p p e e r r J J a a m m s s f f r r o o m m F F i i n n i i s s h h e e r r A A r r e e a a E E 3 3 1. Pull out the jammed paper from the finisher top tray. 2. Open and close the finisher front cover. Xerox ® PrimeLink ®...
- Page 407 2. To remove the jammed paper, do the following steps: a. Pull lever 1d to the right. b. Rotate knob 1e clockwise. c. Remove the jammed paper. 3. Return lever 1d to the original position. 4. Close the finisher front cover. Xerox ® PrimeLink ® B9100/B9110/B9125/B9136 Copier/Printer User Guide...
- Page 408 2. To remove the jammed paper, do the following steps: a. Pull lever 1d to the right. b. Rotate knob 1f counterclockwise. c. Remove the jammed paper. 3. Return lever 1d to the original position. 4. Close the finisher front cover. Xerox ® PrimeLink ® B9100/B9110/B9125/B9136 Copier/Printer User Guide...
- Page 409 C C l l e e a a r r i i n n g g P P a a p p e e r r J J a a m m s s f f r r o o m m F F i i n n i i s s h h e e r r B B o o o o k k l l e e t t A A r r e e a a E E 7 7 1. Open the finisher front cover. 2. To remove the jammed paper, do the following steps: Xerox ® PrimeLink ®...
- Page 410 Remove the jammed paper. 3. If you have difficulty removing paper jam, do the following steps: a. Pull out the Saddle Stitch Unit 3. b. Remove the jammed paper. 4. Return lever 3a to the original position. Xerox ® PrimeLink ® B9100/B9110/B9125/B9136 Copier/Printer...
- Page 411 2. Release latch 3a, then check for a paper jam. If there is no jammed paper, pull out Saddle Stitch Unit 3 toward you until it stops. 3. To remove the jammed paper, do the following steps: Xerox ® PrimeLink ®...
- Page 412 C C l l e e a a r r i i n n g g P P a a p p e e r r J J a a m m s s f f r r o o m m F F i i n n i i s s h h e e r r B B o o o o k k l l e e t t A A r r e e a a E E 9 9 1. Open the finisher front cover. 2. To remove the jammed paper, do the following steps: Xerox ® PrimeLink ®...
- Page 413 C C l l e e a a r r i i n n g g P P a a p p e e r r J J a a m m s s i i n n t t h h e e F F i i n n i i s s h h e e r r M M o o d d u u l l e e A A r r e e a a E E 7 7 1. Open the finisher front cover. 2. Remove any jammed paper. 3. To clear paper jams from area E7: a. Release latches 3a and 3b. Xerox ® PrimeLink ® B9100/B9110/B9125/B9136 Copier/Printer...
- Page 414 C C l l e e a a r r i i n n g g P P a a p p e e r r J J a a m m s s i i n n t t h h e e F F i i n n i i s s h h i i n n g g T T r r a a n n s s p p o o r r t t Clearing Paper Jams in Finishing Transport Area 1 1. Open the Finishing Transport front cover. 2. To remove the jammed paper: a. Release latch 1. b. Remove the jammed paper. Xerox ® PrimeLink ® B9100/B9110/B9125/B9136 Copier/Printer User Guide...
- Page 415 Clearing Paper Jams in Finishing Transport Area 2 1. Open the Finishing Transport front cover. 2. To remove the jammed paper: a. Release latch 2. b. Rotate the knob counterclockwise. c. Remove the jammed paper. Xerox ® PrimeLink ® B9100/B9110/B9125/B9136 Copier/Printer User Guide...
- Page 416 Clearing Paper Jams in Finishing Transport Area 3 1. Open the Finishing Transport front cover. 2. To remove the jammed paper: a. Release latch 3. b. Rotate the knob clockwise. c. Remove the jammed paper. Xerox ® PrimeLink ® B9100/B9110/B9125/B9136 Copier/Printer User Guide...
- Page 417 3. Return latch 3 to the original position. 4. Close the Finishing Transport front cover. Clearing Paper Jams in Finishing Transport Area 4 1. Open the Finishing Transport front cover. 2. To remove the jammed paper, perform the following steps: Xerox ® PrimeLink ® B9100/B9110/B9125/B9136 Copier/Printer...
- Page 418 Use the following procedures when stapling issues occur with the printed output, such as the sheets are not stapled or staples are bent. If the problems continue after you have tried the following solutions, contact a Xerox service representative. Not stapled Bent staple If printed sheets are stapled as shown in the following figures, contact your service representative.
- Page 419 • If staple jams occur, open the cover of the staple cartridge, then remove the bent staples. Do not open the cover of the staple cartridge unless you are removing jammed staples. Xerox ® PrimeLink ®...
- Page 420 After you remove the staple cartridge unit, check the inside of the finisher for any remaining staples. 3. Open the staple cartridge unit cover, then remove the jammed staples. WARNING: To avoid personal injury, use care when you remove jammed staples. Xerox ® PrimeLink ® B9100/B9110/B9125/B9136 Copier/Printer...
- Page 421 If a staple cartridge has been inserted incorrectly or removed accidentally, perform the following procedure to reinsert the staple cartridge correctly into the cartridge unit. 1. Open the finisher front cover. 2. Pull out R1, then remove the staple cartridge unit from the printer. Xerox ® PrimeLink ®...
- Page 422 WARNING: When you move the lever, be careful not to hurt your fingers and fingernails. 5. While holding the lever, turn the staple cartridge unit up, then remove the staple cartridge from the unit. Xerox ® PrimeLink ® B9100/B9110/B9125/B9136 Copier/Printer...
- Page 423 When removing staples, be careful not to hurt your fingers. 7. Insert the staple cartridge into the staple cartridge unit. 8. Reinsert the staple cartridge unit to the original position in the printer. 9. Close the finisher front cover. Xerox ® PrimeLink ®...
- Page 424 1. Open the finisher front cover. 2. To remove the Saddle Stitch Unit 3, pull the unit toward you, then remove it from the printer. 3. While holding the tabs on the staple cartridge, pull the cartridge out of the staple unit. Xerox ® PrimeLink ®...
- Page 425 5. While holding the tabs on the new staple cartridge, push in the cartridge until it stops. Note: Ensure that the small arrows are aligned. 6. Push the Saddle Stitch Unit 3 into the finisher until the unit stops. 7. Close the finisher front cover. Xerox ® PrimeLink ® B9100/B9110/B9125/B9136 Copier/Printer...
- Page 426 The E code on the upper-left part of the Fault message displays which error indicator is illuminated on the PR Finisher Plus for Finisher Module E1–E7 or Finishing Transport Areas 1–4. Xerox ® PrimeLink ®...
- Page 427 The touch screen displays a Faults button that provides information about the fault and detailed instructions to correct the fault. Tip: PR Finisher Plus faults are identified by the codes that start with the three-digit numbers 013 and 051. Xerox ® PrimeLink ® B9100/B9110/B9125/B9136 Copier/Printer...
-
Page 428: Pr Finisher Specifications
330.2 x 482.6 mm (13 x 19 in.) Height 182.0–330.2 mm Custom size (7.17–13 in.) Width 257.0–488.0 mm (10.12–19.21 in.) Paper weight Top tray 52–350 g/m Stacker tray 52–350 g/m Booklet tray 52–350 g/m Xerox ® PrimeLink ® B9100/B9110/B9125/B9136 Copier/Printer User Guide... - Page 429 12.2 in.) Custom size Height 182.0–297.0 mm (7.17–11.69 in.) Width 148.0–432.0 mm (5.83–17 in.) Paper weight Uncoated 52–300 g/m Coated 64–216 g/m Stapling position one place, two places, or four places Xerox ® PrimeLink ® B9100/B9110/B9125/B9136 Copier/Printer User Guide...
- Page 430 (13 x 19 in.) Minimum JIS B5 182 x 257 mm (7.2 x 10.1 in.) Custom size Height 182.0–330.2 mm (7.17–13 in.) Uncoated Width 257.0–488.0 mm (10.12–19.21 in.) Paper weight 52–300 g/m Coated 64–216 g/m Xerox ® PrimeLink ® B9100/B9110/B9125/B9136 Copier/Printer User Guide...
- Page 431 B B o o o o k k l l e e t t C C a a p p a a c c i i t t i i e e s s b b y y P P a a p p e e r r W W e e i i g g h h t t a a n n d d T T y y p p e e Production Ready Finisher Booklet Capacity, Stapled Paper Type and Sheet Capacity Paper Weight Uncoated Coated 60–80 g/m — 81–90 g/m Xerox ® PrimeLink ® B9100/B9110/B9125/B9136 Copier/Printer User Guide...
- Page 432 129–150 g/m 151–176 g/m 177–220 g/m 221–256 g/m 257–300 g/m 301–350 g/m Production Ready Finisher Booklet Capacity, Unstapled Paper Type and Sheet Capacity Paper Weight Uncoated Coated 52–330 g/m 221–256 g/m 257–350 g/m Xerox ® PrimeLink ® B9100/B9110/B9125/B9136 Copier/Printer User Guide...
- Page 433 ® Trimmer Components ..................435 • Square Fold and Trim Features ....................438 • SquareFold ® Trimmer Maintenance..................442 • SquareFold ® Trimmer Troubleshooting ..................444 • SquareFold ® Trimmer Specifications..................449 Xerox ® PrimeLink ® B9100/B9110/B9125/B9136 Copier/Printer User Guide...
-
Page 434: Squarefold ® Trimmer Module Overview
The booklet area of the finisher assembles and staples the booklet. The booklet enters the SquareFold ® Trimmer already assembled. Ensure that you set any adjustments to the original image and its placement on the booklet page at the printer server. Xerox ® PrimeLink ® B9100/B9110/B9125/B9136 Copier/Printer... -
Page 435: Squarefold ® Trimmer Components
T T r r i i m m m m e e r r C C i i r r c c u u i i t t B B r r e e a a k k e e r r Xerox ®... -
Page 436: Output Trays
2. Booklet Tray: Saddle stitch, bi-fold and trim, or square-fold jobs are delivered only to this tray. C C o o n n t t r r o o l l P P a a n n e e l l Xerox ®... -
Page 437: Control Panel
Trimmer device contain trim remnants or scraps from the previously trimmed booklet. Trim remnant or scrap accumulation is due to normal static electricity build-up. If booklets contain trim remnants or scraps, remove and discard the remnants and scraps. Xerox ® PrimeLink ®... -
Page 438: Square Fold And Trim Features
+2 / Higher / High 2. The more pressure that is applied, the more square the booklet spine becomes. The greatest amount of pressure that can be applied to the booklet is +2. Booklet Example The following images show two different booklet types: Xerox ® PrimeLink ®... - Page 439 Access the trim feature from your computer print driver, the printer user interface, or from the print server. T T r r i i m m O O p p t t i i o o n n s s When you use the trim options, always consider the following: Xerox ® PrimeLink ®...
- Page 440 (8.5 x 11 in.) x 8.5 in.) in.) lbs. A4: 210 x 298 mm 149 x 210 mm (5.5 120 g/m ; 32 135 mm (5.31 (8.5 x 11 in.) x 8.5 in.) in.) lbs. Xerox ® PrimeLink ® B9100/B9110/B9125/B9136 Copier/Printer User Guide...
- Page 441 ; 28 18 in.) 9 in.) in.) lbs. 305 x 458 mm (12 x 152 x 229 mm (6 x 210 mm (8.26 120 g/m ; 80 18 in.) 9 in.) in.) lbs. Xerox ® PrimeLink ® B9100/B9110/B9125/B9136 Copier/Printer User Guide...
-
Page 442: Squarefold ® Trimmer Maintenance
Keep the printer powered on when disposing of the waste. If powered off, the printer does not recognize that the waste container was emptied. To empty the trimmer waste container, perform the following steps: 1. Ensure that the printer is not printing, then slowly pull out the trimmer waste container. Xerox ® PrimeLink ®... - Page 443 Ensure that the waste container is emptied completely. If any paper waste or scraps remain, the container becomes full before a control panel message appears, causing the printer to malfunction. 4. Reinsert the empty waste container, then slowly push in the container until it stops. Xerox ® PrimeLink ®...
-
Page 444: Squarefold ® Trimmer Troubleshooting
• If all paper jams are not cleared, an error message continues to appear on the printer control panel. To clear any remaining paper jams, refer to the printer control panel for instructions and information. Xerox ® PrimeLink ®... - Page 445 1. To open the left cover of the trimmer device, press the button on the cover. 2. Remove the jammed paper. 3. If you have difficulty removing the jammed paper, open the front cover of the finisher. Xerox ® PrimeLink ®...
- Page 446 Note: Before you perform this procedure, ensure that the printer is not printing. 1. To open the right cover of the trimmer device, press the button on the cover. 2. Remove the jammed paper. Xerox ® PrimeLink ® B9100/B9110/B9125/B9136 Copier/Printer...
- Page 447 When you use full-page images, ensure that the finished booklet size accommodates any full-page images, and that when the booklet is trimmed, these images are not truncated. The following images are examples of a booklet with pre-printed front and back covers, with a full- page image in different sizes: Xerox ® PrimeLink ®...
- Page 448 • If any images or texts need shifting, use the various selections from your print driver application. Refer to your print driver Help information. Note: It takes one or more test prints before you achieve your required output. Xerox ® PrimeLink ®...
-
Page 449: Squarefold ® Trimmer Specifications
Paper size • Maximum: 330.2 x 488 mm (13 x 19.21 in.) • Minimum: 182 x 257 mm (7.16 x 10.11 in.) Trim size 2–20 mm (0.078–0.787 in.), adjustable in 0.1 mm (0.0039 in.) increments Xerox ® PrimeLink ® B9100/B9110/B9125/B9136 Copier/Printer... - Page 450 SquareFold ® Trimmer Module Xerox ® PrimeLink ® B9100/B9110/B9125/B9136 Copier/Printer User Guide...
Need help?
Do you have a question about the PrimeLink B9100 and is the answer not in the manual?
Questions and answers
How do I connect the printer to my PC using printer cord