HPE 3PAR StoreServ 8000 Service And Upgrade Manual
Hide thumbs
Also See for 3PAR StoreServ 8000:
- Software user's manual (73 pages) ,
- Service and upgrade manual (147 pages) ,
- Customer self install manual (104 pages)
Table of Contents
Advertisement
HPE 3PAR StoreServ 8000 Storage
Service and Upgrade Guide: Customer
Edition
Abstract
This document provides information and instructions to guide you in servicing and upgrading
the HPE 3PAR StoreServ 8000 Storage system without the assistance of an authorized
service provider. If assistance is needed, contact your HPE Sales Representative or HPE
Partner.
Part Number: QL226-10543
Published: December 2018
Edition: 2
Advertisement
Table of Contents

Subscribe to Our Youtube Channel
Related Manuals for HPE 3PAR StoreServ 8000


Summary of Contents for HPE 3PAR StoreServ 8000
- Page 1 Abstract This document provides information and instructions to guide you in servicing and upgrading the HPE 3PAR StoreServ 8000 Storage system without the assistance of an authorized service provider. If assistance is needed, contact your HPE Sales Representative or HPE Partner.
- Page 2 Publication Edition Summary of changes date QL226-10543 December 2018 3 • Added a link to the HPE Parts Store in "Spare part number"; removed parts catalog • Updated "Guidelines for cabling" QL226-99885 June 2018 • Support for a new physical service processor, HPE ProLiant DL360 Gen10 Server •...
-
Page 3: Table Of Contents
Connection methods for the HPE 3PAR Service Processor..........68 Connecting to HPE 3PAR Service Processor 5.x from a web browser....69 Connecting to the HPE 3PAR Service Processor 4.x from a web browser... 69 Connecting to the Linux console of the HPE 3PAR Service Processor through a Secure Shell session................69... - Page 4 76 Creating an account to access the HPE InfoSight web portal..........76 Registering the storage system with the HPE InfoSight web portal using the HPE 3PAR StoreServ Management Console................76 Removing a storage system from the HPE InfoSight platform......... 78 Accounts and credentials for service..................
- Page 5 Power cooling module information, direct-current system........105 Power distribution unit information................. 106 Service processor information..................106 Physical service processor information, HPE ProLiant DL120 Gen9 Server..106 Physical service processor information, HPE ProLiant DL360 Gen10 Server..108 Switch information......................109 Direct-current switch information................. 109 Component LEDs........................109...
- Page 6 ..........................163 vv ..........................164 Controlled thermal shutdown....................165 Log files collection........................165 Collecting HPE 3PAR SmartStart log files—OS 3.2.2 and SP 4.x......... 165 Collecting service processor log files—SP 5.x...............165 Collecting the service processor log files—SP4.x............166 Websites....................167 Support and other resources.............168 Accessing Hewlett Packard Enterprise Support...............
-
Page 7: Preparation
Videos for service and upgrade Customer self repair video With HPE 3PAR OS 3.3.1, the customer self repair (CSR) video is available at the hpe.com website: www.hpe.com/support/3PAR8000CSRVideo With HPE 3PAR OS 3.2.2, the customer self repair (CSR) videos are available at the CSR Services Media Library website: www.hpe.com/support/sml-csr... -
Page 8: Service
Breaker panel replacement The E-T-A Breaker Panel is a direct-current component supported for the HPE 3PAR StoreServ 8000 Storage system. WARNING: Since there is a risk of injury from electric shock or high energy levels, only a certified... -
Page 9: Controller Node Replacement-Two-Node System Only
(ASP). Replacing a controller node—Two-node system only—SP 4.x This procedure is for the replacement of an HPE 3PAR StoreServ 8000 Storage controller node using HPE 3PAR Service Processor (SP) 4.x. - Page 10 a. From the SPOCC interface main menu, click Support in the left navigation pane. b. From the Service Processor - Support page, under StoreServs, click Health Check in the Action column. A pop-up window displays a status message while the health check runs. When running the Health Check using Internet Explorer, the screen might remain blank while information is gathered.
- Page 11 a. Pull to extend the gray rod of the controller node to the extracted position. Figure 2: Extending the controller node rod b. Confirm that the controller node is correctly oriented. In the controller node enclosure, the pair is installed with each controller node oriented 180° from each other. Figure 3: Orientation of a controller node pair c.
-
Page 12: Replacing A Controller Node-Two-Node System Only-Sp 5.X
18. Follow the return instructions provided with the replacement component. Replacing a controller node—Two-node system only—SP 5.x This procedure is for the replacement of an HPE 3PAR StoreServ 8000 Storage controller node using HPE 3PAR Service Processor (SP) 5.x. Service... - Page 13 Connect to the service processor in the Service Console interface: Browse to the IP address: https://<sp_ip_address>:8443 Log in to the HPE 3PAR SP and enter the admin account credentials. Initiate a maintenance window to stop the flow of alerts to Hewlett Packard Enterprise.
- Page 14 To see the Recommended Action, click the banner and Details. • Under the Health pane, the State is Degraded. This status refers to the state of the storage system, not the state of an individual component. • Under the Health pane, the Details indicate that the drive enclosures and drives connected to the failed controller node are Degraded.
- Page 15 Figure 7: Extending the controller node rod b. Confirm that the controller node is correctly oriented. In the controller node enclosure, the pair is installed with each controller node oriented 180° from each other. Figure 8: Orientation of a controller node pair c.
-
Page 16: Drive Replacement
The flow of support information and local notifications of system alerts will be sent to Hewlett Packard Enterprise again. 19. Follow the return instructions provided with the replacement component. Drive replacement Replacing a drive—SP 4.x This procedure is for the replacement of a drive using HPE 3PAR Service Processor (SP) 4.x. Service... - Page 17 IMPORTANT: When replacing a drive that is Failed, Maintenance Mode is not required. By not setting Maintenance Mode, alerts for other issues that might arise will continue to be sent to HPE. Prerequisites Order a replacement component by contacting your Hewlett Packard Enterprise authorized service provider.
- Page 18 a. From the SPOCC interface main menu, click Support in the left navigation pane. b. From the Service Processor - Support page, under StoreServs, click Health Check in the Action column. A pop-up window displays a status message while the health check runs. When running the Health Check using Internet Explorer, the screen might remain blank while information is gathered.
- Page 19 a. To release the handle into the open position, pinch the latch handle to release the handle into the open position (1). b. Extend the latch handle (2). c. Slide the drive out of the bay (3) and place on an ESD safe mat. Figure 11: Removing an SFF drive Figure 12: Removing an LFF drive Replacement...
- Page 20 Figure 13: Installing an SFF drive Figure 14: Installing an LFF drive Verification 11. Observe the newly installed drive and confirm that the fault LED is off and the status LED is solid green. The change in the LEDs may take several minutes as the drive is prepared for use by the system. 12.
-
Page 21: Replacing A Drive-Sp 5.X
IMPORTANT: When replacing a drive that is Failed, Maintenance Mode is not required. By not setting Maintenance Mode, alerts for other issues that might arise will continue to be sent to HPE. Prerequisites Order a replacement component by contacting your Hewlett Packard Enterprise authorized service provider. - Page 22 Browse to the IP address: https://<sp_ip_address>:8443 Log in to the HPE 3PAR SP and enter the admin account credentials. Initiate Check Health on the storage system. a. From the Service Console interface, select Systems. b. Select Actions > Check health.
- Page 23 CAUTION: To avoid damaging the hardware or losing data, always confirm that the drive is ready for removal by its solid amber fault LED. IMPORTANT: If you do not see a solid amber fault LED on the drive, it could be the data has not been vacated yet.
- Page 24 a. On the drive, press the release button to open the handle. b. With the latch handle of the drive fully extended, align and slide the drive into the bay until the handle begins to engage (1). c. To seat the drive into the drive bay, close the handle (2). Figure 17: Installing an SFF drive Figure 18: Installing an LFF drive Verification...
-
Page 25: Power Cooling Module Or Battery Replacement
5.x This procedure is for the replacement of a battery in an alternating-current power cooling module (AC PCM) of the controller node enclosure using HPE 3PAR Service Processor (SP) 5.x. The battery can be replaced without replacing the entire PCM. - Page 26 Log in to the HPE 3PAR SP and enter the admin account credentials. Initiate a maintenance window to stop the flow of alerts to Hewlett Packard Enterprise. a. From the Service Console interface, select Systems. b. Select Actions > Set maintenance mode and then follow the instructions.
- Page 27 Figure 19: Removing the AC power cooling module 11. Remove the battery from the AC PCM. a. At the back of the PCM, lift the battery release handle (1). b. Remove the battery from the battery compartment (2). c. Place on the ESD safe mat. Figure 20: Removing the battery, AC power cooling module, controller node enclosure Replacement 12.
- Page 28 Figure 21: Installing the battery, AC power cooling module, controller node enclosure 13. Install the AC PCM. a. On the ESD mat, extend the PCM handle to the open position, and then carry it to the enclosure. b. Slide the PCM into the enclosure and then push until the insertion mechanism starts to engage (the handle starts to rotate).
-
Page 29: Replacing An Alternating-Current Power Cooling Module In A Controller Node
Replacing an alternating-current power cooling module in a controller node enclosure—SP 5.x This procedure is for the replacement of an alternating-current power cooling module (AC PCM) in a controller node enclosure using HPE 3PAR Service Processor (SP) 5.x. IMPORTANT: •... - Page 30 Connect to the service processor in the Service Console interface: Browse to the IP address: https://<sp_ip_address>:8443 Log in to the HPE 3PAR SP and enter the admin account credentials. Initiate a maintenance window to stop the flow of alerts to Hewlett Packard Enterprise.
- Page 31 c. Slide the PCM out of the enclosure (3). d. Place the PCM on the ESD mat with the battery compartment facing up. Figure 23: Removing the AC power cooling module 10. Remove the battery from the AC PCM. a. At the back of the PCM, lift the battery release handle (1). b.
- Page 32 Figure 25: Installing the battery, AC power cooling module, controller node enclosure 12. Install the AC PCM. a. On the ESD mat, extend the PCM handle to the open position, and then carry it to the enclosure. b. Slide the PCM into the enclosure and then push until the insertion mechanism starts to engage (the handle starts to rotate).
-
Page 33: Replacing An Alternating-Current Power Cooling Module In A Drive Enclosure-Sp 5.X
Unpack the component and place on an ESD safe mat. Connect to the service processor in the Service Console interface: Browse to the IP address: https://<sp_ip_address>:8443 Log in to the HPE 3PAR SP and enter the admin account credentials. Service... - Page 34 Initiate a maintenance window to stop the flow of alerts to Hewlett Packard Enterprise. a. From the Service Console interface, select Systems. b. Select Actions > Set maintenance mode and then follow the instructions. TIP: When you put the storage system in maintenance mode or edit the maintenance mode, specify the duration in hours and a reason.
- Page 35 Figure 27: Removing the AC power cooling module Replacement 11. Install the AC PCM. a. On the ESD mat, extend the PCM handle to the open position, and then carry it to the enclosure. b. Slide the PCM into the enclosure and then push until the insertion mechanism starts to engage (the handle starts to rotate).
-
Page 36: Replacing A Direct-Current Power Cooling Module Battery In A Controller Node
This procedure is for the replacement of a battery in an -48V direct-current (DC) power cooling module (PCM) in the controller node enclosure using HPE 3PAR Service Processor (SP) 5.x. The battery can be replaced without replacing the entire PCM. - Page 37 NOTE: • The power switch on the HPE 3PAR -48VDC 764W Power Cooling Module is inverted 180° from the orientation of the power switch on the alternating-current (AC) power cooling module. • Labels on the HPE 3PAR -48VDC 764W Power Cooling Module show the model as -48VDC INPUT 764W PCM.
- Page 38 Browse to the IP address: https://<sp_ip_address>:8443 Log in to the HPE 3PAR SP and enter the admin account credentials. Initiate a maintenance window to stop the flow of alerts to Hewlett Packard Enterprise. a. From the Service Console interface, select Systems.
- Page 39 Figure 29: Removing the DC power cooling module, controller node enclosure 12. Remove the battery from the DC PCM. a. At the back of the PCM, lift the battery release handle. b. Remove the battery from the battery compartment and place on the ESD safe mat. Figure 30: Removing the battery, DC power cooling module, controller node enclosure Replacement 13.
- Page 40 Figure 31: Installing the battery, DC power cooling module, controller node enclosure 14. Install the DC PCM. a. On the ESD mat, rotate the -48V DC PCM release handle to the open position and then carry it to the enclosure. b.
-
Page 41: Replacing The Direct-Current Power Cooling Module In A Controller Node Enclosure-Sp 5.X
(-36V DC to -72V DC) may damage the direct-current power cooling module. IMPORTANT: The direct-current components are qualified and supported only with a direct-current HPE 3PAR StoreServ 8000 Storage system running HPE 3PAR OS 3.3.1 and later versions. IMPORTANT: The storage system ordered for installation in a direct-current (DC) power environment requires the installation of DC-specific components. - Page 42 NOTE: • The power switch on the HPE 3PAR -48VDC 764W Power Cooling Module is inverted 180° from the orientation of the power switch on the alternating-current (AC) power cooling module. • Labels on the HPE 3PAR -48VDC 764W Power Cooling Module show the model as -48VDC INPUT 764W PCM.
- Page 43 Initiate a maintenance window to stop the flow of alerts to Hewlett Packard Enterprise. a. From the Service Console interface, select Systems. b. Select Actions > Set maintenance mode and then follow the instructions. TIP: When you put the storage system in maintenance mode or edit the maintenance mode, specify the duration in hours and a reason.
- Page 44 Figure 33: Removing the DC power cooling module, controller node enclosure 11. Remove the battery from the DC PCM. a. At the back of the PCM, lift the battery release handle. b. Remove the battery from the battery compartment and place on the ESD safe mat. Figure 34: Removing the battery, DC power cooling module, controller node enclosure Replacement 12.
- Page 45 Figure 35: Installing the battery, DC power cooling module, controller node enclosure 13. Install the DC PCM. a. On the ESD mat, rotate the -48V DC PCM release handle to the open position and then carry it to the enclosure. b.
-
Page 46: Replacing A Direct-Current Power Cooling Module In A Drive Enclosure-Sp 5.X
(-36V DC to -72V DC) may damage the direct-current power cooling module. IMPORTANT: The direct-current components are qualified and supported only with a direct-current HPE 3PAR StoreServ 8000 Storage system running HPE 3PAR OS 3.3.1 and later versions. IMPORTANT: The storage system ordered for installation in a direct-current (DC) power environment requires the installation of DC-specific components. - Page 47 NOTE: • The power switch on the HPE 3PAR -48VDC 764W Power Cooling Module is inverted 180° from the orientation of the power switch on the alternating-current (AC) power cooling module. • Labels on the HPE 3PAR -48VDC 764W Power Cooling Module show the model as -48VDC INPUT 764W PCM.
- Page 48 Initiate Check Health on the storage system. a. From the Service Console interface, select Systems. b. Select Actions > Check health. A check of the storage system runs to ensure that there are no additional issues. CAUTION: If health issues are identified during the Check Health, resolve these issues before continuing.
- Page 49 Figure 37: Removing the DC power cooling module, controller node enclosure Replacement 12. Install the DC PCM. a. On the ESD mat, rotate the -48V DC PCM release handle to the open position and then carry it to the enclosure. b.
-
Page 50: Sfp Transceiver Replacement
SFP transceiver replacement Replacing an SFP transceiver—SP 4.x This procedure is for the replacement of a small form-factor pluggable (SFP) transceiver using HPE 3PAR Service Processor (SP) 4.x. An SFP transceiver is installed in each onboard Fibre Channel (FC) port and in the ports of host adapters. - Page 51 If the email notifications are enabled, information about the failed port due to the failed SFP transceiver is provided in an email alert notification. The port position in the storage system is provided as Node:Slot:Port (N:S:P). Review the information in the HPE 3PAR StoreServ Management Console (SSMC) interface alert notification. Service...
- Page 52 On the Ports screen, an alert notification banner appears that contains the information for the failed port due to the failed SFP transceiver. From the SSMC main menu, select Storage Systems > Systems, select the storage system from the list, select Configuration view from the detail pane, and click the total ports link from the Ports panel.
-
Page 53: Replacing An Sfp Transceiver-Sp 5.X
17. Follow the return instructions provided with the replacement component. Replacing an SFP transceiver—SP 5.x This procedure is for the replacement of a small form-factor pluggable (SFP) transceiver using HPE 3PAR Service Processor (SP) 5.x. An SFP transceiver is installed in each onboard Fibre Channel (FC) port and in the ports of host adapters. - Page 54 The port position in the storage system is provided as Node:Slot:Port (N:S:P). Review the information in the HPE 3PAR Service Console (SC) alert notification. An alert notification banner appears that contains the information for the failed port due to the failed SFP.
-
Page 55: Switch Replacement
17. Follow the return instructions provided with the replacement component. Switch replacement The Brocade 6510 Switch is a direct-current component supported for the HPE 3PAR StoreServ 8000 Storage system. WARNING: Since there is a risk of injury from electric shock or high energy levels, only a certified... - Page 56 When support is needed for the direct-current Brocade 6510 Switch, locate the contact information at the Broadcom website: www.broadcom.com/ For more information about the Brocade 6510 Switch, see the product page: www.broadcom.com/products/fibre-channel-networking/switches/6510-switch Service...
-
Page 57: Upgrade
IMPORTANT: The guidelines for how the drives are installed, allocated, and balanced are critical to the performance and reliability of your storage system. • An encrypted storage system, for example any storage system that has the HPE 3PAR Data Encryption license activated or intended to be activated, must have only self-encrypted drives installed. - Page 58 • Try to distribute an equal number of drives to all enclosures compatible with the drive type being added. If an equal distribution is not possible, get as close as possible while still following the guidelines for the drives. • With a four-node configuration, the best practice is to attach the same number and type of drives to each pair of controller nodes.
- Page 59 This example demonstrates an SFF enclosure loaded correctly with these drives: two pairs of FC, three pairs of NL, and two pairs of SSD. Figure 41: Example of a correct SFF drive allocation in one SFF enclosure This example demonstrates two SFF enclosures loaded correctly with these drives: three pairs of FC (six drives), five pairs of NL (10 drives), and two pairs of SSD (four drives).
- Page 60 LFF drive loading and examples IMPORTANT: Notice that the numbering for the order and direction that drives are installed in the LFF enclosure do not follow the same number order used to identify drives from the storage system management software. Drives are installed in vertical columns instead of by sequential numbering. LFF drives are loaded starting at bay 0, bottom to top in the leftmost column, then bottom to top in the next column, and so on, leaving no empty slots between drives.
-
Page 61: Guidelines For A Drive Addition
Figure 47: Example of an unbalanced LFF drive allocation in one LFF enclosure Guidelines for a drive addition This information is for the drives added to an HPE 3PAR StoreServ 8000 Storage system. • Keep existing drives in the enclosures in their drive-bay slots. - Page 62 Connect to the HPE 3PAR Service Processor. Browse to either the IP address or hostname: https://<sp_ip_address> or https:// <hostname> . Log in to the HPE 3PAR Service Processor (SP). With the 3parcust account credentials, the Service Processor Onsite Customer Care (SPOCC) interface displays.
- Page 63 Remove the bezel from the enclosure front. a. Unlock the bezel if necessary. b. Press the release tab. c. Rotate the bezel away from the enclosure left side. d. Pull the bezel out from the enclosure right side. Installation Remove the slot-filler blanks from where you will be installing the pairs of drives. IMPORTANT: For proper airflow and cooling, a slot-filler blank must remain installed in all unused drive bays.
-
Page 64: Adding Drives-Sp 5.X
Insert the bezel into the enclosure left side. d. Lock the bezel (optional). Adding drives—SP 5.x This procedure is for the addition of drives using HPE 3PAR Service Processor (SP) 5.x. CAUTION: • To ensure proper thermal control, slot-filler blanks are provided with the enclosures and must be inserted in all unused drive bays in the enclosure. - Page 65 Browse to the IP address: https://<sp_ip_address>:8443 Log in to the HPE 3PAR SP and enter the admin account credentials. Initiate a maintenance window to stop the flow of alerts to Hewlett Packard Enterprise. a. From the Service Console interface, select Systems.
- Page 66 a. On the drive, press the release button to open the handle. b. With the latch handle of the drive fully extended, align and slide the drive into the bay until the handle begins to engage (1). c. To seat the drive into the drive bay, close the handle (2). Figure 50: Installing an SFF drive Figure 51: Installing an LFF drive Verification...
- Page 67 a. From the Service Console interface, select Systems. b. Select Actions > Check health. A check of the storage system runs to ensure that there are no additional issues. CAUTION: If health issues are identified during the Check Health, resolve these issues before continuing.
-
Page 68: More Information
About the software on a virtual service processor or physical service processor The service processor (SP) is available as either a physical SP or a virtual SP. The HPE 3PAR Service Processor software is designed to provide remote error detection and reporting and to support diagnostic and maintenance activities involving the storage systems. -
Page 69: Connecting To Hpe 3Par Service Processor 5.X From A Web Browser
Connecting to the Linux console of the HPE 3PAR Service Processor through a VMware vSphere Client Procedure 1. From a VMware vSphere client, connect to the Linux console of the HPE 3PAR Service Processor (SP). 2. Log in to the HPE 3PAR SP software. -
Page 70: Interfaces For The Hpe 3Par Service Processor Software
Service Processor Onsite Customer Care (SPOCC): The SPOCC interface is accessed when you log in to the HPE 3PAR SP and is a web-based GUI (GUI) that is available for support of the HPE 3PAR StoreServ Storage system and its HPE 3PAR SP. The SPOCC interface is the web-based alternative to accessing most of the features and functionality that are available through the SPMaint. -
Page 71: Accessing The Sp 5.X Service Console Interface
1. Connect to the HPE 3PAR Service Processor (SP) 4.x Linux console. 2. Log in to gain access to the HPE 3PAR SPMaint main menu, HPE 3PAR Service Processor Menu. Accessing the CLI session from the Service Console interface, HPE 3PAR Service Processor 5.x... -
Page 72: Hpe 3Par Service Processor 5.X
Accessing the interactive CLI interface from the Text-Based User Interface, HPE 3PAR Service Processor 5.x The Text-based User Interface (TUI) of the HPE 3PAR Service Processor (SP) 5.x provides an interactive CLI interface for issuing HPE 3PAR CLI commands. Procedure 1. -
Page 73: Accessing The Interactive Cli Interface From The Spmaint Interface, Hpe
Before performing the service processor (SP) connection setup, ensure that there are no customer firewall restrictions to the existing HP servers and the new HPE servers on port 443. Firewall and proxy server configuration must be updated to enable outbound connections from the service processor to the existing HP servers and the new HPE servers. -
Page 74: About The Hpe 3Par Storeserv Management Console
HPE 3PAR SSMC Main Console. If that is not the case, you must first add the storage system to the HPE 3PAR SSMC by logging in to the HPE 3PAR SSMC Administrator Console. -
Page 75: Hpe 3Par Storeserv Management Console Connection
Systems that are registered with HPE InfoSight must be added to a system group, and then users in the organization can be added to the system group. Typically, a single system group is all that is necessary to manage multiple systems through the process of assigning users and setting their roles and permissions for the system group. -
Page 76: Accessing The Hpe Infosight Platform And Registering The Storage System: Process Overview
Each system group has a unique HPE InfoSight registration token provided from the Register Systems page. This token is used to register the HPE 3PAR StoreServ Storage system to a specific system group by adding the token to the software for the HPE 3PAR StoreServ Storage system. - Page 77 This token is text beginning with StoreFrontRemoteAccess and will be pasted into a Token field in the Main Console interface. 6. From the server on which the HPE 3PAR SSMC software is installed, access the Main Console: a. Browse to https://<IP address or FQDN>:8443.
-
Page 78: Removing A Storage System From The Hpe Infosight Platform
This procedure is for removing an HPE 3PAR StoreServ Storage system from the HPE InfoSight platform. A storage system may need to be removed from a System Group or from all System Groups in HPE InfoSight. Typically a storage system is removed from a System Group using the method of removing the HPE InfoSight registration token from the storage system software. -
Page 79: Hpe 3Par Service Processor Accounts For Service
Hewlett Packard Enterprise support personnel and authorized service providers. Based on the account, there are differences in the access it provides to the HPE 3PAR SP interfaces, the type of password options, and the permissions associated with the account. - Page 80 Account Password options Interface access Permissions hpesupport Time-based or encryption- • SC through a web browser • Only Hewlett Packard based password Enterprise support • TUI and Linux Shell through • Administrator sets the a physical or virtual console • service and diagnostic password option functions...
-
Page 81: Setting Time-Based Or Encryption-Based Password Option From The Service Console Interface Of The Hpe 3Par Service Processor 5.X
HPE 3PAR Service Processor 5.x Procedure 1. Connect and log in to the HPE 3PAR Service Processor (SP) 5.x. 2. From the Service Console interface main menu, select Service Processor, and then select Actions > HPE Support password 3. -
Page 82: Interface Of The Hpe 3Par Service Processor 5.X
Hewlett Packard Enterprise support over the phone, text message, or email. Procedure 1. Connect and log in to the HPE 3PAR Service Processor (SP) 5.x. 2. From the Service Console interface main menu, select Service Processor, and then select Actions > HPE Support password. -
Page 83: Generating The Encryption-Based Ciphertext From The Text-Based User
- - - End tpd blob - - HPE 3PAR StoreServ Storage system accounts for service For access to the HPE 3PAR StoreServ Storage system interfaces, there are the following account options for the administrator or for Hewlett Packard Enterprise support personnel and authorized service... -
Page 84: Setting Time-Based Or Encryption-Based Password Option For A Storage System Account
Setting time-based or encryption-based password option for a storage system account Procedure 1. Connect and log in to the HPE 3PAR Service Processor (SP) and access the interactive CLI interface. 2. Query the current mode by using the HPE 3PAR CLI controlrecoveryauth status command. -
Page 85: Generating The Encryption-Based Ciphertext For A Storage System Account
Procedure 1. Connect and log in to the HPE 3PAR Service Processor (SP) and access the interactive CLI interface. 2. To generate a ciphertext, initiate the HPE 3PAR CLI controlrecoveryauth ciphertext <user> command, where <user> is either root or console. -
Page 86: Browser Warning When Connecting To The Service Processor
Browser warning when connecting to the service processor Symptom When connecting to your service processor (SP) IP address, you might receive a warning from your browser that there is a problem with the security certificate or that the connection is not private. Solution 1 Cause Warning message in Internet Explorer browser. - Page 87 2. Click Proceed to <sp_ip_address> (unsafe). Solution 3 Cause Warning message in Mozilla Firefox browser. Action 1. Click Advanced. More information...
- Page 88 2. Click Add Exception..3. (Optional) To remove the warning for this site in the future, select Permanently store this exception in the Add Security Exception dialog. More information...
-
Page 89: Component Information
Four-Port 16 Gb FC Host PCIe Adapter information This information applies only to the HPE 3PAR Four-Port 16Gb FC Host Bus Adapter for the HPE 3PAR StoreServ 8000 Storage systems. Use 16 Gb SFP+ transceiver connectors with the ports. -
Page 90: Two-Port 10 Gb Iscsi/Fcoe Cna Host Pcie Adapter Information
N:2:4 Two-Port 10 Gb iSCSI/FCoE CNA Host PCIe Adapter information This information applies only to the HPE 3PAR Two-Port 10Gb iSCSI/FCoE Converged Network Adapter for the HPE 3PAR StoreServ 8000 Storage systems. IMPORTANT: For the HPE 3PAR Two-Port 10Gb iSCSI/FCoE Converged Network Adapter, some of the adapters have the faceplate labeling reversed, with the port on the left identified as port 2, when oriented as in the following illustration. -
Page 91: Two-Port 10 Gbe Nic Host Pcie Adapter Information
Two-Port 10 GbE NIC Host PCIe Adapter information This information applies only to the HPE 3PAR Two-Port 10Gb Ethernet NIC Adapter for the HPE 3PAR StoreServ 8000 Storage systems. IMPORTANT: For the HPE 3PAR Two-Port 10Gb Ethernet NIC Adapter, some of the adapters have the faceplate labeling reversed, with the port on the left identified as port 2, when oriented as in the following illustration. -
Page 92: Four-Port 16 Gb Fc/10 Gb Ethernet Combo Adapter Information
N:2:4 Four-port 16 Gb FC/10 Gb Ethernet Combo Adapter information This information applies only to the HPE 3PAR Four-Port 16Gb FC/10Gb Ethernet Combo Adapter for the HPE 3PAR StoreServ 8000 Storage systems. IMPORTANT: There is no FCoE support for the four-port combo adapter. -
Page 93: Two-Port 32Gb Fc Hba Information
Two-port 32Gb FC HBA information This information applies only to the HPE 3PAR Two-Port 32Gb FC Host Bus Adapter for the HPE 3PAR StoreServ 8000 Storage systems. Use 32Gb SFP28 transceiver connectors with the ports. Figure 56: HPE 3PAR Two-Port 32Gb FC Host Bus Adapter ports... - Page 94 Ethernet port (MGMT) MGMT: 1 Gb Ethernet onboard port used to connect to the network. Ethernet port (RC-1) RC-1: 1 Gb Ethernet onboard port used for an HPE 3PAR Remote Copy or HPE 3PAR File Persona connection. SAS ports Two 12 Gb SAS onboard ports (DP-1, DP-2) used for the expansion drive enclosure connection.
- Page 95 • MGMT—Onboard port for the network connection • RC-1—Onboard port for an HPE 3PAR Remote Copy or HPE 3PAR File Persona connection Figure 60: Ethernet onboard ports, controller node enclosure rear view FC onboard ports The controller node has two Fibre Channel (FC) onboard ports and each port includes two LEDs. The arrow head-shaped LEDs point to the port they are associated with.
- Page 96 Table 11: FC onboard ports numbering Port Node:Slot:Port (N:S:P) FC-1 N:0:1 FC-2 N:0:2 SAS onboard ports The controller node has two SAS onboard ports (DP-1 and DP-2) and each includes two LEDs. Figure 62: SAS onboard ports (DP-1 and DP-2), controller node enclosure rear view Cluster Interconnect Link onboard ports The controller node has two Cluster Interconnect Link onboard ports and each includes two LEDs.
-
Page 97: Drive Information
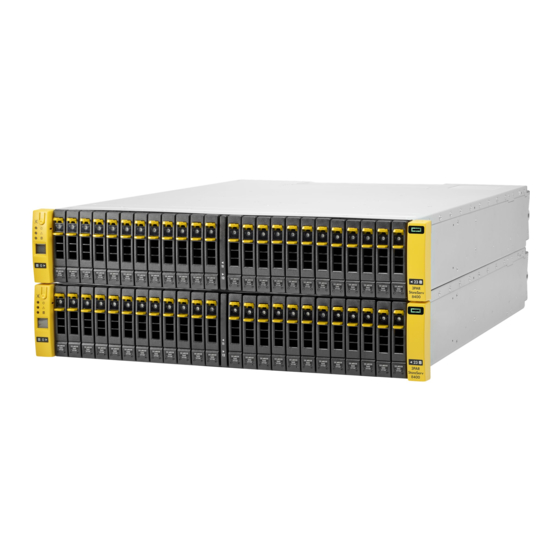
Controller node enclosure and drive enclosures information front view The fronts of the controller node enclosure and expansion drive enclosures contain the drive bays for installing the drives. Each drive bay is assigned a number for locating drives in the HPE 3PAR StoreServ 8000 Storage system. - Page 98 Figure 65: SFF and LFF enclosures front view Table 12: SFF and LFF enclosures front view Item Description Left bezel ear cap Location of the system LEDs and a lower-panel latch that opens to gain access to a captive screw for securing the enclosure to a rack SFF drive SFF 6.4 cm (2.5 in) drives LFF drive...
-
Page 99: Controller Node Enclosure Information Rear View
Figure 68: Drive bays numbering, LFF drive enclosure front view Controller node enclosure information rear view This information applies only to the controller node enclosure for the HPE 3PAR StoreServ 8000 Storage system. Figure 69: Controller node enclosure rear view... -
Page 100: Drive Enclosure Information Rear View
The serial number is on the controller node enclosure next to the rightmost power cooling module (PCM 1) power switch. Drive enclosure information rear view This information applies only to the drive enclosure for the HPE 3PAR StoreServ 8000 Storage system. More information... - Page 101 Figure 70: SFF and LFF expansion drive enclosures rear view Table 14: SFF and LFF expansion drive enclosures rear view Item Description Power connection This power connection requires a power cable to be attached between the power supply and an independent electrical source capable of supporting of the entire power load of the enclosure and controlled by its own circuit breaker.
-
Page 102: I/O Module Information
I/O module information This information applies only to the I/O module for the HPE 3PAR StoreServ 8000 Storage system. IMPORTANT: Notice that the I/O modules are installed differently between the SFF drive enclosure and the LFF drive enclosure. -
Page 103: Power Cooling Module Information
Figure 74: SAS ports (DP-1 and DP-2), LFF drive enclosure rear view Power cooling module information The HPE 3PAR StoreServ 8000 Storage system supports the following power cooling modules based on whether the system is installed in either an alternating-current or direct-current power environment: •... -
Page 104: Power Cooling Module Information, Alternating-Current, Drive Enclosure
Figure 76: PCM numbering, alternating-current, four-node controller node enclosure rear view Power cooling module information, alternating-current, drive enclosure The alternating-current (AC) HPE 3PAR 580W power cooling module is a component for the HPE 3PAR StoreServ 8000 Storage drive enclosure when installing the system in an alternating-current power environment. -
Page 105: Power Cooling Module Information, Direct-Current System
NOTE: • The power switch on the HPE 3PAR -48VDC 764W Power Cooling Module is inverted 180° from the orientation of the power switch on the alternating-current (AC) power cooling module. • Labels on the HPE 3PAR -48VDC 764W Power Cooling Module show the model as -48VDC INPUT 764W PCM. -
Page 106: Power Distribution Unit Information
Figure 82: PCM numbering, direct current, LFF 4U drive enclosure rear view Power distribution unit information For a storage system that is factory integrated in an HPE rack, there are four power distribution units (PDUs) mounted at the bottom of the rack. - Page 107 Figure 84: HPE ProLiant DL120 Gen9 Server details NOTE: For the HPE ProLiant DL120 Gen9 Server, the NIC port 2 is configured for shared mode to either be configured for use as the Service port or configured for use as an iLO (virtual serial) port.
-
Page 108: Physical Service Processor Information, Hpe Proliant Dl360 Gen10 Server
2. Service port; NIC 2 Figure 86: HPE ProLiant DL360 Gen10 Server details For the HPE ProLiant DL360 Gen10 Server, the Service port, iLO Management port, and Serial port are dedicated ports NOTE: The ports are different than the HPE ProLiant DL120 Gen9 Server. -
Page 109: Switch Information
Adapter LEDs Four-Port 16 Gb FC Host PCIe Adapter LEDs This information applies only to the HPE 3PAR Four-Port 16Gb FC Host Bus Adapter for the HPE 3PAR StoreServ 8000 Storage system. Figure 87: HPE 3PAR Four-Port 16Gb FC Host Bus Adapter LEDs... -
Page 110: Two-Port 10 Gb Iscsi/Fcoe Cna Host Pcie Adapter Leds
No activity Two-Port 10 GbE NIC Host PCIe Adapter LEDs This information applies only to the HPE 3PAR Two-Port 10Gb Ethernet NIC Adapter for the HPE 3PAR StoreServ 8000 Storage system. IMPORTANT: For the HPE 3PAR Two-Port 10Gb Ethernet NIC Adapter, some of the adapters have the faceplate labeling reversed, with the port on the left identified as port 2, when oriented as in the following illustration. -
Page 111: Four-Port 1 Gbe Nic Host Pcie Adapter Leds
Link activity Four-Port 1 GbE NIC Host PCIe Adapter LEDs This information applies only to the HPE 3PAR Four-Port 1Gb Ethernet NIC Adapter for the HPE 3PAR StoreServ 8000 Storage system. IMPORTANT: For the HPE 3PAR Four-Port 1Gb Ethernet NIC Adapter, some of the adapters have the faceplate labeling incorrect, indicating that the ports are numbered 0 through 3. -
Page 112: Four-Port 16 Gb Fc/10 Gbe Nic Host Pcie Combo Adapter Leds
Link down Four-Port 16 Gb FC/10 GbE NIC Host PCIe Combo Adapter LEDs This information applies only to the HPE 3PAR Four-Port 16Gb FC/10Gb Ethernet Combo Adapter for the HPE 3PAR StoreServ 8000 Storage system. Table 19: 16 Gb FC port LEDs... -
Page 113: Two-Port 32 Gb Fc Hba Leds
Link at lowest speed and activity Two-Port 32 Gb FC HBA LEDs This information applies only to the HPE 3PAR Two-Port 32Gb FC Host Bus Adapter for the HPE 3PAR StoreServ 8000 Storage system. Figure 91: HPE 3PAR Two-Port 32Gb FC Host Bus Adapter ports... -
Page 114: Controller Node Leds
Controller node LEDs This information applies only to the controller nodes for the HPE 3PAR StoreServ 8000 Storage system. IMPORTANT: The controller nodes in the controller node enclosure are inverted 180° from each other, as well as the ports. Figure 92: Controller node LEDs, controller node enclosure rear view... - Page 115 Figure 93: Ethernet onboard ports, controller node enclosure rear view Figure 94: Ethernet onboard ports LEDs, controller node enclosure rear view Table 25: Ethernet onboard ports LEDs, controller node enclosure rear view LED function Status State Link up Green solid 1 Gb Link speed Amber solid...
- Page 116 Figure 95: FC onboard ports, controller node enclosure rear view Figure 96: FC onboard ports LEDs, controller node enclosure rear view Table 26: FC onboard ports LEDs, controller node enclosure rear view LED function Status State All ports Wake up failure (dead device) or power not applied Port speed Not connected 3 Fast amber flashes...
- Page 117 Figure 97: SAS onboard ports (DP-1 and DP-2), controller node enclosure rear view Figure 98: SAS onboard ports LEDs, controller node rear view Table 27: SAS onboard ports LEDs, controller node rear view Function Status State Activity Green solid No link activity Green flashing Link activity No link established...
-
Page 118: Drive Leds
Controller node in wrong slot • Serial number mismatch between controller nodes No fault Status Green solid Link established No link established Drive LEDs This information applies only to the drives for the HPE 3PAR StoreServ 8000 Storage system. More information... - Page 119 Locate active; amber LED flashes on all drives in OK state NOTE: On failed drives, the Fault amber LED does not flash. Status Green solid Normal operation; drive in an OK state; admitted by the HPE 3PAR OS Green flashing Drive activity More information...
-
Page 120: I/O Module Leds
Green solid Normal operation; drive in an OK state; admitted by the HPE 3PAR OS Green flashing Drive activity I/O module LEDs This information applies only to the I/O modules for the HPE 3PAR StoreServ 8000 Storage system. More information... - Page 121 IMPORTANT: Notice that the I/O modules are installed differently between the SFF drive enclosure and the LFF drive enclosure. • In the SFF drive enclosure, the I/O modules in the enclosure are inverted 180° from each other, as well as the SAS ports. •...
-
Page 122: Power Cooling Module Leds
Power cooling module LEDs Power cooling module LEDs, alternating-current, controller node enclosure This information applies only to the HPE 3PAR 764W power cooling module for the HPE 3PAR StoreServ 8000 Storage system. NOTE: Labels on the PCM for the controller node enclosure show the model as 760W PCM Gold Series. -
Page 123: Power Cooling Module Leds, Alternating-Current, Drive Enclosure
Charging or disarmed Power cooling module LEDs, alternating-current, drive enclosure This information applies only to the HPE 3PAR 580W power cooling module for the HPE 3PAR StoreServ 8000 Storage system. NOTE: Labels on the PCM for the drive enclosure show the model as 580W PCM Gold Series. -
Page 124: Power Cooling Module Leds, Direct-Current System
Out of tolerance Amber flashing Firmware download Power cooling module LEDs, direct-current system This information applies only to the HPE 3PAR -48VDC 764W Power Cooling Module for the HPE 3PAR StoreServ 8000 Storage system. NOTE: • The power switch on the HPE 3PAR -48VDC 764W Power Cooling Module is inverted 180° from the orientation of the power switch on the alternating-current (AC) power cooling module. -
Page 125: Service Processor Leds
Table 35: -48VDC 764W PCM LEDs DC input Power Fan fail DC output State fail fail No DC power on any PCM No DC power on this PCM only DC present; PCM OK PCM fan speed is outside acceptable limits PCM fan has failed PCM fault (over temp, over voltage, over current) -
Page 126: Physical Service Processor Leds, Hpe Proliant Dl120 Gen9 Server
Physical service processor LEDs, HPE ProLiant DL120 Gen9 Server Figure 108: Physical service processor LEDs, HPE ProLiant DL120 Gen9 Server rear view Table 37: Physical service processor LEDs, HPE ProLiant DL120 Gen9 Server rear view LED/Port function Status State UID/Service... - Page 127 Figure 109: Physical service processor LEDs, HPE ProLiant DL120 Gen9 Server front view Table 38: Physical service processor LEDs, HPE ProLiant DL120 Gen9 Server front view LED/Port function Status State 1 Power on/Standby button Green solid Service processor on Green flashing...
-
Page 128: Physical Service Processor Leds, Hpe Proliant Dl360 Gen10 Server
Physical service processor LEDs, HPE ProLiant DL360 Gen10 Server Figure 110: Physical service processor LEDs, HPE ProLiant DL360 Gen10 Server rear view Table 39: Physical service processor LEDs, HPE ProLiant DL360 Gen10 Server rear view LED function Status State UID LED Blue solid Identification is activated. - Page 129 Figure 111: Physical service processor LEDs, HPE ProLiant DL360 Gen10 Server front view Table 40: Physical service processor LEDs, HPE ProLiant DL360 Gen10 Server front view LED function Status State UID button/ Blue solid Activated LED* Blue flashing 1 Hz = Remote management or firmware upgrade in progress...
-
Page 130: System Status Leds
*When all four LEDs described in this table flash simultaneously, a power fault has occurred. System status LEDs This information applies only to the HPE 3PAR StoreServ 8000 Storage system. The controller node enclosures and drive enclosures have system status LEDs at the front, left corner of the enclosures. -
Page 131: Controller Node Rescue
Function Status State Drive status Amber solid Fault—An issue exists with one or more drives within the enclosure. To determine the affected drives, inspect the LEDs on each drive. This LED applies only to drives. No fault Figure 113: System status LEDs, left bezel ear cap, LFF enclosures front view Table 42: System status LEDs, left bezel ear cap, LFF enclosures front view Function Status... -
Page 132: Initiating An Automatic Node-To-Node Rescue
• Replacement of one or more failed node drives within a controller node Initiating an automatic node-to-node rescue An automatic node-to-node rescue process occurs for an HPE 3PAR StoreServ Storage controller node in these circumstances: • Adding one or more controller node pairs to upgrade the storage system •... - Page 133 Figure 115: Orientation of a controller node pair c. Partially install the controller node into the slot. Using two hands to grasp each side of the replacement controller node, align it with the grooves in the slot, and slide it into the slot until it halts against the insertion mechanism that is inside of the slot.
-
Page 134: Customer Self Repair
For more details about CSR, contact an authorized service provider or see the Hewlett Packard Enterprise Customer Self Repair website: www.hpe.com/info/selfrepair IMPORTANT: Some components are not designed for CSR. To satisfy the customer warranty for service of non-CSR components, an authorized service provider has to service the non-CSR components. - Page 135 Cable type Minimum bend radius Network Cat 5/6 (Unshielded) 1.75 in (4.44 cm) Network Cat 5/6 (Shielded) 3.5 in (8.90 cm) Coaxial (50W) 1.2 in (3 cm) Coaxial (75W) 1.7 in (4.31 cm) R1 InfiniBand - at connector 4.6 in (11.68 cm) R2 InfiniBand - away from connector 2.6 in (6.60 cm) •...
-
Page 136: Removing The Cable Restraint Shipping Brackets
During transport, the cable restraint shipping brackets support the connected data cables and connectors for the HPE 3PAR StoreServ 8000 Storage system. When the storage system is in a stationary position, the brackets are not required and may need to be removed to provide access to the components of the storage system. - Page 137 • Contact Hewlett Packard Enterprise Support for assistance. • HPE 3PAR Service Processor Service Console interface. Click the alert banner, and then click Details. From the Activity page, the spare part number is located under the Component heading. • See the Hewlett Packard Enterprise parts store website: www.hpe.com/info/parts-ordercenter.
-
Page 138: Troubleshooting
Alerts are triggered by events that require intervention by the system administrator. To learn more about alerts, see the HPE 3PAR Alerts Reference: Customer Edition and HPE 3PAR StoreServ Storage Concepts Guide documents available at the Hewlett Packard Enterprise Information Library website or the Hewlett Packard Enterprise Support Center website: www.hpe.com/info/storage/docs... -
Page 139: Alert
Alert sw_cli 11 authentication failures in 120 secs alert suggested action View the full alert output using the SSMC interface or the HPE 3PAR CLI command showalert -d . • Displays Adaptive Optimization issues • Checks that all PD classes that exist on any node-pair are found on all node pairs Format of possible ao exception messages AO Nodes:<nodelist>... -
Page 140: Cabling
Component -Identifier- ------------Detailed Description------------ Nodes:0&1 NL PDs need to be attached to this Node pair ao suggestion action Use the following CLI commands to view PD distribution: showpd, showpd -p -devtype NL, showpd -p -devtype NL -nodes 0,1, and showcage. In the following example, there are 72 NL PDs attached to nodes 2&3, but none attached to nodes 0&1. -
Page 141: Cage
Cabling cage7 Check connections or replace cable from (cage6, I/O 0, DP-2) to (cage7, I/O 0, DP-1) - links at 6Gbps cabling suggested action 1 Use the CLI showcage command to verify that both cages are available through two ports, before replacing the cable specified in the error message. - Page 142 Cage cage:<cageid> "Missing A loop" (or "Missing B loop") Cage cage:<cageid>,mag:<magpos> "Magazine is <MAGSTATE>" Cage cage:<cageid> "Power supply <X>'s fan is <FANSTATE>" Cage cage:<cageid> "Power supply <X> is <PSSTATE>" (Degraded, Failed, Not_Present) Cage cage:<cageid> "Power supply <X>'s AC state is <PSSTATE>" Cage cage:<cageid>...
- Page 143 Component -------------Summary Description-------------- Qty Cage Degraded or failed cage power supplies Cage Degraded or failed cage AC power Component -Identifier- ------------Detailed Description------------ Cage cage:1 Power supply 0 is Failed Cage cage:1 Power supply 0's AC state is Failed Cage cage:1 Power supply 2 is Off cage suggested action 2 A drive enclosure (cage) power supply or power supply fan is failed, is missing input AC power, or the...
- Page 144 NOTE: The primary path can be seen by an asterisk (*) in showpd's Ports columns. cli% showcage -d cage1 Name LoopA Pos.A LoopB Pos.B Drives Temp RevA RevB Model FormFactor cage1 1:1:1 20-23 402e DCS8 -----------Cage detail info for cage1 --------- Position: --- Interface Board Info Card0...
-
Page 145: Cert
cert • Displays certificate issues • Reports SSL certificates that have expired, will expire in less than 30 days, and certificates that will not be valid until a future date Format of possible cert exception messages cert -- "Certificate <DNSname> for Service:<servicename> will expire in <count> days" cert -- "Certificate <DNSname>... -
Page 146: Date
DAR -- DAR EKM status is: Error: Unable to access EKM. Configuration or connection issue. dar suggested action 3 Use the controlencryption status -d and controlencryption checkekm CLI commands to view more status about encryption. Check network status for controller nodes with shownet and shownet -d CLI commands. - Page 147 File <nodeID> "sr_mnt is full" File -- "sr_mnt not mounted" File -- "Admin Volume is not mounted" File -- "An online upgrade is in progress" file example 1 File node:2 Behavior altering file "manualstartup" exists created on Oct 7 14:16 file suggested action 1 After understanding why the files are present, the file must be removed to prevent unwanted behavior.
- Page 148 file suggested action 3 This condition might be transient because the service processor retrieves the files and cleans up the dump directory. If the service processor (SP) is not gathering the dump files, check the condition and state of the SP. file example 4 Component ------Summary Description------- Qty License...
-
Page 149: Host
FPG if no longer wanted. For other file services issues, use the CLI showfs, showvfs, showvfs -d commands (and the associated set and stop commands) to investigate and solve issues. host • Displays Adaptive Optimization issues. • Checks that all PD classes that exist on any node pair are found on all node pairs. •... - Page 150 controller nodes, use the CLI showport command to determine if a port is offline or misconfigured. A missing or rebooting controller node will cause a port to be offline. cli% showvlun -v testvvActive VLUNs Lun VVName HostName -Host_WWN/iSCSI_Name- Port Type Status ID 2 testvv testhost 10000000C9E5E0B9 3:1:1 host active cli% showhost testhost...
- Page 151 cli% showld vv.9.usr.3 Id Name RAID -Detailed_State- Own SizeMB UsedMB Use Lgct LgId WThru MapV 57 vv.9.usr.3 1 normal 8192 0 C,V 0 --------------------------------------------------------------------- 8192 cli% showldmap vv.9.usr.3 Ld space not used by any vv ld example 2 Component -------Summary Description-------- Qty LDs in write through mode Component -Identifier-- --------Detailed Description--------- ld:Ten.usr.12 LD is in write-through mode...
-
Page 152: License
cli% showldch R1.usr.0 ld example 4 Component -Identifier-- -----Detailed Description------------- Preserved data storage space does not equal total node's Data memory ld suggested action 4 Preserved data LDs (pdsld) are created during system initialization (OOTB) and after some hardware upgrades (via admithw). The total size of the pdsld must match the total size of all data-cache in the storage system (see the following example). - Page 153 network example 1 Network -- "IP address change has not been completed" network suggested action 1 The setnet command was issued to change some network parameter, such as the IP address, but the action has not been completed. Use setnet finish to complete the change, or setnet abort to cancel.
- Page 154 • Checks for an Unknown sparing algorithm. For example, when it has not been set • Checks for drives experiencing a high number of IOPS • Reports if a servicemag operation is outstanding (servicemag status) • Reports if there are PDs that do not have entries in the firmware DB file •...
- Page 155 Component --Identifier-- ----------------------------Detailed Description---------------------------- Cage:0 PDs FC/10K/450GB unbalanced. Primary path: 5 on Node:0,3 on Node:1 disk:0 Degraded States: missing_A_port,servicing -------------------------------------------------------------------------------------------- 2 total pd suggested action 2 The primary and secondary I/O paths for drives (PDs) are balanced between nodes. The primary path is indicated in the showpd -path output and by an asterisk in the showpd output.
- Page 156 • FC 15K RPM drives < 200 IOPS • SSD < 12000 IOPS Operations such as servicemag and tunevv can cause this condition. If the IOPS rate is very high and/or many drives are experiencing heavy I/O, examine the system further using statistical monitoring commands/utilities such as statpd, the SSMC (GUI), and System Reporter.
-
Page 157: Pdch
6 Check the release notes for mandatory updates and patches to the HPE 3PAR OS version that is installed and install as needed to support this PD in this drive enclosure (cage). pdch • Displays chunklets state issues •... -
Page 158: Port
service action, such as hardware or software upgrades, these exceptions can be ignored until that action has finished and the node is online. In this example, LD 35, with a name of R1.usr.3, is owned (Own) by nodes 3/2/0/1, respectively, and the primary/secondary physical paths to the drives (chunklets) in this LD are from nodes 3 and 2, respectively. - Page 159 Component ------Summary Description------ Qty Port Degraded or failed SFPs Component -Identifier- --Detailed Description-- Port port:0:1:1 SFP is Degraded port suggested action 1 An SFP in a Node-Port is reporting a degraded condition. This is most often caused by the SFP receiver circuit detecting a low signal level (RX Power Low), and that is usually caused by a poor or contaminated FC connection, such as a cable.
-
Page 160: Qos
This output indicates that the port mode, such as an initiator or target, is not correct for the connection type, such as drive, host, ISCSI, FCoE, or RCFC. Useful HPE 3PAR CLI commands are showport, showport -c, showport -par, showport -rcfc, showcage, and so on. - Page 161 qos example Component -------Summary Description-------- Qty VVSets with non-zero reject counts Component -Identifier- -----------Detailed Description------------ vvset6 VVSet has logged 1756.0 rejects in 24 hours qos suggested action Use the CLI showqos command to determine if the QoS rules fit the needs of the host and application access.
-
Page 162: Snmp
• showport -rcip • showport -rcfc • shownet -d • controlport rcip ping snmp Displays issues with SNMP. Attempts the showsnmpmgr command and reports errors if the CLI returns an error. Format of possible snmp exception messages SNMP -- <err> snmp example Component -Identifier- ----------Detailed Description--------------- SNMP... -
Page 163: Vlun
Format of possible task exception messages Task Task:<Taskid> "Failed Task" task example Component --Identifier--- -------Detailed Description-------- Task Task:6313 Failed Task In this example, checkhealth also showed an Alert. The task failed, because the command was entered with a syntax error: Component -Identifier- --------Detailed Description------------------------ Alert sw_task:6313... - Page 164 vlun host:cs-wintec-test1 Host wwn:10000000C964121D is not connected to a port vlun suggested action Check the export status and port status for the VLUN and HOST with CLI commands such as: • showvlun • showvlun -pathsum • showhost • showhost -pathsum •...
-
Page 165: Controlled Thermal Shutdown
30 minutes. Log files collection For a service event, it might be necessary to collect the HPE 3PAR Service Processor (SP) log files for Hewlett Packard Enterprise support. -
Page 166: Collecting The Service Processor Log Files-Sp4.X
◦ Users who accessed the HPE 3PAR SP ◦ Logon and logoff times ◦ The functionality used, such as Interactive CLI. • SPLOR—Gathers files to diagnose service processor issues. The SPLOR data can be retrieved through the Collect support data action from the Service Processor page. -
Page 167: Websites
Websites Hewlett Packard Enterprise general websites: Information Library www.hpe.com/info/EIL Customer Self Repair Services Media Library www.hpe.com/support/sml-csr InfoSight infosight.hpe.com Safety and Compliance www.hpe.com/support/Safety-Compliance-EnterpriseProducts Software Depot www.hpe.com/support/softwaredepot Software License Manager enterpriselicense.hpe.com/ Software updates and licensing www.hpe.com/downloads/software Support Center www.hpe.com/support/hpesc SPOCK www.hpe.com/storage/spock White papers and analyst reports www.hpe.com/storage/whitepapers... -
Page 168: Support And Other Resources
Support and other resources Accessing Hewlett Packard Enterprise Support • For live assistance, go to the Contact Hewlett Packard Enterprise Worldwide website: http://www.hpe.com/assistance • To access documentation and support services, go to the Hewlett Packard Enterprise Support Center website: http://www.hpe.com/support/hpesc Information to collect •... -
Page 169: Customer Self Repair
IMPORTANT: Access to some updates might require product entitlement when accessed through the Hewlett Packard Enterprise Support Center. You must have an HPE Passport set up with relevant entitlements. Customer self repair Hewlett Packard Enterprise customer self repair (CSR) programs allow you to repair your product. If a CSR part needs to be replaced, it will be shipped directly to you so that you can install it at your convenience. -
Page 170: Regulatory Information
Documentation Feedback (docsfeedback@hpe.com). When submitting your feedback, include the document title, part number, edition, and publication date located on the front cover of the document. For online help content, include the product name, product version, help edition, and publication date located on the legal notices page. -
Page 171: Acronyms
Acronyms one-unit rack space two-unit rack space four-unit rack space alternating current all flash array control cache (DIMMs) confidential disclosure agreement command line interface converged network adapter Customer Self Install Customer Self Repair Customer Self Upgrade data at rest direct current (power) or data cache (DIMMs) DHCP dynamic host configuration protocol domain name system... - Page 172 Fibre Channel (protocol) or fast class (drive type) FCoE Fibre Channel over Ethernet (protocol) FIPS Federal Information Processing Standard field replaceable unit Gb/s or Gbps Gigabits per second Gigabit Ethernet graphical user interface host bus adapter input/output integrated lights out I/O Module local area network large form factor...
- Page 173 HPE 3PAR SP Service Console small form factor small form-factor pluggable SFRM Hewlett Packard Enterprise StoreFront Remote Service Processor SPOCC HPE 3PAR Service Processor Onsite Customer Care SPOCK Single Point of Connectivity Knowledge single power supply secure service agent Acronyms...
- Page 174 (drive type) Secure Shell SSMC HPE 3PAR StoreServ Management Console transmission control protocol TOTP time-based one-time password HPE 3PAR SP Text-based User Interface unit of space in a rack unit identification virtual machine virtual volume watt Acronyms...
Need help?
Do you have a question about the 3PAR StoreServ 8000 and is the answer not in the manual?
Questions and answers