Table of Contents
Advertisement
HPE StoreEasy 1X60 Storage
Administrator Guide
Abstract
This document describes how to install, configure, and maintain 16x0 and 18x0 models of HPE
StoreEasy 1X60 Storage and is intended for system administrators. For the latest version of this
guide, go to http://www.hpe.com/support/StoreEasy1000Manuals.
Part Number: B7D88-96608
Published: February 2018
Edition: 1
Advertisement
Table of Contents
Troubleshooting

Subscribe to Our Youtube Channel
Related Manuals for HPE StoreEasy 1X60 Storage


Summary of Contents for HPE StoreEasy 1X60 Storage
- Page 1 Administrator Guide Abstract This document describes how to install, configure, and maintain 16x0 and 18x0 models of HPE StoreEasy 1X60 Storage and is intended for system administrators. For the latest version of this guide, go to http://www.hpe.com/support/StoreEasy1000Manuals. Part Number: B7D88-96608...
- Page 2 © Copyright 2018 Hewlett Packard Enterprise Development Company LP Notices The information contained herein is subject to change without notice. The only warranties for Hewlett Packard Enterprise products and services are set forth in the express warranty statements accompanying such products and services.
-
Page 3: Table Of Contents
System Settings........................23 Networking..........................23 Notifications..........................24 Protection..........................25 HPE StoreEasy management console................... 25 System Architecture..................30 HPE StoreEasy data storage resources to client systems and application........31 Authentication....................38 Active Directory..........................38 Local users and groups........................38 Storage Pools.....................39 Storage Pools Overview........................39 Creating Storage Pool........................39 Creating Storage Pool using HPE StoreEasy management console........ - Page 4 Volumes overview..........................43 Creating Volumes..........................44 Creating Volumes Using HPE StoreEasy management console..........44 Creating Volumes using Server Manager................46 Deleting Volumes..........................47 Deleting Volumes using HPE StoreEasy management console..........47 Managing file and folder permissions....................47 File Shares....................54 File Shares Overview........................54 SMB File Shares..........................57 SMB File Shares Overview.....................57...
- Page 5 Drives............................121 Fan bay numbering.......................125 Drive box identification......................126 Drive bay numbering......................127 HPE Flex Slot Power Supply with Integrated Battery Backup Unit components and LED... 133 Installing the bezel and bezel lock....................135 Power supply options........................135 Hot-plug power supply calculations..................135 Installing a redundant hot-plug power supply............... 136 Fan options............................137...
- Page 6 HPE Smart Storage Administrator....................171 Websites....................173 Support and other resources..............174 Accessing Hewlett Packard Enterprise Support................174 Accessing updates.......................... 174 Customer self repair........................175 Remote support..........................175 Warranty information........................175 Regulatory information........................176 Documentation feedback.........................176 Appendix....................177 Contents...
-
Page 7: About This Guide
File sharing options • Network configuration • System monitoring and troubleshooting Audience The HPE StoreEasy 1X60 administrator guide is intended as a quick reference for administrators and technicians managing storage solutions. Terminology Table 1: Table of commonly used terms Terminology Description Access control list allows the ability to control access rights to computer objects. - Page 8 Terminology Description CIFS Common Internet File System protocol, initially implemented for the purpose of sharing files between computers. Service Message Block (SMB) protocol has replaced CIFS on Microsoft operating systems and various other various Operating Systems. Command-line interface. An interface composed of various commands which are used to control operating system responses.
- Page 9 (such as a server that hosts Exchange or SQL Server) and a target device (such as the HPE All-in-One Storage System). By carrying SCSI commands over IP networks, iSCSI is used to facilitate data transfers over intranets and to manage storage over long distances.
- Page 10 Terminology Description Local area network. A communications infrastructure designed to use dedicated wiring over a limited distance (typically a diameter of less than five kilometers) to connect to multiple intercommunicating nodes. Ethernet and token ring are the two most popular LAN technologies. logical disk A logical disk contains one or more volumes and spans multiple hard drives in an array.
-
Page 11: Introduction To Hpe Storeeasy 1X60 Storage
Introduction to HPE StoreEasy 1X60 Storage The HPE StoreEasy 1000 Storage system provides multi-protocol file sharing and application storage for a range of business environments. The 1660 and 1860 are Gen10 hardware platforms and can accommodate medium and large IT environments. -
Page 12: Getting Started
Use extreme caution when pulling the StoreEasy 1X60 out from the rack. The storage system can slip and fall, which may cause damage or injury to the StoreEasy 1X60 Storage. HPE is not responsible for any damage or injury caused by mishandling of StoreEasy 1X60. -
Page 13: Prerequisites
If any of the above-mentioned items are missing, contact Hewlett Packard Enterprise https:// www.hpe.com/us/en/contact-hpe.html for assistance. Locate serial number, COA HPE personnel uses the system serial number to verify the StoreEasy model and warranty information. It is located in the following places on the system: Prerequisites... - Page 14 Procedure 1. On a label (1) affixed outside the HPE StoreEasy 1X60 Storage shipping box. 2. Top (1) of the HPE StoreEasy 1X60 Storage chassis (some models) Getting started...
- Page 15 3. Inside (1) of the HPE StoreEasy 1X60 Storage chassis (some models) 4. Pull out serial number tab (1) on the product Getting started...
-
Page 16: Mounting The System On A Rack
The storage system can slip and fall, which may cause damage or injury to the StoreEasy 1X60 Storage. HPE is not responsible for any damage or injury caused by mishandling of StoreEasy 1X60. 2. Ensure that the rack is leveled and stable before working on the rack. The leveling jacks (feet) must extend to the floor and the full weight of the rack must rest firmly on the floor. - Page 17 1U Rail instructions Procedure 1. Slide the StoreEasy 1X60 into the position on the rails as shown in the following figure: 2. To secure the StoreEasy 1X60 to the rails, the Configure-to-Order (CTO) bracket at the rear ends of the rails must overlap the chassis tab as shown in the following figure: 3.
-
Page 18: Cabling Instructions
5. Connect all power cords to the facility power source. 2U Rail instructions For detailed instructions on installing the HPE rack rails into square and round hole racks for HPE 2U Storage system, see HPE Rack Rail Kit installation instructions document, that is part of the shipped rail kit. -
Page 19: Power Up
PCIe Slot Description (x8) (x16) (x8) Slot 4 (x8) 5 (x16) 6 (x8) Primary Riser Secondary Riser HPE M.2 Kit Slot Not Slot Not Slot Not Slot Not Slot Not Slot Not with 2 x M.2 Available Available Available Available... -
Page 20: Complete Installation
NOTE: If the StoreEasy 1X60 Storage system is attached to an external storage, including JBODs, power on the external storage system before you power on the StoreEasy 1X60 Storage system. Complete installation Using iLO / Console Before using the HPE StoreEasy management console as the primary management tool, complete the initial startup sequence. - Page 21 Accept End User Licence Agreement (EULA) Read and accept the license terms. Assign Administrator credentials Once the preferred language choice, acceptance of licence terms and setup of the local admin password have been made, log in with the previously set administrator credentials. A post-installation process automatically starts and takes approximately 10-15 minutes.
-
Page 22: Launch The Initial Configuration Toolkit (Ict)
Description of ICT and the steps it runs through Once the HPE StoreEasy 1X60 Storage is connected to your network and to external storage enclosures (if present), power up the system and log on. Configure the system to complete the installation. -
Page 23: Initial System Configuration Using Ict
Set time zone: Enables you to change the date and time settings. You can change the time zone, date and time, and synchronize the date and time with an Internet time server. Networking This task group enables you to set the network IP and domain of HPE StoreEasy 1X60 Storage. The following tasks are included in this group: •... -
Page 24: Notifications
• HPE recommends that you use only Internet-standard characters in the computer name. Standard characters are the numbers from 0 through 9, uppercase and lowercase letters from A through Z, and the hyphen (-) character. Computer names cannot consist entirely of numbers. -
Page 25: Protection
Open Server Manager and select Tools > StoreEasy > Register Product. Protection This task group enables the HPE StoreEasy 1X60 Storage system to receive critical software updates and enhancements directly from Microsoft website. The following features are included in this group: •... - Page 26 User Roles Each resource in the HPE StoreEasy management console has a set of permissions associated with it. These permissions determine who can access the file and what they can do with the file.
-
Page 27: Firewall Settings
Installation and Port configuration HPE StoreEasy management console uses 8443 as default port. The port is configurable and the user can provide any port during installation. If the user agrees to use the default port, the application will use port 8443. - Page 28 Name of the Application Local port Remote port Enable LPD Service Windows Standards- 5990 Based Storage Management CIM-XML indications inbound Windows Standards- Based Storage Management SLP outbound Failover Clusters SNMP Service (UDP Out) DFS Management (SMB- DFS Management (DCOM-In) File Server Remote Management (SMB-In) File Server Remote Management (DCOM-In)
- Page 29 Name of the Application Local port Remote port Enable Core Networking - Dynamic Host Configuration Protocol for IPv6(DHCPV6-Out) Remote Desktop - User Mode (UDP-In) File and Printer Sharing 5355 (LLMNR-UDP-Out) Windows Remote 5985 Management (HTTP-In) Getting started...
-
Page 30: System Architecture
System Architecture Each StoreEasy 1X60 system comes pre-configured with the Windows Storage Server 2016 installed from the factory. Applicable Windows Server roles and features have been enabled for managing a file storage system. For more information on complete list of the Roles and Features installed, see Appendix. Figure provides a high-level overview of a generic StoreEasy 1X60 system, depicting the physical and logical components that are needed to enable reliable, flexible and performant file data storage services for application and user workloads. -
Page 31: Hpe Storeeasy Data Storage Resources To Client Systems And Application
Solid State Drives come in the following drive interface types: 12 Gb SAS (SFF), 6 Gb SATA (SFF, M.2, and enablement kits) or PCIe/NVMe (SFF, Add-in and Mezz cards). Currently HPE StoreEasy 1X60 systems only support the 12 Gb SAS or 6 Gb SATA options. - Page 32 We are going to focus on the recommend RAID configurations that are considered a best practice when configuring your physical disks into RAID arrays. For more information, see HPE Smart Array SR Gen10 User Guide. Mirroring RAID 1 and 1+0 (RAID 10): In RAID 1 and RAID 1+0 (RAID 10) configurations, data is duplicated to a second drive.
- Page 33 This method has the following benefits: • It is useful when high performance and data protection are more important than usable capacity. • This method has the highest write performance of any fault-tolerant configuration. • No data is lost when a drive fails, as long as no failed drive is mirrored to another failed drive. •...
- Page 34 When the array has more than three physical drives, drives are mirrored in trios, and the fault-tolerance method is known as RAID 10 (ADM). If a physical drive fails, the remaining two drives in the mirrored trio can still provide all the necessary data. Several drives in the array can fail without incurring data loss, as long as no three failed drives belong to the same mirrored trio.
- Page 35 Storage Pool: A storage pool is the aggregation of physical drives into a RAID group. When a HPE StoreEasy 1X60 system physical disks have been configured into one or more hardware-based RAID array configurations, the Windows operating system will see these RAID array logical drives as one or more storage pools.
- Page 36 HPE Smart Storage Administrator WARNING: Do not use the Windows Server Manager to create storage pools on a HPE StoreEasy 1X60 system. This would create a storage spaces RAID configuration which is not a supported configuration on the HPE StoreEasy systems.
- Page 37 File Shares – SMB and NFS: There are several file sharing protocols available that can be used on the HPE StoreEasy 1X60 systems. These file sharing protocols include Network File Systems (NFS), File Transfer Protocol (FTP), Hypertext Transfer Protocol (HTTP), and Microsoft Server Message Block (SMB).
-
Page 38: Authentication
Storage system deployed into a work group environment, the user and group information is stored locally on the device. By contrast, if HPE StoreEasy 1X60 Storage is deployed into a domain environment, user and group information is stored on the domain. -
Page 39: Storage Pools
Pools, you can provision volumes on them. Storage Pools Overview Use HPE StoreEasy management console to create, edit, grow, and delete storage pools. A storage pool contains a set of physical disk drives that are grouped together and from which one or more Virtual Disks are created. - Page 40 3. Click Storage Pools. 4. Click + icon on the top left corner. 5. From the Create Storage Pool page, select the storage subsystem. Storage Pools...
-
Page 41: Deleting Storage Pools
6. Click Create. Deleting Storage Pools The Storage Pools can be deleted using: Deleting Storage Pools using Smart Storage Administrator Deleting Storage Pools using Smart Storage Administrator Follow the steps to delete Storage Pools using Smart Storage Administrator: 1. Click Start menu on your desktop. 2. -
Page 42: Adding Disks To Storage Pools
Adding disks to Storage Pools The disks can be added to Storage Pools using: Adding disks to Storage Pools using Smart Storage Administrator Adding disks to Storage Pools using Smart Storage Administrator Follow the steps to add disks to Storage Pools using Smart Storage Administrator: Click Start menu on your desktop. -
Page 43: Volumes
Volumes A volume is a detectable unit of HPE StoreEasy management console data storage. You can create a volume on a physical disk or a virtual disk. A virtual disk is a collection of one or more physical disks from a previously created storage pool. The layout of data across the physical disks can increase the reliability and performance of the volume. -
Page 44: Creating Volumes
Creating Volumes The Volumes can be created by: • Creating Volumes using HPE StoreEasy management console • Creating Volumes using Server Manager Creating Volumes Using HPE StoreEasy management console Create Volume page enables you to create a simple volume or advanced volume. - Page 45 1. Click Volumes in the left navigation menu. 2. Click + add icon in the Volumes page. 3. Enter the name for a volume in the Create Volume page. Use a backslash as required as part of volume names. For example, DataVolume. They are not case- sensitive.
-
Page 46: Creating Volumes Using Server Manager
Click edit icon in the Snapshot Size Limit section and select either of the following options to configure the snapshot size limit: • No Limit • Use Limit Snapshot is a backup copy created at a particular point in time. Snapshot size limits the amount of volume capacity used to store backup copies. -
Page 47: Deleting Volumes
• Select Are you sure and click Yes, Delete to confirm deletion. IMPORTANT: All the data on the volume will be lost. HPE recommends the users to back up the data before deleting. NOTE: File shares must be removed before deleting a volume. - Page 48 1. Using Windows Explorer, access the folder or file that needs to be changed, and then right-click the folder. 2. Click Properties 3. Click Security tab. 4. Several options are available on the Security tab: • To add users and groups to the permissions list, click Add. Follow the dialog box instructions. •...
- Page 49 • Permissions • Auditing Effective Access Permissions: To modify ownership of files, or to modify individual file access level permissions, click Advanced > Permissions. The following functionalities are available in Advanced Security Settings: • Add a new user or group, click Add, and then follow the dialog box instructions. •...
- Page 50 Auditing: Another area of the Advanced Security Settings is the Auditing tab. Auditing allows you to set rules for the auditing of access, or attempted access, to files or folders. Users or groups can be added, deleted, viewed, or modified through the Auditing tab. Volumes...
- Page 51 Click Add to display the Auditing Entry screen. Click Select a principal to display the Select User or Group screen. Volumes...
- Page 52 Enable to audit to configure auditing information. Use the local Computer Policy Editor to configure the audit policy on HPE StoreEasy 1X60 Storage. The Owner tab allows taking ownership of files. Typically, administrators use this area to take ownership of files when the file ACL is incomplete or corrupt.
- Page 53 Volumes...
-
Page 54: File Shares
File Shares File Shares are shared folders on a HPE StoreEasy Storage systems that hold files which users and groups can access over a network. The same set of files and folders can be simultaneously accessed using both the Network File Systems (NFS) and Server Message Block (SMB) protocols. The HPE StoreEasy Storage product family provides SMB, NFS, and iSCSI target server capability that enables storage provisioning over TCP/IP networks. - Page 55 You can perform the following operations in the File Shares screen: File Shares...
- Page 56 Icon Function Description Search Allows the user to locate the specific File Share based on the File Share name. Searches for the text you enter in the Search box. Enter the search string in the Search bar to filter the individual File Share from the existing list of resources.
-
Page 57: Smb File Shares
Icon Function Description Filter Filter tool is used to limit the information displayed to the specified criteria by entering the data you want to filter on. You can filter the File Shares based on the following status: • ALL: This displays all the available File Shares. -
Page 58: Creating Smb File Shares
Folder Permissions Creating SMB File Shares The SMB files can be created from: Creating SMB file Shares using HPE StoreEasy management console Creating SMB File Shares Using HPE StoreEasy management console Procedure Select File Shares from the left navigation pane and click add icon ( ) in the File Shares page. - Page 59 a. Enter the account name of the user if you want to provide the access. The account name can be User, Service account, Computer, and Groups. b. Select either Allow or Deny access type. These options allows grant or deny access to the files. c.
- Page 60 Access Permissions Meaning List folder contents Allows viewing and listing of files and subfolders as well as executing of files; inherited by folders only. Read Allows the user to view or access the File Share. Write Allows writing to a file. a.
-
Page 61: Deleting Smb File Shares
Changing SMB File Share properties using HPE StoreEasy management console Changing SMB File Share properties using HPE StoreEasy management console Procedure 1. Select File Shares from the HPE StoreEasy management console left navigation pane and click any of the available SMB File Shares. 2. Click edit icon ( ) in the File Share page to edit security permissions for shares and folders. - Page 62 Share permissions are the permissions set for a file while sharing. The share permissions determine the type of access others have to the shared files across the network. a. Enter the account name of the user if you want to provide the access. The account name can be User, Service account, Computer, and Groups.
- Page 63 Access Permissions Meaning Read and Execute Permits viewing and accessing of the folder contents as well as executing of the file Share. List folder contents Allows viewing and listing of files and subfolders as well as executing of files; inherited by folders only. Read Allows the user to view or access the File Share.
-
Page 64: Nfs File Shares
UNIX/Linux clients. Creating NFS File Shares The NFS File Shares can be created using: Creating NFS File Shares using HPE StoreServ management console Creating NFS File Shares Using HPE StoreEasy management console Procedure Select File Shares from the left navigation pane and click add icon ( ) in the File Shares page. - Page 65 a. Select any of the following type from the Type drop-down menu: • Host • Netgroup • Client group • All Machines b. Select either of the three types of share permissions from the Access Permissions drop-down menu and click OK: •...
- Page 66 Access Permissions Meaning Full Control The user can perform read, write, edit, and delete folders. Modify The user can read, write, and edit the folder contents. Read and Execute Permits viewing and accessing of the folder contents as well as executing of the file Share. List folder contents Allows viewing and listing of files and subfolders as well as executing of files;...
-
Page 67: Deleting Nfs File Shares
If Quota is not selected to be deleted then only file share will be deleted and Quota on the folder will remain. All the clients connected to the file share will be disconnected. IMPORTANT: HPE recommends you to save the data before deleting the file share. Deleting NFS File Shares... -
Page 68: Directory Quotas
The Quota page displays the list of available quotas in the system, quota path, quota template applied, quota usage and quota type. You can access quotas by clicking Quotas in the HPE StoreEasy management console left navigation menu. You can perform the following operations in the Quotas page:... - Page 69 Icon Function Description Search Allows the user to locate the specified data. Searches for the text you enter in the Search box. Enter the search string in the Search bar to filter the individual element from the existing list of resources. Create quota to limit the space allowed for a volume or folder and generate notifications when the quota limits are...
-
Page 70: Quota Templates
The Quotas can be edited independent of the Quota template. Creating Quota Templates Quota Templates can be created by using: Creating Quota Templates using HPE StoreEasy management console Creating Quota Templates Using HPE StoreEasy management console To create a Quota template, perform the following: Select Settings >... -
Page 71: Delete Quota Templates
13. Provide the description (optional) in the Description field and click Create. Delete Quota Templates The Quota Templates can be deleted using: Delete Quota Templates using HPE StoreEasy management console Deleting Quota Templates Using HPE StoreEasy management console To delete a quota template, perform the following: 1. -
Page 72: Modifying Quota Templates
Modifying Quota Templates The Quota Templates can be modified using: Modifying Quota Templates using HPE StoreEasy management console Modifying Quota Templates Using HPE StoreEasy management console The user can modify the existing template as per their requirements. This option allows you to modify the quota type, increase or decrease the quota limit, modify the threshold alert limits and notifications. -
Page 73: Snapshots
Use Limit Deleting snapshots Deleting snapshots Using HPE StoreEasy management console The older snapshots can be deleted without losing the data and the new snapshots can be used for restoring. Windows clears the old backups once the snapshot limit is set. -
Page 74: Networking
IP addresses are assigned to the network interfaces. View Network Interfaces The Network Interfaces pages displays the list of all the available Network Interfaces of the HPE StoreEasy Storage system which can be managed by the management console of the HPE StoreEasy. - Page 75 Icon Function Description Search Allows you to search the available Network Interfaces by the user- friendly name assigned by the user. Filter The Filter icon allows you to limit the information displayed to the specified criteria. The total number of Network Interfaces appears at the top of the filter icon.
-
Page 76: View Network Interface Details
To view the Network Interface details: 1. Click Settings > Networking > Network Interfaces from the left navigation menu in the management console for HPE StoreEasy. 2. Click on any of the available network interfaces to view the following details:... -
Page 77: View Network Interface State And Status
The following user icon is available in the network interface details page: Icon Function Description Edit Enables the user to change the name of the existing network interfaces. Back button Allows the user to return to the network interfaces home page. The state of the network interface is displayed at the top of the network interface details page as shown in the following image. -
Page 78: Editing A Network Interface
Service: Indicates that the interface is available for HPE StoreEasy management console operations. Once the request is received to start a network interface, the resource tries to bring the interface online. Stopping: Indicates that the interface is in the process of moving to an OK, warning, critical or unknown state. -
Page 79: Network Teams
You can access the Network Team by clicking Settings > Networking > Network Teams from the left navigation menu in the management console of the HPE StoreEasy. The following user icons are available in the Network Teams page:... -
Page 80: Viewing Network Team Details
To view the network team details, click Settings > Networking > Network Teams from the left navigation menu in the management console for HPE StoreEasy, and then click on any of the available network teams to view the following details:... - Page 81 Property Description Teaming Mode The following are the modes of network teaming: • Switch Independent: In this mode, the switches are not aware that different interfaces on the server comprise a team. All the teaming is done exclusively on the server. •...
-
Page 82: View Network Interface State And Status
OK ( Status Starting: Indicates that the network interface is either starting or running. Service: Indicates that the interface is available for HPE StoreEasy management console operations. Once the request is received to start a network interface, the resource tries to bring the interface online. -
Page 83: Creating A Network Team
Disabled Disconnected: Indicates that the network interface is disconnected. Creating a Network Team HPE StoreEasy management console allows you to create a network team. NOTE: Default Network Team interface is created along with the network team. To create a network team, perform the following: 1. -
Page 84: Editing A Network Team
802.1ax works by using the Link Aggregation Control Protocol (LACP) to dynamically identify links that are connected between the host and a given switch. This enables the automatic creation of a team and, in theory but rarely in practice, the expansion and reduction of a team simply by the transmission or receipt of LACP packets from the peer entity. -
Page 85: Network Team Interfaces
You can access Network Team Interfaces by clicking Settings > Networking > Network Team Interfaces from the left navigation menu in the management console of the HPE StoreEasy. The following user icons are available in the Network Team Interfaces page:... -
Page 86: View Network Team Interface Details
To view the Network Team Interface details: 1. Settings > Networking > Network Team Interfaces from the left navigation menu in the management console of the HPE StoreEasy. 2. Click on any of the available network team interfaces to view the following details:... - Page 87 Property Description General Name Displays the name of the network team interface using which the user identifies the Network Team Interfaces. VLAN ID Displays the Virtual LAN ID number which is the combination of one or more physical network interface or adapter. 0 VLAN ID is the default VLAN.
-
Page 88: Viewing Network Team Interface State And Status
Viewing Network Team Interface State and Status The health status of Network Team Interface is mapped from any of the status or state information of each of the Network Team Interface. The parameters considered for status mapping are first individually mapped to one of the values of OK, Critical, Warning, Disabled or Unknown. - Page 89 Service: Indicates that the resource is available to use. Once the request is received to start a Network Team Interface, the resource makes an attempt to bring the interface online. Stopping: Indicates that the interface is in the process of moving to a OK, warning, critical or unknown state.
-
Page 90: Creating A Network Team Interface
Creating a Network Team Interface 1. Click Settings > Networking > Network Team Interfaces from the left navigation menu in the management console of the HPE StoreEasy. 2. Click add (+) icon on the top right-side of the Network Team Interfaces page. -
Page 91: Deleting A Network Team Interface
The status of this task is displayed on top of the Network Team Interface details page. Deleting a Network Team Interface 1. Select Settings from the left navigation menu. 2. Click Networking > Network Team Interfaces. 3. Click on any of the available network team interfaces that you choose to modify. 4. -
Page 92: Troubleshooting, Servicing, And Maintenance
Troubleshooting, servicing, and maintenance Certificate of Authenticity For technical support purposes, record the Certificate of Authenticity (COA) product key and make a print copy of the End User License Agreement (EULA) as needed. The COA label is used to: • Replace the main board/motherboard. -
Page 93: System Recovery
During system recovery, you can replace the existing drives with drives of the same size or larger, but have to be the same type of drive. HPE recommends that the replacement drives be the same size and type as the original drives. - Page 94 old logical partitions from the replacement drives for the operating system. See the online help in the Smart Storage Administrator on how to remove array logical partitions. WARNING: If restoring to a system that shares data and OS partition on the same drives then do not remove any partitions since this would put your data at risk of loss or corruption.
- Page 95 18. Copy all of the selected files to the root of the USB flash drive. Creating a USB flash drive with an image file from HPE Software Depot Follow the procedure to create a system recovery USB flash drive with an image file from HPE Software Depot: After downloading the image file, mount the ISO locally to access the files.
- Page 96 13. Copy the installation files included in the disc image file (ISO) to the root of the USB flash drive. Creating a DVD with an image file from HPE Software Depot Follow the steps to create a system recovery DVD with an image file from HPE Software Depot: 1. Insert a blank dual layer DVD in the drive.
- Page 97 USB flash drive that is prepared with a System Recovery image. For remote management access, connect to the server using iLO from the client PC. Insert the System Recovery DVD in the HPE StoreEasy system or attach a bootable USB flash device that is prepared with a System Recovery image.
- Page 98 During the booting the USB or DVD you need to watch for the prompt to select any key to boot to finish booting to the DVD. Select Windows Recovery Environment. The recovery environment is loaded and the System Recovery Options wizard opens. Select the language and keyboard layout.
-
Page 99: Troubleshooting
HPE Insight Remote Support software • Microsoft Systems Center Operations Manager (SCOM) • HPE SIM 7.6 or later, which is required for proper HPE StoreEasy 1X60 Storage or HPE SIM integration • HPE StoreEasy management console health information NOTE: For the latest version of HPE SIM, see HPE SPOCK. - Page 100 Applying service releases using the Update tool The Update Tool is used to install hotfixes and updated HPE components on the HPE Storage system. The utility "Update Tool" is designed to provide an integrated, enhanced and seamless end user experience exploiting the cluster aware update (CAU) feature.
- Page 101 To troubleshoot problems with HPE StoreEasy 1X60 Storage, select HPE Server, Storage and Networking at the HPE Support & Drivers. Search for HPE StoreEasy 1X60 Storage or use the product ID or component information. For example, SAS I/O module. After entering the details, use the following links for troubleshooting information: •...
-
Page 102: Product Feedback
Product Feedback The Product Feedback feature enables you to send your suggestions, ideas on product improvement, or feedback on HPE StoreEasy 1000 Storage to storeeasyproductfeedback@hpe.com. You can access the Product Feedback dialog box using the following methods: • Double-click the Product Feedback icon on the desktop. -
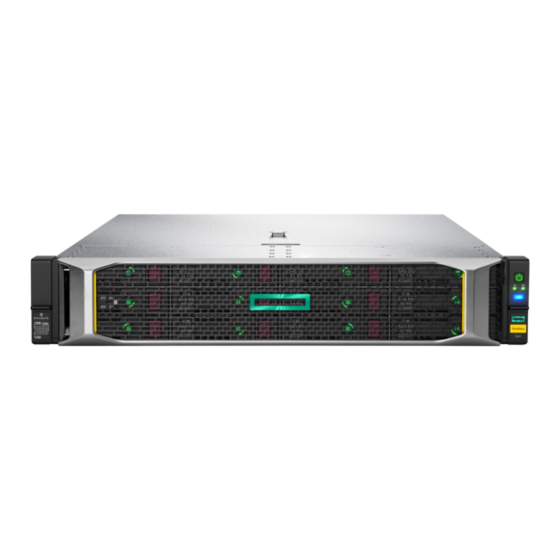
Page 103: Hardware Components Of Hpe Storeeasy 1X60 Storage System
Box 1 (optional drives or universal media bay) Box 2 (optional drives) Box 3 Drives 1-8 Serial label pull tab or optional Systems Insight Display iLO service port USB 3.0 port Universal media bay components Hardware Components of HPE StoreEasy 1X60 Storage system... - Page 104 Video display port Optical disk drive (optional) Drives (optional) 12-drive LFF front panel components Item Description Drive bays 8-drive LFF model front panel components Item Description Drives (optional) LFF power switch module Drive bays Hardware Components of HPE StoreEasy 1X60 Storage system...
-
Page 105: Front Panel Leds And Buttons
LFF power switch module components Item Description Optical disk drive Serial label pull tab USB 3.0 port iLO service port Video display port Front panel LEDs and buttons SFF front panel LEDs and button Front panel LEDs and buttons... - Page 106 **If the health LED indicates a degraded or critical state, review the system IML or use iLO to review the system health status. †Facility power is not present, power cord is not attached, no power supplies are installed, power supply failure has occurred, or the power button cable is disconnected. Hardware Components of HPE StoreEasy 1X60 Storage system...
- Page 107 1 Hz/cycle per sec = Remote management or firmware upgrade in progress • 4 Hz/cycle per sec = iLO manual reboot sequence initiated • 8 Hz/cycle per sec = iLO manual reboot sequence in progress Off = Deactivated Hardware Components of HPE StoreEasy 1X60 Storage system...
- Page 108 Health LED* Solid green = Normal Flashing green (1 Hz/cycle per sec) = iLO is rebooting Flashing amber = System degraded Flashing red (1 Hz/cycle per sec) = System critical** Table Continued Hardware Components of HPE StoreEasy 1X60 Storage system...
- Page 109 The UID button can be used to display the Server Health Summary when the server will not power on. For more information, see the latest HPE iLO User Guide on the Hewlett Packard Enterprise website. Front panel LED power fault codes The following table provides a list of power fault codes, and the subsystems that are affected.
- Page 110 PCI riser LED Off = Normal Amber = Incorrectly installed PCI riser cage Over temp LED Off = Normal Amber = High system temperature detected Table Continued Hardware Components of HPE StoreEasy 1X60 Storage system...
- Page 111 Description Status Amp Status LED Off = AMP modes disabled Solid green = AMP mode enabled Solid amber = Failover Flashing amber = Invalid configuration Power cap LED Off = System is in standby, or no cap is set. Solid green = Power cap applied When the health LED on the front panel illuminates either amber or red, the server is experiencing a health event.
- Page 112 If more than one DIMM slot LED is illuminated, further troubleshooting is required. Test each bank of DIMMs by removing all other DIMMs. Isolate the failed DIMM by replacing each DIMM in a bank with a known working DIMM. Hardware Components of HPE StoreEasy 1X60 Storage system...
-
Page 113: Rear Panel Components
Rear panel components Item Description Primary riser slots 1-3 (Optional drive cage) Optional riser slots 4-6 (Optional drive cage) Optional riser slots 7-8 (Optional drive cage) Power supply 1 Power supply 2 Video port Serial port (optional)* 1Gb RJ-45 ports 1–4 iLO management port USB 3.0 ports FlexibleLOM slot... - Page 114 Off = No network activity Solid green = Link to network Flashing green = Network activity Power supply Off = System is off or power supply has LEDs failed. Solid green = Normal Hardware Components of HPE StoreEasy 1X60 Storage system...
-
Page 115: System Board Components
System board components Item Description FlexibleLOM connector System maintenance switch Primary PCIe riser connector Front display port/USB 2.0 connector Table Continued System board components... - Page 116 Item Description x4 SATA port 1 x4 SATA port 2 x2 SATA port 3 x1 SATA port 4 Optical disk drive/SATA port 5 Front power/USB 3.0 connector Drive backplane power connectors Smart Storage Battery connector Chassis intrusion detection connector Drive backplane power connector Micro SD card slot Dual internal USB 3.0 ports Type-a Smart Array connector...
- Page 117 Position Default Function — Reserved — Reserved — Reserved — Reserved — Reserved To access the redundant ROM, set S1, S5, and S6 to On. When the system maintenance switch position 6 is set to the On position, the system is prepared to restore all configuration settings to their manufacturing defaults.
- Page 118 E = Unbuffered ECC (UDIMM) For more information about product features, specifications, options, configurations, and compatibility, see the product QuickSpecs on the Hewlett Packard Enterprise website (http://www.hpe.com/info/qs). DIMM slot locations DIMM slots are numbered sequentially (1 through 12) for each processor. The supported AMP modes use the letter assignments for population guidelines.
- Page 119 When scanned, the following information from the label can be copied to your cell phone or device: • (P) is the module part number. • (L) is the technical details shown on the label. • (S) is the module serial number. Example: (P)HMN82GR7AFR4N-VK (L)16GB 1Rx4 NN4-2666V-RZZZ-10(S)80AD-01-1742-11AED5C2 Hardware Components of HPE StoreEasy 1X60 Storage system...
- Page 120 NVDIMM LED identification Item LED description LED color Power LED Green Function LED Blue NVDIMM-N LED combinations State Definition NVDIMM-N Power LED NVDIMM-N Function LED (green) (blue) AC power is on (12 V rail) but the NVM controller is not working or not ready. AC power is on (12 V rail) and the NVM controller is ready.
-
Page 121: Processor, Heatsink, And Socket Components
State Definition NVDIMM-N Function LED The save operation is in progress. Flashing The NVDIMM-N finished saving and battery is still turned Solid or On on (12 V still powered). The NVDIMM-N has an internal error or a firmware Fast-flashing update is in progress. For more information about an NVDIMM-N internal error, see the IML. - Page 122 SAS/SATA drive components and LEDs Item Description Status Locate • Solid blue = The drive is being identified by a host application. • Flashing blue = The drive carrier firmware is being updated or requires an update. Activity ring LED •...
- Page 123 NVMe SSD LEDs The NVMe SSD is a PCIe bus device. A device attached to a PCIe bus cannot be removed without allowing the device and bus to complete and cease the signal/traffic flow. CAUTION: Do not remove an NVMe SSD from the drive bay while the Do not remove LED is flashing. The Do not remove LED flashes to indicate that the device is still in use.
- Page 124 Item LED Status Definition Flashing white The drive ejection request is pending. The drive has been ejected. Power Solid green Do not remove the drive. Drive must be ejected from the PCIe bus prior to removal. Flashing green The drive ejection request is pending. The drive has been ejected.
-
Page 125: Fan Bay Numbering
Item Description Status Drive status LED • Off—The drive is not configured by a RAID controller • Solid green—The drive is a member of one or more logical drives • Flashing green (4 Hz)—The drive is operating normally and has activity •... -
Page 126: Drive Box Identification
Drive box identification Front boxes Item Description Box 1 Box 2 Box 3 Item Description Box 1 Box 2 Box 3 Rear boxes Item Description Box 4 Box 5 Box 6 Drive box identification... -
Page 127: Drive Bay Numbering
Item Description Box 4 Box 6 Midplane box (LFF only) Item Description Box 7 Drive bay numbering Drive bay numbering depends on how the drive backplanes are connected: • To a controller ◦ Embedded controllers use the onboard SATA ports. ◦... - Page 128 Drive bay numbering: Smart Array controller When the drive backplane is connected directly to a storage controller, then each drive box starts at 1. The following images are examples of common configurations. 1 2 3 4 5 6 7 8 1 2 3 4 5 6 7 8 1 2 3 4 5 6 7 8 Drive bay numbering: Smart Array controller...
- Page 129 Drive bay numbering: SAS expander Drive numbering through a SAS Expander is continuous. • SAS expander port 1 always connects to port 1 of the controller. • SAS expander port 2 always connects to port 2 of the controller. • SAS expander port 3 = drive numbers 1-4.
- Page 130 When the front 24SFF bays are populated, any installed rear 2SFF drives are always 25 and 27. If a 2SFF drive cage is connected to SAS expander port 3, then the drive numbers are 1 and 3. Hardware Components of HPE StoreEasy 1X60 Storage system...
- Page 131 Front 12LFF + Midplane 4LFF + All rear 2SFF: Hardware Components of HPE StoreEasy 1X60 Storage system...
- Page 132 Drive bay numbering: NVMe drives If the server is populated with NVMe drives and NVMe risers: 5 6 7 8 1 2 3 4 5 6 7 8 1 2 3 4 5 6 7 8 uFF drive bay numbering There are two uFF drives in each drive carrier.
-
Page 133: Hpe Flex Slot Power Supply With Integrated Battery Backup Unit Components And Led
1. Battery check button 2. Power LED For more information about the HPE Flex Slot Power Supply with Integrated Battery Backup Unit, see the document that ships with the component. The label on the component indicates that the flex slot power supply has an integrated battery back up module. - Page 134 Figure 1: HPE Flex Slot Power Supply with Integrated Battery Backup Unit label Checking the battery backup charge level Procedure 1. Using a ball tip pen, press and release the battery check button. After releasing the button, you may have to wait up to seven seconds before the LED starts flashing.
-
Page 135: Installing The Bezel And Bezel Lock
Installing the bezel and bezel lock Power supply options Hot-plug power supply calculations For hot-plug power supply specifications and calculators to determine electrical and heat loading for the server, see the Hewlett Packard Enterprise Power Advisor website (http://www.hpe.com/info/poweradvisor/ online). Installing the bezel and bezel lock... -
Page 136: Installing A Redundant Hot-Plug Power Supply
Installing a redundant hot-plug power supply CAUTION: All power supplies installed in the server must have the same output power capacity. Verify that all power supplies have the same part number and label color. The system becomes unstable and might shut down if it detects different power supplies. -
Page 137: Fan Options
4. Connect the power cord to the power supply. 5. Route the power cord. Use the cable management arm and best practices when routing cords and cables. 6. Connect the power cord to the power source. 7. Observe the power supply LED. Fan options CAUTION: To avoid damage to server components, fan blanks must be installed in fan bays 1 and 2 in a single-... -
Page 138: Installing High-Performance Fans
• At POST and in the OS, iLO performs an orderly shutdown if a cautionary temperature level is detected. If the server hardware detects a critical temperature level before an orderly shutdown occurs, the server performs an immediate shutdown. • When the Thermal Shutdown feature is disabled in the BIOS/Platform Configuration (RBSU), iLO does not perform an orderly shutdown when a cautionary temperature level is detected. - Page 139 Do not mix standard fans and high-performance fans in the same server. 6. Install high-performance fans in all fan bays. 7. Install the air baffle. 8. Install the access panel. 9. Install the server into the rack. Hardware Components of HPE StoreEasy 1X60 Storage system...
-
Page 140: Memory Options
DIMM and NVDIMM population information For specific DIMM and NVDIMM population information, see the DIMM population guidelines on the Hewlett Packard Enterprise website (http://www.hpe.com/docs/memory-population-rules). HPE SmartMemory speed information For more information about memory speed information, see the Hewlett Packard Enterprise website (https:// www.hpe.com/docs/memory-speed-table). -
Page 141: Hpe 16Gb Nvdimm Option
The HPE 16GB NVDIMM is supported on select ProLiant Gen10 servers and can support up to 12 NVDIMMs in 2 socket servers (up to 192GB) and up to 24 NVDIMMs in 4 socket servers (up to 384GB). The HPE Smart Storage Battery provides backup power to the memory slots allowing data to be moved from the DRAM portion of the NVDIMM to the Flash portion for persistence during a power down event. - Page 142 Unlike traditional storage devices, NVDIMMs are fully integrated in with the ProLiant server. Data loss can occur when system components, such as the processor or HPE Smart Storage Battery, fails. HPE Smart Storage battery is a critical component required to perform the backup functionality of NVDIMMs.
- Page 143 11. Slide or install the server into the rack. 12. Connect each power cord to the server. 13. Power up the server. 14. If required, sanitize the NVDIMM-Ns. For more information, see NVDIMM sanitization on page 144. Hardware Components of HPE StoreEasy 1X60 Storage system...
- Page 144 NVDIMM memory options by pressing the F9 key during POST. For more information about UEFI System Utilities, see the Hewlett Packard Enterprise website (http://www.hpe.com/info/uefi/docs). • iLO RESTful API for HPE iLO 5—For more information about configuring the system for NVDIMMs, see https://hewlettpackard.github.io/ilo-rest-api-docs/ilo5/. NVDIMM sanitization Media sanitization is defined by NIST SP800-88 Guidelines for Media Sanitization (Rev 1, Dec 2014) as "a...
-
Page 145: Hpe Scalable Persistent Memory (Cto Only)
NVDIMMs on page 144. HPE Scalable Persistent Memory (CTO only) HPE Scalable Persistent Memory is an integrated storage solution that runs at memory speeds with terabyte capacity unlocking new levels of performance for your business workloads. It provides a complete hardware and software solution utilizing the following components: •... -
Page 146: Installing A Storage Controller
• Embedded controllers Enabled through System Utilities and configured through HPE Smart Storage Administrator (Intelligent Provisioning) • Type-a controllers Type-a controllers install in the type-a smart array connector. • Type-p controllers Type-p controllers install in a PCIe expansion slot Installing a storage controller... -
Page 147: Installing A Midplane 4Lff Sas/Sata Drive Cage
• For Type-p Smart Array controllers, install the controller into an expansion slot. 7. Cable the controller. The installation is complete. Installing a midplane 4LFF SAS/SATA drive cage Observe the following: • A 1U heatsink is required for each processor when installing this option. •... - Page 148 If connecting the data cable to the system board or a controller, connect the data cable. Prepare the drive cage for installation by lifting the latches on the drive cage. 10. Install the drive cage: Hardware Components of HPE StoreEasy 1X60 Storage system...
- Page 149 Pull the plunger pin on the rear right of the drive cage and then lower the drive cage until the plunger pin engages. 11. Install drives or drive blanks. 12. Push down on the latches to lower the drive cage into place. Hardware Components of HPE StoreEasy 1X60 Storage system...
-
Page 150: Installing A Rear 2Sff Sas/Sata Drive Cage In The Primary Or Secondary Riser
13. Connect the power and data cables to the drive backplane. The installation is complete. Installing a rear 2SFF SAS/SATA drive cage in the primary or secondary riser Prerequisites Before installing this option, be sure that you have the following: •... - Page 151 For primary bays, remove the riser cage. For secondary bays, remove the rear wall blank. Install a SAS expander or other expansion card, if needed. Install the drive cage. Hardware Components of HPE StoreEasy 1X60 Storage system...
-
Page 152: Installing A Rear 2Sff Sas/Sata Drive Cage Over The Power Supplies
Cable the drive backplane. Install drives or drive blanks. 10. Install the access panel. 11. Slide the server into the rack. 12. Connect each power cord to the server. 13. Connect each power cord to the power source. 14. Power up the server. The installation is complete. - Page 153 Remove the server from the rack . Remove the access panel. Do one of the following: If installed, remove the secondary riser cage. Remove the secondary wall blank. Remove the tertiary wall blank. Hardware Components of HPE StoreEasy 1X60 Storage system...
- Page 154 Install the drive cage compatible rear wall. Install the drive cage. Hardware Components of HPE StoreEasy 1X60 Storage system...
-
Page 155: Installing A Secondary Riser Cage
Install drives or drive blanks. 10. Install the secondary rear wall or a riser cage. 11. Cable the drive backplane. 12. Install the access panel. 13. Slide the server into the rack. 14. Connect each power cord to the server. 15. - Page 156 Remove the server from the rack. 5. Remove the access panel. 6. Remove the rear wall blank. 7. Install any expansion boards, if needed. 8. Install the riser cage: The installation is complete. Hardware Components of HPE StoreEasy 1X60 Storage system...
-
Page 157: Installing A 12G Sas Expander Card
For configurations including a 2SFF rear drive cage, install the drive cage over the power supplies. • HPE recommends installing the SAS expander card into slot 3 of the primary PCIe riser expansion card. • To ensure that cables are connected correctly, observe the labels on the cable and port. - Page 158 12. Connect cables from the 12G SAS expander to the controller. 13. Connect cables from the 12G SAS expander to the drive backplanes. A standard configuration is shown. For additional cabling diagrams, see "#unique_226". Hardware Components of HPE StoreEasy 1X60 Storage system...
-
Page 159: Installing A Smart Storage Battery
14. Install the fan cage. 15. Install the air baffle. 16. Install the access panel. 17. Install the server into the rack. 18. Connect each power cord to the server. 19. Connect each power cord to the power source. 20. Power up the server . The installation is complete. - Page 160 Install the Smart Storage battery. Install the cable. Install the fan cage. Install the air baffle. 10. Install the access panel. 11. Slide the server into the rack. 12. Connect each power cord to the server. Hardware Components of HPE StoreEasy 1X60 Storage system...
-
Page 161: Installing A Flexiblelom Adapter
13. Connect each power cord to the power source. 14. Power up the server . The installation is complete. Installing a FlexibleLOM adapter Prerequisites • The components included with the hardware option kit • A T-10 Torx screwdriver might be needed to unlock the access panel. Procedure Power down the server . -
Page 162: Installing A Processor
The installation is complete. Installing a processor Observe the following: • Before performing this procedure, HPE recommends identifying the processor-heatsink module components. • Intelligent System Tuning supports specific processors and configurations. For more information, see the product QuickSpecs on the HPE website. - Page 163 Locate the Pin 1 indicator on the processor frame and the socket. c. Align the processor heatsink assembly with the alignment posts and gently lower it down until it sits evenly on the socket. Hardware Components of HPE StoreEasy 1X60 Storage system...
- Page 164 The heatsink alignment posts are keyed. The processor will only install one way. A standard heatsink is shown. Your heatsink might look different. d. Using a T-30 Torx screwdriver, tighten the nuts until they stop. The installation is complete. Hardware Components of HPE StoreEasy 1X60 Storage system...
-
Page 165: Hpe Trusted Platform Module 2.0 Gen10 Option
HPE Trusted Platform Module 2.0 Gen10 option Overview Use these instructions to install and enable an HPE TPM 2.0 Gen10 Kit in a supported system. This option is not supported on Gen9 and earlier systems. This procedure includes three sections: 1. -
Page 166: Installing And Enabling The Hpe Tpm 2.0 Gen10 Kit
Hewlett Packard Enterprise is not liable for blocked data access caused by improper TPM use. For operating instructions, see the TPM documentation or the encryption technology feature documentation provided by the operating system. Installing and enabling the HPE TPM 2.0 Gen10 Kit Installing the Trusted Platform Module board Preparing the server for installation... - Page 167 Line up the tabs on the cover with the openings on either side of the TPM connector. b. To snap the cover into place, firmly press straight down on the middle of the cover. Hardware Components of HPE StoreEasy 1X60 Storage system...
- Page 168 4. Proceed to #unique_238. Preparing the server for operation Procedure 1. Install any options or cables previously removed to access the TPM connector. 2. Do one of the following: • Install the air baffle. • Install the 4LFF midplane drive cage. 3.
- Page 169 3. Change the "TPM Mode Switch Operation" to TPM 1.2. 4. Verify "TPM Visibility" is Visible. 5. Press the F10 key to save your selection. 6. When prompted to save the change in System Utilities, do one of the following: Hardware Components of HPE StoreEasy 1X60 Storage system...
- Page 170 • If in graphical mode, click Yes. • If in text mode, press the Y key. 7. Press the ESC key to exit System Utilities. The reboots a second time without user input. During this reboot, the TPM setting becomes effective. 8.
-
Page 171: Hpe Software And Configuration Utilities
HPE Smart Storage Administrator HPE SSA is the main tool for configuring arrays on HPE Smart Array SR controllers. It exists in three interface formats: the HPE SSA GUI, the HPE SSA CLI, and HPE SSA Scripting. All formats provide support for configuration tasks. - Page 172 Using one of multiple methods, you can run HPE SSA before launching the host operating system. In offline mode, users can configure or maintain detected and supported devices, such as optional Smart Array controllers and integrated Smart Array controllers. Some HPE SSA features are only available in the offline environment, such as setting the boot controller and boot volume.
-
Page 173: Websites
Websites General websites Hewlett Packard Enterprise Information Library www.hpe.com/info/EIL Single Point of Connectivity Knowledge (SPOCK) Storage compatibility matrix www.hpe.com/storage/spock Storage white papers and analyst reports www.hpe.com/storage/whitepapers For additional websites, see Support and other resources. Websites... -
Page 174: Support And Other Resources
Support and other resources Accessing Hewlett Packard Enterprise Support • For live assistance, go to the Contact Hewlett Packard Enterprise Worldwide website: http://www.hpe.com/assistance • To access documentation and support services, go to the Hewlett Packard Enterprise Support Center website: http://www.hpe.com/support/hpesc Information to collect •... -
Page 175: Customer Self Repair
IMPORTANT: Access to some updates might require product entitlement when accessed through the Hewlett Packard Enterprise Support Center. You must have an HPE Passport set up with relevant entitlements. Customer self repair Hewlett Packard Enterprise customer self repair (CSR) programs allow you to repair your product. If a CSR part needs to be replaced, it will be shipped directly to you so that you can install it at your convenience. -
Page 176: Regulatory Information
Documentation Feedback (docsfeedback@hpe.com). When submitting your feedback, include the document title, part number, edition, and publication date located on the front cover of the document. For online help content, include the product name, product version, help edition, and publication date located on the legal notices page. -
Page 177: Appendix
Appendix Roles And Features Installed Active Directory Lightweight Directory Services DHCP Server DNS Server File And Storage Services File and iSCSI Services File Server BranchCache for Network Files Data Deduplication DFS Namespaces DFS Replication File Server Resource Manager File Server VSS Agent Service iSCSI Target Server Work Folders iSCSI Target Storage Provider (VDS and V... - Page 178 WebDAV Publishing Health and Diagnostics HTTP Logging Custom Logging Logging Tools ODBC Logging Request Monitor Tracing Performance Static Content Compression Dynamic Content Compression Security Request Filtering Basic Authentication Centralized SSL Certificate Support Client Certificate Mapping Authentic Digest Authentication IIS Client Certificate Mapping Authe IP and Domain Restrictions URL Authorization Windows Authentication...
- Page 179 FTP Extensibility Management Tools IIS Management Console IIS 6 Management Compatibility IIS 6 Metabase Compatibility IIS 6 Management Console IIS 6 Scripting Tools IIS 6 WMI Compatibility IIS Management Scripts and Tools Management Service .NET Framework 3.5 Features .NET Framework 3.5 (includes .NET 2.0 and 3.0) HTTP Activation Non-HTTP Activation .NET Framework 4.5 Features...
- Page 180 Ink and Handwriting Services Internet Printing Client IP Address Management (IPAM) Server iSNS Server service LPR Port Monitor Management OData IIS Extension Media Foundation Message Queuing Message Queuing Services Message Queuing Server Directory Service Integration HTTP Support Message Queuing Triggers Multicasting Support Routing Service Message Queuing DCOM Proxy...
- Page 181 IP Address Management (IPAM) Client Network Load Balancing Tools SNMP Tools WINS Server Tools Role Administration Tools AD DS and AD LDS Tools Active Directory module for Windows AD DS Tools AD DS Snap-Ins and Command-Line Server for NIS Tools AD LDS Snap-Ins and Command-Line Tools Hyper-V Management Tools Hyper-V GUI Management Tools...
- Page 182 Remote Access Management Tools Remote Access GUI and Command-Line Remote Access module for Windows Volume Activation Tools Windows Deployment Services Tools RPC over HTTP Proxy Simple TCP/IP Services SMB 1.0/CIFS File Sharing Support SMB Bandwidth Limit SMTP Server SNMP Service SNMP WMI Provider Subsystem for UNIX-based Applications Telnet Client...
- Page 183 Windows Server Migration Tools Windows Standards-Based Storage Management Windows TIFF IFilter WinRM IIS Extension WINS Server Wireless LAN Service WoW64 Support XPS Viewer 2. IIS extension AD DS tools Appendix...
Need help?
Do you have a question about the StoreEasy 1X60 Storage and is the answer not in the manual?
Questions and answers