Table of Contents
Advertisement
Quick Links
HPE StoreOnce 3100, 3500, 5100, and
5500 System Installation and
Configuration Guide
Abstract
This guide is for HPE StoreOnce System Administrators. It assumes that the user has
followed the instructions on the appropriate Start Here poster to create a basic network
connection to the HPE StoreOnce System.
Part Number: BB913-90964
Published: April 2018
Edition: 4
Advertisement
Table of Contents

Related Manuals for HPE StoreOnce 3100


Summary of Contents for HPE StoreOnce 3100
- Page 1 5500 System Installation and Configuration Guide Abstract This guide is for HPE StoreOnce System Administrators. It assumes that the user has followed the instructions on the appropriate Start Here poster to create a basic network connection to the HPE StoreOnce System.
- Page 2 © Copyright 2015-2017, 2018 Hewlett Packard Enterprise Development LP Notices The information contained herein is subject to change without notice. The only warranties for Hewlett Packard Enterprise products and services are set forth in the express warranty statements accompanying such products and services. Nothing herein should be construed as constituting an additional warranty. Hewlett Packard Enterprise shall not be liable for technical or editorial errors or omissions contained herein.
-
Page 3: Table Of Contents
Configuring iLO4, all systems..................... 23 Basic network configuration......................27 Logging in to the HPE StoreOnce System and checking status..28 Supported web browsers......................28 Logging in to the HPE StoreOnce System and checking status..........28 Accessing the StoreOnce CLI.....................29... - Page 4 Configuring licenses................34 Capacity expansion license for StoreOnce 5500................ 34 Pre-installed Capacity licenses..................34 Capacity expansion license for HPE StoreOnce 3500 Series and HPE StoreOnce 5100 System............................34 Security license...........................35 Target devices and Catalyst stores licenses................35 StoreOnce Optional Hardware licenses..................35 Checking for installed licenses....................36...
- Page 5 Initiator (StoreOnce VTL)....................67 Hardware overview reference section..........68 Optional hardware........................68 HPE StoreOnce 5500 System....................68 HPE StoreOnce 5500 System front and rear views, server..........68 Front and rear views of the disk enclosure..............69 Storage expansion ......................70 HPE StoreOnce 3100 System....................70 HPE StoreOnce 3500 Series......................
- Page 6 VLAN guidelines with StoreOnce systems..................82 Fibre Channel with StoreOnce Systems..........84 Fibre Channel hardware requirements..................84 Supported Fibre Channel connections..................84 Zoning..........................84 Configuring Fibre Channel......................85 For use with StoreOnce Catalyst stores................85 For use with VTL libraries....................86 Support and other resources...............87 Accessing Hewlett Packard Enterprise Support.................
-
Page 7: Preparing For Basic Configuration
Structure of the StoreOnce guide This guide assumes that the user has followed the instructions on the printed Start Here poster to install the HPE StoreOnce System in the Data Center and establish an initial 1 GbE network connection for the StoreOnce Management Console. -
Page 8: Hpe Storeonce Systems
64 report on the system. HPE StoreOnce Systems HPE StoreOnce 5500 System Table 2: HPE StoreOnce 5500 System Storage capacity 60 TB (11 x 4 TB disks + 4 hot spare) Maximum capacity = 1120 TB Storage Expansion Options... -
Page 9: Hpe Storeonce 3100 System
HPE StoreOnce 3100 System Table 3: HPE StoreOnce 3100 System Storage capacity 8 TB (4 x 2 TB disks) Storage Expansion Options None StoreOnce Optional Hardware Not supported HPE StoreOnce 3500 Series Table 4: HPE StoreOnce 3520 System Storage capacity... -
Page 10: Verifying The Hpe Storeonce Hardware Configuration
Verifying the HPE StoreOnce hardware configuration The HPE StoreOnce System is supplied preconfigured according to the options specified at the time of order. Any additional storage and/or Optional Hardware PCIe cards are already installed. They should also be licensed and available for use. - Page 11 This is the full reference guide for the StoreOnce Command Line Interface (CLI). • HPE StoreOnce System Linux and UNIX Configuration Guide This guide explains how to configure StoreOnce Systems with supported Linux and UNIX operating systems. • OST plug-in documents: Various guides are available describing how to configure backup applications for use with StoreOnce Catalyst.
-
Page 12: Sas Cabling For Hpe Storeonce 5500 Systems
RAID controller card in Slot 2. There is a 1U support shelf above the server to protect it from the weight of the disk enclosures. This is the installation that is described in the printed HPE StoreOnce 5500 System Start Here poster, and is illustrated below. -
Page 13: Sas Cable Lengths For Hpe Storeonce Systems
RAID card in PCI slot 2, port 2 Drawer 2, I/O module B, port 2 SAS cable lengths for HPE StoreOnce Systems The StoreOnce implementation uses Managed Cables, making it easier to identify faults. The StoreOnce software verifies that the correct length SAS cables are being used. Mini-SAS HD connectors are used throughout. -
Page 14: Expansion Installation Scenarios
NOTE: To facilitate future expansion, HPE recommends using 2.0 m SAS cables to connect from the server to Drawer 2 of the disk enclosure. For this reason, the base system of one server and one disk enclosure is supplied with two 0.5 m cables and two 2.0 m cables. -
Page 15: Daisy Chaining Enclosures
This configuration provides equal weight distribution in the rack. To provide protection from the weight of the disk enclosures, the 1U support shelf is installed immediately above the server. Refer to the HPE StoreOnce 5500 System Capacity Upgrade Guide for detailed step- by-step cabling instructions. -
Page 16: Up To Four Enclosures Below The Server
Figure 2: Cabling showing two enclosures above and two enclosures below the server NOTE: Enclosure #1 and Enclosure #3 are in Storage Cluster 1, connected to the RAID controller card in slot 2. Enclosure #2 and Enclosure #4 are in Storage Cluster 2, connected to the RAID controller card in slot 3. Up to four enclosures below the server The second recommended configuration has the server at the top and all enclosures below it. - Page 17 IOM A IOM A IOM B IOM B IOM A IOM A IOM B IOM B Figure 3: Cabling showing two enclosures installed below the server SAS cabling for HPE StoreOnce 5500 Systems...
-
Page 18: Factory-Integrated Sas Cabling Configuration
There is a third option, the factory-integrated option, where the customer orders a system that is prebuilt by HPE into a rack. This installation has specific shipping requirements to keep the mass of the rack as low as possible while in transit. The server is at the lowest level and the four enclosures are installed above the server. - Page 19 IOM B IOM A IOM A IOM B IOM B IOM A IOM A IOM B IOM B IOM A IOM A IOM B IOM B Figure 5: SAS cabling on factory-integrated systems SAS cabling for HPE StoreOnce 5500 Systems...
-
Page 20: Powering Up And Setting Up Ilo4
Powering up and setting up iLO4 Powering up the HPE StoreOnce 5500 System If the StoreOnce system has not yet been powered on, as described in the appropriate Start Here poster, or if you need to configure iLO 4 from a direct connection, perform the following steps. -
Page 21: Powering Up Storeonce 3100, 3500 And 5100 Systems
5. Power on the HPE StoreOnce 5500 System (the power button is on the front of the unit). The Power button LED flashes green during the power-on sequence, and the Power button, System Health and NIC status LEDs all show steady green when the StoreOnce System is powering up. - Page 22 Configuring iLO4, all systems on page 23 . Figure 6: Powering up HPE StoreOnce 3100 System UID LED NIC status LED System health LED Power LED and on/off button Figure 7: Powering up HPE StoreOnce 3500 Series and 5100 System Powering up and setting up iLO4...
-
Page 23: Ilo Network Name And Ilo Password
System health LED Power LED and on/off button NIC status LED UID LED iLO network name and iLO password StoreOnce Systems are built on ProLiant server hardware and use the embedded Integrated Lights-Out 4 (iLO 4) management technology. iLO enables secure remote monitoring and console access via a web browser. - Page 24 3. Select the iLO 4 Configuration Utility. Powering up and setting up iLO4...
- Page 25 4. Select Network Options. Powering up and setting up iLO4...
- Page 26 5. Configure your network settings and press F10 to save. Powering up and setting up iLO4...
-
Page 27: Basic Network Configuration
6. Then exit. The system will continue to boot normally into the StoreOnce OS. Basic network configuration If you have not already done so, run the basic network script net set address as described in the Start Here poster for your product, to configure a static address for LAN port 1 (eth0). Make a note of the IP address details, which you will need to log into the StoreOnce System from a web browser. -
Page 28: Logging In To The Hpe Storeonce System And Checking Status
Password (Admin, admin). You can also set the local language to display the text within the StoreOnce GUI from the Login screen. 4. The HPE StoreOnce Configuration Wizard is automatically displayed. You can either work through the recommended configuration tasks or click Discard. -
Page 29: Accessing The Storeonce Cli
Accessing the StoreOnce CLI The examples in this guide illustrate how to use the StoreOnce GUI to carry out configuration tasks. However, all tasks may also be performed from the StoreOnce CLI, as described in the HPE StoreOnce System CLI Reference Guide. -
Page 30: Setting Up A Login Banner
1. Banner text must be ASCII text – in particular, wider Unicode text is not permitted. 2. Banner text length must be less than or equal to 10,240 characters. 3. Banner text must not contain the backslash character “\”. Banner text that does not conform to the conditions will be rejected. No processing or formatting of the text is carried out either at creation or during display. -
Page 31: Configuring Remote Support
3. Select Customer Information. Click Modify and enter technical contact details for the customer site. It is important to fill in the information on this page because HPE Support will use it to provide feedback and instructions on resolving any issues. Information is required for all fields marked with an asterisk. -
Page 32: More About Warranty Details
6. Contact HPE Support and ask to verify a remote support event has been received. 7. The HPE Support person will check on the database portal that the event has been received and will also verify that warranty/serial/part numbers are valid and under warranty (or have valid care packs). -
Page 33: Hpe Storeonce Configuration Wizard
When deploying or upgrading to StoreOnce version 3.16.0 or later, the first time a user logs in to the StoreOnce GUI, the user must select whether to configure Remote Support or No Support. Once this selection is made, the HPE StoreOnce Configuration Wizard is automatically displayed. The wizard guides you through the system's first-time installation of: •... -
Page 34: Configuring Licenses
The HPE StoreOnce 3500 Series is supplied with 12 disks; two models are available, HPE StoreOnce 3540 System (12 x 4 TB disks) and HPE StoreOnce 3520 System( 12 x 2 TB disks). The base configuration for both models uses 50% of the available capacity (24 TB or 12 TB). Capacity expansion is available by purchasing and applying a license for the remaining disk capacity. -
Page 35: Security License
StoreOnce Optional Hardware kits contain additional 10 GbE Network or Fibre Channel cards that may be installed in the PCIe slots on the HPE StoreOnce 5500 System, HPE StoreOnce 3500 Series and the HPE StoreOnce 5100 System. Each additional FC or 10 GbE card must be licensed. See Optional PCIe cards on page 76 for more details. -
Page 36: Checking For Installed Licenses
2. Go to the appropriate section. 3. The following example shows an HPE StoreOnce 5100 System which has been factory-licensed for a fully-expanded storage capacity with five 48TB Capacity Upgrade enclosures. -
Page 37: Storeonce Full License
1. Make sure you have a note of the Node Lock Serial Number from the License Management page on the StoreOnce GUI. 2. Go to the HPE Licensing website. 3. Log in using your HP Passport user ID and password. -
Page 38: Applying A Full License
StoreOnce System’s repository directory. 4. In the License Key box, type or paste the license string. 5. See the HPE StoreOnce System User Guide for more information about applying licenses from a DAT file. -
Page 39: Setting Time Zone And Configuring Ntp Server
Setting time zone and configuring NTP server Using the StoreOnce GUI to set the time zone There is not a default time zone set for the StoreOnce appliance. Procedure 1. In the Navigator, select Time and Date. 2. In Time zone setting, select your desired region from the Select Region drop down. The list will contain a list of continents to choose from. - Page 40 6. In the confirmation dialog box, click OK. 7. If the NTP time is behind the currently configured time on the appliance, you will see a warning dialog box that reminds you to reboot the system using the system reboot command, and that system time will move backward as a result of that command.
-
Page 41: Creating User Accounts And Changing Default Passwords
• Admin account: This account has permissions associated with an administrator who is responsible for configuring and managing the HPE StoreOnce System. The default User Name and Password for this account is Admin, admin. •... -
Page 42: Changing Passwords For Local Users
3. Change the role of the user, if required. Enter and confirm the new password. 4. Click OK. At the confirmation of success page, click OK. NOTE: See the HPE StoreOnce System User Guide for more information about managing external users. Changing passwords for local users... -
Page 43: Setting Up Storeonce Email Alerts
Setting up StoreOnce email alerts Email setup page The Email Setup page displays the current configuration for sending out event notifications—which may be Warnings, Alerts or Information—via email. The Email Setup page includes information needed to route the email (SMTP server), as well as the association of event types with destination email addresses. A single event can generate a notification to multiple email addresses. -
Page 44: Managing Email Notifications
The Events notified by email page lists the event types that may be notified by email and the addresses to which the email notifications are sent. There are three types of events that generate email notifications, listed under the Severity column once they have been setup in Manage Email Notifications. If the same event generates email notifications to multiple addresses, a separate row is used to represent each event/email-address pairing. - Page 45 a. Choose an existing email address from the drop-down menu and rhwn click Select to display it in the Update events for addresses field. b. Enter a new address directly into the Update events for addresses field. 3. Select the event group(s) to be associated with the addresses (Alert, Warn, and/or Info), and click OK to update the list.
-
Page 46: Setting Up Snmp (Simple Network Management Protocol)
StoreOnce System Procedure 1. To download the MIBs, go to the HPE Support website at http://www.hpe.com/support and search for your StoreOnce System. Select the Software and driver downloads option and OS Independent for the operating system. The MIBs are included under the MIB entry. - Page 47 Procedure 1. In the Navigator select SNMP from Device Configuration. 2. In the SNMP Agent Setup pane, click Modify. 3. In the Modify SNMP Agent window, change the State to On and modify other parameters, as required. 4. Click OK. 5.
- Page 48 Table 10: SNMP Agent configuration parameters Name Description System description This is the description for the StoreOnce system configured for the agent. SNMP version This is the SNMP version of the agent (version 1, 2, or 3). The default is 2. State This shows the state of the agent (off, on).
-
Page 49: Generating The Ssl Certificate
Generating the SSL certificate SSL certificates The StoreOnce Management GUI is accessed via the HTTPS protocol which requires the exchange of an SSL (Secure Sockets Layer) certificate to authenticate the connection between web browser and the StoreOnce appliance. The StoreOnce appliance by default will return a generic SSL certificate which is created when the system is manufactured. -
Page 50: Expanding Storage Capacity, If Supported
Expanding storage capacity, if supported HPE StoreOnce 3500 Series The HPE StoreOnce 3500 Series does not support the addition of storage expansion enclosures. It is supplied with 12 disks installed. The StoreOnce 3540 model is supplied with twelve 4 TB disks installed;... - Page 51 2. Click OK. 3. Click Scan for Storage. You will see a storage scan in progress message. The scan can take up to 5 minutes. 4. If storage has been pre-configured, the following prompt is displayed. Click OK. 5. The storage expansion configuration will be shown. See the online help for information about the fields on this page.
-
Page 52: Storeonce 5100 System And Hpe Storeonce 5500 System
The storage will not be licensed or expanded. IMPORTANT: Storage expansion after installation with the HPE StoreOnce 5100 System and HPE StoreOnce 5500 System is beyond the scope of this guide. Please refer to the StoreOnce 5100 48 TB Capacity Upgrade Kit Guide and the StoreOnce 5500 44 TB and 60 TB Capacity Upgrade Guide supplied with the expansion enclosures for instructions. -
Page 53: Checking For The Latest Software
HPE Support. On the StoreOnce GUI select Events in the Navigator and go to the Settings tab. Or use the StoreOnce CLI command system enable remoteeventsuppression "reason", as described in the StoreOnce System CLI Reference... - Page 54 3. Look for components that have a Recommended Action of either Upgrade or Downgrade. After you have run Scan or Scan All, components will automatically be selected for upgrade or downgrade. NOTE: When the firmware updates are initiated, the backup devices will be taken offline. Before performing this step, check that there are no outstanding backup jobs pending.
-
Page 55: Complete Network Configuration
• You may wish to use a bonded Port Set for the StoreOnce Management Console. • HPE StoreOnce 3100 System: You may wish to configure the remaining 1 GbE ports for dedicated backup and/or replication and StoreOnce Catalyst Copy. •... -
Page 56: Creating A New Storeonce Configuration And Defining Dns Servers
TIP: If configuring multiple VLANs, or reconfiguring a complex network, it may take several minutes for the configuration to activate. During this time the Current Configuration page will show the previous configuration and will be updated once activation is complete for the new configuration. The following examples illustrate how to use the StoreOnce GUI to create and activate a custom network configuration. - Page 57 NOTE: If there is an existing configuration that you wish to use as a template, select it from the Copy Existing drop-down list. 4. As appropriate, select IPv4 or IPv6 for any DNS servers and enter the required addresses in the appropriate format.
-
Page 58: Creating Portsets
Field name Description Protocol: IPv4 or IPv6 The radio button selected defines the Internet Protocol for the DNS servers. DNS Address 1/2/3 Up to three IPv4 and/or IPv6 DNS addresses may be defined. The format of the address details is as appropriate for the protocol selected. In order to use FQDNs “Fully Qualified Domain Names”... - Page 59 Table 12: Network Configuration Port Set fields Field name Description Port Set Name The name of the Port Set Ports The ports that have been defined for use by the Port Set and their speed. All hardware products have four 1Gbit ports. 10Gbit ports may be available for some hardware products.
-
Page 60: Creating Subnets
NOTE: VLAN tagging is not supported with Bonding Mode 6. 6. At this point you may choose to define the Subnets for the Port Set or to create additional Port Sets by clicking on Add in the Port set section. For the purposes of this example, we shall continue to Subnet configuration. -
Page 61: Validating And Activating The Storeonce Configuration
Name Description IP address The IP address for the subnet, in the appropriate format for the protocol selected. Default Subnet When checked, this box indicates that this is the Subnet that contains the default gateway. A default subnet should be provided for both IPv4 and IPv6 networks. - Page 62 Complete network configuration...
-
Page 63: Additional Configuration Tasks
Additional configuration tasks Post StoreOnce configuration Once you have completed configuration tasks for the StoreOnce System, be sure to save the configuration and run a system confidence check. Depending upon your backup environment. it may also be necessary to configure the media servers that are backing up to the StoreOnce System. -
Page 64: Running A Storeonce System Confidence Check
Confidence checks running. Checks will take maximum of 60 seconds. Please wait... ############################################################################### # CONFIDENCE REPORT ############################################################################### Report Date: Wed Nov 18 11:55:40 UTC 2017 Product ID: HPE StoreOnce 3540 System Cluster S/N: XXXXXNNNNNNXX Version: 3.16.0-16xx.x Test Type: ### FILE SYSTEM REPORT ########################################################... -
Page 65: Defining A New Remote Host To Receive Storeonce Audit Log Events
### END ####################################################################### Command Successful Defining a new remote host to receive StoreOnce audit log events With StoreOnce software version 3.15.0 and later, it is possible to define a remote host to receive StoreOnce audit log events. This is done using StoreOnce CLI logs commands. It may also be necessary to configure the remote host to receive the log events offload. -
Page 66: Configuring Media Servers To Use Storeonce Catalyst
Command Successful. Configuring media servers to use StoreOnce Catalyst With HPE Data Protector the StoreOnce deduplication engine is embedded in the HPE Data Protector Media Agent. No additional plug-ins are required. For other backup environments HPE has developed OpenStorage (OST) Plug-ins that create the interface between the backup application and the StoreOnce Catalyst store. -
Page 67: Iscsi Initiator (Storeonce Vtl)
NOTE: Certain backup applications require their own drivers for both the tape device and medium changer. For many applications these are installed automatically during the software installation process. If the backup software is already installed, you may need to update manually the drivers after installing the StoreOnce System. -
Page 68: Hardware Overview Reference Section
Hardware overview reference section Optional hardware All models, apart from the HPE StoreOnce 3100 System provide four PCIe slots for the addition of StoreOnce 10 GbE Network Cards or StoreOnce Fibre Channel cards. These additional PCIe cards may be pre-installed or supplied in separate boxes. Some cards also require SFP+ transceivers, which will be supplied with the kit. -
Page 69: Front And Rear Views Of The Disk Enclosure
Rear UID LED Front and rear views of the disk enclosure For more information about LEDs see the HPE StoreOnce 5500 System Maintenance and Service Guide. Figure 10: Front view of HPE StoreOnce 5500 System disk enclosure Hard drive LEDs... -
Page 70: Storage Expansion
The HPE StoreOnce 5500 System supports capacity expansion. The server element is used for OS disks only; base storage in the disk enclosure consists of 11 x 4 TB disks plus four hot plug disks. The HPE StoreOnce 5500 System supports two models of capacity expansion. -
Page 71: Hpe Storeonce 3500 Series
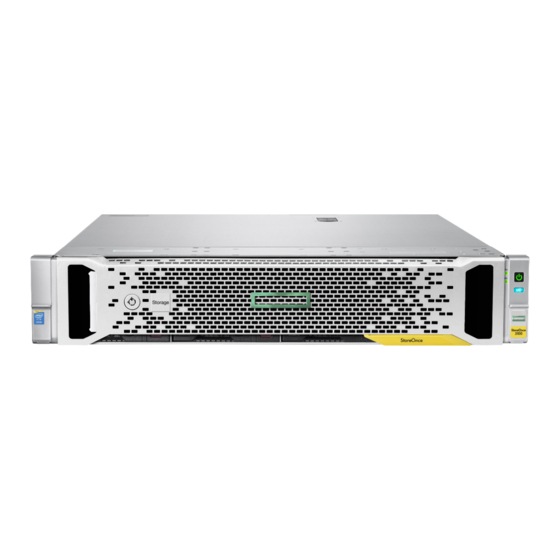
Figure 12: HPE StoreOnce 3100 System front view Pull out label with serial number USB 3.0 port UID LED NIC status LED Health LED Power on/standby button and system power Figure 13: HPE StoreOnce 3100 System rear view Slot 1, RAID controller... -
Page 72: Front And Rear Views
1Gb RJ45 Port 2 1Gb RJ45 Port 1 (eth0) iLO4 connector USB connectors Rear UID LED Storage expansion The HPE StoreOnce 3500 Series does not support the addition of storage expansion enclosures. It is supplied with 12 disks installed. Front and rear views... -
Page 73: Hpe Storeonce 5100 System
When increasing storage capacity from 50% to 100%, the only installation and configuration task is to apply the license for the additional capacity. HPE StoreOnce 5100 System Front and rear views Figure 16: HPE StoreOnce 5100 System front view NIC status LED Health LED Power on/standby button and system power... -
Page 74: Storage Expansion
JBOD # for <server_warranty_number>. The Capacity Upgrade Kits must be connected to the correct HPE StoreOnce 5100 System in the recommended sequence. If they are not, the StoreOnce 5100 System will not be able to discover the storage and make it available for use. - Page 75 Figure 18: Cabling showing five Capacity Upgrade Kits below the server JBOD1 JBOD2 JBOD3 JBOD4 JBOD5 SAS connector on RAID controller on head unit P1 connector on I/O module (SAS IN from P2 connector on I/O module (SAS OUT to head unit or previous expansion shelf) next expansion shelf) More information...
-
Page 76: Optional Pcie Cards
Table 14: PCIe slot configuration options for StoreOnce Systems Product Name PCIe slots available for Card choices additional cards HPE StoreOnce 3100 System None The addition of 10 GbE and/or FC cards is not supported HPE StoreOnce 3500 Series Four: slots 1, 4, 5 and 6... -
Page 77: Port Numbering On Pci Cards
10 GbE Base-T cards. NOTE: The HPE StoreOnce 3100 System does not support the addition of PCIe cards. Figure 19: Rear view of HPE StoreOnce 5100 System, highlighting additional PCIe slots Slot 1, populated with 10 GbE card... -
Page 78: Viewing Optional Hardware Configuration
Figure 21: FC cards 8 Gb FC card 16 Gb FC card Port 1 Port 2 Port 2 Port 1 Viewing Optional Hardware configuration If adding optional hardware after installation, refer to the StoreOnce Optional Hardware Installation and Configuration Guide for details about installing and licensing the cards. To view the Optional Hardware options that is currently installed: Procedure 1. -
Page 79: Network Reference Information
1 GbE network connections All HPE StoreOnce Systems have four 1 GbE network ports. LAN port 1 (eth0) will be connected if you have followed the instructions in the Start Here installation. The remaining three 1 GbE ports (eth1, eth2 and eth3) are available for further network configuration. -
Page 80: Key Network Definitions
Up to three DNS servers (one primary, and two backup servers if the primary is unavailable) may be configured for the HPE StoreOnce System. These may have IPv4 and/or IPv6 addresses and apply across all Port Sets and Subnets defined within the configuration. -
Page 81: Network Bonding Modes
Management, and the network paths that are used for StoreOnce Catalyst Copy and Replication between HPE StoreOnce Systems. This is where the IP protocol and IP address details are defined for the subnet and the VLAN tag, if appropriate. -
Page 82: Vlan Guidelines With Storeonce Systems
StoreOnce System connects must be trunked and tagged. Then using the StoreOnce CLI or GUI, the HPE StoreOnce administrator modifies the network configuration by first defining the Port Set for the physical 10 GbE link and making it VLAN enabled, and then configuring each of the twenty VLAN Subnets to use that Port Set. - Page 83 • StoreOnce monitoring is on the physical Port Set, not on each VLAN Subnet. • VLAN tagging is not a multi-tenancy solution. Once configured, all StoreOnce services can bind / listen to all VLAN Subnets. For example the NAS shares are available on all configured Subnets, and permissions are required to regulate access to shares.
-
Page 84: Fibre Channel With Storeonce Systems
All other StoreOnce Systems described in this guide support data backup to StoreOnce Catalyst and VTL devices via Fibre Channel. If you intend to connect the HPE StoreOnce System to a SAN, you must purchase and install one or more FC cards in the PCIe slots. SFP transceivers are supplied with the FC card. -
Page 85: Configuring Fibre Channel
Reducing the potential for conflict with untested third-party products. Zoning may not be necessary for small or simple configurations. Typically the bigger the SAN is, the more zoning is needed. HPE recommends the following for determining how and when to use zoning. •... -
Page 86: For Use With Vtl Libraries
NOTE: Once the client has Fibre Channel zoned with the StoreOnce appliance, there are a number of considerations for each operating system. See the HPE StoreOnce User Guide for more details. For use with VTL libraries Configuration settings are summarized below. See the StoreOnce System User Guide for detailed instructions with screenshot examples. -
Page 87: Support And Other Resources
Support and other resources Accessing Hewlett Packard Enterprise Support • For live assistance, go to the Contact Hewlett Packard Enterprise Worldwide website: http://www.hpe.com/assistance • To access documentation and support services, go to the Hewlett Packard Enterprise Support Center website: http://www.hpe.com/support/hpesc Information to collect •... -
Page 88: Customer Self Repair
Remote support and Proactive Care information HPE Get Connected www.hpe.com/services/getconnected HPE Proactive Care services www.hpe.com/services/proactivecare HPE Proactive Care service: Supported products list www.hpe.com/services/proactivecaresupportedproducts HPE Proactive Care advanced service: Supported products list www.hpe.com/services/proactivecareadvancedsupportedproducts Proactive Care customer information Proactive Care central www.hpe.com/services/proactivecarecentral Proactive Care service activation www.hpe.com/services/proactivecarecentralgetstarted... -
Page 89: Regulatory Information
Documentation Feedback (docsfeedback@hpe.com). When submitting your feedback, include the document title, part number, edition, and publication date located on the front cover of the document. For online help content, include the product name, product version, help edition, and publication date located on the legal notices page. -
Page 90: Additional Regulatory Information
Additional regulatory information Belarus Kazakhstan Russia marking Manufacturer and Local Representative Information Manufacturer information: Hewlett Packard Enterprise Company, 3000 Hanover Street, Palo Alto, CA 94304 U.S. Local representative information Russian: • Russia: • Belarus: • Kazakhstan: Local representative information Kazakh: •... -
Page 91: Turkey Rohs Material Content Declaration
CCSYWWZZZZ (serial number format for this product) Valid date formats include: • YWW, where Y indicates the year counting from within each new decade, with 2000 as the starting point; for example, 238: 2 for 2002 and 38 for the week of September 9. In addition, 2010 is indicated by 0, 2011 by 1, 2012 by 2, 2013 by 3, and so forth.
Need help?
Do you have a question about the StoreOnce 3100 and is the answer not in the manual?
Questions and answers