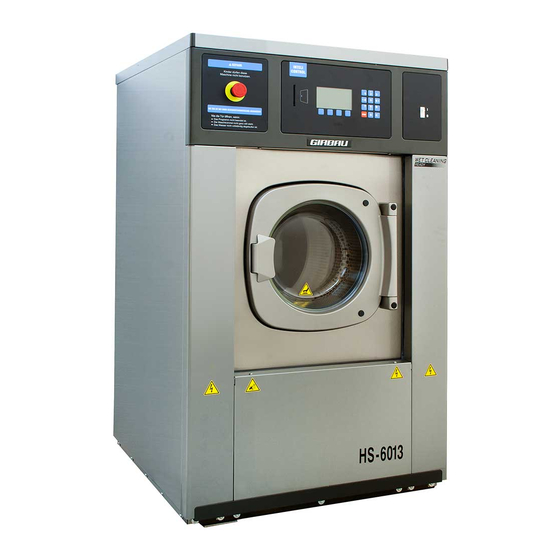
GIRBAU HS-6013 Operation Instructions Manual
Eh inteli control
Hide thumbs
Also See for HS-6013:
- Operation instructions manual (49 pages) ,
- Installation instructions manual (36 pages) ,
- Operating instructions manual (50 pages)
Table of Contents
Advertisement
Quick Links
Operation
HS-6 / EH INTELI CONTROL
GIRBAU, SA
Crta de Manlleu, km. 1
08500 VIC (Barcelona) • SPAIN
National sales:
T.(+ 34) 902 300 359
comercial@girbau.es
International sales:
T.(+ 34) 938 862 219
sales@girbau.es
Service:
T.(+ 34) 902 300 357
sat@girbau.es
www.girbau.es
For USA & CANADA:
CONTINENTAL GIRBAU Inc.
2500 State Road 44
WI 54904 Oshkosh • USA
Tel. 1(920) 231-8222
info@continentalgirbau.com
www.continentalgirbau.com
Instructions for washers
EN
INTELI
control
HS-6 / EH
Code 429159
Rev. 15/0717
Advertisement
Table of Contents

Related Manuals for GIRBAU HS-6013


Summary of Contents for GIRBAU HS-6013
- Page 1 T.(+ 34) 938 862 219 sales@girbau.es Service: T.(+ 34) 902 300 357 sat@girbau.es www.girbau.es INTELI For USA & CANADA: CONTINENTAL GIRBAU Inc. control 2500 State Road 44 WI 54904 Oshkosh • USA HS-6 / EH Tel. 1(920) 231-8222 info@continentalgirbau.com www.continentalgirbau.com Code 429159 Rev.
- Page 2 Models From serial # HS-6013 2,110,001 HS-6017 2,120,001 HS-6023 2,140,001 HS-6024 2,390,001 HS-6032 2,450,001 HS-6040 2,150,001 HS-6057 2,160,001 HS-6110 2,170,001 EH030 1,460,021 EH040 1,470,060 EH055 1,490,001 EH060 2,400,001 EH080 2,460,001 EH090 1,500,001 EH130 1,510,001 EH255 1,520,001 Code 429159 Rev. 15/0717...
-
Page 3: Table Of Contents
Contents CONTENTS SAFETY INSTRUCTIONS........................... 6 1. DESCRIPTION ............................10 1.1. Characteristics ..........................10 1.2. Protection, safety and control elements ..................11 1.3. Safety functions ..........................11 2. CONTROL PANEL ..........................12 2.1. Connection and stop devices ......................12 2.2. Screen ............................. 12 2.3. - Page 4 Contents 7.4. Manual program. Definition and use....................45 7.5. INFO A6 mode ..........................46 7.5.1. External dosing signals used in INFO A6 mode ............... 46 7.5.2. Typical uses of the INFO A6 mode for transferring a numerical value ........47 7.5.3.
- Page 5 Contents 16. SERVICE REMOVAL ........................... 82 16.1. Dismantling ............................ 82 APPENDICES TO THE MANUAL ......................83 A. Examples of the use of INFO A6 mode ....................83 A.1. INFO A6 mode with the machine connected to a smart external control unit ......... 83 A.2.
-
Page 6: Safety Instructions
Safety instructions WARNING! IMPORTANT SAFETY INSTRUCTIONS WARNING: To reduce the risk of fire, electric shock or injury to persons when using the machine, follow basic precautions, including the following: 1. READ all instructions before using the machine, and KEEP them in a prominent location for customer use. 2. - Page 7 Safety instructions 18. All installations required for the proper operation of the machine MUST be carried out by a duly accredited Registered Installation Contractors (see Note 3), in compliance with the legal regulations applicable in the country of use. 19. The machine MUST be commissioned by the Authorised Technical Service in the presence of the Customer Technical Service (see Notes 2 and 4) or a responsible person appointed by the customer.
- Page 8 Safety instructions SYMBOLS USED IN MACHINE LABELLING Electrical risk High temperature risk Protective guard for elements carrying Handle with caution. an electric current. Use adequate protection. Risk of inhaling harmful or irritant Mechanical risk vapours Protective guard for moving parts. Keep the doors/covers closed.
- Page 9 Safety instructions IMPORTANT INSTRUCTIONS FOR USE AND PRESERVATION INTENDED USE OF THE MACHINE AND INAPPROPRIATE USE. This machine is designed and intended solely for processing fabrics washed in a water bath or that have been previously treated in these conditions. Any use other than this is contraindicated without written authorisation from the manufacturer. Maximum output, performance, reliability and durability are achieved when the machine is installed, used and maintained correctly, and if a comprehensive and detailed service is carried out annually by the Authorised Technical Service.
-
Page 10: Description
INTELI control are usable in any washing machine with the same control. Creating programs at the machine itself or through a PC using the INTELI MANAGER TOOL (IMT) developed by Girbau. Multiple controls that assure the safe use of the washer. ... -
Page 11: Protection, Safety And Control Elements
Description 1.2. Protection, safety and control elements Fixed guards: Covers. Protect the user from the contact with dangerous points and accidental machine spattering. Moving guards: Dispenser cover. TILT models. Covers allowing tilting movements of the washer. Door with interlock microswitch, door lock and delayed opening. Unbalance microswitch. -
Page 12: Control Panel
Control panel 2. CONTROL PANEL The INTELI control offers different user intervention devices upon the washing machine. 2.1. Connection and stop devices General switch. Switch disconnector located on the rear part of the washing machine. Totally disconnects the electric supply from the machine. ON switch (A): Switch installed on the front piece of the washing machine. -
Page 13: Keyboards
Control panel 2.3. Keyboards Numerical keyboard: Used for selecting programs, introducing values... Numerical keys: Allows introducing numerical values for selecting 0 ... 9 programs, programming, configuration, access codes, etc. The keys with vertical and horizontal arrow symbols allow inserting text. -
Page 14: Main Menu. Intervention Modes
Main menu 3. MAIN MENU. INTERVENTION MODES The INTELI control is divided into THREE MAJOR OPERATION AREAS or user INTERVENTION MODES. Each of the three modes is accessed through the MAIN MENU made up of three icons identifying each of the modes. -
Page 15: Executing Programs
Executing Programs 4. EXECUTING PROGRAMS 4.1. Starting the washing machine. Main menu Open the manual water inlet valves. Open the manual steam inlet valves (steam heated washing machines). Connect the general switch of the washing machine. Activate the ON switch: position I. The home page will appear and then, the MAIN ... -
Page 16: Information About Functions. Description Of The Screens
Executing Programs 4.3. Information about functions. Description of the screens During the course of the wash program, a series of informative screens about functions that the washing machine is executing will appear on the screen. Information about functions is displayed through icons. To know the meaning of each icon, consult Programming a program phase (section 7.3). -
Page 17: Info Screen
Executing Programs Bath drainage screen PROG. 36 16:43 PHAS. 2 3 4 5 6 7 8 Information about: Drum speed during the bath drainage cycle Spin time Buzzer 4 min (Consult the meaning of icons in sections 7.3.14...7.3.16) RH-OFF ... -
Page 18: Manual Modification
Executing Programs 4.5. Manual modification MANUAL MODIFICATION is understood as meaning the modification of the value of a function of the phase being run. This option allows the user to intervene immediately in the phase being run, modifying the values of the water input, dosing, bath draining and temperature functions programmed. -
Page 19: Crease-Guard Stop. Rinse Hold Function
DOES NOT DISCONNECT the entire electric circuit of the machine. Door opening: Models with safety delay by means of thermal device (HS-6013, HS-6017, EH030 and EH040). After a maximum safety time (at times surpassing 3 minutes), the washing machine lock is unlocked. -
Page 20: Delayed Start Of A Wash Program
Executing Programs DOOR FITTED WITH SAFETY LOCK Never attempt to open the door if: the program has not finished. the drum has not come to a complete halt. the bath has not been completely evacuated. 4.8. Delayed start of a wash program Allows the user to program the start time of a wash cycle. -
Page 21: Systems To Aid Loading And Unloading
Executing Programs 4.10. Systems to aid loading and unloading The systems to aid loading and unloading are options that apply to washing machine models HS-6040, HS-6057, HS-6110, EH090, EH130 and EH255. The EASY LOAD SYSTEM. This system aids washer loading by running a filling sequence of hot or cold water and rotating the drum to compress the clothes, thereby enabling the machine's capacity to be used to the full. -
Page 22: Control Panel Operation
Executing Programs 4.10.1. Control panel operation Control panel devices ON/OFF switch (A): Switch installed on the front piece of the washing machine. Emergency stop (B): Red button with lock located in a visible and accessible place on the washing machine. STOP key (C): key on the numerical keyboard. - Page 23 Executing Programs CAUTION! Because of the washer's tilting movement, there is crushing and shearing hazard between the tilting elements and the building elements. To prevent them, please follow these instructions: Keep away from the rear of the washer during the tilt movement. ...
-
Page 24: Easy Load System Operation
Executing Programs 4.11. EASY LOAD system operation The loading system must ALWAYS BE STARTED WITH THE DOOR OPEN. If the main menu window is displayed, press the OK key to go to the PROGRAM EXECUTION MODE. The LOAD and UNLOAD options are displayed on the screen. Starting the loading sequence Load the washing machine. -
Page 25: Tilt System Operation
Executing Programs 4.12. TILT system operation Operation using the Operation using the control panel remote control Open the door of the washing machine and secure it with the hook on the right-hand side. If the main menu window is displayed, press the OK key to go to the PROGRAM EXECUTION MODE. Run the desired option by pressing the corresponding key on the multifunction keyboard or by activating the selector on the remote control: Loading position. - Page 26 Executing Programs End of TILT System operation The STOP key on the alphanumeric keyboard closes the auxiliary loading and STOP unloading functions screen and displays the screen for returning the washer to the horizontal position. Return to horizontal position. Activate the function corresponding to the figure for tilting the washer back to the horizontal position.
-
Page 27: Tilt + Easy Load System Operation
Executing Programs 4.13. TILT + EASY LOAD system operation Operation using the Operation using the control panel remote control The loading system must always be started with the door open. If the main menu window is displayed, press the OK key to go to the PROGRAM EXECUTION MODE. The LOAD and UNLOAD options are displayed on the screen. - Page 28 Executing Programs Starting the unloading sequence Open the door of the washing machine and secure it with the hook on the right-hand side. If the main menu window is displayed, go to PROGRAM EXECUTION MODE. Unloading position. Activate the function corresponding to the figure in order to tilt the washer into the unloading position.
-
Page 29: Pausing A Program As A Result Of A Dosing Unit Warning
Executing Programs 4.14. Pausing a program as a result of a dosing unit warning Most dosing units that supply several washing PROG. 36 16:43 machines simultaneously may issue a command to PHAS. 2 3 4 5 6 7 8 pause a washing program being run on one of the 80ºC washers connected to this unit. -
Page 30: Pre-Set Programs
Pre-set programs 5. PRE-SET PROGRAMS The washing machine’s memory contains twenty pre-set programs. From software Version 20 onwards these preset programs are numbered 80 to 99 and not 1 to 20 as above. The content of these programs is unalterable. It can not be modified. However, it can be copied into an empty program and later modified (section 8). -
Page 31: Interpreting The Icons In Tables Of Pre-Set Programs
Pre-set programs 5.2. Interpreting the icons in tables of pre-set programs The pre-set programs only use the functions available in the basic configuration of the washing machine without additional options. To interpret the functions numerical values, refer to the programming values indicated on chapter 7.3. of this manual. -
Page 32: Contents Of Pre-Set Programs
Pre-set programs 5.3. Contents of pre-set programs Pr 80 66 min Pr 81 48 min Pr 82 35 min Pr 83 31 min Pr 84 58 min Pr 85 46 min Pr 86 27 min Pr 87 22 min ... - Page 33 Pre-set programs Pr 90 26 min Pr 91 22 min Pr 92 41 min Pr 93 34 min Pr 94 26 min Pr 95 22 min Pr 96 38 min Pr 97 31 min ...
-
Page 34: Programming Mode
Programming mode 6. PROGRAMMING MODE 6.1. Defining programming concepts Before programming new programs, it is important to be familiar with the main concepts involved in the process. To understand the structure of Inteli control wash programs, two basic concepts must be defined: function and phase. -
Page 35: Programming A New Wash Program
Programming a new wash program 7. Programming a new wash program In this chapter, necessary information for programming the content of a NEW program is given. The information that will appear on the screen is always in graphic mode and programming possibilities are ... -
Page 36: Access To Programming A New Program
Programming a new wash program 7.1. Access to programming a new program The PROGRAMMING mode is accessed through the main menu. Connect the general switch of the washing machine. Open the washing machine door. Activate the ON switch: position I. The home page will appear and then, the main menu. ... -
Page 37: Programming A Program Phase
Programming a new wash program Possible programming No (Load detection off or fabric different from the following options) <<< Option programmed by default Poly-cotton Cotton Polyester/Synthetic Mixed (Mixture of the previous options) 7.3. Programming a program phase The program and the phase that are being programmed appear at the upper part of the screen. The distinct programmable options at each operation appear simultaneously on the washing machine screen. -
Page 38: Bath Level
Programming a new wash program Main use options CONNECTION SETUP PROGRAMMING Water intake from third inlet Water intake from AS recovery tank Connection of a water inlet Temperature programmed in this phase: NO other than Water 1 and INDEPENDENT Water intake from third inlet Water 2 inlets. -
Page 39: Heating Gradient
Programming a new wash program 7.3.4. Heating gradient Optional programming The increase in bath temperature can be controlled in different gradients defined in degrees/minute. The type and power of heating, the load in the washing machine and the water temperature can modify the heating speed, mainly in the fastest gradients. -
Page 40: Duration Of The Dosing
SETUP menu. Refer to the TECHNICAL ASSISTANCE- SELECTING SETUP CONTROL – TEST PROGRAM SETUP. In models HS-6013 HS-6017, EH030 and EH040, expanding the external dosing signals is an option, on other models it comes as standard. -
Page 41: Info A6 Mode
Programming a new wash program 7.3.7. INFO A6 Mode The A6 Info mode makes it possible to interact with the A6(I/O2) board, and is activated from the menu: System Tools - Configuring operating parameters and programming - Advanced programming options. The A6 Info mode makes it possible to: Info A6 mode not used. -
Page 42: Rotation Speed
Allows selecting a rotation speed in the wash cycle, among four pre-programmed speeds. These speeds are modifiable in the CONFIGURATION menu. Depending on the load, the drum rotation speed can vary +/- 5 rpm regarding the programmed speed. Possible programming HS-6013 HS-6017 HS-6023 HS-6024... -
Page 43: Cooling Gradient
Programming a new wash program 7.3.13. Cooling gradient Optional programming This function only appears if the COOLING GRADIENT parameter has been activated in the CONFIGURATION menu and if gradual cooling YES has been programmed in the previous stage. Controlling the cooling of the bath is possible in different gradients defined in degrees/minute. The water temperature can modify the cooling speed, mainly in the fastest gradients. -
Page 44: Spin Time
Programming this function is only possible if drain and rotation speed 2 or higher has been programmed. Important! Unlike other Girbau washer controls, INTELI control spin time countdown starts when the positioning speed has been reached and the unbalance value is correct. -
Page 45: Buzzer
Programming a new wash program 7.3.17. Buzzer This buzzer is programmable at the end of each phase. By default, the buzzer lasts 2 seconds. This value can be modified in the corresponding section of the CONFIGURATION menu. BUZZER and PAUSE programming. Optional programming This function appears only if PROGRAMMABLE PAUSE in the CONFIGURATION menu is activated. -
Page 46: Info A6 Mode
Programming a new wash program 7.5. INFO A6 mode By using A6 Info mode, the external dosing signals pertaining to the A6(I/O2) board can be used to increase the number of simultaneous doses or as a mode for binary based communication with a smart external unit (PLC or similar). -
Page 47: Typical Uses Of The Info A6 Mode For Transferring A Numerical Value
Programming a new wash program 7.5.2. Typical uses of the INFO A6 mode for transferring a numerical value There are two main uses for numerical value transfers: Used to activate three or more dosings simultaneously. With this selection it is possible to dose three or more products (up to a maximum of eight) in a single washing phase using the outputs d5...d2...d5 of the A6(I/O2) board. -
Page 48: A6 (I/O2) Board Outputs Activation Table
Programming a new wash program 7.5.3. A6 (I/O2) board outputs activation table The columns from 0 to 255 represent the range of decimal values that can be selected using the Inteli control alphanumerical keypad. Columns d5-d12 represent the equivalence of these decimal values to the activation of the outputs of the A6(I/O2) board (white indicates 0 - no activation). - Page 49 Programming a new wash program Alternatively, using the outputs activation table the user can also calculate the decimal number to enter via the alphanumeric keypad by knowing the value associated with each output on the A6(I/O2) board as described in the following table: Dosing output d5 d6 d7 d8 d9 d10 d11 d12...
-
Page 50: Modifying Programs
Modifying programs 8. MODIFYING PROGRAMS The objective of this menu is providing the user with resources that allow: modifying programmed programs programming new programs from the copy and modifying programs in use eliminating programs out of use with the objective of maintaining the maximum capacity of the ... -
Page 51: Selecting Phase And Intervention
Modifying programs 8.1.2. Selecting phase and intervention PROG. 43 16:35 Select the phase that you want to modify. Confirm PHAS 1 2 3 4 5 6 7 8 9 the selection. The following screen appears. PROG. 43 16:36 Options for modifying a phase Modifying or viewing the content of the phase... -
Page 52: Inserting A Phase
Modifying programs 8.1.4. Inserting a phase Allows inserting a new phase before or after the phase selected. The content of the inserted phase by default is the same as that of a new phase being programmed. The numbering of the program phases is automatically modified. Select the function. -
Page 53: Locking And Unlocking The Use Of A Program
Modifying programs 8.3. Locking and unlocking the use of a program Option that allows the user to lock the use of one or more selected programs, using an access code. See Section 10.5 MANAGING ACCESS CODES. Locking usage From the main menu (Section 4.1), select the icon corresponding to the PROGRAMMING mode (Section 6.3). -
Page 54: Using The Card
The washing machine card is a memory device that allows storing wash programs. Card Operational Characteristics. EXCLUSIVELY USED FOR GIRBAU WASHING MACHINES. It is compatible with every washing machine that incorporates INTELI control. Thanks to the programming system of INTELI control, the programs stored on the card can be copied onto any washing machine model with lNTELI control. -
Page 55: Copy From Machine To Card
Using the card 9.1. Copy from machine to card Allows selecting a program from the washing machine’s memory and copy it onto the card. Once copied, the program name can be modified. In each copying operation, only one program can be copied. Copying the program Access the copying program from machine to card submenu. -
Page 56: Consulting The Card And Changing The Program Name
Using the card 9.3. Consulting the card and changing the program name It permits consulting the content of the card. If a program is selected, its identifying name can be modified. Access the viewing content of the card submenu. The list of programs stored on the card will appear. -
Page 57: System Tools
System tools 10. SYSTEM TOOLS The INTELI control offers a group of tools destined to preparing, personalizing, informing and controlling the global operation of the washing machine. Within this group of tools, there are two large groups or intervention areas: CONFIGURING the system. -
Page 58: Configuring Operation And Programming Parameters
System tools 10.2. Configuring operation and programming parameters Below, the distinct parameters found in the CONFIGURATION menu are listed. Shown at each parameter: Identification of the parameter: description that appears on the screen. Explanation of the parameter. Configurable values or range. ... - Page 59 Factory settings ......NO DOSING TEMPERATURE CONTROL 2 (INTERNAL) (Option only available in HS-6013, HS-6017; EH030 and EH040 models.) The YES temperature control option at the second internal dosing 2 (factory settings) will supply this dispenser compartment with a hot and cold water mixture depending on the temperature programmed at the phase.
- Page 60 System tools PROPORTIONAL DOSING TIME This option only appears if the PROPORTIONAL WATER LEVEL option is activated. Modify the dosing times in proportion to the selected load. Programmable values .... YES / NO Factory settings ....... EXTERNAL DOSING TIME 1 This modifies the external dosing time 1 value in seconds.
-
Page 61: Advanced Programming Options
System tools CLEANING DISPENSERS Option that opens the water inlet valves of the four dispenser compartments, before the final drain of the program, during the time specified in this section. Its objective is to get rid of product remains that could have been deposited inside. The multi-function and numerical keyboard can be used interchangeably. - Page 62 System tools Programmable values ....YES / NO Factory settings ......NO PROGRAMMABLE ROTATION SPEED Activates the programming described in section 7.3.10. that permits programming the drum rotation speed in the wash cycle. Programmable values ....YES / NO Factory settings ......YES PROGRAMMABLE HEATING GRADIENT Activates the programming described in section 7.3.4.
-
Page 63: Modifiable Values Tables
These values must be checked with the drum stopped (programming NO rotation in the phase). Values programmable by the numerical keyboard. Programming limits and table of factory settings depending on the machine model. level values by default in mm programmable machines WITHOUT heating system ranges LEVEL HS-6013 HS-6017 HS-6023 HS-6024 HS-6032 HS-6040 HS-6057 HS-6110... - Page 64 The value of each speed is expressed in rpm and it should always be higher than the lowest spin value and smaller than the highest spin value. Values programmable by the numerical keyboard. Programming limits and table of factory settings depending on the machine model. programmable washing speed by default, in rpm ranges HS-6013 HS-6017 HS-6023 HS-6024 HS-6032 HS-6040 HS-6057...
-
Page 65: Setting The Clock
The value of each spin speed is expressed in rpm and it should always be higher than the lowest spin value and smaller than the highest spin value. Values programmable by the numerical keyboard Programming limits and table of factory settings depending on the machine model. spin speed by default, in rpm programmable ranges HS-6013 HS-6017 HS-6023 HS-6024 HS-6032 minimum... -
Page 66: Initializing The Card
System tools 10.4. Initializing the card This operation will be executed only in new cards or when there are problems recording data. This operation erases the content of the card. Access the CARD menu. The message INITIALIZING THE CARD appears. Confirm operation using the key on the multi-function keyboard. -
Page 67: Information Menu
Information menu 11. INFORMATION MENU The information menu allows access to information concerning the configuration and to the life of the washing machine: General information. About the washing machine model and the control characteristics. Operation counters. There is a counter associated with each one of the main washing machine operations ... -
Page 68: Alarm Counters
Information menu 11.3. Alarm counters List of controlled alarms depending on the machine models. HS-6023; EH040 HS-6024; EH060 HS-6013; EH030 HS-6032; EH080 ALARM COUNTERS HS-6017; EH040 HS-6040; EH055 HS-6057; EH130 HS-6110; EH155 Inverter communication failure Inverter auto-locked Inverter sequence failure Accel. -
Page 69: Executed Program Counters
Text messages 11.4. Executed program counters This counter registers the individual quantity of executions of each program. The counter increases at the end of the program. On the multi-function keyboard the DEL function appears. This function allows erasing the counter related to the selected program. -
Page 70: Cleaning Of Recovery Tank Menu
Cleaning of recovery tank menu 13. CLEANING OF RECOVERY TANK MENU (available only in models with AS recovery tank) Introduction and access This menu allows programming and starting a filling and draining sequence of the tank recovery to better get rid of the rests inside the recovery tank. -
Page 71: Troubleshooting
EH080, EH090, EH130, EH255 models. 3.2. Door disassembly. Consult next section 14.4. Specific information for HS-6013, HS-6017, EH030, EH040 models. 14.2. Freeing a person trapped by the TILT system Procedure to follow in the event of a person being trapped by the TILT system: 1. -
Page 72: Manually Releasing Of The Security Lock
Procedure recommended in problems caused by a failure in the realising of the door of the machine. Fig. 14.2 Specific information for HS-6013, HS-6017, HS-6023- HS-6024, HS- 6032, EH030, EH040, EH055, EH060, EH080 models. Before disassembling the door of the washing machine: ... -
Page 73: What To Do When
Troubleshooting 14.5. What to do when… Some of the washing machine’s operating problems can be solved through the intervention of the user. These problems are detailed below. Should you have any questions, remember to consult the Authorised Technical Service. the wash cycle ends with the report: PERSISTENT UNBALANCE.. -
Page 74: System Alarms
Troubleshooting 14.6. System alarms When a washing alarm appears, the buzzer sounds and a warning appears on the screen. On the multi-function keyboard, the symbols Pressing the key stops the buzzer. Pressing the key information about the alarm appears. Below, the main alarm messages, the most likely causes and some interventions to carry out are listed. ALARM MESSAGE LIKELY CAUSE RESPONSE... - Page 75 Troubleshooting ALARM MESSAGE LIKELY CAUSE RESPONSE Washing machine microprocessor failure INVERTER DETECTION RELAY FAILURE FAULT DETECTION A5 Board I/O1 failure Disconnect the washing machine supply (note 1). (I/O1) BOARD If the problem is not solved or if it repeats: call the Main board connection circuit failure BOARD A5 (I/O1) Connection failure...
- Page 76 Troubleshooting Note 1. When the message “Disconnect the washing machine supply” appears, it is recommended to: Disconnect the ON switch. Wait the safety time for disconnecting the door (approximately 3 minutes). Open the door. Connect the ON switch again. ...
-
Page 77: Maintenance
Maintenance 15. MAINTENANCE Caution The users must refrain from carrying out actions reserved for the Authorised Technical Services. Before performing any work on the washing machine, disconnect and mechanically lock the external switch, and close and mechanically lock the manual water inlet valves. Check the temperature of the parts to be handled, to avoid the risk of burns. -
Page 78: Cleaning The Solenoid Valve Filters
Maintenance 15.3. Cleaning the solenoid valve filters Only by qualified personnel. Required tools: Disassembly of the fittings: slip-joint pliers or pipe wrench 35 mm. Disassembly of the filter supports: wrench 34 mm. Disassembly of the filters: pliers. Steps to follow ... -
Page 79: Cleaning The Dispenser
Maintenance Verifying the Emergency Push-Button.(Appliances with Emergency Push-Button only) WEEKLY check the Emergency Push-Button. Verification procedure: Connect the ON/OFF switch. On the screen the door open icon is displayed. Close the door. Select and start a wash cycle. ... -
Page 80: Greasing The Bearing Housing
Maintenance HS-6013, HS-6017, HS-6023, HS-6024, HS-6032, EH030, EH040, EH055 EH060, EH080 models Disassembly and assembly Open the fastening clasps on the top cover. The dispenser is now accessible. Dismount the siphon tubes from the liquid compartment by pulling them upwards. -
Page 81: Checking The Condition Of The Bearing Housing Seals
Maintenance 15.7. Checking the condition of the bearing housing seals Only by the Authorised Technical Service. At regular intervals check that no water is leaking out of the bearing drain pipe located at the back of the washer at the bottom. Water loss indicates that the seals are in poor condition and need to be replaced. 15.8. -
Page 82: Service Removal
Service removal 16. SERVICE REMOVAL Removing the washer from service requires the Authorised Technical Service or a company specialised in management of waste. Never release the washer unsecured. To release the washer and subsequent transportation, refer to the same specifications and cautions indicated for Installation. -
Page 83: Appendices To The Manual
Appendices to the manual APPENDICES TO THE MANUAL A. Examples of the use of INFO A6 mode Below are some examples with practical applications of the Info A6 mode. A.1. INFO A6 mode with the machine connected to a smart external control unit If the washing machine is connected to a smart external control unit (PLC or similar), the A6 Info mode will make it possible to transfer the value of the load entered as well as a decimal code that activates a function of the smart control unit. -
Page 84: Info A6 Mode As A Trigger Of External Signals
Appendices to the manual A.2. INFO A6 mode as a trigger of external signals If the machine is connected to an individual dosing system using pumps controlled directly from the A6 board, the Info A6 mode can be used to trigger the signals corresponding to these pumps to dose the desired product at the right time. -
Page 85: Example Of Using Multiple External Dosings Of Different Durations
Appendices to the manual A.2.2. Example of using multiple external dosings of different durations Based on example A.2.1, if the products being used via the external dosing require different dosing times, then a sufficient number of phases need to be created to regulate this time. Let us suppose that d6 and d8 need to be triggered in the same phase and require a dosing time of 10 seconds, whereas d11 and d12 require a time of 20 seconds, and therefore their triggering should be performed in a different phase from d6 and d8. -
Page 86: Use Of Bath And Proportional Dosing In A Machine Connected To A Dosing Control Unit
Appendices to the manual B. Use of bath and proportional dosing in a machine connected to a dosing control unit This example shows how to use the proportional dosing function in programs involving external dosing. To be able to use proportional dosing, select the following options from the general operating parameters (see Section 10.2.1) of the Tools menu: ... - Page 87 Appendices to the manual The explanation on the previous page is summarised in the following program setting table: Pr 4 Phase Symbol Value Description A signal that notifies the dosing control unit that the value transmitted from the A6(I/O2) board will be the weight of the load. Duration of the previous signal.
Need help?
Do you have a question about the HS-6013 and is the answer not in the manual?
Questions and answers
Where can I print a service manual?