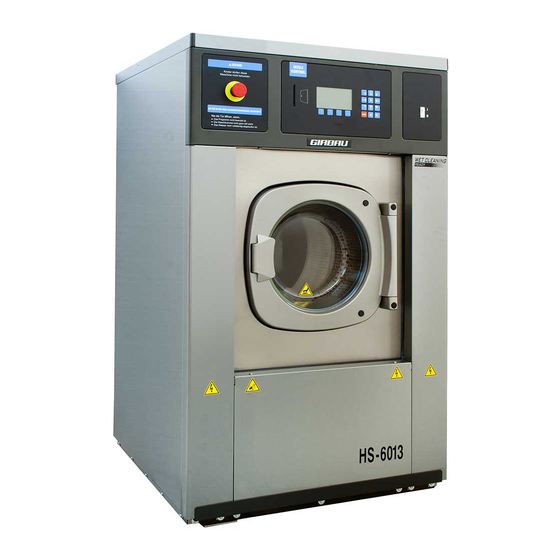
GIRBAU HS-6013 Installation Instructions Manual
Hide thumbs
Also See for HS-6013:
- Operation instructions manual (87 pages) ,
- Installation instructions manual (36 pages) ,
- Operating instructions manual (50 pages)
Table of Contents
Advertisement
Installation
for washers
HS-6013 / HS-6017
EH030 / EH040
GIRBAU, S.A.
Crta de Manlleu, km. 1
08500 VIC (Barcelona) • SPAIN
Tel. 34 93 8861100
Fax 34 93 8860785
girbau@girbau.es
www.girbau.com
For USA & CANADA:
CONTINENTAL GIRBAU Inc.
2500 State Road 44
WI 54904 Oshkosh • USA
Tel. 1(920) 231-8222
Fax 1(920) 231-4666
info@cont-girbau.com
www.cont-girbau.com
instructions
Installation
HS-6013/17
EH030/040
Model
From serial #
HS-6013
EH030
HS-6017
EH040
Serial #
Shipping date
2.110.001
1.460.001
2.120.001
1.470.001
Cod. 429043
Rev. 02/1206
Advertisement
Table of Contents

Related Manuals for GIRBAU HS-6013


Summary of Contents for GIRBAU HS-6013
-
Page 1: Installation Instructions
HS-6017 2.120.001 EH040 1.470.001 Serial # Shipping date Installation instructions for washers HS-6013 / HS-6017 EH030 / EH040 GIRBAU, S.A. Crta de Manlleu, km. 1 08500 VIC (Barcelona) • SPAIN Tel. 34 93 8861100 Fax 34 93 8860785 girbau@girbau.es Installation www.girbau.com... -
Page 2: Safety Instructions
Safety Instructions WARNING! IMPORTANT SAFETY INSTRUCTIONS WARNING: To reduce the risk of fire, electric shock or injury to persons when using the washer, follow basic precautions, including the following: 1. READ all instructions before using the washer and KEEP them in a prominent location for customer use. 2. - Page 3 (1) Qualified Personnel refers to anyone who has read the Instructions Handbooks, has been trained and has a thorough understanding of the machine’s operation (2) An Authorised Service Technician (AST) is one that has successfully completed training on the product by Girbau S.A, or a Girbau, S.A. Distributor.
- Page 4 Safety Instructions HAZARD SYMBOLS USED ON WASHER LABELS: Electric risk High temperature risk. Protection guard for electric Operate with caution. components. Use appropriate protections. Mechanical risk Risk of harmful vapours inhalation. Protection guard for moving parts Keep dispenser box closed. Use appropriate protections.
- Page 5 5. If machine is left idle for long periods of time, it must be PROTECTED from humidity and temperature variations. 6. FOLLOW the fabric care instructions supplied by the manufacturer, GIRBAU S.A., REFUSES ANY RESPONSIBILITY IN CASE OF TEXTILE WEAR AND TEAR.
-
Page 6: Table Of Contents
Index SAFETY INSTRUCTIONS ......................... 2 INDEX..............................6 1. TECHNICAL SPECIFICATIONS ...................... 7 1.1. Tools needed for installation ....................7 1.2. Standards ..........................7 1.3. Accessories in machine ......................7 1.4. Installation specifications ......................8 1.5. Connection table explanation ....................10 1.6. Electrical requirements ......................11 2. -
Page 7: Technical Specifications
Technical Specifications 1. TECHNICAL SPECIFICATIONS 1.1 Tools needed for installation • Shipping restraints ......open end wrench 11/16 in. (17mm). • Shipping restraints ......tubular wrench 11/16 in. (17mm) • Clamps ..........nut driver 7mm • Water inlet filters ......open end wrench 1-3/8 in. (34mm) •... -
Page 8: Installation Specifications
Technical Specifications 1.4. Installation specifications General specifications UNITS HS-6013 / EH030 HS-6017 / EH040 DRY LINEN CAPACITY kg 1/10 (lbs.) 12.6 (28) 17.3 (38) r.p.m. 600 / 1005 550 / 950 SPIN G factor 125 / 351 119 / 354 WASHING SPEED (max) r.p.m. - Page 9 Technical Specifications Legend CONNECTIONS DIMENSIONS (figures 1, 2,) Water inlets Height from the machine base Drain Distance from the centre of symmetry of the unit Electrical connection inlet Depth Electrical connection inlet external dosing Height to door bottom Product inlets external dosing Gravity centre (GC) Steam inlet connection INTELI CONTROL: option 3 x 3/4 inch.
-
Page 10: Connection Table Explanation
Technical Specifications 1.5. Connection table explanation Connection table explanation and symbols of section 1.6 ( 1) HEATING ( 2) EXPLANATION OF CONNECTION VALUES Without heating Wire details in mm x B + N + Electric heating (USA/CANADA: wire details in AWG) x B + GND) Consult TOTAL ELECTRICAL POWER Wire number... -
Page 11: Electrical Requirements
Technical Specifications 1.6. Electrical requirements Check table explanation in section 1.5. In brackets: USA / CANADA specific values HS-6013 / EH030 HEATING TOTAL TOTAL SWITCH WIRE DETAILS VOLTAGE ( 1) POWER CONSUMP. CURRENT ( 2) (AWG) H / V 0.87... - Page 12 Technical Specifications Check table explanation in section 1.5. In brackets: USA / CANADA specific values HS-6017 / EH040 HEATING TOTAL TOTAL SWITCH WIRE DETAILS ( 1) POWER CONSUMP. CURRENT ( 2) VOLTAGE (AWG) H / V 1,5 x 2 + 200V 25,8 6 x 2 +...
-
Page 13: Transport And Location
Transport and Location 2. TRANSPORT AND LOCATION 2.1 Transport of crated machines ALWAYS USE TRANSPORT METHODS WHICH ARE SUITABLE FOR THE WEIGHT AND VOLUME OF THE WASHER. CHECK THE VALUES ON THE PACKAGING AND THE INSTALLATION SPECS (section 1.4) OF THIS MANUAL. •... -
Page 14: Installing More Than One Washer
Transport and Location 2.3. Installing more than one washer. If the installation calls for more than one washer, align them with each other. The minimum distance between adjacent machines and the user and maintenance areas (values I, S and T of figure 3) are specified on the table below. -
Page 15: Removal Of Shipping Braces
Transport and Location 2.4 Removal of shipping braces DO NOT REMOVE THE SHIPPING RESTRAINTS BEFORE PLACING THE WASHER IN ITS DEFINITIVE POSITION. NEVER START THE MACHINE UP WITHOUT FIRST REMOVING THE SHIPPING RESTRAINTS. INCOMPLIANCE WITH THIS PRECAUTION MAY CAUSE SERIOUS PHYSICAL DAMAGES TO PEOPLE AND IRREPARABLE DAMAGES TO THE WASHER. -
Page 16: Installation
Installation 3. INSTALLATION ALL CONNECTIONS FOR ELECTRICAL POWER AND PLUMBING MUST COMPLY WITH THE STATUTORY SAFETY STANDARDS APPLICABLE TO EACH COUNTRY, AND BE MADE BY LICENSED INSTALLERS ONLY. 3.1. Drain Drain to the drain box. (Most recommended option) Build a drain box (fig. 6) following the specifications indicated in the INSTALLATION SPECS, section 1.4. Connect the drain elbow to the drain outlet and secure hose with the corresponding clamp (fig. -
Page 17: Water Supply
Installation 3.2. Water supply Hoses and pipes should be flushed through before being connected to the machine. Install at each water supply and in an accessible location, a mechanically interlocked water valve. Refer to technical specifications on the INSTALLATION SPECS, section 1.4 Assembling the filters and their connection (fig. -
Page 18: Electrical Requirements
Installation 3.3. Electrical requirements 3.3.1. Previous requirements CHECK THAT THE POWER AND FREQUENCY OF THE ELECTRICAL SUPPLY CORRESPONDS TO THOSE OF THE WASHER. Check the nameplate posted on the back panel of the machine. ALL CONNECTIONS FOR ELECTRICAL SUPPLY MUST BE CARRIED OUT BY LICENSED ELECTRICIANS AND MUST COMPLY WITH THE STATUTORY SAFETY STANDARDS APPLICABLE TO EACH COUNTRY. -
Page 19: Machine Electrical Connection
Installation 3.3.3. Machine electrical connection • Disconnect and mechanically lock the external automatic switch. • Open machine terminal box at the rear panel. Remove the support cover of the entry switch to the washer. • On the entry hole of the electrical supply (E identified in figure 2) install a lock mechanism (not supplied with the washer) to fasten the cable or cable pipe protector. -
Page 20: Steam Connection
Installation 3.4. Steam connection. In some models the body of the steam electrovalve and the filter are shipped inside the drum of the washing machine, separate from the electrical wiring system. The coil is connected to the end of the electrical installation. -
Page 21: External Dosing (Option)
Installation 3.5. External dosing (option) This machine can control external dispenser equipment by generating a signal able to activate the various inlets of the dispenser equipment. These signals are made by closing a relay contact between the COMMON terminal and the outputs of each one of the various terminals coinciding with the different dosing made by the washing programs. -
Page 22: Initial Start-Up
COIN CONTROL units: To enable the external dosing system, you must modify the external dosing parameter at the MODIFICATION menu (see the Advanced Operation Instructions, for HS-6 / EH COIN CONTROL at the manufacturer’s website: www.girbau.com) (USA/CANADA www.cont-girbau.com 3.6. Initial Start-up. -
Page 23: Connection To Central Vending Point
It must be pointed out that the Start Wash Program command can be overridden by pressing the STOP button on the washer's keyboard. Refer to the PSH parameter in the Mod menu in the Advanced Coin Control Instruction Manual on the manufacturer’s Web: www.girbau.com. Features and wiring for different inputs (see board A8 on electric circuit diagram) - Alternating current signal: voltage between 115 and 230V. -
Page 24: Washer Configuration
In washers connected to central vending points, the configuration for the token or coin meters (parameter P) should be configured as tokens (value to) Refer to CONFIGURATION of COIN control in the Technical Assistance Manual on the manufacturer’s Web: www.girbau.com. Cod. 429043 Rev. 02/1206...
Need help?
Do you have a question about the HS-6013 and is the answer not in the manual?
Questions and answers