
Related Manuals for Thermo Scientific Orion AquaMate 8000 UV-Vis


Summary of Contents for Thermo Scientific Orion AquaMate 8000 UV-Vis
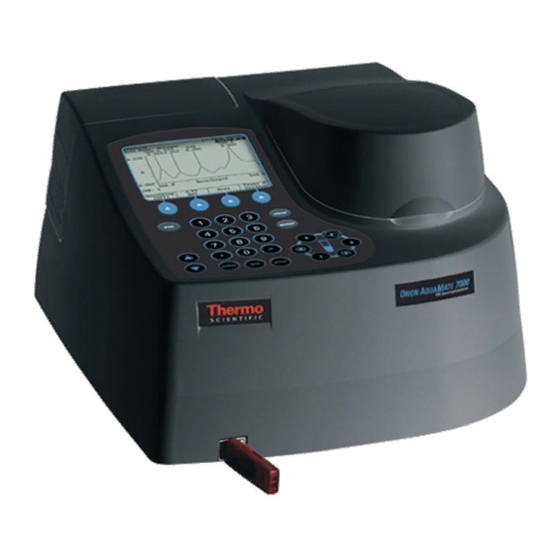
- Page 1 UV-Vis Orion AquaMate 7000 Vis Orion AquaMate 8000 UV-Vis User Guide 269-289800 Revision A October 2012...
- Page 2 © 2012 Thermo Fisher Scientific Inc. All rights reserved. For U.S. Technical Support, please contact: For International Support, please contact: Thermo Fisher Scientific Water Analysis Division Thermo Fisher Scientific Water Analysis Division 22 Alpha Road Telephone: +1 978 232 6000 Chelmsford, MA 01824 U.S.A.
-
Page 3: Table Of Contents
Auto 6 ............19 Thermo Scientific Orion AquaMate 7000 Vis and Orion AquaMate 8000 UV-Vis... - Page 4 Setting Up Test Parameters ........54 Orion AquaMate 7000 Vis and Orion AquaMate 8000 UV-Vis...
- Page 5 Measuring Samples ..........85 Thermo Scientific Orion AquaMate 7000 Vis and Orion AquaMate 8000 UV-Vis...
- Page 6 Replacing the Tungsten Lamp........123 Orion AquaMate 7000 Vis and Orion AquaMate 8000 UV-Vis...
- Page 7 Calculations for Software ..........135 Thermo Scientific Orion AquaMate 7000 Vis and Orion AquaMate 8000 UV-Vis...
- Page 8 Contents viii Orion AquaMate 7000 Vis and Orion AquaMate 8000 UV-Vis Thermo Scientific...
-
Page 9: Preface
Preface Congratulations on your purchase of a Thermo Scientific spectrophotometer! Our spectrophotometers integrate advanced hardware features with the power and flexibility of a wide range of accessories. Safety and Special Notices Make sure you follow the precautionary statements presented in this guide. The safety and other special notices appear in boxes. - Page 10 Preface Orion AquaMate 7000 Vis and Orion AquaMate 8000 UV-Vis Thermo Scientific...
-
Page 11: Chapter 1 Spectrophotometer Basics
Spectrophotometer Components Here are some major components visible on the outside of a typical instrument: Sample compartment USB port Keypad Connectors The connectors are on the back of the instrument: Thermo Scientific Orion AquaMate 7000 Vis and Orion AquaMate 8000 UV-Vis... - Page 12 WARNING Avoid shock hazard. Always turn off the instrument and unplug it from the wall outlet or power strip before you unplug the power cord from the instrument connector. Orion AquaMate 7000 Vis and Orion AquaMate 8000 UV-Vis Thermo Scientific...
-
Page 13: About The Keypad
• Some function keys may not be active. • Clears the value being entered. • Returns to the previous screen. • Deletes the last character entered. • Accepts highlighted, entered, or selected values. • Advances to the next parameter or screen. Thermo Scientific 269-289800... -
Page 14: Cell Holders
= positions when used in Auto 3 mode. Cell Holders The Orion AquaMate 8000 UV-Vis includes a special cell holder with positions for a vial, a square cuvette, and rectangular long path cuvettes up to 50mm in length. 6-position and single cell holders are also included for traditional spectrophotometry applications, allowing you to take advantage of the full capabilities of the instrument. -
Page 15: 6-Position Cell Holder
330 nm to > 1100 nm Disposable: Quartz 190 nm to > 1100 nm Polystyrene > 340 nm Methacrylate > 300 nm Acrylic > 280 nm UV-transparent > 220 nm Note See the manufacturer’s specifications and work within the recommended range. Thermo Scientific 269-289800... -
Page 16: Z-Dimensions
Beam size specifications are shown below. • Distance from bottom of cuvette to center of beam (Z-dimension): 8.5 mm • Beam dimensions: 2 mm (wide) by 7 mm (tall) Orion AquaMate 7000 Vis and Orion AquaMate 8000 UV-Vis Thermo Scientific... -
Page 17: Setting Up The Instrument
Alphanumeric Entry Numeric Entry With the parameter (e.g., Wavelength) highlighted, start typing the numeric value. An Entry window with the value range appears. Type the complete entry and press Enter. Thermo Scientific Orion AquaMate 7000 Vis and Orion AquaMate 8000 UV-Vis... -
Page 18: Menu Selection
With the parameter (e.g., Test Name) highlighted, press Enter. The Name Entry screen appears. Highlight the desired character and press Add Character. When you are finished, press Accept Name. Orion AquaMate 7000 Vis and Orion AquaMate 8000 UV-Vis Thermo Scientific... -
Page 19: Setting Utility Parameters
You cannot set utility parameters or change the utility when the instrument is carrying out a measurement. • Press Utility on the keypad. Setting the Date and Time Highlight Date/Time Setup and press Enter. You can modify the date, time format and time. Thermo Scientific Orion AquaMate 7000 Vis and Orion AquaMate 8000 UV-Vis... -
Page 20: Standby Mode
Since the tungsten lamp of the Orion AquaMate Vis spectrophotometer requires a 30-minute warm-up, the spectrophotometer has been pre-set at the factory to Standby Mode OFF. To change Standby Mode time 1. Highlight Standby and press Enter. Orion AquaMate 7000 Vis and Orion AquaMate 8000 UV-Vis Thermo Scientific... -
Page 21: Setting Baseline Expiration Time
To set the baseline expiration time 1. Highlight Baseline Expiration (hr:min) and press Enter. 2. Enter the desired time in the Entry baseline expiration time field and press Enter. Thermo Scientific Orion AquaMate 7000 Vis and Orion AquaMate 8000 UV-Vis... -
Page 22: Setting The Screen Contrast
To make it easier to read the display, you can adjust the screen contrast on the instrument. To set the screen contrast 1. Highlight Screen Contrast and press Enter. 2. Adjust the contrast by following the instructions on the screen. 3. Press Esc. Orion AquaMate 7000 Vis and Orion AquaMate 8000 UV-Vis Thermo Scientific... -
Page 23: Accessories
Orion AquaMate 8000 UV-Vis. Cell Holder Configurations The following table shows the available cell holders and their accessories. You can install or remove accessories without switching off the instrument. Thermo Scientific Orion AquaMate 7000 Vis and Orion AquaMate 8000 UV-Vis... -
Page 24: Cell Holder Initialization
If a single cell holder has been installed, the message “Error, Single Cell Holder found. Use Single Cell Holder?” appears. Press Accept Change to continue, or install the cell changer and press Cancel Change. Orion AquaMate 7000 Vis and Orion AquaMate 8000 UV-Vis Thermo Scientific... -
Page 25: Changing Cell Holders
To install the 6-Position Cell Holder and the Single Cell Holder 1. Open the sample compartment door and let it rest on its hinge. 2. With one hand, carefully lower the cell holder straight down into the sample compartment. Thermo Scientific Orion AquaMate 7000 Vis and Orion AquaMate 8000 UV-Vis... - Page 26 Captive thumbscrew Figure 2. Single Cell Holder Captive thumbscrews Single cell holder Alignment pin hole 3. With your other hand, tighten the captive thumbscrew(s). 4. Close the sample compartment door. Orion AquaMate 7000 Vis and Orion AquaMate 8000 UV-Vis Thermo Scientific...
-
Page 27: Removing The 6-Position Cell Holder And The Single Cell Holder
External Printers Your spectrophotometer is able to print to external desktop printers supporting HP PCL 5.0 format and later. Note PCL format does not support HP “Windows” printers. Thermo Scientific Orion AquaMate 7000 Vis and Orion AquaMate 8000 UV-Vis... - Page 28 PCL5 communications protocol. If the printer is not purchased from Thermo Scientific, it is your responsibility to determine whether the printer is compatible with the instrument. Contact technical support or your sales representative for more information.
-
Page 29: Sample Positioner Setting
Thermo Scientific Orion AquaMate 7000 Vis and Orion AquaMate 8000 UV-Vis... -
Page 30: Manual 6
B position as a blank. This means that even after measuring your blank the first time, you can place samples only in positions 1 through 5. Orion AquaMate 7000 Vis and Orion AquaMate 8000 UV-Vis Thermo Scientific... -
Page 31: Chapter 5 Cell Correction
Cell “B” of the cell changer. Cell Correction To run Cell Correction 1. Load the test type or stored test. 2. If Cell Correction is not visible, highlight More parameters and press Enter. Thermo Scientific Orion AquaMate 7000 Vis and Orion AquaMate 8000 UV-Vis... - Page 32 Discrete nms – Cell Correction is run on a blank and up to five sample cells for up to 31 user-specified, discrete wavelengths. 6. If you selected Scan mode in the preceding step, specify the Start Wavelength and the Stop Wavelength values. Orion AquaMate 7000 Vis and Orion AquaMate 8000 UV-Vis Thermo Scientific...
-
Page 33: Specifying Wavelengths For Discrete Nms Mode
3. Specify the number of cells you are matching and press Enter. 4. Press Set nms to select the wavelengths for which Cell Correction will be run. A list of wavelengths appears. Thermo Scientific Orion AquaMate 7000 Vis and Orion AquaMate 8000 UV-Vis... - Page 34 The application measures the other cells against the blank and records, stores and dates the measurements. From these measurements the application establishes the required correction factors, which are applied during all subsequent tests (if Cell Correction is activated). Orion AquaMate 7000 Vis and Orion AquaMate 8000 UV-Vis Thermo Scientific...
-
Page 35: Managing Stored Tests
When saving a test, specify its file name using up to eight alphanumeric characters. To name a test 1. After setting the test parameters, highlight Test Name and press Enter. Thermo Scientific Orion AquaMate 7000 Vis and Orion AquaMate 8000 UV-Vis... -
Page 36: Saving A Test
After a method has been configured, there are two options for saving a test. The test method can be saved to an external memory device using the front USB port or to the internal memory of the spectrophotometer. Orion AquaMate 7000 Vis and Orion AquaMate 8000 UV-Vis Thermo Scientific... - Page 37 1. Press Save Test. A prompt appears: 2. Select the appropriate location and press Enter. 3. Create or enter a name for the test. Use the procedure in “Naming a Test” page Thermo Scientific Orion AquaMate 7000 Vis and Orion AquaMate 8000 UV-Vis...
-
Page 38: Loading Test Files
You can load saved test files from the internal memory from the Utility screen. To load test files 1. To access all test files, press Utility. 2. Highlight Stored Tests Directory and press Enter. Orion AquaMate 7000 Vis and Orion AquaMate 8000 UV-Vis Thermo Scientific... -
Page 39: Lock/Unlock
Note To lock or unlock access to the file, you must enter the software password of this manual. Deleting a Test To delete a test, highlight it and press Delete Test. Thermo Scientific Orion AquaMate 7000 Vis and Orion AquaMate 8000 UV-Vis... - Page 40 Managing Stored Tests Deleting a Test This page intentionally left blank. Orion AquaMate 7000 Vis and Orion AquaMate 8000 UV-Vis Thermo Scientific...
-
Page 41: Smartstart
3. Highlight the appropriate test and press Select Test. An arrow sign “>” indicates the test has been selected for the SmartStart menu. Press Esc to return to the Utility screen, or power down the instrument. Thermo Scientific Orion AquaMate 7000 Vis and Orion AquaMate 8000 UV-Vis... - Page 42 Press Esc to return to the Utility screen, or power down the instrument. Note To remove tests from the SmartStart menu, see the procedure above for unselecting a test. Orion AquaMate 7000 Vis and Orion AquaMate 8000 UV-Vis Thermo Scientific...
-
Page 43: Chapter 8 Concentration Units
• ppb • mM/L • g/L • IU • mg/L • pM/μL • mg/mL • ng/μL Custom units can also be created; for more information, see “Creating Custom Units” page Thermo Scientific Orion AquaMate 7000 Vis and Orion AquaMate 8000 UV-Vis... -
Page 44: Creating Custom Units
• Accept the name of a unit 2. Follow steps 2 through 4 in “Naming a Test” page The new custom unit appears in the list of basic units. Orion AquaMate 7000 Vis and Orion AquaMate 8000 UV-Vis Thermo Scientific... -
Page 45: Chapter 9 Calculator Function
3. Press the desired function (+, -, x or ÷). 4. Enter the second desired value and press Enter. You can only add, subtract, multiply, or divide two lines of numbers at a Note time Thermo Scientific Orion AquaMate 7000 Vis and Orion AquaMate 8000 UV-Vis... - Page 46 Calculator Function This page intentionally left blank. Orion AquaMate 7000 Vis and Orion AquaMate 8000 UV-Vis Thermo Scientific...
-
Page 47: Water Analysis Application
Thermo Scientific Orion AquaMate spectrophotometers come with a set of pre-programmed methods loaded onto a USB memory device. Up to ~90 methods can be loaded into the AquaMate’s internal library and accessed at any time. -
Page 48: Running A Test Method From The Usb Stick
2. Press the SmartStart function key. 3. Press the keys to highlight the appropriate test method and press the Load Test function key. 4. Press the Run Test function key. Orion AquaMate 7000 Vis and Orion AquaMate 8000 UV-Vis Thermo Scientific... -
Page 49: Running A Water Test
Note Ideally, the same cuvette or vial, or one that has been matched to the sample vial, should be used. Using a Reverse Color Method for use of reagent blanks in reverse color methods. Thermo Scientific Orion AquaMate 7000 Vis and Orion AquaMate 8000 UV-Vis... - Page 50 Measure Sample option. The screen will display the result as shown below. Note If you set Statistics to OFF in the test parameters screen, no Average or Std Dev information will be displayed. Orion AquaMate 7000 Vis and Orion AquaMate 8000 UV-Vis Thermo Scientific...
-
Page 51: Programming A New Method Or Altering The Factor(S) In A Method
Note The Manual 3 is the only available Sample Positioner option in the Water Analysis test. Select More Parameters to enter the second screen of the Water Analysis test programming, below: Thermo Scientific Orion AquaMate 7000 Vis and Orion AquaMate 8000 UV-Vis... -
Page 52: Using The One Point Adjustment Calibration Feature
1. Load the test method in the Water Analysis test menu. 2. If the 1 pt Adjust parameter is set to Off, press the keys to highlight 1pt Adjust and press Enter to set the parameter to On. Orion AquaMate 7000 Vis and Orion AquaMate 8000 UV-Vis Thermo Scientific... - Page 53 6. Wipe the exterior of the blank vial and place the blank vial into the holder in the sample chamber. 7. Close the sample chamber door. 8. Press the Measure Blank function key. Thermo Scientific Orion AquaMate 7000 Vis and Orion AquaMate 8000 UV-Vis...
- Page 54 15. Press the Accept function key if the calculated adjustment correction factor is acceptable. The screen returns to the Water Analysis test menu and displays the adjustment factor among the parameters. Orion AquaMate 7000 Vis and Orion AquaMate 8000 UV-Vis Thermo Scientific...
-
Page 55: Using A Reverse Color Method
(lower absorbance) as the concentration of the analyte increases. Chemical Oxygen Demand (COD) is an example of a test that is often run using a reverse color chemistry. Thermo Scientific Orion AquaMate 7000 Vis and Orion AquaMate 8000 UV-Vis... -
Page 56: Using A Preprogrammed Reverse Color Method
2. Place a cuvette, tube or vial containing a clear, colorless blank solution (such as distilled water) in the measurement position and press the Measure Blank function key. The Measure Rgnt Blank option will appear. Orion AquaMate 7000 Vis and Orion AquaMate 8000 UV-Vis Thermo Scientific... - Page 57 Note If you leave the method by pressing the Esc key or the Test key on the instrument keypad you will need to re-measure the clear and reagent blanks in order to measure more samples using the reverse color test. Thermo Scientific Orion AquaMate 7000 Vis and Orion AquaMate 8000 UV-Vis...
-
Page 58: Programming A Reverse Color Method
Scroll down to More Parameters… and press the Enter key. Set the factor (or polynomial equation) using the values supplied with the test kit or calculated by your laboratory during development of the test. Orion AquaMate 7000 Vis and Orion AquaMate 8000 UV-Vis Thermo Scientific... - Page 59 Press the Run Test function key to begin the test. See the previous section for a detailed explanation of the blanking and measurement procedure. Thermo Scientific Orion AquaMate 7000 Vis and Orion AquaMate 8000 UV-Vis...
- Page 60 Water Analysis Application Using a Reverse Color Method This page intentionally left blank. Orion AquaMate 7000 Vis and Orion AquaMate 8000 UV-Vis Thermo Scientific...
-
Page 61: Abs And %T Measurements-Basic A-%T-C
You can toggle modes whenever you see Change Mode. When Basic ATC is set to Absorbance or % Transmittance, these capabilities are provided: • Setting the Wavelength • Measuring a Blank • Measuring Samples Thermo Scientific Orion AquaMate 7000 Vis and Orion AquaMate 8000 UV-Vis... -
Page 62: Setting The Wavelength
(ABS) or percent transmittance (%T) measurement appears on the display. If a Single Cell Holder is installed, remove the blank and place the sample in the cell holder. The absorbance or %Transmittance measurement appears on the display. Orion AquaMate 7000 Vis and Orion AquaMate 8000 UV-Vis Thermo Scientific... -
Page 63: Abs And %T Measurements-Advanced A-%T-C
• Selecting the measurement mode (Absorbance or %Transmittance) • Cell Correction • Recalling a Test • Setting Up Test Parameters • Taking Measurements To get started, press Test, highlight Advanced A-%T-C and press Enter. Thermo Scientific Orion AquaMate 7000 Vis and Orion AquaMate 8000 UV-Vis... -
Page 64: Recalling A Test
2. When prompted, place the blank and samples into the cell holder. If the 6-Position Cell Holder is installed, place the blank in the B position and the samples in positions 1 to 5. Orion AquaMate 7000 Vis and Orion AquaMate 8000 UV-Vis Thermo Scientific... - Page 65 The sample measurement appears. If a 6-Position Cell Holder is installed, press the cell position buttons to reposition the cell holder and measure the rest of the samples manually. Thermo Scientific Orion AquaMate 7000 Vis and Orion AquaMate 8000 UV-Vis...
- Page 66 Abs and %T Measurements—Advanced A-%T-C Taking Measurements This page is intentionally left blank. Orion AquaMate 7000 Vis and Orion AquaMate 8000 UV-Vis Thermo Scientific...
-
Page 67: Basic Concentration Measurements-Basic A-%T-C
When Basic ATC is set to Conc/Std or Conc/Factor, you can perform these tasks. • Setting the Wavelength and Mode • Measuring a Blank • Measuring a standard or entering a factor • Measuring Samples Thermo Scientific Orion AquaMate 7000 Vis and Orion AquaMate 8000 UV-Vis... -
Page 68: Setting The Wavelength And Mode
1. If necessary, press Change Mode to switch to the Concentration with Standard mode. If a 6-Position Cell Changer is installed, place the blank in the B position, and the standard in position 1. Orion AquaMate 7000 Vis and Orion AquaMate 8000 UV-Vis Thermo Scientific... -
Page 69: Using Conc/Factor To Measure Concentration
1. If necessary, press Change Mode to switch to the Conc With Factor mode. 2. Press Units/Factor to set the factor and select the units. 3. Press Enter Factor. 4. Type the desired factor value. Thermo Scientific Orion AquaMate 7000 Vis and Orion AquaMate 8000 UV-Vis... -
Page 70: Measuring Samples
The measurement appears. If the Single Cell Changer is installed, remove the blank and place the sample in the cell changer. The measurement appears. Orion AquaMate 7000 Vis and Orion AquaMate 8000 UV-Vis Thermo Scientific... -
Page 71: Concentration Measurements-Advanced A-%T-C
(only if you select either concentration with one standard or concentration with a factor) • Measuring a Blank • Measuring Samples To get started, press Test, highlight Advanced A-%T-C and press Enter. Thermo Scientific Orion AquaMate 7000 Vis and Orion AquaMate 8000 UV-Vis... -
Page 72: Recalling A Test
To measure a standard automatically (using Auto 6 or Auto 3) 1. With Measurement Mode set to Conc/Std, press Run Standard. 2. Enter the concentration of the standard and press Enter. 3. Press Measure Blank. Orion AquaMate 7000 Vis and Orion AquaMate 8000 UV-Vis Thermo Scientific... -
Page 73: Entering A Factor
To measure samples manually (using Manual 6 or Single Cell Holder) 1. Press Run Test. 2. Insert the blank and sample. A 6-Position Cell Holder can hold five samples. Thermo Scientific Orion AquaMate 7000 Vis and Orion AquaMate 8000 UV-Vis... - Page 74 4. Press Measure Sample. If a 6-Position Cell Holder is installed, press the cell position buttons to reposition the cell holder and measure the rest of the samples manually. Orion AquaMate 7000 Vis and Orion AquaMate 8000 UV-Vis Thermo Scientific...
-
Page 75: Scanning
To get started, press Test, highlight Scanning and press Enter. Recalling a Test To recall a test 1. Press Stored Tests. 2. Highlight the test you want to recall and press Enter. Thermo Scientific Orion AquaMate 7000 Vis and Orion AquaMate 8000 UV-Vis... -
Page 76: Setting Up Test Parameters
Note If a 6-Position Cell Holder is installed, be sure to place the blank in the B position. The instrument always uses the B position to collect the baseline. To collect a baseline scan 1. Press Run Test. Orion AquaMate 7000 Vis and Orion AquaMate 8000 UV-Vis Thermo Scientific... -
Page 77: Scanning A Sample
Note To switch between tabular and graphical displays, press Graph/Tabular. Note If Auto Save Data is ON, you must enter a Data File Name before you can access Run Test or Measure Samples. Thermo Scientific Orion AquaMate 7000 Vis and Orion AquaMate 8000 UV-Vis... -
Page 78: Viewing And Manipulating Scan Data
• Use Auto Scale to change the scale and display the new graph. • Use Manual Scale to change the scale and display the new graph. • Use the cursor to identify specific points along the X-axis. Orion AquaMate 7000 Vis and Orion AquaMate 8000 UV-Vis Thermo Scientific... - Page 79 1. Press Manual Scale to display the manual scale options. 2. To set the minimum or maximum value for the X- or Y-axis, press Min Y, Max Y, Min X or Max X. Thermo Scientific Orion AquaMate 7000 Vis and Orion AquaMate 8000 UV-Vis...
-
Page 80: Performing Calculations On The Scan Data
Determining Peak Height Using a 3-point Net Equation Labeling Peaks and Valleys To label valleys and peaks 1. With your scan displayed on the edit graph screen, press Math. Orion AquaMate 7000 Vis and Orion AquaMate 8000 UV-Vis Thermo Scientific... - Page 81 1. With your scan data displayed on the edit graph screen, press Math. 2. Press 3-Pt Net. The 3-point net measurement screen shows the cursor options and three cursor lines (designated for the left, center and right wavelengths). Thermo Scientific Orion AquaMate 7000 Vis and Orion AquaMate 8000 UV-Vis...
- Page 82 To calculate the area under a curve 1. With your scan data displayed on the edit graph screen, press Math. 2. Press Area to display the Area Under the Curve measurement screen. Orion AquaMate 7000 Vis and Orion AquaMate 8000 UV-Vis Thermo Scientific...
-
Page 83: Viewing And Rescaling Tabular Scan Data
The instrument calculates the area under a curve for the selected wavelengths, factor and calculation method. Viewing and Rescaling Tabular Scan Data When working with tabular scan data, you must press Edit Data before performing other functions on the data. Thermo Scientific Orion AquaMate 7000 Vis and Orion AquaMate 8000 UV-Vis... - Page 84 2. Press Start nm or End nm. The instrument highlights the selected data points. To display the plot using the highlighted data points, press Graph. Orion AquaMate 7000 Vis and Orion AquaMate 8000 UV-Vis Thermo Scientific...
-
Page 85: Chapter 16 Multiwavelength
Deleting Wavelengths and Factors • Taking Measurements To get started, press Test, highlight Multiwavelength and press Enter. Recalling a Test To recall a test 1. Press Stored Tests. Thermo Scientific Orion AquaMate 7000 Vis and Orion AquaMate 8000 UV-Vis... -
Page 86: Setting Up Test Parameters
Run Test or Measure Samples. Adding Wavelengths and Factors Note You can enter factors only when the measurement mode is set to Concentration/Factor. To add wavelengths and factors 1. Press Set nms. Orion AquaMate 7000 Vis and Orion AquaMate 8000 UV-Vis Thermo Scientific... -
Page 87: Deleting Wavelengths And Factors
You can access Multiwavelength acquisition from either the Set nms screen shown above or from the Multiwavelength setup screen. To take measurements automatically (Auto 6 or Auto 3) 1. Press Run Test to display the Multiwavelength measurement screen. Thermo Scientific Orion AquaMate 7000 Vis and Orion AquaMate 8000 UV-Vis... - Page 88 If you set the measurement mode to Concentration/Factor, the calculated concentration at each wavelength also appears. If a 6-Position Cell Holder is installed, press Cell Position to reposition the cell holder and measure the rest of the samples manually. Orion AquaMate 7000 Vis and Orion AquaMate 8000 UV-Vis Thermo Scientific...
-
Page 89: Chapter 17 Absorbance Ratio
Measuring Samples To get started, press Test, highlight Absorbance Ratio and press Enter. Recalling a Test To recall a test 1. In the Absorbance Ratio screen, press Stored Tests. Thermo Scientific Orion AquaMate 7000 Vis and Orion AquaMate 8000 UV-Vis... -
Page 90: Setting Up Test Parameters
Run Test or Measure Samples. Note If Auto Save Data is ON, you must enter a Data File Name before you can access Run Test or Measure Samples. Measuring Samples Orion AquaMate 7000 Vis and Orion AquaMate 8000 UV-Vis Thermo Scientific... - Page 91 4. Press Measure Sample. If a 6-Position Cell Holder is installed, press the cell position buttons to reposition the cell holder and measure the rest of the samples manually. Thermo Scientific Orion AquaMate 7000 Vis and Orion AquaMate 8000 UV-Vis...
- Page 92 Absorbance Ratio Measuring Samples This page intentionally left blank. Orion AquaMate 7000 Vis and Orion AquaMate 8000 UV-Vis Thermo Scientific...
-
Page 93: Chapter 18 Absorbance Difference
Recalling a Test • Setting Up Test Parameters • Cell Correction • Measuring a Blank • Measuring Samples To get started, press Test, highlight Absorbance Difference and press Enter. Thermo Scientific Orion AquaMate 7000 Vis and Orion AquaMate 8000 UV-Vis... -
Page 94: Recalling A Test
Run Test or Measure Samples. Note If Auto Save Data is ON, you must enter a Data File Name before you can access Run Test or Measure Samples. Orion AquaMate 7000 Vis and Orion AquaMate 8000 UV-Vis Thermo Scientific... -
Page 95: Measuring Samples
A 6-Position Cell Holder can hold five samples. 3. Press Measure Blank. If a 6-Position Cell Holder is installed, it moves to the B position to measure the blank and returns to its previous position. Thermo Scientific Orion AquaMate 7000 Vis and Orion AquaMate 8000 UV-Vis... - Page 96 Measuring Samples 4. Press Measure Sample. If a 6-Position Cell Holder is installed, press the position buttons to reposition the cell holder and measure the rest of the samples manually. Orion AquaMate 7000 Vis and Orion AquaMate 8000 UV-Vis Thermo Scientific...
-
Page 97: 3-Point Net
Run Test or Measure Samples. Note If Auto Save Data is ON, you must enter a Data File Name before you can access Run Test or Measure Samples. Thermo Scientific Orion AquaMate 7000 Vis and Orion AquaMate 8000 UV-Vis... -
Page 98: Recalling A Test
To take measurements automatically (Auto 6 or Auto 3) 1. With the 3-Point Net Setup screen displayed and the parameters set, press Run Test to display the 3-Point Net measurement screen. Orion AquaMate 7000 Vis and Orion AquaMate 8000 UV-Vis Thermo Scientific... - Page 99 3. Press Measure Blank. If a 6-Position Cell Holder is installed, it moves to the B position to measure the blank and returns to its cell position. Thermo Scientific Orion AquaMate 7000 Vis and Orion AquaMate 8000 UV-Vis...
- Page 100 4. Press Measure Sample. If a 6-Position Cell Holder is installed, press the cell position buttons to reposition the cell holder and measure the rest of the samples manually. Orion AquaMate 7000 Vis and Orion AquaMate 8000 UV-Vis Thermo Scientific...
-
Page 101: Concentration Measurements-Standard Curve Application
Curve: change the number of standards, select a different curve fit or delete points from the curve. • Viewing and saving sample data measured using the standard curve To get started, press Test, highlight Standard Curve and press Enter. Thermo Scientific Orion AquaMate 7000 Vis and Orion AquaMate 8000 UV-Vis... -
Page 102: Recalling A Standard Curve
Measuring the Standards for a Standard Curve To measure standards automatically (using Auto 6 or Auto 3) 1. Install the blank and standards. 2. When the parameters are correct, press Run Standards. Orion AquaMate 7000 Vis and Orion AquaMate 8000 UV-Vis Thermo Scientific... - Page 103 4. Press Measure Blank. If a 6-Position Cell Holder is installed, it moves to the B position to measure the blank and returns to its previous position. 5. Press Measure Standards. Thermo Scientific Orion AquaMate 7000 Vis and Orion AquaMate 8000 UV-Vis...
-
Page 104: Using The Standards Screen
2. Install the blank and samples. 3. Press Enter. The Standard Curve screen shows the absorbance and concentration of each sample. To switch between tabular and graphical displays, press View Graph/Tabular. Orion AquaMate 7000 Vis and Orion AquaMate 8000 UV-Vis Thermo Scientific... -
Page 105: Editing A Standard Curve
You may edit the concentration of any standard on a standard curve. In addition, you may change the number of standards, select a different curve fit or delete points from the curve. Thermo Scientific Orion AquaMate 7000 Vis and Orion AquaMate 8000 UV-Vis... - Page 106 1. With the standard curve displayed, highlight the standard to delete and press Edit Standards. 2. Highlight Delete Standard and press Enter. To clear measurements 1. With the standard curve displayed, press Edit Standards. 2. Highlight Clear Measurements and press Enter. Orion AquaMate 7000 Vis and Orion AquaMate 8000 UV-Vis Thermo Scientific...
- Page 107 2. Highlight the curve fit to use for the standard curve and press Enter. The instrument applies the selected curve fit to the data and displays the new fit. Thermo Scientific Orion AquaMate 7000 Vis and Orion AquaMate 8000 UV-Vis...
- Page 108 Concentration Measurements—Standard Curve Application Editing a Standard Curve This page is intentionally left blank. Orion AquaMate 7000 Vis and Orion AquaMate 8000 UV-Vis Thermo Scientific...
-
Page 109: Kinetics
Note The Kinetics application lets you collect up to 400 data points per run. When setting test parameters, select the interval time and total run time accordingly. To get started, press the Test button, highlight Kinetics and press Enter. Thermo Scientific Orion AquaMate 7000 Vis and Orion AquaMate 8000 UV-Vis... -
Page 110: Recalling A Test
• Viewing the list of stored tests • Measuring a Blank • Measuring Samples Setting Up Test Parameters To set up test parameters 1. In the Kinetics screen, highlight the desired parameter. Orion AquaMate 7000 Vis and Orion AquaMate 8000 UV-Vis Thermo Scientific... -
Page 111: Measuring Samples
To measure samples 1. In the Kinetics screen, press Run Test. 2. If a 6-Position Cell Holder is installed, place the blank in position B and the sample in position #1. Thermo Scientific Orion AquaMate 7000 Vis and Orion AquaMate 8000 UV-Vis... -
Page 112: Recalling And Recalculating Graphical Kinetics Results
When your results are displayed, you can modify the range (start and stop time) and the instrument recalculates the reaction rate. When working with graphical kinetics results, you need to press Edit Graph before you can rescale and recalculate. Orion AquaMate 7000 Vis and Orion AquaMate 8000 UV-Vis Thermo Scientific... - Page 113 The instrument also recalculates the results, using all the data, and displays them. To use Manual Scale 1. With your kinetics data displayed on the edit screen, press Manual Scale to display the manual scale options. Thermo Scientific Orion AquaMate 7000 Vis and Orion AquaMate 8000 UV-Vis...
- Page 114 The data for the selected point appears. 3. When the cursor line is in the correct position, press Set Min X or Set Max X to accept the selected point. Orion AquaMate 7000 Vis and Orion AquaMate 8000 UV-Vis Thermo Scientific...
-
Page 115: Rescaling And Recalculating Tabular Kinetics Results
1. With your kinetics data displayed on the edit screen, highlight the appropriate data point in the table. 2. Press Start Time or End Time to display the recalculated rate and result. Thermo Scientific Orion AquaMate 7000 Vis and Orion AquaMate 8000 UV-Vis... - Page 116 Kinetics Rescaling and Recalculating Tabular Kinetics Results This page intentionally left blank. Orion AquaMate 7000 Vis and Orion AquaMate 8000 UV-Vis Thermo Scientific...
-
Page 117: Chapter 22 Performance Verification
You can also press Print to print another copy of the results. Accessing the Performance Verification Tests To access the Performance Verification tests 1. Press Tests. 2. Highlight Performance Verification and press Enter. Thermo Scientific Orion AquaMate 7000 Vis and Orion AquaMate 8000 UV-Vis... -
Page 118: Troubleshooting Checklist
• The lamp compartment is clear of obstructions. WARNING Do not open the lamp compartment unless the instrument power is OFF. WARNING Do not turn the instrument power ON unless the lamp compartment is closed. Orion AquaMate 7000 Vis and Orion AquaMate 8000 UV-Vis Thermo Scientific... -
Page 119: Wavelength Accuracy - Internal
The results indicate pass or fail for each wavelength. If the test fails, follow these guidelines: • Repeat the test twice to verify that the test is failing consistently. • Contact technical support for more troubleshooting advice. Thermo Scientific Orion AquaMate 7000 Vis and Orion AquaMate 8000 UV-Vis... -
Page 120: Wavelength Accuracy - Standard
2. Press Add nm again to add the wavelength to the list. 3. Enter the tolerance for the entered wavelength in the Entry field. 4. Press Enter. To delete a wavelength 1. Highlight the appropriate wavelength. Orion AquaMate 7000 Vis and Orion AquaMate 8000 UV-Vis Thermo Scientific... -
Page 121: Wavelength Repeatability (Uv-Vis Only)
• The cell holder should be empty. To run the Wavelength Repeatability test 1. Highlight Wavelength Repeatability and press Enter. 2. Press Start Test. The results indicate pass or fail for each wavelength. Thermo Scientific Orion AquaMate 7000 Vis and Orion AquaMate 8000 UV-Vis... -
Page 122: Resolution (Uv-Vis Only)
To run the Resolution test 1. Highlight Resolution and press Enter. Ensure that hexane is in the blank position and toluene in hexane is in cell 1. Orion AquaMate 7000 Vis and Orion AquaMate 8000 UV-Vis Thermo Scientific... -
Page 123: Photometric Accuracy
• Measure the standards in the order they are listed on the test screen. • You can use one to five standards. To display the Photometric Accuracy screen 1. Highlight Photometric Accuracy. 2. Press Enter. Thermo Scientific Orion AquaMate 7000 Vis and Orion AquaMate 8000 UV-Vis... -
Page 124: Selecting The Mode
The test screen displays the values you just entered for that standard. 7. Press Start Test to begin the measurement or Press Esc to save the test. Deleting Standards To delete a standard 1. Highlight the appropriate standard. Orion AquaMate 7000 Vis and Orion AquaMate 8000 UV-Vis Thermo Scientific... -
Page 125: Running The Test
All test parameters are determined by instrument specifications and cannot be changed by the user. When running the noise test, remember: • Perform the 0A measurement with the cell holder empty. Optionally you can perform the 2A measurement with a 2A filter. Thermo Scientific Orion AquaMate 7000 Vis and Orion AquaMate 8000 UV-Vis... -
Page 126: Stray Light
• You need Stray Light standards designed to measure stray light at 220 nm (UV-Vis only), 340 nm and 400 nm (i.e., must have 0.1 %T at the wavelength of interest). Orion AquaMate 7000 Vis and Orion AquaMate 8000 UV-Vis Thermo Scientific... -
Page 127: Running The Test
• Verify that the filters are placed in the correct cell positions. • For more troubleshooting advice contact our sales or service representative in your area or use the information at the beginning of this document to contact us. Thermo Scientific Orion AquaMate 7000 Vis and Orion AquaMate 8000 UV-Vis... - Page 128 Performance Verification Stray Light This page intentionally left blank. Orion AquaMate 7000 Vis and Orion AquaMate 8000 UV-Vis Thermo Scientific...
-
Page 129: Chapter 23 Maintenance
• Always clean up spills as soon as they occur to prevent or minimize damage to the instrument. If concentrated acids or bases, or any hydrocarbon materials, are spilled on the instrument, clean up the affected area immediately. Thermo Scientific Orion AquaMate 7000 Vis and Orion AquaMate 8000 UV-Vis... -
Page 130: Cleaning And Maintaining Cells
• Warm water with detergent • Dilute nitric acid (<10%) rinse • Copious water rinse Organic Alcohol solutions • Rinse with similar alcohol, acetone, or other solvent • Copious water rinse Orion AquaMate 7000 Vis and Orion AquaMate 8000 UV-Vis Thermo Scientific... - Page 131 If a cell was cleaned in an ultrasonic bath, the warranty is void by the manufacturer. Thermo Scientific Orion AquaMate 7000 Vis and Orion AquaMate 8000 UV-Vis...
-
Page 132: Cleaning The Windows Of The Sample Compartment
2. Position the instrument so you can access the power entry module on the back of the instrument. 3. Remove the power cord. 4. Insert a flat-blade screwdriver into the notch on the fuse cover and pry off the cover. Orion AquaMate 7000 Vis and Orion AquaMate 8000 UV-Vis Thermo Scientific... -
Page 133: Replacing The Tungsten Lamp
Replacing the Tungsten Lamp WARNING This lamp gets very hot during operation. Before removing the lamp, turn off the instrument and allow the lamp to cool for 10 minutes. Thermo Scientific Orion AquaMate 7000 Vis and Orion AquaMate 8000 UV-Vis... - Page 134 7. Release the tab and disconnect the cable. 8. Unpack the new lamp assembly. 9. Use a soft, lint-free cloth to wipe off any fingerprints on the lamp. 10. Connect the cable to the connector. Orion AquaMate 7000 Vis and Orion AquaMate 8000 UV-Vis Thermo Scientific...
- Page 135 14. Turn on the instrument and press the UTILITY key. 15. Press the arrow keys to highlight Lamp Hours and press ENTER. 16. Press ENTER to reset the lamp hours to zero. Thermo Scientific Orion AquaMate 7000 Vis and Orion AquaMate 8000 UV-Vis...
- Page 136 Maintenance Replacing the Tungsten Lamp This page intentionally left blank. Orion AquaMate 7000 Vis and Orion AquaMate 8000 UV-Vis Thermo Scientific...
-
Page 137: Chapter 24 Parameters
Turns the audible signal for key presses on and off (Utility) Calculation Baseline Selects the zero baseline or the tangential baseline to calculate area under the peak in the graph (Scanning) Thermo Scientific Orion AquaMate 7000 Vis and Orion AquaMate 8000 UV-Vis... - Page 138 Enters the time from Test Initiation to first measurement; allows for sample equilibration (ADV. A-%T-C and Kinetics) Delete Character Deletes the last character of Name entry (Test Name and Edit [Units]) Orion AquaMate 7000 Vis and Orion AquaMate 8000 UV-Vis Thermo Scientific...
- Page 139 Can be entered or calculated from concentration and absorbance values in ADV A-%T-C Factor 1 Enters a factor to convert a datum to a result Abs(WL1) x Factor = Result (Abs Ratio, Abs Diff, Multiwavelength tests) Thermo Scientific Orion AquaMate 7000 Vis and Orion AquaMate 8000 UV-Vis...
- Page 140 Time Linearity Linearity is the ?A between ?A calculations. P=Pass and F=Fail Orion AquaMate 7000 Vis and Orion AquaMate 8000 UV-Vis Thermo Scientific...
- Page 141 Enters the number of cuvettes that will be run in the Cuvettes Correction Program (maximum of 5) Number of Samples Enters the number of samples to be measured in the test (Not available in Kinetics or Scanning) Thermo Scientific Orion AquaMate 7000 Vis and Orion AquaMate 8000 UV-Vis...
- Page 142 Selects the speed (nm/min) for a scan – Slow, Medium, Fast (Scanning tests only) Screen Contrast Lets you improve visibility of the display by changing the contrast between the background and text (Utility) Orion AquaMate 7000 Vis and Orion AquaMate 8000 UV-Vis Thermo Scientific...
- Page 143 Enters the concentration of the analyte in the standard solution Stop wavelength Enters the ending wavelength for a scan (Scanning tests only) Stored Tests Directory Displays the list of tests stored in the instrument (Utility) Thermo Scientific Orion AquaMate 7000 Vis and Orion AquaMate 8000 UV-Vis...
- Page 144 Unselect Test Removes the “>” tag of the highlighted test name to remove the test from the SmartStart menu (Utility Stored Tests Directory) Wavelength Enters values for the analytical wavelengths Orion AquaMate 7000 Vis and Orion AquaMate 8000 UV-Vis Thermo Scientific...
-
Page 145: Chapter 25 Calculations For Software
= concentration A(c) is defined by an equation of the form: A(c) = a Where: = Y-axis intercept ...a = coefficients (The coefficients are computed using the least squares method.) Thermo Scientific Orion AquaMate 7000 Vis and Orion AquaMate 8000 UV-Vis... - Page 146 “Curve cannot be used to determine sample concentrations – it may produce ambiguous results” will appear when the curve is viewed. Invalid nonlinear standard curve Orion AquaMate 7000 Vis and Orion AquaMate 8000 UV-Vis Thermo Scientific...
- Page 147 Absorbance Result = Difference factor factor factor factor Thermo Scientific Orion AquaMate 7000 Vis and Orion AquaMate 8000 UV-Vis...
- Page 148 (ASTM E169-04) Orion AquaMate 7000 Vis and Orion AquaMate 8000 UV-Vis Thermo Scientific...
Need help?
Do you have a question about the Orion AquaMate 8000 UV-Vis and is the answer not in the manual?
Questions and answers
If the run test key does not work when pressing to run a sample, what need to be performed on the instrument to let it function.
If the Run Test key does not work when trying to run a sample on the Thermo Scientific AquaMate 8000 UV-Vis, take the following troubleshooting steps:
1. Ensure the correct test method is loaded using the SmartStart or internal test menu.
2. Confirm the cell changer is properly installed in the sample compartment.
3. If the cell changer was removed, return to the main menu or test parameter menu before removing it to avoid a Fatal Error.
4. If the instrument displays "Fatal Error: 8," press Esc to return to the main or parameter menu, then press Run Test again.
5. Wait for the message “Calibrating and Checking Turret, Please Wait” to confirm initialization.
6. If prompted with “Error, Single Cell Holder Found,” either reinstall the cell changer or accept switching to the single cell holder.
These steps help ensure proper communication and configuration before running a test.
This answer is automatically generated
What to do if one of the function keys is not working properly?
Calibration charges for Orion Aqamate 8000 Spectrometers in Mumbai