
Related Manuals for Thermo Scientific Nicolet iS5 LS


Summary of Contents for Thermo Scientific Nicolet iS5 LS
- Page 1 Nicolet iS5 Series FT-IR Spectrometers Nicolet iS5 LS User Guide 269-299800 Revision B September 2014...
- Page 2 © 2014 Thermo Fisher Scientific Inc. All rights reserved. All trademarks are the property of Thermo Fisher Scientific Inc. and its subsidiaries. For U.S. Technical Support, please contact: For International Support, please contact: Thermo Fisher Scientific Unity Lab Services Telephone: +1 608 273 5017 Part of Thermo Fisher Scientific E-mail: support.madison@thermofisher.com 5225 Verona Road...
-
Page 3: Table Of Contents
Index ..............57 Thermo Scientific Nicolet iS5 LS User Guide... -
Page 5: About The Instrument
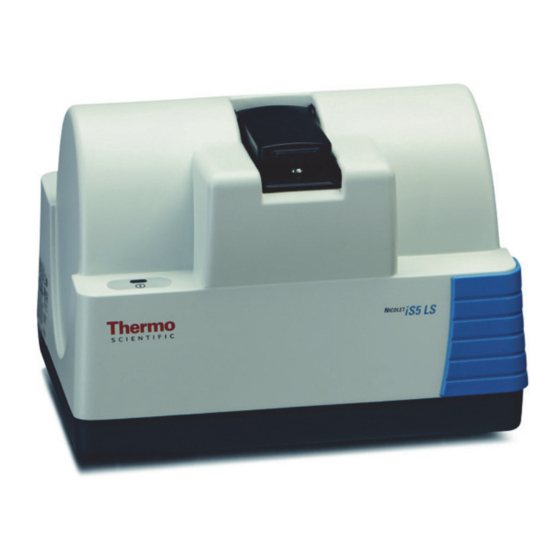
About the Instrument The Thermo Scientific™ Nicolet™ iS™5 LS FT-IR analyzer lets you perform transmission analyses of liquids, gels and films in the mid-infrared spectral range. The system has integrated verification features, a software suite designed for quality control (QC) applications, and many other features that make sampling and data handling easy. -
Page 6: Finding Information About Your System
Tip Provides information that can make a task easier. About the Software The spectrometer can be operated using the Thermo Scientific™ qPro™ Operator software. qPro Operator provides features for loading and updating workflows and exporting data. It also allows password protected access to system tools and diagnostics. The workflows are created using the qPro Developer application which is included in the qPro Developer suite. -
Page 7: Contacting Us
For more information, find the “Retrieving the Diagnostic Log” topic in the qPro Operator Help system. If you need to send the instrument to us for repair, call or e-mail us first for any shipping requirements or other instructions. and Excel Thermo Scientific Nicolet iS5 LS User Guide... -
Page 9: Operating The Instrument
Operating the Instrument This section explains how to set up the Nicolet iS5 LS analyzer and use it to analyze a basic sample. Contents • Setting Up the Instrument • Operating Precautions • Cleaning the Sample Windows • Instrument Performance Tests •... -
Page 10: Setting Up The Instrument
Turning the Power On and Off Electrical and Communication Cabling The illustration below shows the correct cable connections for electrical power and data communication. Figure 3. Electrical and communication cabling for the Nicolet iS5 LS analyzer Power Communication Communication (USB) cable... - Page 11 To turn the instrument power on or off, press the power switch on the back panel. For best performance, we recommend that you leave the instrument powered on continuously. Figure 4. Power switch for the Nicolet iS5 LS analyzer Power switch Thermo Scientific...
- Page 12 USB cable is securely connected to the spectrometer and the computer and the instrument driver was installed from the software media. Figure 5. Power indicator for the Nicolet iS5 LS analyzer Power indicator NOTICE • Do not block the vents at the back of the instrument. Electronic components can overheat if these vents are blocked.
-
Page 13: System Status
System Status icon in the qPro Operator application Status indicator Click the system status icon to check the performance of key instrument components such as the laser or source. Figure 7. System Status report for the Nicolet iS5 LS analyzer Thermo Scientific Nicolet iS5 LS User Guide... -
Page 14: Operating Precautions
These solvents may severely damage the instrument. • Do not leave solvent on the sample windows for longer than 2 minutes. NOTICE Read the safety guide that came with this instrument before operating the instrument. Nicolet iS5 LS User Guide Thermo Scientific... - Page 15 The instrument has two windows that must be cleaned. One is inside the sample cup where you load samples. The other is on the sampling arm. Figure 8. Sample window locations for the Nicolet iS5 LS analyzer Upper sample window Upper sample window...
- Page 16 4. If necessary, place a few drops of cleaning solvent onto a clean wipe and use it to thoroughly clean both windows and the area around them. Discard the soiled wipe. 5. Gently lower the sampling arm. Nicolet iS5 LS User Guide Thermo Scientific...
-
Page 17: Instrument Performance Tests
2. From the qPro Operator main screen, click the Diagnostics category in the left pane and then click Daily Performance Test. Figure 11. Diagnostics category in qPro Operator software Diagnostics category Daily Performance Test workflow Thermo Scientific Nicolet iS5 LS User Guide... - Page 18 When the workflow is completed, the software displays the report. If the instrument passed, a green check mark appears to the right of each test result and the operator can proceed. Here is an example. Figure 12. Example Daily Performance Test report Nicolet iS5 LS User Guide Thermo Scientific...
- Page 19 CAUTION Avoid chemical exposure. Hexadecane is a chemical irritant. When handling hexadecane: • avoid contact with skin and eyes • avoid inhalation of vapor or mist • wear gloves that provide adequate protection Thermo Scientific Nicolet iS5 LS User Guide...
- Page 20 The workflow shows its historical results. 3. Make sure the sampling arm is closed and click continue. 4. Make sure Run a new calibration check is selected and click continue to start the workflow. Nicolet iS5 LS User Guide Thermo Scientific...
- Page 21 5. When the workflow asks you to load hexadecane, lift the sampling arm and use proper technique to add hexadecane to the sample cup (see “Tips” below). Figure 14. Nicolet iS5 LS analyzer with sampling arm raised Sampling arm in raised position •...
-
Page 22: Collecting Data
• Daily Performance Test • Instrument Performance Tests Collecting Data This section explains how samples are analyzed with the instrument. These topics are covered: • Sampling Tips • Background Measurement • Sample Measurements Nicolet iS5 LS User Guide Thermo Scientific... - Page 23 Samples are measured using site-specific workflows which guide the operator through each step in the analysis. To learn how to load and run site-specific workflows, refer to the “Loading a Workflow Package” topic in the qPro Operator Help system. Thermo Scientific Nicolet iS5 LS User Guide...
-
Page 25: Maintaining The Instrument
Maintaining the Instrument This section provides instructions for maintaining the Nicolet iS5 LS analyzer and installing and replacing key components. NOTICE All other maintenance and or repair must be performed by one of our trained and certified service engineers. Contents •... - Page 26 If you have questions about this requirement, contact Follow these steps to monitor the humidity level inside the instrument. • Checking Humidity When the Instrument is Powered Off • Checking Humidity When the Instrument is Powered On Nicolet iS5 LS User Guide Thermo Scientific...
- Page 27 (and the humidity indicator) immediately. NOTICE Check the paper humidity indicator at least once a month when the instrument is powered off. Related Topics • Checking the Humidity Indicators • Replacing the Desiccant Thermo Scientific Nicolet iS5 LS User Guide...
- Page 28 To check the internal humidity indicator 1. From the qPro software main screen, click the System Status indicator at the top of the window. System Status indicator Nicolet iS5 LS User Guide Thermo Scientific...
- Page 29 Note When the internal humidity is above 50%, the software displays a message to replace the desiccant. If the humidity is above a critical level, the system status indicator will report an instrument failure. Related Topics • Checking the Humidity Indicators • Replacing the Desiccant Thermo Scientific Nicolet iS5 LS User Guide...
- Page 30 5. Click the Home button at the top of the qPro window to return to the home screen. Related Topics • Calibrating the Laser Frequency • Calibrating the Sample Stage • Maintaining the Instrument • Troubleshooting the Instrument Nicolet iS5 LS User Guide Thermo Scientific...
- Page 31 After laser calibration is completed, align the instrument optics calibrate the sample stage. Related Topics • Aligning the Instrument Optics • Calibrating the Sample Stage • Maintaining the Instrument • Troubleshooting the Instrument Thermo Scientific Nicolet iS5 LS User Guide...
- Page 32 Stage calibration failed topic in the Troubleshooting section. 5. Click continue to return to System Tools. 6. Click the Home button at the top of the qPro window to return to the home screen. Nicolet iS5 LS User Guide Thermo Scientific...
-
Page 33: Installing Or Replacing Components
You can replace the instrument power supply yourself. To order a replacement power supply, contact WARNING • Before you replace the power supply, turn off the instrument power switch and unplug the power cord. • Replace the power supply only with parts supplied by us. Thermo Scientific Nicolet iS5 LS User Guide... - Page 34 Turn off the instrument power switch and unplug the power cord from the wall outlet or power strip. 2. Disconnect the power cord from the instrument. Figure 18. Nicolet iS5 LS power supply connections Power switch Power connector DC power cord...
- Page 35 50%. Replace the paper humidity indicator each time you replace the desiccant. To order a desiccant replacement kit, contact WARNING Replace the desiccant only with parts supplied by us. Thermo Scientific Nicolet iS5 LS User Guide...
- Page 36 When you are finished, lower the sampling arm so it engages firmly with the magnet. 4. Gently set the instrument on its back so it rests on the back feet. Figure 19. Nicolet iS5 LS analyzer tipped back for service Gently set...
- Page 37 Maintaining the Instrument 5. Raise the sampling arm to avoid damaging it or its cables while you remove the main cover. Figure 20. Nicolet iS5 LS analyzer tipped back with sampling arm raised Gently raise sampling arm Sampling arm in raised position 6.
- Page 38 7. Lower the sampling arm so it engages firmly with the magnet and then set the instrument upright. Figure 23. Nicolet iS5 LS analyzer with cover removed and sampling arm down Close sampling arm and set instrument upright...
- Page 39 NOTICE Make sure nothing falls into the instrument while the desiccant module is removed. Use the #2 Phillips-head screwdriver to loosen the two captive screws that secure the desiccant module to the instrument. Figure 24. Nicolet iS5 LS analyzer desiccant module screws Loosen captive screws (2) Thermo Scientific...
- Page 40 9. Remove and discard the large O-ring around the desiccant module opening. NOTICE Be careful not to drop the O-ring into the instrument. Figure 26. Nicolet iS5 LS analyzer with large desiccant O-ring removed Remove large O-ring Nicolet iS5 LS User Guide...
- Page 41 Press (rather than roll) the new O-ring into place to be sure it is properly seated in the groove. The O-ring should lie flat with little tension. Figure 27. Nicolet iS5 LS analyzer with new desiccant O-ring installed Install...
- Page 42 Turn the desiccant module (see the previous image) upside down and peel the old humidity indicator off the window. Discard the used indicator. Figure 29. Used paper humidity indicator Remove used humidity indicator Nicolet iS5 LS User Guide Thermo Scientific...
- Page 43 Align holes in module with holes in canisters NOTICE Do not overtighten the set screws or you may damage the desiccant module or the canisters. (If the module is bowed, the screws are too tight.) Thermo Scientific Nicolet iS5 LS User Guide...
- Page 44 O-ring and then tighten the two captive screws. (If the captive screws are worn or damaged, replace them with the same type of screws from the desiccant replacement kit.) Figure 33. Nicolet iS5 LS analyzer with desiccant module installed Install Desiccant module...
- Page 45 Carefully slide the cover over the instrument while lifting the cover slightly until it clears the lip of the sampling module baseplate. Then continue sliding the cover forward until it engages with the instrument baseplate. Figure 34. Nicolet iS5 LS analyzer with cover positioned for installation Install Sampling module baseplate...
- Page 46 Maintaining the Instrument Use your fingers to insert the four screws that secure the cover to the baseplate. Tighten the screws with the 7/64-inch ball driver or hex key. Figure 35. Nicolet iS5 LS analyzer baseplate screws Insert and tighten screws...
- Page 47 150 °C (300 °F). Allow the canisters to cool completely in a dry environment before you install them in the instrument. 1. Place the saturated desiccant canisters in a vented oven at 150 °C (about 300 °F) for three hours. Thermo Scientific Nicolet iS5 LS User Guide...
- Page 48 • Source replacement kit (includes desiccant replacement kit) • #1 Phillips-head screwdriver • #2 Phillips-head screwdriver • 7/64-inch ball driver or hex key • 0.05-inch hex key • Clean finger cots, gloves or laboratory tissue Nicolet iS5 LS User Guide Thermo Scientific...
- Page 49 When you are finished, lower the sampling arm so it engages firmly with the magnet. 4. Carefully set the instrument back on its back so it rests on the back feet. Figure 36. Nicolet iS5 LS analyzer tipped back for maintenance Gently set...
- Page 50 Maintaining the Instrument 5. Raise the sampling arm to avoid damaging it or its cables while you remove the main cover. Figure 37. Nicolet iS5 LS analyzer tipped back with sampling arm raised Gently raise sampling arm Sampling arm in...
- Page 51 Lightly tap the source module to remove any loose insulation or other material that might be clinging to it. If you have a source of dry air or nitrogen, set the flow rate to low and use it to lightly clean the source module. Thermo Scientific Nicolet iS5 LS User Guide...
- Page 52 14. Turn on the instrument power switch. Wait 2 minutes for the instrument power indicator to stop flashing. Note If the instrument does not function normally, consult the troubleshooting topics or contact us for assistance. Nicolet iS5 LS User Guide Thermo Scientific...
- Page 53 Technical Support. 16. Align the instrument optics. Make sure the system has been on for at least 15 minutes (one to six hours for best results), and then align the instrument optics. Thermo Scientific Nicolet iS5 LS User Guide...
- Page 54 Maintaining the Instrument 17. Run both instrument performance tests. Related Topics • Maintaining the Instrument • Troubleshooting the Instrument Nicolet iS5 LS User Guide Thermo Scientific...
-
Page 55: Troubleshooting The Instrument
Each topic lists steps you can take to try to resolve the problem. Contents • Performance test failed • Optical alignment failed • Laser frequency calibration failed • Stage calibration failed • Power indicator blinks continuously • Cannot collect data Thermo Scientific Nicolet iS5 LS User Guide... - Page 56 NOTICE • Run the Full (stage) Calibration only if the Quick (stage) Calibration fails. • Always calibrate the laser frequency align the instrument before you run Full (stage) Calibration. Nicolet iS5 LS User Guide Thermo Scientific...
- Page 57 • close the sampling arm (make sure it is all the way down) 2. If quick stage calibration fails again, complete the following in this order: • calibrate the laser frequency • align the instrument optics • run the full stage calibration Thermo Scientific Nicolet iS5 LS User Guide...
- Page 58 If the cable is damaged, replace it. Turn on the instrument power. Then turn on the computer. 4. If the problem persists, use the Data Hub in qPro Operator software to save the diagnostics log file and then contact Technical Support. Nicolet iS5 LS User Guide Thermo Scientific...
-
Page 59: Troubleshooting Tools
(or from nothing if the windows are clean). When data collection is completed, the measured interferogram is displayed along with an image of a reference interferogram from a typical background measurement (using clean sample windows) and information about the expected maximum signal strength in volts. Thermo Scientific Nicolet iS5 LS User Guide... - Page 60 7. Click continue and thoroughly clean both sample windows. 8. Click continue to end the workflow. Note To retrieve data from a Spectra Check workflow, use Data Hub. Nicolet iS5 LS User Guide Thermo Scientific...
-
Page 61: Index
Daily Performance Test temperature range for operation example report troubleshooting historical results vent access for data collecting data cable background data collection defined data collection failure how to measure Thermo Scientific Nicolet iS5 LS User Guide... - Page 62 Calibration Check Daily Performance Test example report historical results HCl vapors notice isooctane hexadecane caution caution used to clean sample windows specifications for Calibration Check used for Calibration check HF vapors notice Nicolet iS5 LS User Guide Thermo Scientific...
- Page 63 Thermo Scientific Nicolet iS5 LS User Guide...
- Page 64 8–9 system status window Technical Support contact information telephone numbers temperature recommended for instrument tests instrument performance tips sampling Nicolet iS5 LS User Guide Thermo Scientific...
Need help?
Do you have a question about the Nicolet iS5 LS and is the answer not in the manual?
Questions and answers