
Related Manuals for GSE 60 SERIES


Summary of Contents for GSE 60 SERIES
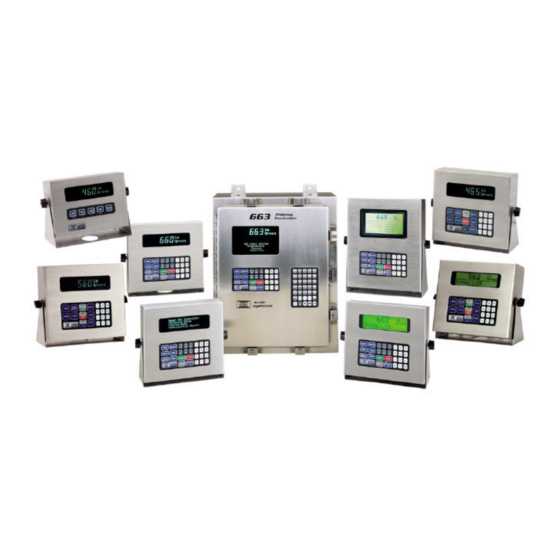
- Page 1 GSE 60 SERIES Technical Reference Manual R O G R A M M A B L E R O C E S S O N T R O L L E R S 3 . 0 E R S I O N...
- Page 2 Information in this Technical Reference Manual is subject to change without notice due to correction or enhancement. The information described in this manual is solely the property of GSE. No part of this manual may be reproduced or transmitted in any form or by any means, electronic or mechanical, including photocopying and recording and sold for any monetary figure without the express written permission of GSE.
- Page 3 GSE 60 SERIES Technical Reference Manual Version 2.0...
-
Page 5: Table Of Contents
ABLE OF ONTENTS 1 INTRODUCTION..............................1-1 ....................................1-2 NTRODUCTION About This Manual ..................................1-2 Conventions ....................................1-2 2 INSTALLATION ..............................2-1 ....................................2-1 NSTALLATION ............................... 2-2 NVIRONMENTAL UITABILITY 465 I ................................2-2 NDICATORS Standard 460 and 465 Indicators .............................. 2-3 Panel Mount 460 and 465 Indicators............................ - Page 6 Parameter Descriptions ................................3-26 ....................................3-47 CRIPT ILES Loading Script Files .................................3-48 4 CALIBRATION................................ 4-1 ....................................4-2 ALIBRATION Quick Calibration ..................................4-2 Calibration Upon Exiting Setup Mode............................4-2 ................................. 4-3 ALIBRATION ETHODS General Notes on Calibration ..............................4-3 New Zero ..................................... 4-4 Last Zero......................................
- Page 7 Scale Number And Range Indication............................5-17 Accumulations ...................................5-18 Warnings ....................................5-18 Cal Mode ....................................5-19 Printing......................................5-19 Variables ....................................5-19 6 LEGAL-FOR-TRADE............................. 6-1 ................................... 6-2 EGAL RADE OIML And International Operation............................6-2 International Keypad (460 Series)............................. 6-3 International Keypad (560 Series)............................. 6-4 International Keypad (660 Series)............................. 6-5 International Characters ................................
- Page 8 Peak Gross (Mode 18)................................7-14 Peak Net (Mode 19)..................................7-15 ..............................7-15 OUNDED EIGHT ARAMETERS Rounded Gross (Parameter 20)...............................7-16 Rounded Net (Parameter 21) ..............................7-16 ..................................7-16 ARAMETERS Rate (Mode 23)..................................7-16 Free Fall (Mode 24) .................................7-17 Future Gross (Mode 25)................................7-18 Future Net (Mode 26)................................7-19 Free Fall 2 (Mode 27) ................................7-19 Future Gross 2 (Mode 28)................................7-19 Future Net 2 (Mode 29)................................7-19 ................................7-19...
- Page 9 Defining a New Custom Transmit............................8-20 Creating a Custom Transmit Table ............................8-21 Entering Fixed Text ..................................8-21 Entering Control Codes................................8-22 Custom GSE Control Codes ..............................8-23 Entering Parameter Data .................................8-26 Parameter Format Codes .................................8-27 Navigating a Custom Transmit Table............................8-28 Editing a Custom Transmit Table ............................8-29 ..............................8-33...
- Page 10 Input Specification Format Line ..............................8-51 Input Specification Macro Number ............................8-52 Clear Interpreter ..................................8-52 Operation....................................8-52 Multiple Parameters .................................8-52 Trailing Data.....................................8-53 Multiple Matches ..................................8-53 Disabling the Input Interpreter..............................8-53 Using a String as a Parameter..............................8-53 Advanced Concepts...................................8-54 Input Interpreter Examples ..............................8-55 -485 N ) ..............................8-60 ETWORKING PTION...
- Page 11 Downloading Individual Macros ............................9-166 0 ...................................SETPOINTS 10-1 ......................................10-2 ETPOINTS ..............................10-2 ETPOINT ETUP ARAMETERS ..................................10-3 ETPOINT PERATION Setpoint Status Mode ................................10-3 Setpoint Status Serial Transmission ............................10-4 Setpoint Inputs...................................10-4 ................................10-5 ETPOINT EYPAD NTRY ..............................10-5 ETPOINT UTPUT ESPONSE ................................10-6 ETPOINT ETUP XAMPLES ..................................10-10 ETPOINT PTIONS 1 ...................................
- Page 12 2 ...........................PROGRAMMABLE DIGITAL I/O 12-1 ....................................12-2 PPLICATIONS Encoders....................................12-2 Flow Meters ....................................12-2 conveyors....................................12-2 Diverters....................................12-2 Flow Rate ....................................12-2 ....................................12-3 ONNECTIONS ....................................12-3 ERMINOLOGY I/O P ...................................12-4 ARAMETERS I/O Parameter Numbers ................................12-4 Referencing I/O Parameters ..............................12-4 Viewing I/O Parameters................................12-4 Scaling I/O Parameters ................................12-5 .............................12-5 ETUP PERATIONAL ETAILS...
- Page 13 Analog Output Calibration..............................13-28 Connecting Multiple SBMs ..............................13-30 ..........................13-30 EMOTE ISPLAY ODULE NSTALLATION Remote Display Parameter Setup............................13-32 Connecting Multiple SBMs ..............................13-32 RS-485 M ..............................13-33 ODULE NSTALLATION Network Parameter Setup ..............................13-34 ..............................13-38 URRENT ODULE 20mA Parameter Setup ................................13-39 20 mA Current Loop Connections ............................13-39 SCR M ....................................13-40 ODULE...
- Page 14 6-Digit, 7-Segment Display................................A-4 4 X 20 Character VFD................................A-4 8 X 40 Character Graphic LCD..............................A-5 16 X 40 Character Graphic LCD...............................A-5 ......................................A-6 EYPAD 460 Keypad....................................A-6 465 Keypad....................................A-8 560 Series Keypad ..................................A-9 660 Series Keypad ..................................A-9 ..................................A-10 ONFIGURATIONS ................................A-11 IMENSIONAL RAWINGS ..............................
-
Page 15: Chapter 1 Introduction
NTRODUCTION This chapter contains information on the conventions used within this manual. O V E R V I E W About This Manual 1-2 Conventions 1-2 Symbols 1-2 Operator Interface 1-2 Examples 1-4... -
Page 16: Introduction
CAUTION! Indicates important considerations. REMINDER Emphasizes a statement. INFORMATION Provides additional information. PERATOR NTERFACE Procedures often refer to information that appears on the 60 Series display as well as the keystrokes required to perform a certain function. GSE Scale Systems... - Page 17 Multiple keys that need to be pressed simultaneously are designated as: ã + ó Keystrokes listed within chapter text may also appear in bold type: 100 [SELECT] 23640 [ID] [ENTER] - or - [CLR] + [SELECT] 60 Series Technical Reference Manual...
- Page 18 1-4 Chapter 1 XAMPLES Examples combine sequential keystroke and display information: Example: Access Setup Mode 100 ó SetUP Keyin Code: 23640 é å SetUP Allow Mods! P10*01 Scale GSE Scale Systems...
-
Page 21: Chapter 2 Installation
NSTALLATION This chapter provides instructions for installation of the 60 Series instruments and load cells connections. O V E R V I E W Installation 2-1 Environmental Suitability 2-2 460 and 465 Indicators 2-2 560 and 562 Controllers 2-7 660, 661, and 662 Controllers 2-12... -
Page 22: Environmental Suitability
Care must be taken to ensure that the AC power socket outlet is properly protected. For the 460 Series, 560 Series and models 660, 661, and 662, GSE offers a Splash Guard transparent vinyl cover for added protection. For models 465, 560, 562, 660, 661, 662, and 665, a dura-shield is also available to protect the lens and keypad. - Page 23 8-mm hex head screws from the rear panel (see Figure 2-1). Figure 2-1: 460 and 465 Rear Panel 4. Carefully lift the rear panel from the enclosure, and disconnect the keypad ribbon cable from J8 on the main printed circuit board (see Figure 2-2). 60 Series Technical Reference Manual...
- Page 24 7. Reconnect any cables to the respective source connectors. 8. Plug the indicator to the AC power outlet socket. 9. Test the indicator for proper operation. GSE Scale Systems...
- Page 25 (see Figure 2-3 and Figure 2-4). Panel Cut-Out Dimensions (460) Figure 2-3 shows the cut-out dimensions for the 460 panel mount indicator. Figure 2-3: 460 Panel Mount Cut-Out Dimensions 60 Series Technical Reference Manual...
-
Page 26: Panel Mount 460 And 465 Indicators
To open the panel-mount 460 and 465 indicators: 1. Remove AC power by unplugging the indicator from the power outlet socket. 2. Disconnect any additional cables from the respective source connectors. GSE Scale Systems... -
Page 27: And Ontrollers
For tabletop use, position the controller for convenient viewing. A swivel bracket with non-slip rubber feet enables tilting of the controller face to any viewing angle without the controller sliding when you press the keys. 60 Series Technical Reference Manual... - Page 28 8-mm hex head screws from the rear panel (see Figure 2-5). Figure 2-5: 560 and 562 Rear Panel 4. Carefully lift the rear panel from the enclosure, and disconnect the keypad ribbon cable from J5 on the main printed circuit board (see Figure 2-6). GSE Scale Systems...
- Page 29 This ensures the best environmental seal and maximum electromagnetic interference (EMI), radio-frequency (RFI), and electrostatic discharge (ESD) shielding performance. Over 60 Series Technical Reference Manual...
- Page 30 The serial number, power requirements, and approvals label is on the cover. Refer to Appendix A for dimensional drawings. NSTALLATION The procedure for installing a 560 and 562 panel mount controller is identical. Figure 2-7: 560 and 562 Panel Mount Cut-Out GSE Scale Systems...
-
Page 31: Panel Mount 560 And 562 Controllers
3. Install the M4 hex bolt in the upper left corner using a 7mm socket. 4. Reconnect any cables from the respective source connectors. 5. Plug the controller into the AC power outlet socket. 6. Test the controller for proper operation. 60 Series Technical Reference Manual... -
Page 32: 660, 661, And
3. Using a #2 cross-tip (Phillips) screwdriver or an 8mm socket, remove source. Hazardous voltage is accessible within the enclosure! the eight 8-mm hex head screws from the rear panel (see Figure 2-8). GSE Scale Systems... - Page 33 LCD driver board #420921-36617. Disconnect the backlight cable from J4 on the LCD driver board. 6. Connect the load cell leads to J2 on the main board (see Figure 2-9 and refer to page 2-19). 60 Series Technical Reference Manual...
- Page 34 Two slots are positioned at the bottom of the cover to enable power, load cell, printer, computer, and other wire routing. All wire strain relieves and terminals should be positioned below or near this area. GSE Scale Systems...
-
Page 35: Panel Mount 660, 661 And 662 Controllers
6. Install the 8 hex nuts from the inside of the panel. 7. Tighten nuts until they are hand tight and pressing against the back panel surface. Then tighten each nut by 3/4 turn to compress the gasket to the front of the panel. 60 Series Technical Reference Manual... -
Page 36: Controller
4. Remove the M4 hex bolt, if installed. Hook a finger under the edge of the cover. Pull outward and upward to disengage the cover from the mounting plate tabs. 5. Locate the main board near the middle right of the controller door interior (see Figure 2-12). GSE Scale Systems... - Page 37 7. Using a large, flat-tip screwdriver, tighten the 1/4-20 slotted pan head screws on the fastening clamps. 8. Connect the controller to an AC power supply to power it on. Figure 2-11: 663 Front Panel 60 Series Technical Reference Manual...
-
Page 38: Controller
For tabletop use, position the 665 controller for convenient viewing. The 665 has a swivel bracket that enables tilting of the controller face to any angle for viewing. The bracket also has non-slip rubber feet to prevent sliding when you press the keys. GSE Scale Systems... - Page 39 J3 on the LCD driver board #420921-36617. Disconnect the backlight cable from J4 on the LCD driver board. 6. Connect the load cell leads to J2 on the main board (see Figure 2-9 and refer to page 2-19). 60 Series Technical Reference Manual...
-
Page 40: Panel Mount 665 Controller
All wire strain relieves and terminals should be positioned below or near this area. The serial number, power requirements, and approvals label is on the cover. Refer to Appendix A for dimensional drawings. GSE Scale Systems... - Page 41 To open the panel-mount 660, 661, and 662 controllers: 1. Remove AC power by unplugging the controller from the power outlet socket. 2. Disconnect any additional cables from the respective source connectors. 60 Series Technical Reference Manual...
-
Page 42: Load Cell Connections
4. Reconnect any cables from the respective source connectors. 5. Plug the controller into the AC power outlet socket. 6. Test the controller for proper operation. ONNECTIONS This section provides information on connecting the load cell the 60 Series instruments. RANSDUCER XCITATION All 60 Series instruments are designed to be connected to any Wheatstone bridge design strain gage-based force measuring transducer. -
Page 43: Sense Lead Connections
Installation 2-23 ENSE ONNECTIONS Four-lead or six-lead scale platforms can be connected to any 60 Series instrument. Refer to Table 2-1 for wiring information. Table 2-1: Load Cell Connections GSE Platform Load Cell Function Color Code + Excitation - Excitation... - Page 44 13. Tighten down the strain relief securely to ensure a firm grip on the cable. Figure 2-16: 460 Series Load Cell Connections Figure 2-17: 660 Series Load Cell Connections GSE Scale Systems...
-
Page 45: Dc Power Connections
Installation 2-25 DC P OWER ONNECTIONS All 60 Series instruments can be powered by an external 10-32 VDC power supply. 460 S ERIES Connect an external DC power source to the 24V and GND pins on the J10 battery connector. -
Page 46: Series
Figure 2-19: 560 Series Main Board J15 DC Power Connection 660 S ERIES Connect an external DC power source to the 24V and GND spring-lever terminals on the J11 connector. Figure 2-20: 660 Series Main Board J11 Power Connection GSE Scale Systems... -
Page 47: Lcd Operation
• It would not be possible to use macro commands to transmit data to the 4X20 VFD as they will instead be automatically routed to the LCD. 60 Series Technical Reference Manual... -
Page 48: Lcd Contrast Adjustment
EYPAD ONFIGURATION All 60 Series indicators are shipped with the keypad properly configured. However proper keypad operation can not always be guaranteed when installing a replacement main board due to the fact that some indicators support multiple keypad styles. A keypad will not operate correctly when it does not match the configuration of the main board. -
Page 49: Series Keypad
” or “ Keypd ” is displayed, then release.** Use these same three keys on both the 25-key and 28-key keypads. ** “M660” is displayed for firmware dated after September 28, 2001. Previously “M650” was displayed. 60 Series Technical Reference Manual... - Page 50 2-30 Chapter 2 GSE Scale Systems...
-
Page 51: Setup
ETUP ARAMETERS This chapter contains detailed information on the parameter setup mode. Topics covered include accessing the parameter setup mode, navigating setup parameters, entering parameter values, exiting the parameter setup mode, and downloading setup parameters. O V E R V I E W Setup Parameters 3-3 Accessing The Parameter Setup Mode 3-3 Navigating Setup Parameters 3-6... - Page 52 Viewing and/or editing setup parameters requires that you first access the setup mode. CCESS It is possible to view the current configuration of any 60 Series Instrument You can key in the full-edit by simply keying in the desired parameter number and pressing access code when viewing [SELECT], then [ENTER].
- Page 53 When using the limited access code it is advisable to assign a PIN number to the full-edit access code at P400 as the default GSE access code is widely known and if used will give full access to all setup parameters.
- Page 54 UMBER CCESS A PIN number can be assigned at P400 and P402 to override the GSE default full-edit access and limited access codes. If a PIN number is in effect, use the PIN number as the access code omit the [ID] key from the keypress sequence.
- Page 55 (see Character Entry on page 5- 6) to enter the code. For example, ú + ó 21353 ô will access the setup parameters using the GSE default limited access code. PIN numbers are also entered this way. AVIGATING...
- Page 56 Shifts right during alpha entry to begin scrolling next character. Moves back one character in the custom transmit, input interpreter ‚ ú + ð and macro tables. Shifts left (backspace) one character during alpha entry. ú ú ú ú Exit setup mode or enter calibration. GSE Scale Systems...
-
Page 57: Parameter Types
If you don’t know the selection number you can press [ENTER] to scroll sequentially through all selections. PERATING ARAMETER NTRY ARAMETERS Some setup parameters require the entry of an operating parameter (see Table 7-1for a complete list of operating parameters). The entry will 60 Series Technical Reference Manual... -
Page 58: Exiting The Parameter Setup Mode
You can exit the setup mode from any parameter by pressing [ZERO] to initiate the exit routine. When exiting you are given the opportunity to calibrate and save or undo all changes you made while in the setup mode. GSE Scale Systems... - Page 59 Non-critical messages such as an indication that the clock speed has changed are displayed briefly when exiting the setup mode and do not require acknowledgement to complete the exit process. A complete list of error messages can be found in Appendix E. 60 Series Technical Reference Manual...
-
Page 60: Downloading Setup Parameters
Once you have completed the scale setup you can download all of the setup information through any of the communication port to a computer to create a backup file or to another indicator to “clone” the setup. Refer to Chapter 14, Information Parameters for the download procedure. GSE Scale Systems... -
Page 61: Setup Parameter Map
Setup Parameters 3-11 ETUP ARAMETER Table 3-3 lists all setup mode parameters for the 60 Series Instrumentation. Parameters and selections apply to all 60 Series Instruments except as otherwise noted. Table Key: M Multiple Instance Parameter Select from List K Key-In Parameter... - Page 62 Analog Output (P171 must be enabled to access P172 à P176) 460 Series Analog Output Instance Selection à à Analog Output: 1 (Defines instance for P171 P176) 560 Series P17)01 AnOut ü à 3-30 Analog Output: 1 660 Series à Analog Output: 1 GSE Scale Systems...
- Page 63 0.0 d Communication Ports 460 Series Serial Port Instance Selection à à Port: 1 (Defines instance for P200 P219) 560 Series à Port: 1 660 Series P19(01 Port— ü à Port: 1 3-32 Communication Ports (continued) 60 Series Technical Reference Manual...
- Page 64 Interpreter: 1 (Defines instance for P220 P224) 560 Series P21(00 RxIn# ü à Interpreter: 1 3-33 None! 660 Series à Interpreter: 1 Input Interpreter (continued) P22)00 RxNam Name Entry Interpreter Name ü ü 3-33 (79 characters maximum) None! GSE Scale Systems...
- Page 65 None! 3-35 P30$00 MODE4 [SELECT] Mode 4 ü None! P30%00 MODE5 [SELECT] Mode 5 ü None! [SELECT] Mode 6 P30^00 MODE6 ü None! Weigh Mode Parameter Selections (continued) P30&00 MODE7 [SELECT] Mode 7 ü None! 60 Series Technical Reference Manual...
- Page 66 Beeper Volume ü Medium High, High, Maximum 3-37 Time & Date P50)00 Time Entry Time Time ü 3-38 (Enter as HH.MM.SS) 00:00 Time & Date (continued) P50!70 Date Entry Date Date ü 3-38 (Enter as MM.DD.YY) 01/01 GSE Scale Systems...
- Page 67 Accum Rename Accumulation ü None! P61)00 Scale Rename Scale Number ü None! P61!00 Tm/Dt Rename Time/Date ü None! Rename Average Gross P61%00 AvGrs ü None! Parameter Renaming (continued) P61^00 AvNet Rename Average Net ü None! 60 Series Technical Reference Manual...
- Page 68 Rename Tare Total of All Scales ü None! P64#00 GTAll Rename Total of All Gross Totals ü None! Rename Total of All Net Totals P64$00 NTAll ü None! Parameter Renaming (continued) P64%00 QuAll Rename Quantity Total of All Scales ü None! GSE Scale Systems...
- Page 69 3-41 None! à Database: 1 660 Series à Database: 1 P70)00 Name Entry DBNam Database Name ü ü 3-41 (79 characters maximum) None! P70!00 Valid Operating Parameter Col01 Database Column Parameter ü ü 3-41 *END* 60 Series Technical Reference Manual...
- Page 70 ü Enbld P81^00 ’6’ [6] Key Function ü Enbld P81&00 ’7’ [7] Key Function ü Enbld P81*00 ’8’ [8] Key Function ü Enbld P81(00 ’9’ [9] Key Function ü Enbld P82)00 AnyKy Any Key Function ü Enbld GSE Scale Systems...
- Page 71 Comm: 1 P99@01 Port 560 Series ü ü 3-43 Comm1 à Comm: 1 3, LCD 660 Series à Comm: 1 4, LCD Ignored, Delayed Current Scale Motion P99#01 CSMtn ü ü 3-44 Dly’d Custom Transmit (continued) 60 Series Technical Reference Manual...
- Page 72 Macro: 1 P511#0 Ignored, Delayed AcMtn Activation Motion ü ü 3-45 Ign’d P511$0 Valid Operating Parameter ALPar Lower Activation Parameter ü ü 3-45 None! Valid Operating Parameter Upper Activation Parameter P511%0 AUPar ü ü 3-45 None! Setpoints (continued) GSE Scale Systems...
- Page 73 P1000! Table Entry Macro Entry Table ü ü 3-47 (text only) ††††‡ Macro Debug P5000) No, Yes LmtAc Macro Debug Table Limited Access ü 3-47 P5000! Read-Only Diagnostic Table None! Macro Debug Table 3-47 ‡‡‡‡‡ 60 Series Technical Reference Manual...
-
Page 74: Parameter Descriptions
Selects the number of zero tracking divisions to a resolution of 0.1 divisions. For example, an entry of 35 will be accepted as ±3.5 divisions of zero tracking. If the live weight on the scale remains within the zero GSE Scale Systems... - Page 75 P118: Zero Range Selects the amount of weight as a percentage of full scale that can be zeroed out using the [ZERO] key. P119: Linearization Enables the five-point linearization feature used during load cell calibration. 60 Series Technical Reference Manual...
- Page 76 Enables the center-of-zero annunciator. In multi-scale applications, disabling the center-of-zero annunciator will allow you to view the scale number when the weight is at center-of-zero. TATUS The status parameters allow renaming of the status word transmitted when using operating parameter 97P. GSE Scale Systems...
- Page 77 P170: Analog Output Instance Sets the analog output# in effect when accessing the remainder of the analog output configuration parameters P171 à P177. P171: Analog Output Enable Enables the analog output currently specified at P170. 60 Series Technical Reference Manual...
- Page 78 Select Same to keep the analog output at the same level it was at immediately prior to entering the setup mode. P177: Output Signal Type Selects the analog output signal type (0-10VDC, 0-20mA or 4-20mA). OUNTING The counting parameters provide configuration of the counting feature. GSE Scale Systems...
- Page 79 Selects the number of motion divisions to be used during a sampling routine (separate from P111) to a resolution of 0.1 divisions. For example, an entry of 15 will be accepted as ±1.5 divisions of motion. 60 Series Technical Reference Manual...
- Page 80 Selects Modbus ASCII or RTU mode. P205 must be set for Modbus for this parameter to be available. P211: Modbus Word Selects the Modbus word format. HiLo will transmit a Modbus high byte followed by the low byte, LoHi will reverse the order. GSE Scale Systems...
- Page 81 Assigns the minimum number of character to send when transmitting weight data. If the number of digits that make up the weight is less than the minimum transmit width, the number is left-padded with spaces to make up the difference. 60 Series Technical Reference Manual...
- Page 82 P291: Echo Start Character Assigns the start character that signifies the beginning of echoed display data. P292: Echo End Character Assigns the end character that signifies the ending of echoed display data. GSE Scale Systems...
- Page 83 Selects the language for the ASCII character set. Selecting alternate languages will result in various display character substitutions as shown in Table 6-4 on page 6-6. P412: Preset Enable Enables the preset status identifier for manually entered tare and accumulation values. 60 Series Technical Reference Manual...
- Page 84 Selects the power-up contrast setting for the LCD display. Pressing [CLR] will restore the default contrast setting. The LCD contrast can also be set at power-up without accessing the setup mode. Refer to the section on LCD Contrast Adjustment on page 2-27. GSE Scale Systems...
- Page 85 P503: AM / PM Time Format Selects 12-hour or 24-hour format for displaying and transmitting time & date values. P504: Date Format Selects USA (mm/dd/yy) or international (dd.mm.yy) format when displaying and transmitting date values. 60 Series Technical Reference Manual...
- Page 86 For example, if the maximum number of rows is 1000 and the number of warning rows is 100, then a warning message will be displayed for every data row stored after the 900 record. The maximum number of warning rows is 999. GSE Scale Systems...
- Page 87 To display the name of a all other variables, the name must be 10 characters or less. If the name is greater than 10 characters, the default 60 Series Technical Reference Manual...
- Page 88 P686 must be set for “Strng” for P689 to be available for selection. ATABASE The database parameters provide configuration of database structure. P699: Database Instance Sets the database# in effect when accessing the remainder of the database configuration parameters P700 à P799. GSE Scale Systems...
- Page 89 The name must be 10 characters or less if it is to be displayed. If the name is greater than 10 characters, the default name (PIOCx) will be displayed. However, the entire given name will still be transmitted. 60 Series Technical Reference Manual...
- Page 90 USTOM RANSMIT The custom transmit parameters provide configuration of the custom transmit tables and the criteria for transmission. P980: Continuous Transmit Rate Assigns the interval to a resolution of 0.1 seconds at which continuous transmits are transmitted. GSE Scale Systems...
- Page 91 If zero (0) was entered, the bottom line will show " ". Requiring motion delay on multiple scales is useful for applications such as multiple-axle truck scales where all scales must become stable before printing a ticket. 60 Series Technical Reference Manual...
- Page 92 3-42 Chapter 3 P995 – P997: Scale Motion (Model 650 Compatibility) Provided only for backward compatibility with the GSE 650 Series upload files. Selections entered here for scale’s 2, 3 and 4 will be reflected in P994. For example, enabling motion delay for scale #2 at P995 (by entering a value of ‘1’) will result in scale #2 appearing at P994.
- Page 93 Assigns the operating parameter to be monitored for activation and deactivation criteria. ODBUS ARAMETER The Modbus parameter map provides mapping for the memory locations of operating parameters to be used with Modbus reading and writing register functions. 60 Series Technical Reference Manual...
- Page 94 Refer to Interrupt Macros on page 9-161 for complete details. P9993: Macro Menu Enable Enables the named macro (P9991) to be invoked by selecting it via the macro menu. GSE Scale Systems...
-
Page 95: Script Files
4. When the desired script file is displayed, press [ENTER] to initiate the default process. 5. When the default is complete, exit and save changes to begin using the script file software. 60 Series Technical Reference Manual... - Page 96 3-46 Chapter 3 (460 S ONFIGURING EMOTE ERIES Remote keys are configured in the same manner as script file. To configure a remote key, access P65003 and follow the same procedure used to load a script file. GSE Scale Systems...
-
Page 97: Calibration
ALIBRATION In addition to general calibration information, this chapter provides information on the New Zero, Last Zero, Temp Zero, Only Zero, Cal Reset, and Known LCOut calibration methods. You will also learn about multi- scale calibration, calibration units, and A/D calibration. O V E R V I E W Quick Calibration 4-2 Calibration Methods 4-3... -
Page 98: Quick Calibration
Keyin SetUp Code: (460) UICK CCESS 54321 é å The GSE default Quick Calibration access code for the 460 is ú + ó ú ð õ ô Quick SetUp Cal! Changing the Quick Cal Access Code Zero? The default Quick Cal access code can be changed at P401 of the setup mode. -
Page 99: Calibration Methods
New calibration values are not permanently saved until the calibration ENTER=SAVE mode is exited and changes are saved by pressing [ENTER] at the prompt. If power is lost during calibration, the previously saved calibration values will be in effect when power is restored. 60 Series Technical Reference Manual... -
Page 100: New Zero
SETUP ENTER =EXIT å If you choose to “undo” the calibration when exiting the setup mode, you will also undo any unsaved changes made to the setup 10)00 parameters. Gross GSE Scale Systems... -
Page 101: Last Zero
SETUP ENTER If you choose to “undo” the calibration when exiting the setup mode, =SAVE you will also undo any unsaved changes made to the setup å parameters. SETUP Exit Setup SETUP ENTER =EXIT å 60 Series Technical Reference Manual... -
Page 102: Temporary Zero
ENTER=UNDO ENTER=EXIT prompt and again at the prompt to exit the calibration mode. If you choose to “undo” the calibration when exiting the setup mode, you will also undo any unsaved changes made to the setup parameters. GSE Scale Systems... -
Page 103: Only Zero
SETUP ENTER to exit the calibration mode. =EXIT å If you choose to “undo” the calibration when exiting the setup mode, you will also undo any unsaved changes made to the setup parameters. Gross 60 Series Technical Reference Manual... -
Page 104: Calibration Reset
(where ‘x’ is the load cell number) and then shows the mV/V value (0.1 à 5.0) last entered for this load cell. Key in the load cell’s mV/V value and press [ENTER]. - or - Press [ENTER] to accept the displayed value. GSE Scale Systems... - Page 105 To exit the calibration mode without saving the new calibration, ENTER ENTER=SAVE =SAVE press [CLR] at the prompt. Then press [ENTER] at ENTER=UNDO ENTER=EXIT prompt and again at the prompt å to exit the calibration mode. SETUP Exit Setup SETUP ENTER =EXIT å Gross 60 Series Technical Reference Manual...
-
Page 106: Multi - Scale Calibration
Select a calibration method as described in Calibration Methods on page 4-3 and proceed with the calibration routine. Enter the calibration weight value for the first linearization point Keyin CalWT when prompted to Keyin Pnt2 Once the first linearization point is established, displayed. GSE Scale Systems... -
Page 107: A/D Calibration
The following figure shows a typical list of A/D calibration values. A similar printout is provided with each multi-scale option. Once saved in EEPROM, this information can be transmitted out any of the communication ports to a printer or computer as described in the following procedure. 60 Series Technical Reference Manual... - Page 108 P61110 à To print A/D calibration values: P61121, these parameters will From the weigh mode, key in 60100 [SELECT] to access the GSE show values of 0 or 1. copyright parameter. Select A/D calibration values for the scale(s): Key in 23640 [PRINT] to send A/D calibration values for all scales.*...
-
Page 109: Restoring A/D Calibration Values
FLASH ROM by pressing [ENTER] at the prompt and entering the module’s serial# as prompted. The serial number of the 60 Series main PC board and multi-scale options is used to reference A/D calibration values. Compare the board serial number with the serial number recorded at P61122 to ensure the correct values will be entered. - Page 110 To exit the calibration mode without saving the new calibration, number is stored in P61122. ENTER=SAVE press [CLR] at the prompt. Then press [ENTER] at ENTER=UNDO ENTER=EXIT prompt and again at the prompt to exit the calibration mode. GSE Scale Systems...
-
Page 111: Calibration Error Messages
The A/D calibration values for one or more enabled scales have not been entered. Press any Code39 ƒ A/D key to continue. Enter the A/D calibration values as described in the Restoring A/D Calibration Values section beginning on page 4-13. 60 Series Technical Reference Manual... -
Page 112: Reference
P61102 (re-zero weight) and P61103 (zero track weight) in the information parameters. To prevent this situation, set the zero tracking parameters (P112, P113) and zero range parameter (P118) appropriately. GSE Scale Systems... -
Page 113: Weigh
EIGH PERATION The Weigh Mode Operation section of this book provides information on keypad functions, time & date, accumulation, and counting. O V E R V I E W Weigh Mode Operation 5-2 Disabling Front Panel Keys 5-6 Time & Date 5-7 Accumulation 5-9 Counting 5-11 Multi-Range Operations 5-17... -
Page 114: Eigh Ode Peration
5-2 Chapter 5 EIGH PERATION The Weigh Mode is the primary operating mode of any 60 Series instrument when it is connected to a scale platform or load cell. Depending upon the operating mode, the standard keypad keys assume different functions. - Page 115 [SELECT]. For example, key in 3.2 [SELECT] to view the Gross total on Scale #2 30.4 [SELECT] to view the Quantity on Scale #4 80.17 [SELECT] to select Variable 17 80.204 [SELECT] to select Variable 204 60 Series Technical Reference Manual...
- Page 116 Entering Alpha-Numeric Characters During operator entries for string variables or entries initiated by a macro command, the arrow keys take on the role of cursor keys allowing you to GSE Scale Systems...
- Page 117 Press the numeric keys to enter numeric values 0 through 9. ECIMAL OINT Press [.] to establish a decimal point or perform an accumulation in the weigh or count mode (see page 5-9). CLR/N Press [CLR/NO] to clear an entry in process. 60 Series Technical Reference Manual...
-
Page 118: Character Entry
41 for more details. Disabled keys can be temporarily re-enabled by holding the [CLR] key at power-up until Macro Disbl is displayed. This resets all key functions to normal until power is cycled or upon exiting the setup mode. GSE Scale Systems... -
Page 119: Time & Date
For example, if you enter 8.1.96 and press [ENTER], the date is set to 08/01/96. If you enter the date improperly, the prompt “try m.d.y” (or “try d.m.y” for the international format) is displayed. 60 Series Technical Reference Manual... -
Page 120: Operator Access To Time/Date
P611 (see page 3-38). PECIFICATIONS The 60 Series battery-backed time/date module is a continuously running clock, even when the indicator is powered down. The time and date is set (as Eastern Standard Time) at the factory prior to shipment. See page A- 16 for complete specifications. -
Page 121: Accumulation
To reset accumulation parameters, select either the GROSS TOTAL or NET TOTAL parameter and press [CLR]. The display prompts ENTER =CLR!. Press [ENTER] to confirm. All accumulation parameters are reset to zero (0). 60 Series Technical Reference Manual... -
Page 122: Preventing Double Accumulations
As the GROSS TOTAL or NET TOTAL increases, the number of decimal places will change to accommodate the number on the 6 digit display. For example, a value of 9999.00 may be displayed exactly as that number. GSE Scale Systems... -
Page 123: Accumulations And Ntep
OUNTING The ability to establish a piece-weight and count parts to a high degree of accuracy is another feature of the 60 Series instruments. The counting feature is not enabled as a standard default. The Counting Operation is the ability of the controller to count the quantity of parts on the weigh platform. -
Page 124: Negative Piece Sampling
Continue to enhance, as desired. Key in the tare weight of the empty container, add the parts removed for sampling back into the container. The quantity displayed will be the total quantity of parts in the container. GSE Scale Systems... -
Page 125: Using Auto-Enhance
However, if the enhance feature has been enabled, the results of a sampling operation may vary. These variations are detailed in the following sections. 60 Series Technical Reference Manual... -
Page 126: Achieved Accuracy Less Than Required
• If a 1 mV/V full scale cell is used, all minimum weight requirements should be 2 times the value stated. • If a 3 mV/V cell is used, the value should be 2/3 the value shown. GSE Scale Systems... -
Page 127: Counting Parts
OUNTING ARTS Several ways to count parts using the 60 Series indicators: Method 1: Counting a specific number of parts 1. Access the quantity mode. 2. Place the empty container on platform (optional). - Page 128 The controller tares to a zero net weight. The display shows the current net weight and prompts, Add 10. (Add means take in this instance). The actual number can be programmed in setup parameter P182). 4. Remove the specified number of parts from the box. 5. Press [ENTER]. GSE Scale Systems...
-
Page 129: Additional Counting Related Parameters To Consider
(21P) are referenced, the rounding is done according to the range in effect at the time of the reference. Of course, the rounding of 20P and 21P is done to the default units, not the current units. 60 Series Technical Reference Manual... -
Page 130: Accumulations
In case of a resolution or range error, once a key is pressed the indicator returns to the setup parameter in question. The multi-range feature does not take effect during the cal mode. The increment during cal is always that specified by P111 or the associated increment for alternate units. GSE Scale Systems... -
Page 131: Printing
High Range 50 - 100 by .01 then copying the value 45.327 into a scale specific variable would be represented as 45.328. Copying the value 55.327 into the same variable would be represented as 55.33. 60 Series Technical Reference Manual... - Page 132 5-20 Chapter 5 GSE Scale Systems...
- Page 133 EGAL RADE This chapter contains information on NTEP and OIML regulations, sealing and audit trails, and other requirements. O V E R V I E W OIML And International Operation 6-2 International Keypad (460 Series) 6-3 International Keypad (560 Series) 6-4 International Keypad (660 Series) 6-5 International Characters 6-6 Renaming Operating Parameters 6-7...
-
Page 134: Chapter 6 Legal-For-Trade
Ensure that the This section explains how to configure the 60 Series instruments to comply indicator is installed in with various regulations and describes other features that make the accordance with all local indicators suitable for installations worldwide. -
Page 135: International Keypad (460 Series)
ZERO P801 The following models use the 460 Series international keypad: • Model 460 (U.K. line cord) P/N: 200460-03100 • Model 460 (Euro line cord) P/N: 200460-04100 • Model 465 (U.K. line cord) P/N: 200465-03100 60 Series Technical Reference Manual... -
Page 136: International Keypad (560 Series)
UNITS P803 ZERO P801 The following models use the 560 Series international keypad: • Model 560 (U.K. line cord) P/N: 200560-03100 • Model 560 (Euro line cord) P/N: 200560-04100 • Model 562 (U.K. line cord) P/N: 200562-03100 GSE Scale Systems... -
Page 137: International Keypad (660 Series)
Invokes Macro 2 Invokes Macro 3 Invokes Macro 4 Invokes Macro 5 Invokes Macro 6 Invokes Macro 7 Invokes Macro 8 SCALE SELECT P804 CLEAR/NO P808 ENTER/YES P807 P806 PRINT P805 SELECT P800 TARE P802 60 Series Technical Reference Manual... -
Page 138: International Characters
Model 665 LCD (Euro line cord) P/N: 200665-04120 NTERNATIONAL HARACTERS The 60 Series instruments can display a variety of international characters. Set P411 to a character set as shown in Table 6-4. The language selection can also be changed temporarily without accessing the setup mode using the %L Language Selection macro command. -
Page 139: Renaming Operating Parameters
The preset status for the tare parameter is cleared (not preset) when an auto-tare is performed, when it is cleared by pressing 0 [TARE], or after an interruption in power and the tare save parameter (P641) is set for “NoSav”. 60 Series Technical Reference Manual... -
Page 140: Ntep
P440 is manually enabled. • Accumulations using the . [ENTER] method can only be performed from the gross, net or quantity mode. • Printing using the [PRINT] key is only possible from the gross, net or quantity mode. GSE Scale Systems... - Page 141 P205 will appear in the “Custom Setup” list for each receive port enabled. lb±²³ For example, if the receive mode is enabled for all four ports, the list will Gross P205— P205˜ P205™ P205š display , and 60 Series Technical Reference Manual...
-
Page 142: Sealing And Audit Trails
Each model in the 60 Series has two types of sealing provisions: • Physical seal used in conjunction with an internal program jumper •... - Page 143 See Figure 6-1 through Figure 6-6 for seal locations. Figure 6-1: 460 Legal-for-Trade Seal Figure 6-2: 460 Panel Mount Legal-for-Trade Seal Figure 6-3: 465, 660, 661 and 662 Legal-for-Trade Seal 60 Series Technical Reference Manual...
- Page 144 An audit trail counter will increment only once upon exiting the setup mode conversions and custom and saving changes regardless of how many settings were changed. transmits will be suspended and Each audit trail counter will increment to 99999 before beginning again at all setpoints will be deactivated! 00001. GSE Scale Systems...
-
Page 145: D S D (Dsd)
The DSD feature of the 560 and660 Series controllers provides a means of recording weight data in a secure database structure that ensures data integrity. The database option is required for DSD usage. Information can 60 Series Technical Reference Manual... -
Page 146: Database Structure
P64.3: GROSS Represents the gross weight for the specified SCALE# at the time the data row was created. P64.4: NET Represents the net weight for the specified SCALE# at the time the data row was created. GSE Scale Systems... - Page 147 EMORY LLOCATION The DSD database requires the use of the 60 Series database option. The maximum amount of memory that can be allocated will depend on the total amount of database option memory and how much is allocated to other functions.
-
Page 148: Setup Parameters
DSD database. The custom transmit specified will not allow non-DSD parameter entries. Transmission will be motion delayed by virtue of the stored data row. The custom transmit communication port can be specified at P991. GSE Scale Systems... -
Page 149: Dsd Function Selection Menu
Pressing [ID] or [ZERO] / [ >0< ] will exit the DSD menu. 10!2 Gross [ID] Make [SELECT] / [MODE] Print dbase [SELECT] / [MODE] Down- Load [SELECT] / [MODE] View Data [SELECT] / [MODE] Make 60 Series Technical Reference Manual... -
Page 150: Make Row
Prints the entire contents of the DSD database in row/column format. Data is sent out the port specified as the DSD printer port in the setup mode. ID# Scale# Gross Tare Gross Total Net Total #Accum Time Date 0.43 lb 0.43 lb 0.00 0.00 0.00 03:26:22pm 10/02/01 GSE Scale Systems... - Page 151 24hr or am/pm time, and US or international date. Weight units are presented as the default calibration units specified at P150. Preset data (manually entered tare, gross total and net total values) are identified with a ‘p’ immediately following the weight value. 60 Series Technical Reference Manual...
- Page 152 “ds Sc” (scale#) “ds G” (gross) “ds N” (net) “ds T” (tare) “ds GT” (gross total) “ds NT” (net total) “ds Ac” (number of accumulations) “ds Tm” (time) “ds Dt” (date) GSE Scale Systems...
-
Page 153: Dsd Custom Transmit
Use of this macro command to change the operation of a comm port that is in use by DSD does not take control away from DSD. If DSD is then moved to another port, this previous selection would then begin operation. 60 Series Technical Reference Manual... - Page 154 Returns the number of existing data rows present in the DSD database (not the maximum number of rows). Returns the lowest id number present in the database. Returns the highest id number present in the database. GSE Scale Systems...
-
Page 155: Chapter 7 Operating Parameters
PERATING ARAMETERS O V E R V I E W Operating Parameters 7-2 Renaming Operating Parameters 7-7 Weight Parameters 7-8 Accumulation Parameters 7-10 Time & Date 7-12 Weight Averaging Parameters 7-13 Peak Weight Parameters 7-14 Rounded Weight Parameters 7-15 Rate Parameters 7-16 Counting Parameters 7-19 Multi-scale Parameters 7-21 Programmable Digital I/O Parameters (PDIO) 7-22... -
Page 156: Operating Parameter Identification
“P” (i.e. P108 = full scale capacity) and operating parameters with a trailing “P” (i.e. 11P = time & date). Refer to Table 7-1 for a list of all 60 Series operating parameters. Note that some parameters, such as counting, are not available or usable without first configuring certain setup parameters. -
Page 157: Accessing Operating Parameters
Net Total – Current Net P608 0 – 2 0 – 4 0 – 8 Accum Number of Accumulations P609 0 – 2 0 – 4 0 – 8 Scale (not displayable) P610 Time & Date (shows time/date) P611 60 Series Technical Reference Manual... - Page 158 0 or 10 0 or 10 Status (not displayable) 0 – 8 0 – 4 0 – 2 Current Displayed Weight/Count (not displayable) 0 – 2 0 – 4 0 – 8 Extnd Extended Gross Diagnostic Diagnostic Diagnostic GSE Scale Systems...
- Page 159 For example, if the counting mode is disabled and you key in 37 [SELECT] to access the last sample size, Invld Instn is briefly displayed indicating that the selection was not 60 Series Technical Reference Manual...
-
Page 160: Mode Menu Access
12. Save changes and exit the setup mode. 0*0!99 12:00 Refer to the Parameter Entry Parameters section more details on entering :00am parameters in the setup mode. Press [SELECT] to toggle through the new Mode Menu parameters. GSE Scale Systems... -
Page 161: Renaming Operating Parameters
P600, P601 and P602 respectively. Likewise, other operating parameters can be renamed in the setup mode at P600 à P646 (see Table 7-1). Note that the last two digits of the setup mode parameter correspond with the operating parameter number. 60 Series Technical Reference Manual... -
Page 162: Weight
The gross weight parameter represents the total live weight on the scale 2!25 since the last time a zero reference was established by pressing [ZERO] Gross or through zero tracking. The gross weight is calculated internally and its value cannot be changed by any other means. GSE Scale Systems... -
Page 163: Net (Mode 1)
Press [TARE] to perform an auto-tare. is equivalent to performing an • auto-tare without motion delay. Key in the tare weight and press [TARE] to perform a manual tare. • Assign a tare value using macros. 60 Series Technical Reference Manual... -
Page 164: Accumulation Parameters
4P will not begin to update until the weight in the hopper falls below the Return-to-Zero (RTZ) range specified at P122. This “locking” feature is a function of the GSE Scale Systems... -
Page 165: Net Total (Mode 6)
It cannot be cleared or preset in any other way except through the use of macros. CALE UMBER The scale parameter is used only in custom transmits or as a database column to represent the currently selected scale number. 60 Series Technical Reference Manual... -
Page 166: Time & Date
Excel treats a time & date value of zero (0) as January 01, 1900. • Excel represents date as the whole number of days since January 01, 1900 and represents the time as a fraction of a day. For example, 12:00:00 pm, August 1, 1999 would be internally represented as: GSE Scale Systems... -
Page 167: Weight Averaging Parameters
Excel format. To import time & date to Excel: 1. Import the 60 Series format unchanged to a column in Excel. This column can be configured as a hidden column or included on a separate sheet if you do not want to view this column in the main spreadsheet. -
Page 168: Peak Weight Parameters
The following routine demonstrates how to use the peak gross parameter to test and report an object’s compression strength: 1. A hydraulic press is used to compress a concrete core sample with increasing force until the sample breaks. GSE Scale Systems... -
Page 169: Peak Net (Mode 19)
ISPLAYED OUNDED ROSS ROSS ROSS (0.0P) (0.0P) (20.0P) (1.0P) (1.0P) (21.0P) 11.0046 11.00 11.00 10.0046 10.00 10.00 11.0032 11.00 11.00 10.0032 10.00 10.00 11.0029 11.00 11.00 10.0029 10.00 10.00 33.0107 33.0107 33.00 30.0107 30.0107 30.00 60 Series Technical Reference Manual... -
Page 170: Rounded Gross (Parameter 20)
0.017 (stored as 0.02) seconds (1/60 second) ensures that a new rate value will be calculated with each new gross weight reported from the A/D converter. An RMP of 1.0 seconds will display the average of the last 60 rate calculations. GSE Scale Systems... -
Page 171: Free Fall (Mode 24)
The free fall value is not calculated FreFl by the 60 Series instrument. It must be assigned manually or through a macro command. Once assigned, this value is used to calculate the weight of product in free fall based on the current flow rate. -
Page 172: Future Gross (Mode 25)
Future Net (26P) = Rate (23P) × Free Fall (24P) + Net (1P) The future net weight is otherwise identical to the characteristics of the future gross weight. GSE Scale Systems... -
Page 173: Free Fall 2 (Mode 27)
When the display shows a quantity greater than zero (0), you can change the quantity by keying in the correct value and pressing [ENTER]. The APW will be recalculated accordingly and the newly entered quantity will be displayed. 60 Series Technical Reference Manual... -
Page 174: Quantity Total (Mode 31)
1000 (M VERAGE IECE EIGHT X The average piece weight × 1000 parameter (APW*K) represents the 2@7700 average weight of 1000 pieces as calculated during the sampling routine. APW*K Only one APW*K is maintained for all enabled scales. GSE Scale Systems... -
Page 175: Percent Accuracy (Mode 36)
The total weight is displayed in the current units and division size of GTAll the current scale. This parameter is used for accumulation applications to instantly determine the total gross accumulation of all scales. 60 Series Technical Reference Manual... -
Page 176: Total Of All Net Totals (Mode 44)
I/O parameter depends upon the function of each PDIO channel defined at P851. Table 7-3 illustrates the relationship between each PDIO function and their corresponding I/O parameters. Chapter 11, Programmable Digital I/O provides complete details on all PDIO functions. GSE Scale Systems... -
Page 177: Pdioa (Mode 50)
These parameters can be used in a custom transmit or stored in a database. However, they are not available for the selectable modes at P300 à P309 of the setup mode. 60 Series Technical Reference Manual... -
Page 178: Extended Resolution Gross (Mode 60)
You can set the state of a scale’s A/D conversion number by using 63.xP=$%o where x represents the number of the scale for which the current A/D conversion number is desired and $ represents the number you wish to set the A/D conversion number to. Remember this exact GSE Scale Systems... -
Page 179: Dsd Parameters
The setpoint timer parameters are used to display or manipulate the 256 independent setpoint delay timers. These parameters are not displayable modes of operation, but can be used in custom transmit tables or macros to display or change timer values. 60 Series Technical Reference Manual... -
Page 180: Setpoint Status (Parameter 78)
For example, assigning 78.1P to P303 of the setup mode give easy access to the status of setpoint #1 via the [SELECT] key. This also give you the opportunity to change setpoint status as described in the setpoint chapter on page 10-3. GSE Scale Systems... -
Page 181: Andom Umbers
(x > 0) 79P=x%o Restart the random number generator at a random value after seeding it by assigning a value of zero (0): 79P=0%o restart generator at a random point 60 Series Technical Reference Manual... -
Page 182: Variables
ARIABLE YPES The 60 Series uses four types of variables as described in Table 7-4 The VAR type is defined in the setup mode at P686. Any VAR can be configured as any one of the four VAR types. -
Page 183: Accessing Variables
NTERED ALUE ISPLAYED ALUE RANSMITTED ALUE V#001 0 dp 10.456456 1 å 1 dp 10.456456 10.5 10.5 2 dp 10.456456 10.46 10.46 3 dp 10.456456 10.456 10.456 V#001 4 dp 10.456456 10.4565 10.4565 õ V#001 60 Series Technical Reference Manual... - Page 184 12345678 to VAR #1 80.1P=12345678%o 1.23457e+07 copies to the entry buffer 80.1P%o 12345678 copies to the entry buffer 80.1.16384P%o GSE Scale Systems...
- Page 185 13.00 [ENTER] Internally, this time value is stored as 933512400, the number of seconds since 12:00:00am on 01/01/99. See Time & Date (Mode 11) on page 7-12 for more information on how the 60 Series instruments handles time/date values. ORMAT Select “Time”...
- Page 186 Internally, this date value is stored as 933465600, the number of seconds since 12:00:00am on 01/01/1970. See Time & Date (Mode 11) on page 7- 12 for more information on how the 60 Series instruments handles time/date values. Press [CLR] to set the displayed time value to 01.01.70 (January 1, 1970).
-
Page 187: Entering String Values
When naming variables, keep in mind how the name will appear on the display. Abbreviate names to 5 characters or less and include spaces where necessary to center text or to wrap text to the next line. 60 Series Technical Reference Manual... -
Page 188: Saving Values During Power Loss
NDEPENDENT IMERS The 60 Series instruments have 8 independent timers that begin at zero (0) upon power-up and increment by 1/747 second intervals continuously thereafter. These timers can be used in macros to calculate elapsed times or in setpoints to provide a precise time interval between events. -
Page 189: Prompting Parameters
Finally, if the macro does not exist or is not menu enabled, it will not be evaluated and thus it will be processed as the actual characters entered (i.e. 90.xP). 60 Series Technical Reference Manual... -
Page 190: Weigh Mode Message (Mode 91)
5, while: 91.5P=”0.0P”% puts 0.0P starting at position 5. SSIGNING EXT TO THE UMERIC ISPLAY In order to write to the numeric portion of the display, the instance should be ’11’. For example, 91.11P=HELLO%o GSE Scale Systems... - Page 191 For example, 91.11P=0.0P%o displays a snapshot of the gross weight of the current scale, right justified, while 91.11P=“0.0P”% displays “ 0.0P” right justified. (The quote marks do not display or take any character positions!) 60 Series Technical Reference Manual...
-
Page 192: Get Displayed Data (Mode 92)
TATUS ARAMETER The status parameter is used in custom transmits to indicate the status (motion, stable, over/under load) of each scale. By default, the status characters transmitted are: • O = Overload/Underload • M = Motion GSE Scale Systems... -
Page 193: Displayed Weight/Count (Parameter 98)
The extended gross parameter is used to momentarily display the current gross weight at 10X the selected division size. This is useful when verifying calibration to determine how close the gross weight is to the next weight division. 60 Series Technical Reference Manual... - Page 194 7-40 Chapter 7 GSE Scale Systems...
-
Page 195: Chapter 8 Communications
OMMUNICATIONS This chapter covers all aspects of the communications setup for all 60 Series instruments. O V E R V I E W Communication Connections 8-2 COMM Port Setup Parameters 8-4 Receive Operations 8-4 Custom Transmit 8-19 Transmitting display Data 8-33 Modbus™... - Page 196 (receive only). directional with software handshake. Bi-directional with hardware handshake or Uni-directional with no handshake (transmit “both” handshake. only). Uni-directional with hardware handshake Uni-directional with no handshake (receive (transmit only). only). GSE Scale Systems...
-
Page 197: Comm3 Port Connections (560/660 Series)
When connecting the 4X20 VFD to J7, the COMM4 transmit terminal will not be available for connection to another device as J7 is considered to be COMM4. Any transmissions sent out COMM4 will be received by the 4X20 VFD. 60 Series Technical Reference Manual... -
Page 198: Communications Cables
When transmitting data to or receiving data from another device, make sure the indicator’s protocol matches that of the device. The default communication protocol for all 60 Series instruments is 9600 baud, 8 data bits, 1 stop bit and Xon/Xoff handshaking. Setup parameters governing communication protocol begin at P199 à... -
Page 199: Receive Buffer
In this case, any text preceding the invalid command will remain in the entry buffer awaiting a valid macro command. Single-byte values greater than 127 are also treated as macro commands (see Table 8-4). 60 Series Technical Reference Manual... - Page 200 [SETUP] 0x87 [SCALE SELECT] 0xE0 9-92 [CLR] 0xE3 9-102 [ENTER] 0xF5 9-102 [ID] 0xE9 9-104 [PRINT] 0xF0 9-123 [SELECT] 0xF3 9-126 [TARE] 0xF4 9-127 [UNITS] 0xF5 9-129 [CLR] + [SELECT] (macro abort) 0xF8 9-17 [ZERO] 0xFA 9-150 GSE Scale Systems...
- Page 201 0x8C -RESERVED- 0x8D -RESERVED- 0x8E -RESERVED- 0x8F -RESERVED- 0x90 -RESERVED- 0x91 -RESERVED- 0x92 -RESERVED- 0x93 -RESERVED- 0x94 -RESERVED- 0x95 -RESERVED- 0x96 -RESERVED- 0x97 -RESERVED- 0x98 -RESERVED- 0x99 -RESERVED- 0x9A -RESERVED- 0x9B -RESERVED- 0x9C -RESERVED- 0x9D 60 Series Technical Reference Manual...
- Page 202 -RESERVED- 0xB3 -RESERVED- 0xB4 -RESERVED- 0xB5 -RESERVED- 0xB6 -RESERVED- 0xB7 -RESERVED- 0xB8 -RESERVED- 0xB9 -RESERVED- 0xBA -RESERVED- 0xBB -RESERVED- %< 0xBC -RESERVED- 0xBD -RESERVED- %> 0xBE -RESERVED- 0xBF Set Pause Time 0xC0 9-47 Activate Setpoint 0xC1 9-48 GSE Scale Systems...
- Page 203 Call / Go To Macro 0xDE 9-89 If Database Error 0xDF 9-91 Scale Select 0xE0 9-92 Target Accuracy 0xE1 9-93 Perform Sample 0xE2 9-94 Clear Entry Buffer 0xE3 9-94 Display Control 0xE4 9-97 Enter / Sample 0xE5 9-102 60 Series Technical Reference Manual...
- Page 204 Units 0xF5 9-129 Write Value to EEPROM 0xF6 9-130 -RESERVED- 0xF7 Macro Abort 0xF8 9-17 Database Operation 0xF9 9-131 Zero 0xFA 9-150 Start Group 0xFB 9-152 0xFC 9-152 End Group 0xFD 9-152 -RESERVED- 0xFE -RESERVED- %DEL 0xFF GSE Scale Systems...
-
Page 205: Custom Transmit
If any custom transmits are set for ‘prompt’, pressing [PRINT] will first display the prompt “Which Tx# ?”. This gives you the opportunity to choose one of several transmits. For example, a vendor may supply components to ten different customers. The vendor can create ten 60 Series Technical Reference Manual... -
Page 206: Defining A New Custom Transmit
When a custom transmit is first defined, the transmit table is empty. Text, parameters and control codes must be entered in the proper sequence to achieve the desired output. For example, suppose we wish to print the following ticket: GSE Scale Systems... -
Page 207: Entering Fixed Text
5.00 lb Tare 45.00 lb This ticket begins with the text “GSE Scale Systems” on the first line, followed by one blank line, followed by three consecutive lines of parameter information. The custom transmit will be configured in the same sequence. The following sections on entering fixed text, control codes and parameters builds on this example. -
Page 208: Entering Control Codes
Note that four lines in our example use the <CR><LF> combination. Since this is a very common combination of control codes, a single entry unique to GSE indicators was created to make entering these characters more convenient. Keying in .256 [ENTER]... - Page 209 Communications 8-15 will enter the <CR><LF> combination. Any other ASCII character, including printable characters, may be entered using this method. Referencing the ASCII chart in Appendix B, ‘GSE’ could have been entered as: .071 [ENTER] .083 [ENTER] .069 [ENTER] GSE C...
- Page 210 Transmit current units (minimum width) of scale #1 Transmit units #1 (minimum width) of scale #1 Transmit units #2 (minimum width) of scale #1 Transmit units #3 (minimum width) of scale #1 Transmit units #4 (minimum width) of scale #1 GSE Scale Systems...
- Page 211 Select medium font size Select large font size 771 à 786 Position cursor at row 1 à 16 respectively LCD Custom Characters 800 à 866 Transmit custom LCD characters (Comm Port 5 only; refer to LCD character set) 60 Series Technical Reference Manual...
-
Page 212: Entering Parameter Data
To complete the example, enter a <CR><LF> after the gross weight parameter and repeat steps 1 – 7 substituting the tare and net parameter numbers at step 3. Remember the <CR><LF> control codes after each parameter. Also include the <FF> character at the end. GSE Scale Systems... -
Page 213: Parameter Format Codes
However the characters can make the custom transmit data appear rather cryptic. We know that represents a control code, but which one? Likewise, represents an unidentified parameter of unknown format. 60 Series Technical Reference Manual... - Page 214 [ 4 ] keys you can scroll backward and forward through the transmit table in the expanded mode, examining details of each parameter in sequence. Text characters and control codes are shown with their corresponding ASCII value. GSE Scale Systems...
-
Page 215: Editing A Custom Transmit Table
Use military time (0 - 23 hours). Use 12 hour clock with am/pm. Seconds: Include seconds with time. Do not include seconds with time. *You must add this value for this table to take effect. 60 Series Technical Reference Manual... - Page 216 Print plus sign if positive data. Don't print '+'. Justification: Left/Right Left Justify. Right Justify. Zero/Space Fill Pad with zeroes. Pad with spaces. Width 2 ... 15 Specifies the minimum width. Print with minimum width. Use print width specified by P240. GSE Scale Systems...
- Page 217 Print Name First 16384 Omit Name Print Name Last Justification: Left/Right Left Justify. Right Justify. Width 2 ... 127 Value specifies the minimum width to output. Output with minimum possible width. Use print width specified by P240. 60 Series Technical Reference Manual...
- Page 218 Send binary data. Output Type: Output 4 byte float value. Output 4 byte integer value. Output 2 byte integer value. Output 1 byte integer value. *You must add this value for this table to take effect. GSE Scale Systems...
-
Page 219: Transmitting Display Data
15th position. Another space is sent after the 5 top line characters, then the bottom line is sent, followed by a <CR> <LF>. This is quite valuable for modem connections to a 60 Series instrument in the field for troubleshooting purposes. -
Page 220: Supported Modbus Commands
While Modbus is specified for a given COMM port, then that port cannot be used to send data native 60 Series commands to the indicator. Also, any attempt to send data out a Modbus Comm port (using the will result in the "NoTxX Allow"... -
Page 221: Modbus "Input" Setpoints
At this time, the indicator can only act as a slave on the Modbus ( network. Operation of the 60 Series instrument as a master may be considered sometime in the future if there is deemed to be significant demand for this capability. - Page 222 DDRESS RANSLATION ABLE P6001: "Modbus" is used to specify which of the 60 Series parameters are mapped to which Modbus address. Since Modbus handles the transferring of data by referencing the data's address, it is necessary to specify which parameters are assigned to which Modbus address.
- Page 223 Then press [F2] or [F4] to toggle between the different viewing modes. When you reach the end of the Modbus translation table, the display will read " End ". If the Modbus Address Translation Table has not been programmed then P6001 will show "None". 60 Series Technical Reference Manual...
-
Page 224: Modbus Packet Formats
Modbus command, Setpoint Assignments the macro associated with that When assigning the 60 Series setpoints to specific devices, it is state change of the setpoint will be invoked. advantageous to group all of the setpoints that will be accessed via the Modbus interface together. - Page 225 (Error Checking) The individual setpoint states specified by the example response above are detailed below. A state of '1' indicates a bit value of 1 which corresponds to an activated setpoint. Refer to Table 8-18. 60 Series Technical Reference Manual...
- Page 226 03 Read Holding Registers This command contains addresses offset from address 40001. A programmable translation table in the 60 Series instruments is used to translate register addresses to parameter numbers and instances. Each row of the translation table contains three elements:...
-
Page 227: Checksum Protocol
To allow one these checksum commands to be issued directly from a macro, use the appropriate code listed above along with the “send control code” command, “%&.” For example, use 306%& to begin a LRCC-8 checksum. 60 Series Technical Reference Manual... - Page 228 CCITT G(x) = x Feedback = 8408h Initial checksum value = 0000 SDLC G(x) = x Feedback = 8408h Initial checksum value = FFFF CRC-16 G(x) = x Feedback = A001h Initial checksum value = 0000 CRC-12 GSE Scale Systems...
- Page 229 Initial checksum value = 0000 Sum-8 Additive checksum Initial checksum value = 0000 Refer to the Printer Interface Example section below for an example of how to interface an Epson printer with the 60 Series instrument using checksums. 60 Series Technical Reference Manual...
-
Page 230: Printer Interface Example
10001%s scale # single ASCII character 80.1P==2%%o%e 0001 compare 1%%”%e 0006 select port 80.1P=1%%o%e 0008 copy register Examples 6%%&%e 0013 send code Scale # Decimal Value/ASCII character 49 = 1 50 = 2 GSE Scale Systems... -
Page 231: Miscellaneous Protocol (Binary T O Text Conversion )
The indicator’s address is selected at parameter P251. Address selections are (4 through 250). This format code will transmit the address as a single ASCII character. Examples ADDRESS Decimal Value/ASCII character 4 = <EOT> 13 = <CR> 49 = 1 60 Series Technical Reference Manual... -
Page 232: Transmit Setpoint Status A S A Binary Code
.401%e Begin binary to text conversion .502%e Send setpoint 9-16 status .400%e End binary to text conversion Setup to send using a macro: 401,502,400%& The resulting transmission would be two bytes: “4”, “D” which in hexadecimal equals: 0x34, 0x44 GSE Scale Systems... -
Page 233: Printing Operations
Tx On Hold will appear for a few seconds. Press [CLR] to abort the transmission. If this situation occurs while the Continuous Print feature is being used, the continuous transmission is suspended, but it can be resumed by pressing the [PRINT] key. 60 Series Technical Reference Manual... -
Page 234: Input Interpreter
NTERPRETER The Input Interpreter, when enabled, operates on data received through the serial port on the 60 Series instrument. It enables the controller to be programmed to perform complex custom applications, as well as recognize specific commands that may be unique to other indicators. This option enables any GSE 60 Series instrument to emulate commands from weigh indicators manufactured by other companies. -
Page 235: Setup
P219, all received serial data is captured and used by the input interpreter. When P219 is disabled or no interpretations specified, all serial data is received and used by the controller command processor. 60 Series Technical Reference Manual... -
Page 236: Termination Character
The numeric display shows how the edit position is offset from the first character of the format line. A solid box character indicates the end of the format line, a lowercase P indicates a GSE Scale Systems... -
Page 237: Input Specification Macro Number
(n = 1 through 250). Press [CLR] to delete an interpreter specification. A prompt will read “Clear One?”. Press [ENTER] to verify clear. To clear all key in [999] [ENTER] at this prompt. 60 Series Technical Reference Manual... -
Page 238: Operation
The input specifications are checked in order from 1 to 250. If the received data could match more than one input specification, the first one checked that generates a match has priority. Once a match occurs, the comparison stops. The other input specifications are not checked. GSE Scale Systems... -
Page 239: Disabling The Input Interpreter
Then you can enter your own format code ahead of the “%.” If you have multiple parameters you have to insert your format codes ahead of the first overridden parameter’s format code. 60 Series Technical Reference Manual... -
Page 240: Input Interpreter Examples
VAR instance 1 682%sTare units%e P682.-- NAME1 Tare units 686%s12%e P686.-- STR size=12 9990%s1%e P9990 macro (instance 1) 10001%s%c%e P10001 Macro table 80.1P==lb%%o%e compare 80.1P=2P%%o%e copy register GOTlbtare!%%P%e pause %%N%e if not 80.1P==kg%%o%e compare 80.1P*=0.4535925%%o%e multiply 80.1P=2P%%o%e copy register GSE Scale Systems... - Page 241 P233.0 RxMac none Exit Setup Mode Below are two lines of sample data transmissions which would be converted to lb and stored as tare weights when received by a 60 Series instrument with the setup specified above: 50kg 50 kg The next two lines of sample data transmissions would be stored as tare weights without any units adjustments.
- Page 242 8-48 Chapter 8 Example 2: Process AIAG Barcodes Another potentially useful application for the GSE Input Interpreter is to process scanned in AIAG barcodes. For those not familiar with the AIAG standard, the following provides a brief primer on the subject.
- Page 243 <CR> ^M=13 233%s1%e P912.00 RxMac 1 221%s10%e P221.10 RxTrm <LF> 230%s2%e P230.01 (instance 2) 231%s2%e P231.02 RxTyp Line 232%s%c%e P232.04 RxFmt %e80.4%e%e INT (integer 4) .013%e <CR> ^M=13 233%s2%e P233.02 RxMac 2 221%s10%e P221.10 RxTrm <LF> 60 Series Technical Reference Manual...
- Page 244 “0”s since STR size is only 10! MPNOT STORED Nothing stored! “M” not defined, “P” not first. MP NOT STORED Nothing stored! “M” not defined, “P” not first. S112233 Stores “112233” into STR 3. S112-233 Stores “112-233” into STR 3. GSE Scale Systems...
- Page 245 “654” to not be stored). V“GSE INC.” Stores “"GSE" into STR 1 (strips off trailing "INC."” due to space). Example 3: Input Interpreter with Spaces in Input This example shows the method that will allow the input interpreter to include spaces in the scanned in data.
-
Page 246: R S -485 Networking (Option )
-485 N ETWORKING PTION The 60 Series instruments support address recognition. This allows a further degree of multi-drop communications implementation. This feature is supported by software. It is recommended that additional hardware, such as a 485 transceiver device, be added. -
Page 247: Operation
Series instruments. Refer to the settings for COM1. These settings are found starting at parameter MODBUS™ Communications on P200. page 1-25 for more information. All devices connected to the network must have matching protocol settings. 60 Series Technical Reference Manual... - Page 248 8-54 Chapter 8 GSE Scale Systems...
-
Page 249: Chapter 9 Macros
ACROS Chapter 9 covers macros setup, execution and a complete list of macro commands. Throughout this chapter, various references are made to the maximum allowable number of macros, databases, communication ports, etc. These references reflect the maximum value allowed for the 660 Series controllers. -
Page 250: Macro Setup
9-2 Chapter 9 ACRO ETUP One of the most powerful operating features of the 60 Series instruments is the macro programming language. A macro is a programmable routine used to automate a process. A simple macro might consist of a single command to zero a scale upon receiving a remote key input. - Page 251 . Refer to Creating a New Macro on page 9-4 and Editing Macros on page 9-5 for complete details on creating and editing macro tables. 60 Series Technical Reference Manual...
-
Page 252: Using The Macro % Character
1. From the setup mode, key in 9990 [SELECT] to access the macro instance selection parameter. 2. Key in the macro number to create and press [ENTER]. Make? NewMc 3. Press [ENTER] again at the prompt to confirm the entry. P9990 now shows the new macro number. GSE Scale Systems... -
Page 253: Editing Macros
(see Downloading Individual Macros on page 9-166). The right and left arrow keys on the front panel keypad can also be used to scroll the characters of the macro table forward and backward across 60 Series Technical Reference Manual... -
Page 254: Deleting Macros
Failure to clear the macro will result in the new macro being appended to the existing one rather than replacing it. GSE Scale Systems... - Page 255 When uploading a macro in a text file, add the following line prior to the first instruction of the macro to ensure the table is cleared. Change the macro number (6) as necessary. 19999.6%s%c%e Clear macro table #6 60 Series Technical Reference Manual...
-
Page 256: Invoking Macros
TARE TARE TARE UNITS UNITS UNITS UNITS SCALE SEL. SCALE SEL. SCALE SEL. SCALE SEL. PRINT PRINT PRINT PRINT F3 / ID ENTER ENTER ENTER CLEAR CLEAR CLEAR CLEAR Any Key Any Key Any Key Any Key GSE Scale Systems... -
Page 257: Macro Menu
‘3’ would have been passed from the entry START buffer to the macro resulting in the macro executing the instruction 31%A FILL rather than 1%A as intended. å Filling Routine Begins 60 Series Technical Reference Manual... -
Page 258: Setpoint Activation / Deactivation
THER ACROS Macros can invoke other macros with the %^ Call \ Go To Macro command or with a variation of the %J Jump to Tag macro command. GSE Scale Systems... -
Page 259: Macro Execution
Up to 200 macros can be stacked in this manner. If the macro stack limit Code81 is exceeded, a macro stack error results. The display will show Macro Stack and all macro execution stops. This situation can occur 60 Series Technical Reference Manual... -
Page 260: Entry Buffer
The following are examples of other functions that can use the entry buffer: > 1 [UNITS] select units #1 (kg) ô 5 [PRINT] send custom transmit #5 3 [SCALE SELECT] select scale #3 2.2 [SELECT] select tare parameter for scale #2 GSE Scale Systems... - Page 261 When this code is executed, the first line copies the time/date in text Figure: Sample Database format to the entry buffer, thus inserting it before the assignment on the second line. Effectively, this code will execute as follows: 60 Series Technical Reference Manual...
- Page 262 11.0.18496P%o save entry buffer (copy to clipboard) 12:00 am Time %]P4,1%C display time on 4X20 VFD (paste clipboard) 12:00 am send time out comm port (paste clipboard) Time %]%$ 12:00 am GSE Scale Systems...
-
Page 263: Using Macros In The Setup Mode
Also remember that setpoints and weight conversions end if are not monitored in the setup mode. Do not attempt to check the status of setpoints or weight values while in the setup mode. 60 Series Technical Reference Manual... -
Page 264: Macro Abort
Macro Abort Menu. Macro execution will not resume automatically upon exiting the setup mode. The Macro Suspd message will be displayed briefly upon exiting the setup mode to remind you that macro execution is inhibited. GSE Scale Systems... - Page 265 When disabling macros by this method, it is only possible to resume macro execution by exiting the setup mode or cycling power. 60 Series Technical Reference Manual...
-
Page 266: Macro Language
9-18 Chapter 9 ACRO ANGUAGE The 60 Series macro language is a full-featured, straightforward programming language tailored specifically for weight-based process control. This section categorizes the entire macro command set with reference to individual macro command syntax. ACRO OMMANDS Macro commands are listed in the following general categories. Some commands may apply to more than one category •... - Page 267 Send Control Code 9-34 If Character Received 9-37 Clear Receive Buffer 9-40 %’ Record Received Serial Data 9-35 If Transmit Buffer Empty 9-84 Enable RS-485 Transmitter 9-123 Send Custom Transmit 9-77 Request Display Data 9-86 60 Series Technical Reference Manual...
- Page 268 If Macro Interrupted 9-45 If Macro Error 9-104 If Database Error 9-90 If Sample Error 9-104 If Accuracy Achieved 9-93 If Parameter Preset 9-102 If Keypress/Remote Key Held 9-105 If Math Comparison 9-119 If Beeper Program Running 9-82 GSE Scale Systems...
- Page 269 Diagnostic commands are used primarily for debugging system operation. ACRO OMMAND ESCRIPTION Record A/D Data 9-40 Reset A/D 9-92 %’ Record Received Serial Data 9-35 Macro Debug Trace Buffer 9-50 If Macro Error Occurred 9-104 Request Display Data 9-86 19%y Database Auto-Test 9-148 60 Series Technical Reference Manual...
- Page 270 Get Current Language 9-73 Get Current Mode 9-74 Get String Length 9-108 Get Character Position in String 9-109 Get Value 9-112 Get Number of Characters in Transmit 9-85 Buffer Get Target Accuracy 9-94 Get Sample Error 9-104 GSE Scale Systems...
- Page 271 9-62 Get Numeric Entry 9-111 Get Entry From 4X20 VFD 9-67 Get Entry From 8X40 and 16X40 9-71 Pause 9-76 Sound Beeper 9-81 Wait For Keypress 9-85 Request Display Data 9-86 If Yes (Enter) 9-87 60 Series Technical Reference Manual...
- Page 272 9-103 ETPOINT OMMANDS Setpoint commands are used to change or indicate the status of individual setpoints. ACRO OMMAND ESCRIPTION Activate Setpoint 9-48 Deactivate Setpoint 9-58 If Setpoint Activated/Queued for 9-75 Activation If Setpoint Deactivated/Queued for 9-61 Deactivation GSE Scale Systems...
- Page 273 A buffered keypress will perform its function when the keypad is re-enabled. If received data is to be completely ignored while a port is disabled, clear the buffer with the %) command before re-enabling the port. 60 Series Technical Reference Manual...
- Page 274 -T%! -T1%! Disables comm port 1 for transmitting data. %” ELECT Syntax Select Comm Port < comm > %” Arguments Communication port (1 à 4). Comm See Also Send Text $& Send Control Code %U Transmit Buffer GSE Scale Systems...
- Page 275 Stores the net weight of the current scale in variable 21, 22, 23, 24, 25, 26, 27 or 28. 1,_%#%y Recall a row from database 1, 2, 3, 4, 5, 6, 7 or 8, as determined by the current scale number. 60 Series Technical Reference Manual...
- Page 276 Transmits up to 79 alphanumeric characters out the comm port last specified by the %” command. Sends the contents of the entry buffer out the selected port Station#1%$ Sends the text ‘Station#1’ out the selected port. 80.1P%o%$ Sends the contents of VAR#1 out the selected port. GSE Scale Systems...
- Page 277 ECORD ECEIVED ERIAL Syntax Display Available Data Collection Memory %’ Free Data Collection Memory F%’ Start Data Collection S%’ End Data Collection E < comm > %’ Resume Data Collection R < comm > %’ 60 Series Technical Reference Manual...
- Page 278 12016.465: 0x53 83 S [2] 12016.466: 0x54 84 T [2] E*%’ Ends (suspends) data collection on all comm ports. 12016.467: 0x25 37 % [2] 12016.469: 0x50 80 P [2] R*%’ Resumes data collection on all comm ports. GSE Scale Systems...
- Page 279 , to evaluate at selected port. Notes Omit comm to test for character on all ports. Receive buffers are tested in order of port 1, 2, 3, 4, followed by the front panel keypad (port 0). 60 Series Technical Reference Manual...
- Page 280 P1d%( Copies the decimal value of the next character in comm port 1 interpreter buffer to the entry buffer. Possible decimal values are 0 à 255. GSE Scale Systems...
- Page 281 1 or 4. The character clear entry 80.3P=""%o is removed from the keypad or comm port buffer. clear row 4 P4,1c%C set cursor P4,1%C blink cursor 21%& else -------------------------------- clear keypress end if 60 Series Technical Reference Manual...
- Page 282 Clears all characters from all comm ports. Also clears the input interpreter buffer. Clears the next character from comm port 1. 24%) Clears the next character from comm port 2 and 4. A13%) Clears all characters from comm ports 1 and 3. GSE Scale Systems...
- Page 283 The amount of data that can be stored is determined by the amount of available database RAM. A 4K database can store 333 rows while a 256K database can store over 20,000 rows of data. Since the A/D update rate is 60 Series Technical Reference Manual...
- Page 284 NV ram available). Repeatedly printing data after data collection is stopped will add another time stamp to the end of the list. It is only possible to redefine the selectable collection columns after allocating database memory using the S%* command. GSE Scale Systems...
- Page 285 S < scale# > %+ End Averaging E < scale# > %+ Resume Averaging R < scale# > %+ Arguments Scale number (1 à 8). scale# Notes Multiple scales may be specified. See Also Weight Averaging Parameters 60 Series Technical Reference Manual...
- Page 286 Text to be displayed as a prompt on the 2X5 character matrix of the 7-segment VFD. scale# Select from the following scale numbers: Current scale Scale 1 Scale 2 Scale 3 Scale 4 Scale 5 Scale 6 Scale 7 Scale 8 All scales GSE Scale Systems...
- Page 287 Motion delayed commands will be motion delayed for the intended scale whether or not it is the currently selected scale. 60 Series Technical Reference Manual...
- Page 288 – Re-Prompt Entry if Macro Interrupted. The following is a list of operator interface commands that can be interrupted that would otherwise suspend macro execution: GSE Scale Systems...
- Page 289 = 5 seconds by another %@ command. prompt and pause BatchDone!%P pause time = 1 second 10%@ Sets the pause time period to 10 seconds. Sets the pause time period to 1 second (default). 60 Series Technical Reference Manual...
- Page 290 P5111. If delay is specified with a value of zero (0), clear macro from stack then any delay specified at P5111 is cancelled and the macro assigned at MACRO #9 – MIXER STARTED P5112 will not be invoked. AUTO STARTP4,1c%C GSE Scale Systems...
- Page 291 Those with a specified delay time will activate when the delay expires. L1,3,5%A Activates and locks setpoints 1, 3 and 5. U1,3,5%A Unlock setpoints 1, 3 and 5. 60 Series Technical Reference Manual...
- Page 292 REAK ACRO Syntax Abort Current Macro Abort All Other Macros Abort All Macros Remove Macro from Stack [D] < macro# > %B If Macro on Stack ? < macro# > %B GSE Scale Systems...
- Page 293 10 Remove Macro From Stack [D] < macro# > %B Clears one or all occurrences of a specified macro from the macro stack. 10%B Removes all occurrences of macro 10 from the macro stack. 60 Series Technical Reference Manual...
- Page 294 Resumes tracing for all macros that were individually suspended. Example: Disabling Standard Text on the 4X20 TS10-50%B Suspends tracing individually for macros 10 through GSE SCALE SYSTEMSP1,2a%C 4X20 VFDP2,7%C TR10-20%B Resumes tracing for macros 10 through 20 that were Use %%C to send text;P3,1%C suspended individually.
- Page 295 You can maintain a blinking cursor after a %C command by transmitting an ASCII decimal value of 21 to the display (i.e. via %& Send Control Code command or by including ‘\021’ within the %C extended text command). 60 Series Technical Reference Manual...
- Page 296 F|f size ] %C Arguments Normal text (black on white) Inverse text (white on black) text Text to be displayed beginning at cursor position. Row (1 à 16) to position cursor. Column (1 à 40) to position cursor. column GSE Scale Systems...
- Page 297 Clears the entire display and displays large size standard text starting on line 3, column 7. 11.0.18496P%oP3,5C,f1%C Displays current time in small size inverse text starting on line 3, column 5, clearing to the end of line 3. 60 Series Technical Reference Manual...
- Page 298 8 à 15 horizontal lines 16 à 21 vertical lines Clears characters within the box (clear blank / white). Clears characters within the box (clear solid / black). Clears characters with alternating pixels (gray fill). GSE Scale Systems...
- Page 299 1P,2P,3P,4PW1PB%C Draws a box using the coordinates specified by the values stored in variables 1, 2, 3 and 4, black line (style specified by value of variable 5) 60 Series Technical Reference Manual...
- Page 300 A delay cannot be specified when locking/unlocking setpoints. A variable value can be substituted for setpoint# and/or delay using the syntax < variable# >P where variable# is a valid variable 1 à 999. GSE Scale Systems...
- Page 301 P5132 will not be invoked. L1%D Deactivate and lock setpoint 1 immediately without invoking the macro specified at P5132. U1%D Unlock setpoint 1 without changing its state. No macros are invoked as a direct result of this command. 60 Series Technical Reference Manual...
- Page 302 Immediately deactivates all setpoints. No delay time can be specified. Delays in progress are cancelled. Deactivates all setpoints immediately, overriding all delays. No macros are invoked as a direct result of this command. *L%D Deactivate and lock all setpoints immediately without invoking macros. GSE Scale Systems...
- Page 303 Determines if a setpoint input or output is deactivated. The example – else 11%^ go to macro 11 Using the %F Command to Toggle a Flag shows how to use the %F end if command to toggle a setpoint used as a prompting flag. 60 Series Technical Reference Manual...
- Page 304 Use of the asterisks ‘*’ argument will cause each entered character to end if appear as an asterisks on the display. This provides a means of adding security to a user entry such as a password. Note that the asterisks store entry (VAR#2) 80.2P=%]%o GSE Scale Systems...
- Page 305 4 ) to be invoked upon receiving a character from auto-update specified port. reset keypad normal 0,0%H else Receive mode for ports 1 à 4 corresponding to selections receive mode -------------------------------- for P205 of the setup mode: clear keypress end if 60 Series Technical Reference Manual...
- Page 306 Should this happen, press [CLR] + [SELECT] to invoke the macro abort menu. Select the “suspend macro” option to stop macro execution. Remember to GSE Scale Systems...
- Page 307 Use of this macro command to change the operation of a comm port that is in use by DSD does not take control away from DSD. If DSD is then moved to another port, this previous selection would then begin operation. 60 Series Technical Reference Manual...
- Page 308 MACRO #250 – POWER-UP skipped due to a branching command. if resume saved… 80.5P!=""%o jump to resume 80.5P%o%J Jumps backward to the last 0%T or %T tag. end if 10%J Jumps backward to the last 10%T tag. GSE Scale Systems...
- Page 309 Column (1 à 20) to position beginning entry position. PACKAGE INFORMATION column Part Number [? Entry window size (1 à 79) in terms of characters. window Tare Wt. Maximum number of characters (1 à 79) to be entered. max entry 60 Series Technical Reference Manual...
- Page 310 Creates a 6-character entry window beginning at row 4, column 10. A maximum of 6 characters can be entered. 1,17,4%K Creates a 4-character entry window beginning at row 1, column 17. A maximum of 79 characters can be entered. GSE Scale Systems...
- Page 311 4,1%H Customer Name: jump to break-tag ™General Productsø else -------------------------------- å if [CLR] pressed… 227P0C%( 0,0%H normal keypad operation normal alpha operation 4,1%H go to macro 20 20%^ else -------------------------------- clear keypress end if 60 Series Technical Reference Manual...
- Page 312 Once a font size is selected, that size remains in effect until changed. Addressing the LCD does not utilize the transmit port of comm 4 as with the 4X20 VFD. See Also %G Get Entry Get Numeric Entry If No Entry Save Entry Buffer Math Assignment GSE Scale Systems...
- Page 313 3, column 1. 6 digits can be entered. 5,1,20g%K Relocates the entry buffer from the LCD auto-update to row 5, column 1of the 4X20 VFD. The entry buffer size is increased to 20 characters. 60 Series Technical Reference Manual...
- Page 314 [STOP] key terminated the entry. If [STOP] was ?7%K pressed, then “Abort” is displayed. Otherwise the Abort%P entry is stored in VAR#1. =80.1P%o ANGUAGE ELECTION Syntax Get Current Language Set Language < language# > %L Arguments language# Select one of the following language numbers: GSE Scale Systems...
- Page 315 < language# > %L Overrides the power-up language selection at P411. 12%L Selects the Latin American character set. Selects the USA character set. 80.11P%o%L Selects the character set as determined by the value of VAR#11. 60 Series Technical Reference Manual...
- Page 316 Determines if the specified mode argument is the currently displayed else parameter number. if tare mode… select gross mode Determines if the current mode is gross. end if Determines if the current mode is net. 1.2%M Determines if the current mode is net of scale 2. GSE Scale Systems...
- Page 317 One Macro for Setpoint Activation and Deactivation shows how the %O start mixer command can be used to allow a single macro to handle both the end if activation and deactivation condition of a setpoint input. This helps 60 Series Technical Reference Manual...
- Page 318 Send Custom Transmit Pressing [PRINT] will uses the same custom transmits to redirect data out comm port 1. Note how the <FF> serves a dual purpose, advancing the printed form and positioning the cursor. GSE Scale Systems ================================ 425%s0%e 4x20 Disbl...
- Page 319 Motion delay criteria at P993 à P997 will be enforced and macro will be suspended for the duration of any motion delay. Sends custom transmit 1 out the comm port specified at P992. 2.3%Q Sends custom transmit 2 out comm 3. 60 Series Technical Reference Manual...
- Page 320 2 out the comm port specified at P992. 2.3D%Q Cancels the continuous transmission of custom transmit 2 out comm port 3. Cancels all continuous transmissions. Set Continuous Transmit Interval to Display Rate < transmit# > [ . comm ] [X] %Q GSE Scale Systems...
- Page 321 < seconds > I%Q Sets the number of seconds between each attempt to send all continuous transmits. This command overrides the transmit interval assigned by P980 at power-up. 2I%Q Sets the continuous transmit interval to 2 seconds. 60 Series Technical Reference Manual...
- Page 322 Renames “Tare” to display “Tara” when the tare mode is selected. 1,Fast%R Renames “Net” to display “Fast” when the net mode is Example: selected. Beeper Frequency Conversion Chart Note frequencies are represented in Hertz (Hz). GSE Scale Systems Gb 46...
- Page 323 A longer tone duration is possible using the program beeper sequence commands. Program Beeper Sequence { [C] [ F frequency ] [ D duration ] [ V volume ] %S 60 Series Technical Reference Manual...
- Page 324 If Beeper Sequence Running {?%S Determines if a programmed beeper sequence is still running. This command could be used in a loop to suspend macro operation until a beeper sequence is completed. OSITION Syntax Tag Position [ tag# ] %T GSE Scale Systems...
- Page 325 Refer to the example – Displaying a Parameter’s Value Prior to Entering a New Value of the %K command on page 9-68 for a practical application using the B%T command. 60 Series Technical Reference Manual...
- Page 326 The number of characters remaining in GSE Scale Systems the transmit buffer is stored in VAR#4 and the buffer is then cleared. ================================...
- Page 327 This command can be used to require an operator’s acknowledgement before continuing a process. It is useful as a debugging aid, providing a means of “stepping” through a macro routine. 60 Series Technical Reference Manual...
- Page 328 Echoes the 7-segment display in a format compatible with the remote <STX><NUL>kg Gross<ETX> display mode of the GSE M450 and M550 series indicators. Display data <STX><LF> 100.00<ETX> is transmitted out the comm port last selected by the % Select Comm Port command.
- Page 329 Saves the entry buffer contents in a temporary register. Clears the entry buffer and the temporary register. 80.1P%o%[ Copies the value of VAR#1 to the entry buffer and saves it in the temporary register. 100%[ Copies the value 100 to the temporary register. 60 Series Technical Reference Manual...
- Page 330 3,%]%y Inserts the contents of the temporary register as the database number in this “make row” command. 80.1P=”P3,10”%o Displays the contents of VAR#2 on the 4X20 VFD beginning at the position assigned in 80.1P%o%[ VAR#1. 80.2P%o%]%C GSE Scale Systems...
- Page 331 Macros can call other macros in this manner up to the remaining capacity of the macro stack allowing called macros to resume in reverse order. 60 Series Technical Reference Manual...
- Page 332 14 If not enough columns / row received during database upload 15 If too many columns / row received during database upload 16 If greater than maximum number of columns found (likely due to missing <CR> at end of each data row) GSE Scale Systems...
- Page 333 All scales (Reset A/D Converter only) Notes Omitting scale# for the Scale Select command selects the next enabled scale. Omitting scale# for the Reset A/D Converter command is the equivalent of specifying the current scale (0). See Also Current Scale 60 Series Technical Reference Manual...
- Page 334 Resets the A/D converter for the current scale. R1%` Resets the A/D converter for scale 1. R2%` Resets the A/D converter for scale 2. R*%` Resets the A/D converter for all scales. ARGET CCURACY Syntax If Target Accuracy Achieved GSE Scale Systems...
- Page 335 Sets the target accuracy requirement to 99.92%. Eliminates the accuracy requirement. Get Target Accuracy Copies the current accuracy requirement to the entry buffer where it can be saved to a parameter and/or used in math commands. 60 Series Technical Reference Manual...
- Page 336 The %c command can also be used to clear the value of the currently clear VAR#1 (set to 0) selected parameter (see example – Clearing the Currently Selected get entry Parameter). save entry in VAR#1 ISPLAY ONTROL Syntax 7-Segment VFD On/Off < mode > %d 7-Segment VFD and Backlight Brightness GSE Scale Systems...
- Page 337 Select medium font standard auto-update, inverse (white on black). Select medium font single-line auto-update, normal (black on white). Select medium font single-line auto-update, inverse (white on black). Select small font single-line auto-update, normal (black on white). 60 Series Technical Reference Manual...
- Page 338 See Also %C Display Text on 4X20 VFD and LCD %K Get Entry from 4X20 VFD and LCD Standard VFD On/Off < mode > %d GSE Scale Systems...
- Page 339 Turns the standard 7-segment VF display off using the dimness specified at P424. Turns the standard 7-segment VF display on using the brightness specified at P423. Sets the standard 7-segment VF display to auto shut-off. 60 Series Technical Reference Manual...
- Page 340 LCD Auto-Update Position (Standard, Large Font) 0P%d This will turn the backlight OFF < row > < H | h > %d Allows the row position of the standard LCD auto-update display window (large size font) to be specified. For example, GSE Scale Systems...
- Page 341 (small size font) to be specified. For example, 1,21K%d will position the auto-update window in the upper-right corner of the LCD. All display data will be displayed in small font size across 20 columns of the display. Enable LCD/LED Remote Display Auto-Update 60 Series Technical Reference Manual...
- Page 342 R%d command. Note that the LED remote display will only display the first 12 characters of a string unless the scroll mode is used. Ar%d Clears the LED remote display. BMix Completer%d Displays “Mix Complete” on the LED GSE Scale Systems...
- Page 343 Enables or disables the LCD remote display mirror imaging. When enabled, displayed characters can be viewed correctly through the use of a mirror. Enables the LCD remote display mirror imaging. Disables the LCD remote display mirror imaging. 60 Series Technical Reference Manual...
- Page 344 13,10%& transmit <CR><LF> Notes Parameters 34P and 35P are common to all scales. An transmit net weight 1.0.0P%o%$ instance of 0 should be specified, however any instance transmit <CR><LF> 13,10%& number will yield the same result. GSE Scale Systems...
- Page 345 Sample OK Sample too small Sample not accurate Sample size error (sample entry was 0 or > 9999) Sample cannot be counted (required sample > 9999) Sample aborted acc Sample aborted by pressing the [CLR] key 60 Series Technical Reference Manual...
- Page 346 See Also Enter / Sample Simulates the operation of the [ID] key. It is most commonly used to select a variable as the current mode of operation to simulate manual entries. Selects VAR#1 as the current operating mode. GSE Scale Systems...
- Page 347 Table 9-3: Keypress ASCII Values ASCII ALUE F4 / TARGET START STOP SETUP SELECT ZERO TARE UNITS SCALE SELECT PRINT ENTER CLEAR Any Key Omit 460/560 Series Remote Key 1 460/560 Series Remote Key 2 60 Series Technical Reference Manual...
- Page 348 Auto-filter selections cannot be selected with the %k MACRO #13 – FILL COMPLETE command, but can be restored with the *%k command. set default filter (2 sec) Fill Done!%S%P prompt Get Current Filter GSE Scale Systems...
- Page 349 R%k command was executed at the time of rate reversal, then the rate history would be cleared and the rate reversal would be instantly realized. %m M ODIFY TRING Syntax Parse String M < variable# > , < position > [ , length ] %m 60 Series Technical Reference Manual...
- Page 350 Set String Case < U | L > < variable# > %m Changes the case of all characters in a string to either upper or lower case (see Table 9-4). Get String Length N < variable# > %m GSE Scale Systems...
- Page 351 I <variable#> , <character> [, position] [, length] %m Determines if a string contains a specified character (see Table 9-6). If a starting position is specified, characters preceding the starting position are ignored. If a length is specified, trailing characters are ignored. 60 Series Technical Reference Manual...
- Page 352 String 1 contains “1234567890” “abcdefgh” “AbCdE12345” “abcdeabcde” (VAR#2 = 2) (VAR#3 = 3) I1,b%m False True True True I1,b,4%m False False False True I1,1,1,3%m True False False False I1,C,2P,3P%m False False True False I1,b,3P%m False False False True GSE Scale Systems...
- Page 353 Prompts for target entry and stores entry in VAR#11. =80.11P%o 11%i Simulates a manual entry into VAR#11. Here, VAR#11 is selected as the current mode, using the variable’s name as the prompt. Use this method when entering time/date values or scale-specific 60 Series Technical Reference Manual...
- Page 354 < parm > [ . instance ] [ . format ] < P | p | q > where parm is an operating parameter with a valid instance and format code, and represents parm as any parameter value, represents parm as a pointer to another variable, GSE Scale Systems...
- Page 355 A = B + C (Equation Assignment) A math assignment can assign the math operation of two parameters and/or constants to another parameter. Assignment will be in the direction of the single parameter. For example, 60 Series Technical Reference Manual...
- Page 356 Copy A to Entry Buffer Performing a math operation without an assignment or math operation will copy the contents of a parameter to the entry buffer. For example, 80.1P%o copies the contents of VAR#1 to the entry buffer. GSE Scale Systems...
- Page 357 VAR#3. Similarly, 11.0.18560P%o%$ copies a text format of the time/date parameter to the entry buffer, then transmits it out the comm port last selected by the %” command. 60 Series Technical Reference Manual...
- Page 358 The original string value up to the first non-numeric character is stored as an unsigned integer Unsigned Integer value. If the string begins with a non-numeric character, the unsigned integer is set to zero (0). All Parameters other rules for assigning values to unsigned integer parameters apply. GSE Scale Systems...
- Page 359 A = B 10.95 -2147483648 50-10 80.2P=-2147483649%o A = B 10.95 2147483647 50-10 80.3P=4294967295%o A = B 10.95 2147483647 4294967295 50-10 80.3P=4294967296%o A = B 10.95 2147483647 50-10 80.3P=4294967297%o A = B 10.95 2147483647 50-10 60 Series Technical Reference Manual...
- Page 360 A = A ^ (A ^ A) 80.3P|=80.2P/4%o A = A | (B / C) Entry Buffer = A+ B (Equation Assignment) 80.1P+80.2P%o Buffer = A + B 80.4P-80.3P%o Buffer = A - B 80.1P*8.1%o Buffer = A * B GSE Scale Systems...
- Page 361 Constant value. math Select one of the following math operators: Subtract Multiply Divide Modulus (divide and determine remainder) Exponent cond Select one of the following conditional operators: > Greater than 60 Series Technical Reference Manual...
- Page 362 Evaluates the contents of the entry buffer. ==6.1P+6.2P%o Determines if the entry buffer equals the sum of the net totals for scales 1 & 2. >20*80.4P%o Determines if the entry buffer is greater than 20 times VAR#4. GSE Scale Systems...
- Page 363 A = Concatenation of B & C “Pastes” two variables together. 80.1P=80.2P\80.3P%o Copies VAR#2 to VAR#1 and appends the value of VAR#3 to VAR#1. Copies the text “Scale #” to VAR#1, 80.1P="Scale #"\80.4P%o then appends the value of VAR#4. 60 Series Technical Reference Manual...
- Page 364 A = A \ B \ C Bin #5007 80.1P\=A%o A = A \ B Bin #5007A 80.4P=80.2P\80.3P%o A = B \ C 2044 80.4P\=80.1P%o A = A \ B 13A77 204413 80.1P\80.2P%o Entry Buffer Row: Row:14 Batch #\80.4P%o Entry Buffer Batch #23 GSE Scale Systems...
- Page 365 Normally, this interrupt is enabled as soon as data is put into the transmit buffer. However if networking is enabled at P250, the transmit interrupt s not enabled until the entire transmission is assembled. In the case of custom transmits or database transmissions, the transmit interrupt is not 60 Series Technical Reference Manual...
- Page 366 #1 < scale# > , < interval > %r end if Sets the rate at which weight values for the specified scale are A/D interval = 60/sec *,0%r recalculated. Reducing the A/D conversion rate can significantly increase GSE Scale Systems...
- Page 367 The example – Waiting for the Next A/D Interval W1%r wait for A/D interval demonstrates the potential problem of activating the fill output for next activate fill output ingredient. 60 Series Technical Reference Manual...
- Page 368 Selects the tare weight mode for scale #2. 80.1%s Selects VAR#1 as the current operating mode. 11%s Selects the time & date parameter as the current operating mode. Selects the next operating mode from the operating modes specified in the setup mode at P300-P309. GSE Scale Systems...
- Page 369 P440, then the net mode is automatically selected after performing a tare (with the exception of performing a tare from the tare mode). If NTEP is enabled, the net mode is not automatically selected if the gross weight is zero. 60 Series Technical Reference Manual...
- Page 370 New name to appear in place of the default unit name on the 2X5 character matrix of the 7-segment VFD. Notes If a unit is renamed, the new name remains in effect until changed again with the %u command or until power is GSE Scale Systems...
- Page 371 Renaming the units in this manner allows you to use a unit’s name to display a prompt without suspending macro execution. The example – Renaming Units for Prompting shows how to use the %u command along 60 Series Technical Reference Manual...
- Page 372 Stores the value of VAR#5 to non-volatile EEPROM. Use the %v command should be used instead of the “Auto” save selection at P684 whenever practical. This reduces the number of writes to EEPROM which has a suggested life expectancy of 100,000 writes. GSE Scale Systems...
- Page 373 Recalls the row with a name of SAE20W. 1,1,2.1;.9%y Recalls the first row with a tare weight of 0.90. 1,1,80.1;0%y Sets the ‘record not found’ flag because a box# of ‘0’ does not exist in database #1. 60 Series Technical Reference Manual...
- Page 374 2,2,80.2;B%y Searches database #2 for the value ‘B’ in the column for VAR#2, then updates all other values in that row. If the search value does not exist, then a new row is created. GSE Scale Systems...
- Page 375 Omitting comm assumes comm port #1. Omitting lines/page assumes 60 lines per page. Omitting header generates a default header. Parameter names will be used for column headings. 60 Series Technical Reference Manual...
- Page 376 0.95 lb 6 SAE30 0.90 lb 7 SAE40 0.90 lb 8 SAE50 0.90 lb 9 SAE20W 0.92 lb IRST Syntax Recall First Row 5 [ , dbase# ] %y Recall Last Row 5 [ , dbase# ] ;L%y GSE Scale Systems...
- Page 377 The recall last row command can be used together with the get row number command to determine the number of rows in a database. For example, 5,1;L%y 6,1;G%y =80.5P%o copies the total number of rows in database #1 to VAR#5. 60 Series Technical Reference Manual...
- Page 378 Moves the database pointer backward to the previous row. It is the reverse function of the recall next row command. 6;P%y Recalls the previous row in the last database selected. 6,1;P%y Recalls the previous row in database #1. 6,2;P%y Recalls the previous row in database #2. GSE Scale Systems...
- Page 379 Omitting dbase# assumes database last accessed. If no else databases have been accessed, the first defined database print row 14,1%y is assumed. next match 7,1%y jump to tag #1 end if See Also Recall Row in Database 60 Series Technical Reference Manual...
- Page 380 Deletes the current row in the last database selected. 8,2%y Deletes the current row in database #2. LEAR OLUMN Syntax Clear Column 9 [ , dbase# ] ; < column > %y Arguments Database number (1 à 250). dbase# GSE Scale Systems...
- Page 381 Deletes all rows in the specified database. This command can be used to ensure a database is empty before making new rows or uploading database information. 10%y Deletes all rows in the last database selected. 60 Series Technical Reference Manual...
- Page 382 < parm > . [ instance ] where parm is a operating parameter with a valid instance. Notes Omitting dbase# assumes database last accessed. If no databases have been accessed, the first defined database is assumed. GSE Scale Systems...
- Page 383 Omitting comm assumes port 1. Omitting format or time/date assumes a selection of 0. See Also Print Database Upload New Database Download Database Transmits all database rows out a designated communication port in a comma-delimited ASCII text format. 60 Series Technical Reference Manual...
- Page 384 3,”Fly Ash”,500,50,958662883 remember that you must use the 4,”Recycle”,1000,250,958662899 same comm port if you later 5,”River Rock”,2000,250,958662908 restore (upload) the database file. Including the format argument 13,1;2.1%y produces the following download out comm port 2 (including upload information) GSE Scale Systems...
- Page 385 Transmits the currently selected row of a database in fixed-width, spreadsheet format similar to the Print Database command. This allows you to print selective rows rather than the entire database (see example – Printing Database Rows). 60 Series Technical Reference Manual...
- Page 386 15,3%y Transmits errors for database #3 out comm port 1. 15,4;3%y Transmits errors for database #4 out comm port 3. 15%y Transmits errors for the last database selected out comm port 1. GSE Scale Systems...
- Page 387 If the upload count exceeds 99999 then the displayed count becomes ####x where #### are the four most significant digits and ‘x’ represents a place holder for the least significant digits. The following is an example of an upload file format: 60 Series Technical Reference Manual...
- Page 388 ASCII text format with fields matching the database structure and column data types. Each data row must be terminated with a carriage return <CR>. The last line of the upload file must be the text ENDofDB GSE Scale Systems...
- Page 389 Rows with exact matches are not sorted further unless a sub-sort column is specified. 18%y Sorts the first column of the last selected database in ascending order. 18,7%y Sorts the first column of database #7 in 60 Series Technical Reference Manual...
- Page 390 If the total does not match, an error is displayed and logged in the macro debug. This command is a diagnostic tool that should only be enabled to trouble shoot database corruption problems. Enabling the auto-test will slow the execution of database macro commands. 19;1%y Enables auto-test. 19;0%y Disables auto-test. GSE Scale Systems...
- Page 391 Get Highest ID# in Database Searches the database and finds the highest ID# that exists. The result can range between zero and the maximum ID# (999999). The result is placed in the entry buffer. 60 Series Technical Reference Manual...
- Page 392 Changes the calibrated zero reference by an absolute offset. 10.5A%z Increases the original calibrated zero reference by 10.5 units. -21A%z Decreases the original calibrated zero reference by 21 units. 0A%z Restores the original calibrated zero reference. GSE Scale Systems...
- Page 393 Relative Zero value 15.1P%oR%z This process could be repeated as desired to incorporate a dynamic zero- tracking routine for the conveyor belt. TART ROUP Syntax Start Group 60 Series Technical Reference Manual...
- Page 394 Start Group command earlier in the macro. OOLEAN OGIC The 60 Series instruments are capable of making simple and complex decisions based on the results of conditional macro commands. Each conditional statement is evaluated and determined to be either TRUE or FALSE.
- Page 395 SP#1 Activ%P prompt end if < Next macro command(s) > This next example shows the execution of the same “IF” statement for a FALSE condition. Note that the commands after the “IF” statement are not 60 Series Technical Reference Manual...
- Page 396 A TRUE condition requires that all conditions in the sequence are TRUE. 1-3%A activate setpoints #1,#2,#3 if setpoint #1 is on, and if setpoint #2 is on, and if setpoint #3 is on… sound beeper SPTs Activ%P prompt else Error%P end if GSE Scale Systems...
- Page 397 FALSE. 1-3%D deactivate setpoints #1,#2,#3 if setpoint #1 is on if setpoint #2 is on if setpoint #3 is on… sound beeper SPTs Activ%P prompt else Error%P end if < Next macro command(s) > 60 Series Technical Reference Manual...
- Page 398 Now, both setpoints #3 and #4 must be active for this single condition to be TRUE. 1-2%A activate setpoints #1 & #2 if setpoint #1 is on, and if setpoint #2 is on… if setpoint #3 is on, and if setpoint #4 is on… GSE Scale Systems...
- Page 399 #1 80.1P=5%o VAR#5 (Product ID) = 5 if setpoint #1 is on… StartFill%P prompt 80.1P!=0%o if PRODUCT ID not 0… Product ID %$ send text 80.1P%o%$ send PRODUCT ID end if 60 Series Technical Reference Manual...
- Page 400 The following example will operate as intended. 1%” select comm1 activate setpoint #1 80.1P=5%o VAR#5 (Product ID) = 5 if setpoint #1 is on… StartFill%P prompt 80.1P!=0%o if PRODUCT ID not 0… Product ID %$ send text GSE Scale Systems...
- Page 401 Again, note how the braces control macro execution. The first “IF” statement is FALSE. Since a Start Group brace immediately follows, all subsequent commands are skipped until the corresponding End Group brace is encountered. OINTERS 60 Series Technical Reference Manual...
- Page 402 WEIGH-IN weight. Note how VAR#11 is formatted to transmit it’s value as the truck ID# and then reformatted to send it’s addressed value as the WEIGH-IN weight. 80.101P=1%o TRUCK ID# = 1 1%" select comm1 GSE Scale Systems...
- Page 403 This feature could be used as an emergency stop routine to immediately respond to an input and deactivate all setpoint control outputs. 60 Series Technical Reference Manual...
- Page 404 Table 9-10 lists all macro commands allowed to be interrupted immediately without completing their functions. Table 9-10: Interruptible Macro Commands OMMAND ESCRIPTION Get Entry Get Entry From 4X20 VFD Get Numeric Entry Pause If Yes (Enter) Wait For Keypress Wait For A/D Interval Tare Zero Print GSE Scale Systems...
- Page 405 EVIEWING ACRO EBUG ABLE The macro debug table is located at P50001 of the setup mode. To access the debug parameter from the weigh mode, key in 50001 [SELECT] 23640 [ID] [ENTER] 60 Series Technical Reference Manual...
- Page 406 The debug buffer will print from the currently selected location to the end of the table. To print the entire debug table, advance to the last record in the table before pressing [PRINT]. The following example demonstrates how to print the entire debug table. 50001 [SELECT] GSE Scale Systems...
- Page 407 This mode reports only the starting “block” information without the macro code as shown below. 50001 [SELECT] P5003% Mc 10 4%D%E [UNITS] P5003% Enter Comm# ** Relative Trace Print Time: 638.864 s Macro 2 Range of Offsets: 10001 to 10004; Start Time: 22.493 s; Stack: 60 Series Technical Reference Manual...
-
Page 408: Downloading Individual Macros
2. Select any parameter within the macro table (P10001 à P19999). Enter Comm# 3. Press [PRINT]. The display will show 4. Press [1], [2], [3] or [4] to transmit the macro table out the desired comm port. The following example shows how to download macro #10: GSE Scale Systems... - Page 409 33 location of macro #2. This can help you quickly locate a specific location to edit within a large macro table. To access the location in this example, key in 10033.2 [SELECT] P1003# 134%D 60 Series Technical Reference Manual...
- Page 411 Throughout this chapter, various references are made to the maximum allowable number of setpoints. These references reflect the maximum value allowed for the 60 Series instruments. The maximum values for other models may be limited as noted in the specifications section of Appendix A.
-
Page 412: Setpoints
P5099. Once a setpoint instance is specified, the other parameters through P5150 are associated with that setpoint. Each setpoint uses the same parameters for setup. The only difference is the instance of the setpoint selected at P5099. GSE Scale Systems... -
Page 413: Setpoint Operation
To select and activate Setpoint #18, key in 18 [•] [1] [ENTER]. • To change all the setpoints to the activated state, key in 999 [•] [1] [ENTER]. • To de-activate all setpoints, key in 999 [•] [0] [ENTER]. - or - 60 Series Technical Reference Manual... -
Page 414: Setpoint Status Serial Transmission
This conditional branching depends on whether or not the input is active or deactivated. An input setpoint can only be activated or deactivated by an external signal. The %A and %D macro commands will not change the state of an input. GSE Scale Systems... -
Page 415: Entry
E. Select the parameter that Setpoint #1 is based upon: 5150 [SELECT] 30 [ENTER] P5150.X Par 30 QTY F. Setpoint Setup is now complete. Proceed to setup macro 1 which is set to invoke on activation of setpoint#1. 60 Series Technical Reference Manual... -
Page 416: Setpoint Setup Examples
If the file is in ASCII form, the setup procedure is the quickest of all approaches. GSE recommends that you back up all custom setups on a PC and diskette. This will make service calls and resale of the same program much easier. - Page 417 CmPar Net 9990%s1%e macro 1. 10000%s%c%e %%t%e tare. 1%%A%e activate setpoint 1. %z%c%e%e Exit Setup Mode Example #4: Grading (Up to 32 Ranges) 100%s23640%i%e Access Setup Modes SET SMALLEST GRADE RANGE 5099%s1%e P5099.1 Setpt 1 60 Series Technical Reference Manual...
- Page 418 CmPar Gross *(set VAR#5 to 20 and VAR#6 to 30) %z%c%e%e Exit Setup Mode Example #5: Power Up Setpoint 100%s23640%i%e Access Setup Modes 5099%s250%e SPT #250 5100%s1%e SPTyp Outpt 5101%s%c SPNam POWER-UP 5110%s4%e Activ Alwys 5111%s0.00%e AcDly 0.00 GSE Scale Systems...
- Page 419 DeDly 15.00 5132%s15%e DeMac 15 9990%s2%e%e MACRO #2 9991%s%c ACTIVATE TIMER 19999.2%s%c%e 4%%A%e activate timer 9990%s15%e%e MACRO #15 9991%s%c TIMER ACTIVATED MACRO 19999.1%s%c%e MIX TIMER EXPIREDP5,4,f2%%C%e display text %%P%%P%%P%e 3 second pause Pa%%C%e clear display 60 Series Technical Reference Manual...
-
Page 420: Setpoint Options
Refer to Chapter 9 for more details. ETPOINT PTIONS The options boards mount in a variety of locations on the different models. Refer to the Options Installation Chapter 13 for step by step installation instructions. GSE Scale Systems... -
Page 421: Database
ATABASE This chapter describes the use of the database option. O V E R V I E W Installation 11-2 Database Applications 11-3 Database Setup 11-4 Database Menu 11-6 Print Format 11-19 Time/Date Handling 11-21 Database Information 11-22 Memory Consumption 11-22 Database Examples 11-24 11-1... -
Page 422: Installation
One row in a database, or a collection of fields in a column of a database. In the preceding telephone directory example, one of the four records shown includes Name 2, Telephone Number 2 and Address 2 fields. GSE Scale Systems... -
Page 423: Database Applications
Normally this type of database only makes rows. The data is never recalled. A report can be sent to a computer or printer at the end of the shift, day, or week, and then the data is deleted. 60 Series Technical Reference Manual... -
Page 424: Part Number Look-Up Database
(560/660 Series). Each database has its own setup mode. Table 11-1 lists the database setup parameters. GSE Scale Systems... - Page 425 To delete all the current selections for the columns of a database: 1. Specify the database instance at parameter P699 (for example, 1), and press [ENTER] or [ZERO] + [TARE] keys on the Model 460. 2. Press the [CLR] key or [TARE] on the Model 460. 60 Series Technical Reference Manual...
-
Page 426: Database Menu
The operations listed on the basic Database Menu are considered simple operations. More complex operations can be performed, but only by keying in the proper numeric operation code and pressing the [SELECT] key (see the chart on the following page). GSE Scale Systems... - Page 427 Database 11-7 WEIGH MODE SELECT Recall Update Make Print Dbase First Next Next Delete Match Clear Clear Column Dbase Dbase Column Down- Print Print Upload load errors Auto Sort Upload Test Dbase Update 60 Series Technical Reference Manual...
-
Page 428: Recall Row (Function 1)
The located row is changed so all other columns in it match the current values of their corresponding parameter. If a matching row is not found, a new row is created using the values from the corresponding parameters. GSE Scale Systems... -
Page 429: Make Row (Function 3)
To access the advanced commands: 1. Press [ID] to access the basic Database Menu. 2. Key in the command number. 60 Series Technical Reference Manual... -
Page 430: First Row (Function 5)
The “Next row” command causes the very next row of the currently selected database to be recalled. This can be used after the “First row” command to cause every stored row to be sequentially recalled and processed in some manner. GSE Scale Systems... -
Page 431: Next Match (Function 7)
[ENTER] is the value used to locate the targeted row. Before you can delete a row from memory, the warning message “SURE? ???” is displayed. Press [ENTER] to delete the row from memory, or any other key to abort the deletion. 60 Series Technical Reference Manual... -
Page 432: Clear Column (Function 9)
Therefore, you must first select the required database before a series of operations can be performed on a specific database. If only one database is used, you never need to use the “Set Dbase” command. GSE Scale Systems... -
Page 433: Set Column (Function 12)
However, some applications require searches of other columns during certain operations, for example, attempting to determine a part number when only the description is known or searching through a transaction database (whose first column is part number) for a specific account number. 60 Series Technical Reference Manual... -
Page 434: Download Database (Function 13)
This will cause the database to be preceded by the necessary commands so the database upload command can be accessed when the file is sent back to the controller later on. The pre-pended information is: 16,d;p%y GSE Scale Systems... -
Page 435: Print Row (Function 14)
GSE recommends that you periodically back up onto a computer any controller databases you consider valuable to safeguard the data. While the controller provides reasonably secure storage, all computer applications recommend that data be backed up to prevent loss. -
Page 436: Print Errors (Function 15)
‘x’ represents a place holder for the least significant digits. You can press [CLR] to abort the process. Normally, you should not do this until the transmission has first been halted at the source. In the GSE Scale Systems... -
Page 437: Upload Update (Function 17)
You must have a computer communication program, such as Procomm or GSE 550 Simulation Software Terminal Window on your IBM-compatible PC to send files to the controller and receive files from the controller. B. An entry followed by the [ENTER] key: You do not have to enter any data before you press the [ENTER] key for this selection. -
Page 438: Sort Database (Function 18)
To do this, you can set an Alarm to invoke a macro that, in turn, will perform the database sort. The controller must be powered up for sorting to occur. B. An entry followed by the [ENTER] key: GSE Scale Systems... -
Page 439: Auto Test (Function 19)
The headings consist of the names of the parameters. If custom names have been defined (using parameters P600 - P637 and P682) then these defined names will be used, otherwise, the default names of parameters will be used. 60 Series Technical Reference Manual... -
Page 440: Down-Load Format
ASCII file. This format is suitable for uploading the information into a computer database or spreadsheet or for transmitting to another GSE 60 Series instrument using the “Up-load” selection. either the “Upld. new” or “Upld. Updat”... -
Page 441: Upload Data Format
However, the alpha parameters are not required to be enclosed in double quotation marks (“ ”). Before you can load any database into a 60 Series database, the setup must be established to match that of the file. If the uploaded file has more columns than the database setup in the controller, the additional columns being uploaded will be ignored. -
Page 442: Database Information Parameters
You can approximate the amount of memory required for your particular database application. Simply access P60033 before and after you define a database to determine the number of bytes that the database definition GSE Scale Systems... -
Page 443: Database Errors
Therefore, it is the responsibility of the person programming the macro to check for possible errors at the appropriate times to ensure that the operation will occur as expected. Refer to the If Database Error on page 9- 60 Series Technical Reference Manual... -
Page 444: Notes Regarding The Storing And Recalling Of Weight Data
However, if it is later printed or recalled, the controller assumes that the stored data is in the current default units of measure. For this reason, GSE recommends that you do not change the default units of measure if records are stored in a database that contains weight data. - Page 445 2%%J%e 0108 jump to tag Macro “2” Setup (“call” subroutine) 9990%s2%e P9990.XX Macro #2 P19999.2%s%c%e P19999.2 macro table 3%%g%e 0001 if sample error 4%%g%e 0003 if sample error 5%%g%e 0005 if sample error %%B%e 0007 break 60 Series Technical Reference Manual...
- Page 446 11-26 Chapter 11 %%E%e 0008 end if 6%%g%e 0009 if sample error ABORTSMPLE%%S%e 0011 sound beeper %%P%e 0022 pause %%B%e 0023 break %%E%e 0024 end if%z Exit Setup Mode GSE Scale Systems...
- Page 447 ROGRAMMABLE IGITAL The Programmable I/O feature allows 660 Series controllers to process various digital inputs and provide programmable digital outputs. The processor has a separate TPU (Time Processing Unit) ‘coprocessor’ built into it. This allows the controllers to process digital inputs and outputs in background, without supervision by the main CPU.
- Page 448 Continuous flow of material applications which are attempting to control or monitor the amount of material/length (i.e. lb/ft) or material/time (lb/sec) on a conveyor can make use of this feature in determining the speed of the conveyor. GSE Scale Systems...
- Page 449 For digital signals, this is generally measured from one edge (rising or falling) to the next similar edge. ms (milli-second) A time measurement of one thousandth (0.001) of a second. 1000 ms equals one second. 60 Series Technical Reference Manual...
- Page 450 To view any of these parameters, enter the parameter number, a period, then the channel number, followed by [SELECT]. If a name has been programmed for that parameter then the name is displayed in the dot matrix portion of the display. GSE Scale Systems...
- Page 451 Specifies that a channel will be used as an input of digital Measurement pulse data. This can be used to determine the frequency Method ‘A’ (pulses per second) of an incoming signal. Method ‘A’ counts pulses over a programmable time period. 60 Series Technical Reference Manual...
- Page 452 P853: “YNam”: Provides for naming a 2nd I/O parameter for the current channel. This parameter applies to FqOut, FqInB, DlyOt, & QdDc3. P854: “ZNam”: Provides for naming a 3rd I/O parameter for the current channel. This parameter applies to QdDc3 only. GSE Scale Systems...
- Page 453 Selecting this choice when a channel is not being used will keep the loading of the TPU of the 660 to a minimum thus insuring optimal performance. The default selection of choice 2, ‘Setpt’ has been made to ensure backward compatibility with older 650 indicators. 60 Series Technical Reference Manual...
- Page 454 The general restrictions listed in Table 12-2 can be attributed to the following facts: 1. The period and high time of the generated signal can only be a multiple of the period of the selected clock. GSE Scale Systems...
- Page 455 Upon power-up a macro should be programmed to copy 20 to the frequency value: (We will assume that channel 6 is being used for the FqOut function.) 60 Series Technical Reference Manual...
- Page 456 P857: “CSrc”: Specifies which clock will be used to time the period used to measure the frequency for this channel. The effects of the two alternatives are shown in Table 12-3. GSE Scale Systems...
- Page 457 For most applications the setting for this parameter will not have any noticeable effect. However, if pulses are occurring sporadically and infrequently it may become desirable to detect a specific edge, either rising or falling. 60 Series Technical Reference Manual...
- Page 458 The measurement uncertainty can be calculated using the following formula: Uncertainty = MeasurementPeriod For example with a measurement period of 250 ms measuring a fixed frequency of 10 Hz counting falling edges the error is calculated as follows: GSE Scale Systems...
- Page 459 If you were to average several sampled frequencies together, you would get the actual frequency. See also Figure 12-2. Table 12-4: Calculating Error for Measuring Fixed Frequency of 10 Hz Measurement Pulses Calculated Window Counted Frequency = Hz = Hz 60 Series Technical Reference Manual...
- Page 460 (if the conveyor slows way down or stops due to a mechanical problem). GSE Scale Systems...
- Page 461 P50 will be the measured frequency multiplied by the scaling factor specified by P863 and the number of decimal places used when displaying and transmitting P50 is specified by P864. Otherwise ‘FqInB’s P50 will show three decimal places. 60 Series Technical Reference Manual...
- Page 462 Figure 12-3: Time Period of any Frequency The accuracy of this frequency measurement technique is dependent upon the frequency of the clock source (used for measuring time), the number of pulses measured, and the frequency being measured. GSE Scale Systems...
- Page 463 Also, PhsTm accumulates the total number of pulses which have occurred and this count may be accessed at any time. The setup parameters that pertain to the ‘PhsTm’ selection are: 60 Series Technical Reference Manual...
- Page 464 These parameters may be viewed on the display by keying in the parameter number followed by a decimal point and then the channel number followed by the [SELECT] key (i.e. 51.3 [SELECT] causes P51 for channel 3 to be displayed). While a parameter is displayed, GSE Scale Systems...
- Page 465 To display the tank level as a percentage of its capacity, the maximum displayed value would be 100 (%) and that would correspond to a phase time measurement of 0.1 ms. Therefore, the scale factor value should be 100/0.1 = of 1,000,000. One Period 60 Series Technical Reference Manual...
- Page 466 PDIO output to go to its de-active state whenever the associated setpoint is off and work normally when the setpoint is on. This feature is essential for the SCR control option. The GSE Scale Systems...
- Page 467 The effects of the two alternatives are shown in Table 12-8. Table 12-8: Selected Clock Specifications Clock A Clock B Clock Frequency 65,536 Hz 524,288 15.26 µs 1.91 µs Clock Period Resolution of 0.015 ms 0.0019 ms Pulse Width and 60 Series Technical Reference Manual...
- Page 468 Thus varying the delay time between 0 and 8.33 ms provides an adjustable vibratory control. Appropriate isolation techniques must be implemented to prevent damage to the 660 electronics and to reduce the risk of electrical shock. GSE Scale Systems...
- Page 469 When the 660 is first powered up and when setup mode changes are saved the value of this parameter is zeroed out. 60 Series Technical Reference Manual...
- Page 470 The change in encoder value may then be divided by the change in time to determine directional speed. See Figure 12-6 for clarification of an encoder’s signals. Figure 12-6: Encoder Signals GSE Scale Systems...
- Page 471 Three sequential channels are required on the Programmable I/O connector in order to use the three wire quadrature decode feature. Therefore this function cannot be assigned to channel 7 or 8 as the first channel. 60 Series Technical Reference Manual...
- Page 472 If P863 is not ‘None’, then the value provided by P52 will be the relative encoder count value multiplied by the scaling factor specified by P863. The number of decimal places used when displaying and transmitting P52 is specified by P864. Otherwise ‘QdDc3’s P52 will show zero decimal places. GSE Scale Systems...
- Page 473 Travel in either direction will result in a positive result. If directional speed is of concern, then a macro may be used to capture the encoder value and a timer. Then some time later, the 60 Series Technical Reference Manual...
- Page 474 10 pulses received. • P864: “# DP”: Used to specify the number of decimal places when reporting the received pulses. There are three (3) weigh mode parameters used to report frequency debounce data: • P50.X Frequency GSE Scale Systems...
- Page 475 Pulses to be noise. ____|--|______|--|______ 10% Duty Cycle using increased expected Max Frequency: System ++++++++++++++++++ Samples (+) now see two “Highs” in a row and now sees a pulse. 60 Series Technical Reference Manual...
- Page 477 PTIONS This chapter contains installation information on the numerous hardware options that maximize the capabilities and functions of 60 series indicators and controllers. O V E R V I E W 660 Series Bus Options 13-3 60 Series Bus Modules (SBM) 13-5...
- Page 478 13-2 Chapter 13 PTIONS The following options are available for 60 Series Instruments: 660 Series Bus Options 24660B-001M0 DATABASE MODULE, 1M 24660B-002M0 DATABASE MODULE, 2M 24660B-256K0 DATABASE MODULE, 256K 60 Series Serial Bus Modules [SBM] 24660B-110A0 DC 4-POSITION OUTPUT 24660B-111A0...
- Page 479 5. Install the three 5.5mm hex nuts on the standoffs to secure the board. option board cables while the indicator is powered. Doing so may result in circuit board damage. Figure 13-1: Database Module Installation 60 Series Technical Reference Manual...
- Page 480 The database modules are meant to be installed on top of the bus option stack. Future options will be developed that make use of the J9 connector on the main board. Up to three options can be stacked upon that connector. GSE Scale Systems...
- Page 481 128 total I/O points on the 660 Series controllers and 8 on the 460 Series indicators. The SBM daisy chain can include I/O options other than the 60 Series I/O modules including the 4, 8, and 16 position I/O boards previously used on the 650 Series controllers.
- Page 482 The second module installs in the same manner with the ribbon cable connected between the first option board’s ‘NEXT’ connector and the second module’s ‘MAIN’ connector. Figure 13-4 shows a multi-scale module installed in the left position and a serial I/O module in the right position. GSE Scale Systems...
- Page 483 Figure 13-4: Serial I/O and Multi-Scale Module Installation 460 SBM OUNTING NTERNAL There is one set of mounting studs available for the 60 Series SBM on the The 60 Series contains 460 Series main board. It is recommended to install high voltage modules components which could be...
- Page 484 OUNTING LATE The 60 Series contains This kit is meant to provide an easy method to mount two of the 60 Series components which could be SBMs in a variety of applications. The two-option mounting plate simplifies damaged by Electrostatic...
- Page 485 7. Tighten the nuts onto the screw threads to hold the mounting plate in place. 8. Install the 4 aluminum standoffs included in each 60 Series Option Kit onto the studs on the mounting plate. See Figure 13-6. 9. Tighten the standoffs hand tight. Do not over torque! 10.
- Page 486 663. See Figure 13-8 for the location and orientation of the option boards and plates. (the wiring duct is removed for clarity). Note that the boards are oriented so the interconnecting ribbon cables avoid the I/O wiring. GSE Scale Systems...
- Page 487 Options 13-11 Figure 13-8: Option Board/Plate Location and Orientation 60 Series Technical Reference Manual...
- Page 488 To mount SBMs to the 655 option mounting bracket: 1. Install the 4 aluminum standoffs included in each 60 Series Option Kit onto the studs on the mounting plate. See Figure 13-9 (the top of bracket is removed for clarity).
- Page 489 Options 13-13 Figure 13-9: 665 Serial I/O Module Installation 60 Series Technical Reference Manual...
- Page 490 To install multi-scale or analog modules on the backside of the bracket: 1. Insert the M3 Phillips screw through the hole in the option mounting bracket so the screw threads are pointing toward the 660 series main The 60 Series contains board. components which could be damaged by Electrostatic 2.
- Page 491 4. Screw down the mounting plate to the enclosure. Installing SBMs in the External Enclosure: 1. Install the 4 aluminum standoffs included in each 60 Series Option Kit onto the studs on the mounting plate. See Figure 13-10. 2. Tighten the standoffs hand tight and then do a ¼ turn. Do not over torque.
- Page 492 HIGH VAC 2-POSITION IN / 2-POSITION OUT The serial I/O modules mount in a variety of locations on the different models. Refer to the 60 Series Bus Modules section on page 13-5 for step by step installation instructions. The modules are meant to be connected in a serial daisy-chain configuration.
- Page 493 Each board has LED’s to indicate the status of the input or output. The LED’s are located above each I/O position. 60 S I/O M ERIES ODULES 24660B-110A0 Setpoint Option, DC, 4 Output, 60 Series Position Signal Description DC Input Power Switched DC Output DC Input Power...
- Page 494 13-18 Chapter 13 24660B-112A0 Setpoint Option 24660B-121A0 Setpoint Option DC, 2 Input 2 Output, 60 Series Low Voltage AC,4 Input, 60 Series Position Signal Description Position Signal Description DC Input Power AC Input Signal Switched DC Output AC Return DC Input Power...
- Page 495 Options 13-19 24660B-130A0 Setpoint Option 24660B-122A0 Setpoint Option, 20-240VAC 4 Output, 60 Series Low Voltage AC, 2 Input 2 Output, 60 Series Position Signal Description Position Signal Description Switched AC Switched AC Switched AC Switched AC AC Input Signal AC Return...
- Page 496 13-20 Chapter 13 24660B-131A0 Setpoint Option, 24660B-132A0 Setpoint Option Hi Voltage AC, 4 Input, 60 Series Hi Voltage AC, 2 Input 2 Output, 60 Series Position Signal Description Position Signal Description AC Input Signal AC Line AC Return Switched AC Load...
- Page 497 The 663 can accommodate both the new variety of SBMs and the 16 position I/O option board. Mounting a 16 position I/O option on the sub- panel of the 663 will prevent the installation of any 60 series modules on the sub-panel. Note however that 60 series modules can be installed on the 660 series main board and RF cover (as described in the previous sections) in addition to the 16 position I/O option board on the sub-panel.
- Page 498 The mounting hole pattern for the board is shown in Figure 13-12. All five hole locations should be used to properly support the board. Make sure there is at least 5/16” of space between the back of the board and the sub- panel. Figure 13-11: 16 Position I/O Board GSE Scale Systems...
- Page 499 ERIES NTERFACE ONNECTIONS The 16-Position I/O Board interfaces to the 60 Series main board with a 20-position, jacketed or non-jacketed ribbon cable, available in various lengths. The cable transmits the control signals for the relay modules. 60 Series Technical Reference Manual...
- Page 500 Up to seven (7) can be installed within the 663 and 665 enclosures. One (1) can be installed in either the 460 and 465 enclosures. Review the methods of installation in the 60 Series Bus Modules (SBM) section on page 13-5.
- Page 501 Make sure E1 is configured for the correct scale number selection. If this is the first multi-scale option card installed (control of scale 2), then the jumper should be in the 2 position. (GSE default is scale 2). • Connect the load cell wiring to J3 of the multi-scale option board.
- Page 502 The serial number (P61122) is intended to allow you to associate these setup parameters to a specific multi-scale option module. Contact GSE with the part number and serial number of the multi-scale board if the calibration sheet is misplaced.
- Page 503 661, and 662 enclosures. Up to eight (8) can be installed within the 663 and 665 enclosures. One (1) module can be installed inside of the 460 and 465 enclosures. Review the methods of installation in the 60 Series Bus Modules (SBM) section on page 13-5.
- Page 504 The serial number (P61207) is intended to allow you to associate these setup parameters to a specific analog output option board. Contact GSE with the part number and serial number of the analog output option board if the calibration sheet is misplaced.
- Page 505 Longer interface cables can be purchased if necessary. EMOTE ISPLAY ODULE NSTALLATION This section provides procedures for installing the remote display module. Review the methods of installation in the 60 Series Bus Modules (SBM) section on page 13-5. 60 Series Technical Reference Manual...
- Page 506 The remote display module will connect via cable (not provided with the kit) to the Model 1500 2” LCD remote display. The Model 1500 remote display will interface to any 60 Series instrument using the remote display module. Interface cables of various lengths and an optional mounting plate are available for custom installations.
- Page 507 It is recommended that a 4-twisted pair conductor Teflon cable (GSE P\N 22-10-4660), or a 4-twisted pair PVC cable (GSE P\N 22-10-4665) is used. Also make sure the interface cable is installed through the Model 1500 strain relief before installing the connector.
-
Page 508: Module Installation
5. Gently press the option board into the socket. 6. Apply the included sticker to comm port 1. The label will go over the silk screen on the board. Use the portion of the label titled “60 Series.” GSE Scale Systems... -
Page 509: Network Parameter Setup
Setup parameters beginning at P250 à P251 (or P205 and P209 à P211 for Modbus) are used to configure the network. Refer to page 3-34 for complete configuration details. 60 Series Technical Reference Manual... - Page 510 The units inside the two end-points of the network loop will utilize both A(-) pin connections and both B(+) pin connections. The units at the end-points of the network will utilize only one A(-) pin connection and one B (+) pin connection. GSE Scale Systems...
- Page 511 3 on the RS- 485 option board. The isolated ground (ISO GND) should be connected in parallel from unit to unit. A shielded twisted two pair cable is recommended throughout the network. Figure 13-18: Half Duplex Wiring Schematic 60 Series Technical Reference Manual...
- Page 512 13-36 Chapter 13 Figure 13-19: Full Duplex Wiring Schematic GSE Scale Systems...
-
Page 513: M A Current Loop Module
6. Apply the included sticker to comm port 1. The label will go over the silk screen on the board. Use the portion of the label titled “60 Series.” Align TA over GND on comm port 1 and adhere the label over the silkscreen. -
Page 514: Ma Current Loop Connections
The active mode transmit current loop provides a driving voltage of 12 VDC. This will allow 20 mA current flow with up to a 600 ohm load. Passive mode will work with an external driving voltage of up to 50 VDC. GSE Scale Systems... - Page 515 5. Pull down on the SCR module to remove. Do NOT remove the circuit board from its enclosure! There are no user serviceable parts inside. Improper orientation of circuit board could result in damage to module, controller and device. Figure 12-17 60 Series Technical Reference Manual...
-
Page 516: Scr Module
ARAMETER ETUP SCR parameters beginning at P850 à P862 are used to setup the output module. Configuring an SCR module requires two consecutive PDIO channels for the first module. The first channel must be configured as a GSE Scale Systems... -
Page 517: Testing The Scr Module
9. Press [F3] to deactivate setpoint 132 (stops device). 10. Press [SELECT] to return to the standard weigh mode. If P862 is not configured for gating, the SCR output activates immediately upon assigning a value to the delay output pulse (P51.2). 60 Series Technical Reference Manual... -
Page 518: Series Time /Date Module
1. Refer to 3-37 for detailed instructions on setting the time and date. PLASH UARDS The GSE Splash Guard is a vinyl bag that encases the controller. The Splash Guard is available for the 660, 661, and 662 controllers. The GSE part number for this product is 44-70-37438. -
Page 519: Alpha Keypad
Depending on the application requirements, the Alpha Keypad can be installed initially, or it can be added later. The GSE part number for the Alpha Keypad Option kit is 24663B-201B0. -
Page 520: Function Keys
“2nd” key to be used during selection of a non-alphabetic character • “ ¡ ” (LEFT arrow), or backspace key • “ ¢ ” (RIGHT arrow), or space key • “ ” (ENTER key), which transmits “%e” (the enter command) to the Process Controller GSE Scale Systems... - Page 521 Large flat tip screwdriver to loosen and tighten ¼-20 slotted pan head screws in the exterior door fastening clamps. 7 mm (9/32 in) nut driver for unfastening and fastening nuts. Small flat tip screwdriver for installing wires into the controller main board connector. 60 Series Technical Reference Manual...
-
Page 522: Installation
Spacer 44-70-311972 Tie Wrap 31-80-0175 The figure below shows the parts included in the Alpha Keypad Kit. The 60 Series instruments contains components which could be damaged by Electrostatic Discharge (ESD) if serviced improperly. Use proper ESD precautions (wear a wrist strap connected to ground, use grounded work stations, etc.) - Page 523 Figure 13-26: Location of The Cover Plate on The 663 9. Remove the cover plate from the retaining studs. 10. Remove the gasket. 11. Remove the Alpha Keypad and other kit parts from the plastic bags. 12. Install the spacer over the retaining studs. 60 Series Technical Reference Manual...
- Page 524 13. Remove the backing from the adhesive side of the rectangular insulator. 14. Center the insulator directly above the spacer, pressing it firmly into place. Figure 13-28: Positioning The Insulator 15. Install the Alpha Keypad onto the retaining studs, over the insulator and spacer. GSE Scale Systems...
- Page 525 17. Remove the backing from the adhesive side of the cable clamp. Figure 13-30: Installing The Cable on The 663 18. Set the dual in-line package (DIP) switch. The factory protocol settings are 9,600 baud, no parity, and no data bits. 60 Series Technical Reference Manual...
- Page 526 Figure 13-31: DIP Switch and Four-Pin Cable Connector on the Alpha Keypad 19. Install the three-color cable to the Alpha Keypad.: To do this, insert the connector end of the cable over the four-pin cable connector (J1) on the top right corner of the Alpha Keypad. GSE Scale Systems...
-
Page 527: Using The Alpha Keypad
OWER To enter alphabetic information in a lower case format, hold in the lower case shift key in the bottom left corner of the Alpha Keypad along with the desired alphabetic keys. View the display. 60 Series Technical Reference Manual... -
Page 528: Troubleshooting
COM4 Port protocol is improperly set and does not match the alpha keypad protocol. • Check the display for error messages. • The [↵] key responds improperly (functions as a “clear” operation instead of an “enter”. The firmware must be updated to a later version. GSE Scale Systems... -
Page 529: Alphanumeric
Parts on the Alpha Keypad Option that can be replaced without replacing the entire Alpha Keypad Option kit include: • Cable (GSE part number 299290-3720012X) • Cable clamp (GSE part number 31-80-0140) • Rubber keypad (GSE part number 44-35-30808) LPHANUMERIC ERIAL... -
Page 530: Cables
13-54 Chapter 13 Table 13-6: GSE Defined Keypress Functions Keypress Decimal Combinations Output Output Function Invoke Macro #1 Invoke Macro #2 Invoke Macro #3 Invoke Macro #4 Invoke Macro #5 Invoke Macro #6 Invoke Macro #7 Invoke Macro #8 Invoke Macro #9... - Page 531 Cable length is 2 feet. Table 13-7: Scanner Adapter Cable Connections 660 Series Connection on J6 Color PIN# RS-232 TTL – not used on 60 Series WHITE RX1, RX2, RX3 or RX4 GREEN BLACK DE-9S Attach ring terminal to instrument ground.
- Page 532 RS232 C ABLE FOR TANDARD RINTER (GSE Part Number 299240-45080) This cable is used to interface a 660 Series controller to a standard line printer. The cable length is 8 feet. Table 13-8: Computer Style Printer Cable Connection 660 Series Connection on...
- Page 533 Notebook type computer. The cable length is 8 feet. Table 13-10: PC/AT or Notebook Type Computer Cable Connections 660 Series Connection Color PIN# on J6 RS-232 TX1, TX2, TX3 or TX4 2(RXD) BLACK 5(GND) RX1, RX2, RX3 or RX4 WHITE 3 (TXD) 60 Series Technical Reference Manual...
-
Page 534: 4X20 Vf Display
The 4X20 VF display is addressed via comm4. However, DO NOT connect the display to the RS-232 comm4 terminals of the J6 communications connector! The display is not RS-232 compatible. The J7 4X20 VFD connector converts the comm4 transmission to GSE Scale Systems... -
Page 535: Display Commands
ONTROL Move cursor left one space Move cursor right one space Move cursor down one row Move cursor to top left corner (home) Move cursor to beginning of line Clear entire display Scroll mode OFF 60 Series Technical Reference Manual... - Page 536 (012) URSOR Moves the cursor to the left end of the top line. (013) URSOR TO EGINNING OF Moves the cursor to the left end of the same line. (14) LEAR ISPLAY Clears all displayed characters. GSE Scale Systems...
- Page 537 ‘ESC’ is the escape character (027), ‘C’ is the custom character command (67), ‘character’ is the ASCII character to be redefined, and D1 through D5 determine which of the custom character’s pixels will be on or off as shown below. 60 Series Technical Reference Manual...
- Page 538 The cursor can be moved to any position on the display using the following escape sequence: ESC + H + < position > where ‘ESC’ is the escape character (027), ‘H’ is the positioning command (072) and ‘position’ is a value between 0 and 79 as shown below. ISPLAY OSITION GSE Scale Systems...
- Page 539 (084) and ‘speed’ is a value between 1 and 255 in 30 millisecond intervals. For example, 4%” 27,84,25%& will send the command setting the cursor blink rate to .75 seconds (25 X 30ms = 750ms). The default blink rate is 20 (600ms). 60 Series Technical Reference Manual...
-
Page 540: R E Flash Software
If the boot block is somehow been corrupted, the BDM flash would be needed to restore it. The BDM connector is used on the main board (J4 on the 660 and J7 on the 460). This is a faster method of loading firmware. GSE Scale Systems... -
Page 541: Information Parameters
NFORMATION ARAMETERS The Information parameters, P60000 à P65010, are used for informational and diagnostic purposes. These parameters include information pertaining to memory usage, serial numbers, audit trails, calibration, self diagnostics, debug and data transfer. O V E R V I E W Accessing Information Parameters 14-2 Memory Parameters 14-2 Processing Speed Parameters 14-7... -
Page 542: Memory Parameters
If the access code was used, follow the setup mode exit routine as P6003@ described on page 3-9. EMORY ARAMETERS This manual references three types of memory: • FLASH ROM Re-Programmable Read-Only Memory • EEPROM (E ) Electrically Erasable Read-Only Memory • Random Access Memory GSE Scale Systems... - Page 543 The FLASH ROM, U24 on the main board, contains the system firmware. It is programmed at the factory, and firmware can be upgraded in the field using the GSE ReFlash software (see page 13-65). The EEPROM, U27 & U28 on the main board, are used to permanently store all setup parameter data.
- Page 544 Unlimited read/write cycles – will not degrade the life of the memory With the exception of critical configuration parameters such as A/D calibration, audit trails, serial numbers, etc., the entire setup configuration is stored in the database when Setup RAM is allocated at P60040. Since GSE Scale Systems...
- Page 545 To avoid this problem, acquire the A/D calibration values of the unit you are transferring Setup RAM to before installing the database option (see Printing A/D Calibration Values on page 4-11). Then enter these values separately after the database option is installed. 60 Series Technical Reference Manual...
- Page 546 P64000 & P64001 will add P60050 to the beginning of the download transmission if Pile RAM is allocated. • P65001& P65002 will disable the Pile RAM as part of the default process. • P65010 will disable the Pile RAM as part of the database reset process. GSE Scale Systems...
-
Page 547: Processing Speed Parameters
= day; yyyy = year; x = daily revision). P6020) B SN: Displays the serial number of the main PC board. 12345 P6020@ I SN: Displays the serial number of the indicator. 12345 60 Series Technical Reference Manual... -
Page 548: Audit Trail Parameters
Displays the amount of weight (in default units per P150) automatically tracked off Wght by zero tracking since the [ZERO] key was last pressed. P6110$ CZero Displays the coarse zero value calculated during the last load cell calibration. GSE Scale Systems... - Page 549 -CAL- Displays the calibration factor for weights within the range of the 3 linearization FACT3 calibration point. P6113^ -CAL- Displays the weight (in default units per P150) used for the 4 linearization WGHT4 calibration point. 60 Series Technical Reference Manual...
- Page 550 Sets the 20mA reference for the 0-20mA analog output. Enter the value that results xxxxx in exactly 20.00mA output (range is 50000à 65535). P6120& Displays the analog output’s serial number. This number should be entered at the 12345 time of installation for future reference. GSE Scale Systems...
-
Page 551: Diagnostic Parameters
ErCnt P6410@ 1stEr Displays the parameter number and line number of the first error encountered while None! uploading a setup file. P6410# Debug Enables/disables the transmission of each error encountered while uploading a setup file. 60 Series Technical Reference Manual... - Page 552 The E in used in the 60 Series instruments is rated for 100,000 writes. Care should be taken when programming to avoid a situation where values are constantly written to E , such as continuously copying the gross weight to a variable that is configured for auto-save.
- Page 553 The total line count for the upload file is registered at P64100. This P6400) Enter parameter counts the number of carriage return characters received since Comm# the access code was last entered. Any errors encountered during the upload process are registered in several ways: 60 Series Technical Reference Manual...
-
Page 554: Utility Parameters
P6502) Initiates the ReFlash process. Pressing [ENTER] will blank the indicator until the Prog? ReFlash process is complete. Requires GSE ReFlash software! † Selections for Scale Enable/Save/Disable (P109), 4X20 Display Enable/Disable (P425), Keypad Type (P450), Serial Numbers & Audit Trails are not affected by defaulting. - Page 555 The message =Dflt will direct you to the Default All parameter. åa P6500! Done! Example: Database Reset 65010 ó P6501) dbase Reset å P6501) Erase DBRAM P6200@ Sure? å P6200@ Done! 60 Series Technical Reference Manual...
- Page 556 14-16 Chapter 14 GSE Scale Systems...
-
Page 557: Appendix A Specifications
Appendix A Specifications This appendix provides specifications for all 60 Series instruments. ERFORMANCE 460 S 560 S 660 S ERIES ERIES ERIES 100,000 displayed (±500,000 100,000 displayed (±500,000 100,000 displayed (±500,000 Resolution internal) internal) internal) A/D Conversion Rate 60 Hz... -
Page 558: Lectrical
NTEP COC# 01-013, class III & IIIL @ 10,000d, Canadian W&M IIIL @ 10,000d, Canadian W&M IIIL @ 10,000d, Canadian W&M pending, class IIIHD @ 25,000 pending, class IIIHD @ 25,000 pending, class IIIHD @ 25,000 Electrical UL, CSA UL, CSA GSE Scale Systems... -
Page 559: Input /Output
M663 Big Box Available in stainless steel, NEMA 4X design (IP66) Stainless steel NEMA 4X design (IP66) M665 Available in stainless steel panel mount design All keypads are elastomeric silicone rubber, self-sealing, chemical resistant Switch Panel 60 Series Technical Reference Manual... -
Page 560: Display
Six fully active 7-segment digits • 0.75” (19 mm) high digits • 2-line-by-5-character alphanumeric dot matrix • Vacuum Fluorescent 4 X 20 C HARACTER • 4-line-by-20-character alphanumeric dot matrix • 0.20” (5 mm) high characters • Vacuum Fluorescent GSE Scale Systems... - Page 561 Graphic box and line drawing 16 X 40 C HARACTER RAPHIC • 16-line-by-40-character alphanumeric (small font size) • 8-line-by-20-character alphanumeric (medium font size) • 4-line-by-10-character alphanumeric (large font size) • Graphic box and line drawing 60 Series Technical Reference Manual...
-
Page 562: Keypad
[UNITS] + [TARE] Instance Previous [PRINT] + [TARE] Instance Abort Abort Abort Abort [ZERO] + [TARE] + macro macro macro macro [SELECT] menu menu menu menu * = No entry in progress † = Entry in progress GSE Scale Systems... - Page 563 Pressing the [SELECT] key while accessing setup: If an entry is started with either the [SELECT] or [ZERO / CLEAR] key then a lower case ‘s’ will be entered when [SELECT] is pressed. Otherwise the [SELECT] key will serve no purpose. 60 Series Technical Reference Manual...
-
Page 564: Keypad
[.] [#] followed by [SELECT], where # is the instance of interest. Or simply enter [.] [.] [SELECT] to increment the instance. This change will apply to all 60 series products. For example, while viewing Var #2’s name, entering [.] [.] SELECT] will change the mode to be that of viewing Var 3’s name. -
Page 565: Series Keypad
The [F3 / ID] key can invoke macros 3 à 100 if configured at P806. 660 S ERIES EYPAD All 660 Series controllers use the same 28-key front panel keypad. F1 F2 ZERO SELECT UNITS TARE SCALE PRINT START STOP SELECT ENTER SETUP 60 Series Technical Reference Manual... -
Page 566: Configurations
665 Stainless 200665-04120 90-250 VAC LCD 240X128 Backlit 28-Key OMIL Euro 665 Panel Mount 200665-19000 90-250 VAC VF 6 Digit & 4X20 28-Key US None 665 Panel Mount 200665-19020 90-250 VAC LCD 240X128 Backlit 28-Key US None GSE Scale Systems... -
Page 567: Dimensional Drawings
Specifications A-11 IMENSIONAL RAWINGS Figure 14-1: 460 Outline Drawing Figure 14-2: 460 Panel Mount Outline Drawing 60 Series Technical Reference Manual... - Page 568 A-12 Appendix A Figure 14-3: 465, 560, 562 Outline Drawing Figure 14-4: 465, 560, 562 Panel Mount Outline Drawing GSE Scale Systems...
- Page 569 Specifications A-13 Figure 14-5: 660, 661, 662 Outline Drawing Figure 14-6: 660, 661, 662 Panel Mount Outline Drawing 60 Series Technical Reference Manual...
- Page 570 A-14 Appendix A Figure 14-7: 663 Outline Drawing Figure 14-8: 663 Big Box Outline Drawing GSE Scale Systems...
- Page 571 Specifications A-15 Figure 14-9: 665 Outline Drawing Figure 14-10: 665 Panel Mount Outline Drawing 60 Series Technical Reference Manual...
-
Page 572: Clock
Vcc. The continuous counter is used with a GSE software algorithm to derive time of day, week, month, and year. The device contains a 32.768 kHz crystal that keeps track of time to within +/-2 min/mo. -
Page 573: Appendix B Ascii Chart
Appendix B ASCII CHART American Standard Code for Information Interchange (ASCII) Chart xHex Binary 0000 0000 0000 0001 0000 0010 0000 0011 0000 0100 0000 0101 0000 0110 0000 0111 0000 1000 Symbol Name (Esc. Seq.) NUL (\0) Start Of Header Start Of Text End Of Text End Of Transmission... - Page 574 B-2 Appendix B GSE Scale Systems...
-
Page 575: Appendix C Vfd / Lcd Character Sets
Appendix C VFD / LCD Character Sets 4X20 VF Display International/Katakana Character Sets Dec Hex x00 001 x01 002 x02 003 x03 004 x04 005 x05 006 x06 007 x07 008 x08 009 x09 010 x0A 011 x0B Int Kat Cursor Cursor Cursor... - Page 576 838 x346 839 x347 840 x348 841 x349 842 x34A 843 x34B 844 x34C 845 x34D 846 x34E 847 x34F 848 x350 849 x351 850 x352 851 x353 852 x354 853 x355 854 x356 855 x357 856 x358 857 x359 858 x35A 859 x35B 860 x35C 861 x35D 862 x35E 863 x35F 864 x360 865 x361 866 x362 GSE Scale Systems...
-
Page 577: Appendix D Parameter Setup
Appendix D Parameter Setup Table D-1: 460 Series Parameter Setup (460 S (460 S ARAMETER ELECTION ESCRIPTION ERIES ARAMETER ELECTION ESCRIPTION ERIES Enter 0 à 100 P115.01 0.1s Scale Configuration P115.02 0.2s P108.01 Scale 1 Scale Instance Selection Enter 1 à 2 P115.03 0.3s P108.02... - Page 578 Zero Offset Enter Operating Parameter P175. † None! Output Signal Range Enter Operating Parameter P133.00 Pounds Third Units P176.00 † Maximum Default Output in Setup Mode Enter 0 à 9 P133.01 Kilograms Enter 0 à 2 P176.01 Minimum GSE Scale Systems...
- Page 579 Parameter Setup D-3 (460 S (460 S ARAMETER ELECTION ESCRIPTION ERIES ARAMETER ELECTION ESCRIPTION ERIES P176.02 Same P205.03 Modbus P205.04 Macro 4 P177.00 † 0-10 VDC Analog Output Type â â Enter 0 à 2 P177.01 0-20 mA P205.250 Macro 250 P177.02 4-20 mA P206.00...
- Page 580 Language Character Set P450.9990 5 Key (460) Keypad Selection Enter 0 à 12 P411.01 France P450.9991 22 Key (465) Enter 9990, 9991 P411.02 German P451.00 None Keypad Repeat Rate P411.03 Enter 0 à 7 P451.01 Very Slow P411.04 Denmark GSE Scale Systems...
- Page 581 Parameter Setup D-5 (460 S (460 S ARAMETER ELECTION ESCRIPTION ERIES ARAMETER ELECTION ESCRIPTION ERIES P451.02 Slow Enter Name P451.03 Medium Slow P629. † None! Rename Future Net 2 P451.04 Medium Enter Name P451.05 Medium Fast P630. † None! Rename Quantity P451.06 †...
- Page 582 Macro 2 P806.03 Menu & Dbase P818.03 Macro 3 P806.04 Macro 4 â â P806.05 Macro 5 P818.15 Macro 15 P806.06 Macro 6 P819.00 † Enabled [9] Key Function â â Enter 0 à 15 P819.01 Macro 1 GSE Scale Systems...
- Page 583 Parameter Setup D-7 (460 S (460 S ARAMETER ELECTION ESCRIPTION ERIES ARAMETER ELECTION ESCRIPTION ERIES P819.02 Macro 2 P5110.14 Mot’n Current P819.03 Macro 3 P5110.15 Stabl Current â â P5111. † seconds Activation Delay (seconds) P819.15 Macro 15 Enter 0.01 à 5,767,168 P820.00 †...
- Page 584 Analog Zero Ref. (4-20mA) P61104.4 100% P61206. xxxxx Analog Gain (4-20mA) P61104.5 125% P61207. xxxxx Analog Option Serial Number P61104.6 150% P62000. Display Test P61104.7 175% Press [ENTER] P61104.8 P62001. Optional RAM Test P61104.9 -25% Press [ENTER] GSE Scale Systems...
- Page 585 Parameter Setup D-9 (460 S ARAMETER ELECTION ESCRIPTION ERIES P62002. EEPROM (E ) Test Press [ENTER] P62010.1 † Analog Output Test for P62011 à P62013 P62010.2 Enter 1 à 2 P62011. 0-10V Analog Output Test Press [ENTER] P62012. 0-20mA Analog Output Test Press [ENTER] P62013.
- Page 586 † 0.000 Low Range Capacity P114.05 0.5d Enter 0.001 à 1,000,000 P114.06 0.6d P114.07 0.7d P114.08 0.8d P114.09 0.9d P114.10 † 1.0d â â P114.200 20.0d P127.00 .00001 Low Range Division Size P115.00 0.05s Motion Delay (seconds) GSE Scale Systems...
- Page 587 Parameter Setup D-11 (560 S (560 S ARAMETER ELECTION ESCRIPTION ERIES ARAMETER ELECTION ESCRIPTION ERIES Enter 0 à 23 Enter 0 à 9 P127.01 .00002 P133.01 Kilograms P127.02 .00005 P133.02 Ounces P127.03 .0001 P133.03 Grams P127.04 .0002 P133.04 US Tons P127.05 .0005 P133.05...
- Page 588 Macro 2 P202.00 † None Parity P224.03 Macro 3 Enter 0 à 2 P202.01 Even â â P202.02 P224.100 Macro 100 P203.00 † 1 bit Stop Bits Enter 0 à 1 P203.01 2 bits Numeric Parameter Formatting GSE Scale Systems...
- Page 589 Parameter Setup D-13 (560 S (560 S ARAMETER ELECTION ESCRIPTION ERIES ARAMETER ELECTION ESCRIPTION ERIES P240.01 Minimum Transmit Width Enter 9990, 9991 Enter 1 à 15 P240.02 P411.00 † Language Character Set P240.03 Enter 0 à 12 P411.01 France P240.04 P411.02 German P240.05...
- Page 590 Rename Net Total + Current Enter Name P608. † None! Rename Net Total – Current Enter Name Variables P609. † None! Rename Accumulation P680.00 † None! Variable Allocation Enter Name Enter 0 à 100 P680.01 P610. † None! Rename Scale# GSE Scale Systems...
- Page 591 Parameter Setup D-15 (560 S (560 S ARAMETER ELECTION ESCRIPTION ERIES ARAMETER ELECTION ESCRIPTION ERIES â â P680.02 P680.03 P802.100 Macro 100 â â P803.00 † Enabled [UNITS] Key Function P680.100 Enter 0 à 100 P803.01 Macro 1 P681.01 Variable 1 P803.02 Macro 2 Variable Instance Selection...
- Page 592 P5130.0 † Above Deactivation Condition Enter 0 à 15 P5130.1 Below P995.00 † Ignored Scale 2 Motion P5130.2 Between P995.01 Delayed See P994. P5130.3 Outside Model 650 backward compatibility P5130.4 Always parameter. P5130.5 Never GSE Scale Systems...
- Page 593 P9990.0 None! P60092. FastT RAM Wait States Enter 1 à 100 P9990.1 Macro 1 P9990.2 Macro 2 P9990.3 Macro 3 P60100. ©1995 *GSE* Copyright â â P60101. 0560-xxxxx Firmware Revision P9990.100 Macro 100 P60102. mmm dd yyyy Firmware Date P9991.
- Page 594 Analog Gain (0-10V) Scale Configuration P61203. xxxxx Analog Zero Ref. (0-20mA) P108.01 Scale 1 Scale Instance Selection P61204. xxxxx Analog Gain (0-20mA) Enter 1 à 8 P108.02 Scale 2 P61205. xxxxx Analog Zero Ref. (4-20mA) P108.03 Scale 3 GSE Scale Systems...
- Page 595 Parameter Setup D-19 (660 S (660 S ARAMETER ELECTION ESCRIPTION ERIES ARAMETER ELECTION ESCRIPTION ERIES P108.04 Scale 4 P115.07 0.7s P108.05 Scale 5 P115.08 0.8s P108.06 Scale 6 P115.09 0.9s P108.07 Scale 7 P115.10 † 1.0s â â P108.08 Scale 8 P115.100 10.0s P109.00...
- Page 596 Enter Operating Parameter P133.02 Ounces P175. † None! Output Signal Range P133.03 Grams Enter Operating Parameter P133.04 US Tons P133.05 Metric Tons P176.00 † Maximum Default Output in Setup Mode Enter 0 à 2 P133.06 Custom Unit1 P176.01 Minimum GSE Scale Systems...
- Page 597 Parameter Setup D-21 (660 S (660 S ARAMETER ELECTION ESCRIPTION ERIES ARAMETER ELECTION ESCRIPTION ERIES P176.02 Same P200.07 selected – 23MHz for 57600 P200.08 baud, 21MHz for 115K and 38400 P177.00 † 0-10 VDC Analog Output Type Enter 0 à 2 P200.09 ** 115K baud.
- Page 598 Enter Operating Parameter P423.04 P307. † None! [SELECT] Mode 7 P423.05 Enter Operating Parameter P423.06 P308. † None! [SELECT] Mode 8 P423.07 Enter Operating Parameter P423.08 P423.09 P309. † None! [SELECT] Mode 9 P423.10 † 100% Enter Operating Parameter GSE Scale Systems...
- Page 599 Parameter Setup D-23 (660 S (660 S ARAMETER ELECTION ESCRIPTION ERIES ARAMETER ELECTION ESCRIPTION ERIES P424.00 † Display ‘OFF’ Dimness P602. † None! Rename Tare Enter 0 à 10 P424.01 Enter Name P424.02 P603. † None! Rename Gross Total P424.03 Enter Name P424.04 P604.
- Page 600 Macro 2 P689.03 3 characters P808.03 Macro 3 P698.04 4 characters â â P698.05 5 characters P808.250 Macro 250 P698.06 6 characters P698.07 7 characters P698.08 8 characters P698.09 9 characters P698.10 † 10 characters â â GSE Scale Systems...
- Page 601 Parameter Setup D-25 (660 S (660 S ARAMETER ELECTION ESCRIPTION ERIES ARAMETER ELECTION ESCRIPTION ERIES P809.00 † Enabled [ . ] Key Function P851.00 None Channel Function Enter 0 à 250 Enter 0 à 10 P809.01 Macro 1 P851.01 Freq Output P809.02 Macro 2 P851.02...
- Page 602 Enter 0 à 1 P9993.1 Enabled P5112.2 Macro 2 P9994.0 † Macro Table Limited Access P5112.3 Macro 3 Enter 0 à 1 â â P9994.1 P5112.250 Macro 250 P10001. Macro Entry Table P10002. Enter Text P5113.0 † Ignored Activation Motion GSE Scale Systems...
- Page 603 Multi-Scale Serial Number P60092. FastT RAM Wait States Enter Serial Number P61123. BckUp GOOD! A/D Calibration Backup P61130. xxxxxx First Linearization Weight P60100. ©1995 *GSE* Copyright First Linearization Factor P61131. xxxxxx P60101. 0660-xxxxx Firmware Revision P61132. xxxxxx Second Linearization Weight P60102.
- Page 604 ) Test Press [TARE], then [ENTER] Press [ENTER] P65010. Database Reset P62010.1 † Analog Output Test for Press [ENTER] P62011 à P62013 P62010.2 P62002. EEPROM (E ) Test Enter 1 à 8 P62010.3 Press [ENTER] P62010.4 P62010.5 P62010.6 GSE Scale Systems...
-
Page 605: Appendix E Error Codes / Messages
Appendix E Error Codes / Messages This sections describes all error codes generated by 60 Series instruments. Most error codes show a two-digit code reference along with a short text message. Possible causes and remedies are described for each error. -
Page 606: Setup Mode Error Codes
Certain combinations of protocol are not available. The protocol combination selections CoDE19 „Data are in P201, P202 and P203. This error occurs if an illegal protocol combination is &Stop selected. Refer to Chapter 8, Communications for more information. GSE Scale Systems... -
Page 607: Calibration Error Codes
CoDE29 The E is corrupted in the PIN section. Check E for problems. The access code is then error defaulted to the manufacturer (GSE) access code. Also refer to Error 11. ALIBRATION RROR ODES ESSAGE ESCRIPTION The entered calibration weight, together with the currently applied signal, indicates that the full scale signal will be greater than the allowed maximum of the controller. -
Page 608: General Error Codes
The accuracy is less than required. The accuracy requirements specified at P183 has Req'D not been achieved. Increase the sample size. An attempt to select a disabled scale was made. Make sure the intended scale is CoDE54 Scale enabled and properly configured beginning at P108. Disbl GSE Scale Systems... -
Page 609: Macro Error Codes
Error Codes / Messages E-5 ESSAGE ESCRIPTION CoDE60 A new FLASH file has been uploaded via the ReFlash or BDM flash utilities in order to FLASH upgrade the firmware. Press any key to acknowledge. The setup mode access code has not been entered prior to attempting to change the CoDE61 Need configuration of a setup parameter. -
Page 610: Setup Error Codes
(P200), incorrect number of data bits (P201), error or incorrect parity setting (P202). The ‘X’ in the error message represents the COMM port number on which the problem occurred. GSE Scale Systems... -
Page 611: Miscellaneous Messages
Error Codes / Messages E-7 ESSAGE ESCRIPTION The indicator did not check its receive data register in time, thus missing a character. portX To prevent the problem, try reducing the baud rate (P200). The ‘X’ in the error error message represents the COMM port number on which the problem occurred. Associated with Modbus. - Page 612 The current setup requires more RAM than is currently installed. Memry >Max Number of rows received during upload exceeded 2,147,483,648. Contact GSE if Rows this error occurs. Occurs during upload new or upload update, followed by the row location (relative to the beginning of the upload) of the error and the column in which it was found.
-
Page 613: Appendix F Assembly Drawings
Appendix F Assembly Drawings The following fold-out pages are assembly drawings of each 60 Series instrument. These drawings are subject to change without prior notice and are updated with each new revision of this manual. ODEL RAWING UMBER 37198 460 Panel Mount... - Page 614 F-2 Appendix F GSE Scale Systems...
- Page 615 NDEX An index will be compiled for this version of the 60 Series Technical Reference Manual and made available in PDF format on the GSE web site (www.gse-inc.com). Index - 1...
- Page 616 Index - 2 GSE Scale Systems...
- Page 617 Index - 3 660 Technical Reference Manual...
- Page 621 Part Number 39-10-X60REF...
Need help?
Do you have a question about the 60 SERIES and is the answer not in the manual?
Questions and answers