Sign In
Upload
Manuals
Brands
MINOLTA Manuals
All in One Printer
DI550
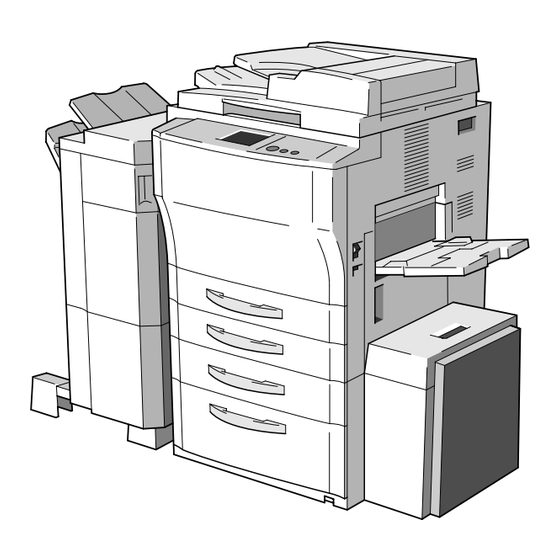
MINOLTA DI550 Manuals
Manuals and User Guides for MINOLTA DI550. We have
4
MINOLTA DI550 manuals available for free PDF download: Service Manual, Operator's Manual, Quick Manual
Minolta DI550 Service Manual (501 pages)
Brand:
Minolta
| Category:
Printer
| Size: 9 MB
Table of Contents
General
4
Table of Contents
4
Safety Information
5
Specification
10
Precautions for Installation
13
Installation Site
13
Power Source
13
Grounding
13
Precautions for Use
14
To Ensure that the Copier Is Used in an Optimum Condition
14
Operating Environment
14
Power Requirements
14
Note
14
Handling of Consumables
15
Other Precautions
15
System Options
16
Mechanical/ Electrical
18
Cross Sectional View
21
Copy Process
22
Drive System
24
Sequential Explanation
25
Image Stabilization System
26
AIDC Sensor
27
Image Stabilization System Control
28
PC Drum Drive Mechanism
29
Pc Drum Section
29
Grounding of the PC Drum
30
Pc Drum Charging Section
31
Image Reading Section
32
Exposure Components Section
33
Exposure Lamp Control
34
Image Processing Process
36
Auto Exposure Control
38
Image Density Control
38
Manual Exposure Control
41
2Nd/3Rd Mirrors Carriage Movement Mechanism
43
Scanner and Mirrors Carriage Movement Mechanism
43
Scanner Movement Mechanism
43
Scanner Motor Drive Control
44
Image Processing Process
45
Memory Section
45
10-1.Original Size Detecting Operation
46
Original Size Detecting Section
46
10-2.Original Size Detecting Sensors Locations
47
10-3.Original Size Detection
48
10-4.Original Size Detection Timing
48
Ph Section
50
11-1.Image Processing Process
51
11-2.Laser Emission Timing (SOS Signal
53
12-2.Sleeve/Magnet Roller
55
12-3.Doctor Blade
55
Developing Unit Section
55
12-4.Developing Bias
58
ATDC Sensor Automatic Adjustment
59
12-6.Toner Replenishing Control
60
12-7.Toner Supply Hole Covering/Uncovering Mechanism
60
12-8.Toner Bottle Home Position Detection Mechanism
61
12-9.Toner Bottle Vibration Mechanism
61
12-10.Main Hopper Toner Replenishing Mechanism
62
12-11.Main Hopper Locking Mechanism
62
12-12.Sub Hopper Toner Replenishing Mechanism
63
12-13.Sub Hopper Toner Empty Detecting Mechanism
64
Paper Take Up/Feed Section
65
13-1.Drawer in Position Detection
66
13-2.Paper Empty Detection Mechanism
67
13-3.Drawer Paper Lifting/Lowering Mechanism
68
13-4.Paper Level Detection Mechanism
70
13-6.Paper Take up Mechanism
73
Paper Separating Mechanism
73
Paper Pressure Release Mechanism
74
Paper Take up Roll Retracting Mechanism
74
13-7.Paper Take up Control
75
Paper Take up Motor Control
75
Paper Take up Retry Control
75
Double Feed Paper Take up Control
76
Paper Take up Interval Control
76
Manual Feed Table Section
78
14-1.Manual Take up Roll Pressure Mechanism
79
14-2.Manual Feed Paper Separating Mechanism
79
14-3.Manual Feed Paper Empty Detection Mechanism
80
14-4.Manual Feed Take up Control
80
15-1.Paper Dust Remover
81
Transport/Synchronizing Rollers Section
81
15-2.Transport Roller Drive Mechanism
82
15-3.Synchronizing Roller Drive Mechanism
82
Image Transfer and Paper Separation Section
83
16-1.PC Drum Paper Separator Fingers Section
84
Finger Back and Forth Detection Mechanism
84
Finger Pressing Detection Mechanism
84
17-1.Cleaning Blade Moving Mechanism
85
Pc Drum Cleaning Section
85
17-2.Toner Conveying/Collecting Mechanism
86
Main Erase Section
87
Transport Section
88
Fusing Unit Section
89
20-1.Fusing Unit Drive Mechanism
90
20-2.Fusing Rollers Pressure Mechanism
91
20-3.Fusing Roller Cleaning Mechanism
92
Cleaning Web Take up Mechanism
92
20-4.Fusing Temperature Control
93
20-5.Mechanism and Control of Fusing Roller Small-Amount Turning
94
20-6.CPM Control
95
Exit/Duplex Switching Section
96
21-1.Exit/Duplex Switching Mechanism
97
Turnover Section
98
22-3.Turnover Roller Separation Control
101
22-4.Turnover/Exit Mechanism
102
Path for Accommodating Paper Longer than A4L
102
Selection of Turnover or Exit Path
102
23-1.Memory Backup
103
Other Mechanism
103
23-2.Flash Memory
104
23-3.Dehumidifying Mechanism
105
Paper Dehumidifying Mechanism
105
PC Drum Dehumidifying
105
IR Section Cooling Mechanism
106
Fusing Section Cooling Mechanism
107
Copier Interior Cooling Mechanism
108
Power Supply Section Cooling Mechanism
109
I Nstallation
125
DI 450 / Di550 Installation
130
Installation
130
Setting-Up
130
Unpacking
130
Loading the Starter
133
ATDC Level Adjustment
137
AIDC Level Adjustment
138
1St / 2Nd Drawer
140
Paper Loading
140
Large Capacity Cabinet
141
Way Paper Feed Cabinet
141
Drawer Size Change
143
Input the Paper Size
143
Way Paper Feed Cabinet
143
Adjusting the Support Feet
145
Installing the Manual Holder
145
Checking for Registration
146
Paper Feed Cabinet • Single-Sided
146
Large Capacity Cabinet
147
Way Paper Feed Cabinet
147
Checking for Registration
150
Paper Feed Cabinet • Duplex
150
Registration Adjustment
150
Duplex Unit
151
Affixing the Labels
153
Components
154
Installing EDH 3
154
Removal of Tape and Cushions
154
Installation
155
Installation of the Document Guide
157
Adjusting Skew Feed
158
Checking for Skew Feed
158
Displaying the I.R. & EDH Check Screen
160
Adjustment of FD Reading Position and Zoom Ratio
161
Adjustment of CD Reading Position
162
Adjustment of Single Feed CD Reading Position
163
Adjustment of Single Feed FD Reading Position
164
Adjustment of Original Detection
165
Entering the Adjust/Edh Adjustment Values
166
Example of Data Entry
167
Installation
168
Unpacking
168
Fitting the Copier to the Cabinet
169
Installation
171
Unpacking
171
Fitting the Copier to the Cabinet
173
PF-7D Installing
173
Unpacking the Cabinet
173
FN-106 Installation
175
Unpacking
175
Remove Tape and Packing Materials
176
Attaching the Positioning Pin, Fixing Brackets, and Pip
178
Adjusting the Position of the Finisher
179
Connecting the Hookup Cord
181
Installing the Tray and Wire Form
181
Affixing the Labels
182
Checking the Hole Positions for Hole Punch (FN-105 Only
183
Adjusting the Hole Positions for Hole Punch (FN-105 Only
184
C-306L Installation
185
Unpacking
185
Unpacking C-306L
186
Installing the Large Capacity Cassette
187
Installing the Paper Transport Guide
187
Changing Paper Size
190
C-306L
192
INPUT the PAPER SIZE for C-306 / C306L
197
Loading Paper
198
Checking the Large Capacity Cassette Installation (C-306 / C-306L
199
Checking the Side-To-Side Image Registration
199
32MB Memory (M32-2) Installation
202
Installation
202
Unpacking
202
Hard Disk Drive Kit (HDD-1) Installation
204
Unpacking
204
Installation
205
Setting
207
Formatting
208
IF Kit Installation
210
Installation
210
Unpacking
210
Installing
213
Installing the Backup Battery
213
Connecting the Hookup Cord
214
Initialization
214
Attaching the
218
Connecting the Telephon Cord
219
Precautions for Connecting a Telephone to the
220
Setting the Modem
220
Specifications
220
Setting Common DT
221
10Setting Date/Time
222
11Setting Maintenance Center (Setting Billing Center
222
12Maintenance RAM Clear
223
1Setting Telephone no
226
14Initial Transmission
227
Switches on Pwbs, Tech. Rep. Settings
231
Control Panel Keys
232
Control Panel Keys and Touch Panel
232
Basis Screen
234
Explanation of the Touch Panel
234
Warning Screens
235
FUNCTION of SWITCHES and OTHER PARTS on Pwbs
236
PWB Location
236
PWB-S (Tech. Rep. Setting Switches Board
236
Clearing Procedures
237
Data/Conditions Cleared by Reset Switches/Pins
237
Utility Mode
238
Utility Mode Function Tree
238
Utility Mode Selection Screen
238
Settings in the Utility Mode
239
User's Choice Mode
239
Administrator Mode
246
Tech. Rep. Mode
248
Tech. Rep. Mode Function Setting Procedure
248
Tech. Rep. Mode Menu Screen
248
Counter
249
Function
249
System Input
249
Tech. Rep. Choice
249
Tech. Rep. Mode Menu Function Tree
249
Admin. Mode
250
EDH Check
250
I/O Check
250
Level History
250
RD Mode
250
ROM Version
250
Finisher
251
Security Mode
269
Security Mode Menu Screen
269
Security Mode Setting Procedure
269
Settings in the Security Mode
270
Adjust Mode
272
Adjust Mode Menu Screen
272
Adjust Mode Setting Procedure
272
Adjust Mode Function Tree
273
Settings in the Adjust Mode
274
Dis/Reassembly, Adjustment
278
Identification of Fuses and Circuit Breakers
282
Precautions for Handling the Laser Equipment
282
Service Instructions
282
Other Screws
283
Parts Which Must Not be Touched
283
Red Painted Screws
283
Variable Resistors on Board
283
Disassembly/Reassembly
284
Doors, Covers, and Exterior Parts: Identification and Removal Procedures
284
Removal of Circuit Boards and Other Electrical Components
286
45-Cpm Copier
290
Maintenance Schedule
290
55-Cpm Copier
293
Removal of the Multi Bypass Unit
296
Removal of the Suction Unit
296
Removal of the Unit
296
Removal of the Main Hopper Unit
297
Removal of the IR Unit
298
Removal of the PH Unit
301
Removal of the Developing Unit
303
Removal of the Fusing Unit
303
Removal of the Sub Hopper Unit
303
Removal of the Upper Left Door (Exit/Duplex Switching Unit
304
Paper Take-Up/Transport Section
305
Removal of the Paper Take-Up Roll, Paper Feed Roll and Paper Separator Roll Assy
305
Cleaning of the Paper Separator Roll
306
Cleaning of the Paper Take-Up Roll and Paper Feed Roll
306
Removal of the Drawer Lift-Up Motor
307
Removal of the Upper and Lower Transport Rollers
308
Cleaning of the Lower Transport Roller
310
Cleaning of the Upper Transport Roller
310
Cleaning of the Vertical Transport Rollers
311
Removal of the Synchronizing Roller
311
Cleaning of the Upper Synchronizing Roller
313
Removal of the Lower Synchronizing Roller
313
Cleaning of the Lower Synchronizing Roller
314
Removal of the Synchronizing Paper Dust Remover
314
Removal of the Transport Paper Dust Remover
314
Cleaning of the Paper Dust Remover
315
Disassembly of the Suction Unit
315
Disassembly of the Multi Bypass Unit
316
Cleaning of the Multi Bypass Paper Separator Roll Assy
318
Cleaning of the Multi Bypass Paper Take-Up Roll/Paper Feed Roll
318
Cleaning of the Lens
319
Cleaning of the Mirrors
319
Cleaning of the Original Glass and EDH Glass
319
Optical Section
319
Cleaning of the PH Glass
320
Cleaning of the Scanner Rails/Bushings
320
Removal of the Scanner
320
Removal of the Exposure Lamp
321
Removal of the EDH Glass
322
Removal of the Scanner Drive Cable
322
Winding of the Scanner Drive Cable
323
Developing Unit
328
Remove of the Developing Unit
328
Cleaning of the Developer Scattering Prevention Plate
331
Cleaning of the DS Positioning Collars
331
Cleaning of the Toner Antisocial Trap
331
Replacement of the Cleaning Blade
331
Replacement of the Developer
333
Cleaning of the AIDC Sensor Board
334
Cleaning of the PC Drum Paper Separator Fingers
334
Removal of the Toner Antispill Seal
334
Cleaning of the Main Erase Lamp Filter
335
Cleaning of the Toner Antispill Seal
335
Removal of the Main Erase Lamp
335
Removal of the Ozone Filter (Image Transfer/Paper Separator Coronas
336
Removal of the Ozone Filter (PC Drum Charge Corona
336
Removal of the Toner Collecting Bottle
336
Cleaning of the PC Drum Charge Corona Housing
337
Pc Drum Charge Corona and Image Transfer/Paper Separator Coronas
337
Removal of the PC Drum Charge Corona
337
Cleaning of the PC Drum Charge Corona Grid Mesh
338
Cleaning of the Comb Electrode
339
Cleaning of the Image Transfer Corona Wire
339
Removal of the Image Transfer/Paper Separator Coronas
339
Cleaning of the Paper Separator Corona Wire
340
Removal of the Image Transfer Corona Wire
340
Cleaning of the Image Transfer/Paper Separator Coronas Housing
341
Removal of the Paper Separator Corona Wire
341
Cleaning of the Pre-Image Transfer Guide Plate
342
Disassembly of the Fusing Unit
343
Fusing Unit
343
Cleaning of the Entrance Guide Plate
348
Cleaning of the Lower Fusing Paper Separator Fingers
348
Cleaning of the Upper Fusing Paper Separator Fingers
348
Removal of the Upper Fusing Paper Separator Fingers
348
Cleaning of the Upper Fusing Roller Thermistor
349
Removal of the Lower Fusing Roller Thermistor
349
Removal of the Upper Fusing Roller Thermistor
349
Cleaning of the Lower Fusing Roller Thermistor
350
Cleaning of the Upper Fusing Roller Thermostat
350
Removal of the Upper Fusing Roller Thermostat
350
Removal of the Web Pressure Roller
351
Removal of the Web Roller
351
Cleaning of the Turnover Roller, Transport Rollers
352
Removal of the Fusing Unit Drive Coupling Gear
352
Removal of the Misfeed Removal Knob Bushing
352
Adjustment
353
Adjustment Jigs and Tools Used
353
Adjustment Requirements List
354
Adjustment of Switches
355
Microswitches
355
Adjustment of Front Door Interlock Switch
356
Adjustment of Belt Tension
357
Adjustment of the Developing Unit Drive Timing Belt
357
Adjustment of the Suction Drive Timing Belt
357
Adjustment of the Scanner Motor Timing Belt
358
Adjustment of Manual Feed Paper Pick-Up Solenoid
359
Solenoid Position Adjustment
359
Adjustment of Turnover Roller Retraction Solenoid
361
Adjustment of Exit/Duplex Switching Solenoid
362
Positioning of the PC Drum Paper Separator Fingers (Separator Finger Solenoid
363
Adjustment of Turnover Route Switching Solenoid
364
Accessing the Adjust Mode
365
Accessing the Tech. Rep. Mode
365
Accessing the Tech. Rep. Mode and Adjust Mode
365
Electrical/Image Adjustment
366
Touch Panel Adj
366
Orig. Size Adjust
367
F8 ATDC Sensor
368
F5 AIDC Sensor
369
Registration (CD
370
Registration (FD
372
Lead Edge Erase
374
Trail Edge Erase
376
Loop Adjustment
378
Erasure Width
380
Zoom (CD
382
Zoom (FD
384
Scale (CD
386
Adjustment of the Reference Position of each Drawer
390
Other Adjustments
390
Adjustment of the Reference Position of the Multi Bypass Tray
392
Adjustment of the Upper Right Door (Multi Bypass Unit
393
Adjustment of the Position of the Scanner and 2Nd/3Rd Mirrors Carriage
394
Adjustment of the 2Nd/3Rd Mirrors Carriage Assy for Parallel Alignment
395
Adjustment of the Gap between the Doctor Blade and Sleeve Roller (D.B. Adjustment
396
Installation of the Key Counter Socket (Option
397
Miscellaneous
397
Mounting the Original Size Detecting Sensors (Option
398
Flash Memory
399
Rewriting the Master Board Data
399
Rewriting the Image Processing Board Data
400
Rewriting the ECC Board Data (Option
402
Rewriting the Master Board, Image Processing Board, and ECC Board (Option) Simultaneously
403
Remounting Eeprom
404
Remounting EEPROM on the Master Board
404
Remounting EEPROM on the Image Processing Board
405
Troubleshooting
407
Controlled Parts Check Procedure
409
I/O Check
409
Introduction
409
Reading the Text
409
I/O Check List
410
Paper Misfeed
416
Paper Transport Failure
416
Misfeed Detection Sensor Layout
417
Copier Paper Take-Up Misfeed
418
Fusing/Exit Misfeed
418
Multi Bypass Misfeed
418
Transport/Separator Misfeed
418
Types of Misfeed Detection and Detection Timings
418
Duplex Paper Take-Up Misfeed
419
C0010 PC Drum Drive Motor's Failure to Turn
437
Detection Timing by Malfunction Code
437
Malfunctions
437
C004E: Power Supply Unit Cooling Fan Motor 1'S Failure to Turn C004F: Power Supply Unit Cooling Fan Motor 2'S Failure to Turn
438
C0090 Developing Unit Drive Motor's Failure to Turn
438
C0210 Image Transfer/Paper Separator Corona Charge Leak Detected
438
C0420 Exposure Lamp Turning on at Abnormal Timing
438
C0510 Abnormally Low Fusing Temperature
439
C0520 Abnormally High Fusing Temperature
439
C0650 SHOME Signal Error
439
C0914: 2Nd Drawer Lift-Up Motor's Failure to Turn
440
C0920: 1St Drawer Paper Lift-Up Sensor Malfunction
440
C0924: 1St Drawer Lift-Up Motor's Failure to Turn
440
C0950: 4Th Drawer Paper Lift-Up Sensor Malfunction
440
C0994 Main Tray Elevator Motor's Failure to Turn
440
C0996: Main Tray Lock Release Failure C0997: Shift Gate Malfunction
440
C099C Shift Motor's Failure to Turn
440
C0D50: Duplex Horizontal Transport Motor Malfunction
442
C0E00: Main Erase Lamp's Failure to Turn on
442
C0F24: AIDC Sensor Contamination Correction Failure
442
C0F33: Abnormally Low T/C as Detected by ATDC Sensor
442
C10XX to C18XX
475
Copier Does Not Turn on
477
Image Failure
479
Image Failure Troubleshooting
479
Initial Checks
479
Troubleshooting Procedures Classified by Image Failure
480
Black Copy
481
Blank Copy
481
Foggy Background
482
High Image Density
482
Low Image Density
482
Black Spots
483
Black Streaks or Bands
483
Blank Streaks or Bands
484
Void Areas
484
Gradation Reproduction Failure
485
Smear on Back
485
Uneven Image Density
485
Rough Image
486
Traces of PC Drum Paper Separator Fingers
486
Void Areas Along Leading Edge
486
Details of Maintenance Codes
487
Entering the Tech. Rep. Mode
487
Resetting the Maintenance Code Display
487
Advertisement
Minolta DI550 Service Manual (271 pages)
Brand:
Minolta
| Category:
All in One Printer
| Size: 4 MB
Table of Contents
Table of Contents
140
Service Manual
1
Other Precautions
6
Identification of Fuses and Circuit Breakers
20
Precautions for Handling the Laser Equipment
20
Service Instructions
20
Parts Which Must Not be Touched
21
Optical Section
51
Developing Unit
60
Fusing Unit
75
Adjustment Jigs and Tools Used
85
Other Adjustments
122
Flash Memory
131
1 Control Panel Keys and Touch Panel
142
Control Panel Keys
142
Explanation of the Touch Panel
144
Basis Screen
144
Warning Screens
145
2 FUNCTION of SWITCHES and OTHER PARTS on Pwbs
146
PWB Location
146
PWB-S (Tech. Rep. Setting Switches Board
146
Clearing Procedures
147
Data/Conditions Cleared by Reset Switches/Pins
147
3 Utility Mode
148
Utility Mode Selection Screen
148
Utility Mode Function Tree
148
Settings in the Utility Mode
149
User's Choice Mode
149
Administrator Mode
156
4 Tech. Rep. Mode
158
Tech. Rep. Mode Menu Screen
158
Tech. Rep. Mode Function Setting Procedure
158
Tech. Rep. Mode Menu Function Tree
159
Setting in the Tech. Rep. Mode
162
Function
162
Tech. Rep. Choice
165
System Input
167
Counter
168
EDH Check
173
I/O Check
173
ROM Version
174
RD Mode
175
Level History
177
Admin. Mode
178
Finisher
178
5 Security Mode
179
Security Mode Menu Screen
179
Security Mode Setting Procedure
179
Settings in the Security Mode
180
6 Adjust Mode
182
Adjust Mode Menu Screen
182
Adjust Mode Setting Procedure
182
Adjust Mode Function Tree
183
Settings in the Adjust Mode
184
Troubleshooting
188
Table of Contents
190
1 Introduction
192
Reading the Text
192
2 I/O Check
192
Controlled Parts Check Procedure
192
I/O Check List
193
3 Paper Transport Failure
199
Paper Misfeed
199
Misfeed Detection Sensor Layout
200
Types of Misfeed Detection and Detection Timings
201
Copier Paper Take-Up Misfeed
201
Multi Bypass Misfeed
206
Transport/Separator Misfeed
208
Fusing/Exit Misfeed
211
Paper Take-Up Misfeed
212
Paper Take-Up Misfeed
215
Duplex Paper Take-Up Misfeed
217
4 Malfunctions
220
Detection Timing by Malfunction Code
220
Troubleshooting Procedures by Malfunction Code
227
C0000: Fusing Motor's Failure to Turn C0010: PC Drum Drive Motor's Failure to Turn
227
C0040: Suction Fan Motor's Failure to Turn C004C: Ventilation Fan Motor's Failure to Turn
228
C0042: Fusing Unit Cooling Fan Motor's Failure to Turn
229
C0045: IR Cooling Fan Motor Malfunction C0046: PH Cooling Fan Motor 1 Malfunction C0047: PH Cooling Fan Motor 2 Malfunction
230
C0049: Paper Source Option Vertical Transport Cooling Fan Motor Malfunction
232
C004E: Power Supply Unit Cooling Fan Motor 1'S Failure to Turn C004F: Power Supply Unit Cooling Fan Motor 2'S Failure to Turn
233
C0072: Main Hopper Toner Replenishing Motor's Failure to Turn C0090: Developing Unit Drive Motor's Failure to Turn
235
C0210: Image Transfer/Paper Separator Corona Charge Leak Detected
237
C0400: Exposure Lamp's Failure to Turn on C0420: Exposure Lamp Turning on at Abnormal Timing
238
C0510: Abnormally Low Fusing Temperature
239
C0520: Abnormally High Fusing Temperature
239
C0650: SHOME Signal Error
242
C0914: 2Nd Drawer Lift-Up Motor's Failure to Turn
244
C0920: 1St Drawer Paper Lift-Up Sensor Malfunction
244
C0924: 1St Drawer Lift-Up Motor's Failure to Turn
244
C0904: 3Rd Drawer Paper Lift-Up Motor's Failure to Turn
246
C0950: 4Th Drawer Paper Lift-Up Sensor Malfunction
246
C0954: 4Th Drawer Paper Lift-Up Motor's Failure to Turn
246
C0994: Main Tray Elevator Motor's Failure to Turn
248
C0997: Shift Gate Malfunction
250
C0998: Shifter Return Failure C099C: Shift Motor's Failure to Turn
252
C0E00: Main Erase Lamp's Failure to Turn on
255
C0F24: AIDC Sensor Contamination Correction Failure
256
C0F32: ATDC Sensor Malfunction C0F33: Abnormally Low T/C as Detected by ATDC Sensor
257
C10XX to C18XX
258
Copier Does Not Turn on
260
5 Image Failure
262
Image Failure Troubleshooting
262
Initial Checks
262
Troubleshooting Procedures Classified by Image Failure
263
Black Copy
264
Blank Copy
264
Foggy Background
265
High Image Density
265
Low Image Density
265
Black Spots
266
Black Streaks or Bands
266
Blank Streaks or Bands
267
Void Areas
267
Gradation Reproduction Failure
268
Smear on Back
268
Uneven Image Density
268
Rough Image
269
Traces of PC Drum Paper Separator Fingers
269
Void Areas Along Leading Edge
269
6 Resetting the Maintenance Code Display
270
Details of Maintenance Codes
270
Entering the Tech. Rep. Mode
270
MINOLTA DI550 Operator's Manual (234 pages)
Brand:
MINOLTA
| Category:
All in One Printer
| Size: 5 MB
Table of Contents
Table of Contents
12
Safety Precautions
16
Laser Safety Label
16
Safety Information
17
Laser Safety
17
Terms and Symbols for the Type of Originals and Paper
19
Feeding Direction (Paper Path)
19
Chapter 1 Safety Notes
20
Installing the Machine Installation Site
21
Power Source
21
Space Requirements
21
Precautions for Use Operating Environment
22
Acoustic Noise
22
Using the Machine Properly
22
Moving the Machine
22
Care of Machine Supplies
23
Note on Making Multiple Copies
23
Legal Restrictions on Copying
23
Chapter 2 Getting to Know Your Machine
24
Typical Copies You Can Make with Your Machine
25
System Overview
29
Machine Parts and Accessories
31
Control Panel Keys and Indicators
37
Using the Touch Panel
39
What Is a Touch Panel
39
How the Screen Is Organized
39
Operating the Touch Panel
40
Turning on and off and Initial Mode
41
Turning on and off
41
When Machine Is Turned on
41
Initial Mode
41
Auxiliary Functions
42
Chapter 3 Making Copies
44
Using Basic Copying Functions
45
Basic Copying Procedures
45
Placing the Original
47
Using the Electronic Document Handler
47
Using the Original Glass
49
Using the SADF Mode
51
Selecting the Paper Paper Size
52
Manual Bypass Copying
54
Selecting the Zoom Zoom Ratio
57
Selecting the Finishing
63
Finishing Functions
63
Selecting the Finishing Function
65
Loading the Originals
75
Auto Dual Function
77
Note on Stapling
78
Original Copy Types
79
Selecting the Original Copy Type
81
Some Precautions for Making Copies
85
Handy Feature Available from Initial Mode Setting
86
Selecting the Density Image Density
87
Auxiliary Functions
89
Cover
89
Page Insertion
92
OHP Interleaving
95
File Margin
97
Edge/Frame Erase
99
Image Repeat
101
Number Stamping
103
Image Stamping
107
Selecting Mixed Orig. Detection and Other Functions
109
Mixed Orig. Detection and Other Functions
109
Selecting the Job Functions
111
Memory Recall
111
Reserve
112
Job List
113
Chapter 4 Typical Function Combinations
116
Making Different Types of Copy
117
Reading the Table
117
Using 1-Sided Originals
118
Making 1-Sided Copies from 1-Sided Originals
118
Making 2-Sided Copies from 1-Sided Originals
121
Using 2-Sided Originals with Filing Margin Along Left Edges Making 1-Sided Copies from 2-Sided Originals with Filing Margin Along Left Edges
124
Making 2-Sided Copies from 2-Sided Originals with Filing Margin Along Left Edges
127
Using 2-Sided Originals with Filing Margin Along Top Edges Making 1-Sided Copies from 2-Sided Originals with Filing Margin Along Top Edges
130
Making 2-Sided Copies from 2-Sided Originals with Filing Margin Along Top Edges
133
Using Large-Size Originals
136
Precautions When Making Copies on 11 17L or Legall
136
Stapled Position
137
Precautions for Stapling
137
Chapter 5 Using the Utility Mode
142
Job Memory Input and Job Recall
143
Job Memory Input
143
Calling up a Job
146
Image Memory Input
147
Meter Count and Toner Replenisher Meter Count
152
Toner Replenisher
152
User's Choice
153
User's Choice Functions
153
Making the User's Choice Settings
158
Administrator Mode
159
Selecting the Administrator Mode
159
Administrator Mode Functions
160
Setting Administrator Mode
161
Chapter 6 When a Message Appears
168
When the Message "Replenish Paper." Appears
169
Adding Paper
169
When the Message "Please Add Toner." Appears
173
Replacing the Toner Bottle
173
When the Message "Stapler Is Empty." Appears
175
Replacing the Staple Cartridge
175
When the Message "Misfeed Detected." Appears
181
Misfeed Location Displays
181
Misfeed Clearing Procedures
183
When a Staple Misfeed Occurs
205
Clearing the Staple Misfeed
205
When the Message "Malfunction Detected." Appears
211
Malfunction Resetting Procedure
211
What Does each Message Mean
212
When this Type of Copy Is Produced
213
The Machine Is Not Functioning as Designed
215
Chapter 7 Miscellaneous
216
Specifications Specifications
217
Specifications
218
Care of the Machine Cleaning
225
Function Combination Matrix
227
Conditions for Combined Functions
229
List of Paper Sizes and Zoom Ratios List of Paper Sizes and Zoom Ratios
230
Advertisement
Minolta DI550 Quick Manual (27 pages)
Brand:
Minolta
| Category:
All in One Printer
| Size: 1 MB
Advertisement
Related Products
Minolta Di520
Minolta DI2010
Minolta DI3010
Minolta Di151f
Minolta Di250f
Minolta Di3010f
Minolta Di850
Minolta Di200f
Minolta DI1610F
Minolta Di251f
MINOLTA Categories
Digital Camera
Film Camera
Printer
Copier
All in One Printer
More MINOLTA Manuals
Login
Sign In
OR
Sign in with Facebook
Sign in with Google
Upload manual
Upload from disk
Upload from URL