Sign In
Upload
Manuals
Brands
Minolta Manuals
All in One Printer
Di200f
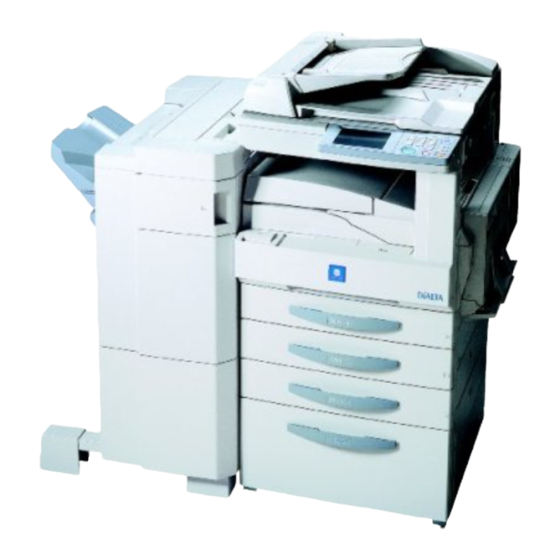
Minolta Di200f Manuals
Manuals and User Guides for Minolta Di200f. We have
4
Minolta Di200f manuals available for free PDF download: Operator's Manual, Setup Quick Manual, Setup Instructions
Minolta Di200f Operator's Manual (388 pages)
Brand:
Minolta
| Category:
All in One Printer
| Size: 6 MB
Table of Contents
Precautions for Routine Use
7
For Canada Users
12
Table of Contents
13
Safety Information
19
Laser Safety
21
Internal Laser Radiation
21
Cdrh Regulation
22
For Denmark Users
23
Laser Safety Label
24
Ozone Release
24
For European Users
24
Terms and Symbols for the Type of Originals and Copy Paper
25
Chapter 1 Safety Notes
26
Installing the Copier Installation Site
27
Power Source
27
Space Requirements
27
Precautions for Use Operating Environment
28
Acoustic Noise
28
Using the Machine Properly
28
Moving the Machine
28
Care of Machine Supplies
29
Legal Restrictions on Copying
29
Chapter 2 Getting to Know Your Copier/Fax
30
Typical Copies You Can Make with Your Copier
31
System Overview
35
Di200F/Di251F/Di351F and Options
35
Option
41
Original Cover Oc
42
A View from the Outside
45
Inside the Machine
46
Fax Options: Identification and Functions
47
Control Panel Keys and Touch Panel
48
Control Panel Keys and Indicators
48
What Is the Touch Panel
49
Operating the Touch Panel
49
How the Basic Screen Is Organized
49
Icons
53
Turning on and off and Initial Mode
54
Turning on and off
54
When Machine Is Turned on
54
Initial Mode
54
Placing the Original
55
Using the Document Feeder
55
Loading the Originals in Document Feeder
56
Placing the Original on the Glass
59
Highly Transparent Originals
60
Mixed Orig. Detection
61
Auxiliary Functions
62
Quitting an Operation
66
Chapter 3 Making Copies
68
Basic Copying Overview
69
Selecting the Paper
71
Paper Size
71
Manual Selection
72
Auto Drawer Switching
72
Manual Bypass Copying
74
Memorize Paper Size
77
Changing the Paper Size
78
Selecting the Zoom
79
Zoom Ratio
79
Finishing Functions
85
Selecting the Finishing Function
85
Hints for Stapling Position
93
Hints for Stapling
97
Hints for Hole-Punching Position
97
Selecting the Original
98
Original Copy Type
98
Selecting the Original Copy Type
101
Some Precautions for Making Copies
108
Handy Feature Available from Initial Mode Setting
108
Selecting the Density
109
Image Density
109
Auxiliary Functions
111
Cover
111
Auxiliary Functions Cover
111
Page Insertion
113
OHP Interleaving
117
File Margin
121
Edge/Frame Erase
123
Image Repeat
125
Distribution
127
Separate Scan
128
Using Memory Recall
129
Memory Recall
129
Chapter 4 Typical Function Combinations
130
Making Different Types of Copy
131
Reading the Table
131
Using 1-Sided Originals
132
Using 2-Sided Originals with Filing Margin Along Left Edges
138
Using 2-Sided Originals with Filing Margin Along Top Edges
144
Using Large-Size Originals
150
Precautions When Making Copies on 11×17 L or Legal L
150
Chapter 5 Using the Facsimile
152
Using the Facsimile
153
Basic Faxing Procedures
153
Sending Documents
155
Quick Memory Transmission
155
Using One-Touch Dialing for Transmission
157
Using Abbreviated Dialing for Transmission
158
Using Facsimile Program for Transmission
159
Adjusting Facsimile Image Quality
160
Adjusting Facsimile Contrast
161
Adjusting Facsimile Reduction
163
Defining the Area of Document to be Scanned for Transmission
165
Chain Dialing
167
Setting the Communication Mode
169
When Transmission Fails
170
Receiving Documents
171
Automatic Reception and Manual Reception
171
On Receiving Documents
171
Using Facsimile as Telephone
173
Using Your Fax Machine as a Telephone
173
Using Activity List
175
Activity List
175
Specific Items that Can be Checked with Activity List
175
Selecting a Function Available from Activity List
176
Chapter 6 Various Ways of Using Your Facsimile
180
Various Ways of Transmitting Documents
181
Serial Broadcast Transmission
181
Manual Transmission
183
Relay Transmission
184
Real Time Transmission
185
Priority Transmission
186
Timer Transmission
187
2In1 Transmission
188
2-Sided Transmission
189
TX Marker
191
TSI Information
193
Destination Insertion
194
TX Report
195
Remote Copy
196
Password TX
197
Using Bulletin Boards
198
Posting a Document on a Bulletin Board
198
Downloading a Document from a Bulletin Board (Retrieve)
201
Using Applied Functions
203
Polling TX
203
Polling Reception and Start Timer
205
Various Ways of Receiving Documents
207
Manual Reception
207
Password Reception
208
Using F CODE
209
What Is F CODE
209
Bulletin Boards
212
Chapter 7 Setting the Utility Mode
214
Using the Utility Mode
215
Programming and Setting Screens
215
User Management
216
List of Programming/Setting Items
217
Required Initial Programming Items and Confirmation of Initial Settings
221
Required Initial Programming Items
221
Checking the Initial Settings
221
Entering Characters
223
Alphanumeric Screen
223
Entering Letters
224
Entering Symbols
224
Job Memory Input and Job Recall
225
Job Memory Input
225
Deleting a Job Program
227
Recalling a Job from Memory
228
Meter Count
229
Using Meter Count
229
Settings in User Management
230
Setting the Confirmation Beep and Alarm Volume
230
Using the Dehumidify Function
231
Using the Toner Replenisher Function
232
Panel Cleaning
233
Data Send
233
Settings for Report
234
Printing Reports and Lists
234
Chapter 8 User's Choice and FAX Input
236
Making the User's Choice Settings
237
User's Choice Functions
237
In1 Copy Order
239
Density Priority
239
Printing Density
240
Output Priority
240
Output Tray
240
Scanner Dry
240
Settings for FAX Input
243
FAX Input Items
243
Selecting FAX Input
244
Setting Abbreviated Dialing Numbers
245
Setting One-Touch Dialing Numbers
251
Setting Indexes
257
Settings for Facsimile Programs
258
FAX Program Procedures
259
Registering Relay Groups
268
Self-Abbreviated Dialing
269
Setting up a Bulletin Board
270
Bultn. Procedures
271
Registering Account (Account Input)
273
Account Input Procedures
275
Chapter 9 Using the Admin. Management Mode
280
Settings in Admin. Management
281
Admin. Management Mode
281
Setting Admin. Management
281
Functions of Admin. Management
282
Settings for Administrator Set
283
Administrator Set
283
Settings for Copy Track
285
Copy Track
285
Settings for Input Accounts
291
Input Accounts
291
Input Accounts Procedures
293
Settings for Initial Settings
297
Initial Settings
297
Incomplete Tx Hold
298
Initial Settings Procedures
299
Received Document
301
Settings for FAX Recept Settings
303
FAX Recept (Reception) Settings
303
FAX Recept Settings Procedures
305
Settings for FAX Trans. Settings
307
FAX Trans. Settings
307
FAX Trans. Settings Procedures
309
Settings for Account Meter
310
Account Meter Procedures
310
Settings for Report Settings
311
Report Settings
311
Report Settings Procedures
311
Settings for Report Printing
312
Report Printing
312
Report Printing Procedures
312
Chapter 10 When a Message Appears
314
When the Message "Replenish Paper." Appears
315
Adding Paper
315
Paper Feed Unit Pf
318
Memorize Paper Size
321
When the Message "Please Add Toner." Appears
323
Replacing the Toner Bottle
323
When the Message "Stapler Empty." Appears
325
Reloading the Staple Cartridge
325
When the Message "Please Change Imaging Unit." Appears
329
Changing the Imaging Unit
329
When the Message "Misfeed Detected." Appears
331
Misfeed Location Displays
331
Misfeed Clearing Procedures
332
Manual Bypass Tray
334
Duplex Unit
334
Automatic Document Feeder
336
Shift Tray
346
When the Message "Cannot Staple." Appears
347
Clearing the Staple Misfeed
347
When a Size Error Message Appears
351
Clearing a Size Error
351
Replacing the TX Marker Stamp (Spare TX Marker STAMP)
353
How to Replace the TX Marker Stamp (Spare TX Marker STAMP)
353
When the Message "A Malfunction was Detected." Appears
354
What Does each Message Mean
355
When this Type of Copy Is Produced
356
The Machine Is Not Functioning as Designed
359
Facsimile Is Not Functioning Properly
360
Transmission Failures
360
Reception Failures
361
Telephone Problems
362
Chapter 11 Miscellaneous
364
Specifications
365
Specifications Specifications
365
Care of the Copier
373
Cleaning
373
Original Pad
374
Function Combination Matrix
375
Conditions for Combined Functions
377
Description of Paper Size and Zoom Ratio Table
378
List of Paper Sizes and Zoom Ratios
378
Terms and Definitions
379
Power Failure
381
Should Power Failure Occurs
381
Advertisement
Minolta Di200f Operator's Manual (233 pages)
Brand:
Minolta
| Category:
All in One Printer
| Size: 3 MB
Table of Contents
Table of Contents
4
Table of Contents
5
Cautions
6
General Cautions
6
FCC Part 15-Radio Frequency Devices
7
Interference-Causing Equipment Standard (ICES-003 Issue 3)
7
Checking the Accessories
9
How to Read this Manual
10
Meanings of Icons
10
Chapter 1 Features
12
One-Touch Document E-Mail (Internet Facsimile Function)
13
Mail Server
13
E-Mail RX-FAX Distribution
14
One-Touch Network File TX (One-Touch Filing Function)
15
Network File Scanner (IP Scanner)
16
MFP Agent
17
Chapter 2 Preparation
18
Connecting to the LAN
19
Network Environment and Available Functions
21
Network Configuration
24
Registering Domain Names (Domain Name Key)
40
Installing Utilities
42
Reboot the Computer
44
Chapter3 One-Touch Document E-Mail
46
Sending a Document
47
When the Memory Is Full
51
Using One-Touch Dialing for Transmission (One-Touch Dialing)
53
Using Abbreviated Dialing for Transmission (Abbreviated Dialing)
54
Using Facsimile Program Dialing for Transmission (Facsimile Program Dialing)
55
Sending a Document to Multiple Destinations (Broadcast Transmission)
56
Report Details
57
Registering the Destination to One-Touch Key (One-Touch Dialing Registration)
58
Registering the Destination to Abbreviated Dial (Abbreviated Dialing Registration)
62
Registering the Index for One-Touch Key (Index Registration)
65
Registering Communication Conditions to Facsimile Program Keys (Facsimile Program Registration)
67
Specify the Destination
68
Sending Fine Print and Photos (Image Quality)
70
Image Quality
70
Select the Destination
71
Adjusting Contrast for Transmission (Contrast)
72
Sending Documents in Their Original Size Irrespective of the Recipient Paper Size (Reduction)
74
Selecting the Area of the Document to be Scanned and Transmitted (Scan Area)
76
Combining One-Touch Key and Dialed Input for Transmission (Chain Dialing)
78
Inserting Text into Transmit Documents (Transmit Document Text Insert)
80
Confirming the Communication Status
81
Receiving a Document
85
Receiving an Internet Facsimile Manually (POP3 Reception)
86
Returning the Activity Report (Activity Report)
87
Printing Header Information on Received Documents (RX Document Header Print)
88
Transmission and Reception for each Account
89
Using the FAX Menu
92
Remote Copying
93
Password Transmission
93
Chapter 4 E-Mail RX-FAX Distribution
96
Distributing Documents Received by Facsimile Via E-Mail (E-Mail RX-FAX Distribution)
97
Facsimile Transmission to a Destination
101
Chapter 5 One-Touch Filing
102
One-Touch Filing (One-Touch Network File TX)
102
Registering a Filing Destination (One-Touch Network File TX Registration)
105
Scanner Mode
109
Registering an Index for Scanner One-Touch Keys (Scanner Index Registration)
110
Chapter 6 Network File Scanner (IP Scanner)
112
Using IP Scanner
113
Selecting Image Quality
116
MFP Agent
122
Preparing MFP Agent
123
Account Operations
124
Administrator Operations
127
Maintenance Settings
130
Registration/Settings List
131
Setting the Date and Time (Time and Date)
139
Accessing the Administrator Management Index
141
Screen
141
Registering Names (TSI Information)
142
Setting the Initial Screen to be Displayed
143
Auto-Mode Screen
144
Setting the Initial Destination Specification Screen to be Displayed (Priority Facsimile Screen)
146
(Priority Screen)
146
Key Dialing Screen
146
Index Screen
147
Setting the Initial Scanner Screen to be Displayed (Priority Scan Screen)
149
One-Touch Screen
149
Settings of Handling the Received Documents (Settings for Received Documents)
151
Administrator Management Screen
151
Setting the Time to Save Documents that Could Not be Sent (Memory Holding Timer)
154
Registering the Destinations for Communication Management Data Mails (Administrator E-Mail Address)
155
Registering Accounts (Account Input)
156
Settings for Transmission (Transmission Settings)
166
Settings for Reception (Reception Settings)
170
Setting for Report Printing (Report Settings)
176
Administrator Management Screen
176
Confirming the Total Pages
178
Changing Account Information
181
Registering F CODE
184
Reports and Lists
190
Confirming the Transmission Status
191
Activity Report (TX)
191
Report Details
192
Confirming the Reception Status
193
Activity Report (RX)
193
Confirming the Setting Status Per Account (Account List)
195
Confirming the Usage Status Per Account (Account Count Report)
198
Confirming the Setting Status Per Function (Setting List)
199
Confirming the Registered Details in One-Touch Dialing (One-Touch List)
201
Confirming the Registered Details as Abbreviated Dialing (Abbr. Dial# List)
202
Confirming the Registered Details in the Facsimile Program (FAX Program List)
203
Chapter 10 Troubleshooting
206
Error Indications
207
Communication Activity Error Codes
209
Troubleshooting
212
Specifications
223
Key Index
230
Minolta Di200f Setup Quick Manual (35 pages)
Network Application
Brand:
Minolta
| Category:
Printer
| Size: 0 MB
Table of Contents
Table of Contents
2
Network Application
2
Network Connection and Setup
2
Flow of Operations
2
Before Connection and Setup
6
FCC Part 15-Radio Frequency Devices
7
Interference-Causing Equipment Standard (ICES-003 Issue 3)
7
Characteristics of the Network Functions
9
Setting up the Network
14
Connecting to the LAN
25
Installing Utilities
27
Installation Starts
29
Checking Operations
32
Related Manuals
33
This Chapter Lists the Attached Manuals
33
Advertisement
Minolta Di200f Setup Instructions (12 pages)
Brand:
Minolta
| Category:
Copier
| Size: 0 MB
Advertisement
Related Products
Minolta DI2010
Minolta DI2510
Minolta Di250f
Minolta Di2010f
Minolta Di251f
Minolta Di620
Minolta DI3510
Minolta DI3010
MINOLTA DI550
Minolta Di183
Minolta Categories
Digital Camera
Film Camera
Printer
Copier
All in One Printer
More Minolta Manuals
Login
Sign In
OR
Sign in with Facebook
Sign in with Google
Upload manual
Upload from disk
Upload from URL