
Subscribe to Our Youtube Channel
Related Manuals for Robotis Comprehensive Kit Robot Series


Summary of Contents for Robotis Comprehensive Kit Robot Series
- Page 1 Closer to Real, Bioloid QuickStart Comprehensive Kit Robot Series ROBOTIS CO.,LTD. www.robotis.com...
-
Page 2: Table Of Contents
Comprehensive Kit Robot Series Contents 1. Starting Bioloid ························· 4 1-1. What is Bioloid? ······································· 5 1-2. Parts of Bioloid ········································ 6 1-3. Installing Bioloid Software··································· 8 1-3-1. The Contents of Bioloid’s CD ······················· 8 1-3-2. Installing Software····························· 8 1-4. How to Use Bioloid ······································ 9 2. - Page 3 Comprehensive Kit Robot Series 2-4. Examples of Advanced Level································· 146 2-4-1. Dinosaur ································ 147 2-4-2. Puppy ·································· 158 2-4-3. King Spider ······························· 169 2-4-4. Humanoid ································ 177 3. Bioloid Operation and Maintenance ··············· 192 3-1. Finding the Serial COM Port Number of the PC ························ 193 3-2.
-
Page 4: Starting Bioloid
Comprehensive Kit Robot Series 1. Starting Bioloid... -
Page 5: What Is Bioloid
Comprehensive Kit Robot Series 1-1. What is Bioloid? Bioloid is composed of block-shaped parts where users can assemble robots in various shapes and functions - making it truly all-around robot kit. Furthermore, we provide software that enable users to connect assembled robots to PC, allowing them to program the robots. With the... -
Page 6: Parts Of Bioloid
Comprehensive Kit Robot Series 1-2. Parts of Bioloid ◎ Main Parts of Bioloid Main Controller CM-5 The main controller of Bioloid robot. Using parts, robots connecting Dynamixel(actuator module, sensor module) to a ■ CM-5 CM-5. Robot Exclusive Actuator, Dynamixel AX-12 Actuator module that functions as joint of robot. - Page 7 Comprehensive Kit Robot Series ◎ Names of each part of AX-12 ( Acutator) Connector ◎ Names of each part of AX-S1 (Sensor Module) Sensor Connector ◎ Names of each part of CM-5 Serial Cable Jack POWER POWER JACK START button...
-
Page 8: Installing Bioloid Software
Comprehensive Kit Robot Series 1-3. Installing Bioloid Software 1-3-1. The Contents of Bioloid’s CD Many helpful materials and instruction are included in the CD. : Programs that needs to be installed in PC in order to operate Bioloid robot. Sofware : QuickStart, User’s Guide and manuals for the Dynamixel (AX-12, AX-S1). -
Page 9: How To Use Bioloid
Comprehensive Kit Robot Series 1-4. How to Use Bioloid ◎ Manuals ▷ QuickStart QuickStart explains how to assemble and operate robots quick and easily, and how to download a program. Printed QuickStart book is provided for your convenience. ▷ User’s Guide User’s Guide explains the operating principle and the program process of... - Page 10 Comprehensive Kit Robot Series ◎ Robot examples and Bioloid Kit Series Beginner Level Robots Beginner kit Beginner Level Robots : Robots with 4 and less joints that can be assembled with Beginner kit. Intermediate Level Robots Beginner kit AX-12, 4 pcs...
-
Page 11: Assembling Bioloid
Comprehensive Kit Robot Series 2. Assembling Bioloid... -
Page 12: Robot Assembling Orders
Comprehensive Kit Robot Series 2-1. Robot Assembling Orders Robot assembling orders . Step 1 Assembling the Robots Step 2 Downloading Robot Programs Step 3 Operating the Robots 2-1-1. Assembling the Robots Assemble the robots in orderly refer to assembly map in QuickStart. -
Page 13: Downloading Robot Programs
Comprehensive Kit Robot Series 2-1-2. Downloading Robot Programs To activate the robots, the users must use the program. Transferring robot program from the PC to CM-5 is called “download.” Serial Cable Download Program ※ If your PC does not support Serial COM Port, install USB2Serial converter. - Page 14 Comprehensive Kit Robot Series ◎ How to download Behavior Control Program The filename extension of Behavior Control Program is “bpg.” The users must download this program to activate the robots. Connect PC and CM-5 Turn on of CM-5. Power Serial Cable Go to File (F) =>Select Open(o) menu and open...
- Page 15 Comprehensive Kit Robot Series ◎ How to download Motion Data The filename extension of Motion Data is “mtn.” The users download this program whenever it is necessary.. Connect PC and CM-5 Turn on of CM-5. Power Serial Cable Select Management(M)=>Robot Motion (R)menu.
- Page 16 Comprehensive Kit Robot Series ◎ Download Troubleshooting If the users see error messages while downloading a program, take the following steps. [ Types of Error Message ] [Troubleshooting Step 1] Make sure CM-5 is connected to the PC. (Troubleshooting Step 2) Make sure CM-5 power is on.
-
Page 17: Operating The Robots
Comprehensive Kit Robot Series 2-1-3. Operating the Robots ◎ Offline Robot Activation Offline robot activation, as name indicates, is the operation of the robots without the connection to PC. Disconnect Serial Cable from CM-5 Serial Cable Press MODE button to make PLAY LED flash on and... - Page 18 Comprehensive Kit Robot Series ◎ Online Robot Activation Online robot activation, as name indicates, is the operation of the robots with the connection to PC. This mode involves the confirmation of the message via monitor when the robot is sending a message to the PC.
-
Page 19: Examples Of Beginner Level
Comprehensive Kit Robot Series 2-2. Examples of Beginner Level 8. Robot Arm 1. Crossing Gate 2. Universal Gauge 9. Cliff Detection Car 10. Greeting Penguin 3. Sound-Level Meter 4. Crocodile Mouth 11. Attacking Duck 5. Pan Tilt 12. Obstacle Detection Car 13. -
Page 20: Crossing Gate
Comprehensive Kit Robot Series 2-2-1. Crossing Gate Let’s build a crossing gate that opens and closes with a button. (1) Necessary parts CM-5 ADAPTOR-CM5 motor AX-12 × 1 × 1 × 1 F2 × 1 × 5 × 1 BU × 1 WA ×... - Page 21 Comprehensive Kit Robot Series (2) Assembling Joint Step 1 Step 2 : 2pcs ADAPTOR-CM5 : 4pcs CM-5 [Battery included] : 4pcs : 4pcs : 4pcs Step 3 : 8pcs : 8pcs : 3pcs Whole Body Assembly Step 4 ※Insert nuts...
- Page 22 Comprehensive Kit Robot Series Wiring and Completion Step 5 CABLE-14 ※Wiring motor CABLE-14 CM-5 m ot or Connector ※Using side connector of , connect cable. CM-5...
- Page 23 Comprehensive Kit Robot Series (3) Check Assembly You should confirm whether assembled uprightly before operate. Step 1 Download “Check Assembly”file which is behavior control program (In CD, Applied Robots\Beginner\Crossing Gate\CheckAssembly(Crossing Gate).bpg) ※Refer to “How to download Behavior Control Program” from “2-1-2 Downloading Robot Programs.”...
- Page 24 Comprehensive Kit Robot Series Step 5 When START button of CM-5 is pressed, the robot will look like the figures below. If different, check the assembly points of Dynamixel using the assembly diagram. ※Side View The Bar is parallel to surface.
-
Page 25: Universal Gauge
Comprehensive Kit Robot Series 2-2-2. Universal Gauge Let’s build a Universal gauge that can control the movement speed of gauge with buttons. (1) Necessary parts motor CM-5 ADAPTOR-CM5 AX-12 × 1 F3 × 3 F6 × 1 × 1 × 1 ※Nuts, screws, and cables shown below are the same as the actual size. - Page 26 Comprehensive Kit Robot Series (2) Assembling CM-5 Step 1 Step 2 ADAPTOR-CM5 CM-5 [Battery included] : 2pcs : 4pcs : 4pcs : 2pcs Joint Whole Body Assembly Step 3 Step 4 ※Insert nuts : 8pcs : 12pcs S1 : 2pcs...
- Page 27 Comprehensive Kit Robot Series (3) Check Assembly You should confirm whether assembled uprightly before operate. Step 1 Download “Check Assembly”file which is behavior control program (In CD, Applied Robots\Beginner\Universal Guage\CheckAssembly(Universal Guage).bpg) ※Refer to “How to download Behavior Control Program” from “2-1-2 Downloading Robot Programs”...
- Page 28 Comprehensive Kit Robot Series Step 5 When START button of CM-5 is pressed, the robot will look like the figures below. If different, check the assembly points of Dynamixel using the assembly diagram. ※Top View The bar is perpendicular to...
-
Page 29: Sound-Level Meter
Comprehensive Kit Robot Series 2-2-3. Sound-Level Meter Let’s build a sound-level meter that shows the sound level in a gauge when a sensor detects sound. (1) Necessary parts motor F3 × 5 F6 × 1 AX-12 × 1 AX-S1 ADAPTOR-CM5 ×... - Page 30 Comprehensive Kit Robot Series (2) Assembling CM-5 Joint 1 Joint 2 Step 1 Step 2 Step 3 ADAPTOR-CM5 S1 : 2pcs S1 : 4pcs : 4pcs CM-5 [Battery included] : 2PCS S1 : 4pcs : 4pcs : 2pcs : 2pcs...
- Page 31 Comprehensive Kit Robot Series (3) Check Assembly You should confirm whether assembled uprightly before operate. Step 1 Download “Check Assembly”file which is behavior control program (In CD, Applied Robots\Beginner\ Sound-Level Meter \CheckAssembly(Sound-Level Meter).bpg) ※Refer to “How to download Behavior Control Program” from “2-1-2 Downloading Robot Programs.”...
- Page 32 Comprehensive Kit Robot Series Step 5 When START button of CM-5 is pressed, the robot will look like the figures below. If different, check the assembly points of Dynamixel using the assembly diagram. ※Top View The bar is perpendicular to...
-
Page 33: Crocodile Mouth
Comprehensive Kit Robot Series 2-2-4. Crocodile Mouth Let’s build a crocodile mouth that opens a mouth when a sensor detects an object and that makes sound when an object is not detected by a sensor in front for a certain period of time. - Page 34 Comprehensive Kit Robot Series (2) Assembling CM-5 Head Step 1 Step 2 : 2pcs ADAPTOR-CM5 CM-5 [Battery included] N1 : 4pcs : 4pcs S2 : 6pcs Mouth 1 Mouth 2 Step 3 Step 4 Step 2 ※Insert nuts N1 : 8pcs...
- Page 35 Comprehensive Kit Robot Series Wiring and Completion Step 6 CABLE-10 CABLE-18 ※Wiring CABLE-18 CM-5 m ot or CABLE-10 m ot or motor...
- Page 36 Comprehensive Kit Robot Series (3) Check Assembly You should confirm whether assembled uprightly before operate. Step 1 Download “Check Assembly”file which is behavior control program (In CD, Applied Robots\Beginner\ Crocodile Mouth \CheckAssembly(Crocodile Mouth).bpg) ※Refer to “How to download Behavior Control Program” from “2-1-2 Downloading Robot Programs”...
- Page 37 Comprehensive Kit Robot Series Step 5 When START button of CM-5 is pressed, the robot will look like the figures below. If different, check the assembly points of Dynamixel using the assembly diagram. ※Side View The Mouth of crocodile is parallel to surface.
-
Page 38: Pan Tilt
Comprehensive Kit Robot Series 2-2-5. Pan Tilt Let’s build a pan tilt robot that can be controlled with the pan(right and left) and tilt(up and down) buttons. (1) Necessary parts BU × 1 motor motor WA × 1 AX-12 × 2 ×... - Page 39 Comprehensive Kit Robot Series (2) Assembling CM-5 Joint 1 Step 1 Step 2 : 2pcs ADAPTOR-CM5 CM-5 [Battery included] : 4pcs : 4pcs : 4pcs : 4pcs Joint 2 Joint 3 Step 4 Step 3 : 4pcs ※Check ※Check assembly point...
- Page 40 Comprehensive Kit Robot Series Wiring and Completion Step 6 ※Using side connector of CM-5 CABLE-14 connect cable. motor Connector ※Wiring CABLE-14 CM-5 m ot or CABLE-14 CABLE-14 m ot or m ot or motor...
- Page 41 Comprehensive Kit Robot Series (3) Check Assembly You should confirm whether assembled uprightly before operate. Step 1 Download “Check Assembly”file which is behavior control program (In CD, Applied Robots\Beginner\Pan Tilt\CheckAssembly(Pan Tilt).bpg) ※Refer to “How to download Behavior Control Program” from “2-1-2 Downloading Robot Programs”...
- Page 42 Comprehensive Kit Robot Series Step 5 When START button of CM-5 is pressed, the robot will look like the figures below. If different, check the assembly points of Dynamixel using the assembly diagram.. ※Top View ※Side View The Pan Tilt is parallel to...
-
Page 43: Parking Gate
Comprehensive Kit Robot Series 2-2-6. Parking Gate Let’s build a parking gate that automatically opens and closes the door when a sensor detects an object. (1) Necessary parts motor motor F3 × 8 F6 × 1 AX-12 × 2 AX-S1 ×... - Page 44 Comprehensive Kit Robot Series (2) Assembling CM-5 Joint Step 1 Step 2 : 4pcs ※Check ADAPTOR-CM5 assembly point CM-5 [Battery included] N1 : 4pcs : 4pcs motor Step 3 : 6pcs F3 : 3pcs ※Check assembly point motor : 6pcs...
- Page 45 Comprehensive Kit Robot Series Wiring and Completion Step 7 motor CABLE-10 Connector CABLE-14 ※Wiring CABLE-10 CM-5 m ot or motor CABLE-14 m ot or m ot or CABLE-10 CM-5 CABLE-10 Connector ※Using side connectors of , connect cables. CM-5...
- Page 46 Comprehensive Kit Robot Series (3) Check Assembly You should confirm whether assembled uprightly before operate. Step 1 Download “Check Assembly”file which is behavior control program (In CD, Applied Robots\Beginner\Parking Gate \CheckAssembly(Parking Gate).bpg) ※Refer to “How to download Behavior Control Program” from “2-1-2 Downloading Robot Programs”...
- Page 47 Comprehensive Kit Robot Series Step 5 When START button of CM-5 is pressed, the robot will look like the figures below. If different, check the assembly points of Dynamixel using the assembly diagram. ※Top View ※Side View The bar is parrael to the surface.
-
Page 48: Melody Car
Comprehensive Kit Robot Series 2-2-7. Melody Car Let’s build a melody car that chimes and moves in a direction corresponding to a button (1) Necessary parts CM-5 ADAPTOR-CM5 motor motor motor motor AX-12 × 4 AX-S1 × 1 × 1 ×... - Page 49 Comprehensive Kit Robot Series (2) Assembling Left Wheel : 2 sets Right Wheel : 2 sets Step 1 Step 2 ※Assemble 2 sets using ※Assemble 2 sets using motor motor motor motor ※Insert nuts ※Attach nut stickers : ※Insert nuts ※Attach nut stickers :...
- Page 50 Comprehensive Kit Robot Series Wiring and Whole Body Assembly Step 5 ※Bottom view ※Wiring CABLE-6 CABLE-6 m ot or m ot or CABLE-6 motor motor CABLE-10 m ot or CABLE-10 CABLE-14 m ot or m ot or CABLE-6 m ot or...
- Page 51 Comprehensive Kit Robot Series (3) Check Assembly You should confirm whether assembled uprightly before operate. Step 1 Download “Check Assembly”file which is behavior control program (In CD, Applied Robots\Beginner\Melody Car \CheckAssembly(Melody Car).bpg) ※Refer to “How to download Behavior Control Program” from “2-1-2 Downloading Robot Programs”...
- Page 52 Comprehensive Kit Robot Series Step 5 Close the CM-5 online robot activation. (4) Operating the Robot Operate completed robot using demonstration(example)program. Step 1 Download “Example” file which is behavior control program. (In CD, Applied Robots\Beginner\Melody Car\DemoExample(\Melody Car).bpg) ※Refer to “How to download Behavior Control Program” from “2-1-2 Downloading Robot Programs.”.
-
Page 53: Robot Arm
Comprehensive Kit Robot Series 2-2-8. Robot Arm Let’s build a robot arm that can be controlled by a button. (1) Necessary parts CM-5 ADAPTOR-CM5 motor motor motor AX-12 × 3 × 1 × 1 F1 × 1 × 1 F3 × 4 F9 ×... - Page 54 Comprehensive Kit Robot Series (2) Assembling CM-5 Joint 1 Hand Step 1 Step 2 Step 5 ADAPTOR-CM5 F3 : 2pcs CM-5 [Battery included] : 4pcs : 4pcs S1 : 4pcs N1 : 4pcs Joint 2 Joint 3 Step 3 Step 4 ※Check...
- Page 55 Comprehensive Kit Robot Series Complete Wiring and Assembly Step 7 ※Wiring CABLE-14 CM-5 m ot or CABLE-10 CABLE-14 m ot or m ot or CABLE-10 m ot or m ot or motor motor CABLE-14 CABLE-14 motor ※Using side connector of CM-5 ※Left side view...
- Page 56 Comprehensive Kit Robot Series (3) Check Assembly You should confirm whether assembled uprightly before operate. Step 1 Download “Check Assembly”file which is behavior control program (In CD, Applied Robots\Beginner\Robot Arm\CheckAssembly(Robot Arm).bpg) ※Refer to “How to download Behavior Control Program” from “2-1-2 Downloading Robot Programs”...
- Page 57 Comprehensive Kit Robot Series Step 5 When START button of CM-5 is pressed, the robot will look like the figures below. If different, check the assembly points of Dynamixel using the assembly diagram. ※Front View ※Side View The palm of the hand is facing the front.
-
Page 58: Obstacle Detection Car
Comprehensive Kit Robot Series 2-2-9. Obstacle Detection Car Let’s build a car that detects an obstacle with a sensor and that avoid the obstacle automatically. (1) Necessary parts CM-5 ADAPTOR-CM5 motor motor motor motor AX-12 × 4 AX-S1 × 1 ×... - Page 59 Comprehensive Kit Robot Series (2) Assembling Left Wheel : 2 sets Right Wheel : 2 sets Step 1 Step 2 ※Assemble 2 sets using ※Assemble 2 sets using motor motor motor motor ※Insert nuts ※Attach nut stickers : ※Insert nuts ※Attach nut stickers :...
- Page 60 Comprehensive Kit Robot Series Wiring and Whole Body Assembly Step 5 ※Bottom view ※Wiring CABLE-6 CABLE-6 m ot or m ot or CABLE-6 motor motor CABLE-10 m ot or CABLE-10 CABLE-14 m ot or m ot or CABLE-6 m ot or...
- Page 61 Comprehensive Kit Robot Series (3) Check Assembly You should confirm whether assembled uprightly before operate. Step 1 Download “Check Assembly”file which is behavior control program (In CD, Applied Robots\Beginner\Obstacle Detection Car\CheckAssembly(Obstacle Detection Car).bpg) ※Refer to “How to download Behavior Control Program” from “2-1-2 Downloading Robot Programs”...
- Page 62 Comprehensive Kit Robot Series Step 5 Close the CM-5 online robot activation. (4) Operating the Robot Operate completed robot using demonstration(example)program. Step 1 Download “Example” file which is behavior control program. (In CD, Applied Robots\Beginner\ Obstacle Detection Car\DemoExample(Obstacle Detection Car).bpg) ※Refer to “How to download Behavior Control Program”...
-
Page 63: Greeting Penguin
Comprehensive Kit Robot Series 2-2-10. Greeting Penguin Let’s build a penguin robot that greets when it detects an object in front and that raises hand when detecting an object on side. (1) Necessary parts ADAPTOR-CM5 CM-5 motor motor motor motor AX-12 ×... - Page 64 Comprehensive Kit Robot Series (2) Assembling Shoulder : 2 sets Hand : 2 sets Head Step 1 Step 2 Step 3 ※Assemble 2 sets in ※Assemble 2 sets in a same style. a same style. N1 : 4pcs S1 : 4pcs...
- Page 65 Comprehensive Kit Robot Series Leg : 2 sets Foot : 2 sets Step 5 Step 6 N1 : 3pcs ※Assemble 2 sets in a same ※Assemble 2 sets in a same style. style. : 4pcs : 4pcs S1 : 3pcs...
- Page 66 Comprehensive Kit Robot Series CM-5 Assembly and Wiring Step 8 : 4pcs CABLE-14 motor motor CM-5 CABLE-14 [Battery included] CABLE-10 : 4pcs motor motor CABLE-10 ※Wiring Connector CABLE-14 m ot or CABLE-14 m ot or CABLE-6 m ot or m otor...
- Page 67 Comprehensive Kit Robot Series (3) Check Assembly You should confirm whether assembled uprightly before operate. Step 1 Download “Check Assembly”file which is behavior control program (In CD, Applied Robots\Beginner\Greeting Penguin\CheckAssembly(Greeting Penguin).bpg) ※Refer to “How to download Behavior Control Program” from “2-1-2 Downloading Robot Programs”...
- Page 68 Comprehensive Kit Robot Series Step 5 When START button of CM-5 is pressed, the robot will look like the figures below. If different, check the assembly points of Dynamixel using the assembly diagram ※Side View ※Back View Two legs are perpendicular to the surface.
-
Page 69: Attacking Duck
Comprehensive Kit Robot Series 2-2-11. Attacking Duck Let’s build a duck robot that attack with a beak when the sensor detects an object. (1) Necessary parts CM-5 ADAPTOR-CM5 motor motor motor AX-12 × 3 AX-S1 × × 1 × 1 F1 ×... - Page 70 Comprehensive Kit Robot Series (2) Assembling CM-5 Joint 1 Hand Step 1 Step 2 Step 5 ADAPTOR-CM5 F3 : 2pcs CM-5 [Battery included] : 4pcs : 4pcs S1 : 4pcs N1 : 4pcs Joint 2 Joint 3 Step 3 Step 4 ※Check...
- Page 71 Comprehensive Kit Robot Series Wiring Step 7 ※Left side view ※Wiring CABLE-14 CM-5 m ot or CABLE-10 CABLE-14 m ot or m ot or CABLE-10 m ot or m ot or motor motor CABLE-10 CABLE-14 motor ※Using side connector of...
- Page 72 Comprehensive Kit Robot Series (3) Check Assembly You should confirm whether assembled uprightly before operate. Step 1 Download “Check Assembly”file which is behavior control program (In CD, Applied Robots\Beginner\Attacking Duck\CheckAssembly\Attacking Duck).bpg) ※Refer to “How to download Behavior Control Program” from “2-1-2 Downloading Robot Programs”...
- Page 73 Comprehensive Kit Robot Series Step 5 When START button of CM-5 is pressed, the robot will look like the figures below. If different, check the assembly points of Dynamixel using the assembly diagram. ※Front View ※Side View The palm of the hand is facing the front.
-
Page 74: Cliff Detection Car
Comprehensive Kit Robot Series 2-2-12. Cliff Detection Car Let’s build a car that detects and avoids cliff and obstacle automatically by a sensor. (1) Necessary parts CM-5 ADAPTOR-CM5 motor motor motor motor AX-12 × 4 AX-S1 × 1 × 1 ×... - Page 75 Comprehensive Kit Robot Series (2) Assembling Left Wheel : 2 sets Right Wheel : 2 sets Step 1 Step 2 ※Assemble 2 sets using ※Assemble 2 sets using motor motor motor motor ※Insert nuts ※Attach nut stickers : ※Insert nuts ※Attach nut stickers :...
- Page 76 Comprehensive Kit Robot Series Whole Body Assembly and Wiring Step 5 ※Bottom view ※Wiring CABLE-6 CABLE-6 m ot or m ot or CABLE-6 motor motor CABLE-10 m ot or CABLE-10 CABLE-14 m ot or m ot or CABLE-6 m ot or...
- Page 77 Comprehensive Kit Robot Series (3) Check Assembly You should confirm whether assembled uprightly before operate. Step 1 Download “Check Assembly”file which is behavior control program (In CD, Applied Robots\Beginner\Cliff Detection Car\CheckAssembly(Cliff Detection Car).bpg) ※Refer to “How to download Behavior Control Program” from “2-1-2 Downloading Robot Programs”...
- Page 78 Comprehensive Kit Robot Series Step 5 Close the CM-5 online robot activation. (4) Operating the Robot Operate completed robot using demonstration(example)program. Step 1 Download “Example” file which is behavior control program. (In CD, Applied Robots\Beginner\Cliff Detection Car \DemoExample(Cliff Detection Car).bpg) ※Refer to “How to download Behavior Control Program”...
-
Page 79: Clapping Penguin
Comprehensive Kit Robot Series 2-2-13. Clapping Penguin Let’s build a penguin robot that greets when it meets an object in front and that imitates the handclap action (1) Necessary parts ADAPTOR-CM5 CM-5 motor motor motor motor AX-12 × 4 AX-S1 ×... - Page 80 Comprehensive Kit Robot Series (2) Assembling (2) Assembling Shoulder : 2 sets Hand : 2 sets Head Step 1 Step 2 Step 3 ※Assemble 2 sets in a same ※Assemble 2 sets in a same style. style. : 4pcs N1 : 4pcs...
- Page 81 Comprehensive Kit Robot Series Leg : 2 sets Foot : 2 sets Step 5 Step 6 : 3pcs ※Assemble 2sets in a same ※Assemble 2sets in a same style. style. : 4pcs : 4pcs : 3pcs Lower Part of Body Assembly Step 7 ※Insert nuts...
- Page 82 Comprehensive Kit Robot Series CM-5 Assembly and Wiring Step 8 : 4pcs CABLE-20 CABLE-18 CABLE-14 CM-5 [Battery included] motor : 4pcs motor ※Wiring Connector CABLE-10 CABLE-20 m ot or CABLE-18 motor m o t o r CABLE-6 m o t o r...
- Page 83 Comprehensive Kit Robot Series (3) Check Assembly You should confirm whether assembled uprightly before operate. Step 1 Download “Check Assembly”file which is behavior control program (In CD, Applied Robots\Beginner\Clapping Penguin\CheckAssembly(Clapping Penguin).bpg) ※Refer to “How to download Behavior Control Program” from “2-1-2 Downloading Robot Programs”...
- Page 84 Comprehensive Kit Robot Series Step 5 When START button of CM-5 is pressed, the robot will look like the figures below. If different, check the assembly points of Dynamixel using the assembly diagram. ※Front View ※Back View Two legs are perpendicular to the surface.
-
Page 85: Walking Droid
Comprehensive Kit Robot Series 2-2-14. Walking Droid Let’s build 2-legged walking robot, Droid. This robot continues to move forward, and when it meets an obstacle, it will avoid it. (1) Necessary parts CM-5 ADAPTOR-CM5 motor motor motor motor AX-12 × 4 AX-S1 ×... - Page 86 Comprehensive Kit Robot Series (2) Assembling Right Leg 1 Right Leg 3 Step 1 Step 3 ※Check ※Insert nuts assembly : 4pcs S1 : 8pcs Step 1 motor motor : 4pcs Right Leg 2 Step 2 : 4pcs ※Check assembly point...
- Page 87 Comprehensive Kit Robot Series Waist Step 7 ※Attach nut stickers: make sure nuts do not come off ※Insert nuts : 12pcs Sticker : 2pcs : 12pcs : 2pcs Lower Part of Body Step 8 CABLE-14 : 16pcs ※Insert nuts CABLE-10...
- Page 88 Comprehensive Kit Robot Series Complete Assembly and Wiring Step 10 ※Wiring CABLE-14 m ot or m ot or CABLE-14 m ot or m ot or : 4pcs CABLE-10 CM-5 m ot or Step 9 CM-5 CABLE-10 CM-5 m ot or...
- Page 89 Comprehensive Kit Robot Series (3) Check Assembly You should confirm whether assembled uprightly before operate. Step 1 Download “Check Assembly”file which is behavior control program (In CD, Applied Robots\Beginner\Walking Droid\CheckAssembly(Walking Droid).bpg) ※Refer to “How to download Behavior Control Program” from “2-1-2 Downloading Robot Programs”...
- Page 90 Comprehensive Kit Robot Series Step 5 When START button of CM-5 is pressed, the robot will look like the figures below. If different, check the assembly points of Dynamixel using the assembly diagram. ※Front View ※Back View Both feet are flat on the surface.
-
Page 91: Examples Of Intermediate Level
Comprehensive Kit Robot Series 2-3. Examples of intermediate Level 1. Probing Robot 2. Excavator 3. Robot Flower 4. Fawn 5. Turtle 6. Spider 7. Gerwalk 8. Battle Droid... -
Page 92: Probing Robot
Comprehensive Kit Robot Series 2-3-1. Probing Robot Let’s build a probing robot that picks up an object in front and that moves it aside. (1) Necessary parts CM-5 ADAPTOR-CM5 motor motor AX-12 × 7 AX-S1 × 1 × 1 × 1 F1 ×... - Page 93 Comprehensive Kit Robot Series (2) Assembling Sensor Assembly Joint Step 1 Step 2 Step 1 motor : 4pcs motor : 2pcs : 4pcs : 8pcs ※Insert nuts ※Check assembly : 8pcs point : 2pcs motor : 8pcs Claw Assembly Step 3 ※Insert nuts...
- Page 94 Comprehensive Kit Robot Series Body Step 4 ※Insert nuts : 4pcs ADAPTOR-CM5 : 2pcs : 4pcs : 4pcs ※Insert nuts : 4pcs : 8pcs Step 3 Right Wheel Left Wheel Step 5 Step 6 ※Attach nut stickers : ※Attach nut stickers :...
- Page 95 Comprehensive Kit Robot Series Tire Assembly 1 Tire Assembly 2 Step 7 Step 8 Step 5 Step 6 : 8pcs 2pcs : 8pcs : 2pcs : 2pcs : 2pcs Whole Body Assembly Step 9 ※Top view Check screw assembly point ※Attach nut stickers :...
- Page 96 Comprehensive Kit Robot Series Wiring and Completion Step 10 : 4pcs Step 4 CM-5 [Battery included] ※Bottom view ※Wiring CABLE-6 m ot or m ot or m ot or m ot or m ot or CABLE-10 m ot or m ot or...
- Page 97 Comprehensive Kit Robot Series (3) Check Assembly You should confirm whether assembled uprightly before operate. Step 1 Download “Check Assembly”file which is behavior control program (In CD, Applied Robots\Intermediate\Probing Robot\CheckAssembly(Probing Robot).bpg) ※Refer to “How to download Behavior Control Program” from “2-1-2 Downloading Robot Programs.”...
- Page 98 Comprehensive Kit Robot Series Step 5 When START button of CM-5 is pressed, the robot will look like the figures below. If different, check the assembly points of Dynamixel using the assembly diagram. ※Side View ※Top View Claw is horizontal to the surface.
-
Page 99: Excavator
Comprehensive Kit Robot Series 2-3-2. Excavator Let’s build an excavator that performs excavation works with its robot arm when the sensor detects an object. (1) Necessary parts CM-5 ADAPTOR-CM5 motor motor × 8 AX-S1 × 1 × 1 × 1 F10 ×... - Page 100 Comprehensive Kit Robot Series (2) Assembling Wheel : 4 sets Drive 1 Step 1 Step 2 Step 3 ※Insert nuts : 2pcs ※Using : 2pcs Step 2 motor motor motor motor , assemble 4sets. motor motor Step 3 motor motor : 4pcs ※Assembl in a same style.
- Page 101 Comprehensive Kit Robot Series Arm 1 Step 8 : 3pcs : 3pcs ※Check assembly point : 3pcs motor ※Insert : 4pcs nuts Step 6 motor : 20pcs ※Insert nuts : 4pcs Step 5 ※Check assembly point motor Arm 2 Step 9 ※Insert nuts...
- Page 102 Comprehensive Kit Robot Series Whole Body Assembly Step 10 ※Top view Check screw assembly point. Step 9 : 4pcs ※Enlarged image : 4pcs m ot or m ot or m ot or m ot or m ot or Step 4...
- Page 103 Comprehensive Kit Robot Series (3) Check Assembly You should confirm whether assembled uprightly before operate. Step 1 Download “Check Assembly”file which is behavior control program (In CD, Applied Robots\Intermediate\Excavator\CheckAssembly(Excavator).bpg) ※Refer to “How to download Behavior Control Program” from “2-1-2 Downloading Robot Programs.”...
- Page 104 Comprehensive Kit Robot Series Step 5 When START button of CM-5 is pressed, the robot will look like the figures below. If different, check the assembly points of Dynamixel using the assembly diagram. ※Side View ※Top View Each joint of robot arm forms the right angle.
-
Page 105: Robot Flower
Comprehensive Kit Robot Series 2-3-3. Robot Flower Let's build a robot that blooms a flower when the light is shone and that moves petals when there is a sound. (1) Necessary parts CM-5 ADAPTOR-CM5 motor motor AX-12 × 6 AX-S1 ×... - Page 106 Comprehensive Kit Robot Series (2) Assembling Joint 1 : 3 sets Joint 2 : 3 sets Step 1 Step 2 ※Assemble 3 sets in a same style. ※Assemble 3 sets in a same style. : 4pcs : 4pcs : 4pcs...
- Page 107 Comprehensive Kit Robot Series Support Sensor Assembly Step 6 Step 7 : 12pcs ※Insert nuts : 4pcs : 4pcs ADAPTOR-CM5 ※Top view Check screw assembly : 4pcs location. Step 6 : 12pcs Assemble Completion Step 8 ※Insert nuts : 4pcs...
- Page 108 Comprehensive Kit Robot Series Wiring Step 9 ※Wiring CABLE-20 CM-5 CABLE-6 m ot or CABLE-10 m ot or m ot or m ot or CABLE-20 CM-5 m ot or CABLE-10 m ot or m ot or CABLE-20 CM-5 m ot or...
- Page 109 Comprehensive Kit Robot Series (3) Check Assembly You should confirm whether assembled uprightly before operate. Step 1 Download “Check Assembly”file which is behavior control program (In CD, Applied Robots\Intermediate\Robot Flower\CheckAssembly(Robot Flower).bpg) ※Refer to “How to download Behavior Control Program” from “2-1-2 Downloading Robot Programs.”...
- Page 110 Comprehensive Kit Robot Series STep 5 When START button of CM-5 is pressed, the robot will look like the figures below. If different, check the assembly points of Dynamixel using the assembly diagram. ※Side View ※Top View Each joint petal is perpendicular to the surface.
-
Page 111: Fawn
Comprehensive Kit Robot Series 2-3-4. Fawn Let's build a fawn that sits and looks around when nothing is detected but that follows an object when it detects an object. (1) Necessary parts CM-5 ADAPTOR-CM5 motor motor AX-12 × 7 AX-S1 ×... - Page 112 Comprehensive Kit Robot Series (2) Assembling Assemble frame Step 1 Step 4 Step 3 Step 4 Assemble 4 sets. Assemble 2 sets. Step 1 Step 2 : 4pcs : 4pcs : 4pcs : 4pcs : 4pcs : 4pcs : 2pcs...
- Page 113 Comprehensive Kit Robot Series Right Hindleg Left Hindleg Step 7 Step 8 Step 1 ※Check ※Check Step 1 assembly point assembly point motor motor : 4pcs : 4pcs ※Insert nuts ※Insert nuts : 4pcs : 4pcs CM-5 Step 9 ※Draw out the cable through...
- Page 114 Comprehensive Kit Robot Series Body Assembly Step 12 ※Top view ※Insert nuts : 16pcs : 16pcs Step 8 Connector m ot or CABLE-20 m ot or Step 9 Step 6 m ot or Connector m ot or CABLE-14 CABLE-20 Step 7...
- Page 115 Comprehensive Kit Robot Series Whole Body Assembly and Completion Step 13 ※Insert nuts : 8pcs : 8pcs Step 10 Step 11 ※Wiring : 4pcs CABLE-14 CABLE-18 CM-5 m ot or m ot or m ot or CABLE-10 CABLE-20 CM-5 m ot or...
- Page 116 Comprehensive Kit Robot Series (3) Check Assembly You should confirm whether assembled uprightly before operate. Step 1 Download “Check Assembly”file which is behavior control program (In CD, Applied Robots\Intermediate\Fawn\CheckAssembly(Fawn).bpg) ※Refer to “How to download Behavior Control Program” from “2-1-2 Downloading Robot Programs.”...
- Page 117 Comprehensive Kit Robot Series Step 5 When START button of CM-5 is pressed, the robot will look like the figures below. If different, check the assembly points of Dynamixel using the assembly diagram. ※Side View ※Top View Fawn’s head directly faces front.
-
Page 118: Turtle
Comprehensive Kit Robot Series 2-3-5. Turtle Let's build a turtle that senses and avoids an obstacle. (1) Necessary parts CM-5 ADAPTOR-CM5 motor motor AX-12 × 8 AX-S1 × 1 × 1 × 1 F1 × 4 F3 × 10 BU × 4 WA ×... - Page 119 Comprehensive Kit Robot Series (2) Assembling Leg 1 : 2 sets Step 1 ※Assemble taking note of the inserted location of nuts. assemble 2 sets. ※Using : 8pcs motor motor ※Attach nut stickers : ※Check assembly ※Insert nuts Make sure nuts do not...
- Page 120 Comprehensive Kit Robot Series Right Hind Leg Left Hind Leg Step 5 Step 6 ※Insert nuts ※Insert nuts Step 1 Step 2 motor motor motor motor : 4pcs : 4pcs ※Check assembly ※Check point assembly point motor motor : 8pcs...
- Page 121 Comprehensive Kit Robot Series Wiring and Whole Body Assembly Step 8 ※Assemble after wiring is finished. ※Bottom view : 16pcs m ot or Step 4 m ot or Step 6 m ot or m ot or Step 7 m ot or...
- Page 122 Comprehensive Kit Robot Series (3) Check Assembly You should confirm whether assembled uprightly before operate. Step 1 Download “Check Assembly”file which is behavior control program (In CD, Applied Robots\Intermediate\Turtle\CheckAssembly(Turtle).bpg) ※Refer to “How to download Behavior Control Program” from “2-1-2 Downloading Robot Programs”...
- Page 123 Comprehensive Kit Robot Series Step 5 When START button of CM-5 is pressed, the robot will look like the figures below. If different, check the assembly points of Dynamixel using the assembly diagram. ※Front View ※Side View All legs are perpendicular to the surface.
-
Page 124: Spider
Comprehensive Kit Robot Series 2-3-6. Spider Let’s build a spider that attacks when it meets an object. (1) Necessary parts CM-5 ADAPTOR-CM5 motor motor AX-12 × 8 AX-S1 × 1 × 1 × 1 × 14 F1 × 2 F2 × 4 F6 ×... - Page 125 Comprehensive Kit Robot Series (2) Assembling Assemble frame Step 1 Step 4 Assemble 2 sets Assemble 2 sets Assemble 2 sets Step 1 Step 2 Step 3 : 2pcs : 2pcs : 2pcs : 2pcs : 2pcs : 2pcs ※Completed ※Completed...
- Page 126 Comprehensive Kit Robot Series Leg (TYPE 2) : 2 sets Step 7 Step 8 motor ※Using , assemble 2 sets. motor motor ※Insert nuts : 4pcs Step 4 Step 8 ※Check assembly point Step 2 motor : 8pcs ※Assemble in a same style.
- Page 127 Comprehensive Kit Robot Series Right Leg 1 Step 11 ※Assemble taking note of the inserted : 8pcs location of nuts . ※Insert nuts ※Attach nut stickers : Make sure nuts do not come off motor Sticker :2pcs ※Check assembly point...
- Page 128 Comprehensive Kit Robot Series Left Leg 2 Step 14 ※Insert nuts N1 : 4pcs : 8pcs ※Check assembly point motor Step 3 Step 13 Whole Body Assembly Step 15 ※Top view Check screw assembly point ※Attach nut stickers : Make sure nuts do not come off.
- Page 129 Comprehensive Kit Robot Series Wiring and Completion Step 16 : 4pcs CM-5 Step 15 [Battery included] ※Wiring CABLE-20 m ot or m ot or CABLE-20 ※Bottom view m ot or m ot or m ot or CABLE-20 m ot or...
- Page 130 Comprehensive Kit Robot Series (3) Check Assembly You should confirm whether assembled uprightly before operate. Step 1 Download “Check Assembly”file which is behavior control program (In CD, Applied Robots\Intermediate\Spider\CheckAssembly(Spider).bpg) ※Refer to “How to download Behavior Control Program” from “2-1-2 Downloading Robot Programs”...
- Page 131 Comprehensive Kit Robot Series Step 5 When START button of CM-5 is pressed, the robot will look like the figures below. If different, check the assembly points of Dynamixel using the assembly diagram. ※Front View ※Top View ※Side View All legs are parallel to the surface.
-
Page 132: Gerwalk
Comprehensive Kit Robot Series Comprehensive Kit Robot Series 2-3-7. Gerwalk Let’s build a two-legged Gerwalk robot that can walks. Gerwalk is a type of robot that has legs- like bird. (1) Necessary parts CM-5 ADAPTOR-CM5 motor motor AX-12 × 7 AX-S1 ×... - Page 133 Comprehensive Kit Robot Series (2) Assembling Assemble Frame Step 1 Step 3 Assemble 2 sets ※Top view Step 3 : Check screw location. : 3pcs Assemble 2 sets Step 1 Assemble 2 sets Step 2 : 4pcs : 4pcs ※Bottom view...
- Page 134 Comprehensive Kit Robot Series Left Leg Step 7 Step 3 Step 5 : 2pcs ※Insert nuts : 12pcs : 20pcs : 2pcs motor motor : 2pcs Step 1 motor motor motor S1 : 20pcs Step 2 ※Check ※Check assembly point...
- Page 135 Comprehensive Kit Robot Series Lower Part of Body Step 9 : 8pc motor ※Insert nuts : 8pcs Step 6 motor Step 7 Body Step 10 Step 8 ※Check assembly point : 4pcs Step 9 Assembly Completion Step 11 ※Completed : 4pcs...
- Page 136 Comprehensive Kit Robot Series Wiring Step 12 ※Wiring CABLE-20 CM-5 m ot or CABLE-18 m ot or m ot or Connector Connector CABLE-14 m ot or m ot or CABLE-10 m ot or m ot or CABLE-20 CM-5 m ot or...
- Page 137 Comprehensive Kit Robot Series (3) Check Assembly You should confirm whether assembled uprightly before operate. Step 1 Download “Check Assembly”file which is behavior control program (In CD, Applied Robots\Intermediate\Gerwalk\CheckAssembly(Gerwalk).bpg) ※Refer to “How to download Behavior Control Program” from “2-1-2 Downloa ding Robo Programs”...
- Page 138 Comprehensive Kit Robot Series tep 5 When START button of CM-5 is pressed, the robot will look like the figures below. If fferent, check the assembly points of Dynamixel using the assembly diagram. ※Top View ※Side View Waist is perpendicular to the CM-5 .
-
Page 139: Battle Droid
Comprehensive Kit Robot Series 2-3-8. B attle Droid Let's build a Battle Droid that attacks with both hands and that gets up on its own when it is knocked down. (1) Necessary parts CM-5 ADAPTOR-CM5 motor motor AX-12 × 8 AX-S1 ×... - Page 140 Comprehensive Kit Robot Series (2) Assembling Right Leg 1 Right Leg 3 Step 1 Step 3 ※Check ※Insert nuts assembly point : 8pcs Step 1 motor : 4pcs motor : 4pcs ※Check assembly point Right Leg 2 Step 2 : 4pcs...
- Page 141 Comprehensive Kit Robot Series Waist Step 7 ※Attac h nut sticke rs : ※Insert nuts Make sur e nuts do not come off. 12pcs Sticker : 12pcs : 2pcs : 2pcs Lower Part of Body Assembly Step 8 CABLE-20 : 16pcs CABLE-14 ※I...
- Page 142 Comprehensive Kit Robot Series Hand : 2 sets Step 11 : 4pcs : 4pcs Right Arm Left Arm Step 12 Step 13 CABLE-20 CABLE-20 CABLE-10 CABLE-18 Step 9 Step 10 ※Check ※Check assembly point assembly point motor motor : 8pcs ※Insert nuts...
- Page 143 Comprehensive Kit Robot Series Upper and Lower Body Assembly Step 15 ※Top view Check screw assembly point. : 2pcs Step 14 ※Back view Pay attention to wire direction. Step 8 Wiring and Completion Step 16 m ot o r m ot o r...
- Page 144 Comprehensive Kit Robot Series (3) Check Assembly You should confirm whether assembled uprightly before operate. Step 1 Download “Check Assembly”file which is behavior control program (In CD, Applied Robots\Intermediate\Battle Droid\CheckAssembly(Battle Droid).bpg) ※Refer to “How to download Behavior Control Program” from “2-1-2 Downloading Robot Programs”...
- Page 145 Comprehensive Kit Robot Series Step 5 When START button of CM-5 is pressed, the robot will look like the figures below. If fferent, check the assembly points of Dynamixel using the assembl y diagram. ※Back View ※Side View ※Top View Two legs and arms are perpendicular to Both tip of the toes are parallel.
-
Page 146: Examples Of Advanced Level
Comprehensive Kit Robot Series 2-4. Examples of Advanced Level 1. Dinosaur 2. Puppy 3. King Spider 4. Humanoid... -
Page 147: Dinosaur
Comprehensive Kit Robot Series 2-4-1. Dinosaur Let's build a dinosaur that ferociously attacks when it detects an object. (1) Necessary parts CM-5 motor motor AX-12 ×15 X-S1 ×1 Expansion ×1 ×1 ADAPTOR-CM5 ×1 F1 ×8 F2 ×3 F3 ×20 F4 ×1 F7 ×2... - Page 148 Comprehensive Kit Robot Series (2) Assembling Assemble Frame Step 4 Step 1 Assemble 2 sets. Step 2 Assemble 4 sets. Step 1 : 4pcs : 4pcs ※Completed : 4pcs : 4pcs Assemble 2 sets. Assemble 2 sets. Step 3 Step 4 ※Top view...
- Page 149 Comprehensive Kit Robot Series Left Arm Step 6 ※Insert nuts : 4pcs Step 1 motor motor motor ※Check assembly point : 16pcs Step 2 motor ※Check assembly point Right Leg Step 7 ※Complete d ※Insert nuts : 4pcs motor motor...
- Page 150 Comprehensive Kit Robot Series Left Leg Step 8 ※Check ※Insert nuts assembly point : 4pcs motor motor motor : 2pcs motor ※Check assembly point motor : 24pcs Step 3 : 2pcs ※Completed Step 2 motor : 2pcs ※Check assembly point...
- Page 151 Comprehensive Kit Robot Series Tail 2 : Frame Assembly Step 12 Step 11 Step 11 Step 12 : 4pcs : 4pcs : 8pcs : 8pcs Tail 3 Step 13 ※Check ※Insert nuts Step 9 assembly point : 4pcs motor motor...
- Page 152 Comprehensive Kit Robot Series Leg-Tail Assembly Step 14 : 8pcs Step 8 Step 7 ※Insert nuts : 8pcs motor Step 13 Head 1 Head 2 Step 15 Step 16 ※Insert nuts : 4pcs motor : 4pcs motor motor N1 : 4pcs : 4pcs ※Check...
- Page 153 Comprehensive Kit Robot Series Head 3 Step 17 ※Insert nuts 8pcs : 4pcs Step 16 motor Step 15 ※Insert nuts : 4pcs : 4pcs : 4pcs : 2pcs motor Body 1 Body 2 Step 18 Step 19 N1 : 4pcs...
- Page 154 Comprehensive Kit Robot Series Upper Part of Body Assembly Step 21 ※Insert nuts : 12pcs Step 17 ※Using side connector of CABLE-14 CM-5 connect cable. : 12pcs Connector Step 5 Step 6 Step 20 Sensor Assembly Step 22 ※Insert nuts...
- Page 155 Comprehensive Kit Robot Series Wiring and Completion Step 24 ※Head m ot o r m ot o r m ot o r m ot o r m ot o r m ot o r m ot o r m ot o r ※Wiring...
- Page 156 Comprehensive Kit Robot Series (3) Check Assembly You should confirm whether assembled uprightly before operate. Step 1 Download “Check Assembly”file which is behavior control program (In CD, Applied Robots\A anced\Dinosaur\CheckAssembly(Dinosaur).bpg) ※Refer to “How to download Behavior Control Program” from “2-1-2 Downloading Robot Programs”...
- Page 157 Comprehensive Kit Robot Series tep 5 When START button of CM-5 is pressed, the robot will look like the figures below. If fferent, check the assembly points of Dynamixel using the assembl y diagram. ※Side V ew ※Top View ※Back View Left and right are same as above pictures.
-
Page 158: Puppy
Comprehensive Kit Robot Series 2-4-2. Puppy Let's build a puppy that performs various cute tricks. (1) Necessary parts CM-5 motor motor motor AX-12 ×15 AX-S1 ×1 Expansion ×1 ×1 ×1 ADAPTOR-CM5 F1 ×1 F2 ×9 F3 ×15 F6 ×1 F7 ×6 F9 ×2... - Page 159 Comprehensive Kit Robot Series (2) Assembling Head 1 : Assemble Frame Step 4 Step 1 Step 1 Step 2 : 2pcs : 2pcs : 2pcs : 2pcs Step 3 Step 4 : 4pcs : 4pcs N1 : 4pcs : 4pcs...
- Page 160 Comprehensive Kit Robot Series Head 4 Step 7 ※Insert nuts : 8pcs Step 3 N1 : 4pcs ※Check motor assembly point Step 6 motor Head 5 Step 8 Step 7 ※Insert nuts N1 : 8pcs Step 4 motor : 8pcs...
- Page 161 Comprehensive Kit Robot Series Head-body Assembly Step 10 ※Insert nuts Step 8 : 4pcs : 4pcs Step 9 Leg 1 : Assemble Frame (4 sets Each) Step 12 Step 11 Assemble 4 sets. Assemble 4 sets. Step 11 Step 12...
- Page 162 Comprehensive Kit Robot Series ※Insert nuts...
- Page 163 Comprehensive Kit Robot Series Hind Leg 1 Step 21 S1 : 8pcs : 4pcs ※Insert nuts N1 : 8pcs : 2pcs : 4pcs Step 18 Step 20 Hind Leg 2 Step 22 : 4pcs : 4pcs motor N1 : 2pcs : 2pcs ※Check...
- Page 164 Comprehensive Kit Robot Series Foreleg Assembly Step 24 Step 22 ※Insert nuts N1 : 12pcs : 12pcs Step 19 Step 17 CM-5 Assembly Step 25 : 2pc CM-5 [Battery included] Step 24 : 2pcs...
- Page 165 Comprehensive Kit Robot Series Wiring 1 Step 26 ※Using side connector of CM-5 connect cable. Connector m ot o r ※Wiring Expansion CABLE-6 m o t o r m ot o r CABLE-10 m o t o r m o t o r...
- Page 166 Comprehensive Kit Robot Series Wiring 2 and Completion Step 26 ※Bottom view...
- Page 167 Comprehensive Kit Robot Series (3) Check Assembly You should con firm whether assembled uprightly before operate. Step 1 Download “Check Assembly”file which is behavior control program (In CD, Applied Robots\Advanced\Puppy\CheckAssembly(Puppy).bpg) ※Refer to “How to download Behavior Control Program” from “2-1-2 Downloading Robot Programs”...
- Page 168 Comprehensive Kit Robot Series tep 5 When START button of CM-5 is pressed, the robot will look like the figures below. If fferent, check the assembly points of Dynamixel using the assembl y diagram. ※Side V ew ※Front View ※Top View Left and right are identical.
-
Page 169: King Spider
Comprehensive Kit Robot Series 2-4-3. King Spider Let's build a king spider that moves around and attacks when it detects an object. (1) Necessary parts CM-5 motor motor AX-12 ×18 AX-S1 ×1 Expansion ×1 ×1 ×1 ADAPTOR-CM5 F1 ×6 F4 ×6 F2 ×6... - Page 170 Comprehensive Kit Robot Series (2) Assembling Assemble Frame : Assemble 6 sets each Step 4 Step 1 Assemble 6 sets. Assemble 6 sets. Step 1 Step 2 : 4pcs : 4pcs : 4pcs : 4pcs : 2pcs Assemble 6 sets.
- Page 171 Comprehensive Kit Robot Series Leg (TYPE 1) 2 Step 7 ※Insert nuts : 4pcs Step 6 : 8pcs motor motor ※Check assem bly point Step 4 Leg (TYPE 1) 3 : Assemble additional 2 sets Step 9 Step 8 Step 8...
- Page 172 Comprehensive Kit Robot Series Leg (TYPE 2) 2 Step 11 ※Insert nuts : 4pcs motor motor : 8pcs ※Check Step 10 assembly point Leg (TYPE 1) 3 : Assemble additional 2 sets Step 13 Step 12 Step 13 Step 12...
- Page 173 Comprehensive Kit Robot Series CM-5 Assembly Step 15 ※Using the connector inside of CM-5 connect cable Connector : 4pcs CM-5 Battery : 4pcs CABLE-10 : 4pcs ※Wiring : 4pcs ADAPTOR-CM5 CABLE-18 Connector Connector Expansion ※Using side connector of CM-5 : 4pcs...
- Page 174 Comprehensive Kit Robot Series Wiring and Completion Step 17 ※Wiring Expansion CABLE-10 ※Bottom view Expansion CM-5 CABLE-10 CABLE-18 CM-5 m o t o r motor motor CABLE-18 CM-5 m o t o r Expansion CABLE-10 m o t o r...
- Page 175 Comprehensive Kit Robot Series (3) Ch k Assembly You sh uld confirm whether assemb led uprightly before operate. Step 1 Download “Check Assemb ly”file which i s behavior cont rol p rog m (In CD, Applied Robots\Advanced\King Spider\CheckAssembly(King Spider).bpg) ※Refer to “How to download Behavior Control Program” from “ -1-...
- Page 176 Comprehensive Kit Robot Series tep 5 When START button of CM-5 is pressed, the robot will look like the figures below. If fferent, check the assembly points of Dynamixel using the assembl y diagram. ※Top View ※Front View ※Side View Step 6 Close the online robot activation.
-
Page 177: Humanoid
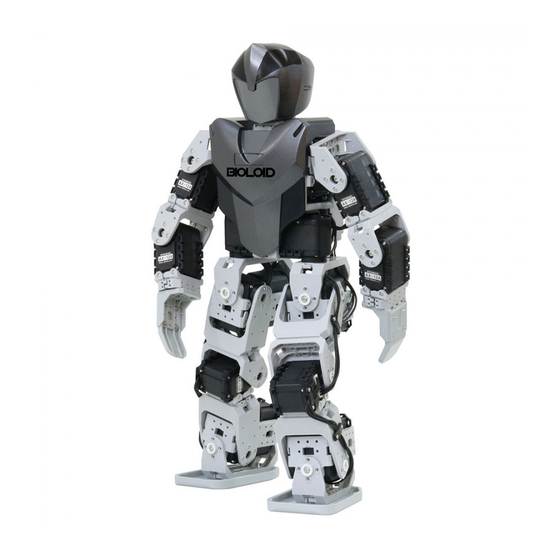
Comprehensive Kit Robot Series 2-4-4. Humanoid Let's build a humanoid robot that avoids an obstacle, walks on two legs and that can dance. (1) Necessary parts CM-5 motor motor AX-12 ×18 AX-S1 ×1 Expansion ×1 ×1 F1 ×4 F2 ×2 F8 ×2... - Page 178 Comprehensive Kit Robot Series (2) Assembling Assemble frame Step 1 Step 4 Assemble 2 sets. Assemble 2 sets. Step 1 Step 2 : 4pcs : 4pcs : 4pcs : 4pcs Step 3 Step 4 : 4pcs ※Bottom View : ※Bottte View :...
- Page 179 Comprehensive Kit Robot Series Intersecting Joint (TYPE 2) : 2 sets Step 8 Step 9 ※Completed CABLE-20 ※Insert nuts CABLE-6 : 8pcs motor Step 8 Step 9 CABLE-6 CABLE-20 motor motor motor motor ※Assemble in a same Step 5 : 8pcs manner.
- Page 180 Comprehensive Kit Robot Series Lef t Leg 1 Step 12 Step 8 : 3pcs ※Check assembly point ※Insert nuts : 4pcs : 3pcs : 3pcs Step 2 : 16pcs motor motor ※Check assembly point Step 7 Step 1 Left leg 2 Step 13 ※Check...
- Page 181 Comprehensive Kit Robot Series Assemble Frame Step 14 Step 15 Assemble 2 sets. Step 15 Assemble 2 s ets. Step 14 : 4pcs : 8pcs ※Completed : 8pcs : 4pcs Right Arm 1 Step 16 ※Check assembly ※Attac h nut...
- Page 182 Comprehensive Kit Robot Series Lef t Arm 1 Step 18 ※Attach nut sticker : ※Check ※ Insert uts assembly point Make sure nuts do motor t co e off. : 8pcs Sticker motor : 2pcs ※Assemble taking not e of the : 8pcs inserted location of nuts.
- Page 183 Comprehensive Kit Robot Series Body 2 Body 3 Step 21 Step 22 ※Front View : 4pcs Pay attention to wire direction. Step 21 CABLE-18 CABLE-18 ※Bottom View Check the inse rted nut location CABLE-18 Step 20 : 4pcs : 4pcs...
- Page 184 Comprehensive Kit Robot Series Arm Assembly Step 25 Step 19 CABLE-10 Step 17 : 8pcs Step 24 Head Assembly Step 6 : 5pcs Step 26 Expansion : 5pcs : 4pcs...
- Page 185 Comprehensive Kit Robot Series Wiring Step 27 ※Wiring ※Upper part of Expansion CABLE-6 CABLE-18 body : Back view m o t o r m o t o r m o t o r CABLE-20 CABLE-18 m o t o r...
- Page 186 Comprehensive Kit Robot Series Completion Step 28 Connect CM-5 Connector Connector Batte : 4pcs ※Using the connector inside of CM-5 nnect ※Using both side connectors of connect cabl CM-5 ※Completed...
- Page 187 Comprehensive Kit Robot Series (3) Check Assembly You should confirm whether assembled uprightly before operate. Step 1 Download “Check Assembly”file which is behavior control program (In CD, Applied Robots\Advanced\Humanoid\CheckAssembly(Humanoid).bpg) ※Refer to “How to download Behavior Control Program” from “2-1-2 Downloading Robot Programs”...
- Page 188 Comprehensive Kit Robot Series tep 5 When START button of CM-5 is pressed, the robot will look like the figures below. If fferent, check the assembly points of Dynamixel using the assembl y diagram. ※Front View ※Side View ※Top View Step 6 Close the online robot activation.
- Page 189 Comprehensive Kit Robot Series give a greeting. When you press the button of CM-5, it will be in a pre-attack position and upon detection of obje ct, it will execute a p rogram that commands a robot to at tack.
- Page 190 Comprehensive Kit Robot Series Step When settin g up the Joint Offset at the first time, double-click the “Original Robot.” If not, double-click the “User Robot”to tune the previous Joint Offset. (If the Motion Editor has been newly downloaded, double-click the“Original Robot”)
- Page 191 Comprehensive Kit Robot Series Step 5 After adjusting the Joint Offset, the revised robot’s pose must be reflected on the robot’s initial pose configuration. (Drag & Drop) Step 6 Save the Joint Offset and close the Motion Editor. Step 7 If the robot still walks unstable,refer to pictures below and start once again from Step 1.
-
Page 192: Bioloid Operation And Maintenance
Comprehensive Kit Robot Series 3. Bioloid Operation and Maintenance... -
Page 193: Finding The Serial Com Port Number Of The Pc
Comprehensive Kit Robot Series 3-1. Finding the Serial COM Port Number of the PC o use the software of Bioloid, the users must know the CM-5 corresponding communication port number . To find out the port number, follow the next steps. -
Page 194: Charging Cm-5
Comprehensive Kit Robot Series 3-2. Charging CM-5 Connect SMPS to CM-5. Click button of CM-5. Turn on of CM-5. PoWER LED light will blink when CM-5 is charging. The speed of LED blink indicates the charging level. The faster blinks signify the closer to full charge. When it is fully charged, it will blink every two seconds. -
Page 195: Changing Dynamixel's Id
Comprehensive Kit Robot Series 3-3. Changing DYNAMIXEL’s ID ▷ Connect only one Dynamixel that will change the ID to CM-5.. ▷ Download behavior control program that can chan ge Dynamixel’s ID. (Use the Examples\ID changing .bpg file) ▷ After download, execute the program via online activation mode. -
Page 196: Exchanging Fuse
Comprehensive Kit Robot Series 3-4. Exchanging Fuse side the CM-5, there is a fuse that protects circuits from o ver-current. If CM-5 does not charge or it does not power on with the battery only but the SMPS is po... -
Page 197: Comprehensive Kit's Parts
Comprehensive Kit Robot Series 3-5. Comprehensive kit’s parts CM-5 motor motor AX-12 ×18 AX-S1 (Battery included) Expansion ×1 ×1 ×1 ADAPTOR-CM5 ×1 F1 ×10 F2 ×10 F3 ×20 F4 ×6 F5 ×6 F6 ×12 F7 ×6 F8 ×3 F9 ×5 F10 ×20...
Need help?
Do you have a question about the Comprehensive Kit Robot Series and is the answer not in the manual?
Questions and answers