Table of Contents
Advertisement
Quick Links
Advertisement
Table of Contents
Troubleshooting

Related Manuals for Ricoh D093


Summary of Contents for Ricoh D093
- Page 1 D093/D094 SERVICE MANUAL 006365MIU...
- Page 5 D093/D094 SERVICE MANUAL 006365MIU...
- Page 7 It is the reader's responsibility when discussing the information contained within this document to maintain a level of confidentiality that is in the best interest of Ricoh Americas Corporation and its member companies. NO PART OF THIS DOCUMENT MAY BE REPRODUCED IN ANY FASHION AND DISTRIBUTED WITHOUT THE PRIOR PERMISSION OF RICOH AMERICAS CORPORATION.
- Page 9 Ricoh Technical Training Program. Untrained uncertified users utilizing information contained in this service manual to repair or modify Ricoh equipment risk personal injury, damage to property or loss of warranty protection. Ricoh Americas Corporation...
- Page 11 LEGEND PRODUCT CODE COMPANY GESTETNER LANIER RICOH SAVIN D093 Aficio MP W2401 D094 GWD3006 LW426 Aficio MP W3601 3406WD DOCUMENTATION HISTORY REV. NO. DATE COMMENTS 02/2011 Original Printing...
-
Page 13: Table Of Contents
D093/D094 TABLE OF CONTENTS NEW FEATURES OF D093/D094 NEW FEATURES OF D093/D094 ..........1-1 MAIN MACHINE ..................1-1 1.1.1 MODEL NUMBERS/NAMES ............1-1 1.1.2 EXTERNAL ..................1-2 1.1.3 REAR SWITCHES ................1-3 ... -
Page 14: Table Of Contents
3.1.5 INSTALLATION OVERVIEW ............3-4 Installation Flow ................... 3-4 SP and User Tool Settings Required for Installation ......3-5 MAIN MACHINE INSTALLATION (D093/D094) ......... 3-8 3.2.1 ACCESSORY CHECK ..............3-8 3.2.2 MACHINE INSTALLATION PROCEDURE ........3-9 ... -
Page 15: Table Of Contents
Connecting the Main Machine and Table ........... 3-57 Attach the Narrow Mylars to the Main Machine ........3-58 Attach the Wide Mylars to the Back of the Table ........ 3-59 Attaching the Stopper Brackets ............3-60 Table Accessories ................3-61 D093/D094... -
Page 16: Table Of Contents
Installation ..................3-83 3.9.8 GIGABIT ETHERNET TYPE B (D377-21) ........3-85 Accessories ..................3-85 Installation ..................3-85 3.9.9 BROWSER UNIT TYPE E (D430-05, -06, -07) ....... 3-88 Accessories ..................3-88 Installation ..................3-88 D093/D094... -
Page 17: Table Of Contents
PREVENTIVE MAINTENANCE PREVENTIVE MAINTENANCE ............ 4-1 PM TABLES ....................4-1 4.1.1 MAIN MACHINE (D093/D094) ............4-1 4.1.2 ROLL FEEDER (D503/D504) ............4-5 4.1.3 PAPER CASSETTE (B853) .............. 4-5 CLEANING POINTS .................. 4-6 ... -
Page 18: Table Of Contents
ROLL 2 PAPER CLUTCH, FEED ROLLER ........5-53 5.6.4 RF EXIT SENSOR ................5-54 5.6.5 ROLL FEED MOTOR ..............5-55 5.6.6 CUTTER MOTOR, HP SENSORS ..........5-56 5.6.7 ROLL PAPER END SENSORS ............5-57 D093/D094... -
Page 19: Table Of Contents
COOLING FAN, OZONE FILTER, PAPER EXIT SELECTION SWITCH5-98 5.12 SPECIAL ADJUSTMENTS ............... 5-100 5.12.1 IMAGE ADJUSTMENT WITH SP MODES ....... 5-100 Step 1: Magnification for Paper Type: Plain ........5-100 Step 2: Scanning Magnification ............5-101 D093/D094... -
Page 20: Table Of Contents
6.2.1 SYSTEM ................... 6-2 SP1-xxx Feed ..................6-2 SP2-xxx Drum ..................6-15 SP3-xxx Process Control ..............6-34 SP4-xxx Scanner ................6-36 SP5-xxx Mode ..................6-45 SP7-xxx Data Log ................6-97 D093/D094 viii... - Page 21 Plotter Late Jams ................7-54 Plotter Lag Jams ................7-55 7.4.4 COVER OPEN ................7-56 7.4.5 ELECTRICAL COMPONENT DIAGRAMS ........7-57 FUSES ..................... 7-67 7.5.1 PSU ....................7-67 120V Version ..................7-67 D093/D094...
-
Page 22: Table Of Contents
Return to Stand-by Mode ..............8-2 Recommendation ................. 8-2 Energy Save Effectiveness ..............8-3 8.1.2 PAPER SAVE ................... 8-4 Effectiveness of Combine Function ............8-4 Recommendation ................. 8-4 Model D093/D094 ................8-4 D093/D094... - Page 23 NEW FEATURES OF D093/D094 APPENDIX: SPECIFICATIONS PRODUCT INFORMATION APPENDIX: SP MODE TABLES INSTALLATION APPENDIX: UP MODE PREVENTIVE MAINTENANCE REPLACEMENT AND ADJUSTMENT SYSTEM MAINTENANCE REFERENCE TROUBLESHOOTING ENERGY SAVING...
-
Page 25: Read This First
READ THIS FIRST Safety, Symbols, Trademarks Safety PREVENTION OF PHYSICAL INJURY Before disassembling or assembling parts of the machine and peripherals, make sure that they are unplugged. The plug should be near the machine and easily accessible. Note that some components of the machine and the paper tray unit are supplied with electrical voltage even if the main power switch is turned off. - Page 26 SAFETY AND ECOLOGICAL NOTES FOR DISPOSAL Do not incinerate toner bottles or used toner. Toner dust may ignite suddenly when exposed to an open flame. Dispose of used toner, developer, and organic photoconductors in accordance with local regulations. (These are non-toxic supplies.) Dispose of replaced parts in accordance with local regulations.
- Page 27 Conventions and Trademarks Conventions Symbol What it means For more refer to Core Tech Manual Bushing C-ring Connector E-ring FFC (Flat Film Connector) Gear Harness clamp Hook (or tab release) Knob screw (black) Knob screw (sliver) Pivot screw Screw (common screw) Shoulder screw Spring Standoff...
- Page 28 The notations "SEF" and "LEF" describe the direction of paper feed. The arrows indicate the direction of paper feed. In this manual "Horizontal" means the "Main Scan Direction" and "Vertical" means the "Sub Scan Direction" relative to the paper feed direction.
- Page 29 Warnings, Cautions, Notes In this manual, the following important symbols and notations are used. A Warning indicates a potentially hazardous situation. Failure to obey a Warning could result in death or serious injury. A Caution indicates a potentially hazardous situation. Failure to obey a Caution could result in minor or moderate injury or damage to the machine or other property.
- Page 31 NEW FEATURES OF D093/D094 R E V I S I O N H I S T O RY P a ge D a t e A d de d /U pd at e d /N ew None...
-
Page 33: Main Machine
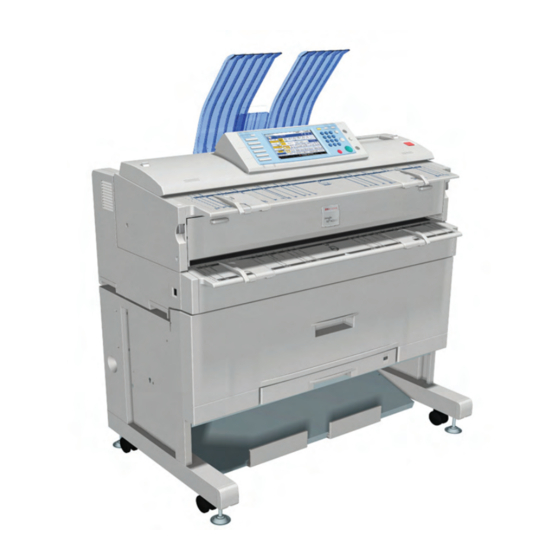
Main Machine 1. NEW FEATURES OF D093/D094 1.1 MAIN MACHINE 1.1.1 MODEL NUMBERS/NAMES Production No. Model Name D093-21 Ricoh Aficio MP W2401 D093-27 Ricoh Aficio MP W2401 NRG MP W2401 D094-17 Ricoh Aficio MPW3601 Gestetner GWD 3006 Savin 3406WD Lanier LW246... - Page 34 Output Guides. The number of output guides has been reduced from six to four. Upper output guide. Remains up for output to the upper trays and can be lowered for output to the rear. D093/D094...
-
Page 35: Rear Switches
The breaker switch [A] is at the same location. However, removal of the rear cover is no longer required for breaker switch testing. A new anti-condensation heater switch is provided. The anti-condensation heater does not require connection at installation. The anti-condensation heaters can be easily switched on and off. D093/D094... -
Page 36: Operation Panel
Job management. Job list function allows management of copy and print jobs (holding back jobs, changing order of the job queue, deleting jobs, etc.) Animated guidance. Animated help gives step-by-step instructions that guide you through problems such as paper jams, open covers, etc. D093/D094... -
Page 37: Paper Exit Selection
The D093/D094 also has the lever, but no sensor. The paper exit selection switch [3] tells the machine whether the upper or lower path can be selected on the operation panel. This mechanism is described in a later section of this manual. -
Page 38: Security And Encryption Unit
Table Type 240 (B854) Same as previous. [07] Original Hanger (D311) Same as previous. [08] Printer Option Type W3601 (D506) SD card (x2).* Printer Option TIFF/GL Filter Provided with [08]. [09] Scanner Option Type W3601 (D507) SD card. * D093/D094... - Page 39 The File Format Converter [12] must be installed for the Scanner option. This a new option that provides easier access to USB and SD card slots at the front of the machine. Operators can scan documents to either an SD card or a USB memory device inserted into this unit. D093/D094...
-
Page 41: Product Information
PRODUCT INFORMATION R E V I S I O N H I S T O RY P a ge D a t e A d de d /U pd at e d /N ew None... - Page 43 Specifications 2. PRODUCT INFORMATION 2.1 SPECIFICATIONS See "Appendices" for the following information: Specifications D093/D094...
-
Page 44: Main Machine And Peripherals
Main Machine and Peripherals 2.2 MAIN MACHINE AND PERIPHERALS Main Peripherals Item Machine Code Main Machine D093/D094 Roll Feeder Type 3601A/B (D504/D504) D503/D504 Table Type 240 B854 Rear Stacker (Option for copies) D312 Original Hanger (Option for originals) D311 Roll Holder Type A... - Page 45 IEEE802.11a/g Interface Unit Type J (D377-01, -02) /K Board (D377-19) GigaBit Ethernet Type B (D377-21) Board File Format Converter Type F (D533) Board Browser Unit Type E (D430-05, -06, -07) SD card USB 2.0/SD Slot Type E (D534) Mounted on main machine D093/D094...
- Page 46 2.3 GUIDANCE FOR THOSE WHO ARE FAMILIAR WITH PREDECESSOR PRODUCTS This section describes similarities and minor differences. The D093/D094 is based on the engine of the B286/B289. The target reliability specifications are the same for both models. 2.3.1 FEATURE COMPARISON Target Reliability: D093/D094 vs.
- Page 47 Guidance for Those Who Are Familiar with Predecessor Products Feature Comparison Table Item D093/D094 B286/B289 Operation panel Wide Color VGA Wide Monochrome VGA 50 sheets 50 sheets Upper Stack Capacity A1/D size LEF A1/D size SEF External controller (P/S)*1 Yes (RATIO CTL)
- Page 48 *5 An additional 1GB memory unit is required for the Scanner Option Type W3601 (D507). (Memory is provided with the scanner option.) *6 These languages are available for the D093/D094 user interface: 1. English, 2. German, 3. French, 4. Italian, 5. Spanish, 6. Dutch, 7. Swedish, 8. Norwegian, 9.
-
Page 49: Option Comparison
Table Type 240 (B854) Original Hanger (D311) Rear Stacker (D312) Discarded Options These B286/B289 options have been discarded for D093/D094. Folder FD 6500A (B889) Manual Feeder (D333) VM Card Type E (D338) VMware for this machine resides on the new printer SD card (Printer Option TIFF/GL Filter). -
Page 50: Changed Options
Guidance for Those Who Are Familiar with Predecessor Products Changed Options The following options are available for both the B286/B289 and D093/D094, but note that the "Type" and number designations for these options have changed. Item B286/B289 D093/D094 Roll Feeder... - Page 51 Overview 2.4 OVERVIEW 2.4.1 MACHINE GENERAL LAYOUT D093/D094...
- Page 52 Paper also feeds from the optional roll feeder with one or Roll Feeder two paper rolls installed. Cut sheets are also supplied from the optional paper Paper Cassette cassette. Toner transfers from a magnetic roller to the OPC drum. Development Unit An ID sensor controls the toner concentration. D093/D094 2-10...
- Page 53 Overview 2.4.2 MECHANICAL COMPONENT LAYOUT 2-11 D093/D094...
- Page 54 25. Roll 1 Paper Feed Rollers 11. Paper Exit Junction Gate 26. Cutter 12. Fusing Exit Rollers 27. Roll/Cassette Exit Rollers 13. Fusing Cleaning Roller 28. Registration Rollers 14. Hot Roller 29. Manual Feed Table (Bypass) 15. Pressure Roller D093/D094 2-12...
-
Page 55: Drive Layout
Overview 2.4.3 DRIVE LAYOUT 1. Scanner Motor 2. Drum Motor 3. Main Motor 4. Fusing Motor 2-13 D093/D094... -
Page 56: Original/Copy Paper Paths
Manual Feed (Bypass) Path Original Path (Upper) Upper output stacker installed. Original Path (Straight-Through) Upper output stacker removed. Paper Path (Upper) Normal (Default) Paper Path (Rear) Selectable (See below) Paper Path (Paper Cassette) Paper Path (Rolls) D503 (1 Roll),D504 (2 Rolls) D093/D094 2-14... - Page 57 “Lower” is selected for the “Copy Output Location” on the operation panel, so the copy always feeds out the rear. “Upper” cannot be selected. If the operator touches “Upper” a message will prompt the operator that the output destination cannot be selected. 2-15 D093/D094...
- Page 58 The closed junction gate [4] guides paper to the top of the machine. The lever [5] should be up. For normal operation, the left upper output stacker must be installed, so the operator has the option of selecting either “Upper” or “Lower” for paper exit. D093/D094 2-16...
- Page 59 The open junction gate guides paper out the back of the machine. With both the upper output stackers removed, the lever [4] must be lowered so the original can pass over it. (With both left and right output stackers removed, the original must exit to the rear.) 2-17 D093/D094...
-
Page 60: Electrical Components
Power supply to scanner components (sensors, motors). RFDB. Drives and controls the components of the optional roll feeder (the motor, clutch, sensors, and switches). SFDB (Sheet Feed Driver Board). Controls the operation of the optional paper cassette that feeds cut sheets. D093/D094 2-18... - Page 61 MB (Mother Board). Provides important relay functions 1) for the Rapi Bus I/F between the SIPU, GW controller, file format converter, and VLB, and 2) for machine power supply. CTL (GW Controller. Performs overall control of all multi-function peripheral (MFP) devices. 2-19 D093/D094...
-
Page 62: Description Of Electrical Components
Roll Feed Clutch 1 to roll 1 in the roll feeder. This transfers power from the roll feed motor Roll Feed Clutch 2 to roll 2 in the roll feeder. Toner Supply Clutch This controls the toner supply mechanism. D093/D094 2-20... - Page 63 Used Toner Bottle This controls the mechanism that keeps the Motor level of used toner in the bottle flat. This moves the corona wire cleaner to the left Wire Cleaner Motor and right to clean the charge corona wire. 2-21 D093/D094...
- Page 64 Interfaces with the controller, SIPU, and PCB7 Mother Board optional devices such as interface board for the printer controller. VDB (Video Drive This controls the image signals that are sent to PCB8 Board) the LPH (LED Print Head). D093/D094 2-22...
- Page 65 T&S Power Pack wire (S) in the T&S (Transfer and Separation) unit. Quenching Lamps: This removes remaining electrical charge on QL1 - 3 1: Left, 2: Center, 3: the left part of the drum immediately after Right cleaning. 2-23 D093/D094...
- Page 66 Original Set Sensor starts the scanner motor. This sensor also (A4/8.5") detects A4 or 8.5" width paper. Original Width Sensor Detects A0/8.5"-width paper. (A0/8.5") Original Width Sensor Detects A1/34"-width paper. (A1/34") Original Width Sensor Detects A2/22"-width paper. (A2/22") D093/D094 2-24...
- Page 67 (1) Detects the leading edge of the paper from the rolls. (2) Detects the trailing edge of cut sheets from RF Exit Sensor the paper cassette and trailing edges of sheets cut from the paper rolls for paper feed timing and jam detection. 2-25 D093/D094...
- Page 68 Detects when the upper unit is open. The actuator of this sensor is attached to the wire that moves the transfer cleaner from left Wire Cleaner Sensor to right. This tells the machine when the wire cleaner moves. D093/D094 2-26...
- Page 69 This detects if the toner supply cover is open Switch or closed. This detects if the upper unit is open on the left Upper Unit Switch 1 side. This detects if the upper unit is open on the Upper Unit Switch 2 right side. 2-27 D093/D094...
- Page 70 Paper Exit Selection the operation panel. When the upper output SW12 Switch stacker is removed, this opens the switch and sets the machine for paper exit to the lower path only. ("Upper" cannot be selected on the operation panel.) D093/D094 2-28...
- Page 71 The CPU uses this thermistor to monitor the Hot Roller Thermistor temperature of the hot roller. Pressure Roller Thermistor 1 (Edge) The CPU uses these thermistors to monitor the temperature of the pressure roller. Pressure Roller Thermistor 2 2-29 D093/D094...
- Page 72 Breaks the main power supply to the machine if there is an overload or short circuit. Located Circuit Breaker on the back of the machine, this switch is set manually. This breaker switch must be at the down position for the machine to operate. D093/D094 2-30...
-
Page 73: Mcu, Sipu
LPH (LED Print Heads) which writes the image on the surface of the durm. The SIPU also controls the HDD and the printer/scanner interface. The SIPU DIP switches must always be OFF (default) and they must not be changed in the field. 2-31 D093/D094... - Page 74 The SIF controls the CIS (Contact Image Sensor) and changes analog data to digital data (A/D) for scanned images. CGB PP (Charge, Grid Bias Power Pack) Supplies the high voltage power for the charge corona wire (C), development bias (B), and charge corona grid (G). D093/D094 2-32...
-
Page 75: Rfdb, Sfdb
The RFDB, on the bottom panel of the roll feeder, controls the motors, solenoids, and clutches for the two paper rolls in the roll sheet feeder. SFDB (Sheet Feed Drive Board) The SFDB, on the left side of the paper cassette unit, controls the paper feed mechanisms for the optional paper cassette. 2-33 D093/D094... - Page 76 The controller board controls the memory and all peripheral devices. The GW architecture control all applications, i.e. copying, printing, and scanning. The controller board has board slots and SD card slots that allow installation of the MFP options. D093/D094 2-34...
- Page 77 INSTALLATION R E V I S I O N H I S T O RY P a ge D a t e A d de d /U pd at e d /N ew None...
- Page 79 If the installation area has air-conditioners or heaters, put the machine in a location where: There are no sudden temperature changes from low to high, or high to low. The machine will not be directly exposed to cool air from an air conditioner in the summer. D093/D094...
-
Page 80: Minimum Space Requirements
The floor must be able to support a load of more than 2.94 kPa (300 kgf/m 10. Do not install the machine in an area where there are frequent strong vibrations. 3.1.2 MINIMUM SPACE REQUIREMENTS Front: 1000 mm (40") Back: 600 mm (23") Right: 600 mm (23") Left: 600 mm (23") D093/D094... -
Page 81: Machine Level
To protect the HDD, always switch the machine off with the operation switch on the operation panel, wait for the power switch LED to stop flashing, then switch off the main switch on the side of the machine. D093/D094... -
Page 82: Installation Overview
Do some sample copies to check the operation of the machine and the installed options. MFP Options, Other Options Install the MFP options and any other options, such as the USB2.0/SD Slot Type E (D354). D093/D094... -
Page 83: Sp And User Tool Settings Required For Installation
Type: Tray n Tray 2: Roll 2 Tray 3: Cassette Bypass User Tool System Settings > Timer Check the date and time setting. If they Settings > Set Date, Set are not correct, set the correct date and Time time. D093/D094... - Page 84 Adjust D503/D504, 1st roll. 1st Roll 1001-2 Leading Edge Registration – Adjust for D504, 2nd roll. 2nd Roll 1002-1 Side-to-Side Registration – 1st Adjust for D503/D504, 1st roll Roll 1002-2 Side-to-Side Registration – Adjust for D504, 2nd roll. 2nd Roll D093/D094...
- Page 85 Adjust for Paper Cassette Cassette B853. 1002-3 Side-to-Side Registration – Cassette MFP Options: Onboard Device Settings 5985-1 On Board NIC Both SP codes must be set to "1" to enable these built-in features. (The default is "0" OFF). 5985-2 On Board USB D093/D094...
-
Page 86: Main Machine Installation (D093/D)
Main Machine Installation (D093/D094) 3.2 MAIN MACHINE INSTALLATION (D093/D094) Always have this Service Manual with you. The installation procedures are not shipped with the main machine. Never turn the main machine off when the main power LED is lit or flashing. -
Page 87: Machine Installation Procedure
Main Machine Installation (D093/D094) Description Q’ty Ferrite Core (For Network Cable) Hinges: Upper Output Guide Upper Output Guide 3.2.2 MACHINE INSTALLATION PROCEDURE Before You Begin… Condensation can occur on the drum the first time the machine is started up in a cold environment, or if the machine has been stored for a long period in a cold location and moved to a warm room. -
Page 88: Removing The Shipping Material
Main Machine Installation (D093/D094) Removing the Shipping Material Do not connect the power cord to the power source during these installation procedures until the procedure tells you to do this. Remove all the orange filament tape and packing materials from the main machine. - Page 89 Main Machine Installation (D093/D094) Setting the Main Machine on the Roll Feeder (D503/D504) or Table (B854) Do not remove the shipping tape from the connectors [1] of the roll feeder [2]. This prevents damage to the connectors when the main machine is put on top of the roll feeder.
- Page 90 Main Machine Installation (D093/D094) Remove the covers and screws: [1] Left upper cover ( x 2) [2] Left screws ( x 2) [3] Right upper cover ( x 2) [4] Right screws ( x 2) Open the upper unit. Remove:...
- Page 91 Main Machine Installation (D093/D094) Remove the right transport lock plate [1] ( x 4). Remove the left transport lock plate [2] ( x 4). 10. Install the studs [1] on the right side and the left side. You must fasten each stud in the upper hole [2] on both sides.
- Page 92 Main Machine Installation (D093/D094) 11. Attach the right joint bracket [1] (the spindle [2] must go through the hole). At the same time, align the plate with the holes for the three screws (blue). The joint brackets and screws are provided as accessories with either the Roll Feeder (D503/D504) or Table (B854).
- Page 93 Main Machine Installation (D093/D094) The guide plate and screws are provided as accessories with either the Roll Feeder (D503/D504) or Table (B854). 16. Install the guide plate [1] ( x 2 Blue). Hang the hooks on each end; this puts the plate in the correct position to be installed.
- Page 94 Main Machine Installation (D093/D094) Leveling the Main Machine and Attaching Leg Covers Raise the original feed unit [1]. Remove the protective sheet and tape [2]. Remove the original table [3] ( x1). Be sure to re-attach the pivot screw and tapping screw at the correct positions.
- Page 95 Main Machine Installation (D093/D094) Set the shoes , , , ,under the main machine. Use a wrench to adjust the nuts [1] on each foot to raise or lower the main machine at each corner. The main machine must be level side-to-side within ±0.15/m.
- Page 96 Main Machine Installation (D093/D094) If the machine is not level, use a wrench to adjust the nuts on each foot to raise or lower the main machine at each corner. The main machine must be level side-to-side within ±0.15/m. Normally, the adjustment with the level on the exposure glass is not required.
- Page 97 Main Machine Installation (D093/D094) Open a 1 kg pack of developer and pour it into the development unit. Do not add the second pack at this time. Open the first pack of developer [1]. Slowly add the developer from the first pack into the development unit, as you move the pack from left to right until the pack is empty.
-
Page 98: Toner Cartridge Installation
Main Machine Installation (D093/D094) 17. Open the second 1 kg pack of developer, then slowly add it to the development unit. Move the pack from left to right until it is empty. 18. Use a clean cloth to clean the edges around the slot of the development unit. - Page 99 Main Machine Installation (D093/D094) Toner Cartridge Storage Show the operators how to store unused toner cartridges properly. Cartridges must be stored horizontally on a flat surface to prevent toner from clumping together at one end of the cartridge. A toner cartridge should never be stored standing on one end.
-
Page 100: Enter Developer Lot Numbers
Main Machine Installation (D093/D094) Enter Developer Lot Numbers Go into the SP mode. Do SP2801-2 and 3 to enter the lot numbers. Use the soft keyboard on the display panel to enter the lot numbers. (The lot numbers are embossed on the top edge of each developer pack.) If the numbers are the same, enter the same number twice. -
Page 101: Main Machine Final Installation
Main Machine Installation (D093/D094) Roll Feeder, Paper Cassette See Roll Feeder (D503/D504), Paper Cassette (B853). Table. See Table (B854). MFP Options. See Installation of MFP Options. After installing all options, complete main machine installation. See Main Machine Final Installation. 3.2.3 MAIN MACHINE FINAL INSTALLATION... -
Page 102: Testing The Main Machine Circuit Breaker
Main Machine Installation (D093/D094) Testing the Main Machine Circuit Breaker Follow the procedure below to test the operation of the circuit breaker. This must be done at installation and at least once a year after installation. Plug the main machine power cord into its power source and make sure that the main machine power is off. -
Page 103: Main Machine Accessories
Main Machine Installation (D093/D094) Main Machine Accessories Make sure the blinders [A] are straight and not separated from the back of the machine. These blinders prevent light from entering the scanner unit. Strong light or direct sunlight can interfere with the operation of the CIS unit and cause vertical white and black lines to appear in copy images. - Page 104 Main Machine Installation (D093/D094) Attach upper output stacker (R) [1]. Attach upper output stacker (L) [2]. Attach the guide lever [2]. This guide lever should be up or down, depending on whether "Upper" or "Lower" is selected for "Copy Output" on the operation panel: The guide lever should be up for "Upper"...
-
Page 105: Roll Feeder, Table Accessories
Main Machine Installation (D093/D094) Roll Feeder, Table Accessories Attach the lower output trays [1] to the lower rear of the roller feeder or table (x 3). The lines and numbers embossed on the back of the main machine (see the upper left of the above diagrams) show where to position the exit guide plates for different paper widths. - Page 106 Main Machine Installation (D093/D094) Do a test print to confirm that the paper exits the main machine straightly and smoothly between the guide plates. Copy Check Scan an original to confirm that the main machine operates correctly. Set an original or test pattern face down on the original feed tray.
-
Page 107: Before You Begin
Main Machine Installation (D093/D094) Paper Cassette Adjustments SP No. Name 1001-3 Leading Edge Registration – Cassette (B853) 1002-3 Side-to-Side Registration – Cassette (B853) 3.2.4 ANTI-CONDENSATION HEATER Before You Begin… The anti-condensation heater has an ON/OFF switch on the back of the machine. When this switch is on, the heaters prevent condensation from forming inside the machine when the main machine is switched off with the main power switch or operation switch. -
Page 108: Moving The Machine
Main Machine Installation (D093/D094) the winter. Please remind the customer that the anti-condensation heater consumes an additional 26W when it is switched on. The heaters operate after the machine is switched off with both the operation power switch and main power switch. However, in order for the heaters to function, the machine must remain plugged into the power mains. -
Page 109: Original Hanger (D)
Check the accessories and their quantities against the table below. Description Q’ty Original Hangers 3.3.2 INSTALLATION Attach one original hanger [1] to the bypass feed table [2]. Attach the other original hanger [3] to the bypass feed table. 3-31 D093/D094... - Page 110 Leg Covers Movable Guides Shoes Joint Brackets (Left, Right) Exit Guide Plates Screws (Cosmetic Silver) Screws (Blue) Harness Brackets Mylars – Wide Mylars – Narrow Nylon clamp Harness clamp Ferrite Core Guide Plate Decal: Cutter: Caution (16 Languages) D093/D094 3-32...
- Page 111 Roll Feeder (D503/D504) 3-33 D093/D094...
-
Page 112: Roll Feeder Installation Procedure
Make sure that you put the rubber feet of the main machine into the holes on top of the roll feeder. Check the dehumidifier switch [6] of the roll feeder. Make sure that it is OFF. If it is ON, set it to OFF. D093/D094 3-34... -
Page 113: Opening The Roll Feeder And Removing Shipping Material
Remove the roll paper holders [3] and cardboard packing [4]. Roll Feeder D503 has 2 holders, and Roll Feeder D504 has 4 holders (shown above). Remove other tape or packing material in the roll feeder. Remove the shipping lock plate [5] ( x 2). 3-35 D093/D094... - Page 114 2) [3] Right upper cover ( x 2) [4] Right screws ( x 2) Open the upper unit. Remove: [1] Left cover ( x 3) [2] Right cover ( x 3) [3] Manual feed table ( x 2) D093/D094 3-36...
- Page 115 4). 10. Remove the left transport lock plate [2] ( x 4). 11. Install the studs [1] on the right side and the left side. You must fasten each stud in the upper hole [2] on both sides. 3-37 D093/D094...
- Page 116 15. Tighten screws 16. Do the above procedure again for the left joint bracket [4]. When you attach the left bracket make sure that the bracket does not pinch or interfere with the harness of the main switch. D093/D094 3-38...
- Page 117 19. Lift each plate and let it fall, to make sure that they move smoothly on the hinges. 20. Reattach the manual feed table. 21. Reattach the left and right covers. The flat-head screw must be attached at the rear side of each cover. 22. Close the upper unit. 3-39 D093/D094...
- Page 118 Remove the original table ( x1). Be sure to re-attach the pivot screw and tapping screw at the correct positions. Open the toner hopper cover [1]. Set a level [2] on the plate [3] of the development unit as shown. D093/D094 3-40...
- Page 119 (Do not remove the support screws.) 11. Put the level [5] on the exposure glass. 12. If the machine is level, you are finished. Be sure to re-attach the lock screws and hinges removed in Steps 9 and 10. -or- 3-41 D093/D094...
-
Page 120: Connecting The Main Machine And Roll Feeder
Step 5 and do the adjustment again with the level on the development unit. Connecting the Main Machine and Roll Feeder Remove the rear cover [1] of the main machine ( x2). Remove the cover of the controller unit [2] ( x1). Remove the shield cover [1] ( x 8). D093/D094 3-42... - Page 121 10. Connect the left harness [2] to CN103 on the PSU ( x 1, x 1). 11. Connect the right harness [3] to CN220 and CN221 on the MCU ( x 2, x 3). 12. Reattach: Shield cover Controller box cover Rear cover 3-43 D093/D094...
-
Page 122: Attaching The Narrow Mylars To The Main Machine
Attach the other end of the mylar to the bottom edge of the cover Do this procedure again to attach the other narrow mylar to the right side of the cover. D093/D094 3-44... -
Page 123: Attaching The Wide Mylars To The Back Of The Roll Feeder
Turn the end with the wide tape against the plate, and align its corner [5] with the inverted “L” pattern embossed on the plate, then push it against the rear plate. Make sure that the tape surfaces are pushed fully against the rear plate. Reattach the rear cover of the main machine ( x 2). 3-45 D093/D094... -
Page 124: Securing The Power Cord
Roll Feeder (D503/D504) Securing the Power Cord Clean the rear plate [1] with alcohol. Attach the harness clamp [2]. Clamp the power cord [3] to the roll feeder ( x 1). D093/D094 3-46... -
Page 125: Installing The Paper Rolls
To install the paper rolls, follow the instructions on the decal on the top edge of the roll feeder drawer. Attaching the Lower Output Tray, Exit Guide Plates Attach the lower output trays [1] to the lower rear of the roll feeder (x 3). 3-47 D093/D094... - Page 126 Position the right exit guide plate [1] as shown then attach it with its magnet. Position the left exit guide plate [2] as shown then attach it with its magnet. Do a test print to confirm that the paper exits the main machine straightly and smoothly between the guide plates. D093/D094 3-48...
-
Page 127: Entering The Cut Length Adjustment
Push [User Tools]> “System Settings”> “Tray Paper Settings”> “Tray Paper Size: Tray 1”, “Tray Paper Size: Tray 2”. Select the paper size for Tray 1 and Tray 2. Push “Next”> “Paper Type: Tray 1”, “Paper Type: Tray2 Select the paper type for Tray 1 and Tray 2. 3-49 D093/D094... -
Page 128: Cutter Caution Decal
Pull the roll feeder out of the machine. Remove the front cover of the roll feeder [1] ( x3). Select one cutter caution decal [2] (for your language) and attach it to the top of the roll feeder frame. D093/D094 3-50... -
Page 129: Accessory Check
3.5 PAPER CASSETTE (B853) The Paper Cassette (B853) is installed inside the Roll Feeder (D503/D504). 3.5.1 ACCESSORY CHECK Check the accessories and their quantities the table below. Description Q’ty Paper Cassette Unit Screws Harness Clamps Paper Cassette (Universal Type) 3-51 D093/D094... -
Page 130: Paper Cassette Installation Procedure
Remove the paper cassette from the paper cassette unit. Remove the rear plate of the roll feeder ( x 2). Put the cassette unit [1] in the roll feeder. The bosses must go through the holes in the D093/D094 3-52... - Page 131 15. Set the Paper Size and Type for the Paper Cassette Push [User Tools]> “System Settings”> “Tray Paper Settings”> “Tray Paper Size: Tray 3” Select the paper size for the paper cassette> [OK]. Push “Next”> “Paper Type: Tray 3” Select the paper type for the paper cassette. 3-53 D093/D094...
-
Page 132: Table (B)
Check the accessories and their quantities in the table below. Description Q’ty Lower Output Trays Leg Covers Shoes Joint Brackets (Left, Right) Exit Guide Plates Screws Mylars – Wide Mylars – Narrow Guide Plate Nylon Clamp Harness Clamp Stopper Bracket (for inch paper sizes) D093/D094 3-54... -
Page 133: Installation Procedure
With one person at each end of the main machine, use the two handles on each end of the main machine to lift it. Make sure that you put the rubber feet of the main machine into the holes on top of the table. 3-55 D093/D094... -
Page 134: Attaching The Guide Plate
Attaching the Guide Plate Keep the power cord disconnected while you do this procedure. Install the guide plate [1] ( x 2 Blue). Hang the hooks on each ends; this puts the plate in the correct position to be installed. D093/D094 3-56... -
Page 135: Connecting The Main Machine And Table
Reattach the manual feed table ( x 2). Reattach the left and right covers ( x 3 ea.). Make sure that you attach the longer screws with the fine threads at the rear sides of the covers. Close the upper unit. 3-57 D093/D094... -
Page 136: Attach The Narrow Mylars To The Main Machine
Use a clean cloth, moistened with a small amount of alcohol, to clean the area around the Remove the tape from each end of one of the narrow mylars. Attach one end to the top edge of the cover D093/D094 3-58... -
Page 137: Attach The Wide Mylars To The Back Of The Table
Turn the end with the wide tape against the plate, and align its corner [5] with the inverted “L” pattern embossed on the plate , then push it against the rear plate. Make sure that the tape surfaces are pushed fully against the rear plate. 3-59 D093/D094... -
Page 138: Attaching The Stopper Brackets
Use a clean cloth soaked in alcohol to clean the surfaces [2] where the stopper brackets [3] will be attached. Remove the double-sided tape [4] from the rear of each bracket. Install each bracket and stopper on the arms. Lock each stopper in the correct position ( x 2 ea.). D093/D094 3-60... - Page 139 Position the right exit guide plate [1] as shown then attach it with its magnet. Position the left exit guide plate [2] as shown then attach it with its magnet. 3-61 D093/D094...
- Page 140 Table (B854) Do a test print to confirm that the paper exits the main machine straightly and smoothly between the guide plates. D093/D094 3-62...
-
Page 141: Rear Stacker (D)
The rear stacker is an option installed on the back of the Roll Feeder (D503/D504). 3.7.1 ACCESSORIES Check the accessories and their quantities against the table below. Description Copy Tray Holder Guide Mylar Rear Copy Tray Screws (M4x8) 3-63 D093/D094... - Page 142 Rear Stacker (D312) 3.7.2 INSTALLATION Attach: [1] Copy tray holder ( [2] Rear copy tray (x3) [3] Guide mylar (x1) ] to center of copy tray D093/D094 3-64...
-
Page 143: Usb 2.0/Sd Slot Type E (D)
Check the accessories and their quantities against the table below. Description Q’ty Screw (M3x6) Screw (M3x8: Wide Pitch) Screw (M3x8: Narrow Pitch) Clamp Plate Spring USB Cable Slot Unit Bracket Device Access Decal Sheet (x16 Languages) Close Cover Decal Sheet (x16 Languages) 3-65 D093/D094... -
Page 144: Usb 2.0/Sd Slot Installation
Select the "close cover" decal [3] for the local language and attach it to the top of the unit. Connect the smaller end of the connector [1] ( x1). Raise ferrite core [2] above the plate. Route the cable at as shown. D093/D094 3-66... - Page 145 Open the original feed unit [1]. Remove the right upper cover [2] ( x 2). 10. Remove the right cover [3] ( x 3). 11. Remove the left upper cover [4] ( x 2). 12. Remove the left cover [5] ( x 3). 3-67 D093/D094...
- Page 146 USB 2.0/SD Slot Type E (D534) 13. Open the rear exit cover [1]. 14. Remove rear top cover [2] ( x 1, x 2). 15. Attach the unit [1] to the left rear corner of the machine ( x2). D093/D094 3-68...
- Page 147 22. Coil and secure the loose cable at [3] ( 23. Confirm that the coiled cable is not visible at [4]. 24. Plug in the machine and turn it on. 25. Do SP1013 (Multi Media Function). Set "0" to "1" to enable the unit. 3-69 D093/D094...
- Page 148 USB 2.0/SD Slot Type E (D534) SP1013 is a Scanner SP code. To open the Scanner SP list, enter the SP mode and select "Scanner SP" (not "System SP"). 26. Exit SP mode and test operation of the installed unit. D093/D094 3-70...
-
Page 149: Installation Of Mfp Options
MFP Option Board Slot/SD Card Assignments Slot Option Name IEEE802.11a/g Interface Unit Type J (D377-01, -02), Type K (D377-19) Not used GigaBit Ethernet Type B (D377-21) File Format Converter Type F (D533) Service Slot: Firmware update NVRAM data download/upload 3-71 D093/D094... - Page 150 Slot 2 is used for machine servicing and application program installation (firmware updates, NVRAM upload and download, application move and undo). If the customer needs more than two applications, one or more application must be moved to one SD card with SP5873-1. D093/D094 3-72...
-
Page 151: Enabling The Onboard Features
After an SD card has been used to combine applications on one card, it cannot be used for any other purpose. Always make sure that the write-protect switch is OFF before uploading data to an SD card. 3-73 D093/D094... - Page 152 Remove the SD card slot cover ( x1). ( p.3-73 "Removing the SD Card Slot Cover") Insert the original SD card with the application in Slot 2. Insert the SD card to receive the application in Slot 1. D093/D094 3-74...
-
Page 153: Undo Exec
Exit the SP mode. Turn off the main power switch. 10. Remove both SD cards. 11. Insert the SD card with the restored application in Slot 1. 12. Turn on the main power switch. 13. Check that the application operates normally. 3-75 D093/D094... -
Page 154: Printer Option Type W3601 (D)
If a network cable is connected, disconnect it. Insert the SD Card (Printer) in Slot 1. Insert the SD Card (TIFF/GL Filter) in Slot 2. Turn on the machine. Follow the prompts on screen to complete the installation of the printer option. D093/D094 3-76... - Page 155 10. Reattach the SD card slot cover. 11. On the operation panel, remove the dummy keytop [1] and replace it with the "Printer" keytop [2]. 12. Attach the "PS3" decal [3]. 13. Attach the "Enable Software Architecture" decal [4]. 3-77 D093/D094...
-
Page 156: Scanner Option Type W3601 (D)
If the Scanner option is to be used with the Printer option, you must first move the Scanner application to the Printer SD card. ( p.3-74 "Application Move") -or- If the printer option is not to be installed, you must first move the Scanner application to the Security & Encryption Unit SD card. D093/D094 3-78... - Page 157 Installation of MFP Options Remove the rear cover [1] of the main machine ( x2). Remove the cover of the controller unit [2] ( x1). Remove the shield cover [1] ( x 8). Remove controller board unit [1] ( x7). 3-79 D093/D094...
- Page 158 12. Enter the SP mode and make sure that SP5985-1 and SP5985-2 are both set to "1" (enabled). 13. Turn the machine power off/on. 14. Print a Configuration Page to make sure that the machine recognizes the installed option: User Tools> Printer Features> List/Test Print> Configuration Page D093/D094 3-80...
-
Page 159: File Format Converter Type F (D)
Before doing the procedure, turn off the main power switch and unplug the machine from its power source. Remove the cover [1] from Slot D ( x2). Insert and attach the File Format Converter board [2] ( x2). 3-81 D093/D094... - Page 160 Installation of MFP Options 3.9.7 IEEE802.11A/G INTERFACE UNIT TYPE J (D377-01, -02), TYPE K (D377-19) Accessories Check the accessories and their quantities against the table below. Description Qt'y LAN board (with antennas) Tape Clamp D093/D094 3-82...
- Page 161 Use a clean cloth moistened with alcohol to clean where clamp [1] will be attached. Attach clamp [1] ( x1). Set the cables [2] in the notch clamps as shown. Make sure the cables are arranged as shown and not twisted. 3-83 D093/D094...
- Page 162 12. Reconnect the machine to the power source and turn the main power switch on. 13. Print a Configuration Page to confirm correct installation: User Tools> Printer Features> List/Test Print> Configuration Page 14. Do SP5840-001 (WEP Key Select). D093/D094 3-84...
-
Page 163: Gigabit Ethernet Type B (D)
Touch a metal surface to discharge any static electricity from your hands before you handle the board. Installation Before doing the procedure, turn off the main power switch and unplug the machine from its power source. Remove the rear cover [1] of the main machine ( x2). 3-85 D093/D094... - Page 164 Remove the shield cover [1] ( x 8). Remove controller board unit [1] ( x7). Remove the cover of Slot C ( x1). Install the Gigabit Ethernet board ( x2). Insert the LAN connector cap [3] into the open "Ethernet" connection point. D093/D094 3-86...
- Page 165 11. Do SP5985-1, SP5985-2 and make sure that both are set to "1" (enable). 12. Turn the machine’s power off/on. 13. Print a Configuration Page to make sure that the machine recognizes the installed board for USB2.0: User Tools > Printer Features > List/Test Print > Configuration Page 3-87 D093/D094...
-
Page 166: Browser Unit Type E (D)
16. Remove the SD card for the Browser unit from Slot 1, then reattach the SD card slot cover. 17. Turn the machine power on. 18. Open the Browser screen from the "Extended Feature Settings" in User Tools. A message appears if the installation was successful: "The MFP Browser was successfully installed." D093/D094 3-88... - Page 167 Installation of MFP Options 19. On the operation panel remove the dummy keytop and replace it with the "Others" keytop. 3-89 D093/D094...
-
Page 169: Preventive Maintenance
PREVENTIVE MAINTENANCE R E V I S I O N H I S T O RY P a ge D a t e A d de d /U pd at e d /N ew None... - Page 171 Key for the PM Table A = Adjust, C = Clean, I = Inspect, L = Lubricate, R = Replace Units of measure in the PM Interval column: Metric: 1,000 meters, Feet: 1,000 feet 4.1.1 MAIN MACHINE (D093/D094) PM Interval Description Q’ty...
- Page 172 Lens paper ( p.4-8) 11.0 36.0 Corona Wire Cleaner 18.0 p.5-30) Charge Corona Casing 18.0 Damp cloth( p.4-8) Grid Wires 18.0 Lens paper ( p.4-8) Transfer Corona Wire 18.0 Lens paper ( p.4-7) 11.0 36.0 Separation Corona Wire 18.0 D093/D094...
- Page 173 Always replace with hot roller. Lubricate with Barrierta – S552R p.5-74) Pressure Roller 33.0 108.0 Replace if necessary. p.5-75) Hot Roller Strippers 18.0 Dry cloth. Pressure Roller Strippers 18.0 Hot Roller Thermistor 11.0 36.0 Pressure Roller Thermistor 11.0 36.0 D093/D094...
- Page 174 Fusing Drive Gears 18.0 Others Ozone Filter 18.0 p.5-101) Line Speed & Magnification Adjust after replacing Adjustments rollers. For details, see SP Adjustments. Circuit Breaker The circuit breaker should be tested once a year. See Main Machine Final Installation. D093/D094...
- Page 175 Blower brush or dry cloth Roll End Sensors 3, 4 11.0 36.0 (EXP) 4.1.3 PAPER CASSETTE (B853) PM Interval Comments Description Q’ty K Prints Feed Roller Replace if necessary. p.5-60) Friction Pad Grip Rollers Blower brush or dry cloth Relay Sensor D093/D094...
- Page 176 Open the upper unit. Retrieve the flat brush from [1] from its storage location. Use the flat brush to clean the 5 entrance spurs [2]. Be sure to return the flat brush to its storage location when you are finished. D093/D094...
-
Page 177: Corona Wire Cleaning
Use a dry or water damp cloth to clean the paper guide and frame [3]. If you use a damp cloth, use the damp cloth first. Then be sure to wipe the cleaned area dry with a clean dry cloth. D093/D094... -
Page 178: Charge Corona Unit
Remove the wire and clean the casing [3] with dry or water damp cloth. If you use a damp cloth, use the damp cloth first. Then be sure to wipe the cleaned area dry with a clean dry cloth. D093/D094... - Page 179 If you use a damp cloth, use the damp cloth first. Then be sure to wipe the cleaned area dry with a clean dry cloth. 4.2.4 IDLE REGISTRATION ROLLER PANEL Remove idle registration roller panel [1]. ( p.5-9) Use a vacuum cleaner to remove developer from the magnets [2]. D093/D094...
-
Page 180: Lubrication Points
Lubricate the development unit gears with Silicone Grease G501). Apply at the points shown by the numbers in the drawing. 4.3.2 FUSING GEARS Remove the fusing unit ( p.5-69) [1]: Fusing Gears (Barrierta S552R). Apply to the surface of the rim. D093/D094 4-10... -
Page 181: Replacement And Adjustment
REPLACEMENT AND ADJUSTMENT R E V I S I O N H I S T O RY P a ge D a t e A d de d /U pd at e d /N ew 02/21/2011 Updated Scanner, CIS, Reinstallation. -
Page 183: Common Procedures
Always remove these items before you start work on the machine: Remove: [A]: Upper output stackers (x 2) [B]: Guide lever [C]: Original output guides (x 4) [D]: Upper output guide (x 1) Lower output trays (x 3) (not shown) D093/D094... -
Page 184: Side Covers
Remove the left upper cover [C] ( x 2). If necessary, push in the release button [D] to remove the cover. Remove the left cover [E] ( x 3). Do Steps 3 and 4 to remove the right upper cover and right cover. D093/D094... -
Page 185: Rear Cover, Controller Cover
Always install the lower covers before the upper covers. If necessary, push in the upper unit release buttons [D] when you attach the upper covers. 5.1.3 REAR COVER, CONTROLLER COVER Rear cover ( x 2) [A] Controller cover [B] ( x 1) D093/D094... -
Page 186: Paper Exit Unit
Disconnect the ground wire [C] on the right ( x 1, x 1). Open the paper exit unit [A] and cover. Raise the paper exit unit approximately 30° from horizontal, and pull the unit away from the left and right hinges [B] and [C]. D093/D094... -
Page 187: Unlocking, Opening The Original Unit
Open the upper unit. Remove the lock screws [A] ( x 2). On the left and right sides, lift the hinges [B] off the support screws and lift the unit to the vertical position. (Do not remove the support screws.) D093/D094... -
Page 188: Removing The Original Feed Unit
Hold the Teflon arms up. At the same time, lower the original feed unit in your direction. When it is approximately 70° from the vertical, lift it off the top of the machine. Be sure to remove the Teflon arms from the ends of the shaft so they do not fall off. D093/D094... -
Page 189: Raising And Locking The Scanner Unit
Remove screws and raise the scanner unit [D] Put a long screwdriver [E] through the holes to lock the scanner unit in the up position. Always lock the scanner with a screwdriver when it is in the up position. D093/D094... -
Page 190: Toner Hopper Cover
Common Procedures 5.1.8 TONER HOPPER COVER Side covers. ( p.5-2 "Side Covers") Open the toner hopper cover [A]. Reinstallation Make sure that the bent edge of the mylar [B] is attached around the edge of the plate. D093/D094... - Page 191 Remove the two rear screws [C] first and let the panel come down. Use a very short screwdriver to remove the rear screws. Disconnect the panel from the stud screw on the right side first [D], then the left side. Do not remove the stud screws. D093/D094...
-
Page 192: Original Feed Table, Original Feed Sensor Cover
Open the upper unit. Side covers ( p.5-2 "Side Covers") Original feed table [A] ( Original feed sensor cover [B] ( x 2) Re-installation Make sure both mylars [C] are on the top of the front edge of the exposure glass. D093/D094 5-10... -
Page 193: Drawer Front Cover
Common Procedures 5.1.11 DRAWER FRONT COVER Open the front drawer of the roll feeder [A]. Push the cutter [B] to the right. Front cover [C] ( x 3) 5-11 D093/D094... - Page 194 Make sure that the safety switches work correctly after finishing any disassembly or adjustment of the scanner unit. Make sure that the original feed unit closes correctly after finishing any disassembly or adjustment of the scanner unit. D093/D094 5-12...
-
Page 195: Led Safety Switches
To ensure the safety of customers and customer engineers, two switches inside the scanner section prevent the LED radiation from switching on accidentally. When the original feed unit is open, the +24V line connecting each LED driver on the SIF board is disconnected. 5-13 D093/D094... - Page 196 "Original Feed Table, Original Feed Sensor Cover"). Original width sensor bracket [A] ( x 3, Original width sensors [B] ( x 1 ea.) Scanner switches [C] ( x 2, x 3) Registration sensor [D] ( x 1, x 2) D093/D094 5-14...
-
Page 197: Original Exit Sensor
Scanner 5.2.3 ORIGINAL EXIT SENSOR Raise and lock the scanner unit ( p.5-7 "Raising and Locking the Scanner Unit") Remove original exit sensor [A] ( 5-15 D093/D094... -
Page 198: Original Feed Unit Rollers
The drive and idle rollers of the scanner unit (original feed and original exit rollers) must be replaced with the rollers designed for use with this machine. If the rollers of the previous model are installed in this machine, this could cause undesirable vibration. D093/D094 5-16... - Page 199 If the lines at the joints in Area A are correct (not broken), the procedure is completed. If the lines are broken at a joint, do SP4965 to adjust them (adjust by trial and error). Then go back to step 3 and check again. 5-17 D093/D094...
-
Page 200: Exposure Glass
"Side Covers") Left exposure glass plate [A] ( x 1 with washer) Right exposure glass plate [B] ( x 1 with washer) Exposure glass [C] The exposure glass is very long and thin. It is very easy to break. D093/D094 5-18... - Page 201 Make sure that the black seal is below the rear edge of the exposure glass. The rear edge of the exposure glass must be on its metal supports and not in front of them. 5-19 D093/D094...
- Page 202 Unlock and raise the original unit. ( p.5-5 "Unlocking, Opening the Original Unit") Raise and lock the scanner unit and remove the original table. ( p.5-7 "Raising and Locking the Scanner Unit") At the rear, open the clamps on the lower plate ( x16). D093/D094 5-20...
- Page 203 Remove the original exit sensor [A] ( Remove the CIS unit [B] ( x4). Remove the three brackets [C] ( The three brackets must be removed and re-attached to the new CIS unit. These brackets are not provided with a new CIS unit. 5-21 D093/D094...
- Page 204 16. Do SP4417 and print Pattern 28 to check the CIS. 17. Do a test copy and check the quality. After replacing the CIS, store the SD card and the data sheet with the flat brush stored on the right bottom edge of the main machine. D093/D094 5-22...
-
Page 205: Vdb, Sif, Cgb Power Pack
"Side Covers") Manual feed table, original feed sensor cover ( p.5-10 "Original Feed Table, Original Feed Sensor Cover") Remove the LPH harness plate [A] ( x1). Remove the VDB [B] ( x 3, x 3, Remove SIF [A] ( 5-23 D093/D094... - Page 206 Scanner Remove CGB power pack [A] ( x 4, x 2) D093/D094 5-24...
-
Page 207: Operation Panel Boards
"Before Working On the Main Machine") Upper output stackers (x 2) Original output guides (x 4) Upper output guide (x 1) Original tray (x1) Removing the Operation Panel Open and raise the operation panel cover. ( Disconnect the operation panel ( x1). 5-25 D093/D094... -
Page 208: Lcdc, Inverter, Lcd Display Window, Lcd Unit
Scanner LCDC, Inverter, LCD Display Window, LCD Unit Remove the operation panel ( p.5-25). Remove LCDC bracket with the LCDC attached ( x12) Remove: [A] LCDC ( [B] Inverter ( Lift the touch panel out of its frame. D093/D094 5-26... - Page 209 Remove the LCD from its frame ( x4). OP-R Board Remove the operation panel ( p.5-25 "Removing the Operation Panel") Remove the LCDC ( p.5-26 "LCDC, Inverter, LCD Display Window, LCD Unit") Remove the OP-R board ( x11). 5-27 D093/D094...
-
Page 210: Touch Screen Calibration
To avoid errors, do not touch the [Reset] key on the operation panel during this procedure. Push [Clear], push [1] [9] [9] [ 3], and then press [Clear/Stop] 5 times. Touch "[1] Touch Screen Adjust" on the touch-panel or push [1] on the operation panel. D093/D094 5-28... - Page 211 If the ( mark does not appear where the screen is touched, push [./* Re-input] and repeat the procedure. When you are finished, touch "[#] OK" on the screen (or push [#] on the operation panel). Touch [#] Exit on the screen to close the menu and save the settings. 5-29 D093/D094...
-
Page 212: Around The Drum
Around the Drum 5.3 AROUND THE DRUM 5.3.1 CHARGE CORONA UNIT Charge Corona Wire, Grid Wire, Wire Cleaner Lift and lock the scanner unit ( p.5-7 "Raising and Locking the Scanner Unit") Remove the LPH ( p.5-36 " D093/D094 5-30... - Page 213 Disconnect the cleaning pad [E] and then move it to the left. You must move the cleaning pad to the left so you can use it as a handle to lift the unit out of the machine. Remove the charge corona unit [F]. 5-31 D093/D094...
-
Page 214: Disassembling The Charge Corona Unit
After you replace the charge corona wire, do SP2803 (Corona Wire Cleaning) to clean the new corona wire. Disassembling the Charge Corona Unit Grid wires [A] (x4) ( x 1 ea.) Two cover plates [B] (pressure release) Charge corona wire [C] ( D093/D094 5-32... -
Page 215: Quenching Lamp Unit, Quenching Lamps
Around the Drum 5.3.2 QUENCHING LAMP UNIT, QUENCHING LAMPS Remove: OPC drum unit ( p.5-47 "Drum Unit") LPH ( p.5-36 " 5-33 D093/D094... -
Page 216: Wire Cleaner Motor, Wire Cleaner Sensor
The quenching lamps are attached to the plate with double-sided tape. 5.3.3 WIRE CLEANER MOTOR, WIRE CLEANER SENSOR Remove the quenching lamp unit ( p.5-33 "Quenching Lamp Unit, Quenching Lamps") Place the quenching lamp unit on a flat surface. D093/D094 5-34... - Page 217 Around the Drum Remove the wire cleaner motor ( x2). Remove the wire cleaner sensor ( x3). 5-35 D093/D094...
- Page 218 Remove the original table ( x2). Remove [A] Left ground wire ( [B] Center ground wire ( x1) You may need to loosen screw [C] Right ground wire ( [D] LPH harness plate ( Disconnect the LPH at [E] ( x3). D093/D094 5-36...
- Page 219 Do SP2952 and input the values that are printed on the label attached to the replacement unit. ( p.5-116 "LPH Adjustment with SP Modes") Make a test print and adjust if necessary. ( p.5-116 "LPH Adjustment with SP Modes") 5-37 D093/D094...
-
Page 220: Transfer Corona, Separation Corona Wires
At each end of the unit, make sure that the tabs [B] are fully engaged with the studs [C]. When the tabs are engaged correctly, the caps on the end are fully level. Disassembling the Transfer Unit Left cap [A] ( Right cap [B] ( D093/D094 5-38... - Page 221 For each pair, the high guide is set on the outer side and the low guide is set on the inner side. If each guide is not installed at its original position, this will cause paper to wrinkle. 5-39 D093/D094...
-
Page 222: Development Unit
Disconnect the right end of the development unit [C] ( x1). Remove the screws [D] ( x1). Remove the development unit [E]. The development unit is very heavy. Pull it out slowly. Re-installation Re-attach the large shoulder screws on each side first, then re-attach the other screws. D093/D094 5-40... - Page 223 Turn the paddle roller knob [D] clockwise until all developer is out of the unit. When disposing of used developer, always obey local laws and regulations regarding the disposal of such items. Clean the development unit (especially the right end), the development filter, and development filter bracket. 5-41 D093/D094...
- Page 224 17. Open the upper unit. 18. Open the toner hopper cover. 19. Open the second 1 kg pack of developer and slowly add it to the development unit. Move the pack from left to right until it is empty. D093/D094 5-42...
- Page 225 The machine will return an error ("Failed") if you attempt to do SP2801-1 before SP2801-2 and -3. If the lot numbers are the same, just enter the same number twice. Do SP2801-1 to mix the developer and initialize the ID sensor. 5-43 D093/D094...
-
Page 226: Paper Set Sensor, Registration Sensor
Remove the development unit ( p.5-40 "Development Unit") Plate [A] ( x 1, x 1) Cut the harness clamp [B]. Toner supply clutch [C] ( x 1) The stopper is spring-loaded and will come out suddenly after you remove the e-ring. D093/D094 5-44... -
Page 227: Development Filter
Development 5.4.5 DEVELOPMENT FILTER Remove the development unit ( p.5-40 "Development Unit") Development unit casing [A] ( x 2) Filter rack [B] Filter [C] 5-45 D093/D094... -
Page 228: Used Toner Collection Bottle, Toner Overflow
Lift the upper unit. Right upper cover [A] ( x 2) Right cover [B] ( x 3) Loosen the leaf spring [C] and lift it. Toner overflow sensor [D] ( x 1, x 1) Toner collection bottle [E] D093/D094 5-46... -
Page 229: Drum Unit
Open the upper unit and set the cleaning blade release lever [A] to the left. Remove the development unit ( p.5-40 "Development Unit"). 5-47 D093/D094... - Page 230 Remove left hub [8] of drum shaft ( x 2). 10. Disconnect the drum at [9] ( x1). 11. Confirm that the drum is disconnected at the left rear corner [A]. 12. Remove drum unit [A]. D093/D094 5-48...
- Page 231 If you do this, scratches on the drum or a bent cleaning blade are less possible to occur. Re-set the cleaning-blade release lever to the right. Do SP3001-2 to initialize the ID sensor. 5-49 D093/D094...
-
Page 232: Cleaning Blade
Do SP2923 (Execute Cleaning Blade Replace Mode) to apply toner to the drum and blade. The coating of toner reduces friction between the drum and the cleaning blade and prevents scratching the drum surface or bending the blade. D093/D094 5-50... -
Page 233: Id Sensor, Pick-Off Pawls, Pick-Off Pawl Solenoid
If the ID sensor is damaged and cannot be replaced immediately, set SP2208-3 (Toner Supply Setting: Toner Supply Mode) to “1”. Then the customer can continue to use the machine until a new ID sensor is available. After you install a new ID sensor, reset this SP to 0. 5-51 D093/D094... -
Page 234: Paper Feed
1) Gear [C] ( x 1, x 1) Gear [D] ( x 1) Remove the used toner collection bottle ( p.5-46 "Used Toner Collection Bottle, Toner Overflow Sensor") Remove the right roller feeder joint bracket ( x3). D093/D094 5-52... - Page 235 At reinstallation, make sure that the vertical brace [C] is locked in the cutouts in the ceramic clutch [D]. 10. Front plate [A] ( x 6) 11. Transport roller dust cover [B] ( x 4) 12. Registration roller [C] ( x 2, x 2, Torque limiter x 1, 5-53 D093/D094...
-
Page 236: Roll 1 Paper Feed Clutch, Feed Roller
1, x 1) Roll 1 feed rollers [C] ( x 3, x 2) After you replace the roller or the clutch, adjust the cut length with SP1920-111 and SP 1920-115. ( p.5-103 "Image Adjustment with SP Modes") D093/D094 5-54... -
Page 237: Roll 2 Paper Clutch, Feed Roller
1, x 1) Roll 2 feed rollers [C] ( x 3, x 2) After you replace the roller or the clutch, adjust the cut length with SP 1920-211 and SP 1920-215. ( p.5-103 "Image Adjustment with SP Modes") 5-55 D093/D094... -
Page 238: Rf Exit Sensor
Paper Feed 5.6.4 RF EXIT SENSOR Open the drawer of the roll feeder. Plate [A] ( x 2) RF exit sensor [B] ( x 1, x 1) D093/D094 5-56... -
Page 239: Roll Feed Motor
Open the roll feeder drawer. Drawer front cover ( p.5-11 "Drawer Front Cover") Below the front, left corner of the roll feeder unit, loosen belt tension bracket [A]. Gear [B] ( Roll feeder motor [C] ( x 2, x 1, x 2) 5-57 D093/D094... -
Page 240: Cutter Motor, Hp Sensors
Right cutter HP switch [C] ( x 1, x 1) Left cutter HP switch [D] ( x 1, x 1) Cutter, race, and motor assembly [E] ( x 3, x 1, x 2) Cutter motor [F] ( x 2) D093/D094 5-58... -
Page 241: Roll Paper End Sensors
Open the roll feeder drawer. Roll feeder back plate [A] ( x 2) Roll end sensors [B] ( x 1, x 1 each) The Roll Feeder B641 has one roll end sensor, and the Roll Feeder B642 has two roll end sensors. 5-59 D093/D094... -
Page 242: Cassette Feed Roller
Paper cassette [A] Cassette feed roller [B] 5.6.9 CASSETTE RELAY SENSOR, CASSETTE END SENSOR Open the roll feeder drawer and remove the paper cassette. Roll feeder rear plate ( x 2 Blue) RFDB shield plate [A] ( x 2 Blue). D093/D094 5-60... - Page 243 Pull the unit to the rear, then remove it from the front. Relay sensor plate [C] ( x 1 Blue) Relay sensor [D] ( x 1, x 2) Cassette end sensor plate [E] ( x 1 Blue) Cassette end sensor [F] ( x 1, x 1, x 3) 5-61 D093/D094...
-
Page 244: Cassette Feed Motor, Cassette Open Sensor
Relay sensor plate, cassette end sensor plate [A] ( x 1 each) Cassette open sensor [B] ( x 1, x 2) Paper cassette feed assembly [C] ( x 6) Paper cassette motor [D] ( x 2, x 1, x 2) D093/D094 5-62... -
Page 245: Cassette Feed Clutch
Paper Feed 5.6.11 CASSETTE FEED CLUTCH Cassette feed motor ( p.5-62 "Cassette Feed Motor, Cassette Open Sensor") Motor mount plate [A] ( x 2) Cassette feed clutch [B] ( x 1, x 1) 5-63 D093/D094... -
Page 246: Pressure Spring Adjustment
Left: Less tension, less pressure. Set to this position to decrease wrinkling Right: More tension, more pressure. Can give better fusing with thick paper. Wrinkling occurs more frequently with some types of paper or film. Adjust the tension of the spring only when necessary. D093/D094 5-64... -
Page 247: Hot Roller Strippers
Hot roller strippers [B] (pressure release, spring x 1 each) 5.7.3 FUSING EXIT SENSOR Remove: Rear cover ( p.5-2 "Side Covers") Paper exit unit ( p.5-4 "Paper Exit Unit") Remove fusing exit sensor [A] ( x 1 white, x 1) 5-65 D093/D094... -
Page 248: Pressure Roller Thermistors
Remove pressure roller thermistors [A] ( x 1, x 2, x1). The end roller thermistor is at The center roller thermistor is at You must first remove the stripper unit [B] in order to remove the center thermistor D093/D094 5-66... - Page 249 Remove: Pressure roller stripper unit [A] ( x 4) Stopper screw [B] ( x 1 ea.) Pressure roller strippers [C] ( x 1 each) There are 11 pressure roller strippers. To remove them, push back and pull out. 5-67 D093/D094...
-
Page 250: Exit Unit Switch
Remove the pressure roller stripper unit [A]. ( p.5-67 "Pressure Roller Strippers") Remove the exit unit switch [B]. Use tips of two small flat-head screwdrivers to release the tabs at the top and bottom of the switch to release it, then pull it out. D093/D094 5-68... -
Page 251: Fusing Unit
Remove the left and right side covers. ( p.5-2 "Side Covers") Remove paper exit unit ( p.5-4 "Paper Exit Unit") Remove: [A] Anti-condensation heater switch bracket ( [B] Left vertical ground plate ( [C] Right vertical ground plate ( 5-69 D093/D094... - Page 252 [C] Fusing exit sensor ( [D] Pressure roller thermistor ( Open clamps [E] ( x2). Release the arms of the fusing unit [A] on both sides. The fusing unit is very heavy. Pull it out slowly. Remove the fusing unit [B] ( D093/D094 5-70...
- Page 253 Close the top cover and push down on the levers on both ends of the fusing unit when you set the fusing unit in the machine. Be sure to match and connect the color coded fusing lamp connectors correctly: Europe: Blue-to-Blue, White to White (as shown above) North America: Red-to-Red, White-to-White 5-71 D093/D094...
-
Page 254: Fusing Cleaning Roller
Fusing unit ( p.5-69 "Fusing Unit") Springs [A] ( x 2) Felt plate [B] ( x 2) Fusing cleaning roller [C] ( x 2, x 2) The brown bushing is on the right; the white bushing is on the left. D093/D094 5-72... -
Page 255: Fusing Lamp
This is the support with the anti-static brush. Fusing lamp [E] ( x 2, Metal harness clamps x 2) Reinstallation Make sure that the ends of the fusing lamp are given support by the rubber grommets of the right support [B] and left support [D]. 5-73 D093/D094... -
Page 256: Hot Roller
Fusing 5.7.10 HOT ROLLER Fusing lamp ( p.5-73 "Fusing Lamp") Hot roller [A] (Clip springs x 2, Sleeve bearings x 2, Gear x 1) Lubricate [B] with Barrierta – S552R (x 2) D093/D094 5-74... -
Page 257: Pressure Roller
Fusing 5.7.11 PRESSURE ROLLER Hot roller ( p.5-74 "Hot Roller") Pressure roller plate [A] ( x 4) Thermistor/Thermostat plate [B] ( x 4) Pressure roller [C] (Sleeve bearings x 2) 5-75 D093/D094... -
Page 258: Hot Roller Thermistor, Thermostats
M3x6 x 2) Thermostat 1 – 200 °C [C] ( M3x6 x 2) Reinstallation The thermostats (199 °C and 200 °C) must be installed at [B] and [C]. "199" and "200" are clearly shown on the edge of each thermostat. D093/D094 5-76... -
Page 259: Scanner Motor
Original feed unit ( p.5-6 "Removing the Original Feed Unit") Lift and lock the scanning unit ( p.5-7 "Raising and Locking the Scanner Unit") Scanner motor assembly [A] ( x 2, x 1, x 2) Scanner motor [B] ( x 2) 5-77 D093/D094... -
Page 260: Drum Motor
Motors 5.8.2 DRUM MOTOR Open the original feed unit. Drive belt plate [A] ( Loosen belt tension plate [B] ( x 2, x 1). Remove drive belt ( x1). Drum motor unit [C] ( x 1, x 3) D093/D094 5-78... -
Page 261: Fusing Motor, Main Motor
Disconnect upper unit sensor harness [B] ( x 1, x 3) Gear cover plate [C] ( x 7) Timing belt and cap [A] Motor mount plate [B] ( x 8, Fusing motor [C] ( x 1, x 4) 5-79 D093/D094... - Page 262 Remove the rear cover. At the left rear corner of the main machine, open two or three harness clamps to release the motor harnesses. This will decrease the tension in the harnesses. D093/D094 5-80...
-
Page 263: Used Toner Bottle Motor
"T&S Power Pack") Removal of the fusing unit is recommended. Loosen screw [A] ( x1). Remove screw [B] ( Disconnect motor and slide it out of the machine [C] ( x 1). Motor [D] ( x 2) 5-81 D093/D094... -
Page 264: Mcu, Sipu, Mb
If you need to replace the MCU, before disassembling the machine do SP5824 to upload the UP and SP mode data from NVRAM to an SD card. Remove: [A] Rear cover ( [B] Controller cover ( Remove PCB shield cover [1] ( D093/D094 5-82... - Page 265 Open all the clamps at [A] in front of the board tray ( x7). Disconnect both harnesses [B] ( x2). Disconnect the board ( x13, Disconnect the board tray [A] and remove it ( Set the board tray on a flat surface. 5-83 D093/D094...
- Page 266 Boards Remove the controller box [A] ( x7). 10. Remove the PCB cover ( x12) The boards must be removed in this order: MCU> SIPU> Motherboard. 11. Remove the MCU ( 12. Remove the SIPU ( D093/D094 5-84...
- Page 267 Scan Correction – CIS2-3 Main Scan ... Scan Correction - CIS1-2 Sub Scan 008 to 010 Scan Correction - CIS2-3 Sub Scan ... 4979 001 to 060 Scan Correction Check the DIP switch settings on the MCU board before you replace it. 5-85 D093/D094...
- Page 268 Boards Setting When you re-install the motherboard [A], check the right upper corner and make sure that the board lies flat on top of the metal tab at and is behind the metal tab at D093/D094 5-86...
- Page 269 Remove the rear cover [A] ( x2). Remove the controller box cover [B] ( x1). Remove breaker switch [A] ( x1). Open the clamps to free harness [B] ( x2). Remove the breaker switch bracket [C] ( x2). 5-87 D093/D094...
- Page 270 [C] Left vertical ground plate ( [D] Right vertical ground plate ( Close the paper exit guide unit. Remove PSU [A] ( x12, 10. Lay the PSU tray on a flat surface. 11. Remove the PSU from the tray ( x2). D093/D094 5-88...
- Page 271 AC power source. Re-installation Be sure to re-connect the breaker switch correctly. The harnesses are color coded: Brown, Blue, Black, White. The machine will not operate if these connectors are re-connected incorrectly. 5-89 D093/D094...
-
Page 272: Controller Board
Boards 5.9.3 CONTROLLER BOARD Remove: [A] Rear cover ( [B] Controller cover ( Remove the PCB shield cover [1] ( x8). D093/D094 5-90... - Page 273 Boards Remove the slot covers of Slots A, B, D (or installed boards) ( x6). Remove the controller box [A] ( x7). Lay the controller box on a flat surface. 5-91 D093/D094...
- Page 274 Boards or slot covers must be removed from Slots, A, B, D, before you can remove the controller board. Remove the controller board ( x7). Remove the NVRAM for the old controller board and then mount it on the new controller board. D093/D094 5-92...
- Page 275 NVRAM. Switch the machine off. Insert an SD card in SD card Slot 2. Switch the machine on. Go into the SP mode and do SP5824 (Upload NVRAM Data). When you see "Completed!", switch the machine off. 5-93 D093/D094...
- Page 276 Follow the instructions on the operating panel display to execute the download. Switch the main power switch off. Switch the main power switch on. 10. If the Data Overwrite Security Unit has been installed, it must be installed again. 11. Do SP3001-2 to initialize the ID sensor. D093/D094 5-94...
-
Page 277: T&S Power Pack
"Circuit Breaker/PSU") Removal of the fusing unit is not absolutely required but is recommended to make this procedure easier. Remove T&S power pack mount [A] ( x 3, x 1) Remove T&S power pack ( x 2, 5-95 D093/D094... -
Page 278: Rfdb (Roll Feeder Drive Board)
Boards 5.9.6 RFDB (ROLL FEEDER DRIVE BOARD) Open the roll feeder drawer. Remove the rear plate of the roll feeder ( x 2 blue) [A] Shield plate ( x 2) [B] RFDB ( x 3, x 2) D093/D094 5-96... -
Page 279: Sfdb (Sheet Feed Drive Board)
[A] RFDB shield plate [A] ( x 2). [B] Paper cassette unit [B] ( x 4, x 2, x 4) Pull the unit to the rear, remove it from the front. Remove the SFDB [A] ( x 2, x 2, x 2) 5-97 D093/D094... - Page 280 5.10 HDD Remove the controller box ( p.5-90 " D093/D094 5-98...
- Page 281 Disconnect the HDD at [A] ( x2). Remove the HDD bracket [A] (with HDD attached) ( x4). Lay the HDD unit on a flat surface. Remove the screws from sides of the HDD bracket [B] ( x4). Separate the HDD and the bracket. 5-99 D093/D094...
- Page 282 A new hard disk should always be formatted with SP5832-1, even if it has already been formatted. The fixed stamp data, the files for fixed stamps such as "Confidential", "Urgent", etc. should always be downloaded from ROM with SP5853 after the HDD is replaced or reformatted. D093/D094 5-100...
- Page 283 Trays, guides on top of the machine off ( p.5-1 "Before Working On the Main Machine") Remove rear top cover [A] ( x 1, x 2). Remove the plate [A] (press release). Lift plate [B]. Remove the ozone filter [B]. 5-101 D093/D094...
- Page 284 Cooling Fan, Ozone Filter, Paper Exit Selection Switch Turn over plate [A]. Remove the cooling fan [B] ( x 1, Disconnect the paper exit selection switch [C] ( x1). Press in the sides of the switch and push it down to remove it. D093/D094 5-102...
-
Page 285: Image Adjustment With Sp Modes
Set a blank sheet of A1 SEF paper in the original tray. Press [Start] to print a test pattern. Print two more test patterns (you need three grid pattern prints). Refer to the diagram and instruction table below to do the SP magnification corrections (if needed). 5-103 D093/D094... -
Page 286: Step 2: Scanning Magnification
Measure the length and width of the images on the original and the copy. Do these SPs in the sequence shown in this table, if the measurements are not in the standard range: Standard Comments 4008 Less than ±0.5 Scanner Sub Scan Magnification 4101 Less than ±0.5 Scanner Main Scan Magnification D093/D094 5-104... -
Page 287: Step 3: Magnification For Paper Type: Translucent
Do these SPs in the sequence shown in this table, if the measurements are not in the standard range: Standard Fine Magnification 2916-5 Less than ±0.5 Film: Mode 1-4: Main Scan 2916-6 Less than ±0.5 Film: Mode 1-4: Sub Scan 5-105 D093/D094... -
Page 288: Step 5: Scanner Mask Setting
Set these SPs to “5” to make measurement easier: Set To: Comments 2101-1 Print Erase Margin – Leading Edge 2101-2 Print Erase Margin – Trailing Edge 2101-3 Print Erase Margin – Left Edge 2101-4 Print Erase Margin – Right Edge D093/D094 5-106... -
Page 289: Step 7: Printer: Leading Edge, Side-To-Side Registration
Leading Edge Registration – 1st Roll 1001-2 Leading Edge Registration – 2nd Roll 1001-3 Leading Edge Registration –Cassette 5 ±0.5 mm 1001-5 Leading Edge Registration – By-pass Feed 1002-1 Side-to-Side Registration – 1st Roll 1002-2 Side-to-Side Registration – 2nd Roll 5-107 D093/D094... -
Page 290: Step 8: Scanner Mask Setting
Do these SPs to replace the settings done in Step 6. Set To: Comments 2101-1 Print Erase Margin – Leading Edge 2101-2 Print Erase Margin – Trailing Edge 2101-3 Print Erase Margin – Left Edge 2101-4 Print Erase Margin – Right Edge D093/D094 5-108... -
Page 291: Step 10: Scanner Registration
The cut length adjustment is done for all paper sizes after these settings are done. After these settings are done you may still need to do fine adjustments for each paper size. Use the Preset Cut feature to make standard cuts of plain paper for these sizes: Size Orientation Sideways Lengthways Lengthways 5-109 D093/D094... - Page 292 ±5 to 2000 ±6 =3000 ±11 to 4000 ±14 If a measurement is not in the standard range of the "Cut Tolerance" in the table above, adjust SP1920-22 to -130 for each roll, paper width, and paper type. D093/D094 5-110...
-
Page 293: Step 12: Synchro Cut (Trailing Edge Registration)
10. Do SP4961-3 to check the scan length. 11. If the display is different, adjust with SP4961-2. Cut Length (mm) Cut Tolerance (mm) Less than 297 ±4.50 to 594 ±5.00 to 841 ±6.00 to 1189 ±8.50 to 2000 ±18.0 to 3000 ±27.0 to 3600 ±33.0 5-111 D093/D094... -
Page 294: Cis Adjustment With Sp Modes
When you look at the printed pattern, the number sequence of the CIS joints is opposite, with CIS-5 on the left through CIS-1 on the right as shown in the diagram above. After completing the CIS adjustments, be sure to reset SP4973 to "2". D093/D094 5-112... -
Page 295: To Adjust The Image At The Cis Joints
To adjust the sub scan offset for Example [B] Problem: Output from CIS 1 is lower than the output from CIS 2. Do SP4972-6 and adjust the setting. Adjust the position of CIS 1. The position of CIS 2 does not move. 5-113 D093/D094... - Page 296 If the CIS 1 area is higher than the CIS 2 area, set a larger value. If the CIS 1 area is lower than the CIS 2 area, set a smaller value. In the example shown [B], you must decrease the value for CIS 1. D093/D094 5-114...
- Page 297 CIS 3-4 CIS 4 moves. CIS 3 does not move. Interval 3-4 Sub Scan Offset: CIS 4-5 CIS 5 moves. CIS 4 does not move. Interval 4-5 After completing the CIS adjustments, be sure to reset SP4973 to "2. 5-115 D093/D094...
-
Page 298: Lph Adjustment With Sp Modes
"Main Scan Adjustment: White, Black Vertical Lines"). If you see the areas are not aligned, do the misalignment adjustments (See below, "To Adjust the LPH for Misalignment"). If you see vertical white/black lines and misalignment, do the vertical line adjustment first. D093/D094 5-116... -
Page 299: Main Scan Adjustment: White, Black Vertical Lines
If the right line is black, adjust SP2952-2 to a larger value. After the adjustment, feed the blank sheet again to print one more pattern. Check the results of the adjustment. Do the adjustment again until the lines appear faint. The lines cannot be completely erased. 5-117 D093/D094... -
Page 300: Main Scan Adjustment: Led Light Level At Lph Joints
Go into the SP mode, and do SP2952-11 for LPH 1-2 Adjust the position of LPH 2 (LPH 1 does not move). If LPH 2 is higher than LPH 1, set a larger value. D093/D094 5-118... - Page 301 For operators who frequently use paper that is less than 420 mm wide, do the sub scan adjustments for the LPH joints with SP2952-51, -52 after you input the values of SP 2952-11 and -12 from the decal. 5-119 D093/D094...
-
Page 302: Lph Density Adjustment With Sp Modes
Touch "SP Mode" to return to the SP mode. 10. Check the density of the patterns in LPH 1, LPH 2, and LPH 3. If density is equal for all areas, no adjustment is necessary. If the density is not equal, do the next procedure. D093/D094 5-120... -
Page 303: To Correct Pattern Density
Do SP2902-2, select Pattern #10, touch [OK], then print the pattern by feeding the blank sheet and check the density. Do this procedure for LPH2 and LPH3 until the density is the same in each of the three sections. LPH2: SP2943-2 LPH3: SP2943-3 5-121 D093/D094... -
Page 304: Firmware Update
Insert the SD card [2] with the firmware in SD card Slot 2. (If there is an SD card in Slot 2, remove it.) Turn on the main power switch. "Program to start firmware update" appears on the operation panel display. D093/D094 5-122... - Page 305 Touch the name of the application that needs to be updated. The name of the application changes to reverse black and the [Update#] key appears at the lower right corner of the screen. Touch [Update#] to start the update procedure. Follow the instructions on the operation panel to complete the procedure. 5-123 D093/D094...
- Page 306 Controller applications and the operation panel update must be done separately. If you select a controller application and the operation panel for update, the machine will display a message: Caution! Controller applications and Op Panel must be installed separately. D093/D094 5-124...
- Page 307 SYSTEM MAINTENANCE REFERENCE R E V I S I O N H I S T O RY P a ge D a t e A d de d /U pd at e d /N ew None...
- Page 309 Service Program Mode 6. SYSTEM MAINTENANCE REFERENCE 6.1 SERVICE PROGRAM MODE See "Appendices" for Service Program Mode. D093/D094...
-
Page 310: Main Sp Modes
To move the start position to the left, decrease the value (–). Note: If you use paper 914 mm wide, adjust within the 5 By-pass Feed range of ±2 mm. If you set the adjustment outside this range, part of the image will be cut off. D093/D094... - Page 311 SP1931. [0 to 50/10/1°C] Copying can start at this temperature before the hot roller reaches its target temperature (SP1931). 3 Low Power Mode Sets the copy ready temperature for low power mode. [80 to 150/90/1°C step] D093/D094...
- Page 312 SC559 is a Class "A" SC error. The service technician must restore operation of the machine. 1911 By-pass Feed Start Timing Adjusts the time that the operator has to adjust the paper skew manually when feeding paper manually from the bypass tray.. [1.0 to 8.0/2.0/0.1 sec.] D093/D094...
- Page 313 [-5 to 0 / 0 / 0.02 %] D093/D094...
- Page 314 50 1st Roll: 15000mm: Translucent Paper 62 1st Roll: 297mm: Film [-100 to +100/0/ 1 mm] 63 1st Roll: 420mm: Film 64 1st Roll: 594mm: Film [-10 to +10/0/0.1 mm] 65 1st Roll: 841mm: Film [-20 to +20/0/0.1 mm] D093/D094...
- Page 315 107 2nd Roll: 2000mm: Translucent Paper 108 2nd Roll: 3600mm: Translucent Paper [-30 to +30/0/1 mm] 109 2nd Roll: 6000mm: Translucent Paper 110 2nd Roll: 15000mm: Translucent Paper [-100 to +100/0/ 1 mm] 122 2nd Roll: 297mm: Film [-10 to +10/0/0.1 mm] D093/D094...
- Page 316 [0 to 500/0/1 mm] Note: The "0" (default) setting does not mean that the gap is eliminated. When set to "0" the standard gap between sheets is maintained (480 mm for the D093 and 168 mm for the D094.) D093/D094...
- Page 317 10 Trans.: Mode5 [120 to 220/165/5 11 Film: Mode1 [120 to 220/195/5 12 Film: Mode2 [120 to 220/190/5 13 Film: Mode3 [120 to 220/185/5 14 Film: Mode4 15 Film: Mode5 [120 to 220/175/5 16 Plain: Low Temp Mode [120 to 220/195/5 D093/D094...
- Page 318 [60 to 180 /100/5 8 Trans.: Mode3 9 Trans.: Mode4 10 Trans.: Mode5 11 Film: Mode1 [60 to 180 /60/5 12 Film: Mode2 13 Film: Mode3 14 Film: Mode4 15 Film: Mode5 16 Plain: Low Temp Mode [60 to 180 /120/5 D093/D094 6-10...
- Page 319 7 Trans.: Mode2 8 Trans.: Mode3 9 Trans.: Mode4 [0 to 50/20/5] 10 Trans.: Mode5 11 Film: Mode1 12 Film: Mode2 13 Film: Mode3 14 Film: Mode4 15 Film: Mode5 16 Plain: Low Temp Mode [0 to 50/0/5] 6-11 D093/D094...
- Page 320 7 Trans.: Mode2 8 Trans.: Mode3 9 Trans.: Mode4 [0 to 50/20/5] 10 Trans.: Mode5 11 Film: Mode1 12 Film: Mode2 13 Film: Mode3 14 Film: Mode4 15 Film: Mode5 16 Plain: Low temp. Mode [0 to 50/0/5] D093/D094 6-12...
- Page 321 3 Plain: Mode3 [0 to 50/0/5 4 Plain: Mode4 5 Plain: Mode5 6 Trans.: Mode1 [0 to 50/20/5 7 Trans.: Mode2 8 Trans.: Mode3 9 Trans.: Mode4 [0 to 50/0/5 10 Trans.: Mode5 11 Film: Mode1 12 Film: Mode2 6-13 D093/D094...
- Page 322 Main SP Modes 13 Film: Mode3 14 Film: Mode4 15 Film: Mode5 D093/D094 6-14...
- Page 323 Adjusts the quantity of erase for copy mode (quantity of white space). 1 Leading Edge 2 Trailing Edge [0 to 10 / 2 /0.1 mm step] 3 Left edge 4 Right edge [0 to 10/ 0.5 / 0.5 mm step] 6-15 D093/D094...
- Page 324 Note: The Low Duty Mode is set as the default because wide format copiers are generally used for low volume copying and printing. [0 to 1/0/1] 0: Low Duty Mode Copy Jobs (< 400 meters/day) 1: High Duty Mode Copy Jobs (> 400 meters/day) D093/D094 6-16...
- Page 325 This coefficient is used in a calculation with GAIN value, and width of the paper to determine the amount of toner supply. Increasing the value of this setting raises the amount of toner applied to control image density. [0 to 3.5 / 1.7 / /0.1 Steps] 6-17 D093/D094...
- Page 326 If the operator is frequently running jobs that contain either a lot of lines or graphics then SP2208-7 (Long Print Mode Setting) should be set accordingly. The values set for this SP are reflected in the printed images after Long Print/Graphic has been selected. [1 to 40 / 3 / 1%] D093/D094 6-18...
- Page 327 For a Long Print mode job the setting of SP2208-5 is reflected when the operator selects graphic mode, and the setting of SP2208-6 is reflected when the operator selects line mode. 6-19 D093/D094...
- Page 328 Transfer Current Adjustment Table The four separate voltages for image transfer to paper are applied: A: Before paper leading edge B: Leading edge C: Image area D: Trailing edge D093/D094 6-20...
- Page 329 Roll Paper: Plain Paper: Trailing Edge [0 to 230/60/1 5 Roll Paper: Plain Paper: Coefficient DFU Adjusts the transfer output coefficient for the image at the center, leading edge, and trailing edge on plain roll paper. [1 to 2 / 1/ 0.1 ] 6-21 D093/D094...
- Page 330 Adjusts the transfer output coefficient for the image at the center, leading edge, and trailing edge on film roll paper. [1 to 2 / 1 / 0.1 ] Cut Paper: Plain Paper: Before Leading Edge [0 to 230/60/1 D093/D094 6-22...
- Page 331 Adjusts the transfer output coefficient for the image at the center, leading edge, and trailing edge on translucent cut-sheet paper. [1 to 2 / 1/ 0.1] Cut Paper: Film: Before Leading Edge [0 to 230/80/1 Cut Paper: Film: Leading Edge [0 to 230/80/1 6-23 D093/D094...
- Page 332 Cut Paper: Film: Trailing Edge [0 to 230/80/1 Cut Paper: Film: Coefficient DFU Adjusts the transfer output coefficient for the image at the center, leading edge, and trailing edge on film cut-sheet paper. [1 to 2 / 1 / 0.1] D093/D094 6-24...
- Page 333 This is the lot number of the 2nd packet. 2803 Corona Wire Cleaning Do this SP to clean the charge corona wire. This SP also moves the cleaning pad to the home position. The cleaning requires about 20 sec. to complete. 6-25 D093/D094...
- Page 334 18: 1-dot Alternating Dot Pattern 6: 6-dot Grid Pattern 19: 2-dot Alternating Dot Pattern 7: 1-dot Argyle Pattern 20: 4-dot Alternating Dot Pattern 8: 2-dot Argyle Pattern 21: Trimming Area 9: 3-dot Argyle Pattern 22: Full Dot Pattern D093/D094 6-26...
- Page 335 7 Recycled Paper: Mode1-4: Main Scan 8 Recycled Paper: Mode1-4: Sub Scan 9 Plain Paper: Mode5: Main Scan 10 Plain Paper: Mode5: Sub Scan 11 Translucent: Mode5: Main Scan 12 Translucent: Mode5: Sub Scan 13 Film: Mode5: Main Scan 6-27 D093/D094...
- Page 336 To solve this problem, set this SP to "1" so as soon as the upper unit is closed, the charge corona can apply a charge to the drum to correct the problem. [0 to 1/1/1] 0: OFF 1: ON D093/D094 6-28...
- Page 337 2 Toner End Level Sets the Vsp/Vsg level for toner end detection. The ID sensor must detect this value three times in succession to detect toner end. The machine stops when toner end is detected. [0.150 to 300/0.165/0.005 V] 6-29 D093/D094...
- Page 338 1 LPH1 [1.0 to 20.0/12.0/0.1%] The optimum LPH settings are printed on the label that is attached 2 LPH2 to LPH replacement units. Always input these settings immediately after the LPH unit has been replaced. 3 LPH3 D093/D094 6-30...
- Page 339 Adjusts sub scanning at LPH 1-2 for paper less than 420 mm wide. This value is calculated automatically. [-50 to +50/0/1] 52 LPH2-3 Sub Scan: < 420mm Adjusts sub scanning at LPH 2-3 for paper less than 420 mm wide. This value is calculated automatically. [-50 to +50/0/1] 6-31 D093/D094...
- Page 340 [0 to 3/1/1] 0: Strongest processing (thinnest) 1: Normal processing 2: Weaker processing 3: Weakest processing (thickest) The illustration above shows how two elements comprise each dot. This example shows vertical and horizontal 1-dot lines. D093/D094 6-32...
- Page 341 The settings have no effect on the horizontal line. When line thickness more than 2 dots the value selected for SP2954-10 affects only the outer lines. The diagram above shows "1" selected for SP2954-10. The setting does not affect the horizontal line. 6-33 D093/D094...
- Page 342 Automatically adjusts the ID sensor with a sensor reading of the bare drum. The initial setting is 4.0V ±0.2. This SP requires about 4 sec. to execute. Always do this SP at installation, and after you replace these components: OPC Drum ID Sensor NVRAM D093/D094 6-34...
- Page 343 3 During Job This SP sets the time interval between the readings of the previous and next ID sensor pattern during a job. [20 to 2000 / 100 / 10 cm] 6-35 D093/D094...
- Page 344 This SP shifts the scanned image relative to the main scan direction. [-4 to 4/0.0/0.1 mm] A higher setting "+" shifts the image to the right (in the main scan direction). A lower setting "-" shifts the image to the left (against the main scan direction). D093/D094 6-36...
- Page 345 [0 to 25/ 0.9 /0.1 s] 3 Original Length Setting Sets the interval between multiple feeds for the DF free run. [0.2 to 15 / 0.6 /0.1 m] 4101 Scanner Main Scan Magnification Adjusts the side-to-side scan magnification. [-0.9 to +0.9/0.0/0.1 %] 6-37 D093/D094...
- Page 346 Vertical Stripes: SCN Horizontal Grayscale: 16-Lvl:SCN Vertical Grayscale: 16-Lvl:SCN Density Patch: 16-Lvl: SCN Cross Pattern: SCN Argyle Pattern: SCN Density Patch: 256-Lvl: SCN Density Patch: 64-Lvl: SCN Trim Area: SCN Vert. Frequency Characteristics: SCN Horiz. Frequency Characteristics: SCN D093/D094 6-38...
- Page 347 The higher settings can make text look better, but can also decrease the quality of the image. Independent Dot Erase: Text Sets the independent dot erase mode for scanning Text Mode. [0 to 7 / 4 / 1] 0 (Weakest), 4 (Medium: Default), 7 (Strongest) 6-39 D093/D094...
- Page 348 Line Width Corr : Text: Sub Scan Sets the strength of line correction effect for Text Mode in the sub scan direction. 0 to 1 / 1 / 1] 0: No line width correction 1: Line width correction D093/D094 6-40...
- Page 349 [0 to 1 / 1 / 1] 0: No line width correction 1: Line width correction 4905 Gray Scale Processing Selects the type of dithering done in Photo mode. [0 to 255/0/1] 0: 2-value dithering 8x8 1: 2-value dithering 16x16 2: 2-value dithering 16x16 6-41 D093/D094...
- Page 350 You may also need to adjust this SP if you see image distortion after CIS adjustments with SP4972. For more about how to use SP4965, please refer to "Replacements and Adjustments" > "Scanner", "Original Feed Unit Rollers". [-1.0 to 0.0/ -0.2 /0.1] D093/D094 6-42...
- Page 351 [0 to 656 / 358 / 0] 2 CIS2 Main Scan 3 CIS2-3 Main Scan [0 to 656 / 424 / 0] 4 CIS3-4 Main Scan [0 to 656/ 425 / 0] 5 CIS4-5 Main Scan [0 to 656 / 426 / 0] 6-43 D093/D094...
- Page 352 2: Gradation adjustment at joint 4975 Prevent Original Falling This SP determines whether the machine stops and holds the edge of the original after the original is fed so that it does not fall. [0 to 1/0/1] *0: Disable, 1: Enable D093/D094 6-44...
- Page 353 1: Paper counter. Shows the total page counts 2 Counter Unit [0 to 8/ 0 / 1] 0: Models -21/-27, 2: Model -17 Meters Yards Feet Meters Yards Feet A3=1 Surface area count 0.1 meters Only for counting devices by user. 01. yards 6-45 D093/D094...
- Page 354 Selects the type of counter: 0: None 1: Key Card (RK3, 4) Japan Only 2: Key Card Down 3: Pre-paid Card 4: Coin Rack 5: MF Key Card 11: Exp Key Card (Add) 12: Exp Key Card (Deduct) D093/D094 6-46...
- Page 355 11: Incrementing key cards for use outside Japan 12: Decrementing key cards for use outside Japan Disable Copying Temporarily denies access to the machine. 5118 [0 to 1/0/1] 0: Release for normal operation 1: Prohibit access to machine 6-47 D093/D094...
- Page 356 [0 to 1/0/1] 0: On 1: Off 5162 App. Switch Method Determines if the application screen changes with a hardware switch or a software switch. [0 to 1/0/1] 0: Soft Key Set 1: Hard Key Set D093/D094 6-48...
- Page 357 1: Tray priority. Switches the feed tray only after the paper in the tray current tray runs out of paper. 6-49 D093/D094...
- Page 358 Sets up operation of the machine with a keycard. [0 to 1/0/1] 5490 0: Disabled. Cancels operation if no code is input. 1: Enabled. Allows operation if another code is input and decrements the counter once for use of the entered code. D093/D094 6-50...
- Page 359 5504 0: Zero (Off) 1: Low (2.5K jams) 2: Medium (3K jams) 3: High (6K jams) Error Alarm Sets the error alarm level. 5505 [0 to 255 / 1 / 1 Step] Note: 1 Step is 100 mm. 6-51 D093/D094...
- Page 360 1: Toner near-end. The alarm triggers at toner-end or toner near-end. Note: The “Interval nn" SP's below specify the paper control call interval for the referenced paper sizes. [00250 to 10000 / 1000 / 1 Step] D093/D094 6-52...
- Page 361 Determines whether an SC call is issued when an SC error occurs while either CSS or @Remote is enabled: [0 to 1/1/1] 1: An SC call is issued when an SC error occurs. 0: An SC call is not issued when an SC error occurs. 6-53 D093/D094...
- Page 362 Initializes default system settings, SCS (System Control Service) settings, operation display coordinates, and ROM update information. 4 IMH Memory Clr Initializes the image file system. (IMH: Image Memory Handler) 5 MCS Initializes the automatic delete time setting for stored documents. (MCS: Memory Control Service) D093/D094 6-54...
- Page 363 Initializes the DCS (Delivery Control Service) settings. 15 Clear UCS Setting Initializes the UCS (User Information Control Service) settings. 16 MIRS Setting Initializes the MIRS (Machine Information Report Service) settings. 17 CCS Initializes the CCS (Certification and Charge-control Service) settings. 6-55 D093/D094...
- Page 364 Displays the signals received from switches and sensors. Roll Unit Open Sensor Cutter Sensor Roll Leading Edge Sensor Roll Unit Sensor 1 Roll End Sensor 1 Roll End Sensor 1: White Roll Unit: Sensor 2 Roll End Sensor 2 D093/D094 6-56...
- Page 365 Clam Shell Open Senor (Left) 5V Exit Cover Open Sensor (Right) 24V Exit Cover Open Sensor (Left) 5V Fusing Unit Sensor Toner Cover Open Sensor Main Motor Lock Sensor Drum Motor Lock Sensor Fusing Motor Lock Sensor Overheat Sensor Zero Cross DIP SW1 6-57 D093/D094...
- Page 366 Original Width Sensor: B2 Original Width Sensor: B3 Original Width Sensor: B4 Original Width Sensor: 914 mm Original Width Sensor: 30" Original Set Sensor Original Registration Sensor Original Exit Sensor Original Emergency Stop Sensor Original Feed Unit Open Sensor D093/D094 6-58...
- Page 367 Paper Junction Gate Solenoid Used Toner Motor Charge Corona Charge Grid: Image Area Charge Grid: ID Sensor Pattern Charge Corona/Grid: Image Area Development Bias: Image Area Development Bias: ID Sensor Pattern Separation Corona: Leading Edge Separation Corona Toner Supply Clutch 6-59 D093/D094...
- Page 368 As soon as the Level A SC code is issued, the machine is disabled immediately. The operator cannot reset the SC because the machine requires servicing immediately. The machine cannot be used until the machine has been service. D093/D094 6-60...
- Page 369 1: Serial (CSS or @Remote) remote diagnostics on. 2: Network remote diagnostics on for @Remote CE Call Lets the operator engineer start or end of the remote machine check with CSS or @Remote; to do this, push the center report key 6-61 D093/D094...
- Page 370 RCG during a call over the @Remote network. [0 to 100/60/1 sec.] Port 80 Enable Controls if permission is given to get access to the SOAP method over Port 80 on the @Remote network. [0 to 1/0/1] 0: No. Access denied 1: Yes. Access granted. D093/D094 6-62...
- Page 371 Embedded RC Gate-M and the Gateway. The length of the address is limited to 127 characters (characters beyond the 127th character are ignored). Proxy Port Number This is the port number of the HTTP proxy used to effect communication between Embedded RC Gate-N and the Gateway. [0 to 0xffff/0/1] 6-63 D093/D094...
- Page 372 A rescue update for certification has been issued and a rescue certification setting is in progress for the rescue CTL connection. The rescue certification setting is completed and the CTL URL is being notified of the certification update request. D093/D094 6-64...
- Page 373 There has been a shift from a common to individual certification. There has been a common certification without ID2. No certification has been issued. CTL URL does not exist. CERT: Up ID The ID of the request for certification. 6-65 D093/D094...
- Page 374 Displays the common name of the @Remote certification subject. CN = the following 17 bytes. Spaces are displayed as underscores (_). Asterisks (****) indicate that no DESS exists. CERT: Serial Number Displays serial number for the @Remote certification. Asterisks (****) indicate that no DESS exists. D093/D094 6-66...
- Page 375 The status of the execution of this SP (dialing in progress, success, failure) is written to SP5816-152. If the check succeeds, the number (dial or push number) written to SP5816-153 can be used If the check succeeds, the number of the carrier line written to SP816-154 can be used. 6-67 D093/D094...
- Page 376 Used only for Embedded RC Gate-M to set the number of the PSTN number to dial out where Embedded RC Gate-M is used with a PBX system. If a number is set here, the number will be replaced by the number returned by the successful execution of SP5816-151. D093/D094 6-68...
- Page 377 This SP code should be set for the customer using Embedded RC Gate-M, depending on the line usage (whether line is shared with a fax or not). [0 to 1/0/1] 0: Line shared with facsimile 1: Line not shared with facsimile 6-69 D093/D094...
- Page 378 Manual Polling Executes manual polling. Embedded RC Gate periodically polls the @Remote Gateway by HTTPS. This is called "center polling". Use this SP at any time to poll the @Remote supply center. D093/D094 6-70...
- Page 379 Displays a number that indicates the result of the inquiry executed with SP5816 203. Succeeded Inquiry number error Registration in progress Proxy error (proxy enabled) Proxy error (proxy disabled) Proxy error (Illegal user name or password) Communication error 6-71 D093/D094...
- Page 380 Register Result Displays a number that indicates the registration result. Succeeded Registration in progress Proxy error (proxy enabled) Proxy error (proxy disabled) Proxy error (Illegal user name or password) Communication error Certification update error Other error Registration executing D093/D094 6-72...
- Page 381 Error Caused by -2391 Two registrations for same device Response from CTL URL -2392 Parameter error -2393 Basil not managed -2394 Device not managed -2395 Box ID for Basil is illegal -2396 Device ID for Basil is illegal 6-73 D093/D094...
- Page 382 5825 Remove the SD card slot cover on the back of the machine. Insert a blank SD card in Slot 2. Open this SP and touch [EXECUTE]. When you see "Completed", remove the SD card from Slot 2. D093/D094 6-74...
- Page 383 0: Clears spooled job. 69 Spooling (Protocol) This SP 8etermines whether job spooling is enabled or disabled for each pro to col. This is a 8-bit setting. BMLinks (Japan Only) (Not DIPRINT Used) Reserved (Not Used) Reserved (Not Used) 6-75 D093/D094...
- Page 384 SP codes 147 to 155 are the IPv6 stateless addresses (1 to 5) referenced on the Ethernet or wireless LAN (802.11b) in the format: "Stateless Address" + "Prefix Length" The IPv6 address consists of a total 128 bits configured in 8 blocks of 16 bits each. D093/D094 6-76...
- Page 385 Enter the SP number for the partition to initialize, then press #. When the execution ends, turn the machine power off and on. 1 HDD Formatting (All) 2 HDD Formatting (IMH) 3 HDD Formatting (Thumbnail) 4 HDD Formatting (Job Log) 5 HDD Formatting (Printer Fonts) 6 HDD Formatting (User Info) 6-77 D093/D094...
- Page 386 0 x 0E – 18M Fix 0 x 13 – 0 x FE (reserved) 0 x 12 – 72M (reserved) 0 x 0D – 12M Fix 0 x 0B – 9M Fix 0 x 09 – 22M (reserved) D093/D094 6-78...
- Page 387 This SP is displayed only when the IEEE802.11 card is installed. 45 WPA Debug Lvl Selects the debug level for WPA authentication application. [1 to 3 / 3 / 1] 1: Info, 2: warning, 3: error This SP is displayed only when the IEEE802.11 card is installed. 6-79 D093/D094...
- Page 388 1 Transfer Rate Sets the speed for USB data transmission. [Full Speed], [Auto Change] 2 Vendor ID DFU Sets the vendor ID: Initial Setting: 0x05A Ricoh Company [0x0000 to 0xFFFF/1] 3 Product ID DFU Sets the product ID. [0x0000 to 0xFFFF/1] 4 Device Release Number DFU Sets the device release number of the BCD (binary coded decimal) display.
- Page 389 An unsupported device is a device that cannot use the functions of the USB device. For example, a USB mouse cannot be used even if it connected. If the PictBridge option is not mounted, even if a digital camera is connected it cannot be used because it is an unsupported device. 6-81 D093/D094...
- Page 390 (excluding user code information) is displayed. Delivery Server Retry Timer Sets the interval for retry attempts when the delivery server fails to acquire the delivery server address book. [0 to 255/0/1 sec.] 0: No retries D093/D094 6-82...
- Page 391 The machine must be cycled off/on for this setting to take effect if it is changed. [0 to 1 / 0 / 1] 0: Uses operator login information (initial value of main machine) 1: Uses address authorization information 6-83 D093/D094...
- Page 392 SP5846-51 before you execute this SP. After the address book data is copied to HDD, all the address book data is deleted from the source SD card. If the operation fails, the data is not erased from the SD card. D093/D094 6-84...
- Page 393 0: Unconfirmed 1: SD Slot 1 2: SD Slot 2 4: USB Flash ROM 20: HDD 30: Nothing Initialize Local Addr Book Clears all of the address information from the local address book of a machine managed with UCS. 6-85 D093/D094...
- Page 394 This feature does not work if the card is write-protected. Note: After you do this SP, go out of the SP mode, turn the power off. Do not remove the SD card until the Power LED stops flashing. D093/D094 6-86...
- Page 395 [0 to 32/0/1] Note: This SP does not normally require adjustment. This SP is enabled only after the system administrator has set up a group password policy to control access to the address book. 6-87 D093/D094...
- Page 396 [0 to 32/0/1] Note: This SP does not normally require adjustment. This SP is enabled only after the system administrator has set up a group password policy to control access to the address book. D093/D094 6-88...
- Page 397 Determines whether the installation date or total count is printed on the total counter printout. [0 to 1/0/1] 0: Off. No Print 1: On. Print 3 Total Counter Displays the total count starting from the installation date (SP5849-1). 6-89 D093/D094...
- Page 398 SMTP Auth. From Field Replacement Determines whether the FROM item of the mail header is switched to the validated account after the SMTP server is validated. [0 to 1/0/1] 0: No. “From” item not switched. 1: Yes. “From” item switched. D093/D094 6-90...
- Page 399 Type "A" SC codes. 0: The machine reboots automatically when the machine issues an SC error and logs the SC error code. If the same SC occurs again, the machine does not reboot. 2 Reboot Type 6-91 D093/D094...
- Page 400 20 DocSvr Acc Ctrl Allows or disallows the functions of web image monitor. 0: OFF, 1: ON (7) 0000 0000 (0) 0bit Denies all access to document server 1bit Denies all access to User Tools 2bit Denies access to printing D093/D094 6-92...
- Page 401 1: Signature required. A signature must be selected for sending. 2: No signature. No signature required. 101 Set Encryption Determines whether the scanned documents with the WIM are encrypted when they are transmitted by an e-mail. [0 to 1 / 0 / 1] 0: Not encrypted, 1:Encryption 6-93 D093/D094...
- Page 402 The machine stores up to six registered names in the SDK application. 5893 This SP has been implemented for all machines using Engine 08S and later. This SP is not needed if there are no SDK applications loaded. 1 to 6 SDK1 to SDK-6 D093/D094 6-94...
- Page 403 1 All (Data List) Prints all of the system parameter lists for the item selected. 2 SP (Mode Data List) Input the number for the item that you want to print, and then press [1]: “Execute” on the 3 User Program 6-95 D093/D094...
- Page 404 Main SP Modes 4 Logging Data touch panel. 5 Diagnostic Report 6 Non-Default 7 NIB Summary 8 Capture Log 21 Copier User Program 22 Scanner SP 23 Scanner User Program 24 SDK/J Summary 25 SDK/J Application Info. D093/D094 6-96...
- Page 405 Shows the total SC count as a 4-digit number. 7403 SC History Latest Latest 1 Latest 2 Latest 3 Latest 4 Display the most recent service calls in their order of occurrence. Latest 5 Latest 6 Latest 7 Latest 8 Latest 9 6-97 D093/D094...
- Page 406 Latest 8 Latest 9 7502 Total Paper Jam Counter Displays the total number of copy jams. Display range: 0000 to 9999 7503 Total Original Jam Counter Displays the total number of original jams. Display range: 0000 to 9999 D093/D094 6-98...
- Page 407 A “Paper Lag” paper jam occurs when the paper remains at the sensor for longer than the prescribed time. Display range: 0000 to 9999 Main Machine (D093/D094) 1: At Power On 3: Tray 1: No Feed 4: Tray 2: No Feed...
- Page 408 Operation Panel Display 7505 Org at Power On Org Reg Sn: Not On Org Reg Sn/Exit Sn: Both Off Org Reg Sn: Not Off Org Exit Sn: Not Off Org Stop Org Exit Sn: Not On Org Interval Error D093/D094 6-100...
- Page 409 This SP displays the counts for the number of jams by paper size. Note: In the paper size notations below, "T" means "SEF" (Short Edge Feed). A0T/A1 A1T/A2 A2T/A3 A3T/A4 B1T/B2 B2T/B3 B3T/B4 36x48T/24x36 24x36T/18x24 18x24T/12x18 12x18T/9x12 9x127 34x44T/22x34 22x34T/17x22 17x22T/11x17 11x17T/8.5x11 8.5x11T Others 6-101 D093/D094...
- Page 410 TOTAL :Total jam error count (SP7003) DATE: Previous jam occurred Latest Latest 1 Latest 2 Latest 3 Sample Display: CODE: 007 Latest 4 SIZE: 05h Latest 5 TOTAL: 0000334 DATE: Mon Mar 15 11:44:50 2000 Latest 6 Latest 7 Latest 8 Latest 9 D093/D094 6-102...
- Page 411 DATE: Date the previous jam occurred Latest Latest 1 Latest 2 Latest 3 Sample Display: CODE: 007 Latest 4 SIZE: 05h Latest 5 TOTAL: 0000334 DATE: Mon Mar 15 11:44:50 2000 Latest 6 Latest 7 Latest 8 Latest 9 6-103 D093/D094...
- Page 412 Displays the PM counter since the last PM. 7804 PM Counter Reset Resets the PM counter. To reset, press [Execute] SC/Jam Counter Reset 7807 Resets the SC and jam counters. To reset, press [Execute]. This SP does not reset the jam history counters: SP7507, SP7508. D093/D094 6-104...
- Page 413 This data should be reported after SC990 occurs. 1 File Name Module name 2 Number of Lines Lines where error occurred. 6-105 D093/D094...
- Page 414 [RPCS,PCL]: Printable area frame border Disabled Enabled bit 7 If enabled, prints all RPCS and PCL jobs with a border around the printable area. 002 Bit Switch 2 Settings DFU 003 Bit Switch 3 Settings DFU 004 Bit Switch 4 Settings DFU D093/D094 6-106...
- Page 415 Enable Disable (100) stored (1000) bit 4 jobs to 1000 jobs. If enabled, changes the maximum number of jobs that can be stored on the HDD (via Job Type settings) to 1000. The default is 100. 6-107 D093/D094...
- Page 416 If enabled, all jobs will be cancelled after a jam occurs. Note: If this bit switch is enabled, printing under the following conditions could cause problems: Job submission via USB port or parallel port. Spool printing: WIM> Configuration> Device Settings> System D093/D094 6-108...
- Page 417 Enables and disables the document server. When you select “0”, the document server is enabled or disabled in accordance with Copy Service Mode SP5-967. When you select “1”, the document server is enabled regardless of Copy Service Mode SP5-967. 0: Linked, 1: On 6-109 D093/D094...
- Page 418 [0 to 1 / 0 / 1] 0: ON (enabled- 1: OFF (disabled) Org Count Display This SP codes switches the original count display on/off. 1011 [0 to 1 / 0 / 1] 0: OFF (no display) 1: ON (count displays) D093/D094 6-110...
- Page 419 [5 to 95 / 50 / 1 /step ] 3 Comp3: 5-95 [5 to 95 / 30 / 1 /step ] 4 Comp4: 5-95 [5 to 95 / 60 / 1 /step ] 5 Comp5: 5-95 [5 to 95 / 20 / 1 /step ] 6-111 D093/D094...
-
Page 421: Troubleshooting
TROUBLESHOOTING R E V I S I O N H I S T O RY P a ge D a t e A d de d /U pd at e d /N ew None... - Page 423 Image Problem Troubleshooting 7. TROUBLESHOOTING 7.1 IMAGE PROBLEM TROUBLESHOOTING 7.1.1 FLOW CHART Follow this flow chart to determine the cause of an image problem. Use SP2902 to print the VDB/SIPU test patterns. D093/D094...
- Page 424 20: 4-dot Alternating Dot Pattern 8: 2-dot Argyle Pattern 21: Trimming Area 9: 3-dot Argyle Pattern 22: Full Dot Pattern 10: 4-dot Argyle Pattern 23: Vertical Black Band 11: 5-dot Argyle Pattern 24: Horizontal Black Band 12: 6-dot Argyle Pattern 25: Blank Image D093/D094...
- Page 425 10: Density Patch: 16-Lvl: SCN 28: Grid Pattern (128-dot Width) 11: Cross Pattern: SCN 12: Argyle Pattern: SCN 13: Density Patch: 256-Lvl: SCN 14: Density Patch: 64-Lvl: SCN 15: Trim Area: SCN 16: Vert. Frequency Characteristics: SCN 17: Horiz. Frequency Characteristics: SCN D093/D094...
- Page 426 CIS defective 2. No image (solid black copy/print, or no image with only vertical white lines on the output) Possible causes: Connection problem between CIS and SIPU. CIS defective 3. Light image Possible causes: Low CIS output SIPU board defective D093/D094...
- Page 427 Dirt or scratches on the white plate above the CIS CIS defective 6. Black or white bands with no image-width 1/5 A0 (E) size Possible causes: Connection problem between CIS and SIPU CIS output error SIPU board adjustment error D093/D094...
- Page 428 The machine is near a window and sunlight is hitting the CIS unit The blinders have been removed from the machine. Make sure that the blinders [A] have not been removed. These protect the CIS unit from light. Move the machine away from the window. D093/D094...
- Page 429 [B] (at least 840 mm wide) to block the sunlight. Case 2: Dark image density at CIS2 and CIS4. Possible causes: The white plate is not flat against the original. The original is wrinkled. D093/D094...
-
Page 430: Image Writing
7.1.3 IMAGE WRITING 1. No Image (blank copy/print) Possible causes: VDB board defective SIPU board defective LPH (LED head) defective 2. Band with no image-width 1/3 of image Possible causes: Connection problem between VDB and LPH LPH head defective D093/D094... - Page 431 3. Vertical white and black line at 150 mm from center. Possible causes: LPH Joints adjustment error 4. Horizontal line broken at 150 mm from center. Possible causes: LPH subscan timing error at joint position 5. Bands/lines every 20 mm pitch in halftone areas Possible causes: LPH defective D093/D094...
- Page 432 Scratched pressure roller (173 mm pitch) 3. Random Black Spots Possible causes: Toner scattering caused by bent entrance seal in cleaning unit Developer scattering caused by defective seals in development unit Deteriorated OPC drum Hot roller cleaning roller dirty D093/D094 7-10...
- Page 433 5. Horizontal Black Lines or Bands Possible causes: Line caused by scratched OPC drum Line caused by discharge at trailing edge of paper Band caused by development bias leakage 6. Light Images Possible causes: Damp paper Corona leakage Defective T&S power pack 7-11 D093/D094...
-
Page 434: Other Problems
There is no way to correct this. Operators should be instructed to use cut sheets if possible. Shrinkage of areas in incomplete images Possible causes: Some customers complained about loss of borderlines at the trailing edge of copies when an A1 original is reduced to A3. This problem has not been corrected. D093/D094 7-12... -
Page 435: Service Call Conditions
To reset these SC codes, turn the Set the operation switch or the operation switch or main power switch off and main power switch to “off” then on. These SC codes are shown again if the to “on”. error occurs again. 7-13 D093/D094... - Page 436 Many SC codes contain more than one level (SC303-1, SC303-2, SC303-3, and others). Some SC codes can show a “-1”, even if there is only one level. The following abbreviations are used in these SC tables: (F) means "Front" (R) means "Rear" "CTL" means "Controller", a problem with the controller. D093/D094 7-14...
- Page 437 MCU defective SIF defective SIPU defective SIF Communication Error SIF serial transmission did not begin within 1 sec. after power on. No communication with SIF. MCU defective SIF defective SIF-to-MCU harness connector loose, disconnected, or defective SIPU defective 7-15 D093/D094...
- Page 438 Ri2001A chip on the SIPU failed (Ri2001A did not respond within 5 ms). SIPU defective 161-4 SIPU Error 4: Cetus Configuration Error At power on, or when the machine returned from energy save mode, Cetus configuration failed after three attempts within 810 ms SIPU defective D093/D094 7-16...
- Page 439 After sampling at 10 ms intervals, the charge-corona feedback voltage remained less than 0.5 V for more than 200 ms. Charge corona unit leakage High voltage cable defective Corona wire dirty or broken CGB power pack fuse, connections loose, broken, or defective 7-17 D093/D094...
- Page 440 The development bias feedback voltage was less than 0.3 V for longer than 200 ms while the PWM duty value was more than 5% (indicating a development bias leak). Bias terminal damaged High voltage cable damaged, defective CGB power pack defective D093/D094 7-18...
- Page 441 The Vsg level was twice detected lower than 2.5 V. -or- The Vsg level was once detected higher than 4.8V. ID sensor dirty ID sensor harness, connector loose, disconnected, damaged, defective ID sensor defective MCU defective CGB power pack defective 7-19 D093/D094...
- Page 442 ID sensor connector defective ID sensor defective MCU defective CGB power pack defective Transfer Output Error A high voltage feedback voltage of less than 0.5 V was detected for 200 ms. High voltage cable disconnected, damaged T/S power pack defective D093/D094 7-20...
- Page 443 Note: Paper can be fed from the bypass table if the roll feeder or paper cassette is not operating. Main Motor Error After the motor started, the main motor lock signal remained HIGH for 5 sec. Physical obstruction blocking motor Motor harness damaged, defective Motor defective 7-21 D093/D094...
- Page 444 Physical obstruction blocking motor Motor harness damaged, defective Motor defective Fusing Unit Ventilation Fan Error After the motor started, the fan motor lock signal remained HIGH for 5 sec. Physical obstruction blocking motor Motor harness damaged, defective Motor defective D093/D094 7-22...
- Page 445 Ready Temp. = Target Fusing Temp. – 10°C (SP1105-1 default) if power on or recovery starts when the hot roller is less that 80°C. Ready Temp. = Target Fusing Temp. – 20°C (SP1937-3 default) if power on or recovery starts with pressure roller inching control on. 7-23 D093/D094...
- Page 446 The machine detected that the fusing temperature was fluctuating out of range for more than 60 sec. (7 readings detected temperature fluctuating more than ±20 Thermistor connection loose, disconnected, defective Hot roller thermistor not positioned correctly Fusing lamp connections loose, disconnected, defective MCU defective D093/D094 7-24...
- Page 447 During the hot roller temperature control sequence, the pressure roller center thermistor measures a value lower than 0.2V. Pressure roller center thermistor not positioned properly Pressure roller center thermistor connector loose, broken, defective Pressure roller center thermistor defective MCU defective 7-25 D093/D094...
- Page 448 Pressure roller end thermistor error 2 During the hot roller temperature control sequence, the end thermistor on the pressure roller returned a digital reading of less than 0.2V. Pressure roller end thermistor connector loose Pressure roller end thermistor short circuit, defective MCU defective D093/D094 7-26...
- Page 449 The backup battery of the counter device RAM is low. RAM backup battery exhausted Counter device defective Key/card counter device error 4 After installation of the device a message alerts user to a battery voltage abnormal error. Device control board defective Device control board backup battery defective 7-27 D093/D094...
- Page 450 Disconnected telephone line Disconnected modem board Check and set the correct user name (SP5816-156) and password (SP5816-157). 650-4 Incorrect modem setting Dial-up failed due to incorrect modem setting. (Possible causes same as 650-1 above.) Check, correct modem settings (SP5819-160) D093/D094 7-28...
- Page 451 NVRAM is compatible, set the common authentication, then try again.. If this error occurs after Cumin has been set, clear the Cumin setting, check the Cumin documentation and make sure that the NVRAM is compatible, set the common authentication, then try again. 7-29 D093/D094...
- Page 452 MCU defective Controller board defective Engine board mismatch error Engine board and controller mismatch detected. Wrong engine board installed. Wrong controller board installed. Check the type of engine board and controller board. Replace BICU Replace controller board D093/D094 7-30...
- Page 453 VDB communication error There was no serial communication with the VDB within 1 sec. after power VDB-to-MCU harness or connectors broken, loose, defective VDB defective MCU defective 7.3.7 SC700 There are no SC700 level SC codes for this machine. 7-31 D093/D094...
- Page 454 NCS (Network Control Service) An error occurred in the access control port list: SC816-67 Number of registrations exceeded 125 Data notifications exceeded 12 Data extension incorrect Sub System SC816-79 Message mismatch. Hardware/System SC816-90 A forced system reset (WDOG) occurred. D093/D094 7-32...
- Page 455 USB loader was detected as defective. Note: For more details about these SC code errors, execute SP5990 to print an SMC report so you can read the error code list. The error code is not displayed on the operation panel. 7-33 D093/D094...
- Page 456 The read/write check done for resident RAM on the mother board could 0F41 not be done correctly. 50B1 Could not initialize or read the bus connection. 50B2 Value of the SSCG register is incorrect. One or more MB (Motherboard) connections loose, damaged, defective MB defective D093/D094 7-34...
- Page 457 Wireless LAN Error 2 During machine operation, the machine can get access to the board that holds the wireless LAN, but not to the wireless LAN card (802.11b or Bluetooth). Wireless LAN card missing (was removed) Wireless LAN connection loose. 7-35 D093/D094...
- Page 458 Replace the controller board HDD Key Setting Error The key was acquired but the HDD could not be set. Turn the machine power off/on several times. Replace the controller board. NVRAM Read Error NVRAM data conversion failed (mismatch with nvram.conf). D093/D094 7-36...
- Page 459 Note: After installation, a new HDD should be formatted with SP5832-1 Power Loss During Data Conversion Data conversion stopped before NVRAM/HDD data was converted. Format HDD with SP5832-1 Data Read Command Error More than two illegal DMAC communications were returned. HDD defective Format HDD with SP5832-1 Replace HDD 7-37 D093/D094...
- Page 460 If the bad sectors are generated at the image partition, the bad sector information is written to NVRAM. The next time the HDD is accessed, these bad sectors will not be accessed for read/write operation. The HDD will probably require replacement soon. D093/D094 7-38...
- Page 461 Turn the machine’s power off/on SD card error 3: SD card access An error occurred while an SD card was used. SD card not inserted correctly SD card defective Controller board defective To reformat the SC card, use SD Formatter Ver 1.1. 7-39 D093/D094...
- Page 462 An error was detected on the HDD immediately after the machine was turned on, or power was turned of while the machine was using the HDD. Do SP5832-007 (Format HDD – Mail TX Data) to initialize the HDD. Replace the HDD. D093/D094 7-40...
- Page 463 An error occurred when the machine deleted data from the HDD. Note: The source of this error is the Data Overwrite Security Unit B735 running from the DOS SD card. Turn the main switch off/on and try the operation again. 7-41 D093/D094...
- Page 464 Initialize HDD with SP5832-4 876-5 Log data error 5 Re-install the previous NVRAM or HDD. Initialize the HDD with SP5832-4. 876-99 Log data error 6 An error other than Log Data Errors 1 to 5 occurred. Request assistance from your supervisor. D093/D094 7-42...
- Page 465 System firmware updated incorrectly. Flash ROM on controller board defective. Replace controller board. File Format Converter (MLB) error A request to access the MLB was not answered within the specified time (60 sec.). File format converter board defective 7-43 D093/D094...
- Page 466 Turn the machine power off/on, or change the controller firmware Insufficient memory Printer Error 2 When the printer application started, the font designated for use could not be found on the SD card. The font is not on the SD card D093/D094 7-44...
- Page 467 Error returned during label read or check (-7) “filesystem” repair failed (-8) “filesystem” mount failed (-9) Drive does not answer command (-10) Internal kernel error (-11) Size of drive is too small (-12) Specified partition does not exist (-13) Device file does not exist 7-45 D093/D094...
- Page 468 If “Procedure 2” is not the solution for the problem, do SP5832-1 (HDD Formatting – All) Cycle the machine off/on. SP5832-001 erases all document and address book data on the hard disks. Consult with the customer before you do this SP code. D093/D094 7-46...
- Page 469 The paper stopped at the registration sensor and roller for buckle adjustment but the signal to start image writing was not received within 60 sec. Printer firmware defective Update printer firmware Check the connections between the LPH sections (x3) and the VDB LPH defective VDB defective MCU defective 7-47 D093/D094...
- Page 470 SC990 or SC991 errors, including the software file name, line number, and so on. (1) above is the recommended method, because another SC could write over the information for the previous SC. D093/D094 7-48...
- Page 471 Cannot select application function An application did not start after the user pushed the correct key on the operation panel. Software bug A RAM or DIMM option required for the application is not installed or not installed correctly. 7-49 D093/D094...
- Page 472 Register processing does not operate for an application within 60 s after the machine power is turned on. No applications start correctly, and all end abnormally. Software bug A RAM or DIMM option needed for the application not installed, or not installed correctly Controller board defective D093/D094 7-50...
- Page 473 The “Code” numbers in the table are also shown. Use SP7507 (Plotter Jam History) and SP7508 (Original Jam History) to see the most recent codes. Code Location Paper Cassette Feed Roll Paper Feed Bypass Paper Feed, Paper Registration Fusing Unit (Exit) Original feed 7-51 D093/D094...
- Page 474 Initial jam: Original Width Sensor (B2) Sensor ON Initial jam: Original Width Sensor (B3) Sensor ON Initial jam: Original Width Sensor (B4) Sensor ON Initial jam: Original Width Sensor (914) Sensor ON Initial jam: Original Exit Sensor Sensor ON D093/D094 7-52...
- Page 475 Scanner Late Jams Code Location Display Comment Registration Jam Registration sensor not ON Registration Jam Registration sensor OFF Exit Jam Fusing exit sensor not ON Scanner Lag Jams Code Location Display Comment Registration Jam (Sensor not OFF) Registration Jam 7-53 D093/D094...
- Page 476 Roll 1 Non-Feed Jam Roll 2 Non-Feed Jam Paper cassette Non-Feed Jam Roll Feeder Exit Jam RF exit sensor not ON Registration Jam Registration sensor not ON Fusing Exit Jam Fusing exit sensor not ON. Bypass Non-Feed Paper set not ON. D093/D094 7-54...
- Page 477 Roll Feeder Exit Jam RF exit sensor failed to go OFF Paper registration sensor failed to go Registration Jam OFF. Fusing Exit Jam Fusing exit sensor failed to go OFF. Bypass Jam Paper set sensor failed to go OFF. 7-55 D093/D094...
-
Page 478: Cover Open
Toner supply clutch, paper registration clutch, drum motor, main motor, CGB power pack, cooling fan, paper junction gate solenoid, quenching lamp, pick-off pawl solenoid, fusing Upper Unit Switch motor, T&S power pack (24 V dc line), fusing lamp (power relay/ac line) D093/D094 7-56... - Page 479 "Upper" or "Lower" on the operation panel. When the upper output stacker is 5 Paper Exit Selection Switch removed, this opens the switch and sets the machine for paper exit to the lower path only. ("Upper" cannot be selected on the operation panel.) 7-57 D093/D094...
- Page 480 13 Original Width Sensor (30”) only) 14 Original Width Sensor (A1/22”) Detects A2/22"-width paper. 15 SIF (Scanner Interface) Interfaces between the SIPU and CIS. 16 Original Width Sensor (A2/17”) Detects A2/22"-width paper. 17 Original Width Sensor (A3/11”) Detects A3/11"-width paper. D093/D094 7-58...
- Page 481 A4 or 8.5" width paper. 19 Original Width Sensor (B4/9”) Detects B4 or 9 " width paper. This controls the image signals that are 20 VDB (Video Drive Board) sent to the LPH (LED Print Head). 7-59 D093/D094...
- Page 482 Pressure Roller Thermistor The CPU uses this thermistor to monitor the 1 (End) temperature of the pressure roller at the end. This safety device prevents overheating if the 8 Thermostat 2 (200°C) temperature control circuit fails. D093/D094 7-60...
- Page 483 The fusing unit cover must always be opened and closed after this SC occurs to restore the machine to full operation. This ensures that the operator has opened and closed the cover to check for paper and/or paper scraps around the hot roller. Loose paper around the hot roller is a fire hazard. 7-61 D093/D094...
- Page 484 Main Control Unit. This is the machine's main board. It contains the SCU (Scanner Control Unit) and ECU 6 MCU (Engine Control Unit). These units control all parts of the machine, and this includes the print engine, scanner, and image processing. D093/D094 7-62...
- Page 485 OPC drum. These Switch heaters operate only when the main switch is switched off. Monitors the main power supply and cuts the main 9 Circuit Breaker power if it detects an overload. 7-63 D093/D094...
- Page 486 In this condition, 5 Right Cutter HP Switch the paper holder of the cutter is locked open (the paper feed path is open). 6 Roll End Sensor 4 Detects the trailing edge of the roll after there is no D093/D094 7-64...
- Page 487 This detects if the cutter in the roller feeder is at the home position at the left side. In this condition, the 10 Left Cutter HP Switch paper holder of the cutter is locked open (the paper feed path is open). 7-65 D093/D094...
- Page 488 This sensor is near the grip rollers. It detects the leading edge of every cut sheet, switches 4 Relay Sensor off the cassette paper feed clutch, and switches on the grip rollers. D093/D094 7-66...
- Page 489 Output Capacity Voltage Load Type Connector FU101 CN100-2 T10AH/250V DC Power FU001 CN101-1 15A/250V Fusing lamps FU100 15A/250V Input protection FU303 CN126-3 T6.3AL/250V MCU, SIF CN402-1 FU302 CN126-2 T6.3AL/250V MCU (via interlock) FU301 CN126-1 T6.3AL/250V MCU (via interlock) 7-67 D093/D094...
- Page 490 Fuses 220-240V Versions Name Output Capacity Voltage Load Type Connector FU001 CN101-1 T6.3AH/250V Fusing lamps FU100 8A/250V Input protection FU303 CN126-3 T6.3AL/250V MCU, SIF CN402-1 FU302 CN126-2 T6.3AL/250V MCU (via interlock) FU301 CN126-1 T6.3AL/250V MCU (via interlock) D093/D094 7-68...
-
Page 491: Board Leds, Dip Switches
No output: OFF LED 2 GREEN Output: ON No output: OFF LED 3 GREEN +12V Output: ON No output: OFF LED 4 GREEN -12V Output: ON No output: OFF LED 5 GREEN +24V Output: ON No output, fuse blown: OFF 7-69 D093/D094... - Page 492 Scanner motor output The following LEDs indicate the status of elements operation on the MCU.<0} Color Downloading Normal Definition Operation Executing Finished LED 1 eSOC status LED 2 GREEN eSOC status FLASH FLASH LED 3 GREEN Trio2 Status D093/D094 7-70...
- Page 493 DIP_SW 1 Factory SW No. DIP SW Definition Comments Setting Destination Setting Area Destination Setting Jam Detect OFF No jam detection at ON SC Detection OFF No SC detection at ON Not Used Not Used Not Used Not Used 7-71 D093/D094...
- Page 494 Operation: ON LED 8 ORANGE Image Processing IC (IC18) Standby: FLASH Status Display Operation: ON LED 9 ORANGE Image Processing IC (IC20) Standby: FLASH Status Display Operation: ON ORANGE Image Processing IC (IC30) Standby: FLASH Status Display Operation: ON D093/D094 7-72...
- Page 495 (At power on, download end: LED15 GREEN Power Display: 3.3V Normal: ON Abnormal: OFF LED16 GREEN Power Display: 3.3V Normal: ON Abnormal: OFF LED17 Power Display: 5VE Normal: ON Abnormal: OFF Normal: ON LED18 YELLOW Power Display: 3.3VEP Abnormal: OFF 7-73 D093/D094...
- Page 496 Board LEDS, DIP Switches DIP_SW5 Factory DIP SW Definition Comments Setting CIS Switching Not Used Never change these settings. Not Used For debugging D093/D094 7-74...
- Page 497 Input from SIPU: FLASH. Else: LED104 GREEN FPGA Net Ver. Distinguishing No. Bit 3: 1: ON 0: OFF LED105 GREEN FPGA Net Ver. Distinguishing No. Bit 2: 1: ON 0: OFF LED106 GREEN FPGA Net Ver. Distinguishing No. Bit 1: 1: ON 7-75 D093/D094...
- Page 498 The following LEDs indicate the status of elements operation on the SIF<0} Color LED Definition LED State LED 1 GREEN Power supply monitoring +5V input: ON (else OFF) LED 2 GREEN Power supply monitoring +5V input: ON (else OFF) D093/D094 7-76...
- Page 499 LED State LED 1 BIOS Post Code Normal: ON Installing: ON Installation END: ON LED 2 BIOS Post Code Normal: ON Installing: ON Installation END: ON LED 3 BIOS Post Code Normal: ON Installing: ON Installation END: ON 7-77 D093/D094...
- Page 500 Install END: FLASH LED 9 BIOS/OS Distinction Normal: FLASH Installing: FLASH Install END: FLASH LED 10 GREEN Power On Normal: ON Installing: ON Installation END: ON LED 11 YELLOW Flash LED Normal: FLASH Installing: FLASH Install END: FLASH D093/D094 7-78...
-
Page 501: Dip Switches
No.1 OFF,No.2 OFF,No.3 OFF: USB Boot Selects boot device No.1 ON, No.2 OFF,No.3 OFF: SD Card Boot Selects boot device Selects "Quick OFF: Quick Boot Boot" ON: Normal Boot Selects Boot OFF: Disable Prompt ON: Enable Do Not Use 7-79 D093/D094... - Page 502 ON: VEP System Power (Power source goes off according to energy save mode (STR). However, ASIC: Whistle controls HDD common power source, regardless of this setting.) Do Not Use D093/D094 7-80...
-
Page 503: Energy Saving
ENERGY SAVING R E V I S I O N H I S T O RY P a ge D a t e A d de d /U pd at e d /N ew None... -
Page 505: Energy Save
Normally, Panel Off timer < Energy Saver timer < Auto Off timer. But, for example, if Auto Off timer < or = Panel Off timer and Energy Saver timer, the machine goes immediately to Off mode when the Auto Off timer expires. It skips the Panel Off and Energy Saver modes. D093/D094... -
Page 506: Return To Stand-By Mode
240 minutes has expired after the last job. This means that after the customer has finished using the machine for the day, energy will be consumed that could otherwise be saved. If you change the settings, the energy consumed can be measured using SP8941, as explained below. D093/D094... -
Page 507: Energy Save Effectiveness
Find the amount of time spent in each mode (subtract the earlier measurement from the later measurement). Multiply this by the power consumption spec for each mode. Convert the result to kWh (kilowatt hours) Here is an example calculation. D093/D094... -
Page 508: Paper Save
Recommendation Please explain the above features to the customers, so that they can reduce their paper usage. Model D093/D094 Total counter: SP 8581-001 Single-sided with combine mode: SP 8421-004 The following table shows paper savings and how the counters increase for some simple examples of Combine jobs. - Page 509 D093/D094 SERVICE MANUAL APPENDICES...
-
Page 511: Table Of Contents
D093/D094 APPENDICES TABLE OF CONTENTS APPENDIX: SPECIFICATIONS ........... 1-1 SPECIFICATIONS ..................1-1 1.1.1 MAIN MACHINE (D093/D094) ............1-1 1.1.2 OPTIONS ..................1-6 Roll Feeder (D503-21, -27/D504-17, -21, -27) ........1-6 Paper Cassette B853 ................1-6 ... -
Page 513: Specifications
APPENDIX: SPECIFICATIONS R E V I S I O N H I S T O RY P a ge D a t e A d de d /U pd at e d /N ew None... - Page 515 Specifications 1. APPENDIX: SPECIFICATIONS 1.1 SPECIFICATIONS 1.1.1 MAIN MACHINE (D093/D094) Configuration: Desktop Copy Process: Dry electrostatic transfer system Scanner CIS (Contact Image Sensor), Monochrome/Color Scanning Speed Monochrome 80 mm/sec. Color 26.7 mm/sec. Image Transfer Image Write LED array Charger Scorotron Method...
- Page 516 Copy Paper Weight 68 - 148 m (Plain paper, Translucent) 3 - 4 mils (Film) Copying Speed (cpm: D093: 2 cpm (A0/E SEF), 4 cpm (A1/D LEF) copies/minute): D094: 3 cpm (A0/E SEF), 6 cpm (A1/D LEF) Photoconductor: OPC (Organic photoconductor drum) Inch Version, Engineering: Reduction: 25.0, 32.4, 50.0, 64.7%...
- Page 517 Upper Output Stocker Plain paper: 50 sheets (maximum A1/D LEF) Translucent: 10 sheets (maximum A1/D LEF) Output Tray Capacity: Roll Feeder or Table Plain paper: 40 sheets (A1/D or A0/E) Translucent: 1 sheet Original Stacker 1 original SM Appendix D093/D094...
- Page 518 1.46 Maximum 1.44 1.50 Low power* 0.137 0.132 Off* 0.0075 0.0094 *¹ Full System: Main Machine with Roll Feeder (2 rolls) and Paper Cassette. These are the values measured with the anti-condensation heater and tray heaters off. D093/D094 SM Appendix...
- Page 519 Specifications The measurements were made in accordance with Noise Emission: ISO 7779 at the operator position Operation Mode D093 D094 Ready 41.4 41.4 Copying 66.3 66.8 Copying (from memory) 66.3 66.8 North America: Less than 1.44 kW Max. Power Consumption: Europe/Asia: Less than 1.5 kW...
- Page 520 Copy Paper Size LT SEF, LG SEF, DLT SEF, 8.5 x 13 SEF, 12 x 18 SEF Copy Paper Weight 64 to105 g/m (17 to 28 lb) plain paper Power Source From Roll Feeder Weight 6 kg (13.2 lb) D093/D094 SM Appendix...
-
Page 521: Sp Mode Tables
APPENDIX: SP MODE TABLES R E V I S I O N H I S T O RY P a ge D a t e A d de d /U pd at e d /N ew 241 ~ 242 06/01/2011 Updated SP1001 Bit Switch 9 added Bit 4 PJL UStatus Job End... -
Page 523: Service Program Mode
Note: Executing these SP's has no effect on operation of the main machine or any peripheral device. Japan Only This feature or item is for Japan only. Do not change this value. Always cycle the machine off/on after changing an SP setting. SM Appendix D093/D094... - Page 524 Raise this setting to lengthen the amount of time that the paper pauses at the nip of the registration rollers if you notice a large amount of skew in printouts. [-20 to +20 / 5 / 1] D093/D094 SM Appendix...
- Page 525 Calibrates the scale for the pressure temperature control at the center of the pressure roller. [-10 to +10/0/1°C step] 7 Pressure Temperature Calibration: Edge DFU Calibrates the scale for the pressure temperature control at the end of the pressure roller. [-10 to +10/0/1°C step] SM Appendix D093/D094...
- Page 526 1 Feed Motor: 1st Roll DFU [-30 to +30/0/1] For every change of "1", speed is adjusted approximately 0.06%. 2 Feed Motor: 2nd Roll DFU [-30 to +30/0/1] For every change of "1", speed is adjusted approximately 0.06%. D093/D094 SM Appendix...
- Page 527 However, this small difference in speed between the rollers can cause jitter when the trailing edge of the paper leaves the nip of the registration rollers. SM Appendix D093/D094...
- Page 528 Note: “Mode 1 to 5” below refer to the paper thickness set with [User Tools]> "System Settings"> "Tray Paper Settings"> "Paper Thickness: Paper Tray" or "Paper Thickness: Bypass Tray". 21 Plain:Mode1 22 Plain:Mode2 [-100 to +100/0/1] 23 Plain:Mode3 24 Plain:Mode4 D093/D094 SM Appendix...
- Page 529 This can cause image distortion at the two LPH joints. SM Appendix D093/D094...
- Page 530 21 Roll/1st Chg Timing/Trans/Width 461-610mm [0 to 15000/170/1mm] 22 Roll/1st Chg Timing/Trans/Width 298-460mm 23 Roll/1st Chg Timing/Trans/Width < 297mm 25 Roll/1st Chg %/Trans/Width > 611mm [-9.99 to 9.99/-0.9/0.01%] 26 Roll/1st Chg %/Trans/Width 461-610mm [-9.99 to 9.99/-1.1/0.01%] 27 Roll/1st Chg %/Trans/Width :298-460mm D093/D094 SM Appendix...
- Page 531 76 Bypass/1st Chg %/ Plain/Width 461-610mm 77 Bypass/1st Chg %/ Plain/Width 298-460mm [-9.99 to 9.99/-1.0/0.01%] 78 Bypass/1st Chg %/ Plain/Width < 297mm [-9.99 to 9.99/-1.3/0.01%] 80 Bypass/1st Chg Timing/Trans/Width > 611mm [0 to 15000/170/1mm] 81 Bypass/1st Chg Timing/ Trans/Width SM Appendix D093/D094...
- Page 532 111 Roll/2nd Chg Timing/Plain/Width 461-610mm [0 to 15000/0/1mm] 112 Roll/2nd Chg Timing/Plain/Width 298-460mm 113 Roll/2nd Chg Timing/Plain/Width > 297mm 115 Roll/2nd Chg %/Plain/Width > 611mm 116 Roll/2nd Chg %/Plain/Width 461-610mm [-9.99 to 9.99/0/0.01%] 117 Roll/2nd Chg %/Plain/Width 298-460mm D093/D094 2-10 SM Appendix...
- Page 533 [0 to 15000/0/1mm] 143 Cassette/2nd Chg Timing/Width < 297mm 147 Cassette/2nd Chg %/Width 298-460mm [-9.99 to 9.99/0/0.01%] 148 Cassette/2nd Chg %/Width < 297mm 170 Bypass/2nd Chg Timing/Plain/Width > 611mm [0 to 15000/0/1mm] Bypass/2nd Chg Timing/ Plain/Width 461-610mm SM Appendix 2-11 D093/D094...
- Page 534 187 Bypass/2nd Chg %/ Trans/Width 298-460mm 188 Bypass/2nd Chg %/ Trans/Width < 297mm 190 Bypass/2nd Chg Timing/Film/Width > 611mm Bypass/2nd Chg Timing/ Film/Width 461-610mm [0 to 15000/0/1mm] Bypass/2nd Chg Timing/ Film/Width 298-460mm 193 Bypass/2nd Chg Timing/ Film/Width < 297mm D093/D094 2-12 SM Appendix...
- Page 535 227 Roll/3rd Chg %/Trans/Width :298-460mm 228 Roll/3rd Chg %/Trans/Width < 297mm 230 Roll/3rd Chg Timing/Film/Width > 611mm 231 Roll/3rd Chg Timing/Film/Width 461-610mm [0 to 15000/0/1mm] 232 Roll/3rd Chg Timing/Film/Width 298-460mm 233 Roll/3rd Chg Timing/Film/Width < 297mm SM Appendix 2-13 D093/D094...
- Page 536 45 1st Roll: 841mm: Translucent Paper [-20 to +20/0/0.1 mm] 46 1st Roll: 1189mm: Translucent Paper 47 1st Roll: 2000mm: Translucent Paper 48 1st Roll: 3600mm: Translucent Paper [-30 to +30/0/1 mm] 49 1st Roll: 6000mm: Translucent Paper D093/D094 2-14 SM Appendix...
- Page 537 102 2nd Roll: 297mm: Translucent Paper 103 2nd Roll: 420mm: Translucent Paper [-10 to +10/0/0.1 mm] 104 2nd Roll: 594mm: Translucent Paper 105 2nd Roll: 841mm: Translucent Paper [-20 to +20/0/0.1 mm] 106 2nd Roll: 1189mm: Translucent Paper SM Appendix 2-15 D093/D094...
- Page 538 [0 to 500/0/1 mm] Note: The "0" (default) setting does not mean that the gap is eliminated. When set to "0" the standard gap between sheets is maintained (480 mm for the D093 and 168 mm for the D094.) D093/D094 2-16 SM Appendix...
- Page 539 Touching a button on the left lowers the temperature and lowers the pressure for thinner paper. These settings can be done independently for paper fed from either the paper cassette or the bypass tray. SM Appendix 2-17 D093/D094...
- Page 540 [120 to 220/165/5 11 Film: Mode1 [120 to 220/195/5 12 Film: Mode2 [120 to 220/190/5 13 Film: Mode3 [120 to 220/185/5 14 Film: Mode4 15 Film: Mode5 [120 to 220/175/5 16 Plain: Low Temp Mode [120 to 220/195/5 D093/D094 2-18 SM Appendix...
- Page 541 8 Trans.: Mode3 9 Trans.: Mode4 10 Trans.: Mode5 11 Film: Mode1 [60 to 180 /60/5 12 Film: Mode2 13 Film: Mode3 14 Film: Mode4 15 Film: Mode5 16 Plain: Low Temp Mode [60 to 180 /120/5 SM Appendix 2-19 D093/D094...
- Page 542 7 Trans.: Mode2 8 Trans.: Mode3 9 Trans.: Mode4 [0 to 50/20/5] 10 Trans.: Mode5 11 Film: Mode1 12 Film: Mode2 13 Film: Mode3 14 Film: Mode4 15 Film: Mode5 16 Plain: Low Temp Mode [0 to 50/0/5] D093/D094 2-20 SM Appendix...
- Page 543 7 Trans.: Mode2 8 Trans.: Mode3 9 Trans.: Mode4 [0 to 50/20/5] 10 Trans.: Mode5 11 Film: Mode1 12 Film: Mode2 13 Film: Mode3 14 Film: Mode4 15 Film: Mode5 16 Plain: Low temp. Mode [0 to 50/0/5] SM Appendix 2-21 D093/D094...
- Page 544 3 Plain: Mode3 [0 to 50/0/5 4 Plain: Mode4 5 Plain: Mode5 6 Trans.: Mode1 [0 to 50/20/5 7 Trans.: Mode2 8 Trans.: Mode3 9 Trans.: Mode4 [0 to 50/0/5 10 Trans.: Mode5 11 Film: Mode1 D093/D094 2-22 SM Appendix...
- Page 545 SP1937. [0 to 50/20/5] 11 Low Temp Mode Setting: Cold Start If the hot roller temperature is below the temperature set with this SP at the SM Appendix 2-23 D093/D094...
- Page 546 User Tools (see "Paper Thickness Default Selection" in this section). 1 Plain: Mode1 2 Plain: Mode2 3 Plain: Mode3 [0 to 1/0/1] 4 Plain: Mode4 0: Disabled 1: Enabled 5 Plain: Mode5 6 Trans.: Mode1 7 Trans.: Mode2 D093/D094 2-24 SM Appendix...
- Page 547 Note: First, use SP1938 to select the paper type and mode where the setting is to apply. Next, select the paper width here. 1 > 611mm [0 to 30 / 20 /5] 2 461-610mm 3 298-460mm [0 to 30 / 30 /5] 4 > 297mm SM Appendix 2-25 D093/D094...
- Page 548 Temp Differential: Step 3 This SP sets Step 3 of CPM down mode. If the difference between actual and target temperature is larger than this SP setting, this is judged as Step 3. [0 to 150/100/5] D093/D094 2-26 SM Appendix...
- Page 549 The default setting (1.4) is the variable for Step 1 multiplied by the constant set for Step 1 of the machine: D093: 480 mm. The default interval is 672 mm (1.4 x 480 mm). D094: 168 mm. The default interval is 235 mm (1.4 x 168 mm).
- Page 550 The default setting (3.5) is the variable for Step 3 multiplied by the constant set for Step 2 of the machine: D093: 480 mm. The default interval is 1680 mm (3.5 x 480 mm). D094: 168 mm. The default interval is 588 mm (3.5 x 168 mm).
- Page 551 If the difference is greater than the setting of SP1940-081, the interval between sheets of translucent paper is calculated by multiplying the normal length of the paper and the setting for SP1940-091. SM Appendix 2-29 D093/D094...
- Page 552 SP1940-001 I SP1940-051 II SP1940-071 III 91 Paper Interval Step 1 D093: [1 to 10 / 2.1 / 0.1] D094: [1 to 10 / 6.8 / 0.1] The thermistors at the center and end of the pressure roller measure the temperatures.
- Page 553 User Tools (see "Paper Thickness Default Selection" in this section). 1 Plain: Mode1 [0 to 50/0/5 2 Plain: Mode2 3 Plain: Mode3 [0 to 50/20/5 4 Plain: Mode4 5 Plain: Mode5 [0 to 50/0/5 SM Appendix 2-31 D093/D094...
- Page 554 SP1947 Press FB Stop: Time Period 1 Level 1 [1000 to 15000/1300/1 mm] 2 Level 2 [1000 to 15000/3700/1 mm] 3 Level 3 [1000 to 15000/6100/1 mm] 4 Level 4 [1000 to 15000/9100/1 mm] 5 Level 5 [1000 to 15000/12100/1 mm] D093/D094 2-32 SM Appendix...
- Page 555 However, for succeeding sheets where the time prescribed for feedback suspension is "0", the "0" value is not overwritten, but feedback suspension control is maintained until countdown for the multiple copies is finished. SM Appendix 2-33 D093/D094...
- Page 556 This SP sets a time period that prohibits printing to begin even after the hot roller temperature reaches its target temperature after a cold start. If a job is started during this time period countdown, the countdown changes to the counts for-11 to -17 above. [0 to 300/60/1 sec.] D093/D094 2-34 SM Appendix...
- Page 557 11 Film: Mode1 [60 to 180/60/5 12 Film: Mode2 13 Film: Mode3 14 Film: Mode4 15 Film: Mode5 16 Plain Mode: Low Temp Cold Start When the machine determines that a cold start in a low-temperature environment SM Appendix 2-35 D093/D094...
- Page 558 13 Normal Mode1: 298-460 14 Normal Mode1: < 297mm 21 Normal Mode2: > 611mm [0 to 1/0/0.1] 22 Normal Mode2: 461-610mm 23 Normal Mode2: 298-460 24 Normal Mode2: < 297mm 31 Normal Mode3: > 611mm 32 Normal Mode3: 461-610mm D093/D094 2-36 SM Appendix...
- Page 559 61 Trans Mode: > 611mm 62 Trans Mode: 461-610mm [0 to 1/0/0.1] 63 Trans Mode: 298-460 64 Trans Mode: < 297mm 111 Film Mode: > 611mm 112 Film Mode: 461-610mm 113 Film Mode: 298-460 114 Film Mode: < 297mm SM Appendix 2-37 D093/D094...
- Page 560 1: ON (Paper exit not specified and can be selected on operation panel) 1970 Fan Stop Time This SP sets the stop timing for the controller box fan and cooling fan that cools the main PCBs. [0 to 30/1/1 min.] D093/D094 2-38 SM Appendix...
- Page 561 Adjusts the quantity of erase for copy mode (quantity of white space). 1 Leading Edge 2 Trailing Edge [0 to 10 / 2 /0.1 mm step] 3 Left edge 4 Right edge [0 to 10/ 0.5 / 0.5 mm step] SM Appendix 2-39 D093/D094...
- Page 562 2 ID Sensor Pattern: Low Duty Copy Jobs This SP sets the development bias applied to create the ID sensor pattern when the Low Duty Mode is selected with SP2201-4 (factory adjusted). [100 to 1000 / 350 /1 V step] D093/D094 2-40 SM Appendix...
- Page 563 If image density is light, use this SP to recover from a low toner supply problem. After executing forced toner supply, the Vsp value displays in the range 0.1 to 0.4 V, and thereafter, the value is stabilized (near 0.4 V) for subsequent printouts. SM Appendix 2-41 D093/D094...
- Page 564 2: Fixed Mode (6%). Coverage fixed at 6% (darker) If the ID sensor is damaged and cannot be replaced immediately, set either SP to “1”. The operator can continue to use the machine until a new ID D093/D094 2-42 SM Appendix...
- Page 565 SP2208-7 (Long Print Mode Setting) should be set accordingly. The values set for this SP are reflected in the printed images after Long Print/Graphic has been selected. [1 to 40 / 6 / 1%] SM Appendix 2-43 D093/D094...
- Page 566 Notes: The coefficient adjustment should be done before the power output. The amount of voltage applied to each area can be set independently in each area for the type of paper in use. D093/D094 2-44 SM Appendix...
- Page 567 Note that the default voltages are slightly higher for Roll Film and Cut-Sheet Film. SP2301 sets the voltage levels. The timing for the application of the voltages is controlled by SP2925. SM Appendix 2-45 D093/D094...
- Page 568 Adjusts the transfer output coefficient for the image at the center, leading edge, and trailing edge on translucent roll paper. [1 to 2 / 1/ 0.1 ] Roll Paper: Film: Before Leading Edge [0 to 230/80/1 uA] D093/D094 2-46 SM Appendix...
- Page 569 [1 to 2 / 1 / 0.1] Cut Paper: Translucent: Before Leading Edge [0 to 230/60/1 uA] Cut Paper: Translucent: Leading Edge [0 to 230/60/1 uA] Cut Paper: Translucent: Image Area [0 to 230/60/1 uA] SM Appendix 2-47 D093/D094...
- Page 570 [0 to 230/80/1 uA] Cut Paper: Film: Coefficient DFU Adjusts the transfer output coefficient for the image at the center, leading edge, and trailing edge on film cut-sheet paper. [1 to 2 / 1 / 0.1] D093/D094 2-48 SM Appendix...
- Page 571 The level of the DC voltage switches to a lower level [B] and causes the total amount of applied voltage to drop. Both AC/DC voltages switch off at [C]. The AC level remains constant. Only the DC level is switched to a lower voltage at [B]. SM Appendix 2-49 D093/D094...
- Page 572 [10 to 300 / 100/ 1] Leading Edge Cut Paper [10 to 300 / 100 / 1] OFF Timing: Roll Paper [-30 to 30 / 19 / 1 mm] OFF Timing: Cut Paper [-30 to 30 / 19 / 1 mm] D093/D094 2-50 SM Appendix...
- Page 573 3 Roll Paper: Translucent: Image Area [0.0 to 66/25/0.1 uA] 4 Roll Paper: Translucent: Image Area [0.0 to 66/15/0.1 uA] 5 Roll Paper: Film: Image Area [0.0 to 66/25/0.1 uA] 6 Roll Paper: Film: Image Area [0.0 to 66/15/0.1] uA] SM Appendix 2-51 D093/D094...
- Page 574 (complete failure with no operation). The Lot Numbers are stored in NVRAM. Even if the Lot Numbers are the same, the number must be entered twice, once for each packet. Enter the Lot Numbers with the soft keyboard. D093/D094 2-52 SM Appendix...
- Page 575 1: After the main switch is turned on. 2: After 300 m of copies 3: After 600 m of copies 4: After 900 m of copies 5: After 1200 m of copies 6: After 1500 m of copies SM Appendix 2-53 D093/D094...
- Page 576 8: 2-dot Argyle Pattern 21: Trimming Area 9: 3-dot Argyle Pattern 22: Full Dot Pattern 10: 4-dot Argyle Pattern 23: Vertical Black Band 11: 5-dot Argyle Pattern 24: Horizontal Black Band 12: 6-dot Argyle Pattern 25: Blank Image D093/D094 2-54 SM Appendix...
- Page 577 10 Plain Paper: Mode5: Sub Scan 11 Translucent: Mode5: Main Scan 12 Translucent: Mode5: Sub Scan 13 Film: Mode5: Main Scan 14 Film: Mode5: Sub Scan 15 Recycled Paper: Mode5: Main Scan 16 Recycled Paper: Mode5: Sub Scan SM Appendix 2-55 D093/D094...
- Page 578 SP to "1" so as soon as the upper unit is closed, the charge corona can apply a charge to the drum to correct the problem. [0 to 1/1/1] 0: OFF 1: ON D093/D094 2-56 SM Appendix...
- Page 579 Initially set at "0" this timing setting provides fine adjustments for the type of paper. This is where the voltage switches on the fourth and last voltage level (SP2301-4) at the trailing edge (TE). This is point where voltage is switched off. SM Appendix 2-57 D093/D094...
- Page 580 OFF Timing: Roll Paper: Film [0 to 35 / 8 / 1 mm] OFF Timing: Cut Paper: Plain Paper [0 to 35 / 8 / 1 mm] OFF Timing: Cut Paper: Translucent [0 to 35 / 8 / 1 mm] D093/D094 2-58 SM Appendix...
- Page 581 3 Used Toner Bottle Full Detect Sets the length of paper that can be printed from the time the toner bottle is detected near full until the used toner bottle is detected completely full. [1 to 50/30/1 m] SM Appendix 2-59 D093/D094...
- Page 582 The machine compares the Vsp value with Vsg, which is read from the bare sursection of the drum (Vsg/Vsg=Vref) If Vsp/Vsg < Vref (the value of this SP setting), recovery is completed and the machine goes back to normal operation. D093/D094 2-60 SM Appendix...
- Page 583 Adjusts sub scanning at LPH 1-2 for paper more than 420 mm wide. [300 to 500/412/1] 12 LPH2-3 Sub Scan Adjusts sub scanning at LPH 2-3 for paper more than 420 mm wide. [2 to 100/16/1] SM Appendix 2-61 D093/D094...
- Page 584 Adjusts the four LEDs at each end of LPH 2. This fine adjustment is not usually necessary in the field. [-63 to +63 / 0 /1] 1 1-Dot: Left 11 1-Dot: Right 2 2-Dot: Left 12 2-Dot: Right 3 3-Dot: Left 13 3-Dot: Right 4 4-Dot: Left 14 4-Dot: Right D093/D094 2-62 SM Appendix...
- Page 585 The illustration above shows how two elements comprise each dot. This example shows vertical and horizontal 1-dot lines. The diagram above illustrates the patterns for the settings SP2954-10 (0 to 3) on a 2-dot vertical line. The settings have no effect on the horizontal line. SM Appendix 2-63 D093/D094...
- Page 586 2959 Display VDB ID This SP displays the 8-bit data that identifies the version of the FPGA flash program on the VDB (Video Drive Board). The VDB controls the signals sent to the LPH. Display: Hexadecimal D093/D094 2-64 SM Appendix...
- Page 587 ID Sensor NVRAM 3103 ID Sensor Output Display This SP displays the current readings of the bare drum surface (Vsg) and the ID sensor pattern (Vsp) 1 Vsg Bare drum reflection 2 Vsp ID sensor pattern reflection SM Appendix 2-65 D093/D094...
- Page 588 3 During Job This SP sets the time interval between the readings of the previous and next ID sensor pattern during a job. [20 to 2000 / 100 / 10 cm] D093/D094 2-66 SM Appendix...
- Page 589 [-10 to 10/0.0/0.1 mm step] A higher setting "+" shifts the image down (opposite the sub scan direction). A lower setting "-" shifts the image up (in the same direction as the sub scan direction). SM Appendix 2-67 D093/D094...
- Page 590 Sets the interval between virtual prints for the scanner free run. [0 to 25/ 0.9 /0.1 s] 3 Original Length Setting Sets the interval between multiple feeds for the DF free run. [0.2 to 15 / 0.6 /0.1 m] D093/D094 2-68 SM Appendix...
- Page 591 2-dot Vertical Line: SCN 1-dot Horizontal Line: SCN 2-dot Horizontal Line: SCN 1-dot Alternating Dot Pattern: SCN 1-dot Grid Pattern: SCN Vertical Stripes: SCN Horizontal Grayscale: 16-Lvl:SCN Vertical Grayscale: 16-Lvl:SCN Density Patch: 16-Lvl: SCN Cross Pattern: SCN SM Appendix 2-69 D093/D094...
- Page 592 Horizontal Grayscale: 16-Lvl: PRN Vertical Grayscale: 16-Lvl: PRN 16-Lvl Grayscale: PRN Density Patch (256-Lvl): PRN Density Patch (64-Lvl): PRN Cross Pattern: PRN Grid Pattern (96-dot Width) Argyle Pattern Horizontal Grayscale (8-Lvl) & Line Grid Pattern (128-dot Width) D093/D094 2-70 SM Appendix...
- Page 593 Note: Raising the brightness level may increase moiré 8 Contrast:1-255 Sets the overall contrast of images scanned in the text/chart mode. [1 to 255 / 128 / 1] 1 (Weakest), 128 (Medium: Default), 255 (Strongest) Note: Raising the contrast level may increase moiré SM Appendix 2-71 D093/D094...
- Page 594 0 (Weakest), 4 (Medium: Default), 7 (Strongest) 7 Brightness:1-255 Sets the overall brightness images scanned in the Text mode. [1 to 255 / 128 / 1] 1 (Weakest), 128 (Medium: Default), 255 (Strongest) Note: Raising the brightness level may increase moiré D093/D094 2-72 SM Appendix...
- Page 595 0 (Weakest), 8 (Medium: Default), 15 (Strongest) 6 Smoothing: 0 (x1) 1-7 (Weak-Strong) Sets the level of smoothing for originals scanned in the Text/Photo mode. [0 to 7 / 0 /1 ] 0 (Weakest), 4 (Medium: Default), 7 (Strongest) SM Appendix 2-73 D093/D094...
- Page 596 This may cause very narrow bands or spacing between black and white areas. Use the MTF adjust to correct this problem and emphasize image detail. [0 to 15 / 8 / 1] 0 (Weakest), 8 (Medium: Default), 15 (Strongest) D093/D094 2-74 SM Appendix...
- Page 597 CIS properties. This may cause very narrow bands or spacing between black and white areas. Use the MTF adjust to correct this problem and emphasize image detail. SM Appendix 2-75 D093/D094...
- Page 598 Sets the level of independent dot erasure to improve the appearance in the backgrounds of images scanned in the Drawing mode. [0 to 7 / 0 / 1] 0: Default (Off) 1 (Weakest) to 7 (Strongest) D093/D094 2-76 SM Appendix...
- Page 599 Note: Raising the brightness level may increase moiré 8 Contrast:1-255 Sets the overall contrast of images scanned in the Grayscale mode. [1 to 255 / 128 / 1] 1 (Weakest), 128 (Medium: Default), 255 (Strongest) Note: Raising the contrast level may increase moiré SM Appendix 2-77 D093/D094...
- Page 600 7 Brightness:1-255 Sets the overall brightness images scanned in color in the Text/Chart mode. [1 to 255 / 128 / 1] 1 (Weakest), 128 (Medium: Default), 255 (Strongest) Note: Raising the brightness level may increase moiré D093/D094 2-78 SM Appendix...
- Page 601 0 (Weakest), 8 (Medium: Default), 15 (Strongest) 6 Smoothing: 0 (x1) 1-7 (Weak-Strong) Sets the level of smoothing for originals scanned in color in the Glossy Photo mode. [0 to 7 / 0 /1 ] 0 (Weakest), 4 (Medium: Default), 7 (Strongest) SM Appendix 2-79 D093/D094...
- Page 602 (LM98714) for CIS 1. Display format: hexadecimal [0 to 1023 / 520 / 1] 1 BkLvl Adj Value CIS 1 2 BkLvl Adj Value CIS 2 3 BkLvl Adj Value CIS 3 4 BkLvl Adj Value CIS 4 D093/D094 2-80 SM Appendix...
- Page 603 1 BkLvl Adj Value CIS 1: Factory Setting 2 BkLvl Adj Value CIS 2: Factory Setting 3 BkLvl Adj Value CIS 3: Factory Setting 4 BkLvl Adj Value CIS 4: Factory Setting 5 BkLvl Adj Value CIS5: Factory Setting SM Appendix 2-81 D093/D094...
- Page 604 Gray Balance Target Value DFU These SP codes set the target grayscale values for three colors (RGB) [0 to 255 / 176 / 1] [0 to 255 / 174 / 1] [0 to 255 / 169 / 1] D093/D094 2-82 SM Appendix...
- Page 605 Address: 0x64A2 CIS 2: R Address: 0x64AC CIS 2: B Address: 0x64B6 CIS 3: G Address: 0x64A4 CIS 3: R Address: 0x64AE CIS 3: B Address: 0x64B8 CIS 4: G Address: 0x64A6 CIS 4: R Address: 0x64B0 SM Appendix 2-83 D093/D094...
- Page 606 4 CIS 2: G 5 CIS 2: R 6 CIS 2: B 7 CIS 3: G 8 CIS 3: R 9 CIS 3: B 10 CIS 4: G 11 CIS 4: R 12 CIS 4: B D093/D094 2-84 SM Appendix...
- Page 607 7 CIS 3: G 8 CIS 3: R 9 CIS 3: B 10 CIS 4: G 11 CIS 4: R 12 CIS 4: B 13 CIS 5: G 14 CIS 5: R 15 CIS 5: B SM Appendix 2-85 D093/D094...
- Page 608 7 CIS 3: G 8 CIS 3: R 9 CIS 3: B 10 CIS 4: G 11 CIS 4: R 12 CIS 4: B 13 CIS 5: G 14 CIS 5: R 15 CIS 5: B D093/D094 2-86 SM Appendix...
- Page 609 The setting can be written with this SP and the set value is reflected in the analog ASIC (LM98174) of the CIS when an original is scanned. [0 to 255 / 84 / 1] 1 CIS 1 2 CIS 2 3 CIS 3 4 CIS 4 5 CIS 5 SM Appendix 2-87 D093/D094...
- Page 610 7 CIS 2 G 8 CIS 3 G 9 CIS 4 G 10 CIS 5 G 11 CIS 1 B 12 CIS 2 B 13 CIS 3 B 14 CIS 4 B 15 CIS 5 B D093/D094 2-88 SM Appendix...
- Page 611 7 CIS 3 B 8 CIS 3 R 9 CIS 3 G 10 CIS 4 B 11 CIS 4 R 12 CIS 4 G 13 CIS 5 B 14 CIS 5 R 15 CIS 5 G SM Appendix 2-89 D093/D094...
- Page 612 5 White Level CIS 5 Displays AGC adjustment or error flags after white level adjustment of each of the five CIS units after the CIS unit self-adjusts when the machine is powered 0: Normal 1: Abnormal (7) 0000 0000 (0) D093/D094 2-90 SM Appendix...
- Page 613 10 Black Level: CIS 5 Displays AGC adjustment or error flags after black level adjustment of each of the five CIS units after the CIS unit self-adjusts when the machine is powered 0: Normal 1: Abnormal (7) 0000 0000 (0) SM Appendix 2-91 D093/D094...
- Page 614 [0 to 6 / 0 / 1] 0: Normal output 1: Black shading data output 2: White shading data output 3: Black raw data output 4: White raw data output 5: Raw data output 6: Test pattern output D093/D094 2-92 SM Appendix...
- Page 615 The peak value for standard white plate reading (the shading data peak value) is set to 880 +-20 digits by white level adjustment. 1 CIS 1 2 CIS 2 3 CIS 3 4 CIS 4 5 CIS 5 SM Appendix 2-93 D093/D094...
- Page 616 7 CIS 2 G 8 CIS 3 G 9 CIS 4 G 10 CIS 5 G 11 CIS 1 B 12 CIS 2 B 13 CIS 3 B 14 CIS 4 B 15 CIS 5 B D093/D094 2-94 SM Appendix...
- Page 617 12 CIS 2 G 13 CIS 3 G 14 CIS 4 G 15 CIS 5 G 16 CIS 1 B 17 CIS 2 B 18 CIS 3 B 19 CIS 4 B 20 CIS 5 B SM Appendix 2-95 D093/D094...
- Page 618 [0 to 1023 / 800 / 1] 3 AREF Correction Value This SP displays and sets the AEF value used to obtain the optimum results for shading correction in scanned images. [-63 to 63 / 25 / 1] D093/D094 2-96 SM Appendix...
- Page 619 (from the center of the orignal as a reference point), stopping at the right side of the original. [0 to 512/60/0.1 mm] 8 Shading Correction Target Level Setting Sets the target level for shading correction. [0 to 1023 / 360 / 1] SM Appendix 2-97 D093/D094...
- Page 620 0 (Weakest), 4 (Medium: Default), 7 (Strongest) Line Width Corr : Text: Mode Select Sets the strength of line correction effect for Text Mode. [0 to 8 / 3 / 1] 0 (Weakest) 3: Default 4 (Medium) 8 (Strongest) D093/D094 2-98 SM Appendix...
- Page 621 2: Line width correction Line Width Corr : Generation: Sub Scan Sets the strength of line correction effect for Generation Mode. [0 to 1 / 1 / 1] 0: No line width correction 1: Line width correction SM Appendix 2-99 D093/D094...
- Page 622 Sets the outline erase function for copy Text Mode. [0 to 3 / 1 / 1] 0 (Weakest), 3 (Strongest) 2 Smoothing Filter Level: Photo Sets the outline erase function for copy Photo Mode.. [1 to 3/2/1] 0 (Weakest), 3 (Strongest) D093/D094 2-100 SM Appendix...
- Page 623 Sets the outline erase function for copy Blue Line Mode. [1 to 3/1/1] 0 (Weakest), 3 (Strongest) 4905 Gray Scale Processing Selects the type of dithering done in Photo mode. [0 to 255/0/1] 0: 2-value dithering 8x8 1: 2-value dithering 16x16 2: 2-value dithering 16x16 SM Appendix 2-101 D093/D094...
- Page 624 [-9.9 to +9.9/0.0/0.1 mm step] Use the 1000-mm position in the sample to check the difference. This setting is used to calculate the motor clock count for adjusting the difference. 3 Original Length Display Displays the original length. D093/D094 2-102 SM Appendix...
- Page 625 Adjust this SP if you see image distortion after replacing the original feed roller or exit roller. You may also need to adjust this SP if you see image distortion after CIS adjustments with SP4972. [-1 to 0 / -0.2 / 0.1%] SM Appendix 2-103 D093/D094...
- Page 626 7 CIS2 Sub Scan 8 CIS2-3 Sub Scan [0 to 2815 / 645 / 1] 9 CIS3-4 Sub Scan [0 to 255 / 26 / 1] 10 CIS4-5 Sub Scan [0 to 2815 / 643 / 1] D093/D094 2-104 SM Appendix...
- Page 627 This SP determines whether the machine stops and holds the edge of the original after the original is fed so that it does not fall. [0 to 1/0/1] 0: Disable, 1: Enable 4979 Scan Correction DFU SM Appendix 2-105 D093/D094...
- Page 628 7: Multi-rate_independent dot erase module 2 RGB Frame Memory (Change 2) 0: Multi-rate gamma conversion module 1: Main scan fine adjust/simple magnification module 2: Density gamma module 3: Gradation processing (M-to-P) module 4: Reserved 5: Reserved 6: Reserved 7: Reserved D093/D094 2-106 SM Appendix...
- Page 629 1: Paper counter. Shows the total page counts 2 Counter Unit [0 to 8/ 0 / 1] 0: Models -21/-27, 2: Model -17 Meters Yards Feet Meters Yards Feet A3=1 Surface area count 0.1 meters Only for counting devices by user. 01. yards SM Appendix 2-107 D093/D094...
- Page 630 This SP sets the level of the low power mode, where the operation panel will switch off after the machine enters low power mode. [0 to 3/3/1] 0: 195 degrees 1: 180 degrees 2: 170 degrees 3: 155 degrees D093/D094 2-108 SM Appendix...
- Page 631 Important Note: Only settings that can be enabled for machines outside Japan are listed here. 0: Disabled 1: Key Cards (RK2, 3, 4) 2: Decrementing keycard 11: Incrementing key cards for use outside Japan 12: Decrementing key cards for use outside Japan SM Appendix 2-109 D093/D094...
- Page 632 APS Off Mode This SP can be used to switch APS (Auto Paper Select) off while a coin lock or pre-paid key card device is connected to the machine. [0 to 1/0/1] 0: On 1: Off D093/D094 2-110 SM Appendix...
- Page 633 0: Count number of sheets by paper size 1: Count frequency by paper size 5188 Copy NV Version DFU This SP displays the NVRAM version to determine whether the NVRAM has been initialized. Used during debugging. SM Appendix 2-111 D093/D094...
- Page 634 This SP determines whether a machine that normally cannot continue to output paper if staple supply runs can continue to operate. [0 to 1 / 0 / 1] 0: OFF. Paper cannot exit if no staples are available. 1: ON. Paper can exit with no staples. D093/D094 2-112 SM Appendix...
- Page 635 The settings for 2 and 3 are done with 8-digit numbers Digits Meaning Month. 4: April, 10: October (for months 1 to 9, the first digit of 0 1st, 2nd cannot be input, so the eight-digit setting for 2 or 3 becomes a seven-digit setting) SM Appendix 2-113 D093/D094...
- Page 636 104 Authentication Time This SP sets the length of time allowed for authentication. [1 to 255 / 0 / 1] (0 = 60 sec. standard) 162 Extend Certification 200 SDK1 Unique ID "SDK" is the "Software Development D093/D094 2-114 SM Appendix...
- Page 637 / 1 / 1] 5 Password Null Permit This SP is referenced only when SP5411-4 is set to "1" (On). [0 to 1/1/1] 0: Password NULL not permitted. 1: Password NULL permitted 6 Detail Options (7) 0000 0000 (0) SM Appendix 2-115 D093/D094...
- Page 638 Determines the length of time that the system waits for correct input of the user ID and password after a lockout has occurred. This setting is used only if SP5413-3 is set to "1" (on). [1 to 999/60/1 min.] D093/D094 2-116 SM Appendix...
- Page 639 Sets the number of attempts to attack the system with random passwords to gain illegal access to the system. [0 to 100/30/1 attempt] 2 Detect Time Sets the time limit to stop a password attack once such an attack has been detected. [1 to 10/5/1 sec.] SM Appendix 2-117 D093/D094...
- Page 640 Sets the length of time for monitoring the frequency of access to MFP features. [10 to 30/10/1 sec.] 3 Productivity Fall Wait Sets the wait time to slow down the speed of certification when an excessive number of access attempts have been detected. [0 to 9/3/1 sec.] D093/D094 2-118 SM Appendix...
- Page 641 Determines whether certification is required before a user can use the document server. [0 to 1/0/1] 0: On 1: Off Scanner Determines whether certification is required before a user can use the scan applications. [0 to 1/0/1] 0: On 1: Off SM Appendix 2-119 D093/D094...
- Page 642 71 SDK3 5430 Auth Dialog Message Change 1 Message Change On/Off [0 to 1 / 0 / 1] 2 Message Text Download Touch [EXECUTE]. 3 Message Text ID 5431 External Auth User Preset Entry Group Mail Folder D093/D094 2-120 SM Appendix...
- Page 643 [0 to 1/0/1] 0: Off 1: On 2 Panel Disp Determines whether an error code appears on the operation panel after a user authentication failure occurs. [0 to 1/1/1] 1: On 0: Off SM Appendix 2-121 D093/D094...
- Page 644 Sets the alarm to sound for the specified jam level (document misfeeds are not included). [0 to 3 / 3 / 1 step] 5504 0: Zero (Off) 1: Low (2.5K jams) 2: Medium (3K jams) 3: High (6K jams) D093/D094 2-122 SM Appendix...
- Page 645 1: Toner near-end. The alarm triggers at toner-end or toner near-end. Note: The “Interval nn" SP's below specify the paper control call interval for the referenced paper sizes. 97 Interval: 841mm 98 Interval: 594mm [100 to 10000/300/1 Step] 99 Interval: 420mm SM Appendix 2-123 D093/D094...
- Page 646 166 Interval: LT 175 Interval: 12x18 225 Interval: 36inch 226 Interval: 24inch 227 Interval: 18inch 228 Interval: 12inch 229 Interval: 9inch [250 to 10000/300/1 Step] 234 Interval: 34inch 235 Interval: 22inch 236 Interval: 17inch 237 Interval: 11inch D093/D094 2-124 SM Appendix...
- Page 647 This setting is enabled only when SP5508-4 is enabled (set to 1). 13 Door Open: Time Length Sets the length of time the remains opens to determine when to initiate a call. [3 to 30/10/1] This setting is enabled only when SP5508-4 is enabled (set to 1). SM Appendix 2-125 D093/D094...
- Page 648 2 Service Parts Near End Call 3 Service Parts End Call 4 User Call 6 Communication Test Call 7 Machine Information Notice 8 Alarm Notice 10 Supply Automatic Ordering Call 11 Supply Management Report Call 12 Jam/Door Open Call D093/D094 2-126 SM Appendix...
- Page 649 Initializes the defaults for the scanner and all the scanner SP modes. 10 Web Service Deletes the Netfile (NFA) management files and thumbnails, and initializes the Job login ID. Netfiles: Jobs to be printed from the document server using a PC and the Desk SM Appendix 2-127 D093/D094...
- Page 650 18 SRM Memory Clr Initializes information in non-volatile RAM. 19 LCS Memory Clr Initializes information in non-volatile RAM. 20 Web Uapli Initializes the web user application settings. 21 ECS Initializes the ECS settings. 22 Folder Initializes the folder settings. D093/D094 2-128 SM Appendix...
- Page 651 11 Cassette Tray Set Sensor 1 12 Cassette 1 Feed Sensor 13 Paper End Sensor 1 14 Exit Fan Lock Sensor 15 Paper Set Sensor 16 Paper Registration Sensor 17 Paper Exit Sensor 18 Total Counter Set SM Appendix 2-129 D093/D094...
- Page 652 35 Folder Connect Sensor 36 Model Detect 37 Copy Exit Switch 201 Original Width Sensor: A0 202 Original Width Sensor: A1 203 Original Width Sensor: A2 204 Original Width Sensor: A3 205 Original Width Sensor: B1 D093/D094 2-130 SM Appendix...
- Page 653 208 Original Width Sensor: B4 209 Original Width Sensor: 914 mm 210 Original Width Sensor: 30" 211 Original Set Sensor 212 Original Registration Sensor 213 Original Exit Sensor 214 Original Emergency Stop Sensor 215 Original Feed Unit Open Sensor SM Appendix 2-131 D093/D094...
- Page 654 42 Charge Grid: Image Area 43 Charge Grid: ID Sensor Pattern 44 Charge Corona/Grid: Image Area 45 Development Bias: Image Area 46 Development Bias: ID Sensor Pattern 49 Separation Corona: Leading Edge 50 Separation Corona 52 Toner Supply Clutch D093/D094 2-132 SM Appendix...
- Page 655 As soon as the Level A SC code is issued, the machine is disabled immediately. The operator cannot reset the SC because the machine requires servicing immediately. The machine cannot be used until the machine has been service. SM Appendix 2-133 D093/D094...
- Page 656 Press the [./*] key to input a pause. Press the “Clear modes” key to delete the telephone number. 1 Service Service representative telephone number. 2 Facsimile Fax number of service representative 3 Supply Supplier of consumables 4 Operation Operation support D093/D094 2-134 SM Appendix...
- Page 657 [1 to 90/30/1 sec.] RCG Write to Timeout Sets the length of time (seconds) for the time-out when sent data is written to the RCG during a call over the @Remote network. [0 to 100/60/1 sec.] SM Appendix 2-135 D093/D094...
- Page 658 0: Internet connection 1: Dial-up connection Cert. Expire Timing DFU Proximity of the expiration of the certification. Use Proxy This SP setting determines if the proxy server is used when the machine communicates with the service center. D093/D094 2-136 SM Appendix...
- Page 659 The certification used by Embedded RC Gate is set correctly. The certification request (SetAuthKey) for update has been received from the CTL URL and certification is presently being updated. The certification update is completed and the CTL URL is being notified of the successful update. SM Appendix 2-137 D093/D094...
- Page 660 The rescue certification of No. 17 has been recorded, and the CTL URL is being notified of the failure of the certification update. D093/D094 2-138 SM Appendix...
- Page 661 URL. Firmware Size Allows the service technician to check the size of the firmware data files during the firmware update execution. CERT: Macro Version Displays the macro version of the @Remote certification SM Appendix 2-139 D093/D094...
- Page 662 CERT: Valid Start Displays the start time of the period for which the current @Remote certification is enabled. CERT: Valid End Displays the end time of the period for which the current @Remote certification is enabled. D093/D094 2-140 SM Appendix...
- Page 663 Used only for Embedded RC Gate-M to display the status of the execution of SP5816-151 identify the type of line. Success Currently dialing Line abnormal Could not confirm external line carrier with automatic detection. Line disconnected Power supply insufficient Line determination not supported SM Appendix 2-141 D093/D094...
- Page 664 Note: Numbers with spaces or # marks appear enclosed with quotation marks in the user name. Local Phone Number DFU This is the number of the local line where Embedded RC Gate-M is connected. This is the line used to communicate with the Call Center. D093/D094 2-142 SM Appendix...
- Page 665 [0 to 1/0/1] 0: Disabled. Embedded RC Gate-M continues to operate if a fax transmission starts on the same line. 1: Enabled. Fax transmissions have priority. Embedded RC Gate-M will shut down when a fax transmission begins. SM Appendix 2-143 D093/D094...
- Page 666 Gate device cannot be set. The @Remote module has not started. Letter Number Allows entry of the number of the request needed for the Embedded RC Gate device. Confirm Execute Executes the inquiry request to the @Remote CTL URL. D093/D094 2-144 SM Appendix...
- Page 667 Displays the result of the notification sent to the device from the CTL URL in answer to the inquiry request. Displayed only when the result is registered at the CTL URL. Register Execute Executes Embedded RC Gate Registration. SM Appendix 2-145 D093/D094...
- Page 668 Unexpected error Inquiry, registration attempted without -12002 acquiring device status. Attempted registration without Operation Error, Incorrect -12003 execution of an inquiry and no previous Setting registration. Attempted setting with illegal entries for -12004 certification and ID2. D093/D094 2-146 SM Appendix...
- Page 669 Releases a machine from its embedded RCG setup. 250 CommLog Print Prints the communication log. 5821 Remote Service Address This SP sets the IP address for RCG (Remote Communication Gate) for processing calls to the @Remote service center. SM Appendix 2-147 D093/D094...
- Page 670 [0 to 1 / 1 / 1 ] 0:Off, 1: On 52 ECP (Centro) Disables and enables the ECP feature (1284 Mode) for data transfer. [0 to 1 / 1 / 1] 0: Disabled, 1: Enabled D093/D094 2-148 SM Appendix...
- Page 671 BMLinks (Japan Only) (Not DIPRINT Used) Reserved (Not Used) Reserved (Not Used) 90 TELNET (0:OFF 1:ON) Disables or enables Telnet operation. If this SP is disabled, the Telnet port is closed. [0 to 1/1/1] 0: Disable 1: Enable SM Appendix 2-149 D093/D094...
- Page 672 LAN (802.11b) in the format: "Manual Set Address" + "Prefix Length" The IPv6 address consists of a total 128 bits configured in 8 blocks of 16 bits each. These notations can be abbreviated. See "Note: IPV6 Addresses" below this table. D093/D094 2-150 SM Appendix...
- Page 673 A colon is inserted as a delimiter every 4th hexadecimal character. fe80:0000:0000:0000:0207:40ff:0000:340e The notations can be abbreviated by elminating zeros where the MSB and digits following the MSB are zero. The example in "2" above, then, becomes: fe80:0:0:0207:40ff:0:340e SM Appendix 2-151 D093/D094...
- Page 674 Consumable Supplier bit2-15: Reserved (all) Web shopping link visible Displays or does not display the link to Net RICOH on the top page and link page of the web system. [0 to 1 / 1 / 1] 0: Not display, 1:Display...
- Page 675 1 HDD Formatting (All) 2 HDD Formatting (IMH) 3 HDD Formatting (Thumbnail) 4 HDD Formatting (Job Log) 5 HDD Formatting (Printer Fonts) 6 HDD Formatting (User Info) 7 Mail RX Data SM Appendix 2-153 D093/D094...
- Page 676 Determines the resolution conversion ratio when a Copy Text image document is sent to the Document Server via the MLB (Media Link Board). [0 to 6/0/1] 0: 1, 1: 1/2 2: 1/3 3: 1/4 6: 2/3 D093/D094 2-154 SM Appendix...
- Page 677 82 Format for Copy B&W Text Determines the image format for Copy Text images sent to the Document Server via the MLB (Media Link Board). [0 to 3/1/1] 0: JFIF/JPEG 1: TIFF/MMR 2: TIFF/MH 3: TIFF/MR SM Appendix 2-155 D093/D094...
- Page 678 Document Server via the MLB (Media Link Board). [5 to 95/60/1] 93 Low Quality for JPEG Determines the quality level of JPEG images for low quality sent to the Document Server via the MLB (Media Link Board). [5 to 95/40/1] D093/D094 2-156 SM Appendix...
- Page 679 [1 to 65 535 / 80 / 1] 104 Primary srv URL path Normally this address is specified remotely for IO registration of the URL path of the primary Capture Server. Default: None Allowed entry: 0 to 16 characters SM Appendix 2-157 D093/D094...
- Page 680 Default: None 0 to 16 characters 120 Default Reso Rate Switch Normally this address is specified remotely for IO registration of the resolution of documents on the Capture Server. [0 to 1 / 0 / 1] D093/D094 2-158 SM Appendix...
- Page 681 Server, but it can be changed on the machine operation panel. Actually the specified resolution setting cannot be changed through hardware control, so in such a case an approximate resolution is used for the capture. [0 to 255 / 3 / 1] SM Appendix 2-159 D093/D094...
- Page 682 0 x 0E – 18M Fix 0 x 13 – 0 x FE (reserved) 0 x 0D – 12M Fix 0 x 12 – 72M (reserved) 0 x 0B – 9M Fix 0 x 09 – 22M (reserved) D093/D094 2-160 SM Appendix...
- Page 683 45 WPA Debug Lvl Selects the debug level for WPA authentication application. [1 to 3 / 3 / 1] 1: Info, 2: warning, 3: error This SP is displayed only when the IEEE802.11 card is installed. SM Appendix 2-161 D093/D094...
- Page 684 Repository related Setting 2 This SP codes sets the optional Not Used setting for message log time Message log stamp. Bit 7 is the 5682 1: mm:ss:ms message log where the 0: mm:ss (time) following are set: D093/D094 2-162 SM Appendix...
- Page 685 1 Transfer Rate Sets the speed for USB data transmission. [Full Speed], [Auto Change] 2 Vendor ID DFU Sets the vendor ID: Initial Setting: 0x05A Ricoh Company [0x0000 to 0xFFFF/1] 3 Product ID DFU Sets the product ID. [0x0000 to 0xFFFF/1] 4 Device Release Number DFU Sets the device release number of the BCD (binary coded decimal) display.
- Page 686 For example, a USB mouse cannot be used even if it connected. If the PictBridge option is not mounted, even if a digital camera is connected it cannot be used because it is an unsupported device. D093/D094 2-164 SM Appendix...
- Page 687 9 Delivery Server Model [0 to 4/ 0 / 1] Allows changing the model of the delivery server registered by the I/O device. 0: Unknown 1: SG1 Provided 2: SG1 Package 3: SG2 Provided 4: SG2 Package SM Appendix 2-165 D093/D094...
- Page 688 There are eight bits (Bit 0 to Bit 7). All are unused at this time. 13 Server Scheme (Primary) 14 Server Port Number (Primary) 15 Server URL Path (Primary) 16 Server Scheme (Secondary) 17 Server Port Number (Secondary) 18 Server URL Path (Secondary) D093/D094 2-166 SM Appendix...
- Page 689 Clears the unique ID of the device used as the name in the file transfer directory. Execute this SP if the connection of the device to the delivery server is unstable. After clearing the ID, the ID will be established again automatically by cycling the machine off and on. SM Appendix 2-167 D093/D094...
- Page 690 Sets the length of the time-out for the search of the LDAP server. [1 to 255/60/1] WSD Maximum Entries WSD (Web Services on Devices) is the Microsoft standard for connectivity to web-service enabled devices. [50 to 250/250/1] Default: 250 D093/D094 2-168 SM Appendix...
- Page 691 SP5846-51 before you execute this SP. After the address book data is copied to HDD, all the address book data is deleted from the source SD card. If the operation fails, the data is not erased from the SD card. SM Appendix 2-169 D093/D094...
- Page 692 1: SD Slot 1 2: SD Slot 2 4: USB Flash ROM 20: HDD 30: Nothing Initialize Local Addr Book Clears all of the address information from the local address book of a machine managed with UCS. D093/D094 2-170 SM Appendix...
- Page 693 This feature does not work if the card is write-protected. Note: After you do this SP, go out of the SP mode, turn the power off. Do not remove the SD card until the Power LED stops flashing. SM Appendix 2-171 D093/D094...
- Page 694 [0 to 32/0/1] Note: This SP does not normally require adjustment. This SP is enabled only after the system administrator has set up a group password policy to control access to the address book. D093/D094 2-172 SM Appendix...
- Page 695 This SP is enabled only after the system administrator has set up a group password policy to control access to the address book. FTP Auth. Port Settings Sets the FTP port to get the delivery server address book that is used in the individual authorization mode. [0 to 65535/3671/1] SM Appendix 2-173 D093/D094...
- Page 696 Note: "6:" above (2/3x) applies to 3, 5, 6 only. Network Quality Default for JPEG Sets the default value for the quality of JPEG images sent as NetFile pages. This function is available only with the MLB (Media Link Board) option installed. [5 to 95/50/1] D093/D094 2-174 SM Appendix...
- Page 697 Note: This SP is used primarily by designers. 100 Repository: Download Image Max. Size [1 to 2048 /2048 /1 K] Setting: Log Type: Job 1 DFU Note: These SP's are for display [0 to 0xFFFFFFFF/0/1] only; they cannot be changed. SM Appendix 2-175 D093/D094...
- Page 698 214 Setting: Secondary Srv DFU Setting: Start Time DFU [0 to 0xFFFFFFFF/0/1] Setting: Interval Time DFU [1 to 100/1/1] Setting: Timing DFU [0 to 2/0/1] 0: Transmission off 1: Transmission 1 by 1 2: Periodic transmission D093/D094 2-176 SM Appendix...
- Page 699 (“Confidential”, “Secret”, etc.) until this SP has been executed. Note: This SP must always be executed after the HDD has been reformatted or replaced. Always switch the machine off and on after executing this SP. SM Appendix 2-177 D093/D094...
- Page 700 A unique file name is generated to avoid overwriting existing file names on the SD Card. Up to 4MB can be copied to an SD Card. 4 MB segments can be copied one by one to each SD Card. D093/D094 2-178 SM Appendix...
- Page 701 Make HDD Debug This SP creates a 32 MB file to store a log on the HDD. Make SD Debug This SP creates a 4 MB file to store a log on an SD card. SM Appendix 2-179 D093/D094...
- Page 702 These SP's allow you to set up to 10 keys for log files for functions that use common memory on the controller board. [-9999999 to 9999999 / 0 / 1] 1 to 10 Key 1 to Key 10 D093/D094 2-180 SM Appendix...
- Page 703 SMTP certification method directly. However, this SP can be used only after SP5860-3 has been set to "1" (On). Bit0: LOGIN Bit1: PLAIN Bit2: CRAM_MD5 Bit3: DIGEST_MD5 Bit4 to Bit 7: Not Used SM Appendix 2-181 D093/D094...
- Page 704 1: Date added Common Key Info Writing 5870 Writes to flash ROM the common proof for validating the device for @Remote specifications. 1 Writing Note: These SP's are for future use and currently are not used. 3 Initialize D093/D094 2-182 SM Appendix...
- Page 705 1 Data Overwrite Security This SP enables the Data Overwrite Security option. Note: Before execution the SD card must be in SD Card Slot 1 (option slot). The SD card must reside in Slot 1 after execution. SM Appendix 2-183 D093/D094...
- Page 706 Denies all access to User Tools 2bit Denies access to printing 3bit Denies access to fax 4bit Denis access to scan-to-email 5bit Denies access data downloading functions 6bit Denies access to data delete functions 7bit Forbid guest user D093/D094 2-184 SM Appendix...
- Page 707 This SP determines how Web Image Monitor memory leaks are handled. A "1" setting enables the function. (7) 0000 0000 (0) Bit 0 Displays memory status at session timeouts. Bit 1 Displays memory status at the start/end of PF handler only. Bit2-7 Not used SM Appendix 2-185 D093/D094...
- Page 708 The machine stores up to six registered names in the SDK application. 5893 This SP has been implemented for all machines using Engine 08S and later. This SP is not needed if there are no SDK applications loaded. 1 to 6 SDK1 to SDK-6 D093/D094 2-186 SM Appendix...
- Page 709 Cherry Server Selects which version of the Scan Router application program, “Light” or “Full (Professional)”, is installed. [0 to 1 / 0 / 1 /step] 0: Light version (supplied with this machine) 1: Full version (optional) SM Appendix 2-187 D093/D094...
- Page 710 Input the number for the item that you want to print, and then press [1]: “Execute” on the 8 Capture Log touch panel. 21 Copier User Program 22 Scanner SP 23 Scanner User Program 24 SDK/J Summary 25 SDK/J Application Info. D093/D094 2-188 SM Appendix...
- Page 711 1: NA (North America) Other Group 6000 SP codes may be displayed but are not used with this machine. (These other SP codes are for peripheral units not support by this machine at the present time. July 2010) SM Appendix 2-189 D093/D094...
- Page 712 2 Latest 1 3 Latest 2 4 Latest 3 5 Latest 4 Display the most recent service calls in their order of occurrence. 6 Latest 5 7 Latest 6 8 Latest 7 9 Latest 8 10 Latest 9 D093/D094 2-190 SM Appendix...
- Page 713 10 Latest 9 7502 Total Paper Jam Counter Displays the total number of copy jams. Display range: 0000 to 9999 7503 Total Original Jam Counter Displays the total number of original jams. Display range: 0000 to 9999 SM Appendix 2-191 D093/D094...
- Page 714 A “Paper Lag” paper jam occurs when the paper remains at the sensor for longer than the prescribed time. Display range: 0000 to 9999 Main Machine (D093/D094) 1: At Power On 3: Tray 1: No Feed 4: Tray 2: No Feed...
- Page 715 Jam Count by Paper Size This SP displays the counts for the number of jams by paper size. Note: In the paper size notations below, "T" means "SEF" (Short Edge Feed). 97 A0T/A1 98 A1T/A2 99 A2T/A3 SM Appendix 2-193 D093/D094...
- Page 716 SP7-xxx Data Log 100 A3T/A4 101 A4T 106 B1T/B2 107 B2T/B3 108 B3T/B4 109 B4T 225 36x48T/24x36 226 24x36T/18x24 227 18x24T/12x18 228 12x18T/9x12 229 9x127 234 34x44T/22x34 235 22x34T/17x22 236 17x22T/11x17 237 11x17T/8.5x11 238 8.5x11T 255 Others D093/D094 2-194 SM Appendix...
- Page 717 10 jams. Display contents are as follows: 7508 CODE: SP7505-*** number. SIZE: Paper size code in hex. (See table below.) TOTAL: Total jam error count (SP7003) DATE: Date the previous jam occurred 1 Latest Sample Display: CODE: 007 2 Latest 1 SM Appendix 2-195 D093/D094...
- Page 718 Others 7801 ROM No./Firmware Version Displays the ROM number, firmware version numbers, and other important information about the machine. Press to see more information. 7803 PM Counter Display Displays the PM counter since the last PM. D093/D094 2-196 SM Appendix...
- Page 719 Self-Diagnosis Result Display Opens the “Self-Diagnose Result Display" to view details about errors. Use the 7832 keys on in the display to scroll through all the information. If no errors have occurred, you will see “No Error”. SM Appendix 2-197 D093/D094...
- Page 720 This data should be reported after SC990 occurs. 1 File Name Module name 2 Number of Lines Lines where error occurred. 3 Location Component affected by error D093/D094 2-198 SM Appendix...
- Page 721 The SP's in this group are prefixed with a letter that indicates the mode of operation (the mode of operation is referred to as an ‘application’). Before reading the Group 8 Service Table, make sure that you understand what these prefixes mean. SM Appendix 2-199 D093/D094...
- Page 722 LCD's of copiers, printers and faxes that also use these SP's. Read over the list of abbreviations below and refer to it again if you see the name of an SP that you do not understand. D093/D094 2-200 SM Appendix...
- Page 723 Dev Counter Development Count, no. of pages developed. Dup, Duplex Duplex, printing on both sides Emul Emulation Full Color Post-print processing, i.e. finishing (punching, stapling, etc.) Full Bleed No Margins GenCopy Generation Copy Mode SM Appendix 2-201 D093/D094...
- Page 724 Print Job Manager/Desk to p Edi to r: A pair of utilities that allows print jobs to be distributed evenly among the printers on the Palm 2 network, and allows files to moved around, combined, and converted to different formats. Personal Computer D093/D094 2-202 SM Appendix...
- Page 725 End to nSave toner Save TXJob Send, Transmission Yellow, Magenta, Cyan YMCK Yellow, Magenta, Cyan, BlacK All of the Group 8SP's are reset with SP5 801 1 Memory All Clear, or the Counter Reset SP7 808. SM Appendix 2-203 D093/D094...
- Page 726 8014 P:Jobs/LS [0 to 9999999/ 0 / 1] 8015 S:Jobs/LS The L: counter counts the number of jobs stored from within the document server mode screen at 8016 L:Jobs/LS the operation panel. 8017 O:Jobs/LS D093/D094 2-204 SM Appendix...
- Page 727 When images stored on the document server by a network application (including Palm 2), are printed with another application, the O: counter increments. When a copy job stored on the document server is printed with a network application (Web Image Monitor, for example), the C: counter increments. SM Appendix 2-205 D093/D094...
- Page 728 When a stored copy job is sent from the document server, the C: counter increments. When images stored on the document server by a network application or Palm2 are sent as an e-mail, the O: counter increments. D093/D094 2-206 SM Appendix...
- Page 729 [0 to 9999999/ 0 / 1] These SP's total finishing methods for scan jobs only. The finishing method is 8065 specified by the application. Note: Finishing features for scan jobs are not available at this time. SM Appendix 2-207 D093/D094...
- Page 730 Number of jobs started in Punch mode. When Punch is set for a 806x 6 Punch print job, the P: counter increments. (See SP8064 6.) 806x 7 Other Reserved. Not used. Important: Codes 8 to 14 are not used with this machine. D093/D094 2-208 SM Appendix...
- Page 731 101 to 300 Pages 807x 4 4 Pages 807x 11 301 to 500 Pages 807x 5 5 Pages 807x 12 501 to 700 Pages 807x 6 6 to ~ Pages 807x 13 701 to 1000 Pages SM Appendix 2-209 D093/D094...
- Page 732 -PC, or if one job is sent to more than one destination. each send is counted separately. For example, if the same document is sent by Scan- to -Email as well as Scan- to -PC, then it is counted twice (once for Scan- to -Email and once for Scan- to -PC). D093/D094 2-210 SM Appendix...
- Page 733 If the job is cancelled during sending, it may or may not be counted, depending on what stage of the process had been reached when the job was cancelled. Even if several files are combined for sending, the transmission counts as one job. SM Appendix 2-211 D093/D094...
- Page 734 File but to n in the Copy mode window, the C: count is 6 and the L: count is 6. If both sides of 3 A4 sheets are copied but not stored, the C: count is 6. If you enter document server mode then scan 6 pages, the L: count is 6. D093/D094 2-212 SM Appendix...
- Page 735 2 Back With an ADF that cannot scan both sides simultaneously, the Back count is the same as the number of pages fed for duplex rear-side scanning. SM Appendix 2-213 D093/D094...
- Page 736 These SP's count the total number of scanned pages by original type for all jobs, regardless of which application was used. C:Scan PGS/Org [0 to 9999999/ 0 / 1] 8242 These SP's count the number of pages scanned by original type for Copy jobs. D093/D094 2-214 SM Appendix...
- Page 737 824x 9: Grayscale 824x 10: Color 824x 11: Other If the scan mode is changed during the job, for example, if the user switches from ADF to Platen mode, the count is done for the last selected mode. SM Appendix 2-215 D093/D094...
- Page 738 Note: At the present time, these counters perform identical counts. 8291 T:Scan PGS/Stamp These SP's count the number of pages stamped with the stamp in the ADF unit. 8295 S:Scan PGS/Stamp [0 to 9999999/ 0 / 1] D093/D094 2-216 SM Appendix...
- Page 739 30x42 830x 6 DLT 830x 107 34x44 830x 8 LT 830x 108 22x34 830x 100 A2 830x 109 17x22 830x 101 B3 830x 254 Other (Standard) 830x 102 A0 830x 255 Other (Custom) 830x 103 A1 SM Appendix 2-217 D093/D094...
- Page 740 O:Total PrtPGS to the C: counter. 838x 1 Field Number Total number of copies (regardless of size) 838x 2 Length (High) Total length 838x 3 Length (Low) Total length 838x 4 Area (High) Total area coverage D093/D094 2-218 SM Appendix...
- Page 741 These SP's count the number of pages printed from the document server. The counter for the application used to 8402 C:PrtPGS/LS print the pages is incremented. 8404 P:PrtPGS/LS The L: counter counts the number of jobs stored from SM Appendix 2-219 D093/D094...
- Page 742 [0 to 9999999/ 0 / 1] 8427 These SP's count by binding and combine, and n-Up settings the number of pages processed for printing by Other applications 842x 1 Simplex> Duplex 842x 2 Duplex> Duplex 842x 3 Book> Duplex D093/D094 2-220 SM Appendix...
- Page 743 Pages that are only partially printed with the n-Up functions are counted as 1 page. Here is a summary of how the counters work for Booklet and Magazine modes: Booklet Magazine Original Pages Count Original Pages Count SM Appendix 2-221 D093/D094...
- Page 744 The number of pages printed in series (one side) or 843x 2 Series/Book printed as a book with booklet right/left pagination. The number of pages printed where stamps were 843x 3 User Stamp applied, including page numbering and date stamping. D093/D094 2-222 SM Appendix...
- Page 745 420 mm Custom 844x 6 844x 243 297 mm Custom 844x 8 844x 244 210 mm Custom 844x 100 844x 245 728 mm Custom 844x 101 844x 246 515 mm Custom 844x 102 844x 247 364 mm Custom SM Appendix 2-223 D093/D094...
- Page 746 Bypass Table 2 Tray 1 Copier 3 Tray 2 Copier 4 Tray 3 Paper Tray Unit (Option) 5 Tray 4 Paper Tray Unit (Option) 6 Tray 5 LCT (Option) * Tray 6 to 15 Not used. D093/D094 2-224 SM Appendix...
- Page 747 These SP's count by paper type the number pages printed from within the document server mode window at the operation panel. 846x 1 Normal 846x 2 Recycled 846x 3 Special 846x 4 Thick 846x 5 Normal (Back) 846x 6 Thick (Back) 846x 7 846x 8 Other SM Appendix 2-225 D093/D094...
- Page 748 These SP's count by printer emulation mode the total number of pages printed. P:PrtPGS/Emul [0 to 9999999/ 0 / 1] 8514 These SP's count by printer emulation mode the total number of pages printed. 851x 1 RPCS 851x 2 RPDL 851x 3 PS3 D093/D094 2-226 SM Appendix...
- Page 749 These SP's count by finishing mode the total number of pages printed by the Copy application. 8524 P:PrtPGS/FIN [0 to 9999999/ 0 / 1] These SP's count by finishing mode the total number of pages printed by the Print application. SM Appendix 2-227 D093/D094...
- Page 750 These SP's count by finishing mode the total number of pages printed from within the document server mode window at the operation panel. 852x 1 Sort 852x 2 Stack 852x 3 Staple 852x 4 Booklet 852x 5 Z-Fold 852x 6 Punch 852x 7 Other D093/D094 2-228 SM Appendix...
- Page 751 User to ols display on the copy machine. Note: This SP is expanded for color MFP and color LP machines. For this machine, the count is done for black only. 8601 Coverage Counter 1 B/W 11 B/W Printing Pages SM Appendix 2-229 D093/D094...
- Page 752 These SP's count by color mode the total number of pages attached to an 8655 e-mail for the Scan application only. Note: This SP is expanded for color MFP and color LP machines. For this machine, the count is done for black only. D093/D094 2-230 SM Appendix...
- Page 753 8694 P:TX PGS/LS [0 to 9999999/ 0 / 1] The L: counter counts the number of pages stored 8695 S:TX PGS/LS from within the document server mode screen at the operation panel. 8696 L:TX PGS/LS SM Appendix 2-231 D093/D094...
- Page 754 [0 to 9999999/ 1] 8711 These SP's count the number of compressed pages scanned in to the document server, counted by the formats listed below. 1 JPEG/JPEG2000 2 TIFF (Multi/Single) 3 PDF 4 Other 5 PDF Comp D093/D094 2-232 SM Appendix...
- Page 755 Total number of pages delivered to WSD by the scanner application. T: Scan PGS/Media 8731 Total number of pages scanned/printed for media. S: Scan PGS/Media 8735 Total number of pages scanned for media. 1 B/W 2 Color SM Appendix 2-233 D093/D094...
- Page 756 This SP displays the number of toner bottles used. The count is done based on the equivalent of 1,000 pages per bottle. 8791 LS Memory Remain This SP displays the percent of space available on the document server for storing documents. [0 to 100/ 0 / 1] D093/D094 2-234 SM Appendix...
- Page 757 This SP counts the number of copies in the toner dot coverage range 8861 11-20% [0 to 9999999] Cvr Cnt: 21-30% This SP counts the number of copies in the toner dot coverage range 8871 21-30% [0 to 9999999] SM Appendix 2-235 D093/D094...
- Page 758 HDD (while engine is no to operating). Engine no to operating. Includes time while 2 Standby Time controller saves data to HDD. Does not include time spent in Energy Save, Low Power, or Off modes. D093/D094 2-236 SM Appendix...
- Page 759 2 Mail Address Mail address registrations. 3 Fax Destination Fax destination registrations. Group destination [0 to 9999999/ 0 / 1] 4 Group registrations. Fax relay destination 5 Transfer Request registrations for relay TX. 6 F-Code F-Code box registrations. SM Appendix 2-237 D093/D094...
- Page 760 17 Coverage: BW Print Page (%) Total coverage (print jobs only) 101 Transmission Total: Color Jobs sent to document server, 102 Transmission Total: BW scan-to-email. 104 Scanner Transmission: Color Jobs scanned to document server, 105 Scanner Transmission: BW scan-to-email. D093/D094 2-238 SM Appendix...
-
Page 761: Printer Service Mode
002 Bit Switch 2 Settings DFU 003 Bit Switch 3 Settings DFU 004 Bit Switch 4 Settings DFU 005 Bit Switch 5 Settings Show "Collate Type", "Staple Type" and bit 0 "Punch Type" buttons on the operation Disabled Enabled panel. SM Appendix 2-239 D093/D094... - Page 762 HDD (via Job Type settings) to 1000. The default is 100. bit 5 If enabled, the image rotation will be performed according to specifications bit 6 of older models (PCL: Pre-04A Models) for binding pages in mixed orientation jobs. bit 7 D093/D094 2-240 SM Appendix...
- Page 763 1: JOB END is sent by the device to the client after the last copy has finished printing. This causes the page counter to be incremented at the end of each job. bit 5 - 7 SM Appendix 2-241 D093/D094...
- Page 764 Enables and disables the document server. When you select “0”, the document server is enabled or disabled in accordance with Copy Service Mode SP5-967. When you select “1”, the document server is enabled regardless of Copy Service Mode SP5-967. 0: Linked, 1: On D093/D094 2-242 SM Appendix...
-
Page 765: Scanner Service Mode
[0 to 1 / 0 / 1] 0: ON (enabled- 1: OFF (disabled) Org Count Display This SP codes switches the original count display on/off. 1011 [0 to 1 / 0 / 1] 0: OFF (no display) 1: ON (count displays) SM Appendix 2-243 D093/D094... - Page 766 3 Comp3: 5-95 [5 to 95 / 30 / 1 /step ] 4 Comp4: 5-95 [5 to 95 / 60 / 1 /step ] 5 Comp5: 5-95 [5 to 95 / 20 / 1 /step ] D093/D094 2-244 SM Appendix...
- Page 767 Printer, Scanner SP Tables SM Appendix 2-245 D093/D094...
- Page 769 APPENDIX: UP MODE R E V I S I O N H I S T O RY P a ge D a t e A d de d /U pd at e d /N ew None...
-
Page 771: User Tools
Copy Count Display Function Priority Print Priority Function Reset Timer Key Repeat System Status/ Job List / Display Time Interleave Print Feed Start Method Original Feed Delay 1 Original Feed Delay 2 Next] Fine Ratio Adjustment: Copier SM Appendix D093/D094... - Page 772 Tray Paper Size: Tray 1 Tray Paper Size: Tray 2 Tray Paper Size: Tray 3 Next] Paper Type: Bypass Paper Type: Tray 1 Paper Type: Tray 2 Paper Type: Tray 3 Paper Thickness: Paper Tray Paper Thickness: Paper Bypass Paper Volume D093/D094 SM Appendix...
- Page 773 Set Date Set Time Auto Logout Timer Interface Settings Tab Machine IPv4 Address IPv4 Gateway Address Machine IPV6 Address IPv6 Gateway Address DNS Configuration DDNS Configuration IPsec Domain Name WINS Configuration Effective Protocol NCP Delivery Protocol Next] SM Appendix D093/D094...
- Page 774 Machine Name IEEE 802.1X Authentication for Ethernet Restore IEEE 802.1X Authentication to Defaults File Transfer Tab Delivery Option SMTP Server SMTP Authentication POP before SMTP Reception Protocol POP3/IMAP4 Settings Administrator's E-mail Address E-mail Communication Port E-mail Reception Interval D093/D094 SM Appendix...
- Page 775 Address Book: Switch Title Back Up/Restore Address Book Display/Print Counter Display/Print Counter per User Next] User Authentication Management Administrator Authentication Management Program/Change Administrator Key Counter Management External Charge Unit Management Enhanced External Charge Unit Management Extended Security SM Appendix D093/D094...
- Page 776 Delete All Files in Document Server Next] Program Change/Delete/LDAP Server LDAP Search Firmware Version Network Security Level Transfer Log Setting Fixed USB Port Program/Change/Delete Realm Copier/Document Server Features General Features Tab Auto Image Density Priority Original Photo Type Priority D093/D094 SM Appendix...
- Page 777 User Reduce/Enlarge Ratio Reproduction Ratio Reduce/Enlarge Ratio Priority User Auto Reduce / Enlarge: A0 User Auto Reduce / Enlarge: A1 User Auto Reduce / Enlarge: A2 User Auto Reduce / Enlarge: A3 User Auto Reduce / Enlarge: A4 SM Appendix D093/D094...
- Page 778 User Auto Reduce / Enlarge: B4 JIS Edit Tab Adjust Position Erase Border Width Erase Original Shadow in Combine Image Repeat Separation Line Double Copies Separation Line Separation Line in Combine Copy Order in Combine Program/Delete Format Margin Adjustment Priority Partial Copy Size D093/D094 SM Appendix...
- Page 779 User Tools Stamp Tab Background Numbering Preset Stamp User Stamp Date Stamp Page Numbering Rotate Sort: Auto Paper Continue Menu Protect Espanol (or other language) Switches the language selection Enquiry Counter Total Counter [1] Meters SM Appendix D093/D094...
Need help?
Do you have a question about the D093 and is the answer not in the manual?
Questions and answers