Sign In
Upload
Download
Table of Contents
Contents
Add to my manuals
Delete from my manuals
Share
URL of this page:
HTML Link:
Bookmark this page
Add
Manual will be automatically added to "My Manuals"
Print this page
×
Bookmark added
×
Added to my manuals
Manuals
Brands
KERN Manuals
Scales
FES 17K-4
Operating instructions manual
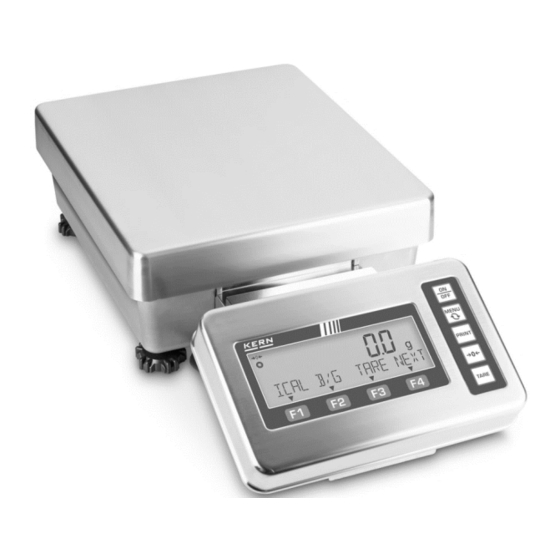
KERN FES 17K-4 Operating Instructions Manual
Precision balance
Hide thumbs
1
Table Of Contents
2
3
4
5
6
7
8
9
10
11
12
13
14
15
16
17
18
19
20
21
22
23
24
25
26
27
28
29
30
31
32
33
34
35
36
37
38
39
40
41
42
43
44
45
46
47
48
49
50
51
52
53
54
55
56
57
58
59
60
61
62
63
64
65
66
67
68
69
70
71
72
73
74
75
76
77
78
79
80
81
82
83
84
85
86
87
88
89
90
91
92
93
94
95
96
97
98
99
100
101
102
page
of
102
Go
/
102
Contents
Table of Contents
Troubleshooting
Bookmarks
Table of Contents
Table of Contents
Technical Data
Declaration of Conformity
Appliance Overview
Components
Keyboard
Display
Explanation of the Display Text
Basic Information (General)
Proper Use
Improper Use
Warranty
Monitoring of Test Resources
Basic Safety Precautions
Pay Attention to the Instructions in the Operation Manual
Personnel Training
Transport and Storage
Testing Upon Acceptance
Packaging / Return Transport
Unpacking, Installation and Commissioning
Installation Site, Location of Use
Unpacking, Scope of Delivery
Placing
Mounting the Weighing Platform with Terminal
Mounting the Weighing Platform Without Terminal
Levelling
Mains Connection
Turning on the Power
Initial Commissioning
Connection of Peripheral Devices
Menu
Menu Overview
Navigation in the Menu
Basic Operation
Turn On/Off
Zeroing
Taring
Deleting the Tare Value
Setting the Weighing Unit
Supported Weighing Units
Selection of a Weighing Application
Simple Weighing
Changing the Display and Function Keys
Numeric Entry
Piece Counting
Select the Piece Counting Function
Actual Value Setting Method: Weighing the Reference Sample Quantity
Numerical Input of the Piece Weight
Other Functions
Percent Weighing
Selecting the Percent Weighing Function
Other Functions
Coefficient Multiplication
Selecting the Coefficient Multiplication Function
Apply Coefficient Multiplication
Other Functions
Weighing with Tolerance Range
Selection of Weighing Function with Tolerance Range
Set Discrimination Condition
Setting the Discrimination Range
Set Discrimination Method
Set Acoustic Signal
Set Relay Output Control
Setting the Tolerance Values
Totalizing
Select the Totalizing Function
Set Totalizing Method
Using the Totalizing Function
TOTAL-Adding
NET-Adding
Display or Clear the Total Sum
Pre-Tare
Storing PRE-TARE Values
Activate and Deactivate Stored PRE-TARE Values
Exit PRE-TARE Mode
Settings for Operation and Operating Behavior
Setting the Short Commands for Weighing Applications
Assigning the Function Keys
Stabilisation Waiting Time
Bar Graph Display
Acoustic Signal
Background Lighting
Stability Settings
Reaction Settings
Zero-Tracking
Simple SCS (Self Counting System)
Enabling / Disabling Simple SCS
Using Simple SCS
Multi-Range Mode
Automatic Switch-Off Function
User Administration and Access Rights
User Administration
Activate / Deactivate Password Control
Assign Passwords
Logging a User on to the Scale
Managing Access Rights
Lock Keys
Lock Menu
Unlock All Access Locks
Set Short Commands and Functions for Users
System Settings
Call System Settings
Balance Identification Number
Date Display Format
Date and Time
Output Language
Readability
Adjustment with Internal Weight at Power-Up
Activate Internal Adjustment at Power-Up
Perform Internal Adjustment
Output of the Adjustment Test Result
Automatic Power on When Connected to Mains
Restore Last Tare Value
Restore Factory Settings
Adjustment
Adjustment with External Weight
Performing the External Adjustment
Adjustment Test with External Weight
Adjustment with Internal Weight
Performing the Internal Adjustment
Adjustment Test with Internal Weight
Setting the Adjustment Reminder
Position of the Adjustment Switches and Seal Marks
Verification
Interfaces
RS-232C Interface for Data Input and Output
Technical Data
Interface Cable
RS232C Interface for Data Output
Data Output Formats (CSP)
Data Composition
Data Description
Data Output Formats (CBM)
Data Composition
Data Description
Data Input
Input Format 1
Input Format 2
Response Formats
A00/Exx Format
ACK/NAK Format
Communication Settings
Activate / Deactivate the RS232-C Interface
Adjust Communication Settings
Servicing, Maintenance, Disposal
Cleaning
Servicing, Maintenance
Disposal
Instant Help for Troubleshooting
Error Messages
Advertisement
Quick Links
Download this manual
Operating instructions
Precision balance
KERN FES / FEJ
Version 1.0
2022-06
GB
KERN & Sohn GmbH
Ziegelei 1
D-72336 Balingen
E-Mail: info@kern-sohn.com
Phone: +49-[0]7433- 9933-0
Fax: +49-[0]7433-9933-149
Internet: www.kern-sohn.com
TFES_TFEJ-BA-e-2210
Table of
Contents
Previous
Page
Next
Page
1
2
3
4
5
Advertisement
Table of Contents
Need help?
Do you have a question about the FES 17K-4 and is the answer not in the manual?
Ask a question
Questions and answers
Related Manuals for KERN FES 17K-4
Scales KERN FES 33K0.1 IPM Operating Instruction
Fes series; fej series industrial scale (89 pages)
Scales KERN FEJ-A06 Installation Information
Loop for underfloor weighing (6 pages)
Scales KERN FEJ-A05 Assembly Instructions Manual
(21 pages)
Scales KERN FES 33K-4 Operating Instructions Manual
Precision balance (102 pages)
Scales KERN FEJ 17K-4M Operating Instructions Manual
Precision balance (102 pages)
Scales KERN FEJ 33K-4M Operating Instructions Manual
Precision balance (102 pages)
Scales KERN 572 Operating Instructions Manual
Precision/ compact balances and platform scales (42 pages)
Scales KERN FCB Operating Manual
Compact balance (37 pages)
Scales KERN FKB 6K0.02 Operating Manual
Table scales (43 pages)
Scales KERN FOB-N series Operating Manual
Compact balance (27 pages)
Scales KERN FFN-N Operating Instruction
(336 pages)
Scales KERN FKA Operating Instructions Manual
Inventory balance (47 pages)
Scales KERN FOB 1K1M Operating Instructions Manual
(22 pages)
Scales KERN FOB 1K-4 Operating Manual
Stainless steel table scales (46 pages)
Scales KERN FIS 30K10 IPM Operating Instructions Manual
Electronic precision balance (56 pages)
Scales KERN FKB A Series Operating Manual
(37 pages)
This manual is also suitable for:
Fes 33k-4
Fes 62k-4d
Fej 17k-4m
Fej 33k-4m
Fej 62k-4dm
Tfes 17k-4-a
...
Show all
Tfes 33k-4-a
Tfes 62k-4d-a
Tfej 17k-4m-a
Tfej 33k-4m-a
Tfej 62k-4dm-a
Table of Contents
Print
Rename the bookmark
Delete bookmark?
Delete from my manuals?
Login
Sign In
OR
Sign in with Facebook
Sign in with Google
Upload manual
Upload from disk
Upload from URL


Need help?
Do you have a question about the FES 17K-4 and is the answer not in the manual?
Questions and answers