
Related Manuals for Micromeritics DVVA II 4000


Summary of Contents for Micromeritics DVVA II 4000
- Page 1 ® DVVA II 4000 Dynamic Void Volume Analyzer Operator’s Manual Rev B 400-42803-01 July 2017...
- Page 2 Windows is a registered trademark of Microsoft Corporation. © Micromeritics Instrument Corporation 2013-2017. All rights reserved. Printed in the U.S.A. The software described in this manual is furnished under a license agreement and may be used or copied only in...
- Page 3 MICROMERITICS shall not be liable for consequential or other type damages resulting from the use of any of its products other than the liability stated above. This warranty is in lieu of all other warranties, express or implied, including, but not limited to, the implied warranties of merchantability or fitness for use.
-
Page 5: Table Of Contents
DV VA II 4000 Table of Contents TABLE OF CONTENTS 1. GENERAL INFORMATION Organization of the Manual ............1-1 Conventions . - Page 6 Table of Contents DV VA II 4000 Generating Graph Overlays ............3-27 Multiple-Samples Overlay .
- Page 7 DV VA II 4000 Table of Contents Description ..............6-1 Sample Analysis.
- Page 8 Table of Contents DV VA II 4000 User Models ..............8-14 Units .
- Page 9 DV VA II 4000 Table of Contents General Terms ............. B-3 Kawakita.
- Page 10 Table of Contents DV VA II 4000 400-42803-01 (Rev B) - July 2017...
-
Page 11: General Information
DVVA II 4000 Organization of the Manual 1. GENERAL INFORMATION Organization of the Manual This manual describes how to operate and maintain the DVVA II 4000 void volume analyzer; it is organized as follows: Chapter 1 GENERAL INFORMATION Provides a general description and specifications of the DVVA II analyzer. -
Page 12: Conventions
Organization of the Manual DVVA II 4000 Chapter 10 ORDERING INFORMATION Provides part numbers and ordering information for system components. Appendix A ERROR MESSAGES Lists the error messages that may be displayed by the software; includes cause(s) and action(s) for each. -
Page 13: Equipment Description
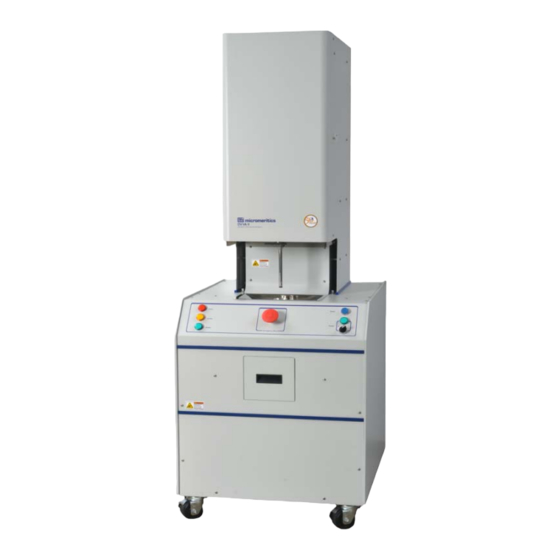
DVVA II 4000 Equipment Description Equipment Description The DVVA (Dynamic Void Volume Analyzer) II 4000 has been designed specifically for the car- bon black industry. The DVVA II enables you to determine the occluded pore volume within the primary structure of carbon black using a compression-type method as opposed to the more lengthy oil-absorption methods. -
Page 14: Specifications
Safety interlocks are provided to prevent the analyzer from operating until the safety shield is lowered over the sample area. The safety shield and interlock system prevent personal exposure to moving parts on the analyzer. Specifications The DVVA II 4000 has been tested to meet the specifications listed below. Characteristic Specification Performance... - Page 15 DVVA II 4000 Specifications Characteristic Specification Electrical Voltage: 100/120/230 VAC Power: 1350 VA or less Frequency: 50 to 60 Hz Computer Minimum requirements: Pentium P3 500 MHz or equivalent One CD ROM drive USB (2.0) connector 128 megabytes of RAM...
-
Page 17: User Interface
DVVA II 4000 Controls, Indicators, and Connectors 2. USER INTERFACE This chapter contains information to familiarize you with the hardware and software of the DVVA II analyzer. It is recommended that you read this chapter before attempting to operate the analyzer. - Page 18 Controls, Indicators, and Connectors DVVA II 4000 Enables you to reset the analyzer to a ready state; this button must Reset be pressed every time you close the shield and begin an operation. Turns the analyzer on and off; the power indicator illuminates Power switch and when power is on.
-
Page 19: Rear Panel
DVVA II 4000 Controls, Indicators, and Connectors Rear Panel USB port Master power switch Voltage selection Circuit breakers Power connector Test points For connecting the communications cable to the computer USB port Enables you to select the correct operating voltage... -
Page 20: Sample Compartment
Controls, Indicators, and Connectors DVVA II 4000 Sample Compartment Safety shield Upper piston Sample chamber The sample compartment contains the sample chamber and the piston, and is enclosed with a safety shield. This shield slides up to open and down to close. This shield must Safety shield be in a fully closed position before the analyzer will operate. -
Page 21: Safety Warning
DVVA II 4000 Turning the System On and Off Safety Warning This warning label is affixed in various locations on the DVVA II analyzer. Safety interlocks are in place to prevent the pistons from operating when the safety shield is not completely lowered or when the tray drawer on the front of the analyzer is not fully closed. -
Page 22: Turning Off
You can also use shortcut keys to access a menu or any function that contains an underlined letter by pressing plus the underlined letter in the command. For example, to access the File menu, press , then Table 2-1 lists the shortcut keys available for operating the DVVA II 4000 program. 400-42803-01 (Rev B) - July 2017... - Page 23 DVVA II 4000 Software Table 2-1. Shortcut Keys Key(s) Function Access operator’s manual Open a sample information file (main menu bar) Clear the field of existing date (Select Dates dialog) Open an analysis conditions file (main menu bar) Insert the current date (Select Dates dialog)
-
Page 24: Dialog Boxes And Subdialog Boxes
Software DVVA II 4000 Dialog Boxes and Subdialog Boxes Dialog boxes are displayed when an item followed by an ellipsis (...) is selected. Subdialog boxes are displayed when a push button on a dialog box is selected. Dialog box Subdialog box... - Page 25 DVVA II 4000 Software Radio buttons allow you to choose one option from a group of Radio button two or more. Some radio buttons enable data entry fields in which values are to be entered. Check boxes also are used to select options; you may select as Check Boxes many items as you wish.
-
Page 26: Selecting Files
Software DVVA II 4000 Selecting Files Certain dialog boxes contain a Files list window which displays a list of files available for the current operation. One example is the Open Sample Information dialog: The Status drop- down list does not... - Page 27 DVVA II 4000 Software Select the Show Date Range radio button to enable the From and To fields so that you may enter a range of dates in which to display files. Alternatively, you can double-click in each field to display a calendar from which to choose a date. The range you specify remains the default until you change the dates or select Show All Dates.
-
Page 28: Selecting Reports
Software DVVA II 4000 • Navigate to a different directory. The current directory is displayed just above the Directories list box. You can change directories by double-clicking a directory in the Directories list box, double-clicking [...] to move up one level, or by entering the desired directory in the File Name field. -
Page 29: File Name Conventions
DVVA II 4000 Software File Name Conventions The following table shows the file name extensions for the DVVA II program. Table 2-3. Default File Name Extensions File Type Extension Sample Information Analysis Conditions Report Options Export (text file) Export (spreadsheet) -
Page 30: Menu Structure
DVVA II 4000 Menu Structure All functions for the DVVA II 4000 program are located on menus which are accessed from the Menu bar. Each menu contains commands, and in some cases a submenu. A submenu is indi- cated when the command is followed by an arrow. -
Page 31: Windows Menu
DVVA II 4000 Software Windows Menu Resizes all open windows and arranges them side by side. Tile Resizes all open windows and arranges them in a stacked fashion. Cascade The active window is positioned on top of the stack. Each window’s title remains visible, making it easy to select other windows. -
Page 33: Operational Procedures
For example; specify defaults for your most commonly analyzed sample material. You can always edit parameters when you create a file. The DVVA II 4000 application automatically generates sample information file names and uses the values you specify as the defaults. - Page 34 Specifying Sample File Defaults DVVA II 4000 1. Select Options > Sample Defaults, the Advanced Sample Defaults dialog is displayed. These labels can be edited. For example, you may wish to use Material in place of Sample. 2. In the Sequence Number field, specify a default string for the sample file number; you can use up to eight characters.
- Page 35 DVVA II 4000 Specifying Sample File Defaults 7. Enter values in the Skeletal Density and Bulk Density fields that are typical of your sample. These values, like all other values, can be edited in the sample file. 8. Select the appropriate material from the Material Properties drop-down list. The Material type is used to determine which carbon property models are used for this particular carbon.
-
Page 36: Basic Format
Specifying Sample File Defaults DVVA II 4000 Basic Format Perform the following steps to define defaults for a sample information file in the Basic format. The defaults you specify in this format also display as the defaults for sample files in the Restricted format. - Page 37 DVVA II 4000 Specifying Sample File Defaults 6. Enter values in the Skeletal Density and Bulk Density fields that are typical of your sample. These values, like all other values, can be edited in the sample file. 7. Select the appropriate material from the Material Properties drop-down list. The Material type is used to determine which carbon property models are used for this particular carbon.
-
Page 38: Creating Sample Information Files
Creating Sample Information Files DVVA II 4000 Creating Sample Information Files A sample information file must be assigned to every sample that is analyzed. When you create a sample file, you can accept the default values or edit them as desired. You can create a sample information file using the Advanced, Basic, or Restricted format. - Page 39 DVVA II 4000 Creating Sample Information Files 6. The Bar Code field enables you to enter bar code information. If bar code information is not used, you can use this field to enter additional information about the sample; for example, you may wish to enter the lot number of your sample.
-
Page 40: Basic And Restricted Formats
Creating Sample Information Files DVVA II 4000 Basic and Restricted Formats Sample information files are created in the Basic and Restricted formats using predefined param- eter files. Refer to Basic, page for a description of the fields associated with creating sample information files using the Basic or Restricted format. -
Page 41: Creating Parameter Files
DVVA II 4000 Creating Parameter Files 7. Enter the mass of the sample; 1.0000 gram, ± 0.05 (determined to nearest 0.0001 gram) is the recommended amount of sample to use. 8. Edit the Skeletal and Bulk densities if needed. 9. Choose the type of sample material you are analyzing. The Material type is used to determine which carbon property models are used for this particular carbon. -
Page 42: Analysis Conditions
Creating Parameter Files DVVA II 4000 Analysis Conditions Refer to Conditions, page for a detailed description of the fields on this dialog. Analysis 5-10 1. Select File > Open > Analysis Conditions; the Open Analysis Conditions File dialog is displayed. -
Page 43: Report Options
DVVA II 4000 Creating Parameter Files Report Options Report options specify the types of reports to be generated from an analysis. They also help you customize details of reports such as axis scale, axis range, and column headings. You can customize report options files to accommodate the requirements of your analyses. For example, you can generate a simple report that lets you determine the basic characteristics of the sample. - Page 44 Creating Parameter Files DVVA II 4000 6. Choose the type of pressure to be interpolated for the user defined tabular reports, the Summary Report, the Pressure Table Report, and the void volume normalization. Applied: the force of the upper piston only.
-
Page 45: Preparing The Sample
DVVA II 4000 Preparing the Sample Preparing the Sample Prepare your sample but do not load it into the sample chamber until prompted. If you plan to: • use blank data from the last analysis, you will be prompted when you click... - Page 46 Preparing the Sample DVVA II 4000 6. When you start the analysis, you will be prompted by the software to load the sample. At that time, remove the pan from the balance and load the sample following the directions given in Performing an Analysis.
-
Page 47: Performing An Analysis
DVVA II 4000 Performing an Analysis Performing an Analysis A blank analysis is always performed prior to the analysis, unless you select the Use Prior Blank option. Do not place the prepared sample into the sample chamber until prompted to do... - Page 48 Performing an Analysis DVVA II 4000 6. Enter the sample weight in the Mass field and verify values for other parameters. 7. Click and choose report output options to generate reports Report After Analysis automatically after the analysis. 8. Click...
- Page 49 DVVA II 4000 Performing an Analysis a. Open the safety shield and pour the prepared sample into the sample chamber; tap the pan to empty as much as possible. Sample Chamber b. Brush out the pan of any remaining sample, then brush around the funnel-shaped sample chamber.
- Page 50 Performing an Analysis DVVA II 4000 11. Click on the Load Sample dialog to begin analysis on the sample; the analyzing view of the Analysis dialog is displayed. 3-18 400-42803-01 (Rev B) - July 2017...
- Page 51 DVVA II 4000 Performing an Analysis 12. When the analysis is finished, the following dialog is displayed: a. Open the tray drawer. b. Remove the lower piston tray, insert the waste tray to collect the sample, and close the drawer, click , then press the Reset button.
- Page 52 Performing an Analysis DVVA II 4000 c. After the sample has ejected, a dialog prompting you to remove the waste tray and replace the lower piston tray is displayed. 3-20 400-42803-01 (Rev B) - July 2017...
- Page 53 DVVA II 4000 Performing an Analysis d. Do as instructed, click , then press the Reset button. Be sure to clean the lower piston tip before inserting back into the drawer. 13. When the analysis is finished, a screen similar to the following is displayed.
-
Page 54: Printing File Contents
Printing File Contents DVVA II 4000 Printing File Contents Print enables you to print the contents of one or more sample or parameter files to the screen, a printer, or a file. The print dialog is common to all file types. - Page 55 DVVA II 4000 Printing File Contents 4. Click , file contents are sent to the selected destination; this example shows an Analysis Conditions file printed to the Screen. : closes the dialog Close : prints the report to the default printer...
-
Page 56: Listing File Statistics
Listing File Statistics DVVA II 4000 Listing File Statistics List enables you to generate a list of the following information on one or more sample or param- eter files: • File name • Date the file was created (or last edited) •... - Page 57 DVVA II 4000 Listing File Statistics 4. Click , a list for the requested file(s) is sent to the selected destination; this example shows a sample file sent to the Screen. This column is empty for parameter files. Refer to Bar, page for an explanation of the buttons on the tool bar.
-
Page 58: Exporting Data
Exporting Data DVVA II 4000 Exporting Data The Export option on the File menu allows you to copy the data in the sample information file and reformat it in ASCII text. The output file consists of data from the corrected data, blank analysis, and sample analysis. -
Page 59: Generating Graph Overlays
DVVA II 4000 Generating Graph Overlays Generating Graph Overlays Use graph overlays when you wish to compare graphically results for multiple samples or multi- ple graphs for one sample. Graph overlays can be implemented in two ways: • Multiple-Sample Overlays Overlay results for up to eight samples on top of a previously selected sample. - Page 60 Generating Graph Overlays DVVA II 4000 4. Choose the type of graph you wish to overlay, then click (this example shows Pressure Edit Applied vs. Time). 5. Click the down arrow to the right of the Overlay field and choose Overlay Samples.
-
Page 61: Multiple-Graphs Overlay
DVVA II 4000 Generating Graph Overlays Multiple-Graphs Overlay This type of overlay enables you to overlay two graphs in the same file. 1. Open the file containing the data you wish to use in the overlay. If your dialog is in the Basic format, click to switch to the Advanced format. - Page 62 Generating Graph Overlays DVVA II 4000 These two graphs will be overlaid. 4. Click the down arrow at the Overlay field and select a graph type from the list. This selection will be overlaid on the graph selected in the Y-Axis field.
-
Page 63: Software And Setup Modification
• create or edit sample and parameter files • generate reports on completed sample files Review the Micromeritics PROGRAM License Agreement for restrictions on the use of another copy of the DVVA II program. Do not attach the USB cable between the computer and the instrument until the software has been installed and the computer restarted. - Page 64 5. Select the check box just below the Destination Folder group box to add an icon to your desktop; this enables quick access to the analysis program. 6. The application icon is added to the Micromeritics folder by default. If you prefer a different folder, enter or select one from the drop-down list.
- Page 65 This dialog may also contain other important notices. After reading the ; for: information contained in this dialog, click Finish A screen containing the Micromeritics logo is displayed for Windows XP operating system a brief period and then closes.
- Page 66 Installing the Software DVVA II 4000 Click the Install this driver software anyway option; the screen containing the Micromeritics logo closes. After a brief period, this dialog is displayed: Click This program installed correctly to close the dialog. 400-42803-01 (Rev B) - July 2017...
- Page 67 DVVA II 4000 Installing the Software 13. The CAN driver Setup Wizard is displayed. 14. Click Next 15. If the CAN driver Setup Wizard indicates that an older version of the software was detected, click on the following dialogs to uninstall the older CAN driver version. Otherwise, skip to step 16.
- Page 68 Installing the Software DVVA II 4000 16. The License Agreement window is displayed. Read the License Agreement for the CAN drivers, select , then click I accept the agreement Next. 400-42803-01 (Rev B) - July 2017...
- Page 69 DVVA II 4000 Installing the Software 17. The Select Destination Location window is displayed. This window enables you to select the folder in which the drivers program will be installed. Click to choose another folder or click to use the default folder.
- Page 70 Installing the Software DVVA II 4000 19. The Select Additional Tasks window is displayed. Select the icons to be created, then click Next. 20. The Ready to Install window is displayed. Click Install 400-42803-01 (Rev B) - July 2017...
- Page 71 DVVA II 4000 Installing the Software 21. The Windows Security window is displayed. Select , then click Always trust software from "IXXAT Automation GmbH" Install 22. The Completing the VCI Setup Wizard window is displayed. 23. Click , then click...
-
Page 72: Using The Setup Program For Other Functions
Using the Setup Program for Other Functions DVVA II 4000 Using the Setup Program for Other Functions After initial installation of the DVVA II 4000 program, the application setup program can be used to: • Upgrade software, page 4-12 • Add an Analyzer, page 4-13 •... - Page 73 DVVA II 4000 Using the Setup Program for Other Functions 6. Select the operation you wish to perform. Procedures for performing each operation are located in subsequent sections. After the requested operation is completed, the setup Welcome screen is again displayed. A confirmation message indicating completion of the operation is shown in the lower section of the dialog.
-
Page 74: Installing Subsequent Software Versions
Using the Setup Program for Other Functions DVVA II 4000 Installing Subsequent Software Versions When you install a software upgrade, existing data files are not overwritten. There are three types of subsequent installations; the software version controlled by the setup program is: •... -
Page 75: Adding An Analyzer
DVVA II 4000 Using the Setup Program for Other Functions Adding an Analyzer This option it not available if a DVVI II 4000 is currently installed on the computer. If however, no analyzer is currently installed on the computer, either from removing the analyzer using the setup program, or if the software was originally installed with 0 instruments, you may use this option to attach an analyzer to the computer. -
Page 76: Moving An Analyzer From One Pc To Another Pc
Using the Setup Program for Other Functions DVVA II 4000 Moving an Analyzer from one PC to another PC You can move your analyzer, along with its status files, from one computer (Source PC) to another computer (Destination PC). This operation does not move sample or parameter files. To move these files, use a file management program such as Explorer or a backup/restore utility. - Page 77 DVVA II 4000 Using the Setup Program for Other Functions 5. In the Step 1 group box, select the analyzer that is to be moved. 6. In the Step 2 group box, choose a location in which the moved files will be stored. If possible, choose a drive that will accommodate removable media or a shared network drive.
- Page 78 Using the Setup Program for Other Functions DVVA II 4000 11. In the Step 1 group box, enter the serial number of the analyzer you are moving to this PC. 12. In the Step 2 group box, click and choose the location of the moved files.
-
Page 79: Removing The Analyzer
DVVA II 4000 Using the Setup Program for Other Functions Removing the Analyzer You can remove the analyzer from the computer as follows. When you remove the analyzer, the status files also are removed; data files are not. 1. Start the Setup program. Refer to... -
Page 80: Reinstalling Calibration Files
Using the Setup Program for Other Functions DVVA II 4000 Reinstalling Calibration Files Calibration files specific to the analyzer are contained on the original program CD; they are not contained on an update CD. It is important that you store your original program CD in a safe location. -
Page 81: Uninstalling The Analysis Program
DVVA II 4000 Using the Setup Program for Other Functions Uninstalling the Analysis Program When you uninstall the DVVA II program, the application removes the analysis program, status files, analyzer setup files, and resulting empty directories. It does not remove data files. Perform the following steps to uninstall the program: 1. - Page 82 Using the Setup Program for Other Functions DVVA II 4000 4. Choose one of the following: • Automatic: click ; the Perform Uninstall dialog is displayed confirming the uninstall Next operation. Click to uninstall the analysis program; the setup Welcome dialog redis- Finish plays.
-
Page 83: File Menu
DVVA II 4000 Description 5. FILE MENU The File menu contains options which allow you to manage sample and parameter files. Description Open an existing sample or parameter file, or create a new one. Page 5-2. Open Save the file in the active window. Page 5-27. -
Page 84: Open
Open DVVA II 4000 Open Open allows you to create a new sample or parameter file, or to open an existing one. When you open a sample or parameter file, a dialog similar to the one shown below is displayed. -
Page 85: Sample Information
DVVA II 4000 Open Lists the files contained in the selected directory of the type Files list chosen in the Status field and within the selected date range. The first column in the list is the file name (number). The second column is the description entered in the file. -
Page 86: Advanced
Open DVVA II 4000 Advanced The Advanced format displays all parts of the sample file in a tabbed dialog, allowing easy access to each parameter. Simply click the desired tab or use the push buttons to Prev Next access the parameter dialogs. Refer to... - Page 87 DVVA II 4000 Open This field enables you to enter bar code information. If bar Bar code code information is not used, you can use this field to enter additional information about the sample; for example, you may wish to enter the lot number of your sample.
- Page 88 Open DVVA II 4000 Enables you to choose the type of sample material you are Material Properties analyzing.The Material type is used to determine which carbon property models are used for this particular carbon. For example, a different equation is used to predict COAN for Tread/Hard carbons than for Carcass/Soft carbons.
-
Page 89: Basic
DVVA II 4000 Open Basic The Basic format displays all parameters in a single, non-tabbed dialog. This format allows you to create a sample information file using previously defined parameter files. You can also switch to the Advanced format to view or edit parameters. - Page 90 Open DVVA II 4000 Contains predefined Report Options files, some of which were Report Options included with the analysis program. If this is a new file, this field contains the one you specified as the default. Click to view or edit file values.
-
Page 91: Restricted Format
DVVA II 4000 Open Restricted Format The Restricted format is used when analysis parameters must remain constant. A password is required to enter and exit this format. Refer to Restricted, page for additional information on the Restricted format. The Restricted format displays in the same manner as the Basic format. Some menu functions, however, are disabled and you cannot switch to the Advanced format to edit file parameters. -
Page 92: Analysis Conditions
Open DVVA II 4000 Analysis Conditions This dialog enables you to specify the analysis conditions for your sample. An analysis condi- tions file can exist as an independent parameter file or as part of the sample information file. Be sure to save this file to the directory you specified as the Parameter Files directory... - Page 93 DVVA II 4000 Open Skips the blank analysis automatically performed before each Use Prior Blank analysis and uses the data from the previous blank analysis. When using this option for your sample analysis, the height of sample material in the sample chamber must be higher than that used in the blank analysis.
-
Page 94: Report Options
Open DVVA II 4000 Report Options This dialog allows you to specify report options for your analysis. A report options file can be created as an independent parameter file or as part of the sample information file. Be sure to save this file to the directory you specified as the Parameter Files directory... - Page 95 DVVA II 4000 Open Select this option to have a graphic display above the report Show graphic title. The graphic can be a bitmap (bmp) or an enhanced metafile (emf). For example, you may wish to display your company logo.
-
Page 96: Summary Report
Open DVVA II 4000 Contains a list of available reports: Selected Reports • Summary Report • Standard Table • Pressure Table • Void Vol. vs Pressure* • Pressure Appl. vs Time* • Height vs Time* • Void Vol. vs Time* •... - Page 97 DVVA II 4000 Open Summary Report The Summary report enables you to generate a condensed report of information on COAN, user- specified Models, density, and void volume at specified pressures. Enables you to select models to appear on the summary COAN report.
- Page 98 Open DVVA II 4000 Calculates the distance from the top of the sample chamber to Top-of-Sample Height sample contact. Reports the void volume at a specified pressure. Void Volume Provides the stored parameters for the blank analysis. Blank Details Reports residual void volume of the sample. Includes the...
- Page 99 DVVA II 4000 Open Enables you to select up to eight columns to appear on Column [n] the report. The drop-down lists contain the following variables: • Time • Apparent Volume • Pressure Applied • Apparent Specific Volume • Pressure Transmitted •...
-
Page 100: Standard Table
Open DVVA II 4000 Standard Table The Standard Table report contains the data points collected during analysis and can display up to 8000 points. You can display up to eight columns on the report. The drop-down lists contain the vari-... -
Page 101: Pressure Table Report
DVVA II 4000 Open Pressure Table Report The Pressure Table report allows you to enter a set of pressures at which to interpolate the col- lected data; the Pressure Table dialog is displayed. Enables you to specify up to 999 pressure points at which to Pressure Table interpolate collected data. -
Page 102: Trend Plots
Open DVVA II 4000 Trend Plots There are seven trend plots listed in the Selected Reports window. These plots can be generated as shown, or they can be customized. The report title is based on the parameters displayed for the x- and y-axes. -
Page 103: Uncorrected Data Report
DVVA II 4000 Open Choose the manner in which data are plotted; as a curve, Plot curve points, or both. Plot points Scales the X- and/or Y-axes automatically. Autoscale x-axis Autoscale y-axis Deselect Autoscale to enter a range in which to scale data. -
Page 104: Compression Reports
Open DVVA II 4000 Compression Reports Compression reports allow you to have your data overlaid with model data. You can choose the optimize options for the equation to have the model data more closely fit the analysis data. Modified Heckel Report... -
Page 105: Kawakita Report
DVVA II 4000 Open Choose the manner in which data are plotted; as a curve, points, Plot curve or both. Plot points Scales the X- and/or Y-axes automatically. Autoscale x-axis Autoscale y-axis Deselect Autoscale to enter a range in which to scale data. -
Page 106: Bauer Report
Open DVVA II 4000 Bauer Report Bauer proposed that the maximum void ratio, the minimum void ratio, and the critical void ratio are pressure-dependent. Plotting the void volume, porosity, and/or apparent density using the Bauer model provides a good fit for carbon black curves. -
Page 107: Wu Report
DVVA II 4000 Open Wu Report The Wu equation was developed to describe the pressure and density dependency of soil. For granular soils, the stress response to a strain input depends explicitly of density, and the tangen- tial stiffness depends on pressure in a way which is weaker than linear. -
Page 108: Cooper-Eaton Report
Open DVVA II 4000 Cooper-Eaton Report The Cooper-Eaton equation is based on the assumption that compression of powder is a process that takes place in two stages, where stage 1 is filling voids, and stage 2 is fragmentation and deformation of the particles. -
Page 109: Save
DVVA II 4000 Save Save Saves any changes you have made to the file in the active window. The file is saved under its cur- rent name. Save As Enables you to: • save a sample or parameter file in the active window under a different name. This option is useful for making a duplicate copy of a file that you can modify as desired without changing the original one. -
Page 110: Print
Print DVVA II 4000 Print Enables you to print the contents of a sample or parameter file. You can choose multiple files by holding down the key while making your selections. Regardless of which file type you Ctrl select, a dialog similar to the one shown below is displayed. - Page 111 DVVA II 4000 Print This example shows an Analysis Conditions file printed to the Screen. Header Closes the dialog Close Prints the report to the default printer Print Toggles the header on and off Header Enabled when the report contains multiple pages allowing you to...
-
Page 112: List
List DVVA II 4000 List Generates the following information on a selected sample or parameter file. You can choose mul- tiple files by holding down the key while making your selections. Ctrl • File name • Date the file was created (or last edited) •... - Page 113 DVVA II 4000 List Enables you to choose output options. Select the down-arrow Settings to the right of the Destination field to choose the destination: • Printer: enables the Copies field allowing you to print up to four copies to a printer.
-
Page 114: Export
Export DVVA II 4000 Export Copies the data in a sample information file and exports it in a text (*.TXT) or spreadsheet (*.XLS) format. The output file consists of data from the corrected data, blank analysis, and sample analysis. • Corrected data has four columns: Corrected Height, Corrected Applied Pressure, Corrected Transmitted Pressure, and Corrected Void Volume. -
Page 115: Exit
DVVA II 4000 Exit Enabled when you choose Printer as the destination, Copies allowing you to print up to four copies to a printer. Contains a list of output destinations; you can print to a Destination Printer, to the Screen, or to a File. -
Page 117: Unit Menu
DVVA II 4000 Description 6. UNIT MENU The Unit menu contains descriptions of the operations that are performed using the DVVA II analyzer. The Unit menu does not appear on the menu bar if the analysis program is being used for offline data manipulation. - Page 118 Description DVVA II 4000 Operate the upper and lower pistons manually. Page 6-8. Enable Manual Control Display the instrument schematic. Page 6-12. Show Instrument Schematic Display the status portion of the operational window, enabling Show Status you to view the status of the operation in progress. Page 6-13.
-
Page 119: Sample Analysis
DVVA II 4000 Sample Analysis Sample Analysis Use this command to perform an analysis. A blank analysis is part of the analysis procedure and is performed before you add the sample material for analysis. The measured force includes changes in friction caused by the sample type A blank analysis is performed to correct for this friction. - Page 120 Sample Analysis DVVA II 4000 Allows you to select a different sample file for your analysis, or Browse to create a new one. Displays the identification of the sample file. Sample Defaults to the type of material you selected on the sample Material Properties information dialog;...
- Page 121 DVVA II 4000 Sample Analysis Displays the reports selected for the current Report Options file; Selected Reports you can edit the selections if you wish. You cannot edit details of the reports. Generates a report automatically after the analysis; displays the...
- Page 122 Sample Analysis DVVA II 4000 Enables you to cancel the analysis; a query dialog is displayed. Cancel Click to cancel the analysis or to continue the analysis. Returns you to the Results window of the last analysis Prev performed. Begins the blank analysis. After completion of the blank analy- Start sis, a dialog prompting you to load the sample is displayed.
-
Page 123: Reference Run
DVVA II 4000 Reference Run Reference Run Use this command to perform analyses on SRB series reference materials. These reference runs should be performed: • on a regular basis to compensate for wear on the piston tip. Perform two reference runs on each reference material monthly;... -
Page 124: Return Upper Piston Home
Return Upper Piston Home DVVA II 4000 Displays the sample file number; numbers are assigned auto- File matically to reference runs. Displays the description assigned to the reference run. By Sample default, this is the SRB series reference material name that was selected in the Reference Name drop-down list for this reference run;... -
Page 125: Clean System
DVVA II 4000 Clean System Clean System Cleans residual sample from the inner walls of the sample chamber; the Clean System dialog is displayed. 1. Wipe off the upper piston tip. 2. Remove the sample tray and insert the waste tray. -
Page 126: Enable Manual Control
Enable Manual Control DVVA II 4000 Enable Manual Control Select this option to manually control the pistons. If the instrument schematic is not displayed, select Unit > Show Instrument Schematic. Manual Control is disabled when an automatic operation is in progress. - Page 127 DVVA II 4000 Enable Manual Control Components on the instrument schematic are: Enable you to move the pistons up and down. The piston’s posi- tion is indicated on the schematic as you press and hold down the arrow with the left mouse button.
-
Page 128: Show Instrument Schematic
Show Instrument Schematic DVVA II 4000 These readings display to the right of the sample chamber. A. The applied force and pressure at which the upper piston presses against the lower piston. B. The transmitted force and pressure received by the lower piston. -
Page 129: Show Status
DVVA II 4000 Show Status Show Status Select this option to show only the status portion of the operational window. Displays the identification of the current sample file. Sample ID Displays the name of the current sample file. Sample File... -
Page 130: Show Instrument Log
Show Instrument Log DVVA II 4000 Show Instrument Log Select this option to display a log of recent analyses, calibrations, and errors or messages. This information is recorded automatically by the software. By default, information for analyses and messages are retained 60 days, and calibration information for 90 days. You may change the time for which this information is retained in the [Unit 1] section of the WIN4000.INI file. - Page 131 DVVA II 4000 Show Instrument Log Use this field to specify a date at which to begin listing entries. Start Date Be sure the cursor is in the Start Date field and use one of the following methods to specify a date: •...
-
Page 132: Unit Configuration
Enables you to reset the Tip run-count fields to zero Reset after the piston tip is replaced. Shows the date and time for current instrument Calibration calibrations. Diagnostics This command is used by Micromeritics service personnel. 6-16 400-42803-01 (Rev B) - July 2017... -
Page 133: Calibration
Calibration Calibration The DVVA II 4000 is calibrated before it leaves the factory; calibration values and dates are dis- played on the Unit Configuration dialog (accessed from the Unit menu). All but one calibration listed on this drop-down menu can be enabled and performed only with... -
Page 134: Upper Zero Force
Calibration DVVA II 4000 Upper Zero Force Zeroes the force of the upper piston. Be sure the upper piston is raised to its uppermost position before beginning. Zero Height Zeroes the piston height. Lower Force Scale Scales the lower load cell reading. -
Page 135: Normalization
DVVA II 4000 Normalization Normalization This option enables you to view detailed reference run data. The current reference sample analy- ses are compared to the original “master” reference analysis averages to determine by how much the current analysis has shifted from that average. The normalization routine calculates a set of polynomials to correct for that difference. -
Page 137: Reports Menu
DVVA II 4000 Description 7. REPORTS MENU The commands on the Reports menu enable you to: • start, close, and open reports • specify SPC report options • generate SPC reports This chapter also provides information on the tools available for customizing and manipulating... -
Page 138: Start Report
Start Report DVVA II 4000 Start Report Select this option to generate a report on a sample analysis; the Start Report dialog is displayed. Displays the name of the sample file you select from the Files File name list window. If you have a sample file open, its name defaults to this field. - Page 139 DVVA II 4000 Start Report This drop-down list determines the type of sample files that Status display in the Files list window, and within the date range. Refer to Description, page Table 2-2. File Status and 2-11 for a definition of the status types.
-
Page 140: Close Reports
Close Reports DVVA II 4000 Close Reports This option enables you to close all open report windows at one time. This avoids having to select on each report window. This option is unavailable if reports are being generated. Close Open Report This option enables you to open a report that was saved from the Report window;... -
Page 141: Spc Report Options
DVVA II 4000 SPC Report Options SPC Report Options The SPC Report Options dialog lists the variables available for SPC reporting. You can check as many as you wish; however, for efficiency, it is best to select only the variables you actually intend to use. -
Page 142: Regression Report
Regression Report DVVA II 4000 Regression Report The regression report is used to determine the interdependency between two variables. Up to three dependent variables (Y-axis) may be plotted against a single independent variable (X- axis). The degree of correlation between the variables also is reported. - Page 143 DVVA II 4000 Regression Report Specify the beginning and ending values for the X- and Y-axis Axis Range ranges. Data collected outside these ranges are not included in the plot. These fields are disabled if you choose Autoscale. Scales the X- and/or Y-axis automatically.
- Page 144 Regression Report DVVA II 4000 Determines the type of sample files that display in the Status Available Files pane in the selected directory for all dates, or within the specified range of dates. Refer to Table 2-2. File Description, page...
-
Page 145: Control Chart
DVVA II 4000 Control Chart Control Chart This option enables you to generate a control chart report which plots the changes in a statistic. Select this option to include a title on your report. You can Show report title enter up to 40 alphanumeric characters. - Page 146 Control Chart DVVA II 4000 Date places the files on the graph at points representing the X-axis Order By (continued) actual date/time the files are analyzed. Minutes places the files on the graph at points representing the minutes that have elapsed from the first file placed on the list, which is the earliest-analyzed file.
- Page 147 DVVA II 4000 Control Chart Displays the options available for limiting lines. You can have Limit Lines the lines placed at some multiple of the standard deviation or at specified positions (Entered). When you select Entered, the High limit and Low limit fields are enabled, allowing you to enter appropriate values.
- Page 148 Control Chart DVVA II 4000 Saves the current definition of the report as the default. Save as Default The options in this group box enable you to choose output Report Settings criteria. The Copies field is enabled when you choose Printer as the destination, enabling you to print up to four copies of the report.
-
Page 149: Printed Reports
DVVA II 4000 Printed Reports Printed Reports Header All reports contain a header displaying file statistics, such as sample information, instrument serial number, date and time of analysis, analysis conditions, and so forth. Headers also contain notes of any changes to the sample file that occur after analysis. -
Page 150: Onscreen Reports
Printed Reports DVVA II 4000 Onscreen Reports The report window containing onscreen reports provides many options for customizing and manipulating reports: • a tool bar, page 7-15 • shortcut menus, page 7-18 • zoom feature, page 7-22 • axis cross hairs, page 7-23 Reports printed to the screen are displayed in a window like the one shown below. -
Page 151: Tool Bar
DVVA II 4000 Printed Reports Tool Bar Contains a list of all requested reports. Reports Shows the selected report in the report window. If the report has Show been hidden, it and its associated tab will become visible. Deletes the selected report. The deleted report(s) will have to be Delete regenerated if deleted in error. - Page 152 Printed Reports DVVA II 4000 For convenience in selecting the reports to print, push buttons are provided beneath the report window. Or, you can make your selection by clicking on the desired reports. prints the report displayed in the report window.
- Page 153 DVVA II 4000 Printed Reports Saves all or specified reports from the currently open file. The Save As push buttons displayed on this dialog perform in the same manner as the print dialog (explained above). Reports can be saved in three different formats: Report system (*.rep): Saved in a format which allows you to...
-
Page 154: Shortcut Menus
Printed Reports DVVA II 4000 Saves the changes as the defaults. If you do not click , the Save Save changes apply to the current report set only. The next reports revert to the defaults. Closes the Default Style dialog and applies the changes. If you... -
Page 155: Graphs
DVVA II 4000 Printed Reports Displays a list of all columns that are not hidden, enabling you Hide column to select the one you wish to hide. Displays a list of hidden columns, enabling you to have them Show column shown again. - Page 156 Printed Reports DVVA II 4000 Allows you to edit curve properties. Edit curve Displays the title of the curve you are editing. Title Drop-down list containing styles in which collected data can be Style displayed. Choices: Curve, Histogram, Points, Curve and Points...
- Page 157 DVVA II 4000 Printed Reports Displays the Axis Properties dialog, allowing you to edit axis Edit axis properties. Displays the Legend Properties dialog, allowing you to edit the Edit legend placement of the legend. Select this option to remove the legend.
-
Page 158: Zoom Feature
Printed Reports DVVA II 4000 Zoom Feature A zoom feature is included with the report system so that you can zoom in to examine fine details. To use this feature, hold down the left mouse button and drag the mouse cursor (drawing a box) across the area you wish to view;... -
Page 159: Axis Cross Hair
DVVA II 4000 Printed Reports Axis Cross Hair A cross-hair function is available so that you can view axis coordinates. To use this feature, sim- ply left-click in the desired area of the graph. Height vs Time Height vs Time Apparent Dens. -
Page 161: Options Menu
DVVA II 4000 Description 8. OPTIONS MENU The Options menu contains commands that allow you to configure the system to your labora- tory’s requirements, and to access service tests. With the options on this menu, you can: • Choose between basic, advanced, or restricted mode •... - Page 162 Basic and Restricted formats. Page 8-19. Enables you to perform certain troubleshooting procedures. Service Test Mode This option is available only under the direction of a Micromeritics service representative. Page 8-19. 400-42803-01 (Rev B) - July 2017...
-
Page 163: Option Presentation
DVVA II 4000 Option Presentation Option Presentation The sample information dialogs for the DVVA II program can be presented in an Advanced, Basic, or Restricted format. Advanced The Advanced format presents all parts of the sample information file in a tabbed dialog. Click the tab (or use to access the parameters. -
Page 164: Basic
Option Presentation DVVA II 4000 Basic The Basic format presents the sample information file and its parameter files in a single dialog. This format is used to create sample information files using previously defined parameter files. You can easily switch to the Advanced format by clicking . -
Page 165: Restricted
DVVA II 4000 Option Presentation Restricted The Restricted format is identical to the Basic format, except that certain menu options are dis- abled, and you cannot switch to the Advanced format. Does not contain an Advanced push button allow- ing access to all parameters of the file. -
Page 166: Sample Defaults
Sample Defaults DVVA II 4000 Sample Defaults This option allows you to specify default parameters for sample information files. You can spec- ify defaults using the Advanced or Basic formats only. The defaults specified for the Basic format are used for the Restricted format. - Page 167 DVVA II 4000 Sample Defaults Specify a default sequence for the sample file name. The Sequence number you specify is sequenced incrementally each time you create a sample file and is the one that appears in the File name field when you select File > Open > Sample Information.
- Page 168 Sample Defaults DVVA II 4000 Enter the name (or other identification) of the operator Operator performing the analysis and the name of the person, department, Submitter customer, etc. that submitted the sample for analysis. The fields on the left can be edited to display something other than Operator and Submitter if desired.
- Page 169 DVVA II 4000 Sample Defaults Enter the bulk density of your most commonly analyzed Bulk Density sample. The fields in this group box can be used for SPC (Statistical User Parameters Process Control) reporting. They are used to specify character- istics of the sample or its manufacturing process, as well as to enter constants to be included in User Model formulae.
-
Page 170: Basic
Sample Defaults DVVA II 4000 Replace the contents of all parameters in the current default Replace All sample file with those from an existing sample file. For example, you may have an existing sample file that contains the parameters that you wish to use for defaults. - Page 171 DVVA II 4000 Sample Defaults Specify a default sequence for the sample file name. The Sequence number you specify is sequenced incrementally each time you create a sample fileand is the one that appears in the File name field when you select File > Open > Sample Information.
- Page 172 Sample Defaults DVVA II 4000 Each parameter has a drop-down list containing predefined Analysis Conditions parameter files (some were included with the software). Choose Report Options the file you wish to use as the default. Enter a default value for the sample mass; 1.0000 gram, ± 0.05 Mass (determined to nearest 0.0001 gram) is the recommended...
-
Page 173: Reference Table
DVVA II 4000 Reference Table Reference Table This table lists the void volume range for SRB (Standard Reference Black) reference materials for the carbon industry. Contains the SRB reference number or name. Reference Name Indicates the type of reference material; Tread/Hard or Class Carcass/Soft. -
Page 174: User Models
User Models DVVA II 4000 User Models Enables you to enter calculated parameters, such as alternate COAN, from void volume curves based on your own experimentation. The calculation results will appear on the Summary Report when selected. Displays the type of material. - Page 175 DVVA II 4000 User Models Enter a name for the model. Name Enter a formula for the model. The formula can contain any of the Formula following: +, -, /, *, ^, parentheses are allowed, numeric constants. Math functions: exp (natural exponential, not base 10) log (natural log, not base 10) Note the capitalization in the following variables.
- Page 176 User Models DVVA II 4000 Collected constants: Formula Mass (g) Piston Area (cm TopOfSample (cm) BulkDensity ResidV (cm , residual void volume) ResidH (cm, residual top-of-sample) WorkPressureSlope (Newton-m/g/MPA, applied pressure) WorkPressureSlopeA (Newton-m/g/MPA, applied pressure) WorkPressureSlopeM (Newton-m/g/MPA, geometric mean pressure) User Parameters* *The user parameters on the Sample Information dialog (refer to Parameters, page 5-5) can be used in the formula as well.
-
Page 177: Units
DVVA II 4000 Units Displays the Select User Model File dialog, allowing you to load a Load from File model file saved in text (.txt) format. Save the selected model to a text file. Refer to the dialog shown Save to File above. -
Page 178: Graph Grid Lines
Graph Grid Lines DVVA II 4000 Graph Grid Lines Choose the type(s) of grid lines to show on your reports; the Graph Grid Lines dialog is displayed. Choose Major and/or Minor lines to display in printed X-Axis reports for the Logarithmic and Linear scales. -
Page 179: Parameter Files Directory
Service Test Mode Calibration procedures are included in the DVVA II 4000 operating program. Some of these cal- ibrations can be performed only with the assistance of a trained Micromeritics service representative. When you select Options > Service Test Mode, a dialog prompting you to enter a password is displayed. -
Page 181: Troubleshooting And Maintenance
DVVA II 4000 Troubleshooting 9. TROUBLESHOOTING AND MAINTENANCE This chapter describes common operational problems and their solutions, and maintenance pro- cedures. If further assistance is needed after following the procedures in this chapter, contact a Micromeritics Service Representative. Troubleshooting Operating problems encountered with the DVVA analyzer are usually easily corrected. Typical problems and the steps required to correct them are described in the following table. - Page 182 Troubleshooting DVVA II 4000 Problem Cause Solution Inconsistent results when Different amounts of the Use 1.0000 gram, ± 0.05 conditioning the tip sample were used. (determined to nearest 0.0001 gram) of sample for each analysis. The same type of sample was Use the same type of sample not used for all analyses.
- Page 183 DVVA II 4000 Troubleshooting Problem Cause Solution Lower piston motor reports The sample is exerting a high Use the provided pellet errors residual force on the lower removal tool to break up the piston after sample compacted sample in the compaction.
-
Page 184: Full Power-On Procedure
5. If required, allow Windows to install the drivers for any new hardware found. Refer to “Power-On Troubleshooting” on page 9-6. 6. Place the instrument front panel Power switch in the ON position. 7. Start the DVVA II 4000 software. 400-42803-01 (Rev B) - July 2017... -
Page 185: Full Power-Off Procedure
This procedure is to be used when the computer needs to be shut down for an extended period of time. 1. Exit the DVVA II 4000 software. 2. Place the power switch on the front panel of the instrument in the OFF position. -
Page 186: Power-On Troubleshooting
Troubleshooting DVVA II 4000 Power-On Troubleshooting Problem Computer is connected to the DVVA II 4000 and Windows is trying to update the driver software. Action Allow Windows to search automatically for the driver software. This will enable Windows to install the device drivers that were placed on the computer during the DVVA II 4000 software installation. -
Page 187: Action 2
If Windows detects new hardware but does not automatically load the drivers, perform the device driver installation process described under Action on page 9-6. Verify that the instrument schematic in the DVVA II 4000 software is not showing 0.0 readings for the linear height transducer and the upper and lower load cells. -
Page 188: Lower Piston Release Procedure
DVVA MAIN POWER switch located on the rear panel of the instrument. The DVVA II 4000 analyzer should not be connected via a USB cable to a computer unless the DVAA II 4000 is powered (the MAIN POWER switch on the rear panel is in the ON position). - Page 189 DVVA II 4000 Troubleshooting 2. If the safety shield is not already raised, raise it to its upper position. 3. Retrieve the pellet removal tool (shown below) that was included in the instrument accessories kit. 4. Carefully place the tool into the compression chamber and while applying pressure, rotate the tool.
- Page 190 Troubleshooting DVVA II 4000 5. The compressed pellet should begin to break up and the lower load cell force shown in the Manual Control window should decline, as shown below. When the lower load cell force has fallen to approximately 230 kg (500 lbs.), remove the tool and manually move the lower piston downward until it reaches its home position using the icon.
- Page 191 DVVA II 4000 Troubleshooting If, after several attempts performing steps 4 and 5, the piston cannot be moved to its home position: a. Close the safety shield. b. Press the Reset button. c. Proceed to “Action 2” on page 9-12.
-
Page 192: Action 2
Troubleshooting DVVA II 4000 Action 2 If Action 1 does not solve the problem, you can manually release the piston as described below. Never override the instrument panel sensor or operate the instrument with the panel removed. 1. Support the lower front panel from the bottom and remove the four screws shown in the photograph below. - Page 193 DVVA II 4000 Troubleshooting 3. Using a 9/16-in. (14 mm) open-ended wrench, release the lower piston as shown below. While the expandable cover is removed, ensure that no foreign matter is allowed to enter inside the cover. Also, avoid disturbing any grease found on the screw thread.
- Page 194 Troubleshooting DVVA II 4000 10. Select Unit 1 > Clean System from the main menu to clear the compressed pellet from the compression chamber. 11. The DVVA II should now be operational. 9-14 400-42803-01 (Rev B) - July 2017...
-
Page 195: Maintenance
DVVA II 4000 Maintenance Maintenance Cleaning Analyzer and Components • Use a soap-based detergent to clean the exterior casing of the analyzer. Do not use detergent or other cleaners on the moving components of the instrument. Perform a full power-off procedure before you clean around any of the connectors on the rear panel of the instrument (refer to page ). -
Page 196: Replacing And Conditioning The Piston Tip
Maintenance DVVA II 4000 Replacing and Conditioning the Piston Tip The piston tip should be replaced when deemed necessary; and must be conditioned before using. Replacing the Upper Piston Tip 1. Select Unit 1 > Return Upper Piston Home to move the piston to its uppermost position, completely out of the sample chamber. - Page 197 DVVA II 4000 Maintenance 4. Using a 3/8-in. wrench, rotate to the left to loosen and remove the piston. 5. Install a new piston tip. Using the same wrench, moderately tighten the piston tip. 6. Select Unit 1 > Unit configuration to display the Unit configuration dialog.
-
Page 198: Replacing The Lower Piston Tip
Maintenance DVVA II 4000 Replacing the Lower Piston Tip 1. Remove the lower piston tray. 2. Using a 3/8-in. wrench, rotate to the left to loosen and remove the piston in the sample tray. 3. Install a new piston tip. Using the same wrench, moderately tighten the piston tip. -
Page 199: Conditioning The Piston Tip
DVVA II 4000 Maintenance Conditioning the Piston Tip A new piston tip should always be conditioned before using. Prepare 10 samples, using 1 gram (± 0.001 gram) each of the same material for this procedure. Use of certain USB devices or the addition or removal of a USB device during an analysis may cause a delay in data acquisition, resulting in a loss of data or the cancellation of an analysis. - Page 200 Maintenance DVVA II 4000 10. Slide the sample compartment shield up; wipe the piston tip with a Kimwipe or paper towel. 11. Slide the sample compartment shield down; press Reset 12. Select Unit 1 > Sample Analysis; the Analysis dialog is displayed with the Open Sample Information dialog positioned on top.
- Page 201 DVVA II 4000 Maintenance 16. Enter the sample mass in the Mass field 17. Click to begin the analysis; a dialog showing data as collected is displayed. Start 18. After the blank analysis is complete, a dialog prompting you to add sample is displayed. Do not click until you have placed the sample in the chamber.
- Page 202 Maintenance DVVA II 4000 19. Slide the sample compartment shield up; wipe the piston tip with a Kimwipe or paper towel. 20. Pour the sample into the sample chamber and close the shield; press Reset 9-22 400-42803-01 (Rev B) - July 2017...
- Page 203 DVVA II 4000 Maintenance 21. Click on the Load Sample dialog to continue the analysis; a dialog stating No Data Available is displayed until analysis data starts to collect, then the following dialog is displayed. This button changes to when the analy- The piston automatically returns to the home position when the analysis is finished.
-
Page 204: Overlaying Results
Maintenance DVVA II 4000 26. Enter the correct mass for the sample being analyzed. 27. Repeat steps 13 through 24 for the remaining nine samples. Be sure to: • change the Sample identification sequentially • wipe the piston tip after each blank analysis and sample analysis 28. - Page 205 DVVA II 4000 Maintenance 3. Highlight Height vs Pressure Appl and click ; the Height vs. Pressure Trend Plot dialog Edit is displayed. Click the down arrow and choose Overlay Samples. 4. Click the down arrow to the right of the Overlay field and choose Overlay Samples, then click to return to the Report Options dialog.
- Page 206 Maintenance DVVA II 4000 11. Click ; the report window containing overlay results is displayed. Click the Height vs Pressure tab to display the data. 12. Right-click in the graph area and choose Autoscale from the shortcut menu. 13. Zoom in on these portions of the graph: 5,000, 15,000 and 25,000 psi. Continue zooming on each until you can determine if the curves for three sequential runs are within 0.001 inch.
-
Page 207: Normalization
DVVA II 4000 Normalization Normalization The instrument should be normalized with SRB series reference materials on a regular basis to compensate for wear on the piston tip. This is accomplished by performing two reference runs on each reference material on a monthly basis, or, one run on each reference material two times a month. - Page 208 Normalization DVVA II 4000 4. Select Unit > Reference Run; the Reference Run dialog is displayed. 5. Enter the sample mass in the Mass field. 9-28 400-42803-01 (Rev B) - July 2017...
- Page 209 DVVA II 4000 Normalization 6. Using the table below, enter in the Bulk Density field the bulk density of the reference material for this run. Bulk Density for SRB Reference Materials Reference Name Bulk Density A-8 Tread/Hard 0.41 B-8 Tread/Hard 0.31...
- Page 210 Normalization DVVA II 4000 11. Perform the following steps: a. Open the sample shield. b. Wipe the piston tip with a Kimwipe or paper towel. d. Close the sample shield and press Reset 12. Complete steps 1 through 10 for all reference materials.
-
Page 211: Verifying Normalization Results
DVVA II 4000 Normalization Verifying Normalization Results The current reference sample analyses are compared to the original "master" reference analysis averages to determine by how much the current analysis has shifted from that average. The nor- malization routine calculates a set of polynomials to correct for that difference. What is shown in the Normalization window (see example below) is how well the software was able to determine the polynomials it will use to correct, or normalize, the collected data. -
Page 213: 10. Ordering Information
Accessories and replacement parts for the DVVA II analyzer can be ordered using one of the fol- lowing methods: • Call our Customer Service Department at (770) 662-3636 • Access our web site at www.micromeritics.com • Contact your local sales representative When ordering, please use the information provided below to place your order:... -
Page 215: Error Messages
Restart the computer. If the problem persists, reinstall the application Action: (this will not affect any of your sample files). If the problem continues, contact a Micromeritics service representative. 2401- FATAL ERROR: (error message). An internal processing and/or hardware error has occurred. - Page 216 Appendix A DVVA II 4000 2431- Error writing file (file name), error code = (number). The hard disk does not have enough space left to perform the opera- Cause: tion. Copy files not used regularly from the hard disk to a diskette, CD, or...
- Page 217 DVVA II 4000 Appendix A 2436- Path specification (path name) is invalid. You entered an invalid path name and/or extension. Cause: Type a valid path name (including the proper extension) and press Action: Enter 2437- File (file name) does not exist.
- Page 218 Appendix A DVVA II 4000 2449- This field does not contain a valid file specification. You entered an invalid file name. Cause: See the description of file naming conventions in your Windows man- Action: ual and re-enter the name. 2450- Sample Defaults may not be edited while this operation is in progress.
- Page 219 DVVA II 4000 Appendix A 2456- Insufficient file handles available. Application cannot continue. You have more than 50 files open at the same time. Cause: Refer to the manual for your operating system and set the limit for Action: open files to 50 or greater.
- Page 220 Appendix A DVVA II 4000 2460- Fatal Communications error on (unit nn). Repeated attempts to maintain communication with the analyzer have Cause: failed. Check the communications cable connecting the analyzer to the com- Action: puter. Confirm that the analyzer is turned on and that the Ready indi- cator is illuminated.
- Page 221 You are attempting to open a file that is currently being used (either by Cause: this application or another). Locate the application using the file (in the Micromeritics application, Action: use the Windows menu item to get a list of all windows, one of which may contain this file).
- Page 222 Appendix A DVVA II 4000 2486- Cannot construct (name) report type. Program will terminate. 2487- Cannot start report generator. Error code (number). Program will terminate. You may not have full rights to the applications’s folders and files. Cause A: You may not have full rights to the applications’s folders and files.
- Page 223 DVVA II 4000 Appendix A 2492- This field’s entry is invalid. The highlighted field contains an invalid entry. Cause: Check the entry and correct the error. Action: 2493- An entry is required for this field. This field requires a valid entry for you to proceed.
-
Page 224: 2500 Series
Appendix A DVVA II 4000 2500 Series 2500- All sample file names that can be created using the sequence number pattern already exist. You may want to modify the next sequence number. No more sample information files can be created using the currently Cause: entered file name sequence number. - Page 225 DVVA II 4000 Appendix A 2506- (sample file) Output device (name) is not installed. Printing cannot be accomplished. The selected output device is not installed in Windows. Cause: Install the device using the Control Panel > Printers operation. Action: 2508- (sample file) Overlay file (name) was not found.
- Page 226 Appendix A DVVA II 4000 2511- Print job (name) has been cancelled due to insufficient disk space. Delete unnec- essary files and restart the report. The disk drive does not have enough space for the temporary file Cause: required by the Windows Print Manager. Therefore, printing of the requested report has been canceled.
- Page 227 DVVA II 4000 Appendix A 2521- Unable to program controller. A hardware malfunction has occurred. Cause: Contact your local Micromeritics service representative. Action: 2522- Invalid controller application file. The application’s control file has been corrupted or deleted. Cause: Reinstall the analysis program.
- Page 228 Appendix A DVVA II 4000 2534- Error opening file (name) for printing. Error code: (number). An error occurred in the selected file for print output. Cause: Ensure that sufficient space is available on the drive containing the file. Action: 2547- The instrument is busy.
-
Page 229: 6000 Series
DVVA II 4000 Appendix A 6000 Series 6000- An error occurred while loading the application control information. Data entry cannot be performed. (Code n) The control information disk file required by this application could not Cause: be found. The disk drive may have failed or be corrupted. Run diagnostics on the Action A: disk drive. - Page 230 Appendix A DVVA II 4000 6003- File (file name) cannot be opened. It is currently being setup for an analysis. You attempted to open a file that is currently being used in an analysis. Cause: Select a different file. Action: 6004 An analysis cannot be performed on (file name).
- Page 231 DVVA II 4000 Appendix A 6007- No data available in file (file name) for reporting. You requested a report for a file that does not contain collected data. Cause: Choose a file that contains collected data (Complete status). Action: 6017- Lower piston motor failure.
-
Page 232: Calibration
Appendix A DVVA II 4000 6021 The Zero Height calibration failed. Please check that the chamber is empty, and the piston tip is clean and undamaged and repeat the calibration. The upper piston tip is damaged. Cause: Replace the upper piston tip, then repeat the calibration. - Page 233 DVVA II 4000 Appendix A 6023- The Height Scale calibration failed. Please check that the chamber contains only the calibration standard, that the length of the standard was entered correctly, and that the piston tips are clean and undamaged. The sample chamber contains sample or debris.
- Page 234 Appendix A DVVA II 4000 6025- Unable to reach the requested ending pressure. The instrument could not build pressure to the endpoint specified in the Cause: Analysis Conditions dialog. Check that the ending pressure in the analysis conditions is within the Action: specification for your instrument.
-
Page 235: Blank Correction
DVVA II 4000 Appendix A 6030- Unable to read the calibration file (file name). You selected an invalid calibration file or one that cannot be read. Cause: Be sure the media containing the calibration file has no problems. Action: 6031- Unable to write the calibration file (file name). - Page 236 Appendix A DVVA II 4000 6036- Force calibration failed. If this occurs during the Upper Force Scale calibration, the external ref- Cause A: erence load cell is not working properly. Make sure the reference load cell has been tared properly and is dis- Action A: playing the correct units.
- Page 237 DVVA II 4000 Appendix A 6039- Data Acquisition error. Network activity is interfering with communication. Cause A: Close programs that use the network and disconnect and shared drives. Action A: You had other applications open while analysis data were being col- Cause B: lected.
- Page 238 Appendix A DVVA II 4000 The lower piston drive assembly is damaged. Cause B: Contact your service representative. Action B: 6051- Analysis cancelled. The difference between upper and lower load cell readings is too high. Check that the sample tray is in place.
- Page 239 DVVA II 4000 Appendix A 6053- The upper piston encountered an unexpected load. Check for obstructions and ensure that the upper piston tip is clean. If required, replace the upper piston tip.. The load on the upper piston is higher than expected for the given oper- Cause A: aiton.
- Page 241 DVVA II 4000 Appendix B B. CALCULATIONS This appendix contains the calculations used in calibrations and in reports available in the DVVA II 4000 program. Calibration The force as a function of load cell voltage is found by a two-point linear calibration. One point ) is measured with no applied force, so F = 0.
-
Page 242: Void Volume
Appendix B DVVA II 4000 Blank Correction A blank analysis is performed to correct for the frictional force between the piston and the sample chamber, and for the deflection of the linear transducer. – F –... -
Page 243: Compaction Equations
DVVA II 4000 Appendix B Compaction Equations General Terms (sometimes V ) = Bulk or Initial Volume. (Mass)/(Bulk Density, ρ β = Volume of Solids, (Mass)/(skeletal density, ρ = Volume of the voids = V – ----- - ----------------- - ----- 1 –... -
Page 244: Cooper Eaton
Appendix B DVVA II 4000 where ----- - = void ratio, = void ratio at P=0 = applied pressure = granulate hardness parameter with units of pressure = dimensionless stiffness parameter between 0.3 (spherical grains) and 0.1 (angular grains) = volume of the voids... -
Page 245: References
DVVA II 4000 Appendix B a, b, and c = material characteristic constants derived from a nonlinear fit of the equation. ----- - The pore fraction (1-D) is equal to the void ratio , which is the ratio of the volume of the... - Page 247 DVVA II 4000 Appendix C C. BULK DENSITY FOR CARBON BLACK Listed below are the bulk densities for the SRB series reference materials. Series 8 (current) Reference Name Bulk Density A-8 Tread/Hard 0.41 B-8 Tread/Hard 0.31 C-8 Tread/Hard 0.29 D-8 Carcass/Soft 0.64...
- Page 249 DV VA II 4000 Index INDEX creating sample file, 3-8 Symbols sample file defaults, 8-10 symbol, 8-11 Sample information file, 5-7 specifying defaults for, 3-1 Bauer report, 5-24 calculations, B-3 Active indicator, 2-1 Bitmap graphic, in report header, 5-13 Add Log Entry dialog, 5-6, 8-9 Blank analysis, 6-3...
- Page 250 Index DV VA II 4000 Cross hair, axis, 7-23 Save As command, 5-27 Curve Properties dialog, 7-20 File name default extensions, 2-13 included as part of ID, 8-7, 8-11 sequence, 8-11 Formula Data entry field, 2-8 for user models, 8-15 viewing valid ranges, 2-9 Front...
- Page 251 DV VA II 4000 Index Service Test Mode, 8-19 Units command, 8-17 Main Menu bar, 2-14 Ordering information, 10-1 Maintenance, 9-15 Overlay Manual control Graph overlay, 3-27 enabling, 6-10 multiple graphs, 3-29 selecting components, 6-10 multiple samples, 3-27 shortcut menus, 6-12 Overlays push button, 5-13 Menu...
- Page 252 Index DV VA II 4000 Tabular, editing onscreen, 7-18 title, showing, 5-12 Radio button, defined, 2-9 Tool bar, 7-15 Ranges, viewing for selected field, 2-9 Uncorrected Data, 5-21 Ready indicator, 2-1 Wu, 5-25 Rear panel, 2-3 zoom feature, 7-22 Reference Report button, 7-8 material, default...
- Page 253 DV VA II 4000 Index defaults for Advanced format, 8-6 Spreadsheet format exporting data, 3-26 saving reports, 7-17 listing file statistics, 2-7, 3-24, 5-30 Standard Table report, 5-18 name, specifying default sequence, 8-7 Start Report command, 7-2 opening, 2-7 Start Report dialog, 7-2 printing contents, 3-22, 5-28...
- Page 254 Index DV VA II 4000 Version, software, 2-15, 6-16 View drop-down list, 6-3 Void volume, 5-11, 8-13 calculations, B-2 Voltage selector, 2-3 Warning defined, 1-2 label, 2-5 Windows menu, 2-15 report, 5-25 calculations, B-5 X-axis order by, 7-9 Zoom feature, 7-22 Index-6 400-42803-01 (Rev B) - July 2017...
Need help?
Do you have a question about the DVVA II 4000 and is the answer not in the manual?
Questions and answers