Table of Contents
Advertisement
Advertisement
Table of Contents

Subscribe to Our Youtube Channel
Related Manuals for Micromeritics 3Flex


Summary of Contents for Micromeritics 3Flex
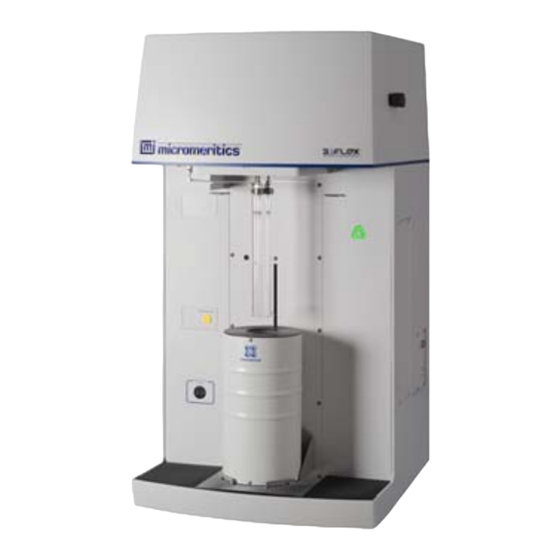
- Page 1 Service Manual 3Flex Analyzer August 2013...
- Page 2 Viton is a registered trademark of DuPont Dow Elastomers L.L.C. Windows is a registered trademark of Microsoft Corporation. © Micromeritics Instrument Corporation, 2013. All rights reserved.
-
Page 3: Table Of Contents
3Flex Service Manual Table of Contents TABLE OF CONTENTS 1. GENERAL INFORMATION Organization of the manual ............1-1 Using This Manual. - Page 4 Table of Contents 3Flex Service Manual 4. DOCUMENTATION AND SOFTWARE Preinstallation Instructions and Checklist ......... . . 4-1 Installation .
-
Page 5: General Information
Organization of the manual 1. GENERAL INFORMATION This service manual contains information and instructions for providing instrument service on the Micromeritics 3Flex Analyzer and is intended for use by Micromeritics' factory-trained and sup- ported service personnel. Organization of the manual... -
Page 6: Using This Manual
Using This Manual 3Flex Service Manual Using This Manual This manual is most efficiently used from the Micromeritics web site. However, it can be down- loaded to a portable media device, such as a CD or a USB stick. Aug 2013... -
Page 7: Functional Description
Overview The 3Flex is an automated gas adsorption analyzer with three ports allowing up to three samples to be analyzed simultaneously. The core analytical engine is composed of an advanced vacuum system, a versatile analysis manifold, and sensitive pressure transducers on each analysis port. The basic configuration can be upgraded for vapor and chemisorption analyses and each port can be individually upgraded for high-quality micropore analyses with 10-torr and 0.1-torr transducers on each micropore... -
Page 8: Product Features
Product Features 3Flex Service Manual Product Features Hardware • Narrowed and modified cabinet more similar in appearance to that of the ASAP 2020. Cabinet dimensions are 23D × 22W × 40H inches (58D x 56W x 102H centimeters). • Up to four analyzers can be attached to one computer •... -
Page 9: Software
3Flex Service Manual Product Features Software The software for the 3Flex is similar to that of the MicroActive application. Many of the dialogs have been changed to have a look and feel more consistent with the Windows 7 operating environment. -
Page 10: Instrument Components
Instrument Components 3Flex Service Manual Instrument Components The 3Flex Analyzer is comprised of these major components and modules: • Cabinetry/Sample Chamber • Interior • Printed Circuit Boards (PCBs) • Power Module Front Panel/Cabinetry Top Panel Po Tube Safety shield bracket... - Page 11 3Flex Service Manual Instrument Components Elevator Raises automatically when the analysis is started and lowers automatically upon completion. Elevator reset Resets the elevator in case of failure. Elevator Circuit Breaker Open displays on the instrument schematic if the elevator requires a reset.
-
Page 12: Rear Panel
The rear panel provides connections for gases, compressed air, the vacuum pump, and the power cord. Side Panels Left side panel Right side panel The side panels of the 3Flex contain the Ethernet connector, RS232 connector, and the On/Off switch, as well as access panels to circuit boards. Aug 2013... -
Page 13: Upper Manifold Assembly
3Flex Service Manual Upper Manifold Assembly Upper Manifold Assembly Shown below is a graphical representation of the upper manifold assembly. Refer to the table below the graphic for component identification, as well as a link to additonal information for each componet. -
Page 14: Analysis Subsystem
Analysis Subsystem 3Flex Service Manual Analysis Subsystem The analysis subsystem includes the analysis manifold, the sample ports, the P port, and the vacuum gauge. All, except the vacuum gauge, are located in the heated, insulated portion of the upper cabinet and mounted on a 1 and 1/4-in. -
Page 15: Sample And Po Ports
3Flex Service Manual Analysis Subsystem Sample and Po Ports The sample port fittings are anchored in place to ensure accurate position and orientation, and to provide a thermal barrier. The P port fitting is attached similarly. The sample port spacing is the same as the 3020;... -
Page 16: Sample And Po Transducers
Analysis Subsystem 3Flex Service Manual Sample and Po Transducers 10-Torr Manifold transducer 0.1-Torr transducers (3) 10-Torr transducers (3) 1000-Torr Manifold transducer 1000-Torr button-head transducer (Po Port) 1000-Torr button-head transducers (Sample Ports) 10-Torr Manifold transducer 0.1-Torr transducers (3) 10-Torr transducers (3) -
Page 17: Heater/Fan Assembly
3Flex Service Manual Analysis Subsystem Heater/Fan Assembly The upper manifold resides in a heated, insulated, temperature-controlled cabinet. The heater/fan assembly is located at the upper right side just in front of the dual transducer PCBs. It controls and maintains the temperature to 45 C, 0.05 C. - Page 18 Analysis Subsystem 3Flex Service Manual The vacuum valve (7) should be kept closed when dosing gas in the manifold to maintain cleanliness of the gauge. Open Valve 7 only when the system is under vacuum. Right-click on the vacuum gauge reading to view vacuum gauge details (you must be in Service Test mode).
-
Page 19: Vacuum Subsystem
3Flex Service Manual Vacuum Subsystem Vacuum Subsystem The vacuum sybsystem includes a turbo (high vacuum) pump, roughing/backing pump (located externally), and the plumbing required to connect them to the analysis and gas inlet subsystems. This includes a pneumatic valve connecting the gas inlet manifold to the vacuum system. -
Page 20: Roughing/Backing Pump
Vacuum Subsystem 3Flex Service Manual Roughing/Backing Pump The roughing/backing pump is located outside the instrument cabinet, making it easier to service. 2-14 Aug 2013... -
Page 21: Gas Inlet Subsystem
3Flex Service Manual Gas Inlet Subsystem Gas Inlet Subsystem The Gas Inlet manifold provides six gas inlet ports (12 when Chemi option is installed) at the rear of the instrument, a servo valve connected to the dosing manifold, and a vacuum valve connected to the vacuum subsystem. -
Page 22: Pneumatic Valves And Manifold
3Flex Service Manual Pneumatic Valves and Manifold The 3Flex uses pneumatically operated air valves. They are metal VCR diaphragm valves with Kel-F seats and require 90-100 psi of house air to operate. The pneumatic valve actuator assembly is located in the lower portion of the cabinet. -
Page 23: Elevator
3Flex Service Manual Elevator Elevator Stepper motor Drive control stepper Proximity sensors (3) Dewar tray Left side of assembly Right side of assembly (from rear of unit) (from rear of unit) The elevator module consists of a stepper motor controller/driver, a stepper motor, three sensors, drive shaft, guides, and mechanical support blocks, framework, and cabling. -
Page 24: System Schematic
System Schematic 3Flex Service Manual System Schematic The schematic diagram in the 3Flex software displays the following: • Valves and their current states • Sample and Po ports • Pressure reading from the transducers • Location and status of the elevator •... -
Page 25: Diagnostic Tests
Diagnostic Tests Diagnostic Tests The 3Flex software includes Diagnostic tests (or service tests) that can be run by the customer if an unusual problem occurs. Many things in the 3Flex system are constantly monitored by the software. If your customer calls you with a problem, have them: 1. -
Page 26: Printed Circuit Boards (Pcbs)
Printed Circuit Boards (PCBs) 3Flex Service Manual Printed Circuit Boards (PCBs) Analysis Transducer Interface PCB, P/N: 350-17705-011 Analysis Transducer Interface PCBs Facing the instrument, the analysis transducer PCBs are located on the upper right side. Side view The two Analysis Transducer ADC PCBs are identical and responsible for controlling most functions throughout the analysis module. -
Page 27: Card Cage
3Flex Service Manual Printed Circuit Boards (PCBs) Card Cage 1 - Valve/LED Driver, RS232 PCB 2 - ADC Interface PCB 3 - CPU PCB These boards all plug into the Backplane board (not shown). Access to the card cage assembly is located on the left side of the analyzer. -
Page 28: Power Distribution Pcb, P/N: 350-17708-011
Printed Circuit Boards (PCBs) 3Flex Service Manual Power Distribution PCB, P/N: 350-17708-011 Turbo pump Power Distribution PCB Provides power for all system components. It is located on the Power tray (below the turbo pump) accessed from the rear panel of the analyzer. -
Page 29: Heating Mantle Interface Pcb, 350-17706-011
3Flex Service Manual Printed Circuit Boards (PCBs) Heating Mantle Interface PCB, 350-17706-011 Controls all heating mantle, chemisorption mantle, and temperatures. This PCB is located to the left of the Power Tray and is accessed through the rear panel of the analyzer. -
Page 31: The Analysis Sequence
3Flex Service Manual Analysis Sequence 3. THE ANALYSIS SEQUENCE The analysis sequence describes what is taking place throughout the instrument during an analysis. The instrument schematic, shown below, will be used to show the state of the system components during the various phases of an analysis. -
Page 32: Analysis Technique
Servo Analysis Technique The 3Flex Analyzer uses physical adsorption and capillary condensation principles to obtain information about the surface area and porosity of a solid material. The analytical technique is simple: a sample contained in an evacuated sample tube is cooled (typically) to cryogenic temperature, then is exposed to analysis gas at a series of precisely controlled pressures. -
Page 33: Analysis Sequence
3Flex Service Manual Analysis Sequence Analysis Sequence 1. Create and save up to three sample files for use during an analysis. 2. Place a plug in any port that is not being used for analysis. 3. Prepare samples to be analyzed. This may include weighing the sample and degassing the sample. - Page 34 Analysis Sequence 3Flex Service Manual 7. The system begins to evacuate the manifold at a rate and time specified in the sample file. 8. All valves close, then the N2 valve opens and the Po tube is filled to the target pressure.
- Page 35 3Flex Service Manual Analysis Sequence 9. A pre-helium evacuation begins. 10. A series of manifold dosings and port equilibrations begin to take place on each port to prepare for analysis under cryogenic conditions. Helium warm free space is measured. Then the elevator is raised to measure cold free space.
- Page 36 Analysis Sequence 3Flex Service Manual 11. Helium is evacuated from the samples and the Dewar is lowered if specified in the sample file. 12. Samples are evacuated for the amount of time specified in the sample file. 13. The Po tube is dosed and allowed to equilibrate.
- Page 37 3Flex Service Manual Analysis Sequence 15. You can view the instrument schematic by selecting Instrument Schematic from the View drop- down list. 16. After evacuation, the instrument starts dosing to the set point specified in the sample file and continues until the specified number of data points have been collected. Data points are displayed in a graph as they are collected.
-
Page 39: Documentation And Software
4. DOCUMENTATION AND SOFTWARE This chapter contains links to the documents applicable for the installation, operation, and servicing of the 3Flex analyzer, as well as to a copy of the demo software. Preinstallation Instructions and Checklist This document helps to ensure that the customer has prepared the laboratory for installation of the instrument and that the supplies, equipment, and personnel are available for installation. -
Page 40: Calibration
3Flex Service Manual Calibration This calibration and test procedure is the one used in Micromeritics’ Final Assembly Department. It is provided as a reference so that you will be familiar with the calibration procedures and instrument tests that are performed on the instrument during manufacture. -
Page 41: Electrical
Click the link below to view a syllabus of the training class. • Service Training (not available) Operator Manual A printed operator’s manual is not shipped with the 3Flex analyzer unless requested on the order. Access to an electronic copy is available on the Help menu. • 3Flex Operator’s Manual,... -
Page 42: Software
Software 3Flex Service Manual Software Click the link below to access a demo version of the 3Flex software. • 3Flex software Aug 2013... -
Page 43: Service Parts
3Flex Service Manual Service Parts 5. SERVICE PARTS This section contains a list of repair parts. Part Number Description 003/20656/05 Cable, M/F 15-pin 2.5 ft, straight 350/63815/00 Cable, RTD 1000 Ohms, 3 wire, 6P MMI, SS 350/63816/21 Cable, RTD, 1000 Ohms, 3 wire, 6P MMI, 21 in. - Page 44 Service Parts 3Flex Service Manual Part Number Description 003/55630/03 Transducer, Vacuum Cold Cathode 004/22601/06 Valve Diaphragm sealed, 1/4 in., Male 004/25341/23 Fitting, 1/2 VCR cap 003/22022/00 Controller stepper drive 003/35632/00 Motor, Stepper 1.8 degree 003/45066/00 Relay, SS, 5 A 3-60 VDC...
Need help?
Do you have a question about the 3Flex and is the answer not in the manual?
Questions and answers