
Subscribe to Our Youtube Channel
Related Manuals for Planmeca ProMax Pan/Ceph


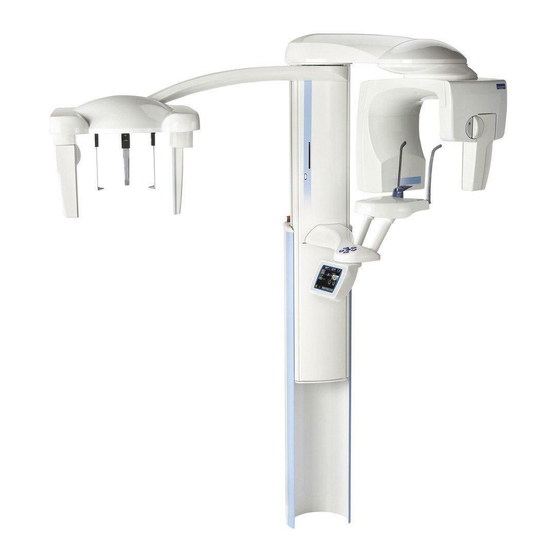
Summary of Contents for Planmeca ProMax Pan/Ceph
- Page 1 PLANMECA ProMax Pan/Ceph Calibration Manual Printed copies of this document are considered uncontrolled. 22811.20.Rev001 07.31.2019...
- Page 2 IEC364. Equipment is used according to the operating instructions Planmeca pursues a policy of continual product development. Although every effort is made to produce up-to-date product documentation this publication should not be regarded as an infallible guide to current specifications. We reserve the right to make changes without prior notice.
-
Page 3: Table Of Contents
Table of Contents Chapter A: General Information Disclaimer Required Tools 2.1. Calibration Tools 2.2. Hand Tools Chapter B: Removing Covers Upper C-Arm Tube head Shoulder Lower C-Arm Patient Positioning Fixed sensor Holder Chapter C: Computer Connections Ethernet Didapi Configuration Chapter D: Beam Alignment Aligning Beam Primary Collimator (61.0) 2.1. - Page 4 Chapter G: Ball Phantom Setting up for a Ball Phantom Setting up the Computer Calibrating / measuring image 2.1.a. Center Ball 2.1.a.i Too Thin 2.1.a.ii Too Fat 2.1.b 10 Ball 2.1.b.i Too Left 2.1.b.ii Too Right 2.1.b.iiiMoving the Table 2.1.c Shadow Ball 2.1.c.i Too Left/Right Position Sensor Calibration (Pots) (64.0)
- Page 5 Angled 5.5.a Left 5.5.b Right Beam Check Setting up Beam Check Computer Setup Calibrating kV/mA fo Cephalometric Computer Setup Dimax3 Tool 7.3.a Not Together 7.3.a.i Raising Up - 5 - Printed copies of this document are considered uncontrolled. 22811.20.Rev001 07.31.2018...
- Page 6 - 6 - Printed copies of this document are considered uncontrolled. 22811.20.Rev001 07.31.2018...
-
Page 7: Chapter A: General Information
General Information DISCLAIMER This manual contains the information required to setup and calibrate the Planmeca ProMax Panoramic with Cephalometric X-ray unit for Digital. WARNING Protect yourself from radiation when you are checking the beam alignment and calibrating. Since radiation safety requirements vary from state to state, country to country, it is the responsibility of the installer to ensure that the correct precautions are observed. - Page 8 - 8 - Printed copies of this document are considered uncontrolled. 22811.20.Rev001 07.31.2018...
-
Page 9: Required Tools
REQUIRED TOOLS Calibration Tools 2.1. Ball phantom (part number 10004011) used for checking the position of the Patient positioning mechanism and the Patient positioning lights. (Figure 1) Figure 1 Frankfort plane alignment tool (part number 50977) used with the ball phantom for checking the position of the Frankfort plane light. -
Page 10: Hand Tools
Sensor head alignment tool (part number 10002699) used for checking the beam alignment. (Figure 4) Figure 4 Cephalostat calibration tool, hatchet, (part number 10004246). For calibrating the digital cephalostat. (Figure 5) Figure 5 Left and Right ear posts (part number 651003, 651005) used for aligning the ball and ring on the cephalometric arm. -
Page 11: Chapter B: Removing Covers
Chapter Removing Covers Upper C-arm Unscrew the eight 2.5mm allen screws on top. (Figure 7) Figure 7 Twist the cover away from the column and off. (Figure 8) Figure 8 - 11 - Printed copies of this document are considered uncontrolled. 22811.20.Rev001 07.31.2018... -
Page 12: Tube Head
Tube head Unscrew the top of the front tubehead cover with a 3mm allen (Figure 9a-b) and unscrew the bottom with a 2.5mm allen (Figure 9c) and remove the front cover. What is unscrewed Figure 9a Figure 9b Bottom Figure 9c Shoulder Pull up on the shoulder cover. -
Page 13: Lower C-Arm
Lower C-Arm Un-screw the four screws with a 2.5 allen. (Figure 11) Figure 11 Patient Positioning Un-screw the five screws with a 2.5 allen. (Figure 12) Figure 12 - 13 - Printed copies of this document are considered uncontrolled. 22811.20.Rev001 07.31.2018... -
Page 14: Fixed Sensor Holder
Fixed Sensor Holder Pull back on the inner cover of the sensor holder. (Figure 13) Figure 13 Unscrew the two screws on the top of the rear cover of the holder with a 2.5mm allen. (Figure 14) Figure 14 - 14 - Printed copies of this document are considered uncontrolled. - Page 15 Unscrew the two screws on the inside of the rear cover with a 2.5mm allen. (Figure Figure 15 Take off the rear cover. (Figure 16) Figure 16 Now turn the unit on and go to Primary Collimator. - 15 - Printed copies of this document are considered uncontrolled.
- Page 16 - 16 - Printed copies of this document are considered uncontrolled. 22811.20.Rev001 07.31.2018...
-
Page 17: Chapter C: Computer Connections
NOTE: If using a PCI card then follow the above instructions but instead use a PCI Interface Cable. Didapi Configuration Click Start , All Programs, Planmeca and then Didapi Configuration (Figure 18) Figure 18 Click on Ethernet Interface. The default ip address is: 192.168.0.130 Click on “ProMax Open device config file”... - Page 18 - 18 - Printed copies of this document are considered uncontrolled. 22811.20.Rev001 07.31.2018...
-
Page 19: Chapter D: Beam Alignment
Chapter Beam Alignment Unscrew the two locking screws from the attachment pins on the sensor holder with a 3mm allen and remove the screws and washers.(Figure 19) Figure 19 Loosen the connector plate screw on the bottom of the holder with a 2.5mm allen. (Figure 20a-b) Figure 20a Figure 20b... -
Page 20: Aligning Beam
Aligning the beam Place a beam alignment tool into the sensor holder. (Figure 21) Figure 21 Attach a fluorescent screen to the beam alignment tool. (Figure 22) Figure 22 - 20 - Printed copies of this document are considered uncontrolled. 22811.20.Rev001 07.31.2018... -
Page 21: Primary Collimator (61.0)
Primary Collimator Press the i button in the lower left hand corner. (Figure 23) Figure 23 Press Technical Calibration, 60.0. (Figure 24) Figure 24 - 21 - Printed copies of this document are considered uncontrolled. 22811.20.Rev001 07.31.2018... - Page 22 Type in 1701 as the password. (Figure 25) Figure 25 Press Primary Collimator, 61.0. (Figure 26) Figure 26 - 22 - Printed copies of this document are considered uncontrolled. 22811.20.Rev001 07.31.2018...
-
Page 23: Pan Mode X-Collimator (61.1)
2.1 Pan mode X-Collimator (61.1) (Figure 27) Figure 27 Now press the exposure button to see where the beam is hitting the screen. The beam image should appear within the borders of the rectangle markings on the screen. (Figure 28) Figure 28 NOTE: The beam will need to be half of the distance of the box. -
Page 24: X-Pan Collimator Position
2.1.a X pan collimator position If the beam is too left, press the right button (Figure 29) Figure 29 If the beam is too right, press the left button (Figure 30) Figure 30 - 24 - Printed copies of this document are considered uncontrolled. 22811.20.Rev001 07.31.2018... -
Page 25: Too Narrow
Press Test and take another exposure. (Figure 31) Figure 31 2.1.a.i Too Narrow Press the X-pan collimator width to the right (Figure 32) Figure 32 Press Test and take another exposure. - 25 - Printed copies of this document are considered uncontrolled. 22811.20.Rev001 07.31.2018... -
Page 26: A.ii Too Wide
2.1.a.ii Too Wide Press the X-pan collimator width to the left (Figure 33) Figure 33 Press Test and take another exposure. If aligned then press Done and move onto the Y Collimator. 2.2 Pan mode Y Collimator (61.2) Now check the top and bottom of the beam. 2.2.a Too High Press the Y-pan collimator top limit button down. -
Page 27: Too Low
Press Test and take another exposure. 2.2.b Too Low Press the Y-pan collimator bottom limit button up. (Figure 35) Figure 35 Press Test and take another exposure. If aligned then press Done and move onto Ball Phantom. 2.2.c Angled Press the i button in the lower left hand corner. (Figure 36) Figure 36 - 27 - Printed copies of this document are considered uncontrolled. - Page 28 Press Technical Calibration, 60.0. (Figure 37) Figure 37 Press Primary Collimator, 61.0. (Figure 38) Figure 38 - 28 - Printed copies of this document are considered uncontrolled. 22811.20.Rev001 07.31.2018...
- Page 29 Press down once and select Collimator assembly screws visible, 61.9. (Figure 39) Figure 39 NOTE: 61.9 is available in software versions 1.19.7 or higher Press Drive and the collimator will move to expose the screws. (Figure Figure 40 - 29 - Printed copies of this document are considered uncontrolled.
-
Page 30: Angled Left/Right
The collimator will move to expose one screw then push the lower blade up and expose the second screw. (Figure 41) Figure 41 NOTE: This allows the two screws that adjust the angle to be visible. 2.2.c.i Angled Left/Right Loosen the two hidden screws with a 2.5 mm allen at # 1. (Figure 42) Figure 42 Twist collimator to the right if angled Right to Left... -
Page 31: Chapter E: Beam Check
Chapter Beam Check Setting up Beam Check Press the i button. (Figure 43) Figure 43 Press Special Functions (40.0) (Figure 44) Figure 44 - 31 - Printed copies of this document are considered uncontrolled. 22811.20.Rev001 07.31.2018... - Page 32 Press Beam Check (47.0) (Figure 45) Figure 45 Press Panoramic (47.1) (Figure 46) Figure 46 - 32 - Printed copies of this document are considered uncontrolled. 22811.20.Rev001 07.31.2018...
-
Page 33: Computer Setup
Computer Setup NOTE: Make sure the sensor is in the sensor holder. Click Start then All Programs then Planmeca then Beam Check. (Figure 47) Figure 47 Click on ProMax Pan. (Figure 48) Figure 48 Click on Take the Image Press Ready on the touch screen (Figure 49) and then take an exposure. - Page 34 Image should be centered on the top, bottom, left, and right. (Figure 50) Figure 50 NOTE: The smaller image to the left is the entire sensor image. Refer to pgs. 20-30 if not aligned properly. - 34 - Printed copies of this document are considered uncontrolled. 22811.20.Rev001 07.31.2018...
-
Page 35: Chapter F: Calibration
Calibration Press Done and Exit Close Beam Check and open Dimax3 Tool Dimax3 Tool Click on Start, All Programs, Planmeca then Dimax3 Tool. (Figure 51) Figure 51 Click on Calibrate and select Pan. (Figure 52) Figure 52 Follow the instructions on the computer screen. -
Page 36: Turning Radiation On/Off
1.1 Turning Radiation On/Off 1.1.a OFF Press the smile in the middle right of the touch screen. (Figure 53) Figure 53 Press all the arrows at the bottom and side, turning each from white to red. (Figure 54) Figure 54 - 36 - Printed copies of this document are considered uncontrolled. -
Page 37: Kv/Ma Setting For Panoramic
1.1.b ON Press the smile again. (See Figure 53) Then Press, all the arrows at the bottom and side, turning each from red to white. 1.2 kV/mA setting for Panoramic Binnings 1.3 Changing Binnings Click Settings and select Binnings then select the appropriate binning. (Figure 55) Figure 55 Press Ready on the touch screen. - Page 38 - 38 - Printed copies of this document are considered uncontrolled. 22811.20.Rev001 07.31.2018...
-
Page 39: Chapter G: Ball Phantom
Chapter Ball Phantom Setting up for ball phantom Place the ball phantom in the patient positioning mechanism. (Figure 57) Figure 57 NOTE: Layer must be at 0mm before doing a ball phantom. If layer is not then adjust the thumb wheel till layer is at 0mm. - Page 40 Make sure the sensor is in the sensor holder. (Figure 59) Figure 59 Setting the kV/mA Press the kV/mA at the top left of the touch screen. (Figure 60) Figure 60 - 40 - Printed copies of this document are considered uncontrolled. 22811.20.Rev001 07.31.2018...
-
Page 41: Setting Up The Computer
Select the 60kV / 4mA then click OK. (Figure 61) Figure 61 Setting up the computer Click on Start, All Programs, Planmeca, Dimaxis 4.x.x. (Figure 62) Figure 62 Click OK then click OK again. Select New from the bottom of the Select Image screen. - Page 42 Click on the first icon, CAL, and calibrate the Center Ball from top to bottom. (Figure 64) Figure 64 Enter the number 7 when asked to input a distance. (Figure 65) Figure 65 There will be an image of 23 balls on the films; one Center Ball and 11 balls to the left and right.
-
Page 43: Center Ball
2.1.a Center Ball NOTE: Center ball will be above the midsagittal bar of the ball phantom. (Figure 67) Figure 67 Click the second icon now and measure the top to bottom and left to right. (Figure 68) Figure 68 The ball should be 7mm top to bottom and left to right. (Figure 69) Figure 69 NOTE: If ball phantom is off, do a Position Sensor Calibration (Pots) on pgs. -
Page 44: Too Thin
2.1.a.i Too thin If the ball is too thin (Figure 70) then adjust worm gear in Pots. Figure 70 Press i then select Technical Calibration (60.0) then select Position Sensor Calibration. (64.0). (Figure 71) Figure 71 Press Position Sensor (64.1) (Figure 72) Figure 72 Press Check and write down what the shoulder position number is. - Page 45 Put the locking pin into the c-arm/elbow. (Figure 73a-b) Figure 73a Figure 73b Press Lock (Figure 74) Figure 74 Press Release then twist the worm gear away from the column. (Figure 75) Figure 75 - 45 - Printed copies of this document are considered uncontrolled. 22811.20.Rev001 07.31.2018...
-
Page 46: A.ii Too Fat
NOTE: The new shoulder number should be higher than older number. Press Lock and take the pin out and then press Done. Take another exposure and check ball size again. If not repeat until correct size. 2.1.a.ii Too Fat If the ball is too fat (Figure 76) then adjust in Pots. Figure 76 Press i then select Technical Calibration (60.0) then select Position Sensor Calibration. - Page 47 Press Check and write down what the shoulder position number is. Put the locking pin into the c-arm/elbow. (Figure 79a-b) Figure 79a Figure 79b Press Lock (Figure 80). Figure 80 Press Release then twist the worm gear towards the column. (Figure 81) Figure 81 - 47 - Printed copies of this document are considered uncontrolled.
-
Page 48: Th Ball
NOTE: The new shoulder number should be lower than old number. Press Lock and take the pin out and then press Done. Take another exposure and check ball size again. If not repeat until correct size. 2.1.b 10 Ball Measure from the center of the Center Ball to the center on the 10 Ball on the right then measure from the center of the Center Ball to the center of 10 Ball on the left. -
Page 49: B.ii Too Right
(Figure 84) Figure 84 2.1.b.iii Moving the Table NOTE: Call Planmeca Technical Support before proceeding. Loosen the four screws on the table with a 4mm allen. (Figure Figure 85 NOTE: Screws might be a Torx T25 instead of a 4mm allen Physically push or pull the table to the left or right. -
Page 50: Shadow Ball
NOTE: Best way to adjust the table is to face the column with the table in the center of the body and gently push or pull depending on what is needed. (Figure 86a-b) Figure 86a Figure 86b 2.1.c Shadow Ball NOTE: The oval above the Center Ball is the shadow ball. - Page 51 Press the i button. (Figure 88) Figure 88 Press Technical Calibration (Figure 89) Figure 89 - 51 - Printed copies of this document are considered uncontrolled. 22811.20.Rev001 07.31.2018...
- Page 52 Press Primary Collimator (Figure 90) Figure 90 Press Pan mode X-collimator calibration. (Figure 91) Figure 91 - 52 - Printed copies of this document are considered uncontrolled. 22811.20.Rev001 07.31.2018...
-
Page 53: Too Left/Right
2.1.c.i Too Left/ Too Right If the shadow ball is too left press the X-Pan collimator pos left button. (Figure 92) Figure 92 Press Test then Done then take another exposure. If the shadow ball is too right then press the X-Pan collimator post right button. -
Page 54: Position Sensor Calibration (Pots) (64.0)
Position Sensor Calibration (Pots) NOTE: If the ball phantom image is good, then skip this section. Press i then select Technical Calibration (60.0) then select Position Sensor Calibration. (64.0). (Figure 94) Figure 94 Press Position Sensor (64.1) (Figure 95) Figure 95 - 54 - Printed copies of this document are considered uncontrolled. - Page 55 Press Check, Lock and then Release Put the locking pins into the elbow/c-arm and in the shoulder (Figure 96a-c) Figure 96a Figure 96b Figure 96c Press Lock (Figure 97) Figure 97 If the triangles are all green, then remove the pins and press Done - 55 - Printed copies of this document are considered uncontrolled.
-
Page 56: Aligning Pots
If any of the pots are red or not centered, align the according pot before removing the pins. (Figure 98) Figure 98 3.1 Aligning Pots 3.1.a Shoulder Unscrew the set screw with a 1.5mm allen to get the sensor coupling off of the spindle. -
Page 57: Elbow
Watch the numbers on the touch screen and rotate spindle until in the Green and center. (Figure 100) Figure 100 Put sensor coupling back onto spindle and re-tighten set screw. Re- check still in the green and center. When aligned take out the pins then press Done. 3.1.b Elbow Unscrew the set screw with a 2mm allen to get the sensor holder off of the cable guide. -
Page 58: C-Arm
Watch the numbers on the touch screen and rotate spindle until in the Green and center. (Figure 102) Figure 102 When aligned take out the pins then press Done. 1.6.d.i.*** C-Arm Unscrew the set screw with a 2mm allen to get the sensor coupling off of the spindle. -
Page 59: Patient Positioning Lights Alignment
Watch the numbers on the touch screen and rotate spindle until in the Green and center. (Figure 104) Figure 104 When aligned take out the pins then press Done. 4 Patient Positioning Lights Alignment After aligning the Ball Phantom, turn the patient positioning lights on by pressing the temple support button. - Page 60 Place the Ball Phantom into the patient positioning mechanism with the Frankfort plane alignment tool on top of the Ball Phantom. (Figure 106) Figure 106 NOTE: Make sure the layer light is on the line of the ball phantom then zero out the layer light. Press i then press Technical Calibration (60.0) (Figure 107) Figure 107 - 60 -...
-
Page 61: Focal Layer Light Beam
Press Layer laser calibration (66.0) (Figure 108) Figure 108 Press Done and now layer is zeroed out. 4.1 Focal Layer Light Beam If the focal layer light is not straight on the Ball Phantom, then finger adjust the laser until it lines up. (Figure 109) Figure 109 - 61 - Printed copies of this document are considered uncontrolled. -
Page 62: Frankfort Light Beam
4.2 Frankfort Light Beam If the Frankfort light is not straight on the Frankfort plane tool, then adjust the laser. (See Figure 109) 4.3 Midsagittal Light Beam If the Midsagittal light is not lined up with the center line on the Ball phantom, then finger adjust the laser until it lines up. -
Page 63: Chapter H: Cephalometric
Chapter d Cephalometric Getting into Cephalometric Mode Press Pan (Figure 110) Figure 110 Press Ceph (Figure 111) Figure 111 - 63 - Printed copies of this document are considered uncontrolled. 22811.20.Rev001 07.31.2018... -
Page 64: Removing Cephalometric Covers
Press Go Ceph on the bottom in the middle. (Figure 112) Figure 112 Removing Cephalometric Covers 2.1 Top covers NOTE: All eight hidden screws are 3mm allens Screws 1-8 - 64 - Printed copies of this document are considered uncontrolled. 22811.20.Rev001 07.31.2018... - Page 65 Rotate the head support to 45º position towards the front of the column and unscrew #1. (Figure 113) Figure 113 Rotate the head support to the 0º position and unscrew #2. (Figure 114) Figure 114 Rotate the head support to the 45º position away from the front of the column and unscrew #3.
- Page 66 Rotate the head support to the 135º position and unscrew #4 and #5. (Figure 116) Figure 116 Rotate the head support to the 150º position and unscrew #6 and #7. (Figure 117) Figure 117 Unscrew the inner attachment screw and take off the covers. (Figure 118) Figure 118 - 66 - Printed copies of this document are considered uncontrolled.
-
Page 67: Secondary Collimator Covers
Secondary Collimator Covers Unscrew the 2mm screw on the bottom of the collimator cover. (Figure 119.2) Figure 119 Unscrew the two 4mm screws holding the cover box to the top of the collimator. (Figure 119.1) Beam Alignment Attach a fluorescent screen to the middle of the beam alignment tool. (Figure 120) Figure 120 - 67 - Printed copies of this document are considered uncontrolled. -
Page 68: Ceph Mode C-Arm Rotation
Ceph mode C-arm rotation (61.5) Press i (Figure 121) Figure 121 Press Technical calibration (60.0) (Figure 122) Figure 122 - 68 - Printed copies of this document are considered uncontrolled. 22811.20.Rev001 07.31.2018... - Page 69 Press Primary collimator (61.0) (Figure 123) Figure 123 Press Ceph mode c-arm rotation (61.5) (Figure 124) Figure 124 - 69 - Printed copies of this document are considered uncontrolled. 22811.20.Rev001 07.31.2018...
-
Page 70: Ceph Mode Beam Right Position
3.1.a Ceph Mode Beam Right Position Press Test on the bottom and take an exposure. Beam should be hitting from the center to the right on the screen. (Figure 125) Figure 125 If not aligned, adjust Ceph mode C-arm rotation. 3.1.a.i Too Left/Right If the beam is too left, move the Ceph mode beam right position to the right. - Page 71 Press Test on the top and take another exposure. (Figure 127) Figure 128 If the beam is too right, move the Ceph mode beam right position to the left. (Figure 129) Figure 129 Press Test on the bottom and take another exposure. If aligned then press Done move onto Ceph mode C-arm rotation.
-
Page 72: Ceph Mode C-Arm Rotation
3.1.b Ceph Mode C-arm Rotation Press Test on the bottom and take an exposure. Beam should be hitting from the center to the right on the screen. (Figure 130) Figure 131 If not aligned, adjust Ceph mode C-arm rotation. 3.1.b.i Too Left/Right If the beam is too left, move the Ceph mode C-arm rotation to the right. - Page 73 Press Test on the bottom and take another exposure. (Figure 133) Figure 133 If the beam is too right, move the Ceph mode C-arm rotation to the left. (Figure 134) Figure 134 Press Test on the bottom and take another exposure. If aligned then press Done move onto Ceph mode beam position.
-
Page 74: Ceph Mode Beam Position
Ceph mode beam position (61.6) Press Ceph mode beam position. (Figure 135) Figure 135 Press Test and take an exposure. Beam should cover the center of the fluorescent screen with a bit of overlap on either side of the center lines. (Figure 136) Figure 136 Adjust if the beam is off. -
Page 75: Too Left/Right
3.2.a Too Left/Right If the beam is too left, move the x-right limit to the right. (Figure 137) Figure 137 Press Test and take another exposure. If the beam is too right, move the x-right limit to the left. (Figure 138) Figure 138 Press Test and take another exposure. -
Page 76: Ceph Y-Collimator Calibration
Ceph y-collimator calibration (61.4) Attach the two fluorescent screens to the beam alignment tool. (Figure 139a- Figure 139a Figure 139b Press Ceph y-collimator calibration (61.4) (Figure 140) Figure 140 Press Test and take an exposure. - 76 - Printed copies of this document are considered uncontrolled. 22811.20.Rev001 07.31.2018... -
Page 77: Too High
Image should come out as covering top to bottom on the fluorescent screens. (Figure 141) Figure 141 3.3.a Too High Press the y-top limit down and y-bottom limit down. (Figure 142) Figure 142 Press Test and take another exposure. If the beam is aligned then press Done and Move onto the Secondary collimator (beaver tail). -
Page 78: Too Low
3.3.b Too Low Press the y-top limit up and y-bottom limit up. (Figure 143) Figure 143 Press Test and take another exposure. If the beam is aligned then press Done. Move onto the Secondary collimator (beaver tail). Ceph Head Leveling Put the left and right ear posts into their respective holders. - Page 79 Click on Start then Run. (Figure 145) Figure 145 Type in pmsample then click OK. (Figure 146) Figure 146 Uncheck Use calibration. (Figure 167) Figure 167 - 79 - Printed copies of this document are considered uncontrolled. 22811.20.Rev001 07.31.2018...
- Page 80 Click on Cephalometric. (Figure 168) Figure 168 Set the kV / mA to 66 kV and 10 mA Press Ready on the GUI. (Figure 169) Figure 169 - 80 - Printed copies of this document are considered uncontrolled. 22811.20.Rev001 07.31.2018...
-
Page 81: Too Left
Ball should be within ring. (Figure 170) Figure 170 4.1 Too Left If the ball is too left then adjust arm at points in Figure 171. Figure 171 Loosen #4 a quarter of a turn then loosen up #1 and #2. Turn #3 toward the column and retighten #1 and #2. -
Page 82: Too Right
4.2 Too Right If the ball is too right then adjust arm at points in Figure 172. Figure 173 Loosen #4 a quarter of a turn then loosen up #1 and #2. Turn #3 away from the column and retighten #1 and #2. Also retighten #4 a quarter of a turn. -
Page 83: Too Low
4.3 Too Low If the ball is too low then adjust arm at points in Figure 174. Figure 174 Loosen #1 a quarter of a turn then loosen up #3 and tighten down #2. Take another exposure. If aligned then tighten #1 a quarter turn. If aligned, re- check Beam check. -
Page 84: Secondary Collimator (Beaver Tail)
Secondary Collimator (Beaver Tail) Unscrew the three 3mm allen screws. (Figure 176a-b) Figure 176a Figure 176b Attach the collimator and screw in the three 3mm allens. (Figure 177a-b) Figure 177a Figure 177b Press i then Technical calibration then Primary Collimator and select “Ceph mode beam position”... -
Page 85: Too Left
The beam should be in the boxes of the fluorescent screens. (Figure 179) Figure 179 5.1 Too Left Loosen the two 3mm screws closest to the column. (Figure 180) Figure 180 - 85 - Printed copies of this document are considered uncontrolled. 22811.20.Rev001 07.31.2018... - Page 86 Loosen the nut on the left and right locking screws. (Figure 181) Figure 181 Loosen the right 3mm locking screw and tighten the 3mm left locking screw. (Figure 182) Figure 182 Take another exposure. If aligned tighten the right nut and tighten the two screws on the bottom.
-
Page 87: Too Right
5.2 Too Right Loosen the two 3mm screws closest to the column. (Figure 183) Figure 183 Loosen the nut on the left and right locking screws. (Figure 184) Figure 184 - 87 - Printed copies of this document are considered uncontrolled. 22811.20.Rev001 07.31.2018... -
Page 88: Too Low
Loosen the left 3mm locking screw and tighten the 3mm right locking screw. (Figure 185) Figure 185 Take another exposure. If aligned tighten the left nut and tighten the two screws on the bottom. Move onto Beam Check. 5.3 Too Low Loosen the two 3mm allen screws on the inside of the collimator. -
Page 89: Too High
Tighten the 3mm locking screw on the outside, closest to the column. (Figure 187) Figure 187 Take another exposure. If aligned then retighten the inner screws and move onto Beam Check. 5.4 Too High Loosen the two 3mm allen screws on the inside of the collimator. (Figure 188) Figure 188 - 89 - Printed copies of this document are considered uncontrolled. - Page 90 Loosen the 3mm locking screw on the outside, closet to the column. (Figure 189) Figure 189 Take another exposure. If aligned then re-tighten the inner screws and move onto Beam Check. 5.5 Angled 5.5.a Left If angled left, then loosen the nuts and loosen the right locking screw and tighten the left locking screw.
- Page 91 5.5.b Right If angled right, then loosen the nuts and loosen the left locking screw and tighten the right locking screw. (Figure 191) Figure 192 Take another exposure. If aligned then re-tighten the nuts and move onto Beam Check. - 91 - Printed copies of this document are considered uncontrolled.
- Page 92 Beam Check 6.1 Setting up beam check Press the i button. (Figure 193) Figure 193 Press Special Functions (40.0) (Figure 194) Figure 194 - 92 - Printed copies of this document are considered uncontrolled. 22811.20.Rev001 07.31.2018...
- Page 93 Press Beam Check (47.0) (Figure 195) Figure 195 Press Cephalometric (47.1) (Figure 196) Figure 196 - 93 - Printed copies of this document are considered uncontrolled. 22811.20.Rev001 07.31.2018...
- Page 94 Computer Setup NOTE: Make sure the sensor is in the sensor holder. Click Start then All Programs then Planmeca then Beam Check. (Figure 197) Figure 197 Click on ProMax Ceph. (Figure 198) Figure 198 Press Take the Image. - 94 - Printed copies of this document are considered uncontrolled.
- Page 95 Take an exposure. The image should be the same on the top, bottom, left, and right. (Figure 199) Figure 199 Calibrating Press Exit on the touch screen, if just finished doing a Beam Check. 7.1 kV / mA for Cephalometric Binnings - 95 - Printed copies of this document are considered uncontrolled.
- Page 96 Place the Cephalostat calibrating tool (hatchet) into the patient’s right ear post holder with the point going towards the back or column. (Figure 200) Figure 200 NOTE: Change binnings by clicking Settings and select Binnings then the appropriate binning in Dimax3tool.
- Page 97 Computer Setup Click on Start, All Programs, Planmeca then Dimax3 Tool. (Figure 202) Figure 202 Dimax3 Tool Click on Calibrate then select Ceph (Figure 203) Figure 203 Click Ready on the touch screen and take an exposure - 97 - Printed copies of this document are considered uncontrolled.
- Page 98 NOTE: image will come out as being a grey hatchet with black around it. (Figure 204) Figure 204 Press the “L” key on the keyboard of the computer to give calibration lines. This gives the point where the images are combined in the computer. Click the magnify glass (+) to zoom in on the lines to check combination.
- Page 99 7.3.a Not together If the image comes out separated check to make sure that the hatchet is placed in the holder correctly. Re-do Beam Check. 7.3.a.i Raising up If hatchet is place correctly, then raise the beaver tail Loosen the two screws on the inside of the beaver tail and tighten the vertical screw on the outside of the beaver tail.
- Page 100 www.planmecausa.com - 100 - Printed copies of this document are considered uncontrolled. 22811.20.Rev001 07.31.2018...
Need help?
Do you have a question about the ProMax Pan/Ceph and is the answer not in the manual?
Questions and answers
vertical lines are on the image