Planmeca ProMax User Manual
Cephalostat
Hide thumbs
Also See for ProMax:
- Technical manual (378 pages) ,
- User manual (66 pages) ,
- Installation instructions manual (20 pages)
Table of Contents
Advertisement
Quick Links
Advertisement
Table of Contents

Subscribe to Our Youtube Channel
Related Manuals for Planmeca ProMax


Summary of Contents for Planmeca ProMax
- Page 1 Planmeca ProMax ® Cephalostat user's manual 10033034...
-
Page 3: Table Of Contents
4.2.1 Removing sensor from C-arm.................... 10 4.2.2 Attaching Dimax sensor to cephalostat................13 Additional preparations on 3D X-ray units..................15 Preparing Planmeca Romexis......................15 Preparing patient..........................16 Cephalometric exposure...........................17 Selecting program.......................... 17 Selecting patient size........................17 Patient positioning in lateral projection................... 18 Patient positioning in posteroanterior or anteroposterior projection.......... - Page 4 IEC 60364 - equipment is used according to the operating instructions. Planmeca pursues a policy of continual product development. Although every effort is made to produce up-to-date product documentation this publication should not be regarded as an infallible guide to current specifications. We reserve the right to make changes without prior notice.
-
Page 5: Introduction
X-ray images of the skull. The device can also be used for taking hand images for bone age studies. The cephalostat is attached to a 2D or 3D Planmeca ProMax X-ray unit. The X-ray unit has a separate manual. Refer to the User’s Manual of the X-ray unit for any general information about the X-ray unit. -
Page 6: Switching X-Ray Unit On
The on / off switch is located on the underside of the stationary column top. NOTE To prolong the lifetime of your X-ray unit, always switch the X-ray unit off when it is not in active use. Planmeca ProMax User's manual... -
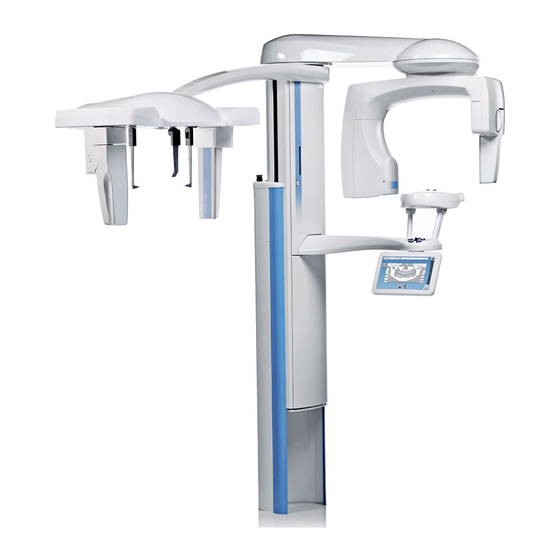
Page 7: Main Parts
1. Height adjusting button 2. Head support plate 3. Rotation scale 4. Nasal positioner 5. Dimax sensor 6. Ear posts (see section "Patient supports" on page 4) 7. Release lever on ear post holder (patient’s left ear) 8. Collimator User's manual Planmeca ProMax... -
Page 8: Patient Supports
/ down movement by pressing any of the other control buttons or the positioning joystick. This is a safety measure that guarantees that the up / down movement can be stopped in an emergency. Planmeca ProMax User's manual... - Page 9 The column movement stops automatically if the emergency stop plate at the bottom is pressed upwards. Clear any obstruction before moving the column again. NOTE When positioning seated patients (e.g. in a wheelchair) always first move the cephalostat down before you position the patient. User's manual Planmeca ProMax...
-
Page 10: Emergency Stop Button
10 mm (0.4 in.). A help message will appear on the touch screen. Guide the patient away from the X-ray unit. Then release the emergency stop button. The X-ray unit will automatically restart. Planmeca ProMax User's manual... -
Page 11: Preparations For Exposure
The left ear post contains a ball. • The right ear post contains a ring. NOTE Ensure that you position the ear posts the right way round. NOTE The nasal positioner has to point inward as shown. User's manual Planmeca ProMax... - Page 12 1. Lift the locking clip up and slide the ear post / nasal positioner as far up as it will go. 2. Press the locking clip down to lock the ear post / nasal positioner in place. Planmeca ProMax User's manual...
-
Page 13: Removing 2D Or 3D Patient Supports
If the support bars are in place, remove all patient supports from the patient support table, including support bars, chin cup and adapter. • To remove the support bars, first loosen the locking knobs and then pull the support bars out. User's manual Planmeca ProMax... -
Page 14: Additional Preparations On X-Ray Units With Dimax Sensor
3. X-ray unit with Dimax sensor C-arm (see section "Removing cephalostat (see section sensor from C-arm" on page "Attaching Dimax sensor to cephalostat" on page 13) 4.2.1 Removing sensor from C-arm NOTE Do not remove the sensor during imaging process. Planmeca ProMax User's manual... - Page 15 4 Preparations for exposure 1. Push in the C-arm electrical connector. This will disconnect the electrical connection between the sensor and C-arm. 1. Turn the locking knob 180 degrees. This will release the locking mechanism. User's manual Planmeca ProMax...
- Page 16 4 Preparations for exposure 2. Carefully pull the sensor out. CAUTION Do not drop the sensor. Planmeca limited warranty does not cover damage which is due to misuse, e.g. dropping the sensor, neglect, or any cause other than ordinary use.
-
Page 17: Attaching Dimax Sensor To Cephalostat
4 Preparations for exposure 4.2.2 Attaching Dimax sensor to cephalostat 1. Push the sensor onto the adapter on the cephalostat. 2. Turn the locking knob 180 degrees in order to complete the mechanical connection. User's manual Planmeca ProMax... - Page 18 4 Preparations for exposure 3. Push in the cephalostat electrical connector button on the other side. This will make the electrical connection between the sensor and cephalostat. Planmeca ProMax User's manual...
-
Page 19: Additional Preparations On 3D X-Ray Units
Remove 3D sensor from C-arm to remove 3D sensor rotate (refer to section "Removing sensor from C-arm" on page 4. Joint: Tube head rotates to 5. 3D unit C-arm ceph position 4.4 Preparing Planmeca Romexis First select the patient. User's manual Planmeca ProMax... -
Page 20: Preparing Patient
4 Preparations for exposure Then select the cephalometric exposure. Refer to the Planmeca Romexis User’s Manual for details on Romexis functions. 4.5 Preparing patient Ask the patient to remove any spectacles, hearing aids, dentures, hairpins, and personal jewellery such as earrings, necklaces and piercings as these can produce shadows or reflections in the image. -
Page 21: Cephalometric Exposure
L = Large adult • XL = Extra large adult NOTE The exposure values will automatically change according to the selected patient size and cephalometric program type. NOTE The patient size can also be selected on the next screen. User's manual Planmeca ProMax... -
Page 22: Patient Positioning In Lateral Projection
1. To the 0° position if you want the patient to face away from the wall. 2. To the 180° position if you want the patient to face towards the wall. The corresponding program is automatically selected and the illustration on the screen shows that projection. Planmeca ProMax User's manual... - Page 23 (XS) if a prohibition sign is in use. NOTE The illustration on the screen is only an example. 3. To go to the next screen, select: • This symbol: • The forward button: User's manual Planmeca ProMax...
- Page 24 5. Adjust the height of the cephalostat by pressing a height adjusting button until the positioning cones at the ends of the ear posts are level with the patient’s ears. Planmeca ProMax User's manual...
-
Page 25: Patient Positioning In Posteroanterior Or Anteroposterior Projection
Frankfort plane is horizontal. 5.4 Patient positioning in posteroanterior or anteroposterior projection 1. Select the posteroanterior program from the drop-down menu at the top of the screen. 2. Rotate the head support plate to either of the 90° positions. User's manual Planmeca ProMax... - Page 26 1. To take a posteroanterior exposure, place the nasal positioner next to the sensor. 2. To take an anteroposterior exposure, place the nasal positioner next to the collimator. The corresponding program is automatically selected and the illustration on the screen shows that projection. Planmeca ProMax User's manual...
- Page 27 (XS) if a prohibition sign is in use. NOTE The illustration on the screen is only an example. 4. To go to the next screen, select: 1. This symbol: 2. The forward button: User's manual Planmeca ProMax...
- Page 28 6. Adjust the height of the cephalostat by pressing a height adjusting button until the positioning cones at the ends of the ear posts are level with the patient’s ears. Planmeca ProMax User's manual...
-
Page 29: Patient Positioning In Submental-Vertex Projection
2. Turn the nasal positioner up. 3. Position the patient between the ear posts and adjust the tilt of the patient’s head until the alar-tragal line is perpendicular to the floor. User's manual Planmeca ProMax... -
Page 30: Patient Positioning In Waters' View
2. Turn the nasal positioner up. 3. Position the patient between the ear posts so that they face the sensor. 4. Position the patient’s head so that the alar-tragal line is tilted up about 35 to 40 degrees. Planmeca ProMax User's manual... -
Page 31: Patient Positioning In Ap Towne Projection
3. Position the patient between the ear posts so that they face the collimator. 4. Position the patient’s head so that the Frankfort plane is tilted down about 30 degrees. 5. Ask the patient to open their mouth as wide as possible. User's manual Planmeca ProMax... -
Page 32: Patient Positioning In Oblique Projection
180 degrees). The oblique program will be automatically selected and the illustration on the screen shows an oblique projection. 3. Select the patient size as described in section "Selecting patient size" on page 17. 4. To go to the next screen, select: Planmeca ProMax User's manual... - Page 33 Adjust the height of the cephalostat by pressing a height adjusting button until the positioning cones at the ends of the ear posts are level with the patient’s ears. User's manual Planmeca ProMax...
-
Page 34: Positioning In Hand Exposure
4. Attach the hand imaging support to the ear post holders. Ensure that you slide the hand imaging support as far up as it will go. 5. Turn the nasal positioner up. 6. To go to the next screen, select: Planmeca ProMax User's manual... -
Page 35: Adjusting Exposure Values For Current Exposure
Always try to minimise the radiation dose to the patient. The preset exposure values are shown in the following tables. Factory presets for program types Lateral and Oblique PATIENT SIZE kV VALUE mA VALUE Child (XS) Small adult (S) Medium-sized adult (M) User's manual Planmeca ProMax... -
Page 36: Selecting Dynamic Exposure Control (Dec)
Program > 2100 Programs > 2140 > 2D Cephalostat. Refer to section “Program settings” in the User’s Manual of the X-ray unit for details. 5.11 Selecting Dynamic Exposure Control (DEC) NOTE Dynamic Exposure Control (DEC) is an optional feature. Planmeca ProMax User's manual... -
Page 37: Adjusting Dec Density
200% (higher exposure values -> darker image). The recommended setting is 100% (default setting). 5.13 Taking an exposure NOTE Make sure that you have selected the correct patient and exposure mode in the Planmeca Romexis program. User's manual Planmeca ProMax... - Page 38 The green lights stop flashing and stay on continuously when the X-ray system is ready for an exposure. 2. Ask the patient to stay as still as possible. 3. Move to a protected area. Planmeca ProMax User's manual...
- Page 39 Press and hold down the exposure button for the duration of both exposures. NOTE Maintain audio and visual contact with the patient and X-ray unit during exposure. If the sensor and / or collimator stop moving during exposure, release the exposure button immediately. User's manual Planmeca ProMax...
- Page 40 5. The image is shown on the computer screen. NOTE You must accept the image in the Planmeca Romexis program. 6. Press the release lever on the left ear post holder and very carefully slide the positioning cones out of the patient’s ears.
- Page 42 Planmeca Oy | Asentajankatu 6 | 00880 Helsinki | Finland tel. +358 20 7795 500 | fax +358 20 7795 555 | sales@planmeca.com | www.planmeca.com...
Need help?
Do you have a question about the ProMax and is the answer not in the manual?
Questions and answers