ETC ColorSource Console User Manual
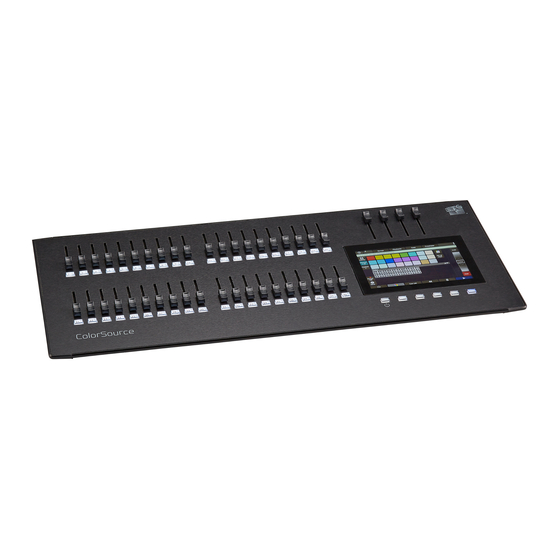
Lighting console
Hide thumbs
Also See for ColorSource Console:
- User manual (19 pages) ,
- Quick manual (5 pages) ,
- Manual (3 pages)

Related Manuals for ETC ColorSource Console


Summary of Contents for ETC ColorSource Console
- Page 1 ColorSource Console User Manual v2.5.0 Part Number: 7225M1200-2.5.0 Rev: A Released: 2018-11...
- Page 2 To view a list of trademarks and patents, go to etcconnect.com/ip. All other trademarks, both marked and not marked, are the property of their respective owners. ETC intends this document, whether printed or electronic, to be provided in its entirety.
-
Page 3: Table Of Contents
Table of Contents Introduction ColorSource 20 ColorSource 40 Shutdown Using This Manual Help from ETC Technical Services Register Your Device Online User Forums ColorSource Overview Touchscreen Performance Stage Map Layout Mode Fader Mode Bumps Crossfader Master Faders Getting Started With Patching... - Page 4 Effect, Color Effect, Shape Effect, Intensity Effect, Parameter Add Effect Remove Effect Turning Lights Off Clear Blackout Special Functions Independent Playback Toy System Settings and Setup Setup Settings Settings: General Settings: Times Settings: Independents Settings: Console Settings: Erase Showfile Management Files Files, Advanced...
-
Page 5: Introduction
Introduction Welcome to the ColorSource Console User Manual. ColorSource 20 ColorSource 40 The topics found in this user manual can also be found on your console by pressing the button. Tutorial videos are also available on your console. Shutdown Hold the Stage Map button (left-most button below the screen) for three seconds to select the Shutdown screen. -
Page 6: Help From Etc Technical Services
If you are having difficulties, your most convenient resources are the references given in this user manual. To search more widely, try the ETC website at etcconnect.com. If none of these resources is sufficient, contact ETC Technical Services directly at one of the offices identified below. Emergency service is available from all ETC offices outside of normal business hours. -
Page 7: Register Your Device
Registering your device with ETC ensures that you will be notified of software and library updates, as well as any product advisories. To register your device, you will need to enroll in “My ETC,” a personalized ETC website that provides a more direct path of communication between you and ETC. - Page 8 Introduction...
-
Page 9: Colorsource Overview
ColorSource Overview The ColorSource console is made up of four different physical areas; the touchscreen (stage map), the faders and bumps, the crossfader, and the master faders. It is important to familiarize yourself with these different areas as you learn to use your console. Touchscreen Performance The ColorSource console touchscreen requires that the power supply is grounded (with a three-pin connector) for optimal performance. -
Page 10: Layout Mode
Available Controls Pinch two fingers to zoom the display in or out, or use the Zoom button located by Clear. Zoom in to see intensity levels within the channel cells. Drag with two fingers to pan the display. Single click on a deselected light to select it. Single click on a selected light to deselect it. -
Page 11: Fader Mode
Fader Mode The faders to the left of the display may be set to operate individual channels or playbacks. Two pages of channels are provided and ten pages of playbacks. Note: channels for information on faders and captured channels. Bumps The buttons below the faders are bump buttons. - Page 12 ColorSource Overview...
-
Page 13: Getting Started With Patching
Getting Started With Patching To be able to control the lighting fixtures in your system you need to assign each fixture (or a group of dimmers) to a channel fader. The channel fader can then be used to set intensity of a fixture. The channel also becomes a way to select that fixture for other types of control like color changes, or adjustment of other parameters (in the case of a moving light, for example). -
Page 14: Add Dimmer
Add Dimmer Dimmers are single-address devices that control intensity only. For patching multiple-address devices, see Device. Note: Dimmer patching can also be used to connect other simple devices that only require one DMX address. Patching a Dimmer or Single-address Device 1. -
Page 15: Add Device
When a duplicate cell is selected or operated, each of the duplicate cells on the Stage Map will respond together. Each cell of a duplicate channel may be moved separately on the Stage Map. Note: You can also add dimmers to a channel without showing them as separate cells on the Stage Map. -
Page 16: Loading A Fixture Profile
There is a device editor application for Windows PCs called ColorSource Personality Edit, which is available for download at www.etcconnect.com. To request a fixture personality from ETC, please send your request along with the user manual, the required mode(s) and your need by date to ColorSourceConsole@etcconnect.com. -
Page 17: Invert Pan
Each cell shows the DMX address, the value in the range 0-255 and the name of the parameter for a device patched with a personality. Cells colored in light blue indicate the base address of the item, which is the address entered in the Patch screen DMX box. -
Page 18: Rdm
Note: An example of when to use this function would be if a fixture is hung sideways or a moving mirror fixture is rotated 90 or 270 degrees from other fixtures. RDM is a two-way communications method built-in to ordinary DMX512 for lighting control. See About RDM for more information. - Page 19 Note: Discovery takes place during short periods of rest of normal DMX transmission and is a lengthy process to complete. You should expect at least several seconds of delay to discover a light on a small system and much longer delays on a very large system. Addressing and Mode RDM allows you to set the DMX address and the operating mode of a light remotely.
- Page 20 Getting Started With Patching...
-
Page 21: Controlling Your Lighting System
Controlling Your Lighting System After you have completed your patch, you are now ready to start controlling your lighting system. Your ColorSource console gives you many options for control of your lights. This section discusses how to control your channels, and how to set the parameters. Note: Depending on the types of lights you have patched, you may have additional parameters that you can control. -
Page 22: Controls
Move a fader to select a channel. If the channel is already on due to playback, move the fader until it matches the channel's current output. Move the fader back to the bottom "zero" position to deselect it (and take its intensity to zero.) Touch the channel cell on the Stage Map. -
Page 23: Wheel
Groups display in the upper section, and the lower section of the screen displays the channel stage map. Avail- able groups are displayed in green boxes. Double click on a group to select only the lights in that group, click on other groups to add or subtract channels from the selection. -
Page 24: Colorsource
Keypad, Plus Adds a channel to the selection set. For Example: 1 Thru 10 + 20 Enter - creates a set of eleven channels: 1-10 plus 20. Keypad, Minus Removes a channel from the selection set. For Example: 1 Thru 10 - 7 Enter - creates a set of nine channels: 1 through 6 plus 8 through 10. Keypad, Thru Selects a range of channels. - Page 25 Each cell on the parameter display is a controllable button to alter the value. Press and hold on the cell and you can wipe the value up and down, using the entire screen height for control. Press once and release on a cell to reveal a filmstrip-style view of the available settings, with diagrams of gobos and samples of fixed colors.
- Page 26 The filmstrip may be scrolled left or right to see all the choices. Parameter, Beam Shows only the beam parameters. All parameters that are not position, intensity or color mixing are included in the beam parameter set. Note: The Param button is only present if you have patched lights with those capabilities. Controls the parameters of the selected light(s).
- Page 27 Pick the value box with one press to open a filmstrip view of the available settings. The filmstrip may be scrolled left or right to see all the choices. The second page displays a cross hair pan and tilt control. Tap the tab twice to get to the second page. A white dot is used to indicate the current location.
- Page 28 Note: Not all color mixing systems can produce precise color matches and a full range of colors. It is advisable to control color on only one fixture type at a time. Note: You may find it necessary to pick colors independently for different lights in order that they all produce a similar color.
-
Page 29: How To Program A Color Chip
Parameter, ColorMix for more information. Record Color Chips Color chips may be programmed to carry any color mix. How to Program a Color Chip. 1. Pick a color using the color selector, move around until you find the one you require. 2. - Page 30 Home All Home Position Home ColorMix Home Beam Home All Sends all or just the selected parameters of the selected lights to their home positions. The home positions are pre-recorded in the patching personality files, and may not be changed by the user. Generally, parameters home to useful settings.
- Page 31 Trackball Pan Tilt When selected, this button allows an attached USB mouse or trackball to control pan and tilt. While enabled, the Trackball Pan/Tilt button will be highlighted in light gray and the mouse pointer will be hidden. Any move- ment of the mouse or trackball will change the pan and tilt values.
- Page 32 Controlling Your Lighting System...
-
Page 33: Recording Your Looks For Playback
Recording Your Looks For Playback This section covers the multiple ways that you can record lighting looks for playing back. You can record cues, playbacks, and sequences. A playback memory can contain one lighting look. A cue is a recorded stage look that can include channel settings for intensity and other parameters, and effects. -
Page 34: Playbacks
When the device is locked, the following operations will not be available: Any record actions All Setup options Color chip setup Layout Mode When unlocked, all options will be available for use. Playbacks The faders can operate the levels of the playbacks. Playbacks can contain one lighting look, or they can con- tain a sequence, which is made up of multiple lighting looks. - Page 35 Playbacks may be named and given a time. The names and times may be viewed and edited in the Playback screen. To clear a playback, use the Erase Playback button under Record/Edit. Include Options When recording to a playback, cue, or sequence step, you may specify which lighting channels...
-
Page 36: Record Cue
Flash Note: The button modes; Flash, Solo, Solo Change, and Move/GO are only available when the faders mode is set to playbacks. When the button mode is set to Flash, pressing the bump button for a playback will cause the channels in that playback to flash on to the level of the... - Page 37 You may make a simple recording by just choosing Store. To specify a recording in more detail, select Include options and choose the lights and parameters you wish to be included. Each cue may be named, and its In, Out and Follow times set. When a follow time is running, both the live cue and the next cue will display in green.
- Page 38 be made as complete new states for each cue by leaving the cues master down and making a new state for each recording. Store And Next The current lighting levels will be stored in the selected and recording will be remain open so additional cues can be recorded.
- Page 39 Tap the cue list indicator to open the cue transport controls. The Cue Transport buttons are Back, Pause, and GO. These buttons may be assigned to the hard buttons below the screen, and are also always available by pressing on the cue list indicator in the upper right corner. Touch again to close the controls. More Pressing on the More button in the Cue List...
- Page 40 Edit Cue List The Edit Cue List option is available by pressing the Record/Edit button and then selecting Cue List. This opens the cue list editor. Here you may change cue names and the timing of fades. You can insert cues, copy cues,...
-
Page 41: Record Sequence
Edit Cue is a mode which takes over the console and screen. While inside the edit screen, you may visit other screens to change colors, parameters, and effects of the cue you are editing. While in those screens, a green watermark will display showing what cue you are editing. - Page 42 exit immediately with Store & Exit or you may store the step and remain inside sequence recording to record further steps with Store & New. Press Cancel to leave the recording screen without saving anything. Include Options When recording to a playback, cue, or sequence step, you may specify which lighting channels...
-
Page 43: Operation
New Step Inserts a new sequence step. The new step is added to the next free whole-numbered step at the end of the sequence list. The new step may then be given another number, including a fractional or 'point' number. For example, to insert a step between steps 4 and 5, you would enter 4.5. -
Page 44: Colorsource
Stopped sequences are indicated by a blue bump button. Stopped sequences may be advanced by pressing the blue bump button. Note: Stopped sequences may be used as additional cue lists if required. To Update a Sequence Step 1. Stop the sequence by using the Seq Run/Step button, which is accessed by pressing the playback mode button in the Playback Toy... -
Page 45: Pause
The Sequence Run/Step button is located in the Playback Toy display. A Sequence Run/Step button will dis- play below each sequence and will only control that particular sequence. The button is a toggle that either lets you stop a sequence so you can manually go through the steps by pressing the bump button, or it runs through the steps automatically. -
Page 46: Back
Press Back to return to the previous cue. Back Reverses the cue list to the previous cue using the default cue times. The live cue is displayed surrounded by a yellow box with the next cue displayed in a red box beneath it and the previous cue above it. -
Page 47: Using Effects
Using Effects Effects are a method within ColorSource to provide dynamic, repetitive patterns to channels. Effects The Effects system is used to apply patterns to selected lights. Patterns are provided for the following effect types: Color, Shape (motion), Intensity, and Parameter effects. -
Page 48: Effect, Color
Effect, Color Applies color effects to selected channels. Note: The color effect system only works with lights capable of performing color mixing. Color effects cannot be applied to lights with fixed colors or a choice of single colors on wheels or scrollers. How to Apply a Color Effect 1. -
Page 49: Effect, Intensity
Note: The shape effect system only works with lights capable of pan / tilt movement. How to Apply a Shape Effect 1. Select some channels. 2. Go to Controls>Effects. 3. Press Effect. 4. Choose the shape tab from the tab area. 5. -
Page 50: Effect, Parameter
Note: Intensity effects may only be applied to devices that produce light and have an intensity con- trol channel. How to Apply an Intensity Effect 1. Select some channels. 2. Go to Controls>Effects. 3. Press Effect. 4. Choose the intensity tab from the tab area. 5. -
Page 51: Add Effect
How to Apply a Parameter Effect 1. Select some channels. 2. Go to Controls>Effects. 3. Press Effect. 4. Choose the parameter tab from the tab area. 5. Select a pattern. 6. Choose the parameter to be affected, you will see the effect start. 7. -
Page 52: Remove Effect
The order that lights are selected in is relevant and affects the behavior of the Fan setting. Fan refers to the amount the effect is spread-out over the selected channels. With no Fan all the lights change together at the same time. -
Page 53: Turning Lights Off
Turning Lights Off This section covers turning off your lights by using the Blackout Clear functions. Clear Clear functions remove levels coming from various sections; cues, playbacks, and channels under control of the wheel. When Clear is pressed, the following options will be available: Playbacks Cues Channels... -
Page 54: Blackout
Speed Clear Speed Clear is a function that can be assigned to one of the configurable buttons under the touchscreen. It is assigned in the Settings: Console tab. By pressing the Speed Clear button a certain number of times, you can perform the following clear functions: Deselect - pressing the speed clear button once deselects any selected channels, but their levels will remain at the current value. -
Page 55: Special Functions
Special Functions This section covers the use of the Playback Toy and Independents. The Playback Toy is a display where you can control playbacks and sequences. Independents can be used to control certain devices and can have special settings applied to them. Independent Operates the independent outputs, 1 or 2. - Page 56 All Filter Position Filter Beam Filter Effects Filter Range Sequence Run/Step View/Edit The page number or name is shown to the right of the Page - and Page + buttons. Hold the button to change the page name. Intensity Playback Toy provides a simple way to play one playback or sequence at a time with a single press.
- Page 57 Parameters may be filtered so you can choose which types of parameters to play, for example you could choose to only play the position part by turning off (filtering) the other parameters such as beam. You may mix one intensity look with another parameter look to make a new combination look. Time/ Rate Playbacks may be given a fade time.
- Page 58 Playback Page Selection, Plus Picks the playback page to switch to. There are ten pages of playbacks. The page will change for the next time a fader is raised from the zero position or a playback is launched in Playback Toy on a mauve or blue button.
- Page 59 Switch off position to exclude it from playback when operating the blue GO buttons. Note: If all parameters are off, the blue GO button will not do anything. However, the mauve intensity button can still launch the intensity and color mixing parts of the chosen playback. Range Playback Toy displays ten...
- Page 60 Special Functions...
-
Page 61: System Settings And Setup
System Settings and Setup This section covers the system settings setup options for your device. Setup Contains functions used in the setup of the device: Patch Settings Files Layout Mode Settings All internal settings and default values are setup here. Settings are arranged in tabs of related items: General: Operating modes, language, stage map zones, auto-select channel on fader move, and about console information. -
Page 62: Settings: Times
Complete Mode: Complete mode offer the whole set of functions and is suited to trained users and experienced lighting professionals. Show stage map zones, when selected, will show the stage map zones. See stage map for more information. Behavior of faders to auto-select channels on move can be disabled here. Enabling Bi-Directional Parameters on playbacks allows for the playbacks to control parameters, including effects, when the playback is brought up and down. -
Page 63: Settings: Erase
Blackout Cue List Effects Ind 1 Ind 2 Keypad Pause Parameter Playback Toy Quick Select Speed Clear Stage Map These buttons default to Color, Cue List, Back, Pause, GO. Note: The left-hand button cannot be re-assigned and always selects the Stage Map display. You can also assign the four master faders above the screen to the following functions:... - Page 64 Note: Other show files stored in the console or on an attached USB drive will not be affected. Only the current show file will be affected. Note: The library of device personalities is not a part of the show data and cannot be erased. System Settings and Setup...
-
Page 65: Showfile Management
Showfile Management This section explains how to create, save, open, delete, import, and export show files. Software upgrades creating a default show file are also covered. Files All filing operations: Open Save Save As Show files: Save as default Remove default Delete Import Export... - Page 66 File, Save Save the show by going to Setup>Files>Save. The show will be saved with the name you last gave it. If you have not yet saved the show with a name, you will be prompted to enter a show file name. Caution: All data is stored internally in non-volatile memory.
- Page 67 File, Delete Delete an existing show file off your device by going to Setup>Files>Shows>Delete. When the Delete button is pressed, the following screen will display showing the available show files. Select the desired file, and then press Accept. If you want to leave this display without deleting, press Cancel. Files, Show files You can open and save shows by going to Setup>Files Shows are saved internally with all content, including lighting and effects.
-
Page 68: Files, Advanced
Update Firmware The main operating software can be updated here. The software must be obtained from ETC and placed in the root of the USB drive. Please make sure the software file is not inside any other folder or subdirectory, as this will hide it from the update function. - Page 69 The files you wish to import must be obtained from ETC and placed in the root of the USB drive. The files will be named with the suffix .cspkg. Note: You cannot update the main operating software here, only support files.
- Page 70 Tel +49 (80 24) 47 00-0 Service: (DE) techserv-hoki@etcconnect.com Hong Kong Tel +852 2799 1220 Service: (Asia) service@etcasia.com Web: etcconnect.com © 2018 Electronic Theatre Controls, Inc. Product information and specifications subject to change. ETC intends this document to be provided in its entirety. 7225M1200-2.5.0 Released 2018-11...
Need help?
Do you have a question about the ColorSource Console and is the answer not in the manual?
Questions and answers