ETC ColorSource 20 User Manual
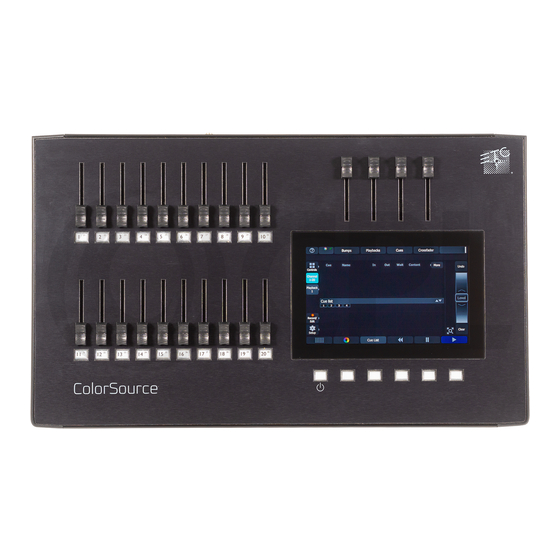
Colorsource av console
Hide thumbs
Also See for ColorSource 20:
- Setup manual (2 pages) ,
- Setup manual (2 pages) ,
- User manual (70 pages)

Related Manuals for ETC ColorSource 20


Summary of Contents for ETC ColorSource 20
- Page 1 ColorSource AV Console User Manual v1.1.0 Part Number: 7225M1210-1.1.0 Rev: A Released: 2016-12...
- Page 2 ETC®, and ColorSource™, are either registered trademarks or trademarks of in the United States and other countries. All other trademarks, both marked and not marked, are the property of their respective owners. ETC intends this document, whether printed or electronic, to be provided in its entirety.
-
Page 3: Table Of Contents
Table of Contents Welcome to the ColorSource Help System ColorSource 20 ColorSource 40 Shutdown ColorSource Overview Stage Map Fader Mode Bumps Crossfader Master Faders Getting Started With Patching Patch Add Dimmer Duplicate Cell Add Device Patching a Device Loading a Fixture Profile... - Page 4 Playbacks Record Playback Memory Include Options Select Page Erase Playback Button Mode Flash Solo Solo Change Move / GO Record Cue Include Options Store Cue List More Flag Next Flag Previous Flag Goto Cue Goto 0 Edit Cue List New Cue Copy Cue Delete Cue Update Live Cue...
- Page 5 Independent Playback Toy AV Functions Use of Media Media Media, Audio Audio Input and Output Help Media, Video Audio Mute Media Pause Video Off S2L Lights S2LVideo Toy OSC Commands Amigo Remote Web Browser Connecting the Amigo Remote Web Browser via WiFi Connecting to the Amigo Remote Web Browser by Cable Using Help with the Remote Web Browser System Settings and Setup...
-
Page 7: Welcome To The Colorsource Help System
The topics found in this help system can also be found on your console by pressing the button. Tutorial videos are also available on your console. ColorSource 20 ColorSource 40 Shutdown Hold the Stage Map button (left-most button below the screen) for three seconds to select the Shutdown screen. - Page 8 Welcome to the ColorSource Help System...
-
Page 9: Colorsource Overview
ColorSource Overview The ColorSource console is made up of four different physical areas; the touchscreen (stage map), the faders and bumps, the crossfader, and the master faders. It is important to familiarize yourself with these different areas as you learn to use your console. Stage Map The Stage Map button (left-most button below the screen) displays a topographical map of channels... -
Page 10: Fader Mode
Available Controls Pinch two fingers to zoom the display in or out. Zoom in to see intensity levels within the channel cells. Drag with two fingers to pan the display. Single click on a deselected light to select it. Single click on a selected light to deselect it. Double click on a light to select that light alone and de-select all others. -
Page 11: Master Faders
Master Faders Master faders can be used to control the output of certain functions. Master faders are the four faders above the touchscreen. They are assigned in the Console tab in Settings. Note: When the Playbacks or Cues faders are fully down no output will be produced by those sections. - Page 12 ColorSource Overview...
-
Page 13: Getting Started With Patching
Getting Started With Patching To be able to control the lighting fixtures in your system you need to assign each fixture (or a group of dim- mers) to a channel fader. The channel fader can then be used to set intensity of a fixture. The channel also becomes a way to select that fixture for other types of control like color changes, or adjustment of other parameters (in the case of a moving light, for example). -
Page 14: Add Dimmer
Add Dimmer Dimmers are single-address devices that control intensity only. For patching multiple-address devices, see Device. Note: Dimmer patching can also be used to connect other simple devices that only require one DMX address. Patching a Dimmer or Single-address Device 1. -
Page 15: Add Device
When a duplicate cell is selected or operated, each of the duplicate cells on the Stage Map will respond together. Each cell of a duplicate channel may be moved separately on the Stage Map. Note: : You can also add dimmers to a channel without showing them as separate cells on the Stage Map. -
Page 16: Loading A Fixture Profile
There is a device editor application for Windows PCs called ColorSource Edit, which is available for down- load at www.etcconnect.com. To request a fixture personality from ETC, please send your request along with the user manual, the required mode(s) and your need by date to ColorSourceConsole@etcconnect.com. -
Page 17: Invert Pan
Each cell shows the DMX address, the value in the range 0-255 and the name of the parameter if for a device patched with a personality. Cells colored in light blue indicate the base address of the item, which is the address entered in the Patch screen DMX box. -
Page 18: Rdm
RDM button. RDM via Network RDM across a network connection from a ETC Net3 DMX/RDM Gateway to the console may be enabled or disabled with the RDM button. Disabling RDM at the console will not affect what Gateways do on their respective DMX outputs. RDM activity on the DMX outputs of Gateways will depend on the type and setup of Gateway being used. - Page 19 Discovery RDM automatically discovers RDM-capable lights. Discovery runs continuously any time the Patch screen is open and the button is enabled, and will repeatedly search for devices. As devices are added or removed from a system, they will be updated in the patch list. Note: Discovery takes place during short periods of rest of normal DMX transmission and is a lengthy process to complete.
- Page 20 Getting Started With Patching...
-
Page 21: Controlling Your Lighting System
Channels need to be associated with an address in patch for there to be output. Channel Counts The ColorSource 20 can control up to 40 channels. The ColorSource 40 can control up to 80 channels. Setting the Operating Mode Choose Simple or Complete mode on the Setup>Settings>Basic... -
Page 22: Controls
To release a captured channel back to the normal output from playbacks and cues, press Clear. Operating a playback or cue containing a channel that is captured will return that channel to normal control. Color and other parameters may also be over-ridden on captured channels. Controls Controls contain all the functions for controlling lights and cues, and setting color and other parameters: Stage... -
Page 23: Keypad
Keypad The keypad is opened by going to Controls>Keypad. This provides classic lighting control of channels and levels via a numeric keypad entry. Note: Colors, Effects, Media, and Parameter settings must be controlled on their respective screens. Available Buttons + (Plus) - (Minus) Thru Full... -
Page 24: Keypad, << (Backspace)
White- Anywhere on the bottom edge picks the color white. The actual shade of white pro- duced will depend on the type of light and its capabilities. Lights made by ETC that are set to 'Direct mode' will produce the color 'D50' - equivalent to a color temperature of 5005K. -
Page 25: Setup Color Chips
Note: Not all color mixing systems can produce precise color matches and a full range of col- ors. It is advisable to control color on only one fixture type at a time. You may find it necessary to pick colors independently for different lights in order that they all produce a similar color. -
Page 26: Parameter, All
Press once and release on a cell to reveal a filmstrip-style view of the available settings, with diagrams of gobos and samples of fixed colors. The strip may be scrolled left-right until the desired setting is found. Pick the setting to close the filmstrip. Parameter, All Shows all the available parameters. -
Page 27: Parameter, Position
Controls the parameters of the selected light(s). Only lights with parameters may be controlled here. Pick a parameter and wipe the value box up and down to change values. Pick the value box with one press to open a filmstrip view of the available settings. The filmstrip may be scrolled left <>... -
Page 28: Parameter, Home
Lamp On: Turns on the fixture's lamp. Also known as striking the lamp. Lamp Off: Turns off the fixture's lamp. Also known as dousing the lamp. Reset: Resets the lamp commands. Parameter, Home Sends all parameters of the selected lights to their home positions. The home positions are pre-recorded in the patching personality files, and may not be changed by the user. -
Page 29: Recording Your Looks For Playback
Recording Your Looks For Playback This sections covers the multiple ways that you can record lighting looks for playing back. You can record cues, playbacks, and sequences. A playback memory can contain one lighting look and media. A cue is a recorded stage look that can include channel settings for intensity and other parameters, effects, and media. -
Page 30: Record Playback Memory
If two playbacks are up and contain the same channels with differing colors, the resulting color will be the combination of the two. For example, if one playback has a channel set to green and another playback has the same light set to red, when they are mixed the light will turn yellow. When playbacks also carry parameter values for automated lights, parameters may be run up or down on a... -
Page 31: Select Page
Beam: Only the beam channels are included (beam includes non-fadable colors such as wheels and scrollers). If any media is playing, you will have the option to include it in the recording. Select Page Playbacks can be arranged on 10 different pages. In normal use, all the playbacks are on the same page. You can arrange the content of pages to match songs, scenes, or other blocks of activity in your show by using Select Page to record playbacks to a different page. -
Page 32: Solo Change
Note: This is the same as if the playback fader had been taken to the same level as the bumps master and all other playbacks and cues set to zero. Solo Change When the button mode is set to Solo Change, pressing the bump button for a playback... -
Page 33: Include Options
To record Media, run the media on the media screen (or from another source, for instance a playback car- rying the desired media). You will see an option to include the running media when the cue is recorded. Note: If you want a media clip to continue across several cues just record the same clip in each cue. -
Page 34: More
Cues are played back with the Cue Transport ( ) buttons or by moving crossfader up and down. The Cue Transport buttons are Back, Pause, and GO. These buttons may be assigned to the hard buttons below the screen, and are also always available by pressing on the cue viewer in the upper right corner. The live and next cues are indicated on the main cue list and also on the small cue viewer ( ... -
Page 35: Goto 0
In the cue list window, press More and then Goto Cue, type in the cue number, and press Enter. Goto 0 Cue 0 does not exist as a real cue. It is an imaginary cue before the first cue. Press Goto 0 to take all levels from the cue list to zero, and prepare the crossfader for the first cue. -
Page 36: Update Live Cue
Update Live Cue Records the current state of the channels to the live cue in the list. The cue's previous content will be replaced. All recording operations use the output currently live on stage. Blind recording is not permitted. Use Update Live Cue to quickly change or edit the cue on stage. Clear Cues Clears the output from the list. -
Page 37: Store
Channels: Active: Only channels with an intensity above zero are included. Selected: Only channels currently selected (surrounded by a green box on the stage map or brightly lit on the bumps) are included. All: All channels are included. Include: Intensity / Color: Only the intensity and color mixing channels are included. Position: Only the position (pan/tilt) channels are included. -
Page 38: New Step
New Step Inserts a new sequence step. The new step is added to the next free whole-numbered step at the end of the sequence list. The new step may then be given another number, including a fractional or 'point' number. For example, to insert a step between steps 4 and 5, you would enter 4.5. -
Page 39: Sequence Rate
5. Pick the bump of the sequence to be updated to complete the update. Note: There may be several stopped sequences at any given time. Sequence Rate Sequences play back on the playback faders. A sequence may contain up to 99 steps with fade and step timing. -
Page 40: Tap Tempo
Stopped sequences are indicated by a blue bump button. Stopped sequences may be advanced by pressing the blue bump button. Note: Stopped sequences may be used as additional cue lists if required. Tap Tempo Places the bump buttons for playbacks carrying sequences into 'Tap' mode. -
Page 41: Undo
Undo You may Undo the most recent function that changed your show data. Undo is one level only, back to the most recent action. The Undo function toggles between Undo and Redo so you may flip back and forth between two recorded items to see which one is correct before moving on. - Page 42 Recording Your Looks For Playback...
-
Page 43: Using Effects
Using Effects Effects are a method within ColorSource to provide dynamic, repetitive patterns to channels. Effects The Effects system is used to apply patterns to selected lights. Patterns are provided for the following effect types: Color, Shape (motion), Intensity, and Parameter effects. -
Page 44: Effect, Color
Effect, Color Applies color effects to selected channels. Note: The color effect system only works with lights capable of performing color mixing. Color effects cannot be applied to lights with fixed colors or a choice of single colors on wheels or scrollers. -
Page 45: Effect, Shape
Note: Effects containing fully saturated colors, such as Rainbow, cannot be made 'more' saturated with the Chroma control. Running Effect Control When effects run, an icon is displayed in the vertical area to the right of the stage map. This may be selec- ted at any time to manipulate the effects. -
Page 46: Effect, Intensity
Aspect- Shape effects may be squashed on one of their axes. This can used to fit a shape effect to a stage area or scenic element. Positive Aspect progressively squashes the tilt axis while negative Aspect progressively squashes the pan axis. Running Effect Control When effects run an icon is displayed in the vertical area to the right of the stage... -
Page 47: Effect, Parameter
Running Effect Control When effects run an icon is displayed in the vertical area to the right of the stage map. This may be selec- ted at any time to manipulate the effects. Effects may be edited, removed or reduced via the wheel control when they are playing back from play- backs or cues. -
Page 48: Add Effect
Running Effect Control When effects run an icon is displayed in the vertical area to the right of the stage map. This may be selec- ted at any time to manipulate the effects. Effects may be edited, removed or reduced via the wheel control when they are playing back from play- backs or cues. -
Page 49: Turning Lights Off
Turning Lights Off This section covers turning off your lights by using the Blackout or Clear functions. Clear Clear functions remove levels coming from various sections; cues, playbacks, and channels under control of the wheel. When Clear is pressed, the following options will be available: Playbacks Cues Channels... -
Page 50: Blackout
By pressing the Speed Clear button a certain number of times, you can perform the following clear func- tions: Deselect - pressing the speed clear button once deselects any selected channels, but their levels will remain at the current value. Clear channels - pressing the speed clear button twice removes all levels coming from channels... -
Page 51: Special Functions
Special Functions This section covers the use of the Playback Toy and Independents. The Playback Toy is a display where you can control playbacks and sequences. Independents can be used to control certain devices and can have special settings applied to them. Independent Operates the independent outputs, 1 or 2. - Page 52 Beam Filter Effects Filter Audio Filter Video Filter Range Sequence Run/Step View/Edit The page number or name is shown to the right of the Page - and Page + buttons. Hold the button to change the page name. Intensity Playback Toy provides a simple way to play one playback or sequence at a time with a single press.
- Page 53 Parameters may be filtered so you can choose which types of parameters to play, for example you could choose to only play the position part by turning off (filtering) the other parameters such as beam. You may mix one intensity look with another parameter look to make a new combination look. Time/ Rate Playbacks may be given a fade time.
- Page 54 The page number or name is shown to the right of the Page - and Page + buttons. Hold the name / num- ber button to change it. Playback Page Selection, Plus Picks the playback page to switch to. There are ten pages of playbacks. The page will change for the next time a fader is raised from the zero position or a playback is launched in Playback Toy on a mauve or blue...
- Page 55 Filter, Effect Filtering is useful to play parts of a playback and leave other parts unaffected. Using this method you can play the pan/tilt part of one playback, the gobo and beam parts of a second playback, and the intensity and color mixing parts of a third playback to make a new composite playback.
- Page 56 Special Functions...
-
Page 57: Av Functions
It is your sole responsibility to ensure that all media that you import into or export from the ColorSource AV console is rightfully yours to use and that such usage is legal. ETC asks that you comply with all applicable laws regarding the usage of media on or with this console, including copyright laws. -
Page 58: Media, Audio
Media, Audio To open the Audio tab, go to Controls >Media. Here you can choose audio clips to play or record. You can also operate the mixer to control audio volume and the external input on the rear panel. For additional information about Audio input and output, please see Audio Input and Output Help on page Browse the clip files to find a sound to play and try it on the local player on this screen. -
Page 59: Audio Input And Output Help
Audio Input and Output Help Input Type 3.5mm (1/8”) TRS, Stereo, unbalanced Max Peak Input: -10dBV (316mV RMS) Input Impedance: 29k ohms Output Type 3.5mm (1/8”) TRS, Stereo, unbalanced Max Output : -10dBV (316mV RMS) at 10k ohms “Line Level” Load Impedance : 10k –... -
Page 60: Media, Video
Caution: You should ask a competent electrician to perform any changes of grounding as it could affect equipment safety. If hum cannot be cured easily you should consider using a Direct Injection (DI) box. You will need a stereo DI box on either the input or the output, and exceptionally on both. DI boxes are readily obtain- able from music stores. -
Page 61: Audio Mute
Video Toy Controls Blur: The degree to which pattern elements remain in view or fades away. Size: Adjusts the size or scale of pattern features. Friction: Modifies the way pattern elements interact with each other. Intensity: Adjusts the brightness of the resulting lighting levels. Rate: Adjusts the rate or speed that pattern elements move or change. -
Page 62: S2L Lights
All video output is blanked, whether from a still image or Video Toy pattern. S2L Lights Turns on or off the Sound2Light Lights function. S2LVideo Toy Turns on or off the Sound2Light Video Toy function. AV Functions... -
Page 63: Osc Commands
OSC Commands OSC is a protocol that uses network communication (wired or wireless) to communicate between various audio, video, and lighting devices, and other devices, such as tablets for remote control of your console. For configuration information, see Settings: Network (on page 72). - Page 64 Variables / Argu- Command Description ments x: tag group number, no /cs/tagGroup/select/{x} Selects all the channels in the tag group x arguments x: tag group number,1 /cs/tagGroup/select=x Selects all the channels in the tag group x integer argument Level- Params - Color x: value [0-100], no argu- /cs/chan/at/{x} Puts the selected channel at level x...
-
Page 65: Amigo Remote Web Browser
Variables / Argu- Command Description ments /cs/playback/x/level/y No arguments Sets the level of playback x to value y /cs/playback/x/level = y 1 argument – level (float) Sets the level of playback x to value y (0.0 to 1.0) 3 arguments – playback /cs/playback = x, “level”, y number (integer), “level”... - Page 66 Note: If the QR code is not visible, your console is not currently connected to a network. Note: A QR reader is required for automatic connection with QR code. 1. Open the Setup>Settings>Basic or Setup>Settings>Network tab. 2. Snapshot the QR code. You may need to wait a few moments for a connection be established. Setting Up Your Computer, Phone, or Tablet Open the Setup>Settings>Network tab on your ColorSource AV console.
-
Page 67: Connecting To The Amigo Remote Web Browser By Cable
http://169.254.12.48:8080 [Enter]. The full text to type will display under the QR code in the Basic and Network tabs. Connecting to the Amigo Remote Web Browser by Cable To operate your ColorSource AV console from a web browser on a wired network, please follow these steps: Setting Up Your Computer, Phone, or Tablet Open the Setup>Settings>Network tab on your ColorSource AV console. -
Page 68: Using Help With The Remote Web Browser
Note: If the QR code is not visible, your console is not currently connected to a network. Note: To use a wireless device, you must install a WiFi access point on the network connected to the console. Using Help with the Remote Web Browser The help tab in the remote web browser follows the functions being operated on your ColorSource AV con- sole. -
Page 69: System Settings And Setup
System Settings and Setup This section covers the system settings and setup options for your ColorSource console. The following topics are covered: Setup Settings Settings: Basic Settings: Times Settings: Independents Settings: Console Settings: Network Settings: Erase Setup Contains functions used in the setup of the console: Patch Settings Files... -
Page 70: Settings: Times
Note: If the QR code is not visible, your console is not currently connected to a network. Choose the operating mode: Simple Mode: Simple mode offers a very basic set of lighting controls. There is no list, no fader paging and only four playbacks. Simple mode is ideal for setting up a few static lighting states without needing any training or deep knowledge of lighting control. -
Page 71: Settings: Independents
Settings: Independents Setup for the two independent control channels. Independents may be used to control lights, for instance the house lights, or accessories and small machines such as smoke machines or mirror balls. In this tab, the following settings for independents can be set: Universe and DMX - an independent can be assigned to a DMX address on a given universe. -
Page 72: Settings: Network
Video Off These buttons default to Color, Cue List, Back, Pause, GO. Note: The left-hand button cannot be re-assigned and always selects the Stage Map display. You can also assign the four master faders above the screen to the following functions: Volume Bumps Crossfader... -
Page 73: Settings: Erase
Open Sound Control (OSC) OSC is a protocol that uses network communication (wired or wireless) to communicate between various audio, video, and lighting devices, and other devices, such as tablets for remote control of your console. OSC Remote control IP- sets the IP address of the device that the console will be sending OSC output to or receiving OSC input from. - Page 74 System Settings and Setup...
-
Page 75: Showfile Management
Showfile Management This section explains how to create, save, open, delete, import, and export show files. Software upgrades and creating a default show file are also covered. Files All filing operations: Open Save Save As Show files: Save as default Remove default Delete Import... -
Page 76: File, Save
File, Save Save the show by going to Setup>Files>Save. The show will be saved with the name you last gave it. If you have not yet saved the show with a name, you will be prompted to enter a show file name. Caution: All data is stored internally in non-volatile memory. -
Page 77: File, Delete
When the Export button is pressed, the following screen will display. Press Yes to export. If you want to leave this display without exporting, press No. Note: Exported shows contain all the media used in the show. If there is a large amount of image or audio clip content, the save may take some time to complete. -
Page 78: Save As Default
Functions Save As Default Remove Default Show Delete Import Export Caution: All data is stored internally in non-volatile memory. Do not switch off the power until any pending save operation is completed, or you may lose data. It is strongly advised that you make periodic backups of important data to an external memory stick using the export function. -
Page 79: Import Media
Functions Import USB: imports media from an external memory stick. Files must be in a folder called Import in the root of the USB stick. Import Show: imports media from another show file. Delete Media: deletes selected media from your console. Caution: All data is stored internally in non-volatile memory. -
Page 80: Files, Advanced
The files you wish to import must be obtained from ETC and placed in the root of the USB drive. The files will be named with the suffix .cspkg. Note: You cannot update the main operating software here, only support files. - Page 81 Showfile Management...
- Page 82 Hong Kong Tel +852 2799 1220 (Asia) service@etcasia.com Web: www.etcconnect.com Copyright 2016 © Electronic Theatre Controls, Inc. Product information and specifications subject to change. ETC intends this document to be provided in its entirety. 7225M1210-1.1.0 Rev A Released 2016-12...
Need help?
Do you have a question about the ColorSource 20 and is the answer not in the manual?
Questions and answers