Table of Contents
Advertisement
Quick Links
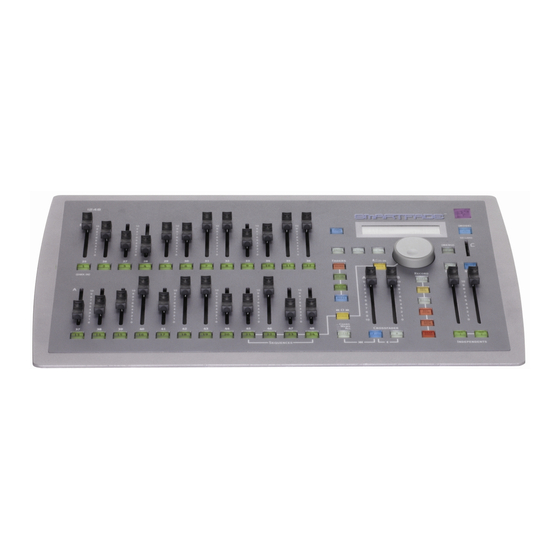
Control Console
User Manual
Version 1.6
C o p y r i g h t © E le c tr o n i c T h e a t r e C o n t r o l s , I n c .
A l l R i g h t s r e s e r v e d .
P r o d u c t in f o r m a t i on a n d s p e c i f i c a t i o n s s u bj e c t t o c h a n g e .
P a r t N u m b e r : 7219M1200-1.6.0 R e v A
R e l e a s e d : D e c e m b e r 2 0 0 5
Advertisement
Table of Contents

Related Manuals for ETC SmartFade


Summary of Contents for ETC SmartFade
- Page 1 Control Console User Manual Version 1.6 C o p y r i g h t © E le c tr o n i c T h e a t r e C o n t r o l s , I n c . A l l R i g h t s r e s e r v e d .
- Page 2 ® ® ® ® ® ® ET C , E m p h a s i s , E x p r e s s i o n , I n s i g h t ™ , I m ag i n e ™ , F o c u s ™ , E x p r e s s ™ , U n i s o n , O b s e s s i o n I I, S m a r t P a c k ®...
-
Page 3: Table Of Contents
Text Conventions........2 Help from ETC Technical Services ......3 Power-up and Shutdown Procedures. - Page 4 Update the Software ....... . .51 SmartFade v1.6 User Manual...
-
Page 5: Introduction
SmartFade console offers a great feature range including hands-on manual control, memory driven operation, and an impressive array of features for systems work. SmartFade is perfect for any venue. Usable for small touring shows, auditorium productions, or as a stage manager’s remote console. -
Page 6: Using This Manual
24 DMX512 states for playback via faders or STACK. • SmartFade 1296, which is the same size as the 1248, but offers 96-channel Normal Mode for manual and memory playback. Two Scene Operation is still limited to 12- channels. -
Page 7: Help From Etc Technical Services
If you are having difficulties, your most convenient resources are the references given in this user manual. To search more widely, try the ETC Web site at www.etcconnect.com. If none of these resources is sufficient, contact ETC Technical Services directly at one of the offices identified below. -
Page 8: Power-Up And Shutdown Procedures
Power-up and Shutdown Procedures SmartFade uses the power button not only for power-up and power-down, but also to access the operating mode selection menu. P o w e r - u p P r o c e d u r e The startup process will run once the console is powered up. -
Page 9: Operating Modes Menu
O p e r a t i n g M o d e s M e n u The power button [ ] is also used to enter the Operating Modes menu. The console must be off before changing the mode. Set the operating mode: Step 1: With the console off, press and hold the power button [... - Page 10 SmartFade v1.6 User Manual...
-
Page 11: Two Scene Mode
C h a p t e r 1 Two Scene Mode SmartFade is specifically designed to be usable right out of the box. Two Scene Mode gives you quick access to the console’s basic functions. If you’re pressed for time, or are anxious... -
Page 12: Two Scene Operation
DMX is restricted to a total of 512 separate values available in each DMX line (referred to as a universe). Since your SmartFade has either 48 or 96 channels available, there are many more DMX values available than console channels to apply them to. This is why your... -
Page 13: Bump Buttons
• They can also operate in SOLO mode. Pressing a bump button in SOLO mode swaps the bumped channel’s output for the current output of the SmartFade. Enable/Disable SOLO mode: Step 1: Press the [SOLO] key to activate SOLO mode. The [SOLO] key lights up white when SOLO is active. -
Page 14: Crossfade Timing
Independent 1 and 2 provide two output channels that are separate from the effect of all other controls on the console. They are intended to operate devices such as smoke machines, tab tracks, cue lights, etc. IND 1 and 2 are always either full on or full off. •... -
Page 15: Master Fader And Black Out
M a s t e r F a d e r a n d B l a c k O u t The Master fader proportionally limits all console outputs except the IND 1 and IND 2 channels. The [Black Out] button instantly sends all console outputs to zero except for the IND 1 and IND 2 channels. -
Page 16: Two Scene Mode Lcd Menu Glossary
10. This is useful if you find you are frequently using times other than 5.0 seconds. Diagnostics Allows you to display the software version that your SmartFade is currently running. Display Allows you to adjust the brightness or contrast of the LCD window. -
Page 17: Normal Mode
Functions N o t e : SmartFade was designed with simplicity in mind. There are many functions (such as saving and erase functions) which are relatively easy to perform and may not be detailed in this manual. Navigating to the function in the menu is typically all that is required. -
Page 18: Normal Operation
[25-48] ([1-48] and [49-96] on the 1296 and 2496). Faders 21-24 (or 45-48) may operate either sequences or memories. • SmartFade 1248 Faders 1-24 will control channels 1-24 when the channel range [1- 24] button is lit and channels 25-48 when the channel range [25-48] button is lit. •... -
Page 19: Bump Buttons
• SmartFade 2496 Faders 1-48 will control channels 1-48 when the channel range [1- 48] button is lit and channels 49-96 when the channel range [48-96] button is lit. • When [1-48] is pressed, output levels from channels 1-24 will be visible in the LCD window. -
Page 20: Single Scene Operation
(up or down). This setting is made in the Normal Mode LCD Menu, page 38 under Settings>Crossfade Faders. The default setting is “Upwards Only”. Step 7: Repeat steps 4-5 as needed to play back each look in your show. SmartFade v1.6 User Manual... -
Page 21: Ind 1 And Ind 2
Independent 1 and 2 provide two output channels that are separate from the effect of all other controls. They are intended to operate devices such as smoke machines, tab tracks, cue lights, etc. IND 1 and 2 are always either full on or full off. •... -
Page 22: Clear
Memories can be played back using the memory faders and bump buttons (1-24 on the SmartFade 1248 and 1-48 on the SmartFade 1296 or 2496), or in a cue stack or sequence. Sequences, page There are 12 pages of memories available, for a total of 288 memories on the SmartFade 1248 or 1296 and 576 memories on the SmartFade 2496. - Page 23 Select a memory page: Press and hold the [MEMS] button, then press the bump button (1-12) corresponding to the page you want to load. Pressing MEMS twice in rapid succession will automatically select page 1. • The current page is indicated by a bump button lit solid red. The current page number is also indicated in the LCD window while the [MEMS] button is pressed.
-
Page 24: Edit Memories
• Blink full red ..Occupied memory. Step 4: If needed, press and hold the [MEMS] button, then press the bump button (1-12) corresponding to the page you want to load. SmartFade v1.6 User Manual... -
Page 25: Playback Memories
Step 5: Press the bump button of the memory you want to edit. The console will temporarily enter channel mode and the faders will default to the first range of available channels. Press the channel range button for the second half of the available channels if needed. -
Page 26: Delete A Memory
Normal Mode LCD Menu, page 38. Sequences that are set to MANUAL operation and are stored on faders 21-24 (45-48) require the bump button for GO operation and will be excluded from SOLO functions. See Pile-on and SOLO Modes, page SmartFade v1.6 User Manual... - Page 27 Record a sequence to a fader: Step 1: If needed, press and hold the [MEMS] button, then press the bump button (1-12) corresponding to the page you want to load. Step 2: Press [REC SEQ]. The [REC SEQ] button blinks full yellow and bumps 21-24 (45-48) light as follows: •...
- Page 28 You can press [MAGIC] as many times as needed to achieve the desired look. Each successive press of [MAGIC] creates new timings based on the settings shown in the LCD window. SmartFade v1.6 User Manual...
- Page 29 Step 8: You can alter any of the parameters offered in the LCD window. Press [ ] to move from one parameter to the next. The parameters in the LCD are: • Order ... 100% means that there is no randomization, constant times are used during playback.
-
Page 30: Copy Memories And Sequences
Press the bump button corresponding to the memory or sequence you want to copy to (the target memory/sequence). The copy is completed, the [COPY] button goes out, and the console is returned to the previous fader mode. SmartFade v1.6 User Manual... -
Page 31: Stack
S T A C K The stack is similar to other sequences in that it is a chain of memories and/or channels. Unlike fader sequences, the stack has 199 steps available for recording (this includes inserted point cues - see below) and stack steps are played back using either the crossfaders or [ .. -
Page 32: Editing The Stack
Mode LCD Menu, page 38 to navigate the menu. Step 1: Use [ ] and the dial to find SmartFade Menu>Sequences>Playback:XF>Modify Steps Step 2: Use the dial to choose the step you want to add a point cue after. Press [ ]. -
Page 33: Crossfader Control Of Stack
E d i t t h e s t a c k You can edit the memory content of an existing stack. Step 1: If the STACK key is dim yellow, press [STACK] to activate it to full yellow. Step 2: Press [EDIT MEM]. -
Page 34: Next Mode And The Stack
Press [ .. ] to fade into the next step automatically. The step will fade in according to the time set during programming. Any added levels will fade in with the pre-programmed step. Step 6: Repeat steps 4-5, as needed, as you play through the stack. SmartFade v1.6 User Manual... -
Page 35: Rate
999% (10x longer than the recorded times). Step 3: Press [ .. ] to play the next look using the adjusted times. You may leave your SmartFade in this mode and alter the fade time before each successive crossfade, or you may... Step 4: Press [RATE] again. - Page 36 You may press [RATE] again to view levels in the LCD window. The rate override will remain in place. Step 7: To remove the step rate override repeat the process above, turning the dial until 100% is displayed. SmartFade v1.6 User Manual...
- Page 37 RATE and Sequences Adjust sequence fade rates: Step 1: Press the [MEMS] button. Faders with recorded sequences, 21-24 (45-48), light yellow. Step 2: Press [RATE] once. Faders with recorded sequences, 21-24 (45-48) will blink at full yellow. Step 3: Press the bump button corresponding to the sequence you want to adjust. The LCD shows the selected sequence fader number, the step number, the recorded fade times and the step’s contents (given as memory page/number).
- Page 38 Step 3: Play back the stack while following the stage action, pressing [ .. ] at the precise time for a desired cue to occur. SmartFade will record the time between presses of [ .. ] as wait times between cues.
-
Page 39: Upfade, Downfade, And Wait Times
U p f a d e , D o w n f a d e , a n d W a i t t i m e s You can adjust the upfade or downfade times of any step of any sequence using the LCD Menu (see Normal Mode LCD Menu, page 38). -
Page 40: Snapshot
S N A P S H O T SmartFade provides ten snapshot locations for lighting looks that you want to record, but you may not know which memory location you want to use. Each time you record a snapshot, it is stored in the next available snapshot number. If you have ten snapshots recorded and you record an eleventh, the contents of snapshot #1 are overwritten with the new levels. -
Page 41: Undo
C L E A R [CLEAR] may be used either by pressing the button a certain number of times to perform a certain function, or in combination with another button. M o m e n t a r y f u n c t i o n s o f [CLEAR] •... -
Page 42: Preview
SD card reader) and editing the file name. DO NOT change the .ASC file extension, as this will render the file unreadable by your SmartFade console. N o r m a l M o d e L C D M e n u The LCD menu provides quick access to configuration settings. - Page 43 Normal Menu < Channels Set Channel Range CH> n-n Lv: % Copy Snap>n Snapshots Store in:> pp mm Overwrite? View & Copy Snap View Snap:> n Store in:> pp mm Overwrite? Delete Step? Delete Sequences Playback:>XF/21-24 Modify Steps Select Step Insert Insert with bump Change...
-
Page 44: Normal Mode Lcd Menu Glossary
Useful if your DMX device is having trouble reading the constant stream of DMX supplied by SmartFade. This is often seen as flicker in your lighting devices. You can slow down the speed to try to alleviate communications errors with other manufacturer’s equipment. This feature will not be needed in the vast majority of applications. - Page 45 Recording (under Settings) This setting will enable/disable the record functions of your SmartFade. If you disable recording, REC MEM and REC SEQ will be rendered inactive. Run Mode (under Sequences) Options for running sequences include: • Manual - requires a press of [ .. ] (in the STACK) or the bump button (for fader sequences) to advance to the next step •...
- Page 46 SmartFade v1.6 User Manual...
-
Page 47: Dmx Backup Mode
C h a p t e r 3 DMX Backup Mode DMX Backup mode provides 24 (48) memories of 512 channels each. The DMX Input can be mastered on either fader #1 or the last fader (24 or 48) depending on the setting in Settings>DMX In Fader>First/Last. -
Page 48: Record A Memory
Clear levels generated by all memories: Press [CLEAR] three times in rapid succession (in less than 1.5 seconds), or press and hold [CLEAR] and press [MEMS]. Either method will clear levels generated by all memories. SmartFade v1.6 User Manual... -
Page 49: Stack
S T A C K The STACK provided in DMX Backup mode consists of memories 1-24 (48) linked in order. This STACK cannot be edited. STACK step #1 is the memory recorded to fader #1. C r o s s f a d e r C o n t r o l s •... -
Page 50: Dmx Backup Mode Lcd Menu
Master/Slave MIDI Channel >n DMX In Data Loss >Keep/Fade out DMX In Fader :>First/Last DMX Out Speed:>Max/Slow/Medium/Fast Bump Mode Bump Mode:> Bump/Toggle Language English/Français/Deutsch/Español Display Brightness >% Contrast >% Intensity:>% Buttons Diagnostics Software Version [display version] SmartFade v1.6 User Manual... -
Page 51: Midi Functions
46). N o t e : You must place your Master SmartFade at the beginning of the MIDI line. Consoles set to Master ignore any data on the MIDI IN port. Slave consoles do not generate any MIDI signal. They do, however, pass-through MIDI signal from the IN port to the OUT port. - Page 52 Solo is not transferred. Each console may be set to solo mode independently. If the slave is set to solo and a memory bump is pressed on the master, the slave will solo that bump even if the master is not in solo mode. The ‘Bumps’ fader level is transferred. SmartFade v1.6 User Manual...
-
Page 53: Midi Sequencing
MIDI. This allows you to build a timed playback including fade times. A SmartFade set to master MIDI mode can be used to create MIDI information that can be recorded by a MIDI sequencer. A SmartFade set to MIDI slave mode, will respond to MIDI sent by a sequencer. - Page 54 SmartFade v1.6 User Manual...
-
Page 55: Appendix A Software Update
Software Update This appendix contains the instructions for updating the software in your SmartFade console.SmartFade software can be updated using either an SD card or a USB connection to a PC. Software can be downloaded from the ETC Web site: www.etcconnect.com... - Page 56 Pre-formatted SD cards that are not formatted as FAT16 may not function properly in SmartFade. Smartfade does not support “FAT12” or “FAT32” file system formats. Ensure that the SD card is correctly formatted to FAT16 before loading software to it.
- Page 57 STACK....29 ETC locations ......3 random sequences .
- Page 58 ......3 two scene operation ..... . . 7 SmartFade v1.6 User Manual...
- Page 60 Hong Kong Room 605-606, Tower III Enterprise Square, 9 Sheung Yuet Road, Kowloon Bay, Kowloon, Hong Kong Tel +852 2799 1220 Fax +852 2799 9325 Service: (Americas) service@etcconnect.com (UK) service@etceurope.com (DE) techserv-hoki@etcconnect.com (Asia) service@etcasia.com Web: www.etcconnect.com Copyright © 2005 ETC. All Rights Reserved. Product information and specifications subject to change. 7219M1200-1.6.0 Rev A Released 12/2005...
Need help?
Do you have a question about the SmartFade and is the answer not in the manual?
Questions and answers