HP ProCurve 7103dl Secure Router Manuals
Manuals and User Guides for HP ProCurve 7103dl Secure Router. We have 2 HP ProCurve 7103dl Secure Router manuals available for free PDF download: Basic Management And Configuration Manual
HP ProCurve 7103dl Basic Management And Configuration Manual (910 pages)
ProCurve 7000dl Series Secure Router
Brand: HP
|
Category: Network Router
|
Size: 8 MB
Table of Contents
-
1 Overview
33-
Contents
33 -
-
Console Port46
-
Slots47
-
Status Leds55
-
Fault LED55
-
Power LED55
-
Status Leds56
-
Backup Leds57
-
Slot 3 Leds57
-
Activity LED58
-
Status LED58
-
Test LED58
-
Link Leds59
-
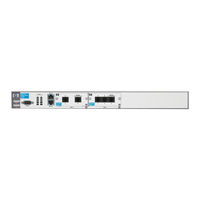
Rear Panel59
-
Memory61
-
-
-
Basic Mode68
-
Enable Mode68
-
Clear71
-
Enable71
-
Logout72
-
Ping72
-
Show73
-
Telnet74
-
Traceroute74
-
Terminal75
-
Wall75
-
Clear76
-
Clock77
-
Configure78
-
Copy78
-
Debug81
-
Dir81
-
Disable82
-
Erase82
-
Events83
-
Reload83
-
Show83
-
Undebug89
-
Write89
-
Show Tech90
-
Safemode94
-
Help Tools97
-
Exit99
-
Compact Flash103
-
Troubleshooting103
-
Quick Start121
-
-
-
Contents125
-
-
-
-
SNMP Versions169
-
Quick Start191
-
Enabling AAA195
-
-
-
Contents203
-
-
Setting the MTU214
-
Quick Start229
-
-
-
Contents231
-
-
-
Channels243
-
Line Coding245
-
Frame Format246
-
-
No Light263
-
Red Light263
-
Yellow Light265
-
Green Light266
-
-
Quick Start269
-
-
-
Contents273
-
-
Quick Start295
-
-
-
Contents297
-
-
PPP Overview300
-
Dlci 16318
-
Set the CIR331
-
Set the EIR331
-
Example Networks344
-
-
Frame Relay370
-
Hdlc372
-
Contents375
-
ADSL Overview
378 -
-
Pppoe Overview
403 -
Pppoa Overview
410 -
-
Quick Start429
-
-
Configure RBE433
-
Configure Pppoe434
-
Configure Pppoa436
-
Contents439
-
The Local Loop443
-
-
Lapd448
-
-
Q.931449
-
Call Process449
-
-
-
Commands Work473
-
-
-
-
-
Test Calls513
-
Line Maintenance515
-
-
Quick Start517
-
Contents525
-
Advertisement
HP ProCurve 7103dl Basic Management And Configuration Manual (817 pages)
Secure Router ProCurve 7000dl Series
Brand: HP
|
Category: Network Router
|
Size: 7 MB
Table of Contents
-
-
Contents27
-
Overview27
-
-
Console Port39
-
Slots40
-
Status Leds49
-
Fault LED49
-
Power LED49
-
Status Leds50
-
Backup Leds51
-
Slot 3 Leds51
-
Activity LED52
-
Status LED52
-
Test LED52
-
Link Leds53
-
Rear Panel53
-
Memory55
-
-
-
Help Tools90
-
Exit92
-
Quick Start109
-
-
-
-
-
Quick Start152
-
Configuring AAA155
-
-
-
-
Setting the MTU169
-
Quick Start184
-
-
-
-
-
No Light218
-
Red Light218
-
Yellow Light220
-
Green Light221
-
-
Quick Start223
-
-
Quick Start250
-
-
-
PPP Overview256
-
-
Dlci274
-
Set the CIR285
-
Set the EIR286
-
-
Example Networks298
-
Quick Start322
-
Ppp322
-
Frame Relay325
-
Hdlc327
-
-
-
ADSL Overview332
-
-
Pppoe Overview356
-
Pppoa Overview363
-
-
Quick Start382
-
-
Configure RBE386
-
Configure Pppoe387
-
Configure Pppoa389
-
Advertisement