Table of Contents
Advertisement
Advertisement
Chapters
Table of Contents
Troubleshooting

Related Manuals for HP 5890 SERIES II


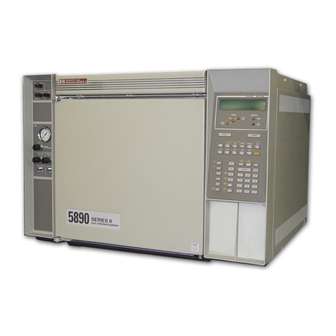
Summary of Contents for HP 5890 SERIES II
- Page 2 HP 5890 SERIES II Gas Chromatograph Service Manual Manual Part No. Edition 1, March 1991 05890- 90320 Printed in U.S.A. Artisan Scientific - Quality Instrumentation ... Guaranteed | (888) 88-SOURCE | www.artisan-scientific.com...
- Page 3 SVC 1- 1 HP 5890 SERIES II GAS CHROMATOGRAPH .......
- Page 4 Setting the GAIN Calibration Value ......... . . SVC 3- 23 Entering Specific ZERO and GAIN Values .
- Page 5 ZONE TEMPERATURE TROUBLESHOOTING ......SVC 6- 3 Remove/Replace Inlet, Detector, and Valve Box .
- Page 6 SVC 10- 9 Verifying the HP 5890 Series II INET Address ........
- Page 7 INET PCB ..............APX A- 19 BUFFERED INET PCB .
- Page 8 There are five inlet options and six detector options which may be encountered when servicing an HP 5890 Series II Gas Chromatograph, as well as a wide variety of flow and pressure control components. All of these common inlet and detector components are represented by the functional diagrams at the end of this section.
- Page 9 Electronic Troubleshooting INTRODUCTION This section is intended to aid the operator and service engineer in the troubleshooting process, i.e., of going from symptom to cause. It has been subdivided into four subsections by type of symptom. Part A covers the most obvious indications of problems. The instrument apparently (generally when first turned on) doesn’...
- Page 10 PART A NON- FUNCTIONING INSTRUMENT A totally non- functioning or DEAD instrument is one that apparently isn’ t working at all. It has no visual indications (i.e., messages) on its front panel and produces no noise or heat. The most obvious cause for such a problem is that line power is not reaching the instrument or that the instrument is not turned on.
- Page 11 Power On Sequence As long as correct Line Voltage is provided to the instrument, the following events should occur when the instrument’ s Line Power Switch is placed in its ON position. Main Transformer (T1) primary winding is energized (fused by F2 on AC Board or F1 & F2 if split phase). (Refer to Section 9 of the IPB portion of this document for main PCB information.) The three secondary windings (3 VAC, 40 VAC, and 120 VAC) of T1 are energized.
- Page 12 FAULT: WARN: The FATAL ERR: message is the most serious. This class of message indicates that the HP 5890 SE- RIES II is essentially nonfunctional. The instrument will always go to a NOT READY state and even the keyboard is inoperative.
- Page 13 MPC. The FAULT: message indicates that a major subsystem of the HP 5890 SERIES II is not functioning properly. Although the operation of the suspected subsystem is suspended until the problem is cor- rected, the balance of the GC is operational.
- Page 14 FAULT: INET RAM indicates that the RAM chip on the Interface Board is not responding properly. Typi- cally, the RAM chip on the Interface Board should be replaced. FAULT: INET ROM indicates that the ROM chip on the Interface Board is not responding properly. Typi- cally, the ROM chip on the Interface Board should be replaced.
- Page 15 PART C OPERATOR INSTIGATED INDICATIONS This section discusses the visual information that the operator can instigate and use as part of the trou- bleshooting process. These visual indications are normally not available unless specifically requested by the operator. There are several functions of the CALIB AND TEST (Clear Dot) modes that can be used as a diagnos- tic tool.
- Page 16 The Minus key decrements the address. The ENTER key switches the type of value presentation. The binary display mode can be entered from the hexadecimal mode by pressing . If already in the binary mode, it will return to the hexadecimal mode.
- Page 17 Check setpoints on both the HP 5890 SERIES II and the integrating/recording device.
- Page 18 Volt Ohm Ampmeter. The HP 5890 Series II GC contains a minimum of four and a maximum of nine electronic boards. The four boards always installed are one of the AC Power Boards, the Keyboard and Display Board(usually done as one module), and the Main Board.
- Page 19 Connectors 1 thru 15 are used to connect the Main Board either with the other electronic assemblies within the instrument or external devices, such as an integrator. (Refer to the main PCB diagrams, pages SVC 1 - 13 and SVC 1 - 14. Refer to appendix a of this document for information on the main PCB connectors.) SVC 1- 12 Artisan Scientific - Quality Instrumentation ...
- Page 20 MAIN PCB FUNCTIONAL ZONES HEATED TEST POINTS VALVES AND CRYO ZONES DETECTORS TRIACS TEST POINTS KEYBOARD PROCESSOR DC POWER SUPPLY AC POWER SUPPLY CLOCKS AND TIMING SVC 1- 13 Artisan Scientific - Quality Instrumentation ... Guaranteed | (888) 88-SOURCE | www.artisan-scientific.com...
- Page 21 REMOTE START/STOP OVEN FLAP ZONE STEPPER ANALOG ANALOG TEMP MOTOR, SIGNAL 1 SIGNAL 2 SENSORS IGNITOR, OUTPUT OUTPUT & VLVA, VLVB INJECTION PORT FAN VALVE PCB KEYBOARD MAIN PCB 250V DISPLAY CRYO & 4 HEATED DETECTOR ZONES 250V 5th HEATED ZONE &...
- Page 22 INLET COMPONENTS REPLACING INLET COMPONENTS There are five inlet options available for the HP 5890 Series II Gas Chromatograph; packed column, packed column with septum purge, split/splitless capillary, split- only capillary, and Programmable Cool On- Column capillary (PCOC). Maintenance procedures for all the inlets are given in the following pages.
- Page 23 PACKED COLUMN INLET Remove/Replace Packed Column Inlet HAZARDOUS VOLTAGES ARE PRESENT IN THE RED O VISIBLE INSTRUMENT WHEN THE POWER CORD IS CONNECTED. AVOID POTENTIALLY DANGEROUS SHOCK HAZARD DISCONNECTING THE POWER CORD BEFORE WORKING ON THE INSTRUMENT. 1. Set the main power line switch to the off position. 2.
- Page 24 11. Remove any insulation from around the top of the inlet. 12. Use a Pozidriv screwdriver to remove the two screws securing the inlet and insulation plate to the instrument. (Depending on the age of the instrument, the insulation plate may be flat, as shown at the left, or may be a box, as shown INSULATION below.
- Page 25 29. Install the left side panel and secure using two screws. WELDMENT 30. Install the injection port cover. 31. Restore power to the HP 5890 Series II. SVC 2- 4 Artisan Scientific - Quality Instrumentation ... Guaranteed | (888) 88-SOURCE | www.artisan-scientific.com...
- Page 26 SEPTUM- PURGED PACKED COLUMN INLET Remove/Replace Septum- Purged Packed Column Inlet HAZARDOUS VOLTAGES ARE PRESENT IN THE INSTRUMENT WHEN THE POWER CORD RED O VISIBLE IS CONNECTED. AVOID A POTENTIALLY DANGEROUS SHOCK HAZARD DISCONNECTING POWER CORD BEFORE WORKING ON THE INSTRUMENT. 1.
- Page 27 11. Cap the base of the inlet. 12. Remove the two screws in the top of the inlet top cover (these screws secure the inlet base weldment to the inlet top cover). 13. Use a Pozidriv screwdriver to remove the two screws securing the top cover to the instru- ment.
- Page 28 44. Install the left side panel and secure using two screws. 45. Install the injection port cover. 46. Restore power to the HP 5890 Series II SVC 2- 7 Artisan Scientific - Quality Instrumentation ... Guaranteed | (888) 88-SOURCE | www.artisan-scientific.com...
- Page 29 SPLIT- ONLY CAPILLARY INLET Remove/Replace Split- Only Capillary Inlet HAZARDOUS VOLTAGES ARE PRESENT IN THE RED O VISIBLE INSTRUMENT WHEN THE POWER CORD IS CONNECTED. AVOID POTENTIALLY DANGEROUS SHOCK HAZARD DISCONNECTING THE POWER CORD BEFORE WORKING ON THE INSTRUMENT. 1. Set the main power line switch to the off position. 2.
- Page 30 9. Disconnect the Carrier Gas Inlet (labelled “ C” ) which terminates at a fitting either at the EFS, a chemical filter, or a mass flow controller mounted on the flow panel. SPLIT VENT 10. Disconnect the Septum Purge Outlet (labelled “...
- Page 31 Handle the heater and sensor cartridges with care to prevent breakage. The cartridges (particularly the smaller sensor cartridge) are fragile. 23. Carefully slide the heater and sensor cartridges out of the heated block portion of the inlet. HEATER/SENSOR CABLE ASSEMBLY LINER Use caution to avoid sharp bends when bending tubing.
- Page 32 51. Install the left side panel and secure using two screws. 52. Install the injection port cover. 53. Restore power to the HP 5890 Series II. SVC 2- 11 Artisan Scientific - Quality Instrumentation ... Guaranteed | (888) 88-SOURCE | www.artisan-scientific.com...
- Page 33 SPLIT/SPLITLESS CAPILLARY INLET Remove/Replace Split/Splitless Capillary Inlet HAZARDOUS VOLTAGES ARE PRESENT IN THE RED O VISIBLE INSTRUMENT WHEN THE POWER CORD IS CONNECTED. AVOID POTENTIALLY DANGEROUS SHOCK HAZARD DISCONNECTING THE POWER CORD BEFORE WORKING ON THE INSTRUMENT. 1. Set the main power line switch to the off position. 2.
- Page 34 9. Disconnect the Carrier Gas Inlet (labelled “ C” ) which terminates at a fitting either at the EFS, a chemical filter, or a mass flow controller SEPTUM PURGE mounted on the flow panel. 10. Disconnect the Septum Purge Outlet (labelled SPLIT “...
- Page 35 Handle the heater and sensor cartridges with care to prevent breakage. The cartridges (particularly the smaller sensor cartridge) are fragile. 23. Carefully slide the heater and sensor cartridges out of the heated block portion of the inlet. HEATER/SENSOR CABLE ASSEMBLY LINER Use caution to avoid sharp bends when bending tubing.
- Page 36 51. Install the left side panel and secure using two screws. 52. Install the injection port cover. 53. Restore power to the HP 5890 Series II. SVC 2- 15 Artisan Scientific - Quality Instrumentation ... Guaranteed | (888) 88-SOURCE | www.artisan-scientific.com...
- Page 37 PROGRAMMABLE COOL ON COLUMN INLET (PCOC) Remove/Replace PCOC Inlet HAZARDOUS VOLTAGES ARE PRESENT IN THE RED O VISIBLE INSTRUMENT WHEN THE POWER CORD IS CONNECTED. AVOID POTENTIALLY DANGEROUS SHOCK HAZARD DISCONNECTING THE POWER CORD BEFORE WORKING ON THE INSTRUMENT. 1. Set the main power line switch to the off position. 2.
- Page 38 9. Disconnect the Carrier Gas Inlet which termi- nates either at the Forward Pressure Regulator (for Manual Pressure Control) or the PCOC Pro- portional Control Valve (for Electronic Pressure Control). 10. Disconnect the Septum Purge Outlet which ter- minates at the PCOC Purge Regulator, mounted inside the flow module.
- Page 39 Handle the heater and sensor cartridges with care to prevent breakage. The cartridges (particularly the smaller sensor cartridge) are fragile. 14. Carefully slide the heater and sensor cartridges out of the heated block portion of the inlet. 15. Use a Pozidriv screwdriver to remove the two screws securing the inlet to the instrument. 16.
- Page 40 34. Install the left side panel and secure using two screws. 35. Install the injection port cover. 36. Restore power to the HP 5890 Series II. SVC 2- 19 Artisan Scientific - Quality Instrumentation ... Guaranteed | (888) 88-SOURCE | www.artisan-scientific.com...
- Page 41 INJECTION PORT COOLING FAN Remove/Replace Cooling Fan HAZARDOUS VOLTAGES ARE PRESENT IN THE INSTRUMENT WHEN THE POWER CORD IS CONNECTED. AVOID A POTENTIALLY DANGEROUS SHOCK HAZARD BY DISCONNECTING THE POWER CORD BEFORE WORKING ON THE INSTRUMENT. 1. Set the main power line switch to the off position. RED O VISIBLE 2.
- Page 42 5. Remove the electronics carrier top cover . SCREWS 6. Remove the right side panel by removing four screws: two each along its top and bottom edges. 7. Remove the back cover of the ELECTRONICS instrument by removing four CARRIER TOP COVER screws and sliding the cover SCREWS...
- Page 43 11. Use the lance release tip of an AMP pin extrac- TOOL EXTRACTION tion/lance reset tool (8710- 1542) to remove the STOP LANCE RESET appropriate pins from connector P7. (The tool TOOL features a lance release tip and a lance reset LANCE tip.
-
Page 44: Table Of Contents
Electronic Flow Sensor (EFS) module. There are many options available for the HP 5890 Series II. Maintenance procedures for the most common items found in the instrument. Procedures are supplied to remove, replace, and/or clean various subassemblies, based on the current maintenance philosophy, i. -
Page 45: Pcoc Epc/Mpc Troubleshooting
PCOC EPC/MPC TROUBLESHOOTING The Programmable Cool On Column (PCOC) injection port is designed to allow the injection syringe to admit sample directly into the capillary column(320, 200, 100 micron id). This is accomplished by the use of an insert which serves to align the syringe with the capillary column and make a seal with both the column and the syringe needle. - Page 46 Electronic Pressure Control 1 second to 99% Safety Shutdown (Standard): If the system is unable to reach or maintain pressure set point value after 45 seconds the following 3 things happen. The alarm relay is triggered and the alarm sounds immedi- ately.
- Page 47 Not Ready light flickers (oscillating temperature) 1. Configuration is wrong 2. Inlet temperature equilibration time too short. Pressure and Temperature are not controllable Configuration is wrong No flow and high zero 1. Pressure transducer probably defective. Background Zero <6psi 1. Possible problem with either EPC pressure transducer or EPC control bd. SVC 3- 4 Artisan Scientific - Quality Instrumentation ...
-
Page 48: Remove/Replace Inlet Flow Control Components
Remove/Replace Inlet Flow Control Components HAZARDOUS VOLTAGES ARE PRESENT IN RED O VISIBLE THE INSTRUMENT WHEN THE POWER CORD IS CONNECTED. AVOID A POTENTIALLY DANGEROUS SHOCK HAZARD DISCONNECTING POWER CORD BEFORE WORKING ON THE INSTRUMENT. FLAME IONIZATION (FID) AND NITROGEN PHOSPHOROUS (NPD) DETECTORS USE HYDROGEN GAS AS FUEL. - Page 49 9. Remove two nuts securing the flow module to the mainframe (one next to the pressure gauge, and one at the lower edge of the module). 10. Once the flow module is clear of the instrument, replace the flow control component desired. When connecting lines and fittings, ensure that all o- rings are properly installed.
-
Page 50: Remove/Replace Split/Splitless Capillary Inlet Solenoid Valve
Remove/Replace Split/Splitless Capillary Inlet Solenoid Valve HAZARDOUS VOLTAGES ARE PRESENT IN RED O VISIBLE THE INSTRUMENT WHEN THE POWER CORD IS CONNECTED. AVOID A POTENTIALLY DANGEROUS SHOCK HAZARD DISCONNECTING POWER CORD BEFORE WORKING ON THE INSTRUMENT. FLAME IONIZATION (FID) AND NITROGEN PHOSPHOROUS (NPD) DETECTORS USE HYDROGEN GAS AS FUEL. - Page 51 11. Locate the solenoid valve (on the flow control bracket at the lower left side of the instrument). 12. Disconnect all plumbing from the solenoid valve. (Label the tubes, noting the valve fittings to which they connect, to facilitate easy assembly. SOLENOID VALVE 13.
- Page 52 When removing a connector from a receptacle, pull on the connector not on its wires. Pulling on the wires may cause breakage. 19. Disconnect connector P8 from its associated connector on the main PCB by pulling it straight out. 20. The solenoid valve leads are connected to ei- ther the VLVA or VLVB outputs of connector P8.
- Page 53 23. Gently pull on the wire to ensure that the pin is locked in the connector. 24. Insert connector P8 into its receptacle by pressing it straight in until it bottoms. When connecting lines and fittings, ensure that all o- rings are properly installed. 25.
-
Page 54: Remove/Replace Electronic Pressure Control (Epc) Components
Remove/Replace Electronic Pressure Control (EPC) Components HAZARDOUS VOLTAGES ARE PRESENT IN RED O VISIBLE THE INSTRUMENT WHEN THE POWER CORD IS CONNECTED. AVOID A POTENTIALLY DANGEROUS SHOCK HAZARD DISCONNECTING POWER CORD BEFORE WORKING ON THE INSTRUMENT. FLAME IONIZATION (FID) AND NITROGEN PHOSPHOROUS (NPD) DETECTORS USE HYDROGEN GAS AS FUEL. - Page 55 13. Remove the nut securing the PCOC purge regulator to the EPC flow bracket. 14. Remove the screw securing the EPC flow control bracket to the instrument flow carrier (which was previously obscured by the proportional control valve). 15. Carefully remove the EPC flow control bracket, and all components attached to it, from the side of the instrument.
- Page 56 22. Remove the two screws securing the fitting housing to the proportional control. (This will free the valve transducer brazement from the proportional control valve.) SCREWS VALVE TRANSDUCER BRAZEMENT FITTING O- RING HOUSING PROPORTIONAL CONTROL VALVE 23. Remove the four screws securing the inlet bypass clamp to the proportional control valve. 24.
-
Page 57: Remove/Replace Manual Pressure Control (Mpc) Components
Remove/Replace Manual Pressure Control (MPC) Components HAZARDOUS VOLTAGES ARE PRESENT IN RED O VISIBLE THE INSTRUMENT WHEN THE POWER CORD IS CONNECTED. AVOID A POTENTIALLY DANGEROUS SHOCK HAZARD DISCONNECTING POWER CORD BEFORE WORKING ON THE INSTRUMENT. FLAME IONIZATION (FID) AND NITROGEN PHOSPHOROUS (NPD) DETECTORS USE HYDROGEN GAS AS FUEL. - Page 58 8. Remove two nuts securing the flow module to the mainframe (one next to the pressure gauge, and one at the lower edge of the module). 9. Remove the screw securing the flow module to the instrument flow carrier. 10. Once the flow module is clear of the instrument, replace the flow control component desired.
-
Page 59: Remove/Replace Epc/Mpc Pressure Control Pcb
Remove/Replace EPC/MPC Pressure Control PCB HAZARDOUS VOLTAGES ARE PRESENT IN THE INSTRUMENT WHEN THE POWER CORD IS CONNECTED. AVOID A POTENTIALLY DANGEROUS SHOCK HAZARD BY DISCONNECTING THE POWER CORD BEFORE WORKING ON THE INSTRUMENT. FLAME IONIZATION (FID), NITROGEN PHOSPHOROUS (NPD), AND FLAME PHOTOMETRIC (FPD) DETECTORS USE HYDROGEN GAS AS FUEL. - Page 60 9. Restore all gas supplies to the instrument. 10. Install the right side panel and secure using four screws. 11. Install the electronics carrier top cover. 12. Restore power to the HP 5890 Series II. PRESSURE CONTROL PCB (TYPICAL) SVC 3- 17...
-
Page 61: Typical Switch Settings For Epc/Mpc Pcbs
- - - - - - - - DON’ T CARE INLET B1 DOWN INLET B0 INLET A1 DOWN CHOICE OF PID CONSTANTS INLET A0 DOWN INLET B1 DOWN CHOICE OF PID CONSTANTS INLET B0 MODE B EPC B INLET A DOWN INLET A0 DOWN... -
Page 62: Replace Electronic Flow Sensor Module
Replace Electronic Flow Sensor Module HAZARDOUS VOLTAGES ARE PRESENT IN RED O VISIBLE THE INSTRUMENT WHEN THE POWER CORD IS CONNECTED. AVOID A POTENTIALLY DANGEROUS SHOCK HAZARD DISCONNECTING POWER CORD BEFORE WORKING ON THE INSTRUMENT. FLAME IONIZATION (FID) AND NITROGEN PHOSPHOROUS (NPD) DETECTORS USE HYDROGEN GAS AS FUEL. - Page 63 11. Disconnect the EFS tubing from their connec- tion sites at the tubing ends. (Label the tubes as to their respective flow channel (“ A”or “ B” ) to ensure an identical connection to the re- placement EFS module.) 12. Free the EFS module by removing two screws. The module can then be removed from its com- partment in the side of the instrument.
- Page 64 19. If the system is leak- free, replace the cover and panels and restore power to the instrument. Check that the EFS is operational by displaying the flow rate for each channel (“ A”and “ B” ) on the display board and also verify the value with a bubble flow meter. It is suggested that the flow rate through each channel be different, in order to verify that the plumbing for the two channels has not been “...
-
Page 65: Electronic Flow Sensor (Efs) Calibration
Electronic Flow Sensor (EFS) Calibration Electronic flow sensor (EFS) calibration may be performed any time to ensure displayed flow rate accu- rately represents real gas flow rate through the sensor. The EFS is factory calibrated for four standard gases, H2, He, N2, and Ar/CH4, within the flow rate range of 0 to 100 ml/min. This covers the majority of chromatographic applications. -
Page 66: Setting The Gain Calibration Value
2. DISCONNECT the gas source to the particular flow channel being calibrated. DO NOT trust an on/off valve, pressure regulator, or mass flow controller to be an effective shutoff device; ANY gas flowing through the EFS will invalidate the ZERO calibration value. Disconnect the source at any convenient point (e.g., at the connection of the supply line into the instrument). -
Page 67: Entering Specific Zero And Gain Values
6. After a short time, GAIN A (or GAIN B) is again displayed, followed by the observed flow rate and a new GAIN calibration value based upon the measured flow rate. NOTE The displayed flow rate value should now be quite close to the measured flow rate value. -
Page 68: Replacing/Repairing A Flow Manifold Block
Replacing/Repairing a Flow Manifold Block Each detector requires a flow manifold block for gas control. There are various types of blocks, de- pending upon the particular detector, and upon whether or not capillary makeup gas is also to be supplied to the detector. HAZARDOUS VOLTAGES ARE PRESENT IN RED O VISIBLE THE INSTRUMENT WHEN THE POWER CORD... - Page 69 12. With a Pozidriv screwdriver, remove the mounting screw from the rear of the block. (The block must be removed from the rear of the instrument.) FRONT CLAMPING PLATE FID/FPD IGNITION VALVE PLUG VALVE COMPRESSION SPRING NEEDLE VALVE ASSEMBLY ON/OFF VALVE AUXILIARY INLET FITTING FID/FPD IGNITION...
- Page 70 16. Restore the gases supplied to the system and leak check all installed fittings. 17. If the system is leak- free, reinstall panels and covers and restore power. SVC 3- 27 Artisan Scientific - Quality Instrumentation ... Guaranteed | (888) 88-SOURCE | www.artisan-scientific.com...
- Page 71 DETECTORS REPLACING DETECTOR COMPONENTS There are five detector options available for the HP 5890 Series II Gas Chromatograph; Thermal Conductivity (TCD), Flame Ionization (FID), Nitrogen- Phosphorus (NPD), Electron Capture (ECD), and Flame Photometric (FPD). Maintenance procedures for all the detectors are given in the following pages.
- Page 72 Remove/Replace NPD Active Element Power Control ....SVC 4- 38 Remove/Replace NPD Detector Weldment ......SVC 4- 41 ELECTRON CAPTURE DETECTOR (ECD) .
-
Page 73: Detector Troubleshooting
Detector Troubleshooting Problem Probable Cause Corrective Action 1. No signal output to exter- a. Improper keyboard or ex- 1. Refer to operation and ref- nal data handling device ternal device operation, or erence manuals as well as (i.e., integrator, etc.). improper cabling. -
Page 74: Thermal Conductivity Detector (Tcd)
THERMAL CONDUCTIVITY DETECTOR (TCD) The main portion of the TCD detector is a heated block into which a heater cartridge and two sensor cartridges are installed. In addition to the standard heater and sensor cartridges, a second sensor car- tridge (referred to as the delta- t cartridge) is employed which is connected to the TCD detector PCB. If the detector requires replacement, the entire assembly is replaced as a unit. - Page 75 VENT of the detector. (This will not be required on a PORT series connected TCD.) 10. Remove the electronics carrier top cover (above the signal cable plugs and receptacles to expose the top edge of the TCD detector PCB). ELECTRONICS CARRIER TOP COVER 11.
- Page 76 Top View (Two TCD Detectors Installed) N.C. N.O. N.O. N.C. FRONT OF INSTRUMENT Use caution when removing and installing the plastic M8 tubing nuts. Excessive force can damage them. 17. Disconnect the tubes from the solenoid valve by loosening the plastic fittings securing them. (The fittings should only be finger- tight.
- Page 77 32. Restore power to the instrument. DETECTOR COVER 33. Run a TCD Test Sample Chromatogram (refer to HP 5890 Series II Reference Manual) to en- sure that the system is operating properly. (If reversed peaks are experienced, the most likely cause is reversed gas tubes connected to the TCD solenoid valve.)
-
Page 78: Remove/Replace Tcd Solenoid Switching Valve
Remove/Replace TCD Solenoid Switching Valve HAZARDOUS VOLTAGES ARE PRESENT IN THE INSTRUMENT WHEN THE POWER CORD IS CONNECTED. AVOID A POTENTIALLY DANGEROUS SHOCK HAZARD BY DISCONNECTING THE POWER CORD BEFORE WORKING ON THE INSTRUMENT. 1. Set the main power line switch to the off position. RED O VISIBLE 2. - Page 79 9. Trace the electrical leads from the solenoid valve to the “ J24”connector on the TCD detec- tor PCB (lower right edge). 10. Disconnect the lead connector from its recep- tacle (J24) on the detector PCB by pulling it straight out. 11.
- Page 80 25. Run a TCD Test Sample Chromatogram (refer to HP 5890 Series II Reference Manual) to ensure that the system is operating properly. (If reversed peaks are experienced, the most likely cause is reversed gas tubes connected to the TCD solenoid valve.)
-
Page 81: Flame Ionization Detector (Fid)
8. Connect the ignitor wire lead connector to the mating connection on the ignitor wire (which runs to the FID flow manifold). 9. Restore all gas supplies. 10. Restore power to the HP 5890 Series II. SVC 4- 11 Artisan Scientific - Quality Instrumentation ... Guaranteed | (888) 88-SOURCE | www.artisan-scientific.com... -
Page 82: Remove/Replace Fid Diode Bridge Assembly
Remove/Replace FID Diode Bridge Assembly HAZARDOUS VOLTAGES ARE PRESENT IN THE INSTRUMENT WHEN THE POWER CORD IS CONNECTED. AVOID A POTENTIALLY DANGEROUS SHOCK HAZARD BY DISCONNECTING THE POWER CORD BEFORE WORKING ON THE INSTRUMENT. 1. Set the main power line switch to the off position. RED O VISIBLE 2. - Page 83 9. Disconnect the ignitor wire lead connector at MATING CONNECTOR TO the mating connection of the diode bridge as- DIODE BRIDGE ASSEMBLY sembly lead (adjacent to the ignitor). 10. Trace the lead, freeing it along its path, to the diode bridge assembly. 11.
-
Page 84: Remove/Replace Fid Collector Body/Collector Assembly
Remove/Replace FID Collector Body/Collector Assembly The FID collector body may be replaced as a piece part, or the entire collector assembly may be re- placed as a unit. Refer to section 2 of the IPB portion of this document for part number information applicable to the FID detector. - Page 85 c. Remove the knurled connector nut from the collector housing. d. Remove the spring washer from the ignitor OPTIONAL PTFE CHIMNEY castle e. Lift the ignitor castle off of the collector COLLECTOR NUT body. SPRING WASHER Lift the upper collector insulator off of the IGNITOR CASTLE collector body.
- Page 86 c. Disconnect the ignitor wire lead connector at the mating connection adjacent to the ig- nitor. d. Loosen the screws securing the clamps holding the detector PCB interconnect in place. The following steps require protection against ESD (Electro- Static Discharge). Use a grounded wrist strap (part no.
- Page 87 Install the right side panel and secure using four screws. o. Install the electronics carrier top cover. 8. Restore all gas supplies. 9. Restore power to the HP 5890 Series II. SVC 4- 17 Artisan Scientific - Quality Instrumentation ... Guaranteed | (888) 88-SOURCE | www.artisan-scientific.com...
-
Page 88: Remove/Replace Fid Jet
Remove/Replace FID Jet HAZARDOUS VOLTAGES ARE PRESENT IN THE INSTRUMENT WHEN THE POWER CORD IS CONNECTED. AVOID A POTENTIALLY DANGEROUS SHOCK HAZARD BY DISCONNECTING THE POWER CORD BEFORE WORKING ON THE INSTRUMENT. FLAME IONIZATION (FID) DETECTORS USE HYDROGEN GAS AS FUEL. BE SURE ALL HYDROGEN GAS IS TURNED OFF AT ITS SOURCE BEFORE REPLACING ANY FLOW COMPONENTS. - Page 89 The following steps require protection against ESD (Electro- Static Discharge). Use a grounded wrist strap (part no. 9300- 0969 - large, or 9300- 0970 - small) connected to a suitable ground. Failure to heed this caution may result in damage to the instrument. When storing or in between handling of PCBs (Printed Circuit Boards), always place them in static control envelopes or enclosures.
- Page 90 26. If the system is leak free, install the right side panel and secure using four screws. 27. Install the electronics carrier top cover. 28. Restore power to the HP 5890 Series II. SVC 4- 20 Artisan Scientific - Quality Instrumentation ... Guaranteed | (888) 88-SOURCE | www.artisan-scientific.com...
-
Page 91: Remove/Replace Fid Detector Weldment
Remove/Replace FID Detector Weldment HAZARDOUS VOLTAGES ARE PRESENT IN THE INSTRUMENT WHEN THE POWER CORD IS CONNECTED. AVOID A POTENTIALLY DANGEROUS SHOCK HAZARD BY DISCONNECTING THE POWER CORD BEFORE WORKING ON THE INSTRUMENT. FLAME IONIZATION (FID) DETECTORS USE HYDROGEN GAS AS FUEL. BE SURE ALL HYDROGEN GAS IS TURNED OFF AT ITS SOURCE BEFORE REPLACING ANY FLOW COMPONENTS. - Page 92 10. At the lower right edge of the cover, press from right- to- left until the right side hinge releases. 11. With the lower right side of the cover pushed in, lift the right side of the cover and slide it to the right to remove the top cover and lid shaft as a unit.
- Page 93 DETECTOR PCB 18. Loosen the screws securing the clamps holding INTERCONNECT the interconnect in place. COLLECTOR IGNITOR COLLECTOR SPANNER COLLECTOR MOUNT CLAMPS THERMAL STRAP The following steps require protection against ESD (Electro- Static Discharge). Use a grounded wrist strap (part no. 9300- 0969 - large, or 9300- 0970 - small) connected to a suitable ground.
- Page 94 29. Lift the base up enough to expose the heated block, heater and sensor cartridge wires. SCREW 30. Carefully slide the two cartridges out of the block. (The smaller of the two cartridges is the SHROUD sensor and must be handled gently in order to prevent breakage.) COOLING FLOW...
- Page 95 37. Slide the heater and sensor cartridges into the heated block portion of the replacement detec- tor weldment. 38. Position the replacement detector weldment in the detector opening. 39. Install the insulation around the detector weld- ment. SLOTS 40. Position the insulation plate over the installed insulation and align its mounting holes with those of the detector weldment.
- Page 96 47. Remove the cap from the detector weldment top opening. 48. Use an inert gas to blow out the detector weld- ment, cleansing it of any debris. DETECTOR 49. Ensure that there is no debris in the detector WELDMENT weldment. 50.
- Page 97 59. Install the collector mount and collector assem- bly as a unit. DETECTOR PCB 60. Secure the collector mount to the thermal strap INTERCONNECT using three screws. COLLECTOR IGNITOR 61. Connect the ignitor wire lead connector at the COLLECTOR SPANNER mating connection adjacent to the ignitor.
-
Page 98: Nitrogen- Phosphorus Detector (Npd)
NITROGEN- PHOSPHORUS DETECTOR (NPD) Remove/Replace NPD Active Element Power Transformer (Toroid) HAZARDOUS VOLTAGES ARE PRESENT IN THE INSTRUMENT WHEN THE POWER CORD IS CONNECTED. AVOID A POTENTIALLY DANGEROUS SHOCK HAZARD BY DISCONNECTING THE POWER CORD BEFORE WORKING ON THE INSTRUMENT. NITROGEN PHOSPHOROUS (NPD) DETECTORS USE HYDROGEN GAS AS FUEL. - Page 99 When disconnecting a plug, pull on the plug not on its wires. Pulling on the wires TO NPD TRANSFORMER may cause breakage. TOP PART OF CONNECTOR The following steps require protection TO NPD BEAD against ESD (Electro- Static Discharge). POWER Use a grounded wrist strap (part no.
- Page 100 The following steps require protection against ESD (Electro- Static Discharge). Use a grounded wrist strap (part no. 9300- 0969 - large, or 9300- 0970 - small) connected to a suitable ground. Failure to heed this caution may result in damage to the instrument. When storing or in between handling of PCBs (Printed Circuit Boards), always place them in static control envelopes or enclosures.
- Page 101 17. Remove the collector assembly and the toroid spacer assembly from the detector cover, as a unit. 18. Using a 1.5- mm hex wrench, loosen the set screw securing the lower toroid lead to the col- SPACER lector assembly. TOROID WIRE SOLDERED AT THIS 19.
- Page 102 32. Guide the new bead power cable through the slot on the edge of the electronics carrier and down through the rectangular opening in the carrier top marked Detector A or B, depending on which position is being used. 33. Orient the new plug in the same position as the one removed. 34.
-
Page 103: Remove/Replace Npd Collector
Remove/Replace NPD Collector HAZARDOUS VOLTAGES ARE PRESENT IN THE INSTRUMENT WHEN THE POWER CORD IS CONNECTED. AVOID A POTENTIALLY DANGEROUS SHOCK HAZARD BY DISCONNECTING THE POWER CORD BEFORE WORKING ON THE INSTRUMENT. NITROGEN PHOSPHOROUS (NPD) DETECTORS USE HYDROGEN GAS AS FUEL. - Page 104 8. Use needle- nose pliers, inserted through the opening in the top of the detector cover, to re- move the collector by forcing it down from inside the top of the collector assembly. 9. Use needle- node pliers to install the connector into the collector assembly, from the bottom.
-
Page 105: Remove/Replace Npd Jet
Remove/Replace NPD Jet HAZARDOUS VOLTAGES ARE PRESENT IN THE INSTRUMENT WHEN THE POWER CORD IS CONNECTED. AVOID A POTENTIALLY DANGEROUS SHOCK HAZARD BY DISCONNECTING THE POWER CORD BEFORE WORKING ON THE INSTRUMENT. NITROGEN PHOSPHOROUS (NPD) DETECTORS USE HYDROGEN GAS AS FUEL. -
Page 106: Svc
The following steps require protection against ESD (Electro- Static Discharge). Use a grounded wrist strap (part no. 9300- 0969 - large, or 9300- 0970 - small) connected to a suitable ground. Failure to heed this caution may result in damage to the instrument. When storing or in between handling of PCBs (Printed Circuit Boards), always place them in static control envelopes or enclosures. - Page 107 24. If the system is leak free, install the right side panel and secure using four screws. 25. Install the electronics carrier top cover. 26. Restore power to the HP 5890 Series II. SVC 4- 37 Artisan Scientific - Quality Instrumentation ... Guaranteed | (888) 88-SOURCE | www.artisan-scientific.com...
-
Page 108: Remove/Replace Npd Active Element Power Control
Remove/Replace NPD Active Element Power Control HAZARDOUS VOLTAGES ARE PRESENT IN THE INSTRUMENT WHEN THE POWER CORD IS CONNECTED. AVOID A POTENTIALLY DANGEROUS SHOCK HAZARD BY DISCONNECTING THE POWER CORD BEFORE WORKING ON THE INSTRUMENT. 1. Set the main power line switch to the off position. RED O VISIBLE 2. - Page 109 7. Remove the control knob from the potentiome- NPD DETECTOR ter assembly by pulling it straight off. A PANEL 8. Using a 1.0- mm hex wrench, loosen the two hex NPD DETECTOR B PANEL screws located around the outside of the brass collar. 9.
- Page 110 22. While still holding the potentiometer shaft fully counterclockwise with a screwdriver, use a 1.0- mm hex wrench to tighten the two hex screws around the outside of the brass collar. 23. Mount the control knob by pushing it on to the control shaft. 24.
-
Page 111: Remove/Replace Npd Detector Weldment
Remove/Replace NPD Detector Weldment HAZARDOUS VOLTAGES ARE PRESENT IN THE INSTRUMENT WHEN THE POWER CORD IS CONNECTED. AVOID A POTENTIALLY DANGEROUS SHOCK HAZARD BY DISCONNECTING THE POWER CORD BEFORE WORKING ON THE INSTRUMENT. NITROGEN PHOSPHOROUS (NPD) DETECTORS USE HYDROGEN GAS AS FUEL. - Page 112 10. At the lower right edge of the cover, press from right- to- left until the right side hinge releases. 11. With the lower right side of the cover pushed in, lift the right side of the cover and slide it to the right to remove the top cover and lid shaft as a unit.
- Page 113 The following steps require protection against ESD (Electro- Static Discharge). Use a grounded wrist strap (part no. 9300- 0969 - large, or 9300- 0970 - small) connected to a suitable ground. Failure to heed this caution may result in damage to the instrument. When storing or in between handling of PCBs (Printed Circuit Boards), always place them in static control envelopes or enclosures.
- Page 114 30. If a PCOC fan is installed, remove the back cov- er of the instrument by removing four screws and sliding the cover off of the rear of the in- SCREW strument. 31. If installed, remove the PCOC fan cover to allow SHROUD removal of the tubing attached to the detector weldment.
- Page 115 38. Install the insulation around the detector weld- ment. 39. Position the insulation plate over the installed insulation and align its mounting holes with SLOTS those of the detector weldment. 40. Secure the detector weldment and insulation plate to the instrument with two screws. 41.
- Page 116 CONNECTING THE HYDROGEN INLET TUBE AT THE WRONG LOCATION ON THE FLOW MANIFOLD BLOCK WILL RESULT IN LEAKAGE, CREATING A FIRE AND EXPLOSION HAZARD. The following steps require protection against ESD (Electro- Static Discharge). Use a grounded wrist strap (part no. 9300- 0969 - large, or 9300- 0970 - small) connected to a suitable ground.
- Page 117 The following steps require protection against ESD (Electro- Static Discharge). Use a grounded wrist strap (part no. 9300- 0969 - large, or 9300- 0970 - small) connected to a suitable ground. Failure to heed this caution may result in damage to the instrument. When storing or in between handling of PCBs (Printed Circuit Boards), always place them in static control envelopes or enclosures.
-
Page 118: Electron Capture Detector (Ecd)
There are two types of ECD detectors which may be installed in an HP 5890 Series II. The older version (shown below on the left) is referred to as the 19233A/19235A variety. The newer version (shown to the right of the 19233A/19235A version) is referred to as the G1223A/G1224A variety. -
Page 119: Electron Capture Detector (Ecd) (19233A/19235A Versions) Svc
ELECTRON CAPTURE DETECTOR (ECD) (19233A/19235A VERSIONS) Remove/Replace ECD Cells Weldment and/or Heated Block (19233A/19235A Versions) HAZARDOUS VOLTAGES ARE PRESENT IN THE INSTRUMENT WHEN THE POWER CORD IS CONNECTED. AVOID A POTENTIALLY DANGEROUS SHOCK HAZARD BY DISCONNECTING THE POWER CORD BEFORE WORKING ON THE INSTRUMENT. 1. - Page 120 10. Remove the screw securing the ground strap to the hinged top cover 11. With the lower right side of the cover pushed in, lift the right side of the cover and slide it to the right to remove the top cover and lid shaft as a unit. 12.
- Page 121 21. Remove the shield from the thermal strap by carefully working it over the collector lead and exhaust vent tube. (Depending on the detec- tor’ s location, it may be necessary to bend the shield to remove and install it. Avoid excessive bending as this will fatigue the metal shield, shortening its life.) 22.
- Page 122 The following steps require protection against ESD (Electro- Static Discharge). Use a grounded wrist strap (part no. 9300- 0969 - large, or 9300- 0970 - small) connected to a suitable ground. Failure to heed this caution may result in damage to the instrument. When storing or in between handling of PCBs (Printed Circuit Boards), always place them in static control envelopes or enclosures.
-
Page 123: Electron Capture Detector (G1223A/G1224A Versions)
ELECTRON CAPTURE DETECTOR (G1223A/G1224A VERSIONS) Remove/Replace ECD Cells Weldment and/or Heated Block (G1223A/G1224A Versions) HAZARDOUS VOLTAGES ARE PRESENT IN THE INSTRUMENT WHEN THE POWER CORD IS CONNECTED. AVOID A POTENTIALLY DANGEROUS SHOCK HAZARD BY DISCONNECTING THE POWER CORD BEFORE WORKING ON THE INSTRUMENT. 1. - Page 124 10. Remove the screw securing the ground strap to the hinged top cover 11. With the lower right side of the cover pushed in, lift the right side of the cover and slide it to the right to remove the top cover and lid shaft as a unit. 12.
- Page 125 25. Carefully slide the two cartridges (heater/sen- sor) out of the block. The sensor enters the block from the top. The heater enters from be- low. The smaller of the two cartridges is the sensor and must be handled gently in order to prevent breakage.
-
Page 126: Clean Anode (Ecd Cell Weldment) (G1223A/G1224A Versions)
Clean Anode (ECD Cell Weldment) (G1223A/G1224A Versions) HAZARDOUS VOLTAGES ARE PRESENT IN THE INSTRUMENT WHEN THE POWER CORD IS CONNECTED. AVOID A POTENTIALLY DANGEROUS SHOCK HAZARD BY DISCONNECTING THE POWER CORD BEFORE WORKING ON THE INSTRUMENT. NOTE This procedure may only be performed by “ Specific License”owners. 1. - Page 127 12. Loosen the anode retaining nut on the cell weldment. 13. Remove the anode from the cell weldment. ANODE WELDMENT 14. Clean the anode using methanol, acetone, or methalyne chloride and/or a light sandpaper. ANODE RETAINING 15. Rinse the anode with methanol. 16.
-
Page 128: Flame Photometric Detector (Fpd)
2. Disconnect the power cable from its receptacle. 3. Remove the thumb- screw holding the detector cover to the top of the HP 5890. 4. Facing the instrument, rotate the detector cover to your right until the tab on the bottom left edge of the cover comes free. - Page 129 6. Remove the spring securing the PMT assembly to its support bracket. 7. Cut the cable- tie securing the resistor network cable assembly to the PMT assembly tube body. 8. Holding the tube body, unscrew the end cap (counter- clockwise) until the threads disengage. 9.
- Page 130 Ensure that no fingerprints, dust, grease, etc. are present on the PMT window facing the detector module. 14. Remove the plastic light seal cap covering the window of the PMT. 15. Carefully insert the PMT into the tube body and engage the threads of the end cap. Seat the end cap (hand tight).
-
Page 131: Clean/Replace Fpd Filter
4. Allow time for the detector module to cool. 5. Remove the thumb- screw holding the detector cover to the top of the HP 5890. 6. Facing the instrument, rotate the detector cover to your right until the tab on the bottom left edge of the cover comes free. - Page 132 8. Remove the extension spring holding the PMT assembly to the support bracket. 9. Remove the PMT assembly by pulling it toward the rear of the instrument. 10. Remove the sulphur filter from the flange adapter. 11. If the filter is not going to be replaced, wipe it clean using a lint- free lens tissue. Be careful not to scratch the surface of the filter.
-
Page 133: Remove/Replace Fpd Diode Bridge Assembly
2. Disconnect the power cable from its receptacle. 3. Remove the thumb- screw holding the detector cover to the top of the HP 5890. 4. Facing the instrument, rotate the detector cover to your right until the tab on the bottom left edge of the cover comes free. - Page 134 7. Remove the two screws securing the left side panel along its bottom edge. 8. Slide the left side panel towards the rear of the instrument and lift. 9. Remove the four screws securing the rear cover to the instrument. 10.
- Page 135 16. Trace the lead, freeing it along its path, to the diode bridge assembly. 17. Disconnect the diode bridge assembly spade lug ground cable from the instrument by loosen- ing the screw that secures it.. 18. Disconnect the diode bridge assembly from its connector at the FPD flow manifold. 19.
-
Page 136: Clean/Replace Fpd Heat Shield Windows
4. Allow time for the detector module to cool. 5. Remove the thumb- screw holding the detector cover to the top of the HP 5890. 6. Facing the instrument, rotate the detector cover to your right until the tab on the bottom left edge of the cover comes free. - Page 137 8. Remove the extension spring holding the PMT assembly to the support bracket. 9. Remove the PMT assembly by pulling it toward the rear of the instrument. 10. Remove the sulphur filter from the flange adapter. SULPHUR FILTER PMT ASSEMBLY (CHIMNEY AND BRACKETRY REMOVED FOR CLARITY) Use care during disassembly of the detector block assembly in order to prevent...
- Page 138 WELDMENT HEAT SHIELD GASKET (19256- 80040) FIRST HEAT SHIELD WINDOW HEAT SHIELD DISK STAINLESS STEEL COUPLING O- RING (0905- 1104) SECOND HEAT SHIELD WINDOW O- RING (0905- 0955) FLANGE ADAPTOR FLANGE RING SCREW O- RING (0905- 1103) LOCK WASHER CLAMP SCREW NOTE Due to the composition of the first heat shield gasket, it may be difficult to remove the...
- Page 139 21. Slide the PMT tube assembly onto the detector assembly. 22. Secure the PMT assembly to its support bracket using the extension spring. 23. Install the FPD cover on the instrument and secure using a thumbscrew. 24. Restore power to the instrument. SVC 4- 69 Artisan Scientific - Quality Instrumentation ...
-
Page 140: Replace Fpd Jet Assembly And First Heat Shield Window
4. Allow time for the heated zones to cool. 5. Remove the thumb- screw holding the detector cover to the top of the HP 5890. 6. Facing the instrument, rotate the detector cover to your right until the tab on the bottom left edge of the cover comes free. - Page 141 11. Release the extension spring securing the PMT assembly to its support bracket. 12. Remove the photomultiplier tube (PMT) assembly and sulphur filter from the detector assembly and set it aside. SULPHUR FILTER PMT ASSEMBLY (CHIMNEY AND BRACKETRY REMOVED FOR CLARITY) 13.
- Page 142 JET WELDMENT 17. Use a 9/16 inch wrench to loosen the nut hold- O- RING ing the weldment exit tube to the jet assembly. It will be necessary to hold the jet assembly VESPEL FERRULE with a 1/2- inch wrench to prevent rotation. BRASS NUT 18.
- Page 143 24. Remove the jet weldment from the base of the weldment. (The jet weldment is not threaded; it is pressed in.) NOTE It may be necessary to use a suitable hex drive (or other strong shaft- like device) to drive out the jet weldment by inserting the device through the exhaust coupler (at the top of the weldment) and striking it with a hammer.
- Page 144 33. Locate the “ U- shaped”slots on the instrument to the left of the inlet. Bend the tubes from the new jet to lay within these slots, and any in- SLOTS stalled clips, and route them to their associated attachment points on the left side of the instru- ment.
- Page 145 44. Secure the weldment exit tube to the jet assembly with by holding the jet weldment with a 1/2- inch wrench, and tightening the nut which secures the weldment with a 9/16- inch wrench. 45. Install the chimney assembly and secure using two screws. 46.
-
Page 146: Replace Fused Silica Liner
4. Allow time for the heated zones to cool. 5. Remove the thumb- screw holding the detector cover to the top of the HP 5890. 6. Facing the instrument, rotate the detector cover to your right until the tab on the bottom left edge of the cover comes free. - Page 147 9. Release the extension spring securing the PMT assembly to its support bracket. 10. Remove the photomultiplier tube (PMT) assembly and sulphur filter from the detector assembly and set it aside. SULPHUR FILTER PMT ASSEMBLY (CHIMNEY AND BRACKETRY REMOVED FOR CLARITY) 11.
- Page 148 19. Remove the nut and ferrule (Vespel) from the transfer tube weldment. 20. Remove the lower heater block from the transfer tube by lifting it vertically. O- RING JET WELDMENT HEATER CARTRIDGE O- RING TRANSFER TUBE WELDMENT VESPEL FERRULE BRASS NUT LOWER HEATER BLOCK GIGABORE LINER/...
- Page 149 27. Install the brass nut and associated ferrule on the transfer tube weldment. 28. Inside the column oven, connect the column to the detector base weldment. 29. Install the assembled detector weldment assembly vertically onto the transfer tube weldment, being careful not to damage the fused silica liner. 30.
-
Page 150: Replace Detector Base Weldment
4. Allow time for the heated zones to cool. 5. Remove the thumb- screw holding the detector cover to the top of the HP 5890. 6. Facing the instrument, rotate the detector cover to your right until the tab on the bottom left edge of the cover comes free. - Page 151 10. Remove the photomultiplier tube (PMT) assembly and sulphur filter from the detector assembly and set it aside. SULPHUR FILTER PMT ASSEMBLY (CHIMNEY AND BRACKETRY REMOVED FOR CLARITY) 11. Remove the drip tube from the exhaust tube at the top of the detector. 12.
- Page 152 19. Remove the nut and ferrule (Vespel) from the transfer tube weldment. 20. Remove the lower heater block from the transfer tube by lifting it vertically. O- RING JET WELDMENT HEATER CARTRIDGE O- RING TRANSFER TUBE WELDMENT VESPEL FERRULE BRASS NUT LOWER HEATER BLOCK GIGABORE LINER/...
- Page 153 26. If a PCOC fan is installed, remove the back cov- er of the instrument by removing four screws SCREW and sliding the cover off of the rear of the in- strument. SHROUD 27. If installed, remove the PCOC fan cover to allow COOLING FLOW removal of the tubing attached to the detector...
- Page 154 35. Carefully install the fused silica liner, ferrule and transfer tube onto the detector base weldment, ensuring that the exposed end of the fused silica liner remains 3 to 6- mm above the top of the transfer tube weldment. 36. Install the heated block onto the transfer tube weldment. 37.
-
Page 155: Adjust High Voltage
Adjust High Voltage After the replacement of a photomultiplier tube it may be necessary to adjust the output of the high volt- age supply to the Photo Multiplier Tube (PMT) in order to attain the optimum sensitivity. After installing the PMT, the FPD check- out/performance verification must be performed. Results are compared with those of the original PMT. - Page 156 4. Connect a voltmeter between ground (TP1 on SIGNAL CABLE the detector PCB or the aluminum oven top) HIGH VOLTAGE and the HV reference test point (TP7). ADJUSTMENT 5. Set the voltage at an optimum point. This point should be somewhere between - 750 and - 850 V dc.
-
Page 157: Replacing A Detector Pcb
REPLACING A DETECTOR PCB Remove/Replace Detector PCB HAZARDOUS VOLTAGES ARE PRESENT IN THE INSTRUMENT WHEN THE POWER CORD IS CONNECTED. AVOID A POTENTIALLY DANGEROUS SHOCK HAZARD BY DISCONNECTING THE POWER CORD BEFORE WORKING ON THE INSTRUMENT. FLAME IONIZATION (FID), NITROGEN PHOSPHOROUS (NPD), AND FLAME PHOTOMETRIC (FPD) DETECTORS USE HYDROGEN GAS AS FUEL. - Page 158 8. With the exception of the TCD and FPD detector PCBs, all of the detector PCBs employed in the HP5890 Series II include an interconnect assembly, which connects in one fashion or anoth- er to a portion of the actual detector. In order to remove the detector PCB, the components which retain the interconnects (or other wiring) must be loosened, removed, or disconnected as applicable for a particular detector: ` TCD:...
- Page 159 ` 19233A/19235A ECD: a. Using a Pozidriv screwdriver, remove the three screws securing the detector cover to the thermal strap. b. Remove the detector cover. CELL COLLECTOR LEAD c. Disconnect the cell collector lead from the PCB INTERCONNECT PCB interconnect. d.
- Page 160 The following steps require protection against ESD (Electro- Static Discharge). Use a grounded wrist strap (part no. 9300- 0969 - large, or 9300- 0970 - small) connected to a suitable ground. Failure to heed this caution may result in damage to the instrument. When storing or in between handling of PCBs (Printed Circuit Boards), always place them in static control envelopes or enclosures.
- Page 161 ` NPD: DETECTOR COVER a. Tighten the screws securing the detector COLLECTOR PCB interconnect clamps to the thermal strap. INTERCONNECT CLAMP SCREW NPD power control plugs installed in the wrong position will permanently damage the NPD detector PCB. b. Connect the NPD bead power cable from the detector PCB by pushing it straight in to the connector receptacle.
- Page 162 24. Install the right side panel and secure using four screws. 25. Install the electronics carrier top cover. 26. Restore power to the HP 5890 Series II. SVC 4- 92 Artisan Scientific - Quality Instrumentation ... Guaranteed | (888) 88-SOURCE | www.artisan-scientific.com...
- Page 163 Section 5 OVEN TEMPERATURE REPLACING OVEN TEMPERATURE CONTROL COMPONENTS Oven temperature control components include the oven, the oven fan and motor, the oven flap motor, and the cryogenic valve (if installed). Removal and installation instructions for all of these components are found on the following pages.
- Page 164 Oven Temperature Troubleshooting Problem Probable Cause Corrective Action 1. Oven does not heat. a. Faulty fuse F4 or F5 on 1. Check both fuses. “ WARN: OVEN SHUTOFF” main PCB. 2. If either fuse is bad, re- message appears on dis- place.
- Page 165 Replace Oven Shroud Assembly HAZARDOUS VOLTAGES ARE PRESENT IN THE INSTRUMENT WHEN THE POWER CORD IS CONNECTED. AVOID A POTENTIALLY DANGEROUS SHOCK HAZARD BY DISCONNECTING THE POWER CORD BEFORE WORKING ON THE INSTRUMENT. 1. Set the main power line switch to the off position. RED O VISIBLE 2.
- Page 166 FAN SHROUD SENSOR HEATER SCREWS STANDOFFS Fan Shroud FAN SHROUD (AS VIEWED FROM INSIDE OVEN) WHEN DISCONNECTING A PLUG, PULL ON THE PLUG NOT ON ITS WIRES. PULLING ON THE WIRES MAY CAUSE BREAKAGE. 14. At the rear of the instrument, disconnect the two heater element leads at the AC power supply PCB.
- Page 167 16. Disconnect connector P7 from its receptacle on the main PCB by pulling it straight off. (Heated zones corresponding to sensor lead locations are labeled to the right of the P7 connector re- ceptacle on the main PCB.) 17. Use the lance release tip of an AMP pin extrac- tion/lance reset tool (8710- 1542) to remove the appropriate pins from connector P7.
- Page 168 23. Insert connector P7 into its corresponding receptacle on the main PCB. 24. Route the heater leads from the replacement shroud through the opening in the rear of the oven so that its ends terminate at the connection locations on the power supply PCB. 25.
- Page 169 Replace Oven Heater Element HAZARDOUS VOLTAGES ARE PRESENT IN THE INSTRUMENT WHEN THE POWER CORD IS CONNECTED. AVOID A POTENTIALLY DANGEROUS SHOCK HAZARD BY DISCONNECTING THE POWER CORD BEFORE WORKING ON THE INSTRUMENT. 1. Set the main power line switch to the off position. RED O VISIBLE 2.
- Page 170 FAN SHROUD SENSOR HEATER SCREWS STANDOFFS Fan Shroud FAN SHROUD (AS VIEWED FROM INSIDE OVEN) 10. Note the position of the sensor so it may be replaced at the same location. 11. Loosen the retainer clamp sufficiently to free the sensor. HEATER STANDOFFS SENSOR HEATER ELEMENT...
- Page 171 13. At the rear of the instrument, disconnect the two heater element leads at the AC power supply PCB. HEATER ELEMENT CONNECTION TERMINALS 14. From inside the oven, draw the heater leads through the opening in the rear of the oven. 15.
- Page 172 20. Install the oven temperature sensor and secure by tightening the retaining clamp. 21. Install the oven heater/fan shroud in the instrument oven and secure using four screws. 22. Place a screwdriver through a hole in the shroud and gently spin the fan. Listen to determine if the fan touches anything while turning.
- Page 173 Replace Oven Temperature Sensor HAZARDOUS VOLTAGES ARE PRESENT IN THE INSTRUMENT WHEN THE POWER CORD IS CONNECTED. AVOID A POTENTIALLY DANGEROUS SHOCK HAZARD BY DISCONNECTING THE POWER CORD BEFORE WORKING ON THE INSTRUMENT. 1. Set the main power line switch to the off position. RED O VISIBLE 2.
- Page 174 FAN SHROUD SENSOR HEATER SCREWS STANDOFFS Fan Shroud FAN SHROUD (AS VIEWED FROM INSIDE OVEN) 14. Note the position of the sensor so that the replacement may be installed at the same location. 15. Loosen the retainer clamp sufficiently to free the sensor. HEATER STANDOFFS SENSOR HEATER SENSOR (AS VIEWED FROM REAR OF SHROUD)
- Page 175 THE TEMPERATURE SENSOR (SMALL CERAMIC BEAD) IS VERY FRAGILE AND MUST BE HANDLED CAREFULLY. 19. Insert the new sensor through the opening in the rear of the oven. 20. Position the new sensor cartridge at the same location as the original and secure it by tighten- ing the retainer clamp.
- Page 176 23. Prepare the pins corresponding to the replace- ment sensor cartridges by adjusting their lock- ing lances using the lance reset portion of the tool. TAPER LOCKING LANCE LANCE RESET 24. Insert the pins for the replacement sensor into their appropriate locations in the plug, making sure the locking lance on each pin seats into its hole through the side of the plug.
- Page 177 Replace Oven Fan and/or Oven Fan Motor HAZARDOUS VOLTAGES ARE PRESENT IN THE INSTRUMENT WHEN THE POWER CORD IS CONNECTED. AVOID A POTENTIALLY DANGEROUS SHOCK HAZARD BY DISCONNECTING THE POWER CORD BEFORE WORKING ON THE INSTRUMENT. 1. Set the main power line switch to the off position. RED O VISIBLE 2.
- Page 178 FAN SHROUD SENSOR SCREWS HEATER STANDOFFS SET SCREW 5890 SERIES II GAS CHROMATOGRAPH Fan Shroud FAN BLADES ARE FRAGILE. BE CAREFUL NOT TO BEND THE BLADES. 12. If only the fan blade is being replaced, go to step 18. 13. At the rear of the instrument, trace the fan motor wire harness to its connector receptacle (J28) on the AC power board.
- Page 179 MOUNTING NUT GROUND WIRE FAN MOTOR CONNECTOR RECEPTACLE (J28) CONNECTOR WIRING 17. Remove the oven fan motor from the instrument. 18. Install the new fan motor and secure using two washers and one nut at each mounting location. 19. Tighten the nuts firmly. 20.
- Page 180 TURN OFF THE POWER TO THE INSTRUMENT IMMEDIATELY IF THERE IS EVIDENCE OF THE FAN BLADES CONTACTING ANYTHING DURING OPERATION, AND/OR IF THERE IS UNDUE VIBRATION. VIBRATION MAY INDICATE BENT FAN BLADES AND/OR A BENT MOTOR SHAFT. 31, Restore power to the instrument. 32.
- Page 181 Replace Oven Flap Motor HAZARDOUS VOLTAGES ARE PRESENT IN THE INSTRUMENT WHEN THE POWER CORD IS CONNECTED. AVOID A POTENTIALLY DANGEROUS SHOCK HAZARD BY DISCONNECTING THE POWER CORD BEFORE WORKING ON THE INSTRUMENT. 1. Set the main power line switch to the off position. RED O VISIBLE 2.
- Page 182 9. Facing the rear of the instrument, locate the oven flap motor (mounted on the oven at its lower right corner). Trace and free its wire harness to the P8 connector on the main PCB. 10. Disconnect connector P8 from the main PCB by pulling it straight out of its receptacle.
- Page 183 20. Mount the air duct over the upper oven flap and secure using two screws. 21. After the new motor has been installed, route its wire harness along the same path used by the old harness and secure it with plastic wire ties. SCREW M4 x 8 mm 0515- 0910 FLAPPER...
- Page 184 22. Use the lance release tip of an AMP pin extrac- TOOL EXTRACTION tion/lance reset tool (8710- 1542) to remove the STOP LANCE RESET appropriate pins (from the old harness) from TOOL connector P8. (The tool features a lance re- LANCE lease tip and a lance reset tip.
- Page 185 Replace Cryogenic Valve and/or Nozzle HAZARDOUS VOLTAGES ARE PRESENT IN THE INSTRUMENT WHEN THE POWER CORD IS CONNECTED. AVOID A POTENTIALLY DANGEROUS SHOCK HAZARD BY DISCONNECTING THE POWER CORD BEFORE WORKING ON THE INSTRUMENT. 1. Set the main power line switch to the off position. RED O VISIBLE 2.
- Page 186 10. Slide the rear cover towards the rear of the instrument. USE PROPER EYE PROTECTION WHEN WORKING WITH CRYOGENIC FLUIDS UNDER PRESSURE. 11. Shut off the cryogenic fluid supply. 12. Slowly loosen the cryogenic fluid supply, at the valve, to release any residual pressure. 13.
- Page 187 c. Mount the cryogenic nozzle on the valve and tighten it firmly with a wrench. (Be sure to install a CO nozzle (if one was present) in the same position as the old one.) d. Go to step 22. INJECTION PORT COVER 20.
- Page 188 c. Remove the air deflector using a Pozidriv screwdriver to remove the screw securing the air deflector to the inlet weldment. Handle the heater and sensor cartridges with care to prevent breakage. cartridges (particularly the smaller sensor cartridge) are fragile. d.
- Page 189 CRYO 1 & 2 INJ B 3 & 4 INJ A 5 & 6 HEAT- DET B 7 & 8 DET A 9 & 10 24. An AMP pin extraction tool (8710- 0614) is re- quired to properly remove pins from connector J9.
- Page 190 28. Connect the cryogenic fluid supply fittings to the valve. 29. Turn the fluid supply on. 30. Verify no leakage occurs at the fitting to the valve body. 31. If there is no evidence of leakage, replace the panels removed at the beginning of this proce- dure.
- Page 191 1% of the actual temperature (which is expressed in _K (Kelvin)). The HP 5890 Series II provides the means to reset oven temperature monitoring (if necessary) so that the ACTUAL displayed temperature value accurately represents the correct temperature.
- Page 192 The HP 5890 Series II also uses an optional cryogenic valve to cool the PCOC inlet. While the cryogen- ic valve is discussed with oven components in Section 5 of the service portion of this document, remov- al of the PCOC nozzle (which carries the cooling gas from the valve to the inlet) is discussed in this sec- tion.
- Page 193 ` Remove/Replace PCOC Inlet Heater and Sensor Cartridges ..SVC 6- 16 Remove/Replace Detector Zone Heater and Sensor Cartridges ..SVC 6- 18 ` Remove/Replace TCD Heater and Sensor Cartridges .
- Page 194 Heated Zone Troubleshooting Problem Probable Cause Corrective Action 1. One heated zone tempera- a. Heater partially shorted to 1. Replace heater and sensor. ture runs away. chassis (grounded). b. Faulty main PCB. 1. Replace main PCB (refer to Section 9). a.
- Page 195 Remove/Replace Inlet, Detector, and Valve Box Heater/Sensor Cable Assemblies Replacement of a heater/sensor cable assembly (which consists of the heater and sensor cartridges, as well as the wiring connecting them to the main PCB) is accomplished by partial removal of the applica- ble heated zone component.
- Page 196 6. Remove the electronics carrier top cover by grasping it at the rear and lifting until its catch releases, the pulling it toward the rear of the instrument . SCREWS 7. Remove the right side panel by removing four screws: two each along its top and bottom edges.
- Page 197 CRYO 1 & 2 INJ B 3 & 4 INJ A 5 & 6 HEAT- DET B 7 & 8 DET A 9 & 10 When disconnecting a plug, pull on the plug, not on its wires. Pulling on the wires may cause breakage.
- Page 198 a. Slide the sleeve portion of the tool straight into the pin to be removed from the con- PIN CONTACT (REF) nector until it is fully bottomed. b. At the same time, allow the plunger to be pushed back by the pin. c.
- Page 199 22. Use the lance release tip of an AMP pin extrac- TOOL EXTRACTION tion/lance reset tool (8710- 1542) to remove the STOP LANCE RESET appropriate pins from connector P7. (The tool TOOL features a lance release tip and a lance reset LANCE tip.
-
Page 200: Remove/Replace Inlet Zone Heater And Sensor Cartridges
Remove/Replace Inlet Zone Heater and Sensor Cartridges ` Remove/Replace Packed Column Inlet Heater and Sensor Cartridges PERFORM THE PROCEDURE FOR DISCONNECTING/CONNECTING HEATER AND TEMPERATURE SENSOR WIRING ON MAIN PCB BEFORE PERFORMING THIS PROCEDURE. INJECTION PORT COVER 1. Allow time for the heated zones to cool. TOP COVER 2. -
Page 201: Svc
Handle the heater and sensor cartridges with care to prevent breakage. cartridges (particularly the smaller sensor cartridge) are fragile. 9. Carefully slide the heater and sensor cartridges out of the heated block portion of the inlet. 10. Slide the replacement heater and sensor cartridges into the heated block of the inlet being in- stalled. -
Page 202: Svc
` Remove/Replace Septum- Purged Packed Column Inlet Heater and Sensor Cartridges PERFORM THE PROCEDURE FOR DISCONNECTING/CONNECTING HEATER AND TEMPERATURE SENSOR WIRING ON MAIN PCB BEFORE PERFORMING THIS PROCEDURE. 1. Allow time for the heated zones to cool. INJECTION PORT COVER 2. -
Page 203: Svc
22. Secure the rear cover to the instrument by installing and tightening four screws. 23. Install the injection port cover. 24. Restore the supply gas pressure. 25. Restore power to the HP 5890 Series II. SVC 6- 12 Artisan Scientific - Quality Instrumentation ... Guaranteed | (888) 88-SOURCE | www.artisan-scientific.com... -
Page 204: Svc
` Remove/Replace Split- Splitless/Split- Only Capillary Inlet Heater and Sensor Cartridges PERFORM THE PROCEDURE FOR DISCONNECTING/CONNECTING HEATER AND TEMPERATURE SENSOR WIRING ON MAIN PCB BEFORE PERFORMING THIS PROCEDURE. INJECTION PORT COVER 1. Allow time for the oven and heated zones to cool. TOP COVER 2. -
Page 205: Svc
11. Use a Pozidriv screwdriver to remove the two screws securing the inlet to the instrument. 12. Gently pull the inlet up and out of its instrument cavity. 13. Remove the retaining nut loosened in step 10. 14. Slide the heated block off of the shell weldment. Handle the heater and sensor cartridges with care to prevent breakage. -
Page 206: Svc
38. Secure the rear cover to the instrument by installing and tightening four screws. 39. Install the injection port cover. 40. Restore power to the HP 5890 Series II. SVC 6- 15 Artisan Scientific - Quality Instrumentation ... Guaranteed | (888) 88-SOURCE | www.artisan-scientific.com... -
Page 207: Svc
` Remove/Replace PCOC Inlet Heater and Sensor Cartridges PERFORM PROCEDURE DISCONNECTING/CONNECTING HEATER TEMPERATURE SENSOR WIRING ON MAIN PCB BEFORE PERFORMING THIS PROCEDURE. INJECTION PORT COVER 1. Allow time for the oven and heated zones to cool. TOP COVER 2. At the bottom of the inlet, inside the column oven, remove the column and hardware asso- ciated with the inlet(s) (liner, column/liner nuts, ferrules, makeup gas adapter, etc.). - Page 208 7. Remove the air deflector using a Pozidriv screwdriver to remove the screw securing the air de- flector to the inlet weldment. Handle the heater and sensor cartridges with care to prevent breakage. cartridges (particularly the smaller sensor cartridge) are fragile. 8.
-
Page 209: Remove/Replace Detector Zone Heater And Sensor Cartridges
Remove/Replace Detector Zone Heater and Sensor Cartridges ` Remove/Replace TCD Heater and Sensor Cartridges PERFORM THE PROCEDURE FOR DISCONNECTING/CONNECTING HEATER AND TEMPERATURE SENSOR WIRING ON MAIN PCB BEFORE PERFORMING THIS PROCEDURE. 1. Allow time for the oven and heated zones to cool. 2. - Page 210 9. Remove the two screws securing the detector to the instrument and then lift the block up enough to expose the heater and sensor cartridge wires. DELTA-T SENSOR Handle the heater and sensor cartridges with care to HEATER prevent breakage. The cartridges (particularly the smaller sensor cartridge) are fragile.
-
Page 211: Remove/Replace Fid Heater And Sensor Cartridges
` Remove/Replace FID Heater and Sensor Cartridges PERFORM THE PROCEDURE FOR DISCONNECTING/CONNECTING HEATER AND TEMPERATURE SENSOR WIRING ON MAIN PCB BEFORE PERFORMING THIS PROCEDURE. FLAME IONIZATION (FID) DETECTORS USE HYDROGEN GAS AS FUEL. BE SURE ALL HYDROGEN GAS IS TURNED OFF AT ITS SOURCE BEFORE REPLACING ANY FLOW COMPONENTS. - Page 212 9. Disconnect the ignitor wire lead connector at DETECTOR PCB the mating connection adjacent to the ignitor. INTERCONNECT COLLECTOR 10. Loosen the screws securing the clamps holding IGNITOR COLLECTOR the interconnect in place. SPANNER COLLECTOR MOUNT CLAMPS THERMAL STRAP The following steps require protection against ESD (Electro- Static Discharge). Use a grounded wrist strap (part no.
- Page 213 Handle the heater and sensor cartridges with care to prevent breakage. cartridges (particularly the smaller sensor cartridge) are fragile. 21. Carefully slide the two cartridges out of the block. 22. Slide the replacement heater and sensor cartridges into the heated block portion of the detec- tor weldment.
- Page 214 36. Install the column and any other associated hardware removed in step 2 of this procedure. 37. Install the collector mount and collector assem- bly as a unit. DETECTOR PCB INTERCONNECT COLLECTOR 38. Secure the collector mount to the thermal strap IGNITOR using three screws.
-
Page 215: Remove/Replace Npd Heater And Sensor Cartridges
` Remove/Replace NPD Heater and Sensor Cartridges PERFORM THE PROCEDURE FOR DISCONNECTING/CONNECTING HEATER AND TEMPERATURE SENSOR WIRING ON MAIN PCB BEFORE PERFORMING THIS PROCEDURE. NITROGEN PHOSPHOROUS (NPD) DETECTORS USE HYDROGEN GAS AS FUEL. BE SURE ALL HYDROGEN GAS IS TURNED OFF AT ITS SOURCE BEFORE REPLACING ANY FLOW COMPONENTS. - Page 216 10. Remove the detector top cover, DETECTOR COLLECTOR and all attached components, from COVER the thermal strap and set aside. INTERCONNECT CLAMP SCREW The following steps require protection against ESD (Electro- Static Discharge). Use a grounded wrist strap (part no. 9300- 0969 - large, or 9300- 0970 - small) connected to a suitable ground.
- Page 217 21. Slide the replacement heater and temperature sensor cartridges into the heated block portion of the detector weldment. 22. Position the detector weldment in the detector opening. 23. Install the insulation around the detector weldment. 24. Position the insulation plate over the installed insulation and align its mounting holes with those of the detector weldment.
- Page 218 NOTE In the next step, avoid touching the lower end of the collector (end nearest the jet). Fingerprints and/or other contamination may cause baseline drift and noise. 32. Install the detector top cover, and all DETECTOR COVER COLLECTOR attached components, on the thermal strap. 33.
- Page 219 ` Remove/Replace ECD (19233A/19235A VERSIONS) Heater and Sensor Cartridges PERFORM THE PROCEDURE FOR DISCONNECTING/CONNECTING HEATER AND TEMPERATURE SENSOR WIRING ON MAIN PCB BEFORE PERFORMING THIS PROCEDURE. 1. Allow time for the oven and heated zones to cool. 2. At the bottom of the detector to be removed, inside the column oven, remove the column and hardware associated with the detector(s) (liner, column/liner nuts, ferrules, makeup gas...
- Page 220 9. Using a Pozidriv screwdriver, remove the three screws securing the detector cover to the ther- mal strap. 10. Remove the detector cover. 11. Disconnect any tubing attached to the detector exhaust tube. 12. Disconnect the cell collector lead from the PCB CELL COLLECTOR LEAD interconnect.
- Page 221 Handle the heater and sensor cartridges with care to prevent breakage. cartridges (particularly the smaller sensor cartridge) are fragile. 29. Carefully slide the heater and temperature sensor cartridges out of the block. 30. Slide the replacement heater and temperature sensor cartridges into the heated block. 31.
- Page 222 ` Remove/Replace ECD (G1223A/G1224A VERSIONS) Heater and Sensor Cartridges PERFORM THE PROCEDURE FOR DISCONNECTING/CONNECTING HEATER AND TEMPERATURE SENSOR WIRING ON MAIN PCB BEFORE PERFORMING THIS PROCEDURE. 1. Allow time for the oven and heated zones to cool. 2. At the bottom of the detector to be removed, inside the column oven, remove the column and hardware associated with the detector(s) (liner, column/liner nuts, ferrules, makeup gas...
- Page 223 9. Using a Pozidriv screwdriver, remove the screw securing the detector top cover to the thermal strap. 10. Remove the detector top cover. 11. Disconnect any tubing attached to the detector TOP COVER purge and vent tubes. 12. Disconnect the cell anode lead from the PCB interconnect.
- Page 224 22. Carefully slide the heater and temperature sensor cartridges out of the block. The sensor en- ters the block from the top. The heater enters from below. 23. Slide the replacement heater and sensor cartridges into the heated block. 24. Install the lower heated block in its mounting position. 25.
-
Page 225: Remove/Replace Fpd Heater And Sensor Cartridges
1. Allow time for the heated zones to cool. 2. Remove the thumb- screw holding the detector cover to the top of the HP 5890. 3. Facing the instrument, rotate the detector cover to your right until the tab on the bottom left edge of the cover comes free. - Page 226 9. Remove the exhaust tube from the detector using a 9/16- inch wrench. 10. Remove the chimney assembly by removing CHIMNEY the two screws securing it to the chimney back. 11. Loosen the three screws which secure the SCREW clamp which secure the detector to the chim- ney back.
- Page 227 20. Install the chimney assembly and secure using two screws. 21. Install the exhaust tube on the detector weld- ment (through the opening in the top of the chimney) and tighten using a 9/16- inch wrench. 22. Install the drip tube on the exhaust tube. 23.
-
Page 228: Remove/Replace Valve Box Heater And Sensor Cartridges
Remove/Replace Valve Box Heater and Sensor Cartridges PERFORM THE PROCEDURE FOR DISCONNECTING/CONNECTING HEATER AND TEMPERATURE SENSOR WIRING ON MAIN PCB BEFORE PERFORMING THIS PROCEDURE. 1. Allow time for the oven and heated zones to cool. 2. Remove the two screws securing the valve box top to the valve box bottom. 3. - Page 229 18. Install the electronics carrier top cover. 19. Restore all gas supplies. 20. Restore power to the instrument. SVC 6- 38 Artisan Scientific - Quality Instrumentation ... Guaranteed | (888) 88-SOURCE | www.artisan-scientific.com...
-
Page 230: Replacing Tcd Delta- T Temperature Sensor Cartridges
Replacing TCD Delta- T Temperature Sensor Cartridges HAZARDOUS VOLTAGES ARE PRESENT IN THE INSTRUMENT WHEN THE POWER CORD IS CONNECTED. AVOID A POTENTIALLY DANGEROUS SHOCK HAZARD BY DISCONNECTING THE POWER CORD BEFORE WORKING ON THE INSTRUMENT. THE TCD MUST BE TURNED OFF BEFORE REPLACING ITS DELTA- T SENSOR CARTRIDGE. - Page 231 10. Remove the electronics carrier top cover (above the signal cable plugs and receptacles to expose the top edge of the TCD detector PCB). DELTA- T SENSOR CONNECTION LOCATION ELECTRONICS CARRIER TOP COVER 11. Disconnect the detector filament and delta- t PRESS temperature sensor leads at their connector HERE...
- Page 232 31. Restore supply pressure. 32. Restore power to the instrument. 33. Run a TCD Test Sample Chromatogram (refer to HP 5890 Series II Reference Manual) to en- DETECTOR COVER sure that the system is operating properly. (If SVC 6- 41...
- Page 233 reversed peaks are experienced, the most likely cause is reversed gas tubes connected to the TCD solenoid valve.) Remove/Replace PCOC Inlet Cryogenic Cooling (Cryo- Blast) Weldment HAZARDOUS VOLTAGES ARE PRESENT IN THE INSTRUMENT WHEN THE POWER CORD RED O VISIBLE IS CONNECTED.
- Page 234 11. Cap the base of the inlet, inside the column oven. 12. Remove the auto- injection assembly (or optional manual injection assembly) by rotating it counter- clockwise). Be careful not to loose the septum, insert, or PCOC insert spring which are installed under the injection assembly.
- Page 235 34. Install the left side panel and secure using two screws. 35. Install the injection port cover. 36. Restore power to the HP 5890 Series II. SVC 6- 44 Artisan Scientific - Quality Instrumentation ... Guaranteed | (888) 88-SOURCE | www.artisan-scientific.com...
-
Page 236: Temperature Sensor Data
TEMPERATURE SENSOR DATA 281O 250O 200O 150O 100O TEMPERATURE ( _C) TEMPERATURE SENSOR RESISTANCE VS. TEMPERATURE To figure the approximate resistance of a temperature sensor, use the following equation: R = 100 O + (.35 ¢ SVC 6- 45 Artisan Scientific - Quality Instrumentation ... Guaranteed | (888) 88-SOURCE | www.artisan-scientific.com... - Page 237 This section is intended to help the technician isolate problems to a specific valve component or com- ponents. The HP 5890 Series II may be found in many different configurations, with varying component options. This complicates the process of providing detailed troubleshooting procedures for even gener- al problems.
-
Page 238: Introduction
An installed valve system is an integrated part of the HP 5890 Series II Gas Chromatograph. Proper instrument operation will prolong the life of the valve system. Read all the accompanying information and avoid the following operational abuses: 1) Exceeding the specified temperature and pressure ranges. - Page 239 Stop Stop Also note the rotor type stamped into the valve body. The letter indicates the rotor installed in the particular body. The rotors are interchangeable. Polytetrafluorethylene (Teflon) rotors may be used from 0 to 175 degrees C (This low temperature valve may be marked with P). High Temperature (polyimide) rotors may be used from 100 to 350 degrees C (This high temperature valve may be marked with PT or just T).
- Page 240 100 to 350 degrees C. Because of the difference in the opera- tion temperature ranges, do not mix these two valve types in the same system. HP offers only the 6 & 10 port GSV’...
-
Page 241: Adjustable Restrictors
Above is illustrated an actual 6 port valve viewed from the actuator side. A functional two dimensional dia- gram representing the same valve is shown. Right Stop Left Stop Port Index Pin Rotor Groves Adjustable Restrictors This restrictors are not designed for temperatures greater than 225 degrees C. Gas Sample Loops A 0.25cc sample loop is included with all valve systems configured for gas sampling. -
Page 242: Liquid Sample Valves (Lsvs)
LIQUID SAMPLE VALVES (LSVs) Liquid sampling valves are designed for use with liquefied gases under pressure such as ethane, propane, butane, LNG, etc. They are not intended for nonvolatile liquids (at room conditions) where a concealed leak may allow an accumulation or pool of liquid to form that may present a significant fire hazard. All standard liquid sample valves have 1/16 inch fittings and are classified by the sample size of the installed rotor (0.2mL, 0.5mL, or 1mL capacity). -
Page 243: Troubleshooting And Maintenance
TROUBLESHOOTING AND MAINTENANCE Chromatographic Symptoms Troubleshooting valves and their related plumbing is primarily a matter of systematic checking and verifica- tion of unimpaired mechanical operation of any moving part. This requires an understanding of how the valve functions internally and how the plumbing is configured. A plumbing diagram is essential for effective troubleshooting. -
Page 244: Extraneous Peaks
gas purity or flow rate in the detector. Poor carrier gas or improperly conditioned filters and traps should be suspected whenever offsets occur. EXTRANEOUS PEAKS Air peaks are sometimes seen in a chromatogram when leakage occurs because the valve rotor does not seal properly. - Page 245 Sampling Valve System Introduction An installed valve system is an integral part of the HP 5890 SERIES II, GAS CHROMATOGRAPH. To prolong the life of the valve system, avoid the following operational abuses: Exceeding the specified temperature and pressure ranges.
- Page 246 Adjustable restrictor valves..ambientto 175 degrees C The HP 5890 was designed to accept valves heated in their own compartments because valves operate best at a constant temperature. It is important to realize that, when a valve is inside a gas chromato- SVC 7- 10 Artisan Scientific - Quality Instrumentation ...
- Page 247 For this and other reasons, gas chromatograph oven- mounted valves are not offered on the HP 5890. An actual 6- port valve viewed from the actuator side is illustrated in Figure 2- 4. A functional two- di- mensional diagram representing the same valve is shown in Figure 2- 5.
- Page 248 Whenever a liquid sample valve is used, an adjustable restrictor is employed on the sample outlet line to maintain internal sample pressure and thereby keep a compressed gas liquefied. THE LIFE OF AN LSV IS SHORTENED IF NOT USED WITHIN ITS SPECIFIED PRESSURE AND TEMPERATURE RANGES.
- Page 249 Troubleshooting and Maintenance Chromatographic Symptoms Troubleshooting valves and their related plumbing is primarily a matter of systematic checking and veri- fication of unimpaired mechanical operation of any moving part. This requires an understanding of how the valve functions internally and how the plumbing is configured. A plumbing diagram is essential for effective troubleshooting.
- Page 250 Often confused with baseline upsets, an offset is a shift in the baseline that does not return quickly to the original level. Baseline offsets may be caused by air leaks but more commonly are due to a change in gas purity or flow rate in the detector. Poor carrier gas or improperly conditioned filters and traps should be suspected whenever offsets occur.
-
Page 251: Valve Box Assembly Removal
Valve Box Assembly Removal 1. Place the main power switch in the off position. HAZARDOUS VOLTAGES ARE PRESENT IN THE INSTRUMENT WHEN THE POWER CORD IS CONNECTED. AVOID A POTENTIALLY DANGEROUS SHOCK HAZARD BY DISCONNECTING THE POWER CORD BEFORE WORKING ON THE INSTRUMENT. 2. -
Page 252: Valve Actuator Alignment
Valve Actuator Alignment 1. Remove the valve box top assembly. See steps 1 through 3 “ Valve Box Top Assembly Remov- al.” 2. Loosen the actuator link arm lock screw at each actuator (Figure 2- 29) with a 3mm hex key wrench so that the coupling/shaft assembly is free to rotate. -
Page 253: Valve Actuation Of Gc- Controlled Valves
Activation of up to two valve solenoids (designated as Purge A or Purge B) may occur in either of two ways. The operator may switch the valves manually whenever it is desirable via keyboard entry, or more conveniently, the valves can be switched ON once and OFF once during a run via the HP 5890’ s timed events table. -
Page 254: Valve Configuration Diagrams
Valve Configuration Diagrams Legend Adjustable Restrictors Arrows indicate the can be manually set to direct ion of flow. adjust its pressure drop (e.g., to balance flow). Fixed restrictors Loops have a spe- cannot be adjusted. cified volume + 5% Union Jumper volume is Fit- not specified. - Page 255 Custom Plumbing (Diagram Required), Option 200 or 230 Column 2nd Valve Carrier Loop Sample Gas Sampling Option, Option 201 or 231 Column 2 Column 1 Carrier Detector or Valve Adj. Restr. Column Isolation, Option 202 or 232* *Temperature limited to 235° C by micrometering needle valve. SVC 7- 19 Artisan Scientific - Quality Instrumentation ...
- Page 256 Stream 1 In to GSV Sample In Vent Stream 2 In Two Stream Selection (Requires Gas Sampling), Option 203 or 233 Column Carrier Detector Backflush to Detector, Option 204 or 234 Precolumn Vent 1st Carrier 2nd Carrier Column Detector Backflush a Precolumn to Vent, Option 205 or 235 SVC 7- 20 Artisan Scientific - Quality Instrumentation ...
- Page 257 Column 1 from Flow Controller, Inj. Port or GSV Detector Column 2 Column Selection (Unused Column Isolated), Option 206 or 236 Column 1 Carrier Detector Column 2 Sequence Reverse, Option 207 or 237 Column 1 Detector Carrier Column 2 Sequence Reverse with Backflush of Column 1, Option 208 or 238 SVC 7- 21 Artisan Scientific - Quality Instrumentation ...
- Page 258 Custom Plumbing (Diagram Required), Option 400 or 430 Column Detector or 2nd Valve Precolumn 1st Carrier Vent Sample Loop 2nd Carrier Gas Sampling with Backflush of Precolumn to Vent, Option 401 or 431 Column Carrier Detector or 2nd Valve Sample Loop Gas Sampling with Backflush to Detector, Option 402 or 432 SVC 7- 22...
- Page 259 Sample 2 Loop 2 Carrier Sample 1 Detector or 2nd Valve Loop 1 Gas Sampling of Alternate Streams, Option 403 or 433 Column 2 Carrier Sample Column 1 Loop Gas Sampling with Sequence Reverse, Option 404 or 434 Column 2 Carrier Detector Sample...
- Page 260 Column 2 Carrier 1 Vent Carrier 2 Column 1 Detector or 2nd Valve Column Selection with Backflush to Vent, Option 406 or 436 Carrier Carrier Liquid Sampling, Options 151, 152, 153, and 162 Column 2 Column 1 Carrier Detector Loop Adj.
- Page 261 Column 2 Column 1 Carrier Detector Sample Loop Adj. Restr. Gas Sample/Backflush and Column Isolation, Option 602 SVC 7- 25 Artisan Scientific - Quality Instrumentation ... Guaranteed | (888) 88-SOURCE | www.artisan-scientific.com...
- Page 262 KEYBOARD AND DISPLAY KEYBOARD AND DISPLAY REPLACEMENT The keyboard and display components of the HP 5890 Series II are housed in a single display PCB as- sembly. Removal, disassembly. and installation instructions for the display PCB assembly are found on the following pages.
- Page 263 Keyboard and Display Troubleshooting Problem Probable Cause Corrective Action 1. No visual indications of any a. Faulty display PCB assem- 1. Replace display PCB as- kind on display. bly. sembly. 2. If problem persists, remove replaced display PCB 3. Install original display PCB assembly.
- Page 264 Replace Display PCB Assembly HAZARDOUS VOLTAGES ARE PRESENT IN THE INSTRUMENT WHEN THE POWER CORD RED O VISIBLE IS CONNECTED. AVOID A POTENTIALLY DANGEROUS SHOCK HAZARD DISCONNECTING POWER CORD BEFORE WORKING ON THE INSTRUMENT. 1. Set the main power line switch to the off position. 2.
- Page 265 NOTE It may be necessary to remove the detector PCB from the “ a”position on the main PCB in order to access the locking tabs at the top of the display PCB assembly. Refer to Section 4 of this document for information on the removal of detector PCBs. 7.
- Page 266 STATUS sure that the instrument OVEN FINAL TIME shows the expected RATE INITIAL READY normal displays. TIME ACTUAL SETPOINT 5890 Series II memory test in progress. STATUS OVEN FINAL TIME RATE INITIAL READY TIME ACTUAL SETPOINT 5890A Self-testing in progress.
- Page 267 Section 9 MAIN PCB Specific part numbers are not given in this section. For replacement part numbers, refer to the Section 9 of the IPB (Electronics). TABLE OF CONTENTS MAIN PCB ......... . SVC 9- 1 Replace Main PCB .
- Page 268 Replace Main PCB HAZARDOUS VOLTAGES ARE PRESENT IN THE INSTRUMENT WHEN THE POWER CORD IS CONNECTED. AVOID A POTENTIALLY DANGEROUS SHOCK HAZARD BY DISCONNECTING THE POWER CORD BEFORE WORKING ON THE INSTRUMENT. NPD AND FID DETECTORS USE HYDROGEN GAS AS FUEL. BE SURE ALL HYDROGEN GAS IS TURNED OFF AT ITS SOURCE BEFORE REPLACING ANY FLOW COMPONENTS.
- Page 269 7. Disconnect any signal cables installed at the connectors on the top of the main PCB. SIGNAL CABLE CONNECTORS The following steps require protection against ESD (Electro- Static Discharge). Use a grounded wrist strap (part no. 9300- 0969 - large, or 9300- 0970 - small) connected to a suitable ground.
- Page 270 8. Remove detector PCB(s), optional communications interface PCB, and optional EPC (Electronic Pressure Control) or MPC (Manual Pressure Control) interfcae PCB if installed. (Refer to section 4 of this manual for information on removal and installation of detector PCBs. Refer to section 10 of this manual for information on removal and installation of Communications interface PCBs.
- Page 271 WHEN DISCONNECTING A PLUG, PULL ON THE PLUG NOT ON ITS WIRES. PULLING ON THE WIRES MAY CAUSE BREAKAGE. 9. Disconnect connectors (if present) from their respective receptacles (“ J1,”“ J7,”“ J8,”“ J10,”and “ J11” ) by carefully pulling them straight out. (For “ J1”and “ J11,”note the locking tab at each end of the plug: these must be released to free the plug for removal.) (Also, note that “...
- Page 272 19. Install the right side panel and secure using four screws. 20. Install the electronics carrier top cover. 21. Restore power to the HP 5890 Series II. SVC 9- 6 Artisan Scientific - Quality Instrumentation ... Guaranteed | (888) 88-SOURCE | www.artisan-scientific.com...
- Page 273 22. Observe the alphanumeric dis- play as the instrument performs NORMAL an internal self- diagnostic inte- “ INTEGRITY CHECK”AT POWER-ON grity- check. ACTUAL SETPOINT Test of display elements: all alphanumeric and LED ele- 23. If the self- testing process does ments are lit.
- Page 274 ......... . . SVC 10- 9 Verifying the HP 5890 Series II INET Address ..... . .
- Page 275 Replace Communications Interface PCB HAZARDOUS VOLTAGES ARE PRESENT IN THE INSTRUMENT WHEN THE POWER CORD RED O VISIBLE IS CONNECTED. AVOID A POTENTIALLY DANGEROUS SHOCK HAZARD DISCONNECTING POWER CORD BEFORE WORKING ON THE INSTRUMENT. 1. Set the main power line switch to the off position. 2.
- Page 276 8. If an HPIB/RS- 232- C communications PCB is installed, free and remove the rear panel PCB cable from the connector on the communications PCB by releasing the locking tabs (one on either side of the connector receptacle) and pulling the cable straight out. 9.
- Page 277 STATUS OVEN sure that the instrument FINAL TIME shows the expected RATE INITIAL READY normal displays. TIME ACTUAL SETPOINT 5890 Series II memory test in progress. STATUS OVEN FINAL TIME RATE INITIAL READY TIME ACTUAL SETPOINT 5890A Self-testing in progress.
- Page 278 Replace Rear Panel Connector PCB and/or Cable for DICE PCB HAZARDOUS VOLTAGES ARE PRESENT IN THE INSTRUMENT WHEN THE POWER CORD RED O VISIBLE IS CONNECTED. AVOID A POTENTIALLY DANGEROUS SHOCK HAZARD DISCONNECTING POWER CORD BEFORE WORKING ON THE INSTRUMENT. 1.
- Page 279 suitable ground. Failure to heed this caution may result in damage to the instrument. 9. Slide the rear panel away from the back of the instrument, taking care not to damage the rear panel connector PCB ribbon cable. 10. If the rear panel connector PCB is to be replaced, remove it from the rear panel. 11.
- Page 280 STATUS sure that the instrument OVEN FINAL TIME shows the expected RATE INITIAL READY normal displays. TIME ACTUAL SETPOINT 5890 Series II memory test in progress. STATUS OVEN FINAL TIME RATE INITIAL READY TIME ACTUAL SETPOINT 5890A Self-testing in progress.
- Page 281 START STOP the HP 5890A affects only the HP 5890A. A run may be started or stopped at the HP 5890A without affecting other devices on the INET loop. In “ local”mode, note that the HP 5890A remains part of the INET system;...
- Page 282 Figure 13-5. INET ”GLOBAL/LOCAL“ Displays An example of where having the HP 5890A in “ local”mode might be useful is in the case of conditioning a column: the HP 5890A may be started or stopped as desired without affecting other devices on the INET loop.
- Page 283 “ OUT”receptacle on the controller device (the controller is always defined as “ 0” ). A “ 2”indicates the HP 5890A is the second device on the loop, etc., to a maximum value of “ 31” .
- Page 284 Similarly, OFF indicates the channel is considered inactive; no data from this signal channel is transmitted to other devices on the loop. OFF has the same meaning here as “ - ”shown in the HP 5890A portion of the INET configuration table in the HP 3392A work file listing.
- Page 285 The “ HPIL LOOPBACK TEST”may be performed any time to verify that HP 5890A INET communication is performing satisfactorily. Testing involves setting up the HP 5890A to send an INET message directly to itself by connecting its INET output to its INET input. The following procedure is used: 1.
- Page 286 The LOOPBACK TEST may be used to check for continuity in an INET cable; an open cable causes test failure. Verify that the cable is at fault (rather than the HP 5890A) by testing a second cable. If an intermittent cable problem is suspected, the test may be re- peated as necessary while flexing the cable (particularly at its plugs).
- Page 287 Section 11 POWER SUPPLY REPLACING POWER SUPPLY COMPONENTS Power supply components include the power supply PCB, the power supply transformer, the power switch, and the power cable. Removal and installation instructions for all of these components are found on the following pages. Specific part numbers are not given in this section.
- Page 288 Remove/Replace Power Supply PCB HAZARDOUS VOLTAGES ARE PRESENT IN THE INSTRUMENT WHEN THE POWER CORD IS CONNECTED. AVOID A POTENTIALLY DANGEROUS SHOCK HAZARD BY DISCONNECTING THE POWER CORD BEFORE WORKING ON THE INSTRUMENT. 1. Set the main power line switch to the off position. RED O VISIBLE 2.
- Page 289 When disconnecting a plug, pull on the plug not on its wires. Pulling on the wires may cause breakage. 9. Disconnect push- on type connectors J1, J2, J3, and J4 (from blade connectors P1, P2, P3, and P4, respectively) by grasping each one and pulling it straight off of its terminal. 10.
- Page 290 FINAL four screws. TIME RATE INITIAL READY TIME 26. Restore all gas sup- plies. ACTUAL SETPOINT 5890 Series II memory test in progress. 27. Restore power to the STATUS OVEN instrument. FINAL TIME RATE INITIAL 28. Observe the alphanu- READY...
- Page 291 Remove/Replace Power Supply Transformer HAZARDOUS VOLTAGES ARE PRESENT IN THE INSTRUMENT WHEN THE POWER CORD IS CONNECTED. AVOID A POTENTIALLY DANGEROUS SHOCK HAZARD BY DISCONNECTING THE POWER CORD BEFORE WORKING ON THE INSTRUMENT. 1. Set the main power line switch to the off position. RED O VISIBLE 2.
- Page 292 When disconnecting a plug, pull on the plug not on its wires. Pulling on the wires may cause breakage. 8. Disconnect connector P10 from its receptacle on the main PCB by squeezing its ribbed sides while pulling the plug straight out of the receptacle.
- Page 293 11. At the right side of the instrument, below the main PCB, remove the power switch from its PRESS HERE slot by prying the plastic locking tabs on each side of the switch in toward the switch body. 12. Remove the four push- on- type connectors from the rear of the switch.
- Page 294 TIME RATE INITIAL 28. Slide the rear cover on READY TIME to the instrument. ACTUAL SETPOINT 5890 Series II memory test 29. Secure the rear cover in progress. to the instrument by in- STATUS OVEN stalling and tightening FINAL TIME RATE four screws.
- Page 295 Remove/Replace Power Switch HAZARDOUS VOLTAGES ARE PRESENT IN THE INSTRUMENT WHEN THE POWER CORD IS CONNECTED. AVOID A POTENTIALLY DANGEROUS SHOCK HAZARD BY DISCONNECTING THE POWER CORD BEFORE WORKING ON THE INSTRUMENT. 1. Set the main power line switch to the off position. RED O VISIBLE 2.
- Page 296 RATE 14. Observe the alphanu- INITIAL READY TIME meric display as the in- strument performs an ACTUAL SETPOINT 5890 Series II memory test internal self- diagnostic in progress. integrity check. to en- STATUS OVEN sure that the instrument FINAL TIME...
- Page 297 Remove/Replace Power Cable HAZARDOUS VOLTAGES ARE PRESENT IN THE INSTRUMENT WHEN THE POWER CORD IS CONNECTED. AVOID A POTENTIALLY DANGEROUS SHOCK HAZARD BY DISCONNECTING THE POWER CORD BEFORE WORKING ON THE INSTRUMENT. 1. Set the main power line switch to the off position. RED O VISIBLE 2.
- Page 298 When disconnecting a plug, pull on the plug not on its wires. Pulling on the wires may cause breakage. 9. Disconnect push- on type connectors J1 and J2 (from blade connectors P1 and P2, respective- ly) by grasping each one and pulling it straight off of its terminal. 10.
- Page 299 STATUS OVEN sure that the instrument FINAL TIME shows the expected RATE INITIAL READY normal displays. TIME ACTUAL SETPOINT 5890 Series II memory test in progress. STATUS OVEN FINAL TIME RATE INITIAL READY TIME ACTUAL SETPOINT 5890A Self-testing in progress.
- Page 300 Appendix A PCB CONNECTOR INFORMATION This appendix contains all of the connector mnemonics used throughout the HP 5890 Series II. It is intended to help the technician isolate problems to a specific component or components. The HP 5890 Series II may be found in many different configurations, with varying component options. This compli- cates the process of providing detailed troubleshooting procedures for even general problems.
- Page 301 EPC PROPORTIONAL CONTROL VALVE ....APPX A- 16 MPC PCB ......... . . APPX A- 17 RS232C PCB CONNECTORS .
- Page 302 AC POWER PCB CONNECTORS 120VAC BOARD LINE CORD NEUTRAL LINE CORD PHASE 1 OVEN HEATER NEUTRAL ( oven triac controlled ) OVEN HEATER PHASE 1 OVEN TRIAC ANODE 1 OVEN TRIAC ANODE 2 OVEN TRIAC GATE P26.1 P26.2 OVEN CONTROL (to pulse transformer and oven triac gate) P26.3 K1 OVEN CONTACTOR CONTROL J27.1...
- Page 303 J27.1 MAIN POWER SWITCH PHASE 1 J27.2 J27.3 MAIN POWER SWITCH NEUTRAL J28.1 OVEN FAN MOTOR NEUTRAL J28.2 OVEN FAN MOTOR NEUTRAL J28.3 OVEN FAN MOTOR PHASE 1 J28.4 OVEN FAN MOTOR PHASE 1 220VAC SPLIT PHASE BOARD LINE CORD PHASE 2 LINE CORD PHASE 1 OVEN HEATER PHASE 2 ( oven triac controlled ) OVEN HEATER PHASE 1...
- Page 304 MAIN PCB CONNECTORS KEYBOARD CONNECTOR P1.1 P1.2 - 24V P1.3 - 15V P1.4 P1.5 614.4KHz P1.6 P1.7 *BA4 P1.8 P1.9 38.4KHz P1.10 *38.4KHz P1.11 *POP P1.12 +15V P1.13 P1.14 P1.15 +24V P1.16 *EXT_IN1 P1.17 *EXT_OUT9 P1.18 *EXT_OUT10 P1.19 P1.20 P1.21 P1.22 P1.23 P1.24...
- Page 305 DETECTOR A PCB CONNECTOR P2.1 +15V P2.2 +15V P2.3 - 15V P2.4 - 15V P2.5 *STOPA P2.6 +10V REF P2.7 P2.8 A1 OF U16.2 P2.9 STARTA P2.10 A2 OF U16.2 P2.11 P2.12 P2.13 P2.14 P2.15 P2.16 P2.17 153.6KHz P2.18 307.4KHz P2.19 +24V P2.20...
- Page 306 DETECTOR B PCB CONNECTOR P3.1 +15V P3.2 +15V P3.3 - 15V P3.4 - 15V P3.5 *STOPB P3.6 +10V REF P3.7 P3.8 A3 OF U 16.2 P3.9 STARTB P3.10 A4 OF U 16.2 P3.11 P3.12 P3.13 P3.14 P3.15 P3.16 P3.17 153.6KHz P3.18 307.2KHz P3.19...
- Page 307 ANALOG SIGNAL 2 OUTPUT CONNECTOR P5.1 RECORDER COMMON P5.2 P5.3 RECORDER2 P5.4 INTEG2 P5.5 P5.6 COMMON P5.7 COMMON P5.8 P5.9 INTEG2 P5.10 RECORDER2 P5.11 P5.12 RECORDER COMMON REMOTE START CONNECTOR P6.1 REMOTE START INPUT P6.2 P6.3 REMOTE CONFIGURATION INPUT P6.4 P6.5 READY OUTPUT ( common for 6 &...
- Page 308 OVEN FLAP MOTOR CONNECTOR P8.1 3VAC IGNITOR P8.2 3VAC IGNITOR P8.3 +24V P8.4 VALVA P8.5 +24V P8.6 VALVB P8.7 F0 phase 0 of oven flap stepper motor P8.8 F2 phase 2 of oven flap stepper motor P8.9 +24V for oven flap stepper motor P8.10 +24V for oven flap stepper motor P8.11...
- Page 309 ELECTRONIC FLOW SENSOR CONNECTOR P11.1 FLOWA P11.2 FLOWB P11.3 +10VREF P11.4 +10VREF P11.5 +15V P11.6 P11.7 - 15V P11.8 P11.9 ACGND P11.10 ACGND P11.11 ACGND P11.12 ACGND P11.13 - 24V P11.14 - 24V P11.15 3VAC fused F1 P11.16 3VAC fused F1 P11.17 3VAC fused F1 P11.18...
- Page 310 EPC/MPC PCB CONNECTOR P12.1 P12.2 P12.3 P12.4 P12.5 P12.6 P12.7 P12.8 P12.9 P12.10 *EXT_IN2 P12.11 *EXT_OUT2 P12.12 *EXT_OUT0 P12.13 *EXT_OUT1 P12.14 *EXT_OUT8 P12.15 P12.16 P12.17 9.8304MHz P12.18 P12.19 P12.20 P12.21 P12.22 P12.23 D240 P12.24 P12.25 +15V P12.26 - 15V P12.27 +10VREF P12.28 COMMON...
- Page 311 COMMUNICATIONS PCB CONNECTOR P13.1 P13.2 P13.3 P13.4 P13.5 P13.6 P13.7 P13.8 P13.9 *EXT_OUT3 - - - - - - - - - - - - - - - - - - - | Decode to give P13.10 A(5) | addresses 3,35,67,99 P13.11 A(6) | for Input or Output...
- Page 312 DISPLAY PCB J1.1 J1.2 - 24V J1.3 - 15V J1.4 J1.5 614.4KHz J1.6 J1.7 *BA4 J1.8 J1.9 38.4KHz J1.10 *38.4KHz J1.11 *JOJ J1.12 +15V J1.13 J1.14 J1.15 +24V J1.16 *EXT_IN1 J1.17 *EXT_OUT9 J1.18 *EXT_OUT10 J1.19 J1.20 J1.21 J1.22 J1.23 J1.24 J1.25 J1.26 APPX A- 13...
- Page 313 DETECTOR PCBS J2.1 +15V J2.2 +15V J2.3 - 15V J2.4 - 15V J2.5 *STOJA J2.6 +10V REF J2.7 J2.8 A1 OF U16.2 J2.9 STARTA J2.10 A2 OF U16.2 J2.11 J2.12 J2.13 J2.14 J2.15 J2.16 J2.17 153.6KHz J2.18 307.4KHz J2.19 +24V J2.20 J2.21 +24V...
- Page 314 EPC PCB CONNECTORS J1.1 J1.2 J1.3 J1.4 J1.5 J1.6 J1.7 J1.8 J1.9 *EXT_OUT3 - - - - - - - - - - - - - - - - - - | Decode to give J1.10 A(5) | addresses 3,35,67,99 J1.11 A(6) | for Input or Output...
- Page 315 P3.1 P_SENSB (B pressure sensing) P3.2 +15VDC P3.3 +5VDC P3.4 ACOM P3.5 P_CNTLB P3.6 - 15VDC P3.7 SHEILD EPC PRESSURE TRANSDUCER MODULE P1.1 +15VDC P1.2 +5VDC P1.3 ACOM P1.4 P_SNS (pressure sensing) EPC PROPORTIONAL CONTROL VALVE pin 1 VLV DR (proportional valve control) pin 2 SHEILD pin 3...
- Page 316 MPC PCB J1.1 J1.2 J1.3 J1.4 J1.5 J1.6 J1.7 J1.8 J1.9 *EXT_OUT3 - - - - - - - - - - - - - - - - - - | Decode to give J1.10 A(5) | addresses 3,35,67,99 J1.11 A(6) | for Input or Output J1.12...
- Page 317 RS232C PCB CONNECTORS J12.1 J12.2 J12.3 J12.4 J12.5 J12.6 J12.7 J12.8 J12.9 J12.10 *EXT_IN2 J12.11 *EXT_OUT2 J12.12 *EXT_OUT0 J12.13 *EXT_OUT1 J12.14 *EXT_OUT8 J12.15 J12.16 J12.17 9.8304MHz J12.18 J12.19 J12.20 J12.21 J12.22 J12.23 D240 (240 Hz square wave) J12.24 POP ( power- on- pulse) J12.25 +15V J12.26...
- Page 318 INET PCB J12.1 J12.2 J12.3 J12.4 J12.5 J12.6 J12.7 J12.8 J12.9 J12.10 *EXT_IN2 J12.11 *EXT_OUT2 J12.12 *EXT_OUT0 J12.13 *EXT_OUT1 J12.14 *EXT_OUT8 J12.15 J12.16 J12.17 9.8304MHz J12.18 J12.19 J12.20 J12.21 J12.22 J12.23 D240 (240 Hz square wave) J12.24 POP ( power- on- pulse) J12.25 +15V J12.26...
- Page 319 BUFFERED INET PCB J12.1 J12.2 J12.3 J12.4 J12.5 J12.6 J12.7 J12.8 J12.9 J12.10 *EXT_IN2 J12.11 *EXT_OUT2 J12.12 *EXT_OUT0 J12.13 *EXT_OUT1 J12.14 *EXT_OUT8 J12.15 J12.16 J12.17 9.8304MHz J12.18 J12.19 J12.20 J12.21 J12.22 J12.23 D240 (240 Hz square wave) J12.24 POP ( power- on- pulse) J12.25 +15V J12.26...
- Page 320 DICE PCB J12.1 J12.2 J12.3 J12.4 J12.5 J12.6 J12.7 J12.8 J12.9 J12.10 *EXT_IN2 J12.11 *EXT_OUT2 J12.12 *EXT_OUT0 J12.13 *EXT_OUT1 J12.14 *EXT_OUT8 J12.15 J12.16 J12.17 9.8304MHz J12.18 J12.19 J12.20 J12.21 J12.22 J12.23 D240 ( 240 Hz square wave) J12.24 POP ( power- on- pulse) J12.25 +15V J12.26...
- Page 321 J1.13 +5 DCV J1.14 DIO0 J1.15 DIO1 J1.16 DIO2 J1.17 DIO3 J1.18 DIGITAL GROUND J1.19 DIO4 J1.20 DIO5 J1.21 DIO6 J1.22 DIO7 J1.23 +5 DCV J1.24 RX (RECEIVE) J1.25 TX (TRANSMIT) J1.26 GROUND DICE CONNECTOR PCB J1.1 DIGITAL GROUND J1.2 J1.3 J1.4 J1.5...
- Page 322 J2.7 NRFD J2.8 NDAC J2.9 J2.10 J2.11 J2.12 SHEILD J2.13 DIO5 J2.14 DIO6 J2.15 DIO7 J2.16 DIO8 J2.17 J2.18 DCOM- - - - - - - - - - - - - - - - - - - - - - - - - - - - - - - - | J2.19 DCOM J2.20...
- Page 323 ELECTRONIC FLOW SENSOR MODULE J1.1 FLOWA J1.2 FLOWB J1.3 +10VREF J1.4 +10VREF J1.5 +15V J1.6 J1.7 - 15V J1.8 J1.9 ACGND J1.10 ACGND J1.11 ACGND J1.12 ACGND J1.13 - 24V J1.14 - 24V J1.15 3VAC fused F1 J1.16 3VAC fused F1 J1.17 3VAC fused F1 J1.18...
- Page 324 Print @ 115% of this size Printed on recycled paper. This product is recyclable. Manual Part No. Hewlett-Packard Company 05890-90320 Printed in USA 3/91 Artisan Scientific - Quality Instrumentation ... Guaranteed | (888) 88-SOURCE | www.artisan-scientific.com...
- Page 325 VALVE PCB CONNECTORS J1.1 +24V J1.2 PURGE A J1.3 PURGE B J1.4 GROUND J1.5 120VAC J1.6 120VAC J1.7 120VAC J1.8 GROUND J1.9 VALVE A J1.10 VALVE B APPX A- 25 Artisan Scientific - Quality Instrumentation ... Guaranteed | (888) 88-SOURCE | www.artisan-scientific.com...
Need help?
Do you have a question about the 5890 SERIES II and is the answer not in the manual?
Questions and answers