
Related Manuals for Quantum Data 780C


Summary of Contents for Quantum Data 780C
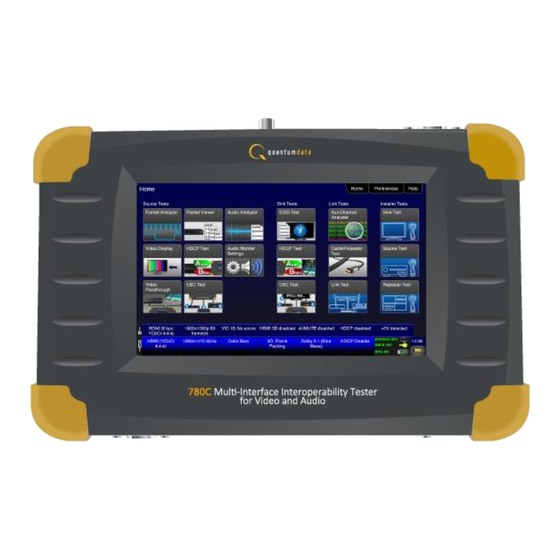
- Page 1 780C Multi-Interface Interoperability Tester for Video and Audio User Guide Rev: A1...
-
Page 2: Table Of Contents
3.3.3 Status Bar ................................16 Calibrating the LCD ..............................18 Using the 780C Test Instrument to Video and Audio Pattern Tests on Sink Devices ............ 20 Making Physical Connections - HDMI ........................20 4.1.1 Connecting the 780C to the Display Device - HDMI ..................... 20 4.1.2... - Page 3 4.7.5 Testing HDMI Audio Return Channel (ARC) 780C only ..................65 Using the 780C Test Instrument to Test HDMI and HDBaseT Protocols on Sink Devices ..........68 Testing HDCP on an HDMI, HDBaseT HDTV, Projector or Repeater Device ............68 5.1.1...
- Page 4 7.4.3 Procedures for Testing HDMI Networks (Links) with the Installer Utility ............. 147 Using the 780C to Monitor the HDMI/HDBaseT CEC and DDC channel ................. 150 Auxiliary Channel Analyzer (ACA) Transactions ...................... 150 Auxiliary Channel Analyzer – Emulation Monitoring of DDC on Sink............... 151 8.2.1...
- Page 5 12.2 Procedures for Enabling the Command Line Interface through USB Port ............... 208 12.3 Procedures for using the Command Line Interface through RS-232 Port (780C only) ......... 210 12.4 Procedures for Entering Commands ........................211 13 Using the Keypad ................................228 13.1...
-
Page 6: Overview Of The 780C Multi-Interface Interoperability Tester
HDBaseT and 3G-SDI devices. A color touch display makes the 780C easy and convenient to use. When testing a digital video source device you can toggle between operating the unit through the touch screen and viewing the incoming video from the source. -
Page 7: Overview Of 780C Features
780C Multi-Interface Interoperability Tester – User Guide Page 6 Note: 780C Image above shows the front edge with the SD Card slot which is used for storing and loading bitmaps, reports and for recovery in the event of a failed upgrade. -
Page 8: Network Analyzer Features
The following Network Analyzer features are available: HDCP test of an HDMI or HDBaseT sink or input to a repeater device – The 780C enables you to run an HDCP functional test on an HDMI or HDBaseT sink device directly or through a repeater device. -
Page 9: Auxiliary Channel Analyzer For Ddc Monitoring Features
The following features are available with the Auxiliary Channel Analyzer test options: DDC monitoring with Auxiliary Channel Analyzer (ACA) – The 780C ACA enables you to monitor HDMI or HDBaseT CEC DDC transactions such as HDCP and EDID as well as hot plug related events while emulating an HDMI or HDBaseT source and/or an HDMI or HDBaseT sink device(s) in a system. -
Page 10: Physical Interfaces Of The 780C Multi-Interface Interoperability Tester
This section describes the administration, video and audio interfaces on the 780C test instrument: Video Interfaces Table 2-1 below describes the video interfaces on the 780C test instrument, these interfaces are used to render test patterns for testing consumer electronic HDTVs and computer displays. -
Page 11: Audio Interfaces
Formats: LPCM, Dolby Digital (clips), DTS (clips) Administrative Interface The 780C is equipped with a USB interface. This interface is used to download custom bitmaps and to upgrade firmware and issue commands. The USB interface is a peripheral device. There are two modes: ... - Page 12 780C Multi-Interface Interoperability Tester – User Guide Page 11 September 29, 2014 Revision A1...
-
Page 13: General Operation
The 780C has a rocker style power switch on the back panel. Refer to the photo below. The 780C is supplied with the Part No 25-00106 12V DC power supply adapter as well as a part number 30A00400A03 line cord. -
Page 14: Navigating Through The 780C User Interface
Navigating through the 780C User Interface The 780C user interface is a color touch screen display 800 by 480. A single touch will activate an item on the screen or take you down to a lower level menu. A + indicates that you have to double touch to navigate down to a lower level menu. - Page 15 have created. Enter to navigate to custom menu screen. Custom Menu On – 780C automatically select the formats in Preferences Hot Plug Formats the EDID of the connected HDTV. Off – 780C will not automatically select the Page 2 ...
-
Page 16: Back Navigation
Viewing the CEC devices on an HDMI network Audio Analyzer Testing Audio of an HDMI Source Device Audio Monitor Procedures for Monitoring LPCM Audio from a Source Device (780C only) Verifying the EDID on an HDMI HDTV or HDMI Repeater Device Sink Tests Buttons EDID Test... -
Page 17: Status Bar
780C Multi-Interface Interoperability Tester – User Guide Page 16 3.3.3 Status Bar The 780C has a status bar on the bottom of the screen. The items in the status bar are described in the Table 3-2. Table 3-2: Status Bar... - Page 18 780C Multi-Interface Interoperability Tester – User Guide Page 17 Video Identification Status Indicates the video resolution on the HDMI Rx port. This includes: Horizontal Active in pixels Vertical Active in pixels Frame rate 3D Status Indicates the status of 3D video for HDMI or HDBaseT.
-
Page 19: Calibrating The Lcd
Calibrating the LCD It is recommended that you calibrate the LCD display prior to using the 780C Test Instrument. Use the following procedures to perform the calibration. 1. From the Home menu, navigate to the Help menu by pressing the Help activation button on the upper status bar. - Page 20 780C Multi-Interface Interoperability Tester – User Guide Page 19 2. Touch select the Calibrate activation button. A screen appears instructing you to press each of four red squares. When you finish touch selecting the fourth box, the calibration is completed and you will return to the Home menu.
-
Page 21: Using The 780C Test Instrument To Video And Audio Pattern Tests On Sink Devices
RGB Analog (via the HD VGA connector). Making Physical Connections - HDMI The first step in testing a sink device is to make the HDMI physical connections between the 780C and the device(s) under test. 4.1.1 Connecting the 780C to the Display Device - HDMI Use the following procedures to make the physical connections from the 780C to the display device under test. -
Page 22: Connecting The 780C To The Display Device - Hdbaset
Connecting the 780C to the Display Device - HDBaseT Use the following procedures to make the physical connections from the 780C to the display device under test. 1. Make the cable connection between the appropriate the 780C video HDBaseT output connector and the input connector of the HDBaseT device. -
Page 23: Connecting The 780C To The Display Device - Analog
Connecting the 780C to the Display Device - Analog Use the following procedures to make the physical connections from the 780C to the display device under test. 1. Make the cable connection between the appropriate the 780C video VGA output connector and the input connector of the HDTV or computer monitor using the cables supplied. - Page 24 780C Multi-Interface Interoperability Tester – User Guide Page 23 The Signal Type menu appears as shown below. 3. Touch select the desired signal type using the associated activation button, example HDMI. 4. Touch select the options for the Signal Type. Use the information in Table 4-1 below as a guide:...
-
Page 25: Procedures For Selecting An Resolution And Frame Rate - Hdmi And Hdbaset
1) Hot plug formats On; 2) Hot plug formats Off. When hot plug formats are On and a hot plug event occurs, the 780C will read the EDID of the display device connected to its output port. It will then automatically configure the list available signal types (resolutions and frame rates) to only those supported by the HDMI or HDBaseT sink device. - Page 26 780C Multi-Interface Interoperability Tester – User Guide Page 25 2. Select the Hot Plug Formats mode to On or Off as desired. Refer to the screen above. 3. Touch select the Formats activation button on the Status bar OUT to access the Formats menu. Refer to the figure below.
- Page 27 780C Multi-Interface Interoperability Tester – User Guide Page 26 The Formats menu appears as shown below (example HDMI): 4. Touch select the desired format and Frame Rate (example 2160p at 30Hz above). For the HDMI formats, there are color codes that are applied to the Resolution and Frame Rate selections. The following is a summary of their meaning: ...
-
Page 28: Procedures For Enabling Avmute
HDMI or HDBaseT that enables a source to signal a sink to extinguish its audio and video. The source, in this case the 780C emulating a source sets the AVMute Set flag in the general control packet. -
Page 29: Procedures For Selecting A Resolution And Frame Rate - Sdi
4.2.4 The procedures below describe how to select the resolution for the SDI output. Note: You can create your own custom formats using the Quantum Data Format Editor. These procedures are described in Creating and Using Custom Formats, EDIDs and Bitmaps. -
Page 30: Rendering Test Patterns On An Hdtv
4.3.1 Procedures for Outputting Test Patterns The procedures below cover cases where there is a direct connection between the 780C and the HDTV and also where the 780C is connected to an HDTV through a repeater device. 1. From the Home screen on the 780C display, touch select the Video Pattern status and activation button on the Status Bar as shown below. - Page 31 2. Touch select the desired test pattern from the menu shown below. You can select patterns that are standard with the 780C or bitmaps that you have imported. Note: A “+” on the lower right portion of the pattern indicates that there are options related to the specific pattern.
- Page 32 780C Multi-Interface Interoperability Tester – User Guide Page 31 Table 4-3: Test Patterns Pattern Name Variant Options Range of Values Orientation - Vertical Direction: ColorBar patterns SMPTE Left to Right Applications: Right to Left SMPTEBars - To adjust color...
- Page 33 780C Multi-Interface Interoperability Tester – User Guide Page 32 Table 4-3: Test Patterns Pattern Name Variant Options Range of Values Direction: Ramp/Stair Patterns Stair - Full Orientation - Vertical Left to Right Applications: Right to Left Stair - To visually check...
- Page 34 780C Multi-Interface Interoperability Tester – User Guide Page 33 Table 4-3: Test Patterns Pattern Name Variant Options Range of Values Pixel values in RGB, 8bit In 8-bit color mode (24) the ramp with TV (limited range) displays all 256 shades of gray.
- Page 35 780C Multi-Interface Interoperability Tester – User Guide Page 34 Table 4-3: Test Patterns Pattern Name Variant Options Range of Values 3D Cross Talk No variants Description: This image is divided in two sections with four rows of 16 white boxes each. The top section is for testing with the left eye Application: This is a 3D open.
- Page 36 780C Multi-Interface Interoperability Tester – User Guide Page 35 Table 4-3: Test Patterns Pattern Name Variant Options Range of Values Overscan EMI/Grill H Type Applications: EMI – Show grid of “H” characters to check for EMI effects on image. Each “H”...
- Page 37 780C Multi-Interface Interoperability Tester – User Guide Page 36 Table 4-3: Test Patterns Pattern Name Variant Options Range of Values Needles Pattern No variants Application: To detect whether scan velocity modulation is enabled on display. Window/Raster Pattern Window IRE Level ...
- Page 38 780C Multi-Interface Interoperability Tester – User Guide Page 37 Table 4-3: Test Patterns Pattern Name Variant Options Range of Values Focus Pattern Application: To detect whether scan velocity modulation is enabled on display. Multiburst Pattern Application: To check a display’s ability to produce sharply defined stripes at equal brightness up to full resolution.
- Page 39 780C Multi-Interface Interoperability Tester – User Guide Page 38 Table 4-3: Test Patterns Pattern Name Variant Options Range of Values Pseudo Random Pattern No Variants Application: To test for pixel errors on an HDMI cable. Horizontal LG Color Pattern No Variants Application: To test a display’s...
- Page 40 780C Multi-Interface Interoperability Tester – User Guide Page 39 Table 4-3: Test Patterns Pattern Name Variant Options Range of Values Pixel values in RGB, 10bit Outer background: with limited range (TV) R=64 G=64 B=64 mode. Outer blinking box: R=80/64 G=80/64 B=80/64...
- Page 41 780C Multi-Interface Interoperability Tester – User Guide Page 40 Table 4-3: Test Patterns Pattern Name Variant Options Range of Values Pixel values in RGB, 10bit Top background: with limited range (TV) R=64 G=64 B=64 mode. Top dark vertical line: R=32 G=32 B=32...
-
Page 42: Using Custom Test Image Packs
Using Custom Test Image Packs The 780C provides licensed image packs for certain sets of test images. You need to have a license key to use these custom test image packs. You can arrange to get access to them by contacting Quantum Data customer support at: http://www.quantumdata.com/support. - Page 43 780C Multi-Interface Interoperability Tester – User Guide Page 42 Table 4-4: Custom Test Image Packs – ChinaRes Pattern ChinaRes Pattern Pack This is a bitmap that is available through the Image Packs option. The ChinaRes test pattern is specified by the National Testing and Inspection Center for Radio and TV Products of China.
- Page 44 780C Multi-Interface Interoperability Tester – User Guide Page 43 Table 4-5: Custom Test Image Packs – THX Test Patterns September 29, 2014 Revision A1...
- Page 45 780C Multi-Interface Interoperability Tester – User Guide Page 44 Table 4-5: Custom Test Image Packs – THX Test Patterns THX Test Patterns 3D Convergence - test patterns to align pixels for proper convergence. The THX Pattern Pack offers a variety of test patterns for calibrating the luminance and chrominance of high end 3D-capable HDTVs.
- Page 46 780C Multi-Interface Interoperability Tester – User Guide Page 45 Table 4-5: Custom Test Image Packs – THX Test Patterns THX box - 2D/3D grayscale test patterns to accurately adjust white point and gamma. September 29, 2014 Revision A1...
-
Page 47: Outputting 3D Test Patterns Through Hdmi Or Hdbaset
Frame Packing (for both interlaced and progressive timings) 3D format structures. 4.5.1 Configurations for Rendering 3D Bitmaps on an HDMI or HDBaseT Sink Device Typically you will render 3D bitmap images with the 780C directly connected to an HDTV or projector. This configuration is shown below: September 29, 2014... -
Page 48: Procedures For Obtaining 3D Bitmaps On Hdmi Or Hdbaset Sink Device
Procedures for Selecting an HDMI Resolution and Frame Rate. If you have used the Quantum Data 3D Bitmap Conversion Tool, there is a naming convention for the 3D bitmaps which also provides the required format for each specific bitmap. 2. Enable the HDMI or HDBaseT as the active digital interface input. - Page 49 780C Multi-Interface Interoperability Tester – User Guide Page 48 3. Touch select 3D Output option from the top level menu shown below. The following screen will appear: September 29, 2014 Revision A1...
- Page 50 780C Multi-Interface Interoperability Tester – User Guide Page 49 4. Select the 3D mode (Side-by-Side, Top-and-Bottom or Frame Packing) and then select the subtype and Left/Right options (if applicable). 5. Select the 3D bitmap or image image from the Test Pattern list.
-
Page 51: How To Scroll Or Pan A Bitmap Pattern
There are two ways you can animate (move) a bitmap image: 1) image shifting (scrolling); 2) panning. You can shift or scroll a bitmap image that you have imported into the 780C by modifying the X and Y parameters or by dragging and panning. -
Page 52: Procedures For Panning Bitmaps
780C Multi-Interface Interoperability Tester – User Guide Page 51 2. Double touch select on the Zone Plate bitmap to access its options. The Zone Plate Options menu appears: 3. Specify the Horizontal Movement by touch selecting the appropriate setting Slow, Medium, Fast. - Page 53 780C Multi-Interface Interoperability Tester – User Guide Page 52 Use the following procedure to pan your custom bitmaps. 1. Select by double touching, the desired bitmap image, e.g. Master 1920x1080 image from the list of video patterns (shown below). 2. Double touch select on a bitmap to access its options. The screen below appears.
- Page 54 780C Multi-Interface Interoperability Tester – User Guide Page 53 September 29, 2014 Revision A1...
-
Page 55: Testing Digital Audio On An Hdtv Or A/V Receiver
(per channel) Mute – On/Off (per channel) 4.7.1 Connecting the 780C to an Audio Rendering Device Use the following procedures to make the physical connections from the 780C to the audio rendering device under test. September 29, 2014 Revision A1... - Page 56 A/V receiver. In this case make the HDMI connection between the HDMI OUT connector on the 780C and the HDMI input of the HDMI repeater device using an HDMI-to-HDMI cable. Then connect the HDTV to an active output on the repeater. The following illustrations depict the typical test configurations.
-
Page 57: Procedures For Testing A Display With Dolby Digital Or Dts Audio Test Patterns
Use the following procedures to run audio tests using Dolby Digital and or DTS audio test patterns. These test patterns are useful for calibrating the room acoustics in a home theatre system. 1. Make the physical connections between the 780C and the audio rendering device as described in the procedures above. - Page 58 780C Multi-Interface Interoperability Tester – User Guide Page 57 4. Enable the digital audio interface (HDMI, HDBaseT, SDI, TOSLInk, SPDIF). Refer to the screen examples below. Please note that not all of the audio formats are available on all of the Interface types.
- Page 59 780C Multi-Interface Interoperability Tester – User Guide Page 58 7. Touch select the desired audio test pattern. (500-2kHz Pink is shown selected in the sample screen shot above and Sine Wave shown in the screen shot below.) Use the information in Table 4-6 below to understand the application of each audio test pattern.
- Page 60 780C Multi-Interface Interoperability Tester – User Guide Page 59 Table 4-6: Audio Pattern Tests Pattern Format Interfaces Range of Values HDMI Pink Noise Patterns: Individually selectable channels Dolby Digital 5.1 HDBASET 500-2kHz Pink noise Cycle – cycling through each 20-20kHz Pink noise ...
-
Page 61: Procedures For Testing A Display With Dolby Digital Or Dts Sine Wave Clips
Use the procedures below for testing multi-channel Dolby or DTS sine wave using clips. 1. Make the cable connection between the appropriate the 780C video output connector (e.g. HDMI, HDBaseT OUT, SPDIF or OPTICAL) and the input connector of the audio rendering device using the cables supplied. - Page 62 780C Multi-Interface Interoperability Tester – User Guide Page 61 The Audio Pattern (Test Tone) menu appears as shown below: 3. Touch select the desired Interface from the Audio Pattern (Test Tone) menu (refer to the screen shot above which shows HDMI). The options are Optical, SPDIF or HDMI.
-
Page 63: Procedures For Testing With Programmable Sine Waves
780C Multi-Interface Interoperability Tester – User Guide Page 62 5. Touch select the desired clip. 4.7.4 Procedures for Testing with Programmable Sine Waves Use the procedures below for testing with programmable sine waves. Table 4-8 below describes the audio sine wave parameters that can be configured. - Page 64 Mute – On/Off (per channel) 1. Make the cable connection between the appropriate the 780C video output connector (e.g. HDMI OUT, HDBaseT OUT, SPDIF or OPTICAL) and the input connector of the audio rendering device using the cables supplied.
- Page 65 780C Multi-Interface Interoperability Tester – User Guide Page 64 The Audio Pattern (Test Tone) menu appears as shown below: 4. Touch select the desired Interface (shown in the screen above) to select the active digital audio output. (Optical selected in the example screen shot above.) 5.
-
Page 66: Testing Hdmi Audio Return Channel (Arc) 780C Only
Testing HDMI Audio Return Channel (ARC) 780C only You can test the HDMI 1.4 Audio Return Channel using the 780C. The selected audio is output from the 780C’s HDMI IN connector in this case. The HDMI IN connector emulates an ARC Tx device to test the ARC Rx function on an A/V Receiver that supports the Audio Return Channel. - Page 67 780C Multi-Interface Interoperability Tester – User Guide Page 66 1. From the top level menu (shown in the screen sample below), select Audio Test Tone. The Audio Test Tone menu appears as shown below: September 29, 2014 Revision A1...
- Page 68 780C Multi-Interface Interoperability Tester – User Guide Page 67 2. Select ARC. 3. Select the desired audio Signal Type. Table 4-9 below describes the audio format available for testing the HDMI Audio Return Channel. Table 4-9: HDMI Audio Return Channel (ARC) Testing...
-
Page 69: Using The 780C Test Instrument To Test Hdmi And Hdbaset Protocols On Sink Devices
780C HDMI OUT port connected directly to an HDTV input 780C HDMI OUT port connected to a repeater device which is then connected to a downstream HDTV. These configurations are shown below: 5.1.2 Configurations for Testing HDCP on an HDBaseT Sink Device You can run this test in two configurations. -
Page 70: Procedures For Testing Hdcp On An Hdmi Or Hdbaset Sink Device
Procedures for Testing HDCP on an HDMI or HDBaseT Sink Device Use the procedures below to run an HDCP test on an HDMI or HDBaseT sink. 1. Make the physical connections between the 780C HDMI/HDBaseT OUT connector and the sink device under test. - Page 71 780C Multi-Interface Interoperability Tester – User Guide Page 70 4. Touch select Enable from the HDCP Output Tests menu shown below. The Pass/Fail results and the key values exchanged during the authentication are presented on the display as shown below:...
-
Page 72: Verifying The Edid On An Hdmi, Hdtv, Hdbaset Projector Or Hdmi Repeater Device
780C Multi-Interface Interoperability Tester – User Guide Page 71 5. Touch select Auto-Restart to restart HDCP authentication. Alternatively you can run this test from the command line as follows: HDCP? // indicates pass (1 indicates a failure) Verifying the EDID on an HDMI, HDTV, HDBaseT Projector or HDMI... -
Page 73: Configurations For Verifying And Viewing The Edid On An Hdbaset Sink Device Or Input Of An Hdbaset Distribution Device
Use the procedures below to run an EDID test on an HDMI sink. 1. Make the physical connections between the 780C HDMI OUT connector and the display device under test. 2. Enable the HDMI or HDBaseT interface as shown below. - Page 74 780C Multi-Interface Interoperability Tester – User Guide Page 73 Note for testing SPDIF of TOSLink this is not necessary. 3. Touch select EDID from the Home menu shown below. 4. Touch select the Read activation button from the EDID Test menu shown below.
- Page 75 780C Multi-Interface Interoperability Tester – User Guide Page 74 September 29, 2014 Revision A1...
- Page 76 780C Multi-Interface Interoperability Tester – User Guide Page 75 The EDID sink test will also run certain sections of the EDID compliance test. The sections that are run are those sections that do not require Capabilities Declaration Form (CDF) information to be entered for example Test ID 8-2 shown in the following screen example below.
-
Page 77: Workflow For Comparing Edids
Use the following procedures to compare two EDIDs. The following is the workflow for comparing two EDIDs. Load a reference EDID either from an EDID file stored on the 780C or an EDID you have obtained from an HDTV and subsequently stored. - Page 78 Load File – Loads from an EDID file stored on the 780C file system Load TV Default – Loads the standard reference EDID for a TV from the 780C file system Load AVR Default - Loads the standard reference EDID for a AVR from the 780C file system 5.
- Page 79 The EDID is loaded and displayed on the screen. 6. Connect the 780C HDMI OUT or HDBaseT OUT port to a sink device (e.g. HDTV, projector or A/V receiver) and touch select Compare. The results will show PASS or FAIL with an explanation as in the following two screen examples.
-
Page 80: Viewing The Cec Devices On An Hdmi/Hdbaset Network
You can run this test in two configurations. 780C HDMI/HDBaseT OUT port connected directly to an HDTV or projector input 780C HDMI/HDBaseT OUT port connected to a repeater device which is then connected to a downstream HDTV. September 29, 2014 Revision A1... - Page 81 780C Multi-Interface Interoperability Tester – User Guide Page 80 These configurations are shown below: September 29, 2014 Revision A1...
-
Page 82: Procedures For Testing Cec On An Hdmi/Hdbaset Sink Device
Procedures for Testing CEC on an HDMI/HDBaseT Sink Device Use the following procedures to test CEC on an HDMI/HDBaseT sink device. 1. Connect the 780C HDMI/HDBaseT OUT port to an HDMI/HDBaseT sink device (e.g. HDTV or A/V receiver) using the configuration guidelines provided above. - Page 83 780C Multi-Interface Interoperability Tester – User Guide Page 82 September 29, 2014 Revision A1...
-
Page 84: Multi-Protocol (Hdcp, Edid And Cec) Testing On An Hdmi Or Hdbaset Hdtv Or Projector
This configuration is shown below: 5.4.2 Configurations for running multi-protocol tests on an HDBaseT Sink Device You run this test with the 780C HDBaseT OUT port connected directly to a projector or HDBaseT input on a distribution device. This configuration is shown below: 5.4.3... - Page 85 780C Multi-Interface Interoperability Tester – User Guide Page 84 Note for testing SPDIF of TOSLink this is not necessary. 3. Touch select video pattern status and activation button on the lower right of the LCD interface. 4. Touch select the Aux Combo Test pattern from the second page of the Video Pattern menu shown below.
- Page 86 780C Multi-Interface Interoperability Tester – User Guide Page 85 The results will appear on the connected display. An example of the results is shown below: 4. Alternatively you can run the AuxComboTest from the command line as follows: IMGL AuxTest...
-
Page 87: Using The 780C Test Instrument To Test Hdmi Or Hdbaset Source Devices
In all cases the 780C is emulating a sink to test an upstream source. In the third configuration, the 780C is emulating both an HDMI source and sink. These test configurations are shown below. -
Page 88: Connection Configurations For Testing Hdbaset Outputs On Repeater And Distribution Devices
Connection Configurations for Testing HDBaseT Outputs on Repeater and Distribution Devices The 780C’s HDMI input port acts as a “reference” HDBaseT sink device. Therefore it enables you to emulate a known good HDBaseT sink device to conduct a basic confidence test of an HDBaseT output of an HDBaseT distribution or repeater device. -
Page 89: Procedures For Viewing Video On An Hdmi/Hdbaset Source Device
Use the following procedures to test the video from an HDMI/HDBaseT source device. You can view the incoming video and check the video and timing parameters of the incoming video. 1. Make the physical connection between the 780C HDMI/HDBaseT IN port and the source device under test using the configuration instructions above. - Page 90 4. Touch select the Start Fullscreen activation button on the Video Display menu to view only the incoming video (no metadata) from the source device under test. The video from the source is shown on the 780C LCD as depicted below. September 29, 2014...
- Page 91 780C Multi-Interface Interoperability Tester – User Guide Page 90 5. Return to the Source Test menu by touching the LCD. The Source Test menu reappears as shown below. Note that you can also view 3D video bitmaps as well. The following screen is a sample of what a 3D bitmap would look like.
- Page 92 In this example a test pattern is shown. Note that the HDCP encryption status and AVmute status are also shown. 1. For the 780C you have the additional option of capturing and viewing a captured bitmap of the entire resolution of the incoming video View Full Frame.
- Page 93 780C Multi-Interface Interoperability Tester – User Guide Page 92 Use the arrows to move about the video frame. Note that in the example below the 780 is receiving a test pattern; typically this screen would show video from a source device.
-
Page 94: Viewing The Incoming 4K Hdmi/Hdbaset Video On A Connected Display Using Passthrough
780C Multi-Interface Interoperability Tester – User Guide Page 93 6.1.4 Viewing the Incoming 4K HDMI/HDBaseT Video on a Connected Display using Passthrough You can also view 4K incoming video on a connected display using the Video Passthrough feature. Use the following procedures. -
Page 95: Viewing Video Metadata From An Hdmi/Hdbaset Source Device
780C Multi-Interface Interoperability Tester – User Guide Page 94 2. Specify how you want to view the video on the connected display. You can either view it unscaled on a 4K display, or scaled to 1080p or scaled to 1920 by 1080 resolution. - Page 96 780C Multi-Interface Interoperability Tester – User Guide Page 95 2. Touch select Format Analyzer from the Source Tests menu shown below. 3. Touch select the Read activation button (shown on the screen below) to initiate the test. The results are shown in the screen shots below.
- Page 97 780C format library, an indication of the error is shown as can be seen below. If the timing does not match a standard timing in the 780C format library, a message is shown: “Unknown format” as can be seen below.
- Page 98 780C Multi-Interface Interoperability Tester – User Guide Page 97 Table 6-2 below describes each field in the Format Analyzer on-screen report. The basic timing information is shown on the left of the resulting screen and the AVI infoframes received are displayed on the right. Also displayed on the right side is an indication of the status of HDCP encryption.
-
Page 99: Procedures For Viewing Video On An Sdi Source Device
Use the following procedures to test the video from an SDI source device. You can view the incoming video and check the video and timing parameters of the incoming video. 1. Make the physical connection between the 780C SDI IN port and the source device under test using the configuration instructions above. - Page 100 4. Touch select the Start Fullscreen activation button on the Video Display menu to view only the incoming video (no metadata) from the source device under test. The video from the source is shown on the 780C LCD as depicted below. September 29, 2014...
- Page 101 780C Multi-Interface Interoperability Tester – User Guide Page 100 5. Return to the Source Test menu by touching the LCD. The Source Test menu reappears as shown below. 6. Touch select the screen to return to Video Display menu. 7. Touch select the Start Detailed activation button on the Video Display menu to view the incoming video along with the metadata from the source device under test.
- Page 102 780C Multi-Interface Interoperability Tester – User Guide Page 101 For the 780C you have the additional option of capturing and viewing a captured bitmap of the entire resolution of the incoming video View Full Frame. Use the arrows to move about the video frame. Note that in the example below the 780 is receiving a test pattern;...
-
Page 103: Viewing Video Metadata From An Sdi Source Device
780C Multi-Interface Interoperability Tester – User Guide Page 102 8. Return to the Home menu by touching the LCD then the Home menu. 6.1.7 Viewing Video Metadata from an SDI Source Device Use the following procedures to verify the video metadata and video timing data from an SDI source device. - Page 104 780C Multi-Interface Interoperability Tester – User Guide Page 103 2. Touch select Format Analyzer from the Source Tests. 3. Touch select the Read activation button (shown on the screen below) to initiate the test. The results are shown in the screen shots below. The first screen shows a typical pass results, the second screen shows a failure condition and the third screen shows a case where the incoming format was unknown.
-
Page 105: Viewing Source Data Island Packets On Hdmi And Hdbaset
HDMI sink device to conduct a test on a source device. You can view the data island packets with the source device connected directly to the 780C. This test configuration is shown below for HDMI and HDBaseT (second illustration). -
Page 106: Procedures For Viewing The Hdmi/Hdbaset Data Island Packets From A Source Device
Use the following procedures to view the data islands packets from an HDMI source device or output of an HDBaseT distribution device. 1. Connect the HDMI/HDBaseT system devices to the 780C as shown in the diagram above. The HDMI source device output is connected the 780C HDMI IN or HDBaseT IN connector. - Page 107 780C Multi-Interface Interoperability Tester – User Guide Page 106 4. Touch select the Refresh activation button on the Packet Viewer menu (shown below) to view the data island packet information (AVI Infoframe shown). 5. Touch select the Save activation button on the Packet Viewer menu to save the data to a file.
-
Page 108: Testing Hdcp Max Devices On An Hdmi Source Devices And Outputs Of Hdbaset Distribution Devices
Configurations for Testing Max Devices an HDMI Source Device Supports The 780C’s HDMI input port acts as a “reference” HDMI sink device. Therefore it enables you to emulate a known good HDMI sink device to conduct a test on a source device. You can run this source device connected directly to the 780C. - Page 109 780C Multi-Interface Interoperability Tester – User Guide Page 108 3. Touch select HDCP Test from the Home menu shown below. September 29, 2014 Revision A1...
- Page 110 780C Multi-Interface Interoperability Tester – User Guide Page 109 4. Touch select the Find Max Devs activation button on the HDCP Input Tests menu (shown below) to test the number of HDCP device the source device supports. The results of the test are shown on the screen.
-
Page 111: Procedures For Disabling Hdcp On The 780C Hdmi/Hdbaset Out Port - Gui
Procedures for disabling HDCP on the 780C HDMI/HDBaseT Out port - GUI You can disable the HDCP registers of the 780C’s Rx port to test how your source device responds to HDCP being disabled. You can disable the HDCP port either through the GUI or through the command line. -
Page 112: Testing Audio Of An Hdmi Source Device Or At The Output Of An Hdbaset Distribution Device
Configurations for Testing Audio on an HDMI Source Device With the 780C you can run a test on the HDMI audio from a source device. This test shows you the decoded audio IEC header information, the audio infoframes and the audio sample packet header information transmitted from the connected source device which could be a DVD, set top box or the output of an A/V Receiver. -
Page 113: Configurations For Testing Audio On The Output Of An Hdbaset Distribution Device
Configurations for Testing Audio on the Output of an HDBaseT Distribution Device With the 780C you can run a test on the HDMI audio from a source device. This test shows you the decoded audio IEC header information, the audio infoframes and the audio sample packet header information transmitted from the connected source device which could be a DVD, set top box or the output of an A/V Receiver. -
Page 114: Procedures For Testing Audio From An Hdmi/Hdbaset Source Device
Procedures for Testing Audio from an HDMI/HDBaseT Source Device Use the following procedures to test the audio from an HDMI source device. 1. Make the physical connection between the 780C HDMI or HDBaseT IN port and the source device under test using the configuration instructions above. - Page 115 780C Multi-Interface Interoperability Tester – User Guide Page 114 4. Touch select the Read activation button to initiate the test. 5. Alternatively you can run this test from the command line as follows: AUDA:RPTP? An example of the results are shown below:...
- Page 116 780C Multi-Interface Interoperability Tester – User Guide Page 115 Table 6-2 below describes each field in the Audio Analyzer on-screen report. The audio infoframe information is shown on the left of the resulting screen and the channel status data from the audio sample packets received are displayed on the right.
- Page 117 780C Multi-Interface Interoperability Tester – User Guide Page 116 Table 6-2: Audio Analyzer Audio IEC Header decoded data (left side) Description Sampling Frequency The sampling frequency. One of: Refer to Stream Header 32kHz 44.1kHz 48kHz ...
-
Page 118: Procedures For Testing Audio From An Hdmi/Hdbaset Source Device
Procedures for Testing Audio from an HDMI/HDBaseT Source Device Use the following procedures to test the audio from an HDMI source device. 6. Make the physical connection between the 780C HDMI or HDBaseT IN port and the source device under test using the configuration instructions above. - Page 119 780C Multi-Interface Interoperability Tester – User Guide Page 118 The Audio Analysis screen appears as shown below: 9. Touch select the Read activation button to initiate the test. 10. Alternatively you can run this test from the command line as follows:...
- Page 120 780C Multi-Interface Interoperability Tester – User Guide Page 119 Word length: Refer to stream header Sampling freq.: Refer to stream header Channel allocation: Channel status bits: Application: Consumer Sample words: LPCM Copyright asserted: Yes Format info: Default Mode: 0 Category code: 00...
- Page 121 780C Multi-Interface Interoperability Tester – User Guide Page 120 Table 6-2 below describes each field in the Audio Analyzer on-screen report. The audio infoframe information is shown on the left of the resulting screen and the channel status data from the audio sample packets received are displayed on the right.
- Page 122 780C Multi-Interface Interoperability Tester – User Guide Page 121 Table 6-2: Audio Analyzer Audio IEC Header decoded data (left side) Description Sampling Frequency The sampling frequency. One of: Refer to Stream Header 32kHz 44.1kHz 48kHz ...
-
Page 123: Procedures For Audible Monitoring Of Lpcm Audio From An Digital Video Source Device
You can monitor the incoming stereo LPCM audio on the HDMI, HDBaseT or SDI IN port at the headphone jack on the front edge of the 780C. You can also monitor a single channel of LPCM audio through the embedded speaker. You can select what channels of a multi-channel LPCM to monitor on the stereo headphone jack or which single channel on the speaker using the screens provided. - Page 124 780C Multi-Interface Interoperability Tester – User Guide Page 123 The following screen appears: 3. Select the pair of channels to monitor through the headphone jack using the Headphone Channels set of selection buttons. September 29, 2014 Revision A1...
- Page 125 780C Multi-Interface Interoperability Tester – User Guide Page 124 4. Specify the Headphone amplitude in increments of +/-3dB or =/-1dB using the buttons under Headphone Level. Select Mute to extinguish the audio. 5. Select the single channel to monitor through the embedded speaker using the Speaker Channel set of selection buttons.
- Page 126 780C Multi-Interface Interoperability Tester – User Guide Page 125 6. Specify the speaker amplitude in increments of +/-3dB or =/-1dB using the buttons under Speaker Level. Select Mute to extinguish the audio. September 29, 2014 Revision A1...
-
Page 127: Testing An Hdmi Or Hdbaset Source's Response To Edids
The 780C HDMI and HDBaseT IN ports emulate an HDMI or HDBaseT sink device. Part of that emulation function is presenting an EDID to a source when a sink device is powered and hot plug is asserted. The 780C is provisioned with a default EDID from the factory. There are two standard EDIDs available with the 780C as provided: 1) Standard HDTV EDID, 2) Standard A/V Receiver EDID. -
Page 128: Procedures For Testing An Hdmi Source Devices Response To An Edid
780C Multi-Interface Interoperability Tester – User Guide Page 127 6.5.3 Procedures for Testing an HDMI Source Devices Response to an EDID Use the following procedures to test the EDID response from an HDMI source device. 1. Touch select EDID Test from the Home menu (shown below). - Page 129 780C Multi-Interface Interoperability Tester – User Guide Page 128 The following menu appears. 3. Touch select Load from the EDID Tests menu. The following screen results. September 29, 2014 Revision A1...
- Page 130 Load File – Loads from an EDID file stored on the 780C file system Load TV Default – Loads the standard reference EDID for a TV from the 780C file system Load AVR Default - Loads the standard reference EDID for a AVR from the 780C file system 4.
- Page 131 5. If you wish to obtain an EDID from an HDMI or HDBaseT sink device that you have on hand, connect the 780C HDMI or HDBaseT OUT port to the HDMI/HDBaseT input of that sink device. This configuration is depicted below.
- Page 132 HDMI/HDBaseT sink device, to the 780C HDMI or HDBaseT IN port. 9. Connect the 780C HDMI IN or HDBaseT IN port to the HDMI output of a source device or HDBaseT output you wish to test as shown in the illustration below.
- Page 133 780C Multi-Interface Interoperability Tester – User Guide Page 132 September 29, 2014 Revision A1...
-
Page 134: Using The 780C Test Instrument Installer Test Utility
780C Multi-Interface Interoperability Tester – User Guide Page 133 7 Using the 780C Test Instrument Installer Test Utility This section provides procedures for diagnosing HDMI and HDBaseT networks using the automated Installer Test. The features and functions described in this section are included as a standard feature. The Installer Test enables you to quickly and simply identify common interoperability problems. -
Page 135: Diagnosing Hdmi And Hdbaset Interoperability Problems Toward The Source - Upstream
Connection Configurations for Testing HDMI Source Devices The 780C’s HDMI input port acts as a “reference” HDMI sink device. Therefore it enables you to emulate a known good HDMI sink device to conduct diagnostics upstream toward the source device. The following illustrations show the typical configurations. -
Page 136: Connection Configurations For Testing Hdbaset Source Devices
1. Make the physical connection between the 780C HDMI IN or HDBaseT IN port and the upstream device under test using the configuration instructions above or by following the instructions on the screen. - Page 137 780C Multi-Interface Interoperability Tester – User Guide Page 136 3. Touch select Source Test under Installer Tests from the Home menu shown below. 4. Touch select the OK activation button to initiate the test. September 29, 2014 Revision A1...
- Page 138 The test will run for up to about a minute. A status screen is provided as shown below. You will be asked to verify the video and video parameters presented on the 780C display. Touch select the appropriate activation button Yes or No.
- Page 139 780C Multi-Interface Interoperability Tester – User Guide Page 138 September 29, 2014 Revision A1...
-
Page 140: Diagnosing Hdmi And Hdbaset Interoperability Problems At The Sink - Downstream
Connection Configurations for Testing HDMI Sink Devices The 780C’s HDMI input port acts as a “reference” HDMI source device. Therefore it enables you to emulate a known good HDMI source device to conduct diagnostics downstream toward the sink device. The following illustrations show the typical configurations. -
Page 141: Procedures For Testing Downstream (Sink Test) With The Installer Utility
Use the following procedures to test the video from an HDMI sink device. 1. Make the physical connection between the 780C HDMI/HDBaseT OUT port and the sink device under test using the configuration instructions above or by following the instructions on the screen. - Page 142 780C Multi-Interface Interoperability Tester – User Guide Page 141 3. Touch select Sink Test under the Installer Tests from the Home menu shown below. 4. Touch select the OK activation button to initiate the test. September 29, 2014 Revision A1...
- Page 143 780C Multi-Interface Interoperability Tester – User Guide Page 142 The test will run for up to about a minute. You will be asked to verify the video and video parameters presented on the display device under test. Touch select the appropriate activation button Yes or No.
-
Page 144: Diagnosing Hdmi/Hdbaset Interoperability Problems With A Repeater
Connection Configurations for Testing HDMI Repeater Devices The 780C’s HDMI input port acts as a “reference” HDMI source and sink device simultaneously. Therefore it enables you to emulate both a known good HDMI source and sink device to conduct diagnostics on a repeater device. -
Page 145: Procedures For Testing Repeaters (Repeater Test) With The Installer Utility
Use the following procedures to test the video from an HDMI/HDBaseT repeater device with the Installer Utility. 1. Make the physical connections between the 780C HDMI/HDBaseT IN and OUT ports and the sink device under test using the configuration instructions above or by following the instructions on the screen. - Page 146 4. Touch select the OK activation button to initiate the test. The test will run for up to about a minute. You will be instructed to switch to different timings and verify that the video displayed on the 780C screen looks correct. September 29, 2014...
- Page 147 780C Multi-Interface Interoperability Tester – User Guide Page 146 The results are presented for each timing (video resolution) tested. The following screen is a sample of these results. September 29, 2014 Revision A1...
-
Page 148: Diagnosing Hdmi/Hdbaset Interoperability Problems In An Hdmi/Hdbaset Network
Use the following procedures to test the video on an HDMI link with the Installer Utility. 1. Make the physical connection between the 780C HDMI IN and OUT ports and the HDMI source and sink devices under test using the configuration instructions above or by following the instructions on the screen. - Page 149 3. Touch select Link Test from Installer Tests from the Home menu shown below. A diagram will appear on the 780C display depicting the proper setup for the Link Test. 4. Touch select the OK activation button to initiate the test.
- Page 150 780C Multi-Interface Interoperability Tester – User Guide Page 149 The test will run for up to about a minute. A status screen is provided as shown below. You will be instructed to switch interfaces on the HDTV during the test. Touch select the appropriate the OK activation button.
-
Page 151: Using The 780C To Monitor The Hdmi/Hdbaset Cec And Ddc Channel
HDMI/HDBaseT source and/or sink device(s) in an HDMI/HDBaseT system. DDC and CEC passive monitoring with Auxiliary Channel Analyzer (ACA) – The 780C ACA enables you to passively monitor HDMI CEC and DDC transactions between an HDMI source and sink. You can monitor +5V, hot plug events as well as the HDCP and EDID transactions and CEC messages. -
Page 152: Auxiliary Channel Analyzer - Emulation Monitoring Of Ddc On Sink
Upstream means that the 780 is upstream and communicating downstream and Downstream means that the 780 is downstream and communicating upstream. You can save these transactions and then view them on the Quantum Data external ACA viewer which is available for free on the Quantum Data website. -
Page 153: Configurations For Monitoring Ddc Transactions With Aca On Hdmi Sink Devices
This subsection provides configuration diagrams that depict ACA monitoring of HDMI sink devices, with or without a repeater while the 780C is emulating an HDMI source device. 1. Connect the HDMI or HDBaseT sink devices to the 780C in either of the ways shown in the diagrams below and described as follows: a. -
Page 154: Monitoring Ddc Transactions With Aca On Hdmi Or Hdbaset Sink Devices
This subsection provides configuration diagrams that depict ACA monitoring of HDMI or HDBaseT sink devices, with or without a repeater while the 780C is emulating an HDMI or HDBaseT source device. 1. Enable the HDMI or HDBaseT as the active digital interface input as shown below. - Page 155 6. Determine what data types you wish to monitor. Typically you will want to monitor the DDC and hot plug (+5V only available with passive monitoring option). Note: By default the two activation buttons labeled 780C Tx Port and 780C Rx port are enabled. You cannot disable them. Transactions will be shown based on which ports (HDMI/HDBaseT OUT and/or...
- Page 156 HDMI/HDBaseT IN) are connected to HDMI/HDBaseT devices and which set of transactions you have enabled (i.e. DDC, HPD on Tx or Rx side). 7. Enable HDCP on the 780C HDMI or HDBaseT OUT port. Use the procedures in the section entitled: Testing HDCP on an HDMI HDTV or HDMI Repeater Device.
-
Page 157: Configurations For Monitoring Ddc Transactions With Aca On Hdmi Source Devices
Configurations for Monitoring DDC Transactions with ACA on HDMI Source Devices This subsection provides configuration diagrams that depict ACA monitoring of HDMI source devices, with or without a repeater, while the 780C is emulating an HDMI sink device. 8.2.5 Configurations for Monitoring DDC Transactions with ACA on HDBaseT Source Devices... -
Page 158: Procedures For Monitoring The Ddc Transactions Using The Auxiliary Channel Analyzer On Hdmi Or Hdbaset Source Devices
Note: You will have to obtain a license key for the ACA option to use the feature. 1. Connect the HDMI or HDBaseT source devices to the 780C in either of the ways shown in the diagrams above and described as follows: a. - Page 159 5. Determine what data types you wish to monitor. Typically you will want to monitor the DDC, hot plug (shown in the example above). Note: By default the two activation buttons labeled 780C Tx Port and 780C Rx port are enabled. You cannot disable them. Transactions will be shown based on which ports (HDMI/HDBaseT OUT and/or HDMI/HDBaseT IN) are connected to HDMI/HDBaseT devices and which set of transactions you have enabled (i.e.
- Page 160 6. Take whatever action necessary to initiate a new HDCP authentication. Typically this would be a hot plug event, for example a disconnection and reconnection on the 780C HDMI/HDBaseT IN port. 7. Touch select the Capture Data Table activation button to access the Auxiliary Channel Analyzer screen.
-
Page 161: Configuration For Monitoring Ddc Transactions With The Aca On An Hdmi Or Hdbaset Repeater Or Distribution Device
780C Multi-Interface Interoperability Tester – User Guide Page 160 9. Touch select Stop activation button (top left) to halt the collection of messages. 10. Touch select Clear activation button (top center) to clear the collected of messages. Configuration for Monitoring DDC Transactions with the ACA on an... -
Page 162: Procedures For Running An Auxiliary Channel Analyzer Test On Hdmi/Hdbaset Repeater Or Distribution Devices
HDMI/HDBaseT sink device and an HDMI/HDBaseT source device. 1. Connect the HDMI system devices to the 780C as shown in the diagrams above and described as follows: a. The HDMI/HDBaseT repeater device input is connected the 780C HDMI/HDBaseT OUT connector. - Page 163 (+5V is only available for monitoring with the passive monitoring option). Select the data types that you wish to monitor. Note: By default the two activation buttons labeled 780C Tx Port and 780C Rx Port are enabled. You cannot disable them. Transactions will be shown based on which ports (HDMI OUT and/or HDMI IN) are connected to HDMI devices and which transaction types (i.e.
- Page 164 780C Multi-Interface Interoperability Tester – User Guide Page 163 5. Enable HDCP on the 780C HDMI OUT port. Use the procedures in the section entitled: Configurations for Testing HDCP on an HDMI Sink Device. 6. Take whatever action necessary to initiate a new HDCP authentication. Typically this would be a hot plug event at the sink device you are testing.
- Page 165 780C Multi-Interface Interoperability Tester – User Guide Page 164 9. Touch select Stop activation button (top left) to halt the collection of messages. 10. Touch select Clear activation button (top center) to clear the collected of messages. September 29, 2014...
-
Page 166: Auxiliary Channel Analyzer - Passive Monitoring
This subsection provides configuration diagrams that depict ACA passive monitoring of an HDMI system. 1. Connect the HDMI system devices to the 780C as shown in the diagram below and described as follows: a. The HDMI source is connected to the 780C ACA IN connector. - Page 167 780C Multi-Interface Interoperability Tester – User Guide Page 166 2. From the Home screen (shown below) touch select the Aux Channel Analyzer activation button. The ACA Setup Options screen appears: September 29, 2014 Revision A1...
- Page 168 780C Multi-Interface Interoperability Tester – User Guide Page 167 3. Select the data types that you wish to monitor. In this application you would select either Passive Upstream or Passive Downstream. 4. Determine what data types you wish to monitor. Typically you will want to monitor the DDC and hot plug and +5V.
-
Page 169: Auxiliary Channel Analyzer - Monitoring Of Cec Messages
780C Multi-Interface Interoperability Tester – User Guide Page 168 8. Touch select the Details activation button (top center) to view the details of any specific transaction that you have selected. The following screen is an example of the details screen. This example shows the BCAPS register details. -
Page 170: Procedures For Passive Monitoring Hdmi Cec Messages With The Auxiliary Channel Analyzer
Note: You will have to obtain a license key for the ACA passive monitoring option to use the feature. 1. Connect the HDMI system devices to the 780C as shown in the diagram above and described as follows: a. The HDMI source is connected to the 780C ACA IN connector. - Page 171 780C Multi-Interface Interoperability Tester – User Guide Page 170 3. Select the CEC to monitor. In this application you would select Passive Upstream. Note that you need only set either the Passive Upstream or Passive Downstream. 4. Enable HDCP on the HDMI source device under test. Use the procedures in the section entitled:...
- Page 172 780C Multi-Interface Interoperability Tester – User Guide Page 171 Touch select the Details activation button (top center) to view the details of any specific transaction that you have selected. The following screen is an example of the details screen. These screen examples show polling example.
-
Page 173: Using The 780C Test Instrument To Test Hdmi Cable Or Repeaters
The cable test and repeater test can be used when the source and sink ends are collocated, in other words can be connected to the 780C Tx and Rx ports. For a cable or distribution system that is installed and where the source and sink ends cannot be connected to the 780C, you can use the Frame Compare feature. -
Page 174: Procedures For Running An Hdmi Cable Or Network ("Repeater") Test
This subsection provides procedures for performing an HDMI cable test or a test of an HDMI network comprised of repeaters, splitters, extenders, switches, etc. 1. For testing an HDMI cable, connect one end of the HDMI cable to the 780C HDMI OUT connect and the other end to the 780C HDMI IN connector. - Page 175 780C Multi-Interface Interoperability Tester – User Guide Page 174 3. For testing an HDMI cable touch select Test Wire to initiate the test. The pixel errors are displayed for each timing on the screen as shown below. The +5V, Hot Plug and DDC test results are shown as Pass/Fail.
- Page 176 Cable Test. In the Test Repeater function, the 780C initiates a hot plug event on its sink (HDMI IN) port. The hot plug delay is the time that elapses between the falling edge of the hot plug line on the on the sink side of a repeater and the falling edge of the hot plug line on the source side.
-
Page 177: Hdmi Frame Compare Test
This subsection provides procedures for performing an HDMI Frame Compare test on an HDMI network comprised of repeaters, splitters, extenders, switches, etc. 1. Connect the far end of the HDMI cable (at the display or HDTV) to the 780C HDMI IN connect as shown in the diagram above. - Page 178 Page 177 The following screen appears: 3. Select Frame Capture to capture a reference frame. The 780C will capture a frame and indicate that the +5V was detected properly or not. The screen below shows these results. September 29, 2014...
-
Page 179: Procedures For Running The Remote Prn Test
780C Multi-Interface Interoperability Tester – User Guide Page 178 4. Select Frame Compare to compare a series of frames to the reference frame. The following screen example shows the results of the Frame Compare test. Note that the incoming resolution is shown with the number of pixel errors detected. - Page 180 780C Multi-Interface Interoperability Tester – User Guide Page 179 2. Disconnect the source device at the near end of an HDMI distribution network and connect the HDMI cable to the first 780’s HDMI output connector. 3. Disconnect the sink device at the far end of an HDMI distribution network and connect the HDMI cable to the second 780’s HDMI input connector.
- Page 181 780C Multi-Interface Interoperability Tester – User Guide Page 180 The 780C will run the PRN test at the format resolution set for the 780 at the source end. Repeat the test at other resolutions and bit depths. September 29, 2014...
-
Page 182: Running The Automated Edid Tests On Hdmi Source Devices
EDID such as the preferred timing. The test also verifies that the video parameters are consistent with the capabilities of the EDID that is emulated. The 780C is configured with a set of EDIDs that it will emulate on its HDMI Rx port. - Page 183 Note: In the example above the first white space separates the name of the EDID which matches the EDID file in the 780C for testing and the description that appears on the AutoEDID test screen. The second white space is part of the description.
-
Page 184: Configurations For Running An Auto Edid Test
780C Multi-Interface Interoperability Tester – User Guide Page 183 10.1.2 Configurations for Running an Auto EDID Test This subsection provides configurations supported when performing an HDMI Auto EDID test on a source device which could be an entire upstream HDMI network. -
Page 185: Procedures For Running The Auto Edid Test
Important Note: If you wish to run the optional text report, you will have to have installed a suitable SDCard into the 780C at the SDCard input on the front edge. You will have to install the SDCard before you boot up the 780C and run the test. - Page 186 780C Multi-Interface Interoperability Tester – User Guide Page 185 The EDID Test screen appears. 2. From the EDID Test screen, touch select Auto-EDID Test as shown below. The Auto-EDID Test screen appears. 3. From the Auto-EDID Test screen optionally select Set Report Name as shown below.
- Page 187 Refer to the image below. You will have to install the SDCard before you boot up the 780C and run the test. If you have not installed the SDCard. Install the SDCard now, power cycle the 780C and repeat the previous steps.
- Page 188 780C Multi-Interface Interoperability Tester – User Guide Page 187 5. (Optionally) Touch select the Set Test List activation button if you wish to use your specific list of EDIDs for testing. September 29, 2014 Revision A1...
- Page 189 780C Multi-Interface Interoperability Tester – User Guide Page 188 The Auto Test Lists screen will appear enabling you to select your previously defined test list. Refer to the screen below. 6. Select the desired EDID test list as shown in the screen above.
-
Page 190: Viewing The Auto-Edid Test Report
780C Multi-Interface Interoperability Tester – User Guide Page 189 The test will begin executing and you will see the results one by one as each EDID it tested. The following screen shows another example. Note that you can stop the test anytime by touch selecting the Stop activation/toggle button (indicated above). - Page 191 780C Multi-Interface Interoperability Tester – User Guide Page 190 view the text report. You can view the Auto-EDID test report directly from the SDCard or transfer it to your PC. An example of the report is shown below. You can disseminate the test report to subject matter experts or colleagues.
-
Page 192: Creating And Using Custom Formats, Edids, Bitmaps And Menus
User buttons on the Signal Type menu. 11.1.1 Workflow for Using Custom Formats In order to import and use custom formats in the 780C you must take the following high level steps (detailed procedures are provided further below): ... - Page 193 The 780C will appear as a mass storage device on your PC like any other USB drive. Note: If this is the first time you have used the 780C in the Disk mode you will have to reformat the disk.
- Page 194 780C Multi-Interface Interoperability Tester – User Guide Page 193 8. Touch select COM for the USB Mode (refer to the screen above). 9. Power cycle the 780C. 10. Navigate to the Signal Type menu of the desired interface and select User-Defined for the Format Type as indicated below.
- Page 195 780C Multi-Interface Interoperability Tester – User Guide Page 194 11. (Alternatively) Establish a command line session with the 780C from your PC using the procedures described in Procedures for Enabling the Command Line Interface. 12. Load a custom format using the following commands: FMTL <formatName>...
-
Page 196: Adding Reference Edids For Use In Testing Hdmi Devices
You can import EDIDs for use in testing HDMI source and sink devices. You can compare a reference EDID stored in the 780C with the EDID of an HDMI sink device the 780C is connected to. You can also test HDMI source devices to test how they will respond to a variety of EDIDs you have stored in the 780C. - Page 197 The 780C will appear as a mass storage device on your PC like any other USB drive. Note: If this is the first time you have used the 780C in the Disk mode you will have to reformat the disk.
-
Page 198: Procedures For Saving An Edid Into The 780C
11.2.3 Procedures for Saving an EDID into the 780C Use the following procedures to add an EDID to your 780C from a connected HDMI sink device. 1. Make the physical connections between the 780C HDMI or HDBaseT OUT connector and the display device whose EDID you wish to store. - Page 199 780C Multi-Interface Interoperability Tester – User Guide Page 198 5. Touch select the Save activation button from the EDID Test menu shown below. A keypad appears as shown below allowing you to save the EDID to a file. 6. Spell out a name for the EDID (limit 8 characters) by touch selecting the virtual keys (e.g. above “MYEDID”.
- Page 200 780C Multi-Interface Interoperability Tester – User Guide Page 199 9. Touch select the Load File option to view your new EDID. September 29, 2014 Revision A1...
-
Page 201: Using Custom Bitmaps
11.3 Using Custom Bitmaps You can import your own bitmaps into the 780C through the USB interface or load them from an SD card. Note that when bitmaps are imported into the 780C, they are rendered at their native resolution, i.e. they do not scale to the resolution of the video format you have selected as the standard test patterns do. - Page 202 The 780C will appear as a mass storage device on your PC like any other USB drive. 5. If this is the first time you have used the 780C in the Disk mode you will have to reformat the disk. The system will prompt you through the format process.
- Page 203 MYBRTS07.bmp RGMultBurst 720 MYBRTS10.bmp RGMultBurst 1080 7. Transfer your userpats.txt file from your PC to the 780C using standard Windows methods for transferring files to a USB drive, i.e. by dragging and dropping or copying and pasting. Note: Your bitmaps are limited to 8 characters with an extension (.bmp).
-
Page 204: Procedures For Loading Bitmaps From Sd Card
780C Multi-Interface Interoperability Tester – User Guide Page 203 10. Touch select COM for the USB Mode (refer to the screen above). 11. Power cycle the 780C. 12. Navigate to the Video Pattern menu. You should now see the new bitmap image(s) on the pattern list (below). -
Page 205: Creating Custom Menus
This section describes how to configure custom menus on the 780C. Custom menus enable you to display a menu of commonly used functions on the 780C touch display. This allows you to save time by quickly executing a specific set of resolution and image combinations. -
Page 206: To Create A Custom Menu
Page 205 The custom menus are setup using two text files that you create on your PC and transfer over to the 780C. The two files are: 1) UserKeys.txt and 2) SeqMap.txt. The UserKeys.txt is a set of commands with menu key codes. - Page 207 780C Multi-Interface Interoperability Tester – User Guide Page 206 2. Navigate Touch select Custom Menu from the Preference screen as shown below. The following screen appears. September 29, 2014 Revision A1...
- Page 208 780C Multi-Interface Interoperability Tester – User Guide Page 207 September 29, 2014 Revision A1...
-
Page 209: Command Interface
The command line is available through the 780C USB port and additionally through an RS-232 connector on the 780C. In order to use the command line through the USB port you need to set the 780C USB port in COM mode. - Page 210 780C Multi-Interface Interoperability Tester – User Guide Page 209 5. Follow the instructions provided on the dialog box to browse to the location of the .INF file. Once you locate the .INF file the required software will load as shown below.
-
Page 211: Procedures For Using The Command Line Interface Through Rs-232 Port (780C Only)
Use the following procedures for command line control of the 780C via the RS-232 serial port. Please note if you experience a different behavior on your PC, refer to the 780C release notes on the Quantum Data website at: http://www.quantumdata.com/downloads/index.asp. -
Page 212: Procedures For Entering Commands
3. Use the following tables as a guideline for enter commands. Note: Changes you make through the command line will not be reflected on the 780C touch panel. For example if you make a selection through the touch panel for the signal type, format and pattern and then... - Page 213 780C Multi-Interface Interoperability Tester – User Guide Page 212 Table 12-1: List of Commands (alphabetical) – For Testing HDMI Sink Devices Command Description Syntax Parameters Command Example AVMM Enables or disables AVMM <enable> Where enable is one of: To enable avmute on an HDMI...
- Page 214 780C Multi-Interface Interoperability Tester – User Guide Page 213 Table 12-1: List of Commands (alphabetical) – For Testing HDMI Sink Devices Command Description Syntax Parameters Command Example DACG Specifies which audio DACG <mask> Where mask is an 8 bit value.
- Page 215 780C Multi-Interface Interoperability Tester – User Guide Page 214 Table 12-1: List of Commands (alphabetical) – For Testing HDMI Sink Devices Command Description Syntax Parameters Command Example FRAT? Queries the frame rate FRAT? Not Applicable To read the frame rate of the...
- Page 216 780C Multi-Interface Interoperability Tester – User Guide Page 215 Table 12-1: List of Commands (alphabetical) – For Testing HDMI Sink Devices Command Description Syntax Parameters Command Example HSPG Sets enable gate of HSPG <enable> Where enable is: To enable the horizontal sync...
- Page 217 780C Multi-Interface Interoperability Tester – User Guide Page 216 Table 12-1: List of Commands (alphabetical) – For Testing HDMI Sink Devices Command Description Syntax Parameters Command Example VRAT? Queries the vertical VRAT? Not Applicable To read the vertical rate of the...
- Page 218 780C Multi-Interface Interoperability Tester – User Guide Page 217 Table 12-1: List of Commands (alphabetical) – For Testing HDMI Sink Devices Command Description Syntax Parameters Command Example XAVI To set the scan parameter to Enables you to send XAVI:aviparameter <value>...
- Page 219 780C Multi-Interface Interoperability Tester – User Guide Page 218 Table 12-1: List of Commands (alphabetical) – For Testing HDMI Sink Devices Command Description Syntax Parameters Command Example XAUD To set the channel count to 3: Enables you to send XAUD:audparameter <value>...
- Page 220 780C Multi-Interface Interoperability Tester – User Guide Page 219 Table 12-1: List of Commands (alphabetical) – For Testing HDMI Sink Devices Command Description Syntax Parameters Command Example XSPD To assign a vendor string name: Enables you to send XSPD:spdparameter <value>...
- Page 221 780C Multi-Interface Interoperability Tester – User Guide Page 220 Table 12-2: List of Commands (alphabetical) – For Testing HDMI Audio in Sink Devices Command Description Syntax Parameters Command Example NBPA Sets the number of NBPA <bits> Where bits is one of:...
- Page 222 780C Multi-Interface Interoperability Tester – User Guide Page 221 Table 12-3: List of Commands – For Testing HDMI Source Devices Command Description Syntax Command Example AUDA:RPTP? Queries the audio infoframe and AUDA:RPTP? To view the audio infoframe and channel status bits and issues a text channel status bits: report.
- Page 223 780C Multi-Interface Interoperability Tester – User Guide Page 222 Table 12-3: List of Commands – For Testing HDMI Source Devices Command Description Syntax Command Example DIDU Applies an EDID file loaded with DIDU To load an EDID file, apply it to the...
- Page 224 780C Multi-Interface Interoperability Tester – User Guide Page 223 Table 12-4 below provides the list of commands supported for testing HDMI source devices: Table 12-4: List of Commands – For Testing HDMI Cables and Distribution Networks Command Description Syntax Command Example CBLT? Cable Test.
- Page 225 780C Multi-Interface Interoperability Tester – User Guide Page 224 Table 12-5: List of Commands – For Testing Distribution Networks with the Frame Compare Test Command Description Syntax Command Example PDAU Initiates the capture of the number PDAU To capture a reference frame and...
- Page 226 780C Multi-Interface Interoperability Tester – User Guide Page 225 Table 12-6 below lists the format names, their resolutions and frame rates for television formats. For command line control you would use the format name as the argument for the FMTL command.
- Page 227 FMTL command as shown in the example Note: The following table only shows a sample of some of the more common formats. The other names can be obtained from the list on the 780C itself. Table 12-7: Partial List of Computer Format Names for Command Line...
- Page 228 780C Multi-Interface Interoperability Tester – User Guide Page 227 Table 12-8: List of Image parameter names for command line Image Name Example Image Name Example Image Name Example Raster IMGL Raster Flat_Wht IMGL Flat_Wht Linearity IMGL Linearity IMGU IMGU IMGU...
-
Page 229: Using The Keypad
Page 228 13 Using the Keypad This section provides information and procedures for operating the 780C with a keypad. The 780C can support keypad operation to enable efficient production test operation. An RS-232 numeric keypad is used for this application. Supported keypad functions include selection of interface, timing, pattern, and test sequences. -
Page 230: Keypad Functionality
780C so that the changes take effect. 13.3 Keypad Functionality For keypad support, the 780C uses four configuration files stored in the root directory of the internal flash. Here are the names and functions of the four files: ... -
Page 231: Selecting A Format (Timing)
780C Multi-Interface Interoperability Tester – User Guide Page 230 . or Del Out or End Go to Previous item Go to Next item 13.4 Selecting a Format (Timing) A format can be selected by pressing the TIMING key followed by the number that represents the desired timing and interface. - Page 232 780C Multi-Interface Interoperability Tester – User Guide Page 231 1080i30 1080p24 1080p24 1080p25 1080p29 1080p30 1080p50 (YPbPr) 1080p59 1080p60 480i24 480p60 1080i30 720p60 1080p59 480i24 480i24 576i25 480p60 480p59 576p50 720p60 720p50 1080i30 1080i25 HDMI 1080p50 1080p60 DMT0659 DMT0860 DMT1060...
-
Page 233: Selecting A Test Pattern (Image)
780C Multi-Interface Interoperability Tester – User Guide Page 232 480i30 720p59 DMT0660 480p60 Table 13-3 – Format Range per Interface Map Interface Number Interface Name 301 - 309 310 - 331 BNC + S-Video + CVBS (ED/HD) 332 - 336... -
Page 234: Programming A Test Sequence Using The Keypad
780C Multi-Interface Interoperability Tester – User Guide Page 233 Flat93 Flat87 Flat80 Flat73 Flat67 Flat60 Flat53 PRN24Bit 13.6 Programming a Test Sequence using the keypad You can create and run test sequences in one of two ways. You can program a test sequence through the keypad using the procedures below. -
Page 235: Programming A Test Sequence In The Userkeys File
780C Multi-Interface Interoperability Tester – User Guide Page 234 // 1080p60 HDMI PATTERN // ramp // press the END key to halt the of sequence programming 2. Play back a sequence as follows. NEXT NEXT (repeat NEXT or PREVIOUS) 13.7 Programming a Test Sequence in the UserKeys file You can also create a test sequence by including a set of commands in the UserKeys.txt file. - Page 236 780C Multi-Interface Interoperability Tester – User Guide Page 235 To run a test sequence macro stored in the UserKeys.txt file you use the kbrd command on the command line as follows. KBRD F0 // This command would run the F0 macro in the UserKeys.txt file...
-
Page 237: Upgrading The 780C
You can upgrade the firmware and gateware on your 780C through the USB interface. In order to upgrade the 780C firmware and gateware you have to put the 780C in the “Disk” mode. This is not the default mode. Important Note: Be sure to check the Release Notes on the Quantum Data website for additional information on upgrading for a particular release. - Page 238 780C Multi-Interface Interoperability Tester – User Guide Page 237 12. Activate the gateware (if you are updating the FPGA Flash) by touching the associated Update button. A confirmation prompt is displayed. Touch select Confirm to initiate the firmware upgrade. (Note: The screen on your unit may appear slightly different.)
- Page 239 The screen will show several messsages indicating the progress of the update. Once the firmware update has completed the following screen appears. 16. Reboot the 780C by power cycling. 17. Touch select the Preferences from the 780C top menu. 18. Choose COM for the USB Mode (refer to the screen below). 19. Power cycle the 780C.
- Page 240 780C Multi-Interface Interoperability Tester – User Guide Page 239 END OF USER GUIDE September 29, 2014 Revision A1...
Need help?
Do you have a question about the 780C and is the answer not in the manual?
Questions and answers