Quantum Data 980 User Manual
Protocol analyzer
Hide thumbs
Also See for 980:
- User manual (75 pages) ,
- Application manual (36 pages) ,
- Product manual (8 pages)

Related Manuals for Quantum Data 980


Summary of Contents for Quantum Data 980
- Page 1 980 User Guide Rev. B29 980 Protocol Analyzer User Guide Rev: B29 Page 1 August 5, 2011...
-
Page 2: Table Of Contents
What options are available with the 980? Changes to this User Guide 980 User Interface What kinds of data does the 980 Protocol Analyzer allow you to view? Getting Started What is in the 980 Protocol Analyzer shipping box? Operational workflow... - Page 3 Command Line Examples We wish to thank Chris Pasqualino of Broadcom for his helpful suggestions and feedback during the development of the 980 Protocol Analyzer. His help in reviewing requirements and providing useful feedback during alpha testing were greatly appreciated.
-
Page 4: About The
980 Protocol Analyzer. There are two options for the 980: 1) 980 225MHz ―Gen 2‖ and 2) 980 297MHz ―Gen 3‖. The 980 225MHz ―Gen 2‖ is able to parse HDMI streams from source devices with a TMDS clock up to 225MHz. The 980 297MHz ―Gen 3‖... -
Page 5: Scope Of This User Guide
Compliance test in accordance with Sections 8.2 and 8.5 of the HDMI 1.4 CTS. You can determine what options the 980 is provisioned with by looking at the label on the bottom of the 980 or by accessing the Instrument Information screen on either the built-in or external GUI manager. Refer to the following screen. -
Page 6: Changes To This User Guide
1.5.1 980 GUI Manager The external 980 GUI Manager provides easy access to the captured data on your PC for sharing with others. Also the external 980 GUI Manager enables you to operate the 980 through a larger interface which allows you to use multiple panels at the same time. -
Page 7: What Kinds Of Data Does The 980 Protocol Analyzer Allow You To View
1.5.2 Embedded 980 GUI Manager – Real Time Monitoring You can operate the 980 fully through the built-in color touch screen display using the embedded version of the 980 GUI Manager. In addition to the basic operation of the 980 Protocol Analyzer the touch screen display GUI also enables you to view the incoming video from a source even when encrypted with HDCP content protection. -
Page 8: Getting Started
Put the 980 on your corporate network and enable DHCP using an available Ethernet patch cable, or… o Connect directly with a host PC or laptop using the Ethernet crossover cable provided. 6. (Optional – not required if using the built-in display) Assign an IP address to the 980 either directly or by enabling DHCP. -
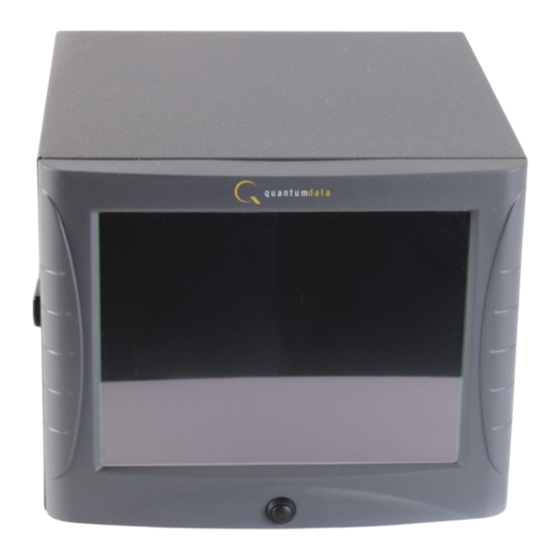
Page 9: Front Panel
980 Protocol Analyzer for a short period of time. For extended periods of off time, it is best to power the 980 down by first using the power button on the front and then the rocker switch on the back. - Page 10 980 User Guide Rev. B29 Page 10 August 5, 2011...
-
Page 11: Operational Modes
You can monitor the HDMI transactions between the source device under test and the 980 Rx port. All of the data types described in this manual can be monitored in the sink emulation mode unless noted otherwise. - Page 12 980 User Guide Rev. B29 Sink Emulation Configuration (HDMI Example shown – MHL requires Quantum Data TPA-MHL-8R) Pass-Through or Encrypted Link Analyzer Mode Configuration Page 12 August 5, 2011...
-
Page 13: Getting Started Procedures
Establishing a physical connection from the HDMI source device you wish to test and the 980 Protocol Analyzer. (Not required if using the built-in display exclusively) Changing the IP address of the 980 so that it is compatible with your PC and or corporate LAN. ... - Page 14 1. If necessary, apply power by toggling the rocker type power switch on the back of the 980. Note: The power switch in the front is used when you are turning off the 980 Protocol Analyzer for a short period of time. For extended off periods, it is best to power down the 980 Protocol Analyzer by first using the power button on the front and then the rocker switch on the back.
- Page 15 980 User Guide Rev. B29 The following prompt will occur. Select the desired option. Page 15 August 5, 2011...
-
Page 16: Connection Scenarios For External 980 Gui Manager
DHCP server to assign one to the 980 that is compatible with your corporate network. To be compatible, the IP address of the 980 must have the same network portion of the IP address as your network but a unique host portion. - Page 17 1. Connect an Ethernet cable from the 980 Ethernet jack on the lower left half of the back panel of the 980 Protocol Analyzer to your corporate LAN. The IP address on this 980 Ethernet port is configurable using the procedures that following.
- Page 18 Refer to the procedure and diagrams below. 1. Connect an Ethernet cable from the 980 Ethernet jack on the lower left half of the back panel of the 980 Protocol Analyzer frame to your PC hosting the 980 GUI Manager. The IP address on this 980 port is configurable using the procedures that follow.
- Page 19 1. Touch select the terminal icon on the lower right corner of the 980 built-in display to access the Connection Properties dialog box to view the current IP address. If the IP address of the 980 is compatible with IP address of your PC and corporate network, no further action is required.
- Page 20 980 User Guide Rev. B29 The following dialog box appears: 3. If you are wish to allow the 980’s IP address to be set through DHCP services, select the DHCP Checkbox as shown below: Page 20 August 5, 2011...
- Page 21 Note: You will have to deselect DHCP if it is checked in order to access the pop up keyboard. 5. Touch select the Change activation button to initiate the change. You do not have to reboot the 980 for the IP address change to take effect.
- Page 22 980 Manager and that you have a suitable Ethernet cable connected between the PC and the 980. 1. Add your 980 Protocol Analyzer to the 980 Manager application using the green + icon or the + Add item on the Instrument pull-down menu identified below.
- Page 23 (below). 2. Enter the name (any suitable name) and IP address of the 980 Protocol Analyzer that you want to connect to in the Add Instrument dialog box (above) and click on the Add activation button.
- Page 24 3. (If not already connected) Connect to the 980 Protocol Analyzer using either the Connect icon or the Connect item on the right click menu as shown in the screen below. Note that you can also double click on the 980 in the Instrument dialog box in order to initiate a connection.
- Page 25 980 User Guide Rev. B29 Page 25 August 5, 2011...
- Page 26 Use the following procedures to connect your HDMI source device to the 980 Protocol Analyzer. 1. Connect the HDMI-to-HDMI cable provided from your HDMI source device under test to the topmost HDMI connector on the back of the 980 Protocol Analyzer (labeled Rx). Refer to the picture below. Page 26...
- Page 27 2. (For pass-through or Encrypted Link Analyzer modes only) You will also connect a second HDMI-to-HDMI cable provided from an HDMI display device to the lower HDMI connector—the Tx connector—on the back of the 980 Protocol Analyzer. Refer to the picture below. Page 27...
-
Page 28: Overview Of The 980 Manager (External) Gui
3 Overview of the 980 Manager (External) GUI Overview This chapter describes the 980 Manager panels. The 980 Manager is an application that runs on your local PC. It enables you to examine the data captured by the 980 Protocol Analyzer through a user friendly graphical interface. - Page 29 980 User Guide Rev. B29 You can specify which panels are open on the main window by selecting them from the View/Show pull-down menu as shown below. You can also double click on a panel to enlarge it such that it consumes the entire area of the application. The result of double clicking on the Data Decode panel is shown below.
- Page 30 980 User Guide Rev. B29 Page 30 August 5, 2011...
- Page 31 980 User Guide Rev. B29 You can redisplay any of the panels by double clicking on the icons. You can revert to the default configuration by invoking the Reset Perspective option available in the Window pull-down menu as shown below.
- Page 32 980 User Guide Rev. B29 3.1.2 Top level menus There are a series of top level menus on the 980 GUI Manager graphical interface. These are described in the following image and table: Menu Selection Function File Open Opens a capture in the GUI. You must select a capture for this option to be available.
- Page 33 Delete instrument. Clicking on this item will initiate a connection Connect to the 980 that is selected in the list. This item will not be highlighted if you have not selected a 980. Clicking on this item will initiate a...
- Page 34 Licensed options applied to the 980 Edit [the Enables you to edit certain information about Instrument Entry] the 980 that you have selected. You can edit the name and IP address. Configure Allows you to view and set the network...
- Page 35 Nano-Seconds [HHMMSSmsusns] - Format Time is shown in nanoseconds. The baseline time is the time from the time of the last boot of the 980. Micro-Seconds [HHMMSSms.usns] - Time is shown in microseconds. The baseline time is the time from the time of the last boot of the 980.
- Page 36 AVmute test results of the Audio Analysis test results. Console - Displays the Console Panel. Reset Perspective Resets the panel configuration to the default view. Help About the 980 Provides release and version information Manager about the 980 Manager software components. Page 36 August 5, 2011...
-
Page 37: Manager (External) Gui - Panel Descriptions
980 device and/or when selecting a capture. You can also view the hardware and software configuration of the 980 or view a list of captures. There are two right click menus: 1) when selecting a 980 instrument, or 2) when selecting a capture. - Page 38 Rev. B29 The Navigator panel provides a list of captures. You can highlight an existing capture entry in the 980 Navigator / Data panel and right click to perform various functions. The right click menu is shown in the following screen.
- Page 39 [Capture] Information - Provides information about the selected capture (if a capture is selected) and the 980 used to capture the data: Creation date and time of the capture Status of the capture, i.e. was it successful or were there...
- Page 40 RX HDCP Settings… – Opens up a dialog box that enables you to set the HDCP mode: 1) Enable/disable HDCP on the 980 Rx port, 2) Set the HDMI status to HDMI or DVI, 3) Set the BCAPS register values. ...
- Page 41 980 IP address, subnet mask and gateway IP address. Upgrade GUI Application - Upgrade GUI Application - Enables you to apply an upgrade of the 980 built-in GUI. You can download new GUI release from the Quantum Data website. Upgrade Firmware/Gateware - Enables you to apply and upgrade to the 980.
- Page 42 980 and that it is sending video. Export Capture Data - Enables you to export a capture file that resides on the 980 Manager host PC. All captured data is zipped up into a single file. Open [the Selected Capture] - Loads the selected capture into the 980 Manager for viewing and analysis.
- Page 43 980 User Guide Rev. B29 Navigator Panel - Item Function data is missing. Active Capture - Indicates that this is the capture that is currently loaded. Page 43 August 5, 2011...
-
Page 44: Capture Control Panel
980 User Guide Rev. B29 Capture Control panel The Capture Control panel enables you to setup the capture parameters. The figure below shows the Capture Control panel and its control and selection items. Page 44 August 5, 2011... - Page 45 Capture Control Panel - Function Item - Description Instrument Selection Enables you to select the 980 that you want to use for a capture. Note that in some cases you might have more than one 980 defined in the 980 Manager.
- Page 46 (Capture Tab) you want to capture. This could be: All [Audio, Video, Data Islands] - The 980 will capture all the audio packets, video data and the data islands. If you select All you can then refine your selection to...
- Page 47 4.2.1 Defining Precision Triggering and Pre-Capture Filtering The 980 Capture Control function has an advanced triggering and pre-capture filtering function which enables you to specify the triggering and pre-capture filtering with a greater degree of detail. These advanced features are configured through the Match functional tab under the Capture tab shown below.
-
Page 48: Video Analysis Panel
980 User Guide Rev. B29 Video Analysis Panel The Video Analysis panel enables you to view the captured video images. It provides thumbnails of each captured frame. It also enables you to navigate to the Data Decode panel to view the transactions for that frame. - Page 49 980 User Guide Rev. B29 Page 49 August 5, 2011...
- Page 50 980 User Guide Rev. B29 4.3.1 Image Viewer The Video Analysis panel enables you view the video pattern or content for a frame in full size by simply double clicking on a frame. The screen below shows the Video Image Viewer for a specific frame.
- Page 51 980 User Guide Rev. B29 Once you have activated the full view of a frame in the Video Image Viewer panel you can view the pixel values for any pixel by moving your mouse over the pattern. In the example below pixel (x=537, y=184) is selected. Its RGB color values are (R=180, G=16, B=16).
- Page 52 980 User Guide Rev. B29 4.3.2 Viewing 3D Images You can view captured 3D images in the Video Analysis panel. The 3D images appear adjacent to one another in the window, either side by side or one on top and the other below it for the left and right eyes depending on the 3D structure used.
-
Page 53: Data Decode Panel
980 User Guide Rev. B29 Data Decode Panel The Data Decode panel (shown below) is the primary panel for examining data at the detail level. Page 53 August 5, 2011... - Page 54 980 User Guide Rev. B29 When you select a packet in the Data Decode panel that packet is highlighted in the Event Plot panel. It is only visible if the Event Plot is zoomed to show each distinct packet. Refer to the screen shot below.
- Page 55 980 User Guide Rev. B29 Data Decode Status Icons Function dialog box appears enable you do select or deselect data types individually or a page at a time. This dialog box is described further below. – The Find activation button enables you to locate ...
- Page 56 980 User Guide Rev. B29 Page 56 August 5, 2011...
- Page 57 980 User Guide Rev. B29 4.4.1 Working with Segments in the Data Decode Panel Large captures are broken into smaller distinct sections called segments to make them more manageable and to improve speed and performance. When you click on the Segment activation button , a dialog box appears (shown below) enabling you to select and load another segment.
- Page 58 980 User Guide Rev. B29 4.4.2 Searching for Data in the Data Decode Panel You can search for data in the Data Decode panel using the search function. The search function is accessible using the magnifying glass icon on the upper left of the Data Decode panel. In the example below, a search for the next occurrence of an AVI infoframe is being initiated.
- Page 59 980 User Guide Rev. B29 4.4.3 Post-Capture Filter Selection tab The Post-Capture Events button on the Data Decode panel enables you to do the following: Specify the data that you want to view in the Event Plot and Data Decode panels.
- Page 60 980 User Guide Rev. B29 Page 60 August 5, 2011...
- Page 61 980 User Guide Rev. B29 4.4.4 Data Decode Record Field Descriptions The Data Decode panel enables you to select the individual protocol transactions (records). When you highlight a transaction, the details for the selected transaction, are shown in the lower panels: There are two lower panels: top and bottom.
- Page 62 Description Nano-Seconds [HHMMSSmsusns] Time is shown in nanoseconds. The baseline time is the time from the time of the last boot of the 980. Micro-Seconds [HHMMSSmsusns] Time is shown in microseconds. The baseline time is the time from the time of the last boot of the 980.
-
Page 63: Event Plot Panel
980 User Guide Rev. B29 Event Plot Panel The Event Plot panel (shown below) is the primary panel for locating the data for high level navigation to the detail level provided by the Data Decode panel. The vertical axis is the data types. The Event Plot panel provides a set of data types labeled on the left of the panel that inform you of the type of data for that layer. - Page 64 980 User Guide Rev. B29 4.5.2 Zooming in the Event Plot Panel You can zoom in and zoom out and pan across the data using the slide bars provided. You can also zoom by surrounding a specific section of the captured data. These functions are described in the following table.
- Page 65 980 User Guide Rev. B29 4.5.3 Viewing the Timestamps of the Data The timestamp indicated on the dark status panel just below the icons indicates the location of the scroll bar. When you scroll or pan through the data, the timestamps are shown in the status panel. If you use the pointer tool to select a particular point, the timestamp and data element will be shown in the center of the dark status panel.
- Page 66 980 User Guide Rev. B29 4.5.4 Surrounding and Zooming The Event Plot provides a Range Zoom tool . You can select an area of the Event Plot by clicking and dragging across. When you do this the new view will be limited to the horizontal range that you selected. The midpoint of the selection will become the new center of the data displayed.
- Page 67 980 User Guide Rev. B29 4.5.5 General Controls The various other icons and controls in the Event Plot are described in the tables and screens that follow. Even Plot Icons Function Icons – General Control Segment – Large captures are broken into smaller...
- Page 68 980 User Guide Rev. B29 The Event Plot legend panel is shown in the screen shot below. The Event Plot Row configuration dialog panel is shown in the screen shot below. The default configuration is shown below. Simply check the time items that you wish to show in the Event Plot. Then click OK.
- Page 69 980 User Guide Rev. B29 4.5.6 Working with Segments in the Event Plot Panel The Segments in the Event Plot panel work the same way they do as the Data Decode panel. Large captures are broken into smaller distinct sections called segments to make them more manageable and to improve speed and performance.
- Page 70 980 User Guide Rev. B29 4.5.7 Working with Markers The Event Plot panel enables you to view the data at a high level and identify points of interest for further analysis. You can set two cursors or "markers" in the Event Plot panel at particular points of interest. The Event Plot will show you the time difference between the two cursors.
- Page 71 980 User Guide Rev. B29 Page 71 August 5, 2011...
-
Page 72: Audio Analysis Panel
980 User Guide Rev. B29 Audio Analysis Panel The Audio (Data) Analysis panel enables you to assess the consistency of the audio metadata. The audio test is a special test. It is executed from the Std Tests tab of the Capture Control panel. -
Page 73: Timing Analysis Panel
980 User Guide Rev. B29 Timing Analysis Panel The Timing Analysis panel provides timing information about a particular frame and line or for all frames and lines. It tells you if the incoming data is compliant with a known-standard timing. - Page 74 980 User Guide Rev. B29 The following screen shows and HDMI 4K by 2K format timing. Note: Support for 4K by 2K is only available on the 980 297MHz ―Gen 3‖ version of the Protocol Analyzer. Page 74 August 5, 2011...
- Page 75 The following table describes the information on the Timing Analysis panel. Panel Item - Column Description CEA Name The CEA name of the format that the 980 has detected based Video Format on the timing parameters. The CEA Video Identification Code. Number of bits per pixel.
- Page 76 980 User Guide Rev. B29 Panel Item - Column Description Hfreq (kHz) The rate that a line in a frame is rendered. Vtotal The total number of lines in the vertical frame. Vactive The number of lines in the vertical resolution.
-
Page 77: Edid Management Panel
The EDID Management panel enables you to modify existing EDIDs or create new ones through a graphical interface. You can import .xml-based EDID files from your PC for use on the 980 Rx port. In this way you can emulate any EDID in the 980 to ensure that your source responds correctly to it. - Page 78 980 User Guide Rev. B29 check boxes and you can change values through pull-down menus or text field boxes. The following screens show examples of these techniques. Page 78 August 5, 2011...
- Page 79 980 User Guide Rev. B29 Page 79 August 5, 2011...
- Page 80 Save EDID to PC Saves the EDID that you have created or modified using the EDID Management Editor to the host PC. Set 980 EDID from PC file Configures the 980 Rx port with the specified EDID. Page 80 August 5, 2011...
-
Page 81: Real Time Mode
Accessing the Real Time mode When you boot up the 980, the Real Time mode will be displayed by default. However once you have selected to view the Capture mode, you can navigate back to the Real Time using the procedure below. It assumes that you have an HDMI cable connected from your HDMI source device and the 980 Protocol Analyzer and that your source device is outputting HDMI video. - Page 82 980 User Guide Rev. B29 This subsection describes the functions of the main interface of the Real Time mode. The Real Time mode interface is shown in the two example screens below. The first screen image shows the Real Time mode without any of the viewing windows open.
- Page 83 980 User Guide Rev. B29 Page 83 August 5, 2011...
- Page 84 980 User Guide Rev. B29 5.2.2 Main Control Panel This subsection describes the main control panel for the Real Time mode. Refer to the table below for a description of these controls. Real Time Mode – Main Control Button Descriptions...
- Page 85 Mode - The Mode button opens up dialog boxes that enable you to select the operating mode of the 980. You can control the pass through modes and HDCP modes. Goto - The Goto button enables you to open up various windows in the 980 interface.
-
Page 86: Real Time Mode Data Panels
5.3.1 Reference Frames Concept The 980 Real Time feature uses the concept of ―Reference Frames‖ which are sets of data values that you can compare with other collected frames of data of the same type. As you collect data in the Real Time mode, the feature will create a distinct view for each change in the source stream for that specific data type. - Page 87 980 User Guide Rev. B29 5.3.3 Image Scale Dialog Box The incoming video content, whether it be full motion video or a basic test pattern, is shown in the window (refer to the screen examples above). You can control the way the incoming video is displayed using the Scale button just below the Video button on the right side control panel.
- Page 88 980 User Guide Rev. B29 5.3.4 Video Timing Panel The Video Timing panel (shown below) enables you to view basic video information of the incoming video content. The table below describes the information in this panel. Real Time Mode – Video Timing...
- Page 89 980 User Guide Rev. B29 5.3.5 Video Info Panel The Video Color panel (shown below) enables you to view the pixel values of the incoming video content. The table below describes the information in this panel. Real Time Mode – Video Color...
- Page 90 980 User Guide Rev. B29 5.3.6 AVI Infoframe Panel The AVI-IF button to open up the AVI panel (shown below). The AVI panel enables you to view the AVI infoframe data. There is a control pull down menu associated with the AVI Info panel. The control menu can be accessed either from the panel itself (the pull down tab on the upper right corner) or from the AVI-IF button on the main control panel on the right side of the Real Time window.
- Page 91 980 User Guide Rev. B29 Real Time – AVI Infoframe Information / Function AVI Pulldown Menu There is a pulldown menu associated with the AVI Info panel. You can access either from the main control panel or from the AVI panel via the icon on the upper right of the panel.
- Page 92 980 User Guide Rev. B29 5.3.7 VS-IF Infoframe Panel The VS-IF button opens up the VS-IF panel (shown below). The VS-IF panel enables you to view the Vendor Specific infoframe data. There is a control pull down menu associated with the VS-IF panel. The control menu can be accessed either from the panel itself (the pull down tab on the upper right corner) or from the VS-IF button on the main control panel on the right side of the Real Time window.
- Page 93 980 User Guide Rev. B29 Real Time – VS-IF Information / Function Upper Status Bar The upper status bar shows the following information from left to right: Pause mode The pause/resume (active) status. The type of data panel (e.g. VS-IF).
- Page 94 980 User Guide Rev. B29 5.3.8 General Control Packet Data Panel The GCP (General Control Packet) button opens up the GCP panel (shown below). The GCP panel enables you to view the General Control Packet data. There is a control pull down menu associated with the GCP panel. The control menu can be accessed either from the panel itself (the pull down tab on the upper right corner) or from the GCP button on the main control panel on the right side of the Real Time window.
- Page 95 980 User Guide Rev. B29 Real Time – General Control Packet Information / Function The total number of frames captured since the panel was opened or since the last clear. Lower Control Panel The lower control panel enables you to control and view the...
- Page 96 980 User Guide Rev. B29 Real Time – User: Type Selection Information / Function ISRC2 - Selects the ISRC2 panel. Gamut Metadata – Selects the Audio Clock Regeneration panel. Infoframes SPD Infoframe – Selects to Source Product Descriptor (SPD) InfoFrame.
- Page 97 980 User Guide Rev. B29 5.3.10 User: Audio Infoframe Panel The User AUD (Audio Infoframe) button opens up the AUD panel (shown below). The AUD panel enables you to view the Audio Infoframe data. There is a control pull down menu associated with the AUD panel. The control menu can be accessed either from the panel itself (the pull down tab on the upper right corner) or from the User: AUD button on the main control panel on the right side of the Real Time window.
- Page 98 980 User Guide Rev. B29 Real Time – User: Audio Infoframes Information / Function following functions: Show/Hide – Enable or disable the appearance of the audio infoframe panel in the Real Time window. Type – You can select/change which type of User data you want to display.
- Page 99 980 User Guide Rev. B29 5.3.11 User: Source Product Descriptor Infoframe Panel The User SPD (Source Product Descriptor) check box in the DI Type Selection opens up the SPD Infoframe panel (shown below). The SPD Infoframe panel enables you to view the Source Product Descriptor Infoframe data.
- Page 100 980 User Guide Rev. B29 Real Time – User: SPD Infoframes Information / Function The number of changes defined since you set the reference frame. Resume (active) mode The number of distinct data views in parentheses. The total number of frames captured since the panel was opened or since the last clear.
- Page 101 980 User Guide Rev. B29 5.3.12 User: Audio Clock Regeneration (ACR) Panel The User ACR (Audio Clock Regeneration) check box in the DI Type Selection opens up the ACR panel (shown below). The ARC panel enables you to view the Audio Clock Regeneration data. There is a control pull down menu associated with the ACR panel.
- Page 102 980 User Guide Rev. B29 Real Time – User: ACR Packet Information / Function The total number of frames captured since the panel was opened or since the last clear. Lower Control Panel The lower control panel enables you to control and...
- Page 103 980 User Guide Rev. B29 5.3.13 Data Island Match Editor The Data Island Match Editor function enables you to specify the Real Time match filtering with a high degree of detail. To set the match criteria for pre-capture filtering or triggering, you check the appropriate box (Data or Trigger) in the Match tab for each Match definition.
- Page 104 Data Bytes area to define the match criteria. In the example below, the match condition is set such that if the 980 receives incoming video with a video type of YCbCr 4:4:4 (Hex 40 Y1=1, Y0=0), it will display the data in the appropriate data panel.
- Page 105 980 User Guide Rev. B29 Setting a Custom Data Match Definition Configuring the system to capture a subset of the data islands is more complex and involves setting the mask data to values for the data island header which satisfies multiple data island types. You do this using the Data Bytes table on the left side of the Data Island Match Editor.
- Page 106 980 User Guide Rev. B29 5.3.14 ACA Data Panel The ACA (Auxiliary Channel Analyzer) enables you to view the DDC traffic for HDMI streams and the C-Bus traffic for MHL streams. The ACA button opens up the ACA Events panel (shown below). The ACA Events panel enables you to view the transaction data in real time.
- Page 107 980 User Guide Rev. B29 Real Time – ACA Information / Function Pause – Halts the updates of the data to the ACA panel. Events – Shows or hides events. Details – Opens up the Details panel described below.
- Page 108 Rev. B29 5.3.15 Mode Configurations The 980 can operate in three different configuration modes. The configuration of these modes can be accomplished both through the Real Time mode and the Capture mode. The table below describes the panels in the Real Time mode that are used to set the configuration mode.
- Page 109 HDCP is enabled on the 980 Rx port. Tx - This field shows the status related to HDCP on the 980 Tx port. A + sign and green text indicates that HDCP is active on the 980 Tx port. ...
- Page 110 980 User Guide Rev. B29 Real Time – Link and HDCP Mode Settings Information / Function bit will toggle the binary value. The hex value of the Bcaps register is shown in the field above the bit values (80 in the example).
-
Page 111: Monitoring The Hdmi Auxiliary Channels In Real Time
Monitoring the HDMI auxiliary channels in real time You can monitor the HDMI DDC transactions in real time either while the 980 is emulating a sink device or you can monitor the transactions passively. Procedures for these applications are provide in this subsection. - Page 112 980 User Guide Rev. B29 2. Touch select the ACA button on the right side of the Real Time panel. The menu appears as shown below. Page 112 August 5, 2011...
- Page 113 980 User Guide Rev. B29 3. Touch select Show from the menu. The blank ACA panel appears. 4. Take the necessary action—such as a hot plug—to initiate EDID or HDCP transactions from the HDMI source device. You will see the DDC transactions in the ACA panel as shown below.
- Page 114 980 User Guide Rev. B29 5. View the details of any selected transaction by selecting the Details button from the pulldown menu. Page 114 August 5, 2011...
- Page 115 980 User Guide Rev. B29 Page 115 August 5, 2011...
-
Page 116: Analyzing Hdmi Protocol Data With Your 980 Protocol Analyzer
5. Specify a trigger method. 6. Initiate the capturing of the data. 7. Examine the test data through the 980 GUI Manager at the high level view on the Event Plot panel or the Video Analysis panel. 8. Drill down to examine the data at the lower level through the details of the Data Decode panel view. -
Page 117: Setting The Rx Hdcp Mode
Setting the RX HDCP mode The 980 enables you to enable and disable HDCP on the Rx sink emulation port. This enables you to test how your source device under test responds to a sink that does not support HDCP. You can also configure certain HDCP configuration registers such as the BSTATUS and BCAPS. -
Page 118: Setting The +5V Levels
(80 in the example below). Setting the +5V levels The 980 enables you to view the +5V levels from the source device under test and to set the current load on the +5V lead. 1. Select the RX 5 Volts… item from the Instrument pull-down menu on the built-in front panel as shown below. - Page 119 980 User Guide Rev. B29 2. Note the current Measured 5V level (4.98 in the example above). 3. Select the Threshold Level using the upper slidebar (0.0 to 5.3V). Be sure to select the Apply button. Then hit Refresh to view the new value. You may wish to lower the threshold to enable testing of a source whose 5V level is too low.
-
Page 120: Configuring The 980 With An Edid
To provision the EDID: 1. (optional) Load the EDID to use in the 980 Protocol Analyzer. This is the EDID that the 980 will be emulating. The default EDID has a preferred timing of 1080p60 with a maximum TMDS rate of 165MHz. You can provision the 980 with a different EDID. -
Page 121: Viewing Incoming Video (Built-Embedded Gui Only)
Prior to a capture you may wish to view the incoming video from the source device under test. This subsection describes how to use the 980 to view live video. Please note however that you can only view the live video on the built-in GUI through the Real Time Video panel. - Page 122 980 User Guide Rev. B29 Page 122 August 5, 2011...
- Page 123 980 User Guide Rev. B29 A video image appears in the Real Time panel. An example is shown below: You can adjust the image viewing area using the Image Scale dialog box. Mode – The Mode can be either 1:1 or Full. Use the checkbox adjacent to each item to select. The 1:1 ...
-
Page 124: Using Automatic Triggering
Configuration section of the Capture Control dialog box. 2. Check the Generate Hot Plug on Capture Start button if you want the 980 to issue a hot plug to initiate HDCP authentication. You also need to specify the duration of hot plug pulse in milliseconds. - Page 125 All [Audio, Video, Data Islands] - The 980 will capture all the audio packets, video data and the data islands. If you select All you can then refine your selection to include or exclude Timing data and Video data using the associated check boxes under the Analysis heading.
- Page 126 980 User Guide Rev. B29 7. Select the trigger Condition Page 126 August 5, 2011...
- Page 127 GUI. 9. Click on the Execute Capture button. The 980 Protocol Analyzer will capture the data. A series of dialog boxes will appear showing the capturing in progress (one example shown below). Note: If there is some action that needs to be taken by a user in order to cause the trigger condition occur, the capture dialog box will stating ―Waiting for capture trigger to occur…‖...
- Page 128 980 User Guide Rev. B29 When the 980 Protocol Analyzer is done capturing data a decode file is shown in the Event Plot panel and the Data Decode panel. Page 128 August 5, 2011...
-
Page 129: Using External Triggering
The minimum voltage required to activate the external trigger is 2.1 volts. The pulse duration of the External Trigger must be greater than 1 TMDS pulse clock period. The Trigger Input is on the rear of the 980. It is the top most BNC connector. -
Page 130: Using Precision Trigging And Pre-Capture Filtering
Typically manual triggers are used in the Pass-through or Encrypted Link Analyzer mode. In these modes there is a display connected to the 980 Tx port. A common application would be to observe the connected display and when it exhibits the behavior you are looking for, you can initiate the manual trigger. - Page 131 980 User Guide Rev. B29 To set the match criteria for either pre-capture filtering or triggering, you check the appropriate box (Data or Trigger) in the Match tab for each Match definition. Once you check either the Data or Trigger checkbox the Edit activation button becomes enabled.
- Page 132 Data Bytes values to define the match criteria. In the example below, the match condition is set such that if the 980 receives incoming video with a video type of YCbCr 4:4:4 (Hex 40 Y1=1, Y0=0), it will display the data in the appropriate data panel.
- Page 133 980 User Guide Rev. B29 6.11.3 Setting a Custom Data Match Definition Configuring the system to capture a subset of the data islands is more complex and involves setting the mask data to values for the data island header which satisfies multiple data island types. You do this using the Data Bytes table on the left side of the Data Island Match Editor.
-
Page 134: Examining Captured Data
6.12.1 Viewing data through the Data Decode panel This subsection provides procedures for viewing the data through the Data Decode panel in the 980 GUI Manager. To view captured data through the Data Decode panel: 1. To view the protocol data transactions on the Data Decode panel, activate the Data Decode tab. - Page 135 980 User Guide Rev. B29 2. Highlight an AVI infoframe record to view its contents as shown below. The Data Decode window above shows the AVI Infoframe data record selected. The AVI infoframe contents are parsed out in human readable text on the upper panel.
- Page 136 980 User Guide Rev. B29 3. Highlight a Vendor Specific infoframe record to view its contents. The example below shows a Vendor Specific infoframe where the HDMI source is transmitting 3D content in Frame Packing. Page 136 August 5, 2011...
- Page 137 980 User Guide Rev. B29 4. Highlight a General Control Packet record to view its contents as shown below. 5. Highlight an audio infoframe record to view its contents as shown below. Page 137 August 5, 2011...
- Page 138 980 User Guide Rev. B29 6. Highlight an Audio Clock Regeneration packet record to view its contents as shown below. 7. Highlight an audio sample packet record to view its contents as shown below. The number of channels and samples are provided and the content of the samples is shown in the lower panel.
- Page 139 980 User Guide Rev. B29 8. Highlight an audio sample packet channel status block record to view its contents as shown below. The channel status block is shown in the detailed data window when it is fully acquired, i.e. after the 192 frames are all captured.
- Page 140 980 User Guide Rev. B29 9. Highlight a DDC transaction to view its contents as shown below. The example below shows a BCAPS register read. Page 140 August 5, 2011...
- Page 141 980 User Guide Rev. B29 6.12.2 Filtering the data in the Data Decode panel The procedures below describe how to filter the data in the Data Decode panel. You use the panel on the right that is adjacent to the Data Decode panel to apply filtering on the data displayed on the Data Decode panel.
- Page 142 980 User Guide Rev. B29 The following is a screen example of the Control Packets page. 2. Select the data items you want to appear in the Data Decode panel. The filtering you apply in this series of dialog boxes also applies to the Event Plot panel.
- Page 143 980 User Guide Rev. B29 6.12.3 Searching through the data in the Data Decode panel The procedures below describe how to search through the data in the Data Decode panel. To search through the data: 1. Click on the Search icon.
- Page 144 6.12.4 Viewing data through the Event Plot panel This subsection provides procedures for viewing the data through the Event Plot panel in the 980 GUI Manager. The Event Plot panel provides you with a graphical view of the data. It enables you to see relationships between the various data types on a time line.
-
Page 145: Running Hdmi Tests Using The Pass-Through Mode
In the Pass-Through mode the 980 Rx port is connected to the source device under test and the 980 Tx port is connected to a display device. The source device can be used with HDCP authentication and encryption but you will not be able to see the encrypted data or video once the data is encrypted. - Page 146 980 User Guide Rev. B29 3. Power up the 980 Protocol Analyzer using the power rocker switch on the back. Then press the power on button on the front panel. 6.13.1 Configuring the 980 with an EDID When in Pass-Through mode, the EDID of the far end display is passed through to the source device under test.
- Page 147 980 User Guide Rev. B29 The mode dialog box appears as shown below. 1. Select the Pass-Through Link Mode item from the pull-down menu on the built-in front panel as shown below. A pop out menu will appear enabling you to select the Pass-Through mode using the check boxes provided: Checking the TX-RX HPD checkbox will replicate the hot plug signal from the TX side (an attached sink device) on the RX side (like a hot plug repeater).
- Page 148 6.13.3 Setting the HDCP mode The 980 enables you to enable and disable HDCP on the Rx sink emulation port. This enables you to test how your source device under test responds to a sink that does not support HDCP. You can also configure certain HDCP configuration registers such as the BSTATUS and BCAPS.
- Page 149 Configuration section of the Capture Control dialog box. 2. Check the Generate Hot Plug on Capture Start button if you want the 980 to issue a hot plug to initiate HDCP authentication. You also need to specify the duration of hot plug pulse in milliseconds.
- Page 150 980 User Guide Rev. B29 3. Set the Capture Buffer Size slidebar to a percent value to meet your requirements. You can capture up to about 2GB of data which is about 1150 frames at 576p/480p and about 204 frames at 1080p which includes the video.
- Page 151 ―Waiting for capture trigger to occur…‖ This is shown in the following screen shot. When the 980 Protocol Analyzer is done capturing data a decode file is shown in the Event Plot panel and the Data Decode panel.
-
Page 152: Loading Or Importing Existing Captures With The 980 Protocol Analyzer
980 User Guide Rev. B29 6.14 Loading or importing existing captures with the 980 Protocol Analyzer You can capture load a decoded file that had been captured previously for analysis. 6.14.1 Importing a Capture Use the following procedures to import a capture that you have stored on the host PC. - Page 153 The imported file will then appear in the Data directory of the 980 Navigator panel as shown below. The captured file is loaded automatically and has an asterisk in front of it to indicate that this capture is the one that...
- Page 154 980 User Guide Rev. B29 6.14.2 Loading a Capture Use the following procedures to load a capture that you have listed in the 980 Manager for the 980. You can load a file in one of three ways: Double clicking on the captured file in the Captures panel ...
- Page 155 980 User Guide Rev. B29 Page 155 August 5, 2011...
-
Page 156: Running Hdmi Tests Using The Encrypted Link Analyzer
Note: You must have purchased the Encrypted Link Analyzer option in order to be able to use this feature. In the Encrypted Link Analyzer mode, the 980 HDMI Rx port is connected to the source device under test and the 980 HDMI Tx port is connected to a sink device. - Page 157 To provision the EDID: 1. (optional) Load the EDID to use in the 980 Protocol Analyzer. This is the EDID that the 980 will be emulating. The default EDID in the 980 has a preferred timing of 1080p60 with a maximum TMDS rate of 165MHz. You can provision the 980 with a different EDID.
- Page 158 Rev. B29 The dialog box shown below opens up enabling you to select an EDID to assign to the 980’s Rx port. Note that there are two checkbox options on the dialog box. The following is a description of each: ...
- Page 159 980 User Guide Rev. B29 When you click Ok a dialog box appears. 6.15.2 Setting the Configuration Link Mode Prior to a capturing or viewing video you will need to set the Link Mode to Encrypted Link Analyzer. When using the Encrypted Link Analyzer configuration you will connect an HDMI display device to the HDMI Tx port.
- Page 160 6.15.3 Setting the HDCP mode The 980 enables you to enable and disable HDCP on the Rx sink emulation port. This enables you to test how your source device under test responds to a sink that does not support HDCP. You can also configure certain HDCP configuration registers such as the BSTATUS and BCAPS.
- Page 161 Configuration section of the Capture Control dialog box. 2. Check the Generate Hot Plug on Capture Start button if you want the 980 to issue a hot plug to initiate HDCP authentication. You also need to specify the duration of hot plug pulse in milliseconds.
- Page 162 980 User Guide Rev. B29 3. Set the Capture Buffer Size slidebar to a percent value to meet your requirements. You can capture up to about 2GB of data which is about 1150 frames at 576p/480p and about 204 frames at 1080p which includes the video.
- Page 163 ―Waiting for capture trigger to occur…‖ This is shown in the following screen shot. When the 980 Protocol Analyzer is done capturing data a decode file is shown in the Event Plot panel and the Data Decode panel.
- Page 164 980 User Guide Rev. B29 Page 164 August 5, 2011...
-
Page 165: Transferring Capture Files From The 980 To A Pc
There are three ways you can transfer files from the 980 to the PC. 1) using an FTP utility, 2) using the FTP command, or 3) saving the files to a USB drive connected to the 980. - Page 166 10. Touch select Edit at top and then touch Paste to copy the capture directory to your USB drive. 11. You can now place the USB drive in your PC and move the files over to the 980 Manager’s working directories: quantumdata/980Manager/980mgr/workspace/captures/.
-
Page 167: Standard Tests
Manager. To run the video timing test: 1. Select the 980 that you are using to capture the data from your HDMI source device under test from the pull-down menu. 2. Set the Capture Buffer Size slidebar to a percent value to meet your requirements. You can capture up to about 2GB of data which is about 1150 frames at 576p/480p and about 204 frames at 1080p which includes the video. - Page 168 6. Select Vsync Asserted for the Trigger Selection condition. 7. Click on the Execute Capture button to initiate the test. The 980 Protocol Analyzer will capture the data including the timing data. A series of dialog boxes will appear showing the capturing in progress (one example shown below).
- Page 169 If there is not a precise match between the timing parameters of a format in the 980 format library and the measured values, the 980 will select the format nearest to the values measured and indicate any parameters that deviate from that standard timing.
- Page 170 980 User Guide Rev. B29 Page 170 August 5, 2011...
- Page 171 980 User Guide Rev. B29 You can view captured 3D timing in the Timing Analysis panel. The screen shot below shows an example of a 3D timing data for the Frame Packing format at 720p60. Note the vertical active timing (1470 lines).
- Page 172 980 User Guide Rev. B29 You can view 4K by 2K timing data on the 980 297MHz ―Gen 3‖ version of the Protocol Analyzer. Page 172 August 5, 2011...
-
Page 173: Running A Video Analysis Test
Data Decode panel. To run the video analysis test: 1. Select the 980 that you are using to capture the data from your HDMI source device under test from the pull-down menu. 2. Set the Capture Buffer Size slidebar to a percent value to meet your requirements. You can capture up to about 2GB of data which is about 1150 frames at 576p/480p and about 204 frames at 1080p which includes the video. - Page 174 6. Select Vsync Asserted for the Trigger Selection condition. 7. Click on the Execute Capture button to initiate the test. The 980 Protocol Analyzer will capture the data including the video data. A series of dialog boxes will appear showing the capturing in progress (one example shown below).
- Page 175 980 User Guide Rev. B29 When the 980 Protocol Analyzer is done capturing data you can view the video thumbnails in the Video Analysis panel. The Video Analysis panel enables you to view the captured video images. It provides thumbnails of each captured frame.
- Page 176 980 User Guide Rev. B29 8. View the pixel values of any frame by double clicking on any frame to open up the Video Image Viewer panel (shown below). Page 176 August 5, 2011...
- Page 177 980 User Guide Rev. B29 The Video Analysis panel enables you view the video pattern or content for a frame in full size by simply double clicking on a frame. Once you have activated the full view of a frame in the Video Image Viewer panel you can view the pixel values for any pixel by moving your mouse over the pattern.
- Page 178 980 User Guide Rev. B29 Page 178 August 5, 2011...
- Page 179 980 User Guide Rev. B29 You can view captured 3D images in the Video Analysis panel. The 3D images appear adjacent to one another in the window, either side by side or one on top and the other below it for the left and right eyes depending on the 3D structure that is used.
-
Page 180: Audio Analysis
To run the audio analysis test: 1. Select the 980 that you are using to capture the data from your HDMI source device under test. 2. Set the Capture Buffer Size slidebar to a percent value to meet your requirements. You can capture up to about 2GB of data which is about 1150 frames at 576p/480p and about 204 frames at 1080p which includes the video. - Page 181 980 User Guide Rev. B29 The results are shown in the Data Analysis panel in the main window of the 980 Manager. A sample is shown below. Page 181 August 5, 2011...
-
Page 182: Avmute Test
To run the AVmute test: 1. Select the 980 that you are using to capture the data from your HDMI source device under test. 2. Set the Capture Buffer Size slidebar to a percent value to meet your requirements. You can capture up to about 2GB of data which is about 1150 frames at 576p/480p and about 204 frames at 1080p which includes the video. - Page 183 Note: If there is some action that needs to be taken by a user in order to cause the trigger condition occur, the capture dialog box will indicate that. This is shown in the following screen shot. The results are shown in the Data Analysis panel in the main window of the 980 Manager. A sample is shown below.
- Page 184 980 User Guide Rev. B29 Page 184 August 5, 2011...
- Page 185 980 User Guide Rev. B29 Page 185 August 5, 2011...
-
Page 186: Audio Return Channel (Heac) Testing
The 980 supports the following ARC related tests: Test ARC on an HDMI A/V receiver (ARC Rx) – The 980 can emulate an ARC Tx device in order to test an ARC-capable HDMI source device’s (ARC Rx) response to an ARC stream. - Page 187 980 User Guide Rev. B29 When configuring the HEAC functions, you click on the activation buttons within the panel. The status of each selection is indicated on the simulated LED indicators to the left of the activation button. Green indicates that the function associated with the activation button is active.
- Page 188 Mode on the 980 Rx port. Specifies that the source of the audio for the ARC channel is from an external source connected to the SPDIF In port on the 980. ARC Source Specifies that the source of the audio for the ARC channel is from the internal audio source on the 980 main board.
-
Page 189: Test Arc On An Hdmi Source (Arc Rx)
The procedures below describe how to use the 980 to emulate an ARC Tx device (HDMI sink). The 980 can use audio from its internal source or you can feed an external SPDIF source into the 980 and have the 980 inject the SPDIF audio onto the Audio Return Channel on its HDMI Rx port. - Page 190 980 User Guide Rev. B29 You will also have to enable audio on the 980 Main Board as shown below: 5. When using an external SPDIF source, select the appropriate button in the RX HEAC Control – ARC Source subpanel as shown below.
-
Page 191: Test Arc On An Hdmi Sink (Arc Tx)
980 User Guide Rev. B29 You will need to connect your external SPDIF source to the SPDIF In RCA connector on the rear of the 980 as indicated in the image below: Test ARC on an HDMI sink (ARC Tx) The procedures below describe how to use the 980 to emulate an ARC Rx device (HDMI A/V Receiver) in order to test an HDMI sink (ARC Tx). - Page 192 To test the ARC stream from an HDMI sink (ARC Tx): 1. Connect an HDMI 1.4a cable from the HDMI 1.4a ARC-capable sink to the 980 Tx port. 2. Determine the HEAC mode for ARC that you wish to test with and then activate that mode by clicking on the appropriate activation button.
- Page 193 980 User Guide Rev. B29 4. (Optional) Connect a SPDIF audio analyzer to the SPDIF Out RCA connector on the rear of the 980 as indicated in the image below: Page 193 August 5, 2011...
-
Page 194: Upgrading The 980 Manager And 980 Protocol Analyzer
Graphical User Interface that will be installed for the Touch Screen User Interface. 2. Graphical User Interface for Windows PCs. This is the 980 Manager GUI that can be used to control all 980 instruments from a Windows PC. -
Page 195: Command Line Interface
There are 980-based commands that enable you to initiate commands to capture data. Once you capture data, you can conduct searches either on your host PC or the 980 itself. To conduct searches on your PC you have to transfer the captured data to your host PC using an FTP utility. This procedure is described in the section: Transferring Capture Files from the 980 to a The 980 Protocol Analyzer is based on the Linux operating system;... - Page 196 To establish a command line session through a telnet session: 1. Launch the Command Prompt utility from the Windows Accessories. 2. Establish a telnet session with the 980 using the following command. Note you will enter in the IP address of the 980 (192.168.254.001 in example below): >telnet 192.168.254.001...
-
Page 197: Command Line Examples
Once you have captured data you can transfer into the Linux shell and run typical Unix commands. Note: You can run Linux commands on a capture file (decode.log) that either resides in the 980 instrument or that resides on your PC. However, the method is different. For captures that reside on the 980, you must run the capture through the command line either through a telnet session or through the 980 Manager Console. - Page 198 980 User Guide Rev. B29 p-scope> pcap decode // Decodes the hex file into human readable text and stores in default directory: /home/qd/pdecode.log Note: If you want to recapture and save a decode file you will have to move the existing decode file to another directory or rename it.
Need help?
Do you have a question about the 980 and is the answer not in the manual?
Questions and answers