Sign In
Upload
Manuals
Brands
Konica Minolta Manuals
Copier
Di1611
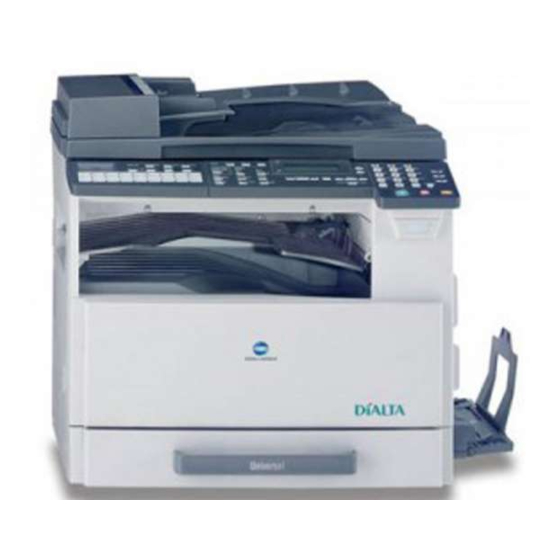
Konica Minolta Di1611 Manuals
Manuals and User Guides for Konica Minolta Di1611. We have
5
Konica Minolta Di1611 manuals available for free PDF download: Advanced Information, Service Manual, User Manual, Manual
Konica Minolta Di1611 Service Manual (213 pages)
Brand:
Konica Minolta
| Category:
Printer
| Size: 5.71 MB
Table of Contents
Important Notice
2
Safety Warnings
3
Measures to Take in Case of an Accident
11
Table of Contents
13
Maintenance
21
Safety Information
21
Laser Safety
21
Internal Laser Radiation
21
Laser Safety Label
24
Laser Caution Label
24
Precautions for Handling the Laser Equipment
25
Other Precautions
25
Service Tools
26
Jigs and Tools
26
Maintenance Schedule
27
PM Parts List
27
Guidelines for Life-Time Expected Values by Unit
28
Replacement and Cleaning of Parts
29
Paper Take-Up/Transport Section
29
Removal of the Paper Separator Roller Assy and Paper Take-Up Roller
29
Cleaning of the Paper Separator Roller
30
Cleaning of the Paper Take-Up Roller
30
Cleaning of the Upper/Lower Synchronizing Rollers
30
Cleaning of the Bypass Transport Roller/Roll
31
Cleaning of the Paper Dust Remover
31
Removal of the Paper Dust Remover Assy
31
Cleaning of Mirrors
32
Cleaning of the Original Glass and Original Scanning Glass
32
IR Section
32
Cleaning of the CCD Sensor
33
Cleaning of the Lens
33
Cleaning of the PH Window
34
Cleaning of the Scanner Rails/Bushings
34
PH Section
34
Disassembly of the IU
35
Imaging Unit (IU)
35
Removal of the Imaging Unit (IU)
35
Removal of the Ozone Filter
37
Removal of the PC Drum
37
Cleaning of the PC Drum Paper Separator Fingers
38
Removal of the Cleaning Blade
38
Removal of the PC Drum Charge Corona Assy
38
(10) Replacement of the Developer
39
Cleaning of the Developer Scattering Prevention Plate
39
Cleaning of the Ds Collars
39
(11) Cleaning of the Pre-Image Transfer Guide Plate
40
(12) Replacement of the ATDC Sensor
40
(13) Application of Toner
41
Cleaning of the Charge Neutralizing Plate
43
Cleaning of the Pre-Image Transfer Lower Guide Plate
43
Image Transfer Section
43
Removal of the Image Transfer Roller Assy
43
Fusing Section
44
Removal of the Fusing Unit
44
Miscellaneous Parts
45
Disassembly and Reassembly
45
Copier
45
Identification and Removal Procedures of Doors, Covers, and Exterior Parts
45
Removal of Circuit Boards and Other Electric Components
47
Removal of the Master Board (PWB-A)
48
Removal of the Control Board (PWB-C/C)
49
Removal of the High Voltage Unit (HV1)
50
Removal of the Power Supply Unit (PU1)
51
Removal of the Paper Size Detecting Board (PWB-I)
52
Removal of the Heater Relay Board (PWB-RY): 200 V Area Only
53
Removal of the Pre-Image Transfer Board (PWB-R2)
53
Removal of the Manual Bypass
54
Removal of the Manual Bypass (Duplex Unit): Di2011 Only
54
Removal of the Toner Hopper Unit
54
Removal of Units
54
Removal of the PH Unit
55
Disassembly of the Fusing Unit
56
Disassembly of the IR Section
59
Removal of the CCD Unit
59
Installation of the CCD Unit
60
Removal of the Scanner, Exposure Lamp, and Inverter Board (PU2)
60
Removal of the Scanner Motor
62
Removal of the Scanner Drive Cables
63
Winding of the Scanner Drive Cables
66
Disassembly of the Engine Section
71
Removal of the Main Motor
71
Removal of the Power Unit Cooling Fan Motor
71
Removal of the Fusing Cooling Fan Motor
72
Removal of the Paper Size Sensor Assy
73
Removal of the Fusing Unit Interlock Switch
74
Removal of the Flickerless Resistor (Only for 200 V Area of Di1611)
76
Removal of the Inch/Metric Sensor/1 Assy (3Rd Area Only)
76
Remounting of the EEPROM (U16)
77
Installation of the Key Counter
78
Upgrading the Firmware
80
Upgrading the Copier Firmware (PWB-C/C)
80
Installing the Driver
80
Plug and Play Installation of the GDI Printer/Twain Driver
80
Procedure for Upgrading the GDI Firmware
82
Procedure When Upgrading the Firmware Has Failed
84
Adjusting/Setting
87
How to Use the Adjustment Section
88
Composition
88
Checking before Starting Work
88
Checkpoints When Conducting On-Site Service
88
Adjustment Item List
90
Utility Mode
92
Utility Mode Function Tree
92
Utility Mode Setting Procedure
94
Setting in the Utility Mode
94
Auto Panel Reset
94
Auto Shut off
94
Energy Save Mode
94
Machine Setting
94
Density (Adf)
95
Density (Book)
95
Language
95
Lcd Contrast
95
Print Density
95
Inch/Metric
96
Paper Source Setup
96
Paper Type
96
Tray1 Paper
96
Drum Dehumidify
97
Toner Replenisher
97
User Management
97
Admin. Management
98
Auto Shut off
98
Copy Track
98
Binding Pos
101
Copy Setting 1
101
Density Level (A)
101
Density Level (M)
101
Density Priority
101
Margin Setting
101
Paper Priority
101
Copy Priority
102
Copy Setting 2
102
Erase Setting
102
Mixed Original
102
Output Priority
102
Small Original
102
4In1 Copy Order
103
Crisscross Mode
103
Duplex Copy
103
Service Mode
104
Service Mode Function Tree
104
Service Mode Function Setting Procedure
107
Setting in the Service Mode
108
Service's Choice
108
Shipment Destination
108
Iu Life Stop Mode
109
Maintenance Counter
109
ID Adjust
109
Vg Adjust
110
FUSER TEMP. Ad (PLAIN)
110
FUSER TEMP. Ad (THICK)
111
FUSER TEMP. Ad (OHP)
112
Leading Edge Erase
113
(11) Trailing Edge Erase
114
(12) Vertical Edge Erase
115
Loop Adjust (Tray1)
116
Loop Adjust (Tray2 to Tray5)
116
(15) LOOP ADJUST (DUPLEX): Di2011 Only
117
Loop Adjust (Bypass)
117
(17) Fls Paper Size
118
(18) CCD Aps Size
118
(19) Gdi Timeout
118
Adjust
119
Prn Main Regist
119
Prn Sub Regist
120
CCD Main Zoom
121
CCD Sub Zoom
122
CCD Main Regist
123
CCD Sub Regist
124
Adf Sub Zoom
125
Adf Main Regist
125
Adf Sub Regist1
125
(10) Adf Sub Regist2
126
(11) Adf Reg. Loop1
126
(12) Adf Reg. Loop2
126
(13) Atdc Gain
126
(14) Model Setting
127
Counter
127
Total Counter
127
Size Counter
127
Pm Counter
127
Maintenance Counter
128
Supplies Life Count
128
Application Counter
128
(10) Scan Counter
128
(11) Paper Size Counter
129
(12) Misfeed Counter
129
(13) Trouble Counter
130
Display
131
Toner Density Level
131
Process Control
131
Main F/W Ver. (Pwb-C/C)
132
Engine F/W Ver. (Pwb-A)
132
Pcl F/W Ver
132
Nic F/W Ver
132
Adf F/W Ver
132
Main Ram Size
132
Pcl Ram Size
132
(10) Serial no
132
(11) Customer ID
133
Atdc Auto Adjust
133
Function
133
Paper Feed Test
133
Process Check
133
Adf Feed Test
134
Copy Adf Glass Area
134
Print Test Pattern
134
(11) Adf Sensor Adjust
135
Adf Width Adj. (Max)
135
Adf Width Adj. (Min)
135
CCD Move to Home
135
Scan Test
135
Admin. Registration
136
China
137
Fixed Zoom Change
137
Inch
137
Japan
137
Metric
137
Factory Test
138
Latin America (Inch)
138
Latin America (Metric)
138
Oem1 Us
138
Panel Buzzer Test
138
Ram Test
138
Application Counter
139
Clear Data
139
Maintenance Counter
139
Memory Clear
139
Pm Counter
139
Scan Counter
139
Supplies Life Count
139
ADF BACKUP CLEAR (Di2011 Only)
140
Misfeed Counter
140
Paper Size Counter
140
Security
140
Total Counter Count
140
Trouble Counter
140
Machine Counter
141
Plug-In Counter Copy
141
Size Counter Count
141
Mechanical Adjustments
142
Adjustment of the Position of the Scanner and 2Nd/3Rd Mirrors Carriage
142
CCD Unit Position Adjustment
144
Adjustment of the Gap between the Doctor Blade and Sleeve Roller (Db Adjustment)
145
Manual Bypass (for the Optional AD-17) CD Registration Adjustment
147
Troubleshooting
149
Introduction
150
Electrical Components Check Procedure
150
Sensor
150
Clutch
151
Solenoid
151
Switch
151
Motor
152
Misfeeds
153
Initial Checks
153
Paper Misfeed Detection
153
Outline
153
Misfeed Display
154
Misfeed-Detecting Sensor Layout
155
Misfeed Detection Timing/Troubleshooting Procedures
156
Misfeed at the Paper Feed Tray/1 Paper Take-Up Section
156
Misfeed at the Manual Bypass Paper Take-Up Section
157
Misfeed at the Multiple Bypass Paper Take-Up Section (When the Optional Multiple Bypass MB-6 Is Mounted)
158
Misfeed at the Paper Feed Unit Paper Take-Up/Vertical Transport Section (When the Optional Paper Feed Unit PF-126 Is Mounted)
159
Misfeed at the Paper Separating Section
160
Misfeed at the Fusing/Exit Section
161
Misfeed at the Document Take-Up Section (When the Optional Automatic Document Feeder AF-12 Is Mounted)
162
Misfeed at the Document Transport Section (When the Optional Automatic Document Feeder AF-12 Is Mounted)
163
Misfeed at the Document Exit Section (When the Optional Automatic Document Feeder AF-12 Is Mounted)
164
Malfunctions
165
List of Malfunction Codes
165
Resetting Procedure by Malfunction Code
169
Malfunction Detection Timing and Troubleshooting Procedure
170
C0000 Main Motor Malfunction
170
C0044 ADF Cooling Fan Failure (When the Optional Duplexing Document Feeder AFR-19 Is Mounted)
171
C0045 Fusing Cooling Fan Motor Malfunction
172
C004E Power Supply Cooling Fan Motor Malfunction
173
C0070 Toner Replenishing Motor Malfunction
174
C0210 Abnormal Image Transfer Voltage
175
C0501 Warm-Up Failure 2 (Di2011 Only)
176
C0510 Fusing Failure (Abnormally Low Fusing Temperature)
176
C0511 Fusing Failure (Abnormally Low Fusing Temperature 2)
176
C0520 Fusing Failure (Abnormally High Fusing Temperature)
176
C0521 Fusing Failure (Abnormally High Fusing Temperature 2)
176
C0650 Faulty Scanner Home Position Sensor
179
C0F33 Improperly Adjusted ATDC Sensor
180
(10) C1038 Engine Connection Failure
181
(11) C1200 Faulty Asic/Memory
182
C1300 Polygon Motor Malfunction C13F0 Faulty HSYNC
183
(14) C1468 Faulty EEPROM
184
C133B Communication with Option Error C133D ROM Check Error
184
(15) C14A3 IR Fluorescent Lamp Fault
185
Miscellaneous Errors
186
Flash ROM Error
186
Power Source-Related Malfunctions
187
The Copier Does Not Turn on
187
Image Failure
189
Image Failure Troubleshooting
189
Initial Checks
189
Identification of the Faulty System
190
Troubleshooting Procedures by Image Failure
191
Image Reading Section: Blank Copy
191
Image Reading Section: Black Copy
192
Image Reading Section: Low Image Density
193
Image Reading Section: Foggy Background or Rough Image
194
Image Reading Section: Black Streaks or Bands
195
Image Reading Section: Black Spots
196
Image Reading Section: Blank Streaks or Bands
197
Image Reading Section: Uneven Image Density
198
Image Reading Section: Gradation Reproduction Failure
199
Image Reading Section: Periodically Uneven Image
200
Image Reading Section: Moire
201
Printer Section: Blank Copy
202
Printer Section: Black Copy
203
Printer Section: Low Image Density
204
Printer Section: Foggy Background or Rough Image
205
Printer Section: Black Streaks or Bands
206
Printer Section: Black Spots
207
Printer Section: Blank Streaks or Bands
208
Printer Section: Void Areas
209
Printer Section: Smear on Back
210
Printer Section: Uneven Image Density
211
Printer Section: Gradation Reproduction Failure
212
Printer Section: Periodically Uneven Image
213
Advertisement
Konica Minolta Di1611 Advanced Information (232 pages)
Brand:
Konica Minolta
| Category:
Copier
| Size: 3.32 MB
Table of Contents
Table of Contents
3
1 Introduction
11
We Want You to be a Satisfied Customer
11
Explanation of Manual Conventions
11
Explanation of Basic Concepts and Symbols
13
Paper Feeding
13
Width" and "Length
13
Paper Orientation
14
Energy Star
15
What Is an ENERGY STAR® Product
15
Safety Information
16
Warning and Precaution Symbols
16
Meaning of Symbols
16
Warning
17
Caution
18
Precautions for Routine Use
19
USER INSTRUCTIONS CE Marking (Declaration of Conformity)
19
Laser Safety
20
CDRH Regulation
21
For European Users
21
For Denmark Users
21
For Finland, Sweden Users
22
For Norway Users
22
Laser Safety Label
23
Ozone Release
23
Acoustic Noise
23
2 Precautions
25
Installation Precautions
25
Installation Site
25
Power Source
25
Space Requirements
26
Operation Precautions
27
Operating Environment
27
Proper Use
27
Transporting the Machine
29
Care of Machine Supplies
29
Storage of Copies
29
Legal Restrictions on Copying
30
Components and Their Functions
31
Part Names and Their Functions
33
Main Unit
33
Inside of Main Unit
35
Document Feeder (Optional)
36
Multiple Bypass (Optional)
37
Paper Feed Unit (Optional)
38
Job Separator (Optional)
39
Names of Control Panel Parts and Their Functions
40
Control Panel Parts and Their Functions
40
Display Indications
43
Adjusting the Angle of the Display
44
Power Supply
45
To Turn on the Machine
45
To Turn off the Machine
45
Default Settings
45
Auto Panel Reset
46
Energy Save Mode
46
Auto Shut off
47
Queued Copy Jobs
47
3 Basic Operations
49
Making Copies
49
To Make a Simple Copy
49
Loading Paper
51
Loading Paper into the 1St Paper Tray
52
Loading Paper into the 2Nd Paper Tray
54
Loading the Document
56
Loading Documents into the Document Feeder
56
Positioning Sheet Documents on the Original Glass
57
Positioning Transparent Documents on the Original Glass
58
Positioning Books on the Original Glass
59
Loading Documents of Mixed Sizes in the Document Feeder
60
Stopping/Restarting/Cancelling a Copy Job
62
Confirmation Mode
63
To Check the Counters
63
Reducing Electricity Usage
65
4 Useful Operations
67
Specifying a Zoom Setting
67
To Zoom a Standard-Sized Document to a Different Standard Size
67
Using the "Auto/Photo" Function
69
To Make Sharp Copies of Illustrations or Photos
69
Copying Onto Various Types of Media
71
To Copy Onto OHP Transparencies
71
To Copy Onto Label Sheets
73
To Copy Onto Envelopes (Non-Standard Size)
75
To Copy Onto Postcards
78
5 Before Making Copies
81
Paper
81
Paper Types
81
Paper Sizes
83
Paper Capacity
84
Unsuitable Paper
85
Print Area
86
Paper Storage
86
Making Copies on Manually Fed Paper
87
Paper that Can be Fed Manually
87
Adjusting the Multiple Bypass
88
Loading Plain Paper into the Bypass Trays
89
Loading Postcards into the Bypass Trays
90
Loading Envelopes into the Bypass Trays
91
Loading OHP Transparencies into the Bypass Trays
93
Loading Label Sheets into the Bypass Trays
94
Copying Onto Manually Fed Paper by Manual Bypass
95
Copying Onto Manually Fed Paper by Multiple Bypass
98
Selecting the Paper Source
101
To Make Copies Using the Auto Paper Function
101
To Copy with a Manually Selected Paper Size
102
To Load Special Paper into the 1St Tray
102
Automatically Selecting the Paper Source
103
Order for Automatically Switching Paper Drawers
104
Original Documents
105
Using the Document Feeder
105
Document Types
105
Documents of Uniform Sizes
106
Mixed Width Document Sizes (AFR-19)
106
Precautions Concerning the Documents
107
Specifying a Zoom Setting
108
Zoom Settings
108
To Make Copies Using the "AUTO" Zoom Setting
109
To Make Copies Using a Fixed Zoom Setting
110
To Make Copies Using a Specific Zoom Setting
111
To Make Copies Using the "X/Y Zoom" Function
112
Specifying the Copy Density ("Auto/Photo" Function)
114
To Make Copies after Specifying a Copy Density
115
Interrupting Copy Jobs
116
To Interrupt a Copy Job
116
6 Advanced Copy Operations
119
Single-Sided Copies
119
To Make Copies Using the "2In1" (or "4In1") Copy Function
119
To Make Copies Using the "Book Separation" Function
121
Double-Sided Copies
123
Double-Sided Copying Is Not Possible under the Following Conditions
125
To Make Double-Sided Copies Using the Original Glass
125
To Make Double-Sided Copies Using the Document Feeder
126
Finishing Copies ("Sort" and "Group" Functions)
127
Notes on Using the "Sort" and "Group" Functions
128
Shift Sorting
129
Crisscross Sorting
129
Shift Grouping
129
Crisscross Grouping
129
Specifying Finishing
130
Erasing Sections of Copies
131
Precautions on the Erased Margin Location
131
To Make Copies Using an Erase Setting
132
Negative/Positive Inverted Copying
133
To Make Copies Using the Negative/Positive Inverted Copy Function
133
Making Copies for Filing ("File Margin" Function)
134
Precautions on the Binding Margin Location
134
To Make Copies Using the "File Margin" Function
135
Programmed Copy Jobs
136
To Store a Copy Program
136
To Recall a Copy Program
137
Access Numbers
138
To Enter an Access Number
138
7 Utility Mode - Copy Functions
139
Utility Menu Commands
139
Duplex Unit
140
Specifying Machine Settings ("MACHINE SETTING" Menu)
141
To Select the "MACHINE SETTING" Menu
142
To Set the "AUTO PANEL RESET" Function
143
To Set the "ENERGY SAVE MODE" (Preheat Mode) Function
144
To Set the "AUTO SHUT OFF" Function
145
To Specify the Scanning Image Quality ("DENSITY(ADF)" Function)
146
To Specify the Scanning Image Quality ("DENSITY(BOOK)" Function)
147
To Specify the Printing Density ("PRINT DENSITY" Function)
148
To Set the "LCD CONTRAST" Function
149
To Set the "LANGUAGE" Function
150
Setting up the Paper Sources ("PAPER SOURCE SETUP" Menu)
151
To Select the "PAPER SOURCE SETUP" Menu
152
To Specify the Automatic Paper Size Detection Units ("INCH/METRIC" Function)
153
To Specify the Size of Paper Loaded into the 1St Tray ("TRAY1 PAPER" Function)
154
To Set the "PAPER TYPE" Function
156
Specifying User-Managed Service Tasks ("USER MANAGEMENT" Menu)
157
To Perform the "DRUM DEHUMIDIFY" Function
157
To Perform the "TONER REPLENISHER" Function
159
Specifying Administrative Settings ("ADMIN. MANAGEMENT" Menu)
160
To Select the "ADMIN. MANAGEMENT" Menu
161
To Set the "AUTO SHUT OFF" Function
162
To Turn On/Off User (Section) Management
164
To Register User (Section) Access Numbers
165
To Change/Delete User (Section) Access Numbers
167
To Display/Clear the Total Count for a Specific Account
169
To Clear the Total Counts for All Accounts
171
Specifying Copy Settings
172
COPY SETTING 1" & "COPY SETTING 2" Menus
172
To Select the "COPY SETTING 1" Menu
174
To Set the "PAPER PRIORITY" Function
175
To Set the "DENSITY PRIORITY" Function
176
To Set the "AUTO" Density Level ("DENSITY LEVEL(A)" Function)
177
To Set the Manual Density Level ("DENSITY LEVEL(M)" Function)
178
To Set the "BINDING POS." Function
179
To Specify the Binding Width ("MARGIN SETTING" Function)
180
To Specify the Erased Width ("ERASE SETTING" Function)
181
To Set the "SMALL ORIGINAL" Function
182
To Select the "COPY SETTING 2" Menu
183
To Set the "MIXED ORIGINAL" Function
184
To Set the "COPY PRIORITY" Function
185
To Specify the Default Finishing Mode ("OUTPUT PRIORITY" Function)
186
To Set the "4IN1 COPY ORDER" Function
187
To Set the "CRISSCROSS MODE" Function
188
To Set the "DUPLEX COPY" Function
189
8 Error Messages
191
When the Message "TONER EMPTY" Appears
191
To Replace the Toner Bottle
192
When the Message "PAPER JAM" Appears
194
To Clear a Paper Misfeed in the Duplex Unit
194
To Clear a Paper Misfeed in the Main Unit or 1St Tray
195
To Clear a Paper Misfeed in the Paper Feed Unit
198
To Clear a Paper Misfeed in the Multiple Bypass
199
When the Message "ORIGINAL DOC.JAM" Appears
201
To Clear a Misfeed in the Automatic Document Feeder (AF-12)
201
To Clear a Misfeed in the Duplexing Document Feeder (AFR-19)
203
Main Error Messages and Their Remedies
205
9 Troubleshooting
209
When Incorrect Copies Are Produced
209
When Copying Is Not Performed Correctly
211
Konica Minolta Di1611 User Manual (168 pages)
Brand:
Konica Minolta
| Category:
Fax Machine
| Size: 3.78 MB
Table of Contents
Table of Contents
3
1 Introduction
9
User Manuals
9
We Want You to be a Satisfied Customer
9
Explanation of Manual Conventions
10
Energy Star
11
What Is an ENERGY STAR® Product
11
Safety Information
12
Warning and Precaution Symbols
12
Meaning of Symbols
12
Warning
13
Caution
14
Precautions for Routine Use
15
Miscellaneous
16
User Instructions - CE Marking
16
Notice for Ni-MH Batteries
16
2 Precautions
17
Part Names and Their Functions
17
Main Unit
17
Names of Control Panel Parts and Their Functions
18
Control Panel Parts and Their Functions
18
Display Indications
23
Symbol List
24
Entering Text
25
Changing Input Mode
25
Inputting Example
26
3 Faxing
29
Dialing
29
To Fax by Entering the Fax Number Directly Using the 10-Key Pad
30
To Fax Using One-Touch Dialing
31
To Fax Using Speed Dialing
32
To Fax Using Group Dialing
33
To Fax Using Chain Dial
34
To Fax Using Program Dialing
35
To Fax Using the Phone Book
36
To Search the Phone Book
37
To Redial the Last Recipient Called
39
Transmission Settings
40
Adjusting the Fax Resolution
40
To Specify the Resolution
41
Basic Faxing
42
To Fax Using the Automatic Document Feeder
42
To Fax Documents Positioned on the Original Glass
44
If the Memory Becomes Full While Scanning Fax Documents
45
Confirmation Mode
46
Checking the Machine's Counters
46
To Check the Counters
47
Checking Transmission Results
48
To Check the Transmission Result
48
Outputting a Report/List
49
To Output a Report/List
50
Transmission Result Report
51
Reception Result Report
51
Activity Report
52
Memory Data List
52
Memory Image Print
52
List of One-Touch Dial Keys
53
List of Speed Dial Numbers
53
Key Setting List
53
Relay Box List
53
Machine Status List
53
Configuration Page
54
PCL Font List
54
4 Fax Transmission/Reception Methods
55
Transmission Methods
55
Memory Transmission
55
To Specify Memory TX
56
Direct Transmission
57
Manual Transmission
57
To Send a Fax Manually
58
Batch Transmission
58
To Fax Using Batch Transmission
59
Broadcast Transmission
59
To Fax Using Broadcast Transmission
60
Timer Transmission
63
To Fax Using Timer Transmission
63
Mailbox Transmission
65
To Fax Using Mailbox Transmission
65
Relay Initiation Transmission
67
To Fax Using Relay Initiation Transmission
67
Relay Broadcast Transmission
69
Polling Transmission
70
To Set up Polling Transmission
70
To Delete a Document from the Polling Transmission Setup
72
Canceling (Deleting) a Document Queued in the Memory for Transmission
73
To Cancel a Queued Document
73
Reception Methods
75
Manual Reception
75
To Receive a Fax Manually
75
Memory Reception
76
Mailbox Reception
76
To Retrieve a Document from a Mailbox
76
Polling Reception
77
To Receive a Fax Using Polling Reception
77
Using F Codes
79
Using Mailboxes
80
Specifying F Codes
81
When Sending Faxes
81
Programming F Codes
81
5 Using the Utility Mode
83
Utility Mode
83
Specifying the Machine Settings
84
Selecting the "MACHINE SETTING" Menu
85
Specifying the Setting for "BUZZER VOLUME
86
Specifying the Setting for "INITIAL MODE
86
Setting up the Paper Sources ("PAPER SOURCE SETUP" Menu)
87
Specifying Administrative Settings ("ADMIN. MANAGEMENT" Menu)
88
To Select the "ADMIN. MANAGEMENT" Menu
89
To Set the "REMOTE MONITOR" Function
90
6 Using the Utility Mode (Fax)
91
Setting up the Fax Registration
91
Selecting the "FAX REGISTRATION" Menu
92
Setting up One-Touch Dialing ("ONE-TOUCH DIAL" Function)
93
To Program a One-Touch Dial Key
93
To Change/Delete a Programmed One-Touch Dial Key
95
Specifying the Setting for "SPEED DIAL
97
To Program a Speed Dial Number
97
To Change/Delete a Programmed Speed Dial Number
99
Specifying the Setting for "GROUP DIAL
101
To Program a Group of Fax Numbers
101
To Change/Delete a Programmed Group of Fax Numbers
103
Specifying the Setting for "PROGRAM DIAL
105
To Set Program Dialing
105
To Change/Delete a Programmed Broadcast Transmission
107
To Change/Delete a Programmed Timer Transmission
109
To Change/Delete a Programmed Mailbox Transmission
111
To Change/Delete a Programmed Polling Reception
113
To Change/Delete a Programmed Relay Initiation Transmission
115
Specifying the Setting for "BATCH TX
117
To Set Batch Transmitting
117
To Change the Batch Transmission Setting
119
To Delete the Batch Transmission Setting
120
Specifying the Setting for "MAILBOX
120
To Register a Mailbox
121
To Delete a Mailbox
122
Setting up Relay Boxes ("RELAY BOX" Function)
123
To Program the Relay Box
123
To Delete the Relay Box
125
Setting up the Transmission
126
Selecting the "TX OPERATION" Menu
127
Specifying the Setting for "SCAN CONTRAST
127
Specifying the Setting for "RESOLUTION
128
Specifying the Setting for "DEFAULT TX
129
Specifying the Setting for "HEADER
129
Setting up the Reception
130
Selecting the "RX OPERATION" Menu
132
Specifying the Setting for "MEMORY RX MODE
133
To Cancel Memory Reception
134
Specifying the Setting for "No.of RINGS
135
Specifying the Setting for "REDUCTION RX
135
Specifying the Setting for "RX PRINT
136
Specifying the Setting for "RX MODE
136
Specifying the Setting for "FORWARD
137
Specifying the Setting for "FOOTER
138
Specifying the Setting for "SELECT TRAY
138
Specifying the Setting for "CLOSED NETWORK
139
Settings up the Communication
140
Specifying the Setting for "TONE/PULSE
141
To Specify the Telephone Dialing System
141
Specifying the Setting for "LINE MONITOR
142
Specifying the Setting for "PSTN/PBX
143
To Specify the Telephone Wiring System
143
Setting up the Report Output
144
Selecting the "REPORTING" Menu
145
Specifying the Setting for "ACTIVITY REPORT
145
Specifying the Setting for "RESERV.REPORT
146
Specifying the Setting for "TX RESULT REPORT
146
Specifying the Setting for "RX RESULT REPORT
147
Specifying Initial User Data
148
Selecting the "INITIAL USER DATA" Menu
148
Specifying the Setting for "DATE&TIME
149
Specifying the Setting for "USER FAX no
150
Specifying the Setting for "USER NAME
151
Pagescope Light Settings Page
152
Advertisement
Konica Minolta Di1611 User Manual (160 pages)
Fax Kit
Brand:
Konica Minolta
| Category:
Fax Machine
| Size: 3.13 MB
Table of Contents
User Manual
1
Table of Contents
2
1 Introduction
8
User Manual
9
Introduction
9
We Want You to be a Satisfied Customer
9
Explanation of Manual Conventions
10
Energy Star
11
What Is an ENERGY STAR ® Product
11
Safety Information
12
Warning and Precaution Symbols
12
Meaning of Symbols
12
Warning
13
Caution
14
Precautions for Routine Use
15
Miscellaneous
15
For New Zealand Users
16
Notice for Ni-MH Batteries
17
2 Precautions
18
Part Names and Their Functions
19
Main Unit
19
Names of Control Panel Parts and Their Functions
20
Control Panel Parts and Their Functions
20
Display Indications
25
Entering Text
26
Changing Input Mode
26
Inputting Example
27
3 Faxing
30
Dialing
31
To Fax by Entering the Fax Number Directly Using the 10-Key Pad
31
To Fax Using One-Touch Dialing
32
To Fax Using Speed Dialing
33
To Fax Using Group Dialing
34
To Fax Using Chain Dial
35
To Fax Using Program Dialing
36
To Fax Using the Phone Book
37
To Search the Phone Book
38
To Redial the Last Recipient Called
39
Transmission Settings
40
Adjusting the Fax Resolution
40
To Specify the Resolution
40
Basic Faxing
41
To Fax Using the Automatic Document Feeder
41
To Fax Documents Positioned on the Original Glass
42
If the Memory Becomes Full While Scanning Fax Documents
44
Confirmation Mode
45
Checking the Machine's Counters
45
To Check the Counters
45
Checking Transmission Results
46
To Check the Transmission Result
46
Outputting a Report/List
48
To Output a Report/List
48
Transmission Result Report
49
Reception Result Report
49
Activity Report
49
Memory Data List
50
Memory Image Print
50
List of One-Touch Dial Keys
50
List of Speed Dial Numbers
50
Key Setting List
50
Relay Box List
51
Machine Status List
51
Configuration Page
51
PCL Font List
51
4 Fax Transmission/Reception Methods
52
Transmission Methods
53
Memory Transmission
53
To Specify Memory TX
53
Direct Transmission
54
Manual Transmission
55
To Send a Fax Manually
56
Batch Transmission
57
To Fax Using Batch Transmission
57
Broadcast Transmission
58
To Fax Using Broadcast Transmission
58
Timer Transmission
61
To Fax Using Timer Transmission
61
Mailbox Transmission
63
To Fax Using Mailbox Transmission
63
Relay Initiation Transmission
65
To Fax Using Relay Initiation Transmission
65
Relay Broadcast Transmission
67
Polling Transmission
68
To Set up Polling Transmission
68
To Delete a Document from the Polling Transmission Setup
70
Canceling (Deleting) a Document Queued in the Memory for Transmission
71
To Cancel a Queued Document
71
Reception Methods
73
Manual Reception
73
To Receive a Fax Manually
73
Memory Reception
73
Mailbox Reception
74
To Retrieve a Document from a Mailbox
74
Polling Reception
75
To Receive a Fax Using Polling Reception
75
Using F Codes
77
Using Mailboxes
78
Specifying F Codes
79
When Sending Faxes
79
Programming F Codes
79
5 Using the Utility Mode
80
Utility Mode
81
Specifying the Machine Settings
82
Selecting the "MACHINE SETTING" Menu
83
Specifying the Setting for "BUZZER VOLUME
84
Specifying the Setting for "INITIAL MODE
85
Setting up the Paper Sources ("PAPER SOURCE SETUP" Menu)
86
Specifying Administrative Settings ("ADMIN. MANAGEMENT" Menu)
87
To Select the "ADMIN. MANAGEMENT" Menu
88
To Set the "REMOTE MONITOR" Function
89
6 Using the Utility Mode (Fax)
90
Setting up the Fax Registration
91
Selecting the "FAX REGISTRATION" Menu
92
Setting up One-Touch Dialing ("ONE-TOUCH DIAL" Function)
93
To Program a One-Touch Dial Key
93
To Change/Delete a Programmed One-Touch Dial Key
95
Specifying the Setting for "SPEED DIAL
97
To Program a Speed Dial Number
97
To Change/Delete a Programmed Speed Dial Number
99
Specifying the Setting for "GROUP DIAL
101
To Program a Group of Fax Numbers
101
To Change/Delete a Programmed Group of Fax Numbers
102
Specifying the Setting for "PROGRAM DIAL
104
To Set Program Dialing
104
To Change/Delete a Programmed Broadcast Transmission
105
To Change/Delete a Programmed Timer Transmission
106
To Change/Delete a Programmed Mailbox Transmission
107
To Change/Delete a Programmed Polling Reception
109
To Change/Delete a Programmed Relay Initiation Transmission
110
Specifying the Setting for "BATCH TX
112
To Set Batch Transmitting
112
To Change the Batch Transmission Setting
113
To Delete the Batch Transmission Setting
114
Specifying the Setting for "MAILBOX
115
To Register a Mailbox
115
To Delete a Mailbox
116
Setting up Relay Boxes ("RELAY BOX" Function)
117
To Program the Relay Box
117
To Delete the Relay Box
119
Setting up the Transmission
120
Selecting the "TX OPERATION" Menu
120
Specifying the Setting for "SCAN CONTRAST
121
Specifying the Setting for "RESOLUTION
121
Specifying the Setting for "DEFAULT TX
122
Specifying the Setting for "HEADER
122
Setting up the Reception
123
Selecting the "RX OPERATION" Menu
124
Specifying the Setting for "MEMORY RX MODE
125
To Cancel Memory Reception
126
Specifying the Setting for "No.of RINGS
127
Specifying the Setting for "REDUCTION RX
127
Specifying the Setting for "RX PRINT
128
Specifying the Setting for "RX MODE
128
Specifying the Setting for "FORWARD
129
Specifying the Setting for "FOOTER
130
Specifying the Setting for "SELECT TRAY
130
Specifying the Setting for "CLOSED NETWORK
131
Settings up the Communication
132
Specifying the Setting for "TONE/PULSE
132
To Specify the Telephone Dialing System
132
Specifying the Setting for "LINE MONITOR
133
Specifying the Setting for "PSTN/PBX
134
To Specify the Telephone Wiring System
134
Setting up the Report Output
135
Selecting the "REPORTING" Menu
135
Specifying the Setting for "ACTIVITY REPORT
136
Specifying the Setting for "RESERV.REPORT
136
Specifying the Setting for "TX RESULT REPORT
137
Specifying the Setting for "RX RESULT REPORT
137
Specifying Initial User Data
138
Selecting the "INITIAL USER DATA" Menu
138
Specifying the Setting for "DATE&TIME
139
Specifying the Setting for "USER FAX no
140
Specifying the Setting for "USER NAME
141
Pagescope Light Settings Page
142
Konica Minolta Di1611 Manual (22 pages)
Twain Driver
Brand:
Konica Minolta
| Category:
Printer Accessories
| Size: 0.31 MB
Table of Contents
Table of Contents
3
1 Setting up PC Scanning
5
2 Connecting to the USB Port
7
3 Installing the TWAIN Driver
9
Installing the TWAIN Driver Using Plug and Play
9
Installing the TWAIN Driver Using Plug and Play under Windows XP
9
Installing the TWAIN Driver Using Plug and Play under Windows 2000
11
Installing the TWAIN Driver Using Plug and Play under Windows Me/98
12
4 How to Scan Document
13
Using the Automatic Document Feeder
13
Using the Original Glass
14
5 Common Settings
15
Auto Options
15
6 Error Message
17
Original Document Jam
17
To Clear a Misfeed in the Automatic Document Feeder
18
Communication Error
19
Scanner Busy
19
Read Data Error
20
Automatic Document Feeder no Paper
21
Other Machine Error
22
Advertisement
Related Products
Konica Minolta Di1610f
Konica Minolta Di183
Konica Minolta Di152
Konica Minolta Di2010
Konica Minolta Di3010
Konica Minolta DI2510
Konica Minolta Di2011
Konica Minolta Di7210
Konica Minolta Di650
Konica Minolta Di551
Konica Minolta Categories
All in One Printer
Printer
Digital Camera
Measuring Instruments
Copier
More Konica Minolta Manuals
Login
Sign In
OR
Sign in with Facebook
Sign in with Google
Upload manual
Upload from disk
Upload from URL