VeriFone Omni 3200 Reference Manual
Hide thumbs
Also See for Omni 3200:
- Reference manual (180 pages) ,
- Installation manual (32 pages) ,
- Quick reference manual (6 pages)
Table of Contents
Advertisement
Advertisement
Table of Contents
Troubleshooting

Related Manuals for VeriFone Omni 3200


Summary of Contents for VeriFone Omni 3200
- Page 1 Omni 3200 Reference Manual VeriFone Part Number 19134, Revision B...
- Page 2 Limited Liability. In no event shall VeriFone be liable for any indirect, special, incidental, or consequential damages (including damages for loss of business, profits or the like), even if VeriFone or its representatives have been advised of the possibility of such damages.
-
Page 3: Table Of Contents
Table of Contents Setting Up the Terminal Setup Procedure .................. 1 Step 1: Select a Location for the Terminal ......... 2 Step 2: Unpack the Shipping Carton........... 3 Step 3: Examine Terminal Features............ 4 General Features................5 Connection Ports on the Back Panel ..........6 Step 4: Connect the Terminal to a Telephone Line ...... - Page 4 OMNI 3200 Reference Manual Performing System Mode Operations When to Use System Mode...............27 Verifying Terminal Status..............28 The System Password ...............28 The System Prompt................30 List of System Mode Functions ............31 Local and Remote Functions.............32 About System Mode Procedure Descriptions ........33 Entering System Mode..............35 [1]: Display EPROM Information.............37...
- Page 5 Table of Contents Setting Up the Download Environment..........64 Cable Connection for Direct Downloads ........64 Cable Connection for Terminal-to-Terminal Uploads ....66 Application Downloads ..............67 Preparing for a Direct Application Download ......67 Performing a Full Direct Application Download ....... 69 Performing a Partial Direct Application Download ....
- Page 6 OMNI 3200 Reference Manual Descriptions of Diagnostic and Debugging Commands ....118 B — Get Static Registers (Debugger Only) ......118 C — Clear All Diagnostic Counters.........119 D — Memory Dump ..............119 F — Get Current Source File Name .........120 G — Get Diagnostics Counters ..........121 I —...
- Page 7 Maintaining the Omni 3200 ............134 Cleaning the Terminal ..............134 Cleaning the Printer..............134 Returning a Terminal for Repair or Replacement ....135 Calling the VeriFone Customer Support Hot Line ......137 Specifications.................. 138 Terminal Accessories..............139 How to Order................139 Appendix A.
- Page 8 OMNI 3200 Reference Manual viii...
- Page 9 Front Panel Key Arrangement ............19 Direct Download Cable Connection ..........65 Terminal-to-Terminal Cable Connection ......... 66 Cable Connection for Remote Diagnostics and Debugging ..111 Product Information on the Terminal Base ........135 ASCII Table for the Omni 3200 Display ........B-2...
- Page 10 OMNI 3200 Reference Manual...
- Page 11 List of Tables Example [ALPHA] Key Entries ............23 Using the [ALPHA] Key and the 12-Key Keypad ......24 System Mode Functions ..............31 Enter System Mode ................35 Display EPROM Information ............37 Display Unit ID and SRAM Size ............. 38 Initiate Display Test .................
- Page 12 OMNI 3200 Reference Manual...
- Page 13 Information is organized in the following sections: • Setting Up and Installing the Terminal. You can find this same information in the Omni 3200 Installation Guide. It is included in this manual for reference, and to provide a concise introduction to Omni 3200 features.
- Page 14 • Appendix A lists and describes all standard English-language system prompts and error messages. • Appendix B is the standard ASCII table for the Omni 3200 printer. • Appendix C is a glossary of definitions of product-specific terms used in the Omni 3200 documentation, as well as of relevant industry-standard terms.
- Page 15 CONFIG.SYS Terminal file system or terminal-related objects are shown in ALL CAPS. [ALPHA] Keys on the Omni 3200 terminal keyboard appear between square brackets. UNIT SEND The Ariel type font is used to identify messages or prompts that appear on the Omni 3200 display.
- Page 16 OMNI 3200 Reference Manual...
-
Page 17: Setting Up The Terminal
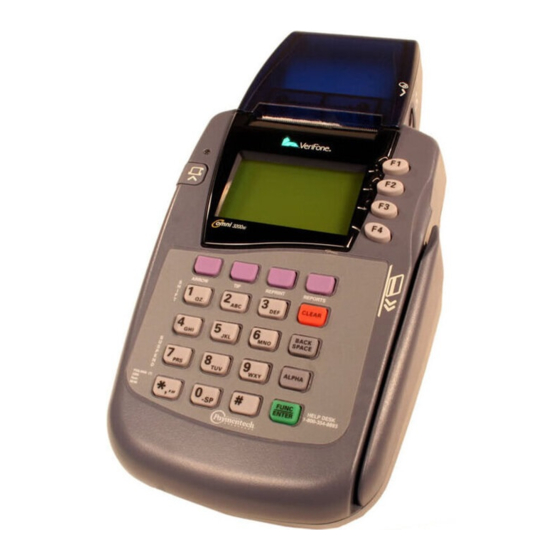
Setup Procedure The following procedure, which consists of seven steps, explains how to set up and install the Omni 3200 terminal (see Figure 1). It helps you select a location for the terminal, establish cable and telephone line connections, and configure optional peripheral devices, if necessary. -
Page 18: Step 1: Select A Location For The Terminal
Caution: The Omni 3200 terminal is designed for indoor use only. Place the Omni 3200 on a flat surface such as a table or countertop. Avoid areas with: •... -
Page 19: Step 2: Unpack The Shipping Carton
Note: Carefully inspect the shipping carton and its contents for shipping damage (see Figure 2). If the terminal, or any other component, appears damaged, file a claim immediately with the shipping company and notify VeriFone. Do not use a damaged terminal. Figure 2 Omni 3200 Product Components Follow these steps to unpack the carton: 1. -
Page 20: Step 3: Examine Terminal Features
Omni 3200 Reference Manual Note: The roll of thermal printer paper and the paper roll spindle may have been installed in the Omni 3200 terminal prior to shipment. 2. Remove any protective plastic wrapping from the terminal or other components and place them on a table or countertop. -
Page 21: General Features
Setting Up the Terminal General Features Viewing the top surface of the Omni 3200 terminal, you will notice the following features: • In the center of the terminal, a display screen with a non- removable, clear protective cover. • 24 keys, arranged in groups (see Figure 4): •... -
Page 22: Connection Ports On The Back Panel
If you turn the terminal around and view it from the back, you will notice five jacks, or ports, that are used to connect the Omni 3200 to a telephone line, to optional external devices, and to a power source (see Figure 6). - Page 23 The first port is identified by a telephone-shaped ‘Telset’ icon (shown to the right). You use this Telset port to connect the Omni 3200 to a telephone base unit. The second telephone line port is identified by a jack- shaped ‘Telco’ icon (shown to the right). You use this Telco port to connect the Omni 3200 to a telephone company wall jack.
-
Page 24: Step 4: Connect The Terminal To A Telephone Line
To process electronic transactions, the terminal automatically dials up and communicates with a host computer over a telephone line. You can connect the Omni 3200 to a telephone line in one of two ways: with a pass-through connection or with a direct connection: •... -
Page 25: Set Up A Direct Telephone Connection
Figure 7 Pass-Through Telephone Line Connection Set Up a Direct Telephone Connection To set up a direct telephone line connection from the Omni 3200 terminal to a telephone company wall jack (see Figure 8): 1. Insert the connector on one end of the telephone line cord into the Telco port on the back panel of the terminal. -
Page 26: Step 5: Connect Optional Device(S)
Warning: Before you connect a peripheral device to the Omni 3200, be sure the terminal is not connected to a power source. If necessary, unplug the power cable from the power port on the back panel of the terminal. -
Page 27: Connect A Pinpad
Setting Up the Terminal Connect a PINpad To connect a PINpad to the Omni 3200 terminal (see Figure 9 and Figure 10): 1. If necessary, insert the small modular plug on one end of the PINpad cable into the modular jack on the PINpad. -
Page 28: Connect A Cr 600 Check Reader
Omni 3200 Reference Manual Connect a CR 600 Check Reader Warning: Check readers may require a separate power source. Before you connect a check reader, or a similar device, to the Omni 3200 terminal, be sure the device is not connected to a power source. -
Page 29: Connect A Smart Card Reader/Writer Or Pinpad 501
Connect a Smart Card Reader/Writer or PINpad 501 To connect a SC 4xx or SC 5xx smart card reader/writer, or a PINpad 501, to the Omni 3200 terminal (see Figure 12): 1. If a cable is not already connected to the smart card reader/writer or PINpad 501, insert the small modular plug on one end of the interface cable into the modular jack on the optional device. -
Page 30: Connect A Bar Code Reader
Omni 3200 Reference Manual Connect a Bar Code Reader To connect a VeriFone bar code reader, or wand, insert the RJ45-type plug on the end of the cable into the ‘Bar Code/PINpad’ serial port on the back panel of the terminal (see Figure 13). - Page 31 2. Plug the metal prongs on the end of the other power pack cable into an indoor electrical power outlet. When you connect the power, the Omni 3200 display screen, and the green LED at the top left corner of the terminal, light up. The LED should now be flashing off and on, indicating that there is no paper in the printer.
-
Page 32: Step 7: Install A Paper Roll In The Printer
Omni 3200 Reference Manual Step 7: Install a Paper Roll in the Printer A fast, quiet thermal printer is built in to the Omni 3200. Because the printer receives power directly from the terminal, there are no additional cables to connect (see Figure 15). -
Page 33: Installing A Paper Roll
Installing a Paper Roll To install a roll of thermal printer paper in the Omni 3200: 1. Be sure the terminal is connected to a power source. (The green LED indicator should be blinking off and on.) 2. - Page 34 Omni 3200 Reference Manual Step 7: Install a Paper Roll in the Printer...
-
Page 35: Using The Terminal Keys
When you have completed the setup procedure described above, it is useful to familiarize yourself with the operational features of the Omni 3200 front panel, and with using the terminal keypad to enter data, before proceeding with other tasks. This section describes how to use the ‘core keypad,’ which consists of the 12-key Telco-style keypad and the four color-coded function keys to the right of this keypad (see Figure 16). -
Page 36: Data Entry Modes
Data Entry Modes Before you can use the keys on the front panel to enter ASCII characters, the Omni 3200 must be in a mode that allows keyed data entry. There are two terminal operating modes, each of which lets you press keys to enter data under specific circumstances: •... -
Page 37: The Core Keypad
Using the Terminal Keys The Core Keypad The core keypad is a 16-key arrangement which consists of a 12-key Telco-style keypad and four color-coded function keys located to the right of this keypad (see Figure 16). Note: The System Mode functions described in the next section of this manual require that you enter numbers, letters, or symbols using the core keypad. - Page 38 Omni 3200 Reference Manual [BACKSPACE] In Normal Mode, the [BACKSPACE] key is commonly used to delete a number, letter, or symbol that is typed on the terminal’s display screen. You press [BACKSPACE] one time to delete the last character typed on a line. To delete additional characters, moving from right to left, you press the [BACKSPACE] key multiple times, once for each character.
-
Page 39: Example [Alpha] Key Entries
Using the Terminal Keys If two or more characters are displayed on the Omni 3200 screen, pressing the [ALPHA] key changes the last character on the line to the next letter, number, or symbol in the key sequence. For example:... -
Page 40: Using The [Alpha] Key And The 12-Key Keypad
Omni 3200 Reference Manual Table 2 below lists all of the ASCII characters you can type using the [ALPHA] key and the 12-key Telco-style keypad: Table 2 Using the [ALPHA] Key and the 12-Key Keypad Without Press Press Press Pressing... -
Page 41: Viewing Information Wider Than The Display
Using the Terminal Keys [FUNC/ENTER] In Normal Mode, the [FUNC/ENTER] key is generally used in the same was as the Enter key on a PC. That is, to end a procedure, confirm a value or entry, answer ‘Yes’ to a query, or to select a displayed option. - Page 42 Omni 3200 Reference Manual Viewing Information Wider Than the Display...
-
Page 43: Performing System Mode Operations
• Those who deploy Omni 3200 terminals to end-user sites: To perform specific tasks that are a prerequisite to deploying a new Omni 3200 terminal in the field, including configuring the terminal, downloading application software, and testing the terminal prior to deployment. -
Page 44: Verifying Terminal Status
Omni 3200 Reference Manual Verifying Terminal Status The Omni 3200 terminal you are working with may, or may not have an application program running on it. When you have set up the terminal as described in Section 1, and the terminal is connected to a power source, follow these simple guidelines to verify the terminal’s... - Page 45 The terminal can, however, continue to process transactions in Normal Mode. If you forget or lose the password to your terminal, please contact your local VeriFone representative for assistance. The System Password...
-
Page 46: The System Prompt
XX is the two-digit operating system version number YY is the two-letter country specifier, and Z is the one-digit country release ID. Note: Two example Omni 3200 firmware version IDs are VPQ47AO0 (“all open” version) and VPQ47US1 (U.S. version). The System Prompt... -
Page 47: List Of System Mode Functions
Performing System Mode Operations List of System Mode Functions Table 3 is a complete list of the local and remote terminal functions you can access in System Mode. Table 3 System Mode Functions Function Description Type Display the creation date, two-character originator ID Local (usually the initials of a person’s first and last name), and the 4-digit TXO interpreter version number. -
Page 48: Local And Remote Functions
Omni 3200 Reference Manual Local and Remote Functions The System Mode functions that are available on an Omni 3200 terminal can be divided into the following two categories or types: • Local functions. Local functions address a standalone terminal and do not require communication or data transfers between the terminal and another computer or terminal. -
Page 49: About System Mode Procedure Descriptions
Performing System Mode Operations Because additional information is required to set up and perform remote operations such as downloads and remote diagnostics, remote System Mode functions are described in other sections: “Performing Downloads” and “Remote Diagnostics and Debugging.” • The following three procedures are described in the section, “Performing Downloads:”... - Page 50 Note: Before you proceed to enter System Mode and select the function(s) you want to perform, please verify that you have completely installed the Omni 3200, as described in Section 1 of this manual, and that the terminal is connected to a power source.
-
Page 51: Entering System Mode
Entering System Mode To enter System Mode after you have connected the Omni 3200 terminal to a power source, follow the procedure described in Table 4. Table 4... -
Page 52: Display Eprom Information
Omni 3200 Reference Manual Table 4 Enter System Mode Display Action 3. SYSTEM= (Firmware ID) The System Prompt, which is displayed whenever the terminal enters System Mode, consists of SYSTEM=, followed by an 8-character firmware version ID, such as VPQ47AO0. -
Page 53: Display Eprom Information
Performing System Mode Operations [1]: Display EPROM Information Pressing the [1] key in System Mode displays the following information about the flash EPROM in your Omni 3200 terminal: • Flash EPROM creation date (11/11/98, for example) • Initials of EPROM originator’s name (DM, for example) •... -
Page 54: Display Unit Id And Sram Size
Because a terminal’s Unit ID cannot be changed, it is often called a permanent terminal ID, or PTID. Factory-assigned PTIDs for VeriFone terminals are unique to ensure an added level of security. Table 6 Display Unit ID and SRAM Size... -
Page 55: Initiate Display Test
Performing System Mode Operations [3]: Initiate Display Test Press [3] in System Mode to initiate a two-step test of the terminal display panel. This test lets you verify that the pixel display grid and the display panel backlight are working properly. Table 7 Initiate Display Test Display... -
Page 56: Initiate System Diagnostic Tests
SYSTEM DIAG prompt as you type them. NOTE: If a diagnostic test fails several times, contact your local VeriFone representative for assistance. To return to the SYSTEM= prompt, press [CLEAR]. To exit System Mode and restart the terminal application, press [CLEAR] again. - Page 57 SYSTEM DIAG prompt continues to be displayed. NOTE: If a diagnostic test fails several times, contact your local VeriFone representative for assistance. To return to the SYSTEM= prompt, press [CLEAR]. To exit System Mode and restart the terminal application, press [CLEAR] again.
- Page 58 To test a bar code reader/wand: Swipe the tip of the wand in either direction across a bar code symbol. NOTE: The Omni 3200 firmware supports the Code 39 and EAN/UPC bar code optical recognition standards. Although seldom used, the ‘raw timing’ standard is also supported for bar code readers.
- Page 59 O.) The string of O’s indicates the following: – The Telco or Telset telephone line connection of the Omni 3200 terminal has been established, and – The dual-tone multiple-frequency (DTMF) function of the terminal modem has been automatically turned on.
-
Page 60: Set The Date And Time
Omni 3200 Reference Manual [5]: Set the Date and Time This function lets you reset the current date and time maintained in the terminal’s calendar/clock chip. Following the procedure described in Table 12 below, you can change both values, or you can selectively change the date or time value. -
Page 61: Display Messages And Prompts
Performing System Mode Operations Table 12 Set Date and Time Display Action 4. Ww YYMMDD HHMMSS The terminal displays the day of the week (Ww) followed by the date and time. (The current time is continuously updated by the calendar/clock chip.) NOTE: The days of the week are displayed with initial capital letters as Su, Mo, Tu, We, Th, Fr, and Sa. -
Page 62: Edit A Keyed File
Telephone number for remote diagnostics host computer *ZA= Application ID (for ZONTALK) *ZP= Host/download computer telephone number (for ZONTALK) *ZT= Terminal ID (for ZONTALK) ® For more information about the ZONTALK 2000 download software, please contact your local VeriFone representative. [7]: Edit a Keyed File... - Page 63 CONFIG.SYS file. For more information about using VeriTalk in client-server installations, please contact your local VeriFone representative. Using the keyed file editor, you can modify the value that follows a key by entering the appropriate value from the core keypad when the record is displayed.
-
Page 64: Edit A Keyed File
Omni 3200 Reference Manual Table 14 Edit a Keyed File Display Action 1. SYSTEM= (Firmware ID) Press [7] to activate the keyed file editor. 2. EDIT CONFIG.SYS To edit records stored in CONFIG.SYS, press any key except [BACKSPACE] and continue with Step 3. - Page 65 Performing System Mode Operations Table 14 Edit a Keyed File Display Action 4. (Key)= (EMPTY) NOTE: If a variable is not stored under a record key you enter in Step 5, the (EMPTY) message is (or) displayed following the equal sign (=). (Key)= (Variable) To enter a variable under an “empty”...
-
Page 66: Initiate Remote Diagnostics
Appendix B. [8]: Initiate Remote Diagnostics Press [8] in System Mode to initiate a remote diagnostics session between the Omni 3200 terminal and a remote host computer over a telephone line. Note: For detailed information about performing remote diagnostics, please refer to the section, “Performing Downloads.”... -
Page 67: Test The Thermal Printer
Performing System Mode Operations [9]: Test the Thermal Printer Press the [9] key in System Mode to initiate a test of the Omni 3200 integrated thermal printer. The test prints out all 95 ASCII characters in the printer’s character set (32 to 126 decimal) in three different character sizes: •... -
Page 68: Initiate Download By Telephone
To change the System Password, press the [ALPHA] key while in System Mode. If the Omni 3200 terminal you are working with is new, it may still use the factory pre-set default password, [1] [ALPHA] [ALPHA] [6] [6] [8] [3] [1]. -
Page 69: Change The System Password
Performing System Mode Operations Note: The procedure described below assumes that the default System Password is still valid for your Omni 3200 terminal. Table 16 Change the System Password Display Action 1. SYSTEM= (Firmware ID) Press [ALPHA] to initiate the password change procedure. -
Page 70: [Backspace]: Initiate Destructive Memory Test
Omni 3200 Reference Manual Table 16 Change the System Password Display Action 6. SYSTEM= (Firmware ID) The System Prompt is displayed when the password modification is complete. The next time you enter System Mode, you will have to enter the new System Password. - Page 71 Press [CLEAR] to return to the System Prompt. 4. SYSTEM= (Firmware ID) Because contents of the Omni 3200 application memory (SRAM) were cleared during the test, you can now proceed to select the appropriate System Mode function and download a new application program.
-
Page 72: [*]: Initiate Upload To Another Terminal
[*]: Initiate Upload to Another Terminal In System Mode, press [*] to upload the application program stored in the memory of one Omni 3200 terminal into the memory of another Omni 3200 terminal. Note: The term “upload” is used to denote the transfer of data between two devices (terminals) of similar size, as opposed to a “download,”... -
Page 73: Performing Downloads
‘upload’. In common usage, both types of data transfer procedures are often called ‘downloads.’ To deploy and support the Omni 3200 terminal, two basic types of data transfer operations are used: •... -
Page 74: What Can Be Downloaded
You can use a download procedure to transfer the following types of software or data elements from one system to another: • An Omni 3200 application program (a full program or, if a full application has already been downloaded, part of a program). •... -
Page 75: General Guidelines For Downloads
• To perform a direct download, the download computer must be running a special download program that is compatible with the Omni 3200 terminal’s firmware. For example, ZONTALK, VeriTalk, or Direct Load (DL.exe). General Guidelines for Downloads... -
Page 76: Comparison Of Download Methods
Omni 3200 Reference Manual • Direct application downloads may be full or partial, and do not replace the operating system on the receiving terminal. In addition, this type of download does not overwrite protected records stored in the terminal’s CONFIG.SYS file. -
Page 77: Comparison Of Download Methods
3200 CONFIG.SYS keyed file records Direct Cable to connect ZONTALK, Completely overwrites Operating download computer VeriTalk, or Direct existing Omni 3200 System serial port to Omni Load (DL.exe) operating system; Download 3200 ‘RS232’ serial running on download Completely overwrites port computer;... - Page 78 Omni 3200 Reference Manual Table 18 Comparison of Download Methods Download Hardware Software Download Options and Type Requirements Requirements Features Modem and dial-up ZONTALK or Can select full or partial Application Download by line connection on VeriTalk running on application program...
- Page 79 SRAM size as the sending terminal Terminal-to- Serial cable with Sending and Completely overwrites the RJ45-type connector receiving terminal existing Omni 3200 Terminal Operating on each end to should have the same operating system; System connect RS232 ports (or similar) boot-...
-
Page 80: Setting Up The Download Environment
Two cables are available from VeriFone to support direct downloads: one for computers with DB25-type serial connectors (PN 26263-XX) and another for DB9-type connectors (PN 26264-XX). Both cables have a 10-pin RJ45-type modular plug on one end for the Omni 3200- side connection. Setting Up the Download Environment... -
Page 81: Direct Download Cable Connection
Performing Downloads To connect the cable link between the sending download computer and the receiving Omni 3200 terminal: 1. Disconnect the power source from both systems. 2. Connect the DIN-type connector on one end of the cable to the COM1 (or COM2) serial I/O port on the download computer. -
Page 82: Cable Connection For Terminal-To-Terminal Uploads
Cable Connection for Terminal-to-Terminal Uploads To upload an application or an operating system version from one Omni 3200 terminal to another, you must use a serial cable to connect the ‘RS232’ ports of the sending and receiving terminal. See Figure 18 below. -
Page 83: Application Downloads
Performing Downloads Application Downloads This section contains step-by-step procedures for performing the following three types of application downloads: • Direct (full or partial) • Telephone (full or partial) • Terminal-to-terminal (full only) Note: Procedures for performing operating system downloads are presented in the section, “Performing Operating System Downloads”... - Page 84 • The download software (for ZONTALK, VeriTalk, or Direct Load) is running on the host computer, and is properly configured to download the correct application or data files to the Omni 3200 terminal. • The serial cable between the download computer and the Omni 3200 terminal is properly connected.
-
Page 85: Performing A Full Direct Application Download
Omni 3200 terminal. Note: The steps described in the ‘Action’ column are performed directly on the Omni 3200 terminal. Notes are also provided in this column to indicate actions you must perform on the download computer side of the data transfer. - Page 86 Omni 3200 Reference Manual Table 19 Full Direct Application Download Procedure Display Action 3. DOWNLOAD DONE Any one of the following four messages indicates that the download was completed successfully: (or) – DOWNLOAD DONE indicates that neither the DOWNLOAD DONE C clock nor the password was reset.
-
Page 87: Performing A Partial Direct Application Download
Omni 3200 terminal. Note: The steps described in the ‘Action’ column are performed directly on the Omni 3200 terminal. Notes are also provided in this column to indicate the actions you must perform on the download computer. - Page 88 Omni 3200 Reference Manual Table 20 Partial Direct Application Download Procedure Display Action 3. PARTIAL DOWNLOAD The terminal displays the PARTIAL DOWNLOAD prompt until the download is initiated from the ---------- download computer. *--------- The terminal displays the progress of the download.
- Page 89 If you continue to have problems with the direct application download procedure, contact your local VeriFone representative for assistance. 5. SYSTEM= (Firmware ID) Press [CLEAR] at the System Prompt to exit System Mode and start the application program.
-
Page 90: Performing An Application Download By Telephone
The procedure described in Table 21 below tells you how to perform a full or partial application download by telephone from a remote host download computer running ZONTALK software to an Omni 3200 terminal. Note: For details about the setup requirements and download procedures for VeriTalk, please refer to the VeriTalk Enterprise System 1.3 User’s Guide, VeriFone Part Number 52077-02. - Page 91 Application program ID (protected record key *ZA). The application ID is usually assigned prior to deployment of an Omni 3200 terminal to an end-user site, and can be modified in CONFIG.SYS using the keyed file editor. The application ID is a maximum 21-character alphanumeric value.
- Page 92 Omni 3200 Reference Manual Note: NOTE: If you do not know the correct values for *ZP, *ZT, and *ZA, contact your local VeriFone representative for information or instructions. • If a baud rate other than 2400 bps is required for the application download by telephone, you can optionally assign a value to the *ZR record stored in CONFIG.SYS.
-
Page 93: Application Download By Telephone (Using Zontalk)
Performing Downloads Table 21 Application Download by Telephone (Using ZONTALK) Display Action 1. SYSTEM= (Firmware ID) Press [0] to initiate a full or partial application download over a telephone line connection. NOTE: If the terminal’s CONFIG.SYS file does not contain values for the *ZP, *ZT, and *ZA variables, you will be prompted to enter this information in the next step. - Page 94 Omni 3200 Reference Manual Table 21 Application Download by Telephone (Using ZONTALK) Display Action 5. DIAL (Phone number) The terminal’s modem starts dialing the number stored in the *ZP record. Several different messages may be (or) displayed at this point to indicate the status of the dial-...
- Page 95 System Prompt and repeat the procedure, starting with Step 1. 2. If attempts to download an application by telephone fail repeatedly, contact your local VeriFone representative for assistance. 8. SYSTEM= (Firmware ID) Press [CLEAR] at the System Prompt to exit System Mode and start the application program.
-
Page 96: Performing A Terminal-To-Terminal Application Upload
If you have one Omni 3200 terminal with a complete and up-to-date application program, you can conveniently transfer this application to one or more Omni 3200 terminals. The procedure is also fast, as the serial data transfer rate between the sending and receiving terminal is 19200 baud. - Page 97 512 KB SRAM. The SRAM size of the receiving terminal must be either 512 KB or 1 MB. To determine the SRAM size of an Omni 3200, enter System Mode and press the [2] key twice. •...
-
Page 98: Terminal-To-Terminal Application Upload
• Verify that the firmware version on both Omni 3200 terminals is identical and that the SRAM size of the receiving terminal is at least the same size as that of the sending terminal. - Page 99 NOTE: If the message DOWNLOAD FAILED is displayed on either terminal, check the cable connection and try again. If the problem persists, contact your local VeriFone representative for assistance. 3b. Receiving terminal: When the upload is successfully received, the...
-
Page 100: Operating System Downloads
1. Disconnect the serial cable from the ‘RS232’ port of the terminal that received the previous application upload. 2. Connect the next Omni 3200 terminal to its power source and insert the plug of the serial cable into its ‘RS232’ port. - Page 101 Performing Downloads Note: See Table 18 to compare the general features of operating system downloads to different types of application system downloads. An operating system download has the following effects on the receiving terminal: • It overwrites the existing TXO operating system version, including the bootloader software that is stored in the flash EPROM.
- Page 102 VeriTalk Enterprise System 1.3 User’s Guide, VeriFone Part Number 52077-02. • For terminal-to-terminal uploads, there is no software requirement, except that the Omni 3200 firmware version on the sending and receiving terminal should be identical (or at least, very similar). Upgrades and Downgrades...
-
Page 103: Performing A Direct Operating System Download
The procedure described in Table 23 below explains how to download a complete version of the TXO operating system from a download computer to an Omni 3200 terminal over a serial cable connection. In Table 23, you will note that the first step of an operating system download procedure is different than for an application download. -
Page 104: Direct Operating System Download
When the terminal beeps, release the [CLEAR] key. The ENTER PASSWORD prompt is displayed. Key in the System Password and press [FUNC/ENTER]. NOTE: If the Omni 3200 you are preparing for the direct operating system download does not have an application program loaded in its memory (DOWNLOAD NEEDED), you must still key in the System Password to continue with this procedure. - Page 105 System Prompt. If you see the prompt DOWNLOAD FAILED, press [CLEAR], check all cable connections and repeat the procedure. NOTE: If you continue to have problems with the operating system download, contact your local VeriFone representative for assistance. Operating System Downloads...
-
Page 106: Performing An Operating System Download By Telephone
ZONTALK or VeriTalk software and an Omni 3200 terminal. Before you can perform this type of download, you must set up ZONTALK or VeriTalk configuration files on the download computer and you must enter a set of ZONTALK or VeriTalk keyed records in the CONFIG.SYS file of the receiving terminal. - Page 107 Performing Downloads Setting Up the Download Computer (ZONTALK) You must set up three files on the download computer before performing a ZONTALK operating system download by telephone: <terminal>.FAM, <terminal>.TMS, and <terminal>.TDD: • <terminal>.FAM — The Family Type file for the download must contain an entry such as: OMNI-OPSYS nn, X6 where ‘nn’...
- Page 108 Omni 3200 Reference Manual Setting Up the Terminal (ZONTALK) To prepare the receiving terminal for an operating system download by telephone, you must store variable data under the following required record keys in the terminal’s CONFIG.SYS file: • *OS = Name of operating system to download •...
- Page 109 1. Set up the Family and Application configuration on the download computer using the VeriTalk user interface. 2. Invoke the Family configuration and check if the Omni 3200 is listed. If not, enter this device and fill in the respective fields.
-
Page 110: Operating System Download By Telephone
When the terminal beeps, release the [CLEAR] key. The ENTER PASSWORD prompt is displayed. Key in the System Password and press [FUNC/ENTER]. NOTE: If the Omni 3200 you are preparing for the operating system download by telephone does not have an application program loaded in its memory (DOWNLOAD NEEDED), you must still key in the System Password to continue with this procedure. - Page 111 Performing Downloads Table 24 Operating System Download by Telephone Display Action 4. SYSTEM= If you select the [1] option in Step 3, the terminal’s bootloader firmware executes and you see the (then) SYSTEM= message, followed by the bootloader’s (Bootloader version ID) version ID (for example, VPZ06AO0).
- Page 112 This message is displayed to let you select a serial port or a modem port for the download. To perform an Omni 3200 download by telephone, press [2] to select the internal modem, DEV_MODEM, as the terminal’s COM port for the data transfer.
- Page 113 Performing Downloads Table 24 Operating System Download by Telephone Display Action 12.ERASING FLASH When you select [2] in Step 8, and when the necessary values have been stored in CONFIG.SYS (Steps 9–11), the ERASING FLASH message appears briefly to indicate that the flash EPROM of the terminal is being erased as the first step of the operating system download.
- Page 114 If you see the prompt DOWNLOAD FAILED, press [CLEAR], check all cable connections and repeat the procedure. NOTE: If you continue to have problems with the download, contact your local VeriFone representative for assistance. 16.SYSTEM= (Firmware ID) At the end of a successful operating system download procedure, the System Prompt is displayed.
-
Page 115: Performing A Terminal-To-Terminal Operating System Upload
Performing a Terminal-to-Terminal Operating System Upload The procedure described in Table 25 below tells you how to transfer a complete TXO operating system version from one Omni 3200 terminal to another. To perform this upload, the sending and receiving terminals are connected at their respective RS232 ports by a serial cable, as described at the beginning of this section. - Page 116 Omni 3200 Reference Manual Table 25 Terminal-to-Terminal Operating System Upload Display Action 2b. Receiving Terminal: When the terminal beeps, release the [CLEAR] key. The ENTER PASSWORD prompt is displayed. Key ENTER PASSWORD in the System Password. 3a. Sending Terminal: Press [1] to prepare the sending terminal to upload the operating system, or [2] to stop the procedure.
- Page 117 Performing Downloads Table 25 Terminal-to-Terminal Operating System Upload Display Action 4a. Sending Terminal: If you select the [1] option in Step 3a, the terminal’s bootloader firmware executes and you see the SYSTEM= SYSTEM= message, followed by the bootloader (then) version ID (for example, VPZ06AO0). (Bootloader version ID) After a few seconds, the OPSYS NEEDED prompt is (then)
- Page 118 System Prompt is SYSTEM= (Firmware ID) displayed. NOTE: The Omni 3200 firmware version ID (the 8-character value in VPQXXYYZ format) that is displayed as part of the System Prompt on the receiving terminal should now be identical to the firmware ID of the sending terminal.
-
Page 119: Remote Diagnostics And Debugging
Remote diagnostics are different than the self-diagnostic tests you can perform on an Omni 3200 in System Mode. Specifically, when you enter System Mode and press [4] to test the display, keypad, integrated printer, and so on. These are local diagnostics, as opposed to remote diagnostics. -
Page 120: Performing Remote Diagnostics
Performing Remote Diagnostics Using remote diagnostics, a technician or programmer working from a diagnostic computer can exchange information with an Omni 3200 terminal. This exchange can be direct, using a serial cable connection, or it can be done over a telephone line using a modem. -
Page 121: Performing Remote Diagnostics Over A Telephone Line
When the remote diagnostic session is completed, the following events occur: 1. The host computer ends the telephone connection, 2. The remote diagnostic procedure running on the Omni 3200 terminal ends, and 3. The terminal exits System Mode and the application is restarted. - Page 122 Before you can perform a remote diagnostics session over a telephone line connection, the following requirements must be met: • The Omni 3200 terminal must be connected to a dial-up telephone line. • The remote diagnostic computer must be set up and ready to receive a telephone request from the Omni 3200 terminal.
-
Page 123: Initiating A Remote Diagnostics Session
Initiating a Remote Diagnostics Session The procedure described in Table 26 below explains how to initiate a remote diagnostics session from an Omni 3200 terminal over a telephone line connection. As in previous procedure descriptions, it starts from the System Prompt (displayed when the terminal is in System Mode). - Page 124 Omni 3200 Reference Manual Table 26 Remote Diagnostics Over a Telephone Line Display Action 3. REMOTE DIAG DIAL The terminal modem starts dialing the remote computer. Each digit of the telephone number appears (Dialing proceeds) to the right of the DIAL prompt as it is dialed.
-
Page 125: Remote Diagnostics Using A Direct Cable Connection
Remote Diagnostics and Debugging Remote Diagnostics Using a Direct Cable Connection Developers of Omni 3200 applications and diagnostic test programs can perform remote diagnostics on-site using a direct cable connection. This method is much faster than telephone diagnostics, with a data transfer rate up to 19200 baud. - Page 126 Omni 3200 terminal. Two cables are available from VeriFone to support direct diagnostics and debugging: one for computers with DB25-type serial connectors (PN 26263-XX) and another for DB9-type connectors (PN 26264- XX).
- Page 127 Remote Diagnostics and Debugging To connect the cable between the computer and the Omni 3200 terminal: 1. Disconnect the power source from both systems. 2. Connect the DIN-type connector on one end of the cable to the COM1 (or COM2) serial I/O port on the download computer.
-
Page 128: Remote Diagnostics Using A Direct Cable Connection
Initiating a Direct Diagnostics Session The procedure described in Table 27 below describes how to set up the required *D record in an Omni 3200 terminal’s CONFIG.SYS file and to initiate a direct remote diagnostics or debugging session from the terminal. The procedure assumes that the required software program is running on the diagnostic or debugging computer, and that the serial cable connection has been established as described above. -
Page 129: Debugging An Application Program
In Direct Diagnostic Mode, a program developer can use debugging software running on a diagnostic computer to monitor an application program running on the Omni 3200 terminal, as well as test and validate the program code. Debugging via modem is not supported. -
Page 130: Debugging Commands
Omni 3200 Reference Manual Debugging Commands The debugging computer can send the following commands to the terminal. These commands are described in detail at the end of this section. Command Terminal Response Get static registers Clear all diagnostic counters Memory dump... -
Page 131: Error Detection Protocols
Remote Diagnostics and Debugging • <count> is the number of bytes that follow the command or response packet. This lets the terminal know how long the packet will be. The count includes the following: Bytes Item Counted Count Command (variable) Number of bytes = length of data in bytes 1st CRC character 2nd CRC character... -
Page 132: Diagnostic Counters
Note: Diagnostic counters noted with an asterisk (*), 50–68, are not supported for the Omni 3200 terminal. Table 28 Diagnostic Counters Counter Description of Event 0 –... - Page 133 Remote Diagnostics and Debugging Table 28 Diagnostic Counters Counter Description of Event Internal modem messages indicating NO CARRIER Internal modem messages indicating ERROR Internal modem messages indicating CONNECT 1200 Internal modem messages indicating NO DIALTONE Internal modem messages indicating BUSY Internal modem messages indicating CONNECT 2400 Internal modem messages indicating NO LINE MDM host packet ACK’d by terminal (protocol level)
-
Page 134: Descriptions Of Diagnostic And Debugging Commands
Omni 3200 Reference Manual Table 28 Diagnostic Counters Counter Description of Event 63 * Transmit timeouts on LAN port 64 * Runt packages received on LAN 65–68 * Reserved for future use Descriptions of Diagnostic and Debugging Commands The commands for remote diagnostics and debugging are listed in alphabetical order below. -
Page 135: C - Clear All Diagnostic Counters
Remote Diagnostics and Debugging C — Clear All Diagnostic Counters The C command clears all of the diagnostic counters in the terminal. The terminal sends the response packet to the diagnostic computer to indicate that the command was received and executed. Command Packet Received by Terminal: <FFh>... -
Page 136: F - Get Current Source File Name
Omni 3200 Reference Manual Minus sign (–) for negative offset or plus sign (+) for positive offset aaaaaa = Unassigned memory location offset Number of bytes to get (in hexadecimal format) Command Packet Received by Terminal: <FFh> <55h> <count> D <rsaaaaaann parameter> <CRC1>... -
Page 137: G - Get Diagnostics Counters
Remote Diagnostics and Debugging G — Get Diagnostics Counters The G command reads 16 diagnostics counters beginning at the counter number specified. The 16 counts returned are each two bytes, in binary format. Command Packet Received by Terminal: <FFh> <55h> <count> G <counter number> <CRC1> <CRC2> Response Packet Sent by Terminal: <FFh>... -
Page 138: L - Get Line Number In Source File (Debugger Only)
Omni 3200 Reference Manual L — Get Line Number in the Current Source File (Debugger Only) The L command asks the terminal to indicate the source code line number that the program is currently running. The debugging computer can use this line number to locate and display the source code for that line stored in the computer's disk drive. -
Page 139: P - Read From Device
Remote Diagnostics and Debugging Command Packet Received by Terminal: <FFh> <55h> <count> N <CRC1> <CRC2> Response Packet Sent by Terminal: <FFh> <55h> <count> N <CRC1> <CRC2> P — Read from Device The P command reads data from the device specified in the device parameter. -
Page 140: R - Resume Em Execution (Debugger Only)
Omni 3200 Reference Manual Command Packet Received by Terminal: <FFh> <55h> <count> P <device> <CRC1> <CRC2> Response Packet Sent by Terminal: <FFh> <55h> <count> P <device> <data> <CRC1> <CRC2> R — Resume EM Execution (Debugger Only) The R command resumes executing the EM code that was blocked by the S command or put in the step mode by the [space] command. -
Page 141: T - Configure Diagnostics Parameters (Debugger Only)
Remote Diagnostics and Debugging Command Packet Received by Terminal: <FFh> <55h> <count> S <CRC1> <CRC2> Response Packet Sent by Terminal: <FFh> <55h> <count> S <CRC1> <CRC2> T — Configure Diagnostics Parameters (Debugger Only) The T command sets the diagnostics status byte, which is also reported as part of the L and I command response packet. -
Page 142: W - Write To Device
Omni 3200 Reference Manual W — Write to Device The W command writes data to the device specified in the command packet: • The <device> parameter consists of a two-byte code identifying the device to write to. Codes for the various devices available are listed below. -
Page 143: Terminate Diagnostics And Restart Terminal
Remote Diagnostics and Debugging X — Terminate Diagnostics and Restart Terminal The X command stops executing the application program and restarts the terminal. If the terminal is running remote diagnostics in the System Mode, the command will make the terminal exit the System Mode and restart itself. - Page 144 Omni 3200 Reference Manual Descriptions of Diagnostic and Debugging Commands...
-
Page 145: Troubleshooting And Service
System Messages Appendix A lists all of the system messages, including informational and error messages, and prompts, that may appear on the Omni 3200 display panel. For an explanation of a message indicating that some terminal malfunction has occurred, please refer to the descriptions in Appendix A. -
Page 146: Troubleshooting Scenarios
3. Replace the power pack that came with your terminal with a power pack from another Omni 3200 terminal. If this solves the problem, contact your local VeriFone representative. You may need to order a replacement power pack. -
Page 147: Printer Does Not Work
Printer Does Not Work 1. Check all terminal power connections. The printer receives its power directly from the Omni 3200 terminal. The LED indicator light in the upper left corner of the terminal should be on. 2. If the LED indicator is blinking off and on, the printer is out of paper. -
Page 148: Pinpad Does Not Work
2. The cable connecting the optional device to the Omni 3200 serial port may be defective. Try using a different serial cable. 3. If the problem persists, contact your local VeriFone representative for assistance. -
Page 149: Keypad Does Not Respond
If they are not experiencing difficulties with their line, contact the telephone company to have your line checked. 3. If the telephone line works, contact your local VeriFone representative for assistance. The terminal may be defective. Keypad Does Not Respond 1. -
Page 150: Maintaining The Omni 3200
Omni 3200 Reference Manual Maintaining the Omni 3200 Cleaning the Terminal To remove dirt from your terminal, use a clean cloth dampened with water and mild soap. To remove stubborn stains, use alcohol or an alcohol-based cleaner. Caution: Never use thinner, trichloroethylene, or ketone-based solvents to clean the terminal because they may cause plastic parts to deteriorate. -
Page 151: Returning A Terminal For Repair Or Replacement
VeriFone may invalidate our warranty. Before returning a terminal to VeriFone, you must first obtain a Merchandise Return Authorization (MRA) number. The following procedure describes how to return one or more terminals for repair or replacement (for U.S. - Page 152 Your shipping address. This is where the repaired or replacement unit(s) will be returned. 2. From inside the U.S., call the VeriFone Service Center at 800-834-9133 toll-free, or at 502-425-1332. Note: If you are located outside the U.S., your local VeriFone representative will assist you with this return or replacement procedure.
-
Page 153: Calling The Verifone Customer Support Hot Line
Calling the VeriFone Customer Support Hot Line If you cannot resolve a problem you are experiencing with your Omni 3200 terminal using these troubleshooting tips, or if a local VeriFone representative is not readily available to assist you, call the following numbers for assistance: •... -
Page 154: Specifications
Omni 3200 Reference Manual Specifications Power • Terminal power input requirements: 22 V AC at 2 A (U.S.) 25.5 V DC at 1.57 A (International) • Power pack input requirements: AC power pack: 120 V AC at 60 Hz (U.S.) DC power pack: 100–250 V AC at 50–60 Hz (International) -
Page 155: Terminal Accessories
Terminal Accessories How to Order Ordering VeriFone accessories and consumable supplies is now easier than ever. The VeriFone Online Store, on the Internet at the address http://www.store.verifone.com, provides easy access and secure ordering for products and accessories, as well as up-to-the-minute information about other VeriFone countertop systems. -
Page 156: Power Packs
Omni 3200 Reference Manual Power Packs 07096-01G AC power pack (U.S. version) (120 V AC to 22 V AC) 05790-XX DC power pack (“all open” version) (120 V AC to 25.5 V DC) Thermal Printer Paper CRM0039 High-grade thermal printer paper, 58-mm (2.25-inch) width;... -
Page 157: Appendix A. System Messages
Telco test using the local System Diagnostics function in System Mode. The string of O’s indicates two conditions: 1) the Telco or Telset connection of the Omni 3200 terminal has been established, and 2) the dual-tone multiple-frequency (DTMF) function of the... - Page 158 Omni 3200 Reference Manual This prompt appears when you initiate a remote diagnostics session, but the terminal’s CONFIG.SYS file does not contain the remote computer’s dial-up telephone number. At the prompt, key in the complete number of the remote diagnostic host and press [FUNC/ ENTER] to store the variable in the *T record.
-
Page 159: Change Password
This error message is displayed during the card reader test if the terminal detects a bad LRC (Longitudinal Redundancy Check) in the magnetic stripe card data. If this occurs, try the test again with a different card. If the message persists, contact your local VeriFone representative for assistance. BAD PARITY This error message appears during the magnetic stripe card reader test if the terminal detects a parity error. - Page 160 ID of the application you are trying to download. Then, try again. If you continue to have problems with the download, contract your local VeriFone representative for assistance. DOWNLOAD NEEDED This message appears when a terminal does not have an application program stored in its memory.
- Page 161 --EXEC ERROR nn This error message indicates that an unexpected application program error occurred. Download the application program again. If the error message persists, contact your local VeriFone representative for assistance. FATAL MEMORY ERR This error message indicates an error occurred in the terminal’s volatile RAM.
- Page 162 FILE SYS CORRUPT This error message indicates that the terminal’s file system has been corrupted. Contact your local VeriFone representative for assistance. Abbreviation for Friday. This appears as part of the date and time prompt when you use the date/time function in System Mode.
- Page 163 Appendix A. System Messages MEMORY TEST MEM WILL BE LOST PRESS FUNC IF OK These messages are displayed in sequence when you initiate a Destructive Memory Test in System Mode by pressing the [BACKSPACE] key. Press [FUNC/ENTER] if you want to proceed with the test.
- Page 164 STX (Start of Text) character in the data on a magnetic card. If this occurs, try the test again with a different card. If the message persists, contact your local VeriFone representative for assistance. NO SUCH FILE This message appears when you enter the name of a keyed file in response to the EDIT prompt, and the file does not exist.
-
Page 165: Partial Download
Appendix A. System Messages PARTIAL DOWNLOAD To select a partial application download, you press [*] while the message UNIT RECEIVE is being displayed. The PARTIAL DOWNLOAD message indicates that the terminal is now ready to receive a partial direct application download. PARTIAL OR FULL? This prompt is displayed when you request an application download from a remote computer. - Page 166 The terminal is requesting that you enter the System Password as a prerequisite to entering System Mode. Key in the password and then press [FUNC/ENTER]. The default password for the Omni 3200 terminal, which is pre-set at the factory, is [1] [ALPHA] [ALPHA] [6] [6] [8] [3] [1].
- Page 167 This message is displayed when you press the [2] key in System Mode. The terminal’s unit ID consists of two components: a 2-digit manufacturer ID (‘12’ = VeriFone) and a unique 8-digit terminal ID. If the terminal ID is a string of zeros, the terminal does not have a permanent ID (PTID), which can optionally be assigned at the factory.
- Page 168 Omni 3200 Reference Manual ZONTALK DOWNLOAD This message appears when you press [0] in System Mode. The ZONTALK DOWNLOAD message indicates that the terminal is ready to receive a download from a remote computer running ZONTALK 2000 (or VeriTalk Enterprise System 1.3) software. After displaying this prompt for several seconds, the terminal will ask if you want to execute a partial or full download.
-
Page 169: Appendix B. Ascii Table
Appendix B. ASCII Table An ASCII table for the Omni 3200 display is presented as Figure B-1 below. The table is formatted for quick reference, as follows: • The letters and numbers in the column to the left of the table and... - Page 170 Omni 3200 Reference Manual Figure B-1 ASCII Table for the Omni 3200 Display...
-
Page 171: Appendix C. Glossary
Appendix C. Glossary ABA. Abbreviation for ‘American Bankers Association’. The Omni 3200 card reader can read ABA information stored on track 2 of a card’s magnetic stripe. Access Code. A code number dialed to gain access to a telephone line, such as dialing the number ‘9’ to reach an outside line. ACK. - Page 172 Bar Code. Optical binary code imprinted on merchandise in retail stores. To support specific applications, an optional bar code reader can be attached to the Omni 3200 to read and process bar codes. Bar Code Reader. A pencil- or wand-shaped optical scanner used to read bar codes.
- Page 173 Byte. A term developed to indicate a measurable number of consecutive binary digits that are usually operated on as a unit. For the Omni 3200, a byte consists of eight bits. See also ‘Bit’. Calendar/Clock Chip. A microchip inside the Omni 3200 terminal which keeps track of the current date and time.
- Page 174 Omni 3200 Reference Manual CONFIG.SYS File. A special keyed file that is stored in terminal memory and which contains system and application configuration parameters. Each record in the CONFIG.SYS file is identified by an alphanumeric key. You can modify CONFIG.SYS records using the keyed file editor.
- Page 175 Appendix C. Glossary Debugging. The process of detecting and solving errors (bugs) in a program. The Omni 3200 terminal has built-in debugging support that allows it to receive and execute debugging commands from a computer connected to its serial port.
- Page 176 Omni 3200 Reference Manual Display. The small screen on the Omni 3200 terminal. Besides showing fully-formed numerals, letters, punctuation symbols, and graphics, the display also shows information entered from the core keypad, as well as system prompts and messages. Download. To send programs or data from a central or controlling computer to a remote terminal.
- Page 177 Point-of-Sale (POS) terminal. Host computers are also used to process transactions that originate from a distributed network of POS terminals. IATA. International Air Transport Association. The Omni 3200’s card reader can read IATA information stored on Track 1 of a credit card’s magnetic stripe.
- Page 178 Also, to interact. Keyed File Character Set. A limited set of 95 ASCII characters, from 00h to 5Fh (or 0 to 95 decimal), that is used by the Omni 3200 keyed file editor. Although an application program can download all 95 characters in this set, you can only enter 50 of these characters from the terminal keypad: 0–9, A–Z, and 14 special characters.
- Page 179 (modulation), and can convert incoming analog signals back into digital signals (demodulation). The Omni 3200 internal modem lets the terminal communicate with a host computer over a dial-up telephone line. NAK. Short for ‘negative acknowledgment’. In data...
- Page 180 Non-Volatile Memory. A memory or storage medium that retains data in the absence of power so that the data is available upon restoration of power. For the Omni 3200, application code files, data files, and the communications buffer pool are stored in non-volatile memory, or SRAM.
- Page 181 Appendix C. Glossary Peripheral Device. In a computer system, any equipment that provides the processing unit with outside communication. Typical peripheral devices for a POS terminal include PINpad, bar code wands, and check readers. PIN. Abbreviation for ‘personal identification number’. A 4-digit to 16-digit confidential code used to identify a person as the proper user of a credit or debit card.
- Page 182 PTID. Acronym for ‘permanent terminal ID’. Part of the unit ID of a VeriFone terminal which is permanently set at the factory. The unit ID consists of two components: a 2-digit manufacturer ID (‘12’ for VeriFone) and a unique 8-digit terminal ID.
- Page 183 For the Omni 3200, text that does not fit entirely within the 21-character wide display area can be scrolled to the left or right using the [#] and [*] keys.
- Page 184 Swipe. The action of sliding a magnetic stripe card through a terminal card reader. The Omni 3200 card reader has a bidirectional swipe direction. The user must hold the card so that the magnetic stripe is down and facing to the right.
- Page 185 Terminal. Any device capable of sending and receiving data over a data communications channel, such as a telephone line or a RS-232 cable. Some terminals, such as the Omni 3200, can print receipts and display information and graphics on a screen.
- Page 186 Example: A customer provides a magnetic-stripe card to a merchant. The account number on the card is read via a VeriFone terminal. The terminal exchanges data with a host computer, which provides verification of the account’s validity.
- Page 187 Appendix C. Glossary Volatile Memory. A type of memory whose contents are destroyed if the power supply to the memory is interrupted. When volatile memories are used for crucial applications, they can be backed up by batteries. Compare with ‘Non-Volatile Memory’. C-17...
- Page 188 Omni 3200 Reference Manual C-18...
-
Page 189: Index
Index , 139 Accessories , 139 Cables for optional peripherals , 140 Documentation , 139 Download cables , 139 How to order , 140 Paper roll spindle , 140 Power packs , 139 Telephone line cord , 140 Thermal printer paper , 22 [ALPHA] key Application downloads... - Page 190 OMNI 3200 Reference Manual , 22 [BACKSPACE] key Bar code reader , 14 Connecting , 42 Testing , 133 Troubleshooting Cables , 110 Direct cable connection for diagnostics or debugging , 109 Direct cable connection, for remote diagnostics , 64...
- Page 191 Debugger commands , 118 B - Get Static Registers , 119 C - Clear All Diagnostic Counters , 119 D - Memory Dump , 120 F - Get Current Source File Name , 121 G - Get Diagnostics Counters , 121 I - Get Current EM Instructions , 122 L - Get Line Number in the Current Source File...
- Page 192 OMNI 3200 Reference Manual Diagnostics , 109 *D variable in CONFIG.SYS , 110 Cable connection for direct remote diagnostics , 118 Command descriptions , 104 Commands , 116 Counters , 114 Data packet exchange during remote diagnostics , 115 Error detection protocols...
- Page 193 Downloads , 67 Application downloads, types , 58 Available download methods , 58 By telephone, definition , 64 Cable connection for direct downloads , 68 Checklist for a direct download , 60 Comparison of download methods , 67 Direct application download, preparing for , 58 Direct downloads , 87...
- Page 194 , 25 [FUNC/ENTER] , 19 Using terminal keys , C-1 Glossary , 137 Hot line, for VeriFone customer support Installation , 14 Connecting a bar code reader , 12 Connecting a CR 600 Check Reader , 11 Connecting a PINpad...
- Page 195 Key functions, in System Mode , 56 [#], Receive direct download , 56 [*], Initiate upload to another terminal , 52 [0], Initiate download by telephone , 37 [1], Display EPROM information , 38 [2], Display Unit ID and SRAM size , 39 [3], Initiate display test , 40...
- Page 196 OMNI 3200 Reference Manual , 84 Operating system downloads , 92 Appending an application download to the procedure , 90 By telephone , 85 Hardware and software requirements , 91, 93 Preparing for a download by telephone , 92 Preparing for an operating system download by telephone...
- Page 197 Printer , 134 Cleaning , 131 Clearing a paper jam , 16, 17 Installing a paper roll , 140 Paper roll spindle , 51 Testing , 131 Troubleshooting Printer paper , 140 30-roll bulk package , 140 Ordering , 140 Single rolls Prompts Descriptions...
- Page 198 Select a Location for the Terminal , 132 Serial port, troubleshooting , 129 Service , 137 Calling the VeriFone Customer Support Hot Line , 135 Returning a terminal for repair or replacement Smart card reader/writer , 13 Connecting , 138...
- Page 199 , 43 Test telephone line connection , 51 Test the thermal printer , 28 System Password Default password , 52 Procedure for changing , 30 System Prompt, definition Telephone line connection , 43 Testing , 130 Troubleshooting Telephone line connections Direct Pass-through , 139...
- Page 200 OMNI 3200 Reference Manual , 28 Verifying status Terminal-to-terminal uploads , 66 Cable connection , 58 Definition , 81 Hardware and software requirements , 56 Initiating an upload , 80 Introduction , 99 Operating system upload , 84 Performing multiple uploads in a single session...
- Page 201 , 38 Unit ID, displaying , 86 Upgrades, operating system Uploads, terminal-to-terminal , 66 Cable connection , 56 Initiating an upload , 99 Operating system upload , 84 Performing multiple uploads , 81 Requirements for application uploads , 80 Special full application upload , 80 Special, full application upload , 82...