Sign In
Upload
Manuals
Brands
Barco Manuals
Projector
HDF W series
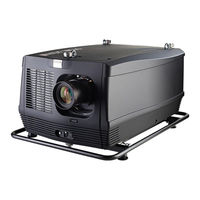
Barco HDF W series Manuals
Manuals and User Guides for Barco HDF W series. We have
6
Barco HDF W series manuals available for free PDF download: User And Installation Manual, Service Manual, Use And Installation Manual, Installation Manual, Safety Manual, Quick Start Manual
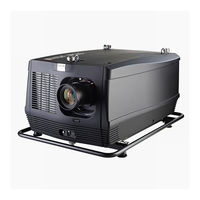
Barco HDF W series User And Installation Manual (453 pages)
HDF series
Brand:
Barco
| Category:
Projector
| Size: 52.86 MB
Table of Contents
Table of Contents
5
1 Safety
11
General Considerations
12
Important Safety Instructions
13
Light Beam Hazard Distance (HD)
17
HD in Function of the Lens Throw Ratio (TR)
19
Important Warnings Concerning HDF Series Flight Cases
20
2 Configurations, Requirements and Restrictions
21
Installation Requirements
22
Unpacking the Projector
23
HDF Series Flight Case
25
Projector Configurations
26
Positioning the Projector
27
Projector Air Inlets and Outlets
29
Free Download of Projector Toolset
30
Installation Process Overview
31
3 Physical Installation
33
Remote Control Unit (RCU)
34
RCU Battery Installation
35
RCU Rugged Case Installation
36
RCU XLR Adaptor Installation
37
Using the XLR Adaptor of the RCU
38
RCU Usage Possibilities
39
Lenses
40
Available Lenses
41
Lens Selection
42
Lens Installation
43
Lens Removal
45
Lens Safety Cable
46
Lens Shift, Zoom & Focus
49
Scheimpflug Adjustment
50
Power Connection
55
Suspension of the HDF Series Projector with Rigging Clamps
56
4 Input & Communication
59
Introduction
60
Input Source Connections
61
Communication Connections
64
Usb Port
66
Ethernet Port
66
Status Lights
66
5 Getting Started
67
RCU & Local Keypad
68
Terminology Overview
69
Power on Projector
71
Software Overview
72
Switching to Standby
74
Power off Projector
75
Status Leds
76
Using the RCU
77
Projector Address
78
Displaying and Programming Addresses into the RCU
79
Controlling the Projector
80
Source Selection
81
Alignment of a Table Mount HDF Series Projector
82
Alignment of a Ceiling Mount HDF Series Projector
83
6 Quick Set up Adjustment
85
Text Boxes on or off
86
Quick Lens Adjustment Via LENS Key
87
Direct Lens Adjustment (RCU)
89
Quick Picture in Picture
90
Quick Language Selection
91
7 Start up of the Adjustment Mode
93
About the Adjustment Mode
94
About the Use of the Remote Control and the Local Keypad
95
Start up the Adjustment Mode
96
Navigation and Adjustments
97
Menu Memory
98
Shortcut Keys to the Menus
99
Test Patterns in Adjustment Mode
100
Help Information in Adjustment Mode
101
8 Input
103
Input Menu Overview
104
Input Selection
106
Advanced Settings
107
About Input Setup
108
Input Configuration
109
DVI - RGB Input
110
SDI Input
111
Cable Input
113
HDMI - Displayport Input (3D Input Module)
114
Input Locking
115
Minimum Delay
117
Native Resolution
118
No Signal
120
Background Color
121
Background Logo
122
Shutdown Settings
123
Shutdown Retarding Time
124
Auto Dimming
125
Edid
126
Configure an Input
127
Create Custom EDID File
128
Delete a Custom EDID File
130
Delete All Custom EDID File
131
Input
132
About 3D Modes
133
Supported Formats
134
Activate 3D
136
Auto Detection
137
Input Type Selection
139
Second Input
140
L-R Synchronisation, Field Dominance
141
L-R Synchronisation, Invert 3D Sync out
142
9 Image
145
Image Menu Overview
146
Start up the Image Adjustments
148
Image Settings
149
Contrast
150
Brightness
151
Saturation
152
Phase
153
Color Temperature (Fixed Values)
155
Color Temperature (Custom Values)
157
Input Balance
158
Introduction to Input Balance
159
Adjusting the Input Balance
161
Image Settings, Defaults
164
Aspect Ratio
165
Timings
167
Source Timings
168
Advanced Timings, Clamp Delay - Clamp Width
169
Image File Services
171
Files and File Manipulations
172
Manual Load File
173
File Load Filter
174
Delete a File
175
Delete All Custom Files
177
Rename Custom Files
178
Copy Custom File
180
Image File Service Options, Load File
182
Image File Service Options, Auto Picture Alignment
183
Save Custom Settings
184
Splash Image
185
10 Layout
187
Layout Menu Overview
188
Introduction
189
Main Window
190
Main Window Source Selection
191
Main Window Size
192
Main Window Position
194
Pip Window
196
Introduction to PIP
197
Picture in Picture Activation
198
Pip Window, Source Selection
199
Pip Window, Size
200
Pip Window, Position
202
Layout File Services
203
Load Layout File
204
Rename Layout File
205
Delete Layout File
206
Delete All Layout Files
207
Copy or Save as Layout File
208
Lens Behavior
209
11 Lamp
211
Lamp Menu Overview
212
Lamp Power Mode
213
Lamp Power
214
Auto Dimming When on Pause
215
Auto Dimming When no Signal
216
Auto Dimming When Over-Temperature
217
CLO Mode (Constant Light Output Mode)
218
CLO Targets
220
LPS Power
221
Lamp Identification
222
Z-Axis Adjustment
223
12 Alignment
225
Alignment Menu Overview
226
Orientation
228
Lens Adjustment, Zoom - Focus
229
Lens Adjustment, Shift
230
Lens Adjustment, MID Position
231
Calbrate Lens at Startup
232
Calibrate Lens
233
Warping
234
About Warping
235
Warp Activation - Deactivation
236
Start up Manual Adjustment
237
Warp Adjustment Principle
239
Setting the Warping Level
241
Warp Adaptation Steps
242
Making Selections and Adjustments
243
Keystone Correction Workflow
245
Linearity Adjustment, Workflow
246
Selecting and Changing the Position of a SpecifiC Point
247
Scaling the Image
248
Shifting the Image
249
Rotating the Image
250
Hardware Reset
252
OSD Opacity
253
Warp File Service, Load File
255
Warp File Service, Save to File
256
Warp File Service, Save as
257
Warp File Service, Rename File
258
Warp File Service, Delete File
259
Warp File Service, Delete All Files
260
Warp Board Reset
261
Warp Board and Values Reset
262
Alternative Side Keystone
263
Blanking Adjustment
264
Contrast-Intensity
266
Gamma
267
Internal Patterns
268
Color Space
269
Scenergix
271
Introduction
272
Preparations
273
Scenergix Activation
274
Scenergix Pattern
275
Scenergix Adjustment Lines
276
Data Doubling
277
White Level Adjustment (Blending Area)
279
Black Level Adjustment
282
Scenergix Reset
286
Glasses
287
Dark Time Adjustment
288
Left-Right Output Reference Delay
291
Sync Loop through
293
Upper Limit for Triple or Double Flash
294
High End Systems Mirror
295
13 Projector Control
297
Projector Control Menu Overview
298
Individual Projector Address
299
Projector Common Address
300
Serial Communication
301
Baud Rate Setup
302
Interface Standard
303
Network
304
Introduction to a Network Connection
305
Wired DHCP Set up
306
Wired IP Address Set up
307
Wired Subnet Mask Set up
309
Wired Default Gateway Set up
311
Wireless Network Activation
313
Wireless Access Points Selection and Setup
315
Wireless DHCP Set up
317
Wireless Fixed IP Address Set up
318
Wireless Subnet Mask Set up
320
Wireless Default Gateway Set up
322
IR Control Switching
324
DMX
325
DMX Address
326
DMX Universe
328
DMX Mode
330
Art-Net DMX
331
Front XLR Output Voltage Control
332
Monitor
334
DMX Shutdown
335
DMX Shutdown Retarding Time
336
Buttons
337
Standby Button
338
Shortcut Keys
339
Menu Position
340
Local LCD
341
Language Selection
342
Scheduler
343
Add a Task to the List
344
Lamp Status
346
Edit a Task
347
Delete Task
349
Scheduler, on or off
350
GSM Configuration, Activation
351
GSM Configuration, Subscription
353
FLEX, Light Output Configuration
355
About FLEX, Light Output Control
356
Light Output Configuration Via OSD Menu
357
Configure Projector's Light Output Via SMS
358
SMS Services
359
Request for Notifications
360
Request for Information
361
Lamp Ignition Admission
362
Advertisement
Barco HDF W series Use And Installation Manual (319 pages)
Brand:
Barco
| Category:
Projector
| Size: 51.94 MB
Table of Contents
Table of Contents
5
1 Safety
11
General Considerations
11
Important Safety Instructions
12
Light Beam Hazard Distance (HD)
14
HD in Function of the Lens Throw Ratio (TR)
15
Important Warnings Concerning HDF Series Flight Cases
16
2 Configurations, Requirements and Restrictions
17
Installation Requirements
17
Unpacking the Projector
18
HDF Series Flight Case
19
Projector Configurations
20
Positioning the Projector
21
Projector Air Inlets and Outlets
23
Free Download of Projector Toolset
23
Installation Process Overview
24
3 Physical Installation
25
Remote Control Unit (RCU)
25
RCU Battery Installation
25
RCU Rugged Case Installation
26
RCU XLR Adaptor Installation
27
Using the XLR Adaptor of the RCU
27
RCU Usage Possibilities
28
Lenses
29
Available Lenses
29
Lens Selection
30
Lens Installation
30
Lens Removal
32
Lens Safety Cable
32
Lens Shift, Zoom & Focus
34
Scheimpflug Adjustment
35
How to Adjust
36
Power Connection
39
Suspension of the HDF Series Projector with Rigging Clamps
40
4 Input & Communication
45
Introduction
45
Input Source Connections
46
Communication Connections
48
Usb Port
50
Ethernet Port
50
Status Lights
50
5 Getting Started
53
RCU & Local Keypad
53
Terminology Overview
53
Power on Projector
55
Software Overview
56
Switching to Standby
58
Power off Projector
58
Status Leds
58
Using the RCU
59
Projector Address
60
Displaying and Programming Addresses into the RCU
60
Controlling the Projector
60
Source Selection
61
Alignment of a Table Mount HDF Series Projector
62
Alignment of a Ceiling Mount HDF Series Projector
62
6 Quick Set up Adjustment
65
Text Boxes on or off
65
Quick Lens Adjustment Via LENS Key
65
Direct Lens Adjustment (RCU)
67
Quick Picture in Picture
67
Quick Language Selection
68
7 Start up of the Adjustment Mode
71
About the Adjustment Mode
71
About the Use of the Remote Control and the Local Keypad
71
Start up the Adjustment Mode
71
Navigation and Adjustments
72
Menu Memory
73
Shortcut Keys to the Menus
73
Test Patterns in Adjustment Mode
73
Help Information in Adjustment Mode
74
8 Input
75
Input Menu Overview
75
Input Selection
76
Advanced Settings
77
About Input Setup
77
Input Configuration
77
DVI - RGB Input
78
SDI Input
78
Cable Input
80
HDMI - Displayport Input (3D Input Module)
80
Input Locking
80
Minimum Delay
82
Native Resolution
83
No Signal
84
Background Color
84
Background Logo
85
Shutdown Settings
85
Shutdown Retarding Time
86
Auto Dimming
87
Edid
88
Configure an Input
88
Create Custom EDID File
89
Delete a Custom EDID File
91
Delete All Custom EDID File
92
Input
92
About 3D Modes
92
Supported Formats
94
Activate 3D
95
Auto Detection
96
Input Type Selection
97
Second Input
98
L-R Synchronisation, Field Dominance
99
L-R Synchronisation, Invert 3D Sync out
100
9 Image
103
Image Menu Overview
103
Start up the Image Adjustments
104
Image Settings
104
Contrast
104
Brightness
105
Saturation
106
Phase
107
Color Temperature (Fixed Values)
109
Color Temperature (Custom Values)
110
Input Balance
111
Introduction to Input Balance
111
Adjusting the Input Balance
112
Image Settings, Defaults
115
Aspect Ratio
116
Timings
118
Source Timings
118
Advanced Timings, Clamp Delay - Clamp Width
119
Image File Services
121
Files and File Manipulations
121
Manual Load File
121
File Load Filter
122
Delete a File
122
Delete All Custom Files
124
Rename Custom Files
125
Copy Custom File
126
Image File Service Options, Load File
127
Image File Service Options, Auto Picture Alignment
128
Save Custom Settings
129
Splash Image
129
10 Layout
133
Layout Menu Overview
133
Introduction
133
Main Window
133
Main Window Source Selection
134
Main Window Size
134
Main Window Position
136
Pip Window
137
Introduction to PIP
138
Picture in Picture Activation
138
Pip Window, Source Selection
139
Pip Window, Size
140
Pip Window, Position
141
Layout File Services
142
Load Layout File
143
Rename Layout File
143
Delete Layout File
144
Delete All Layout Files
145
Copy or Save as Layout File
146
Lens Behavior
147
11 Lamp
149
Lamp Menu Overview
149
Lamp Power Mode
149
Lamp Power
150
Auto Dimming When on Pause
150
Auto Dimming When no Signal
151
Auto Dimming When Over-Temperature
152
CLO Mode (Constant Light Output Mode)
152
CLO Targets
154
LPS Power
154
Lamp Identification
155
Z-Axis Adjustment
155
12 Alignment
157
Orientation
157
Lens Adjustment, Zoom - Focus
158
Lens Adjustment, Shift
159
Lens Adjustment, MID Position
160
Calbrate Lens at Startup
160
Calibrate Lens
161
Warping
162
About Warping
163
Warp Activation - Deactivation
163
Start up Manual Adjustment
164
Warp Adjustment Principle
165
Setting the Warping Level
168
Warp Adaptation Steps
168
Making Selections and Adjustments
169
Keystone Correction Workflow
170
Linearity Adjustment, Workflow
171
Selecting and Changing the Position of a SpecifiC Point
172
Scaling the Image
172
Shifting the Image
173
Rotating the Image
173
Hardware Reset
175
OSD Opacity
175
Warp File Service, Load File
176
Warp File Service, Save to File
177
Warp File Service, Save as
178
Warp File Service, Rename File
179
Warp File Service, Delete File
180
Warp File Service, Delete All Files
181
Warp Board Reset
182
Warp Board and Values Reset
183
Alternative Side Keystone
184
Blanking Adjustment
185
Gamma
187
Internal Patterns
187
Color Space
188
What Can be Adjusted
189
Scenergix
190
Introduction
190
Preparations
191
Scenergix Activation
191
Scenergix Pattern
192
Scenergix Adjustment Lines
193
Data Doubling
194
White Level Adjustment (Blending Area)
195
Black Level Adjustment
198
Scenergix Reset
201
Glasses
202
Dark Time Adjustment
202
Left-Right Output Reference Delay
205
Sync Loop through
206
Upper Limit for Triple or Double Flash
207
High End Systems Mirror
208
13 Projector Control
211
Projector Control Menu Overview
211
Individual Projector Address
212
Projector Common Address
213
Serial Communication
214
Baud Rate Setup
214
Interface Standard
214
Network
215
Introduction to a Network Connection
215
Wired DHCP Set up
216
Wired IP Address Set up
217
Wired Subnet Mask Set up
218
Wired Default Gateway Set up
220
Wireless Network Activation
221
Wireless Access Points Selection and Setup
222
Wireless DHCP Set up
224
Wireless Fixed IP Address Set up
225
Wireless Subnet Mask Set up
226
Wireless Default Gateway Set up
228
IR Control Switching
229
DMX
230
DMX Address
230
DMX Universe
232
DMX Mode
233
Art-Net DMX
234
Front XLR Output Voltage Control
235
Monitor
237
DMX Shutdown
238
DMX Shutdown Retarding Time
238
Buttons
239
Standby Button
239
Shortcut Keys
240
Menu Position
241
Local LCD
242
Language Selection
243
Scheduler
244
Add a Task to the List
244
Edit a Task
247
Delete Task
249
Scheduler, on or off
250
GSM Configuration, Activation
251
GSM Configuration, Subscription
253
FLEX, Light Output Configuration
255
About FLEX, Light Output Control
255
Light Output Configuration Via OSD Menu
256
Configure Projector's Light Output Via SMS
257
SMS Services
257
Request for Notifications
257
Request for Information
257
Lamp Ignition Admission
258
Barco HDF W series Installation Manual (267 pages)
HDF W series
Brand:
Barco
| Category:
Projector
| Size: 47.44 MB
Table of Contents
Table of Contents
5
1 Safety
9
General Considerations
9
Important Safety Instructions
10
Important Warnings Concerning HDF W Series Flight Cases
12
2 Configurations, Requirements and Restrictions
15
Installation Requirements
15
Unpacking the Projector
16
HDF W Series Flight Case
17
Rear Projection
18
Projector Configurations
18
Positioning the Projector
19
Projector Air Inlets and Outlets
21
Free Download of Projector Toolset
21
Installation Process Overview
22
3 Physical Installation
23
Remote Control Unit (RCU)
23
RCU Battery Installation
23
RCU Rugged Case Installation
24
RCU XLR Adaptor Installation
25
Using the XLR Adaptor of the RCU
25
RCU Usage Possibilities
26
Lenses
27
Available Lenses
27
Lens Selection
28
Lens Installation
28
Lens Removal
29
Lens Safety Cable (Optional)
30
Lens Shift, Zoom & Focus
32
Scheimpflug Adjustment
33
How to Adjust
34
Power Connection
37
Suspension of the HDF W Series Projector with Rigging Clamps
38
4 Input & Communication
43
Introduction
43
Input Source Connections
44
Communication Connections
45
Usb Port
47
Ethernet Port
47
Status Lights
48
5 Getting Started
49
RCU & Local Keypad
49
Terminology Overview
49
Power on Projector
51
Software Overview
53
Switching to Standby
54
Power off Projector
54
Status Leds
55
Using the RCU
55
Projector Address
57
Displaying and Programming Addresses into the RCU
57
Controlling the Projector
57
Source Selection
57
Alignment of a Table Mount HDF W Series Projector
58
Alignment of a Ceiling Mount HDF W Series Projector
59
6 Quick Set up Adjustment
61
Text Boxes on or off
61
Quick Lens Adjustment Via LENS Key
61
Direct Lens Adjustment (RCU)
63
Quick Picture in Picture
64
Quick Language Selection
64
7 Start up of the Adjustment Mode
67
About the Adjustment Mode
67
About the Use of the Remote Control and the Local Keypad
67
Start up the Adjustment Mode
67
Navigation and Adjustments
68
Menu Memory
69
Shortcut Keys to the Menus
69
Test Patterns in Adjustment Mode
69
Help Information in Adjustment Mode
70
8 Input
71
Input Menu Overview
71
Slot Module Type
72
About Input Setup
72
Input Configuration
72
DVI - RGB Input
72
SDI Input
73
Cable Input
74
Input Locking
75
Native Resolution
77
No Signal
78
Background Color
78
Background Logo
79
Shutdown Settings
79
Shutdown Retarding Time
80
Auto Dimming
81
Edid
81
Configure an Input
82
Create Custom EDID File
83
Delete a Custom EDID File
84
9 Image
87
Image Menu Overview
87
Start up the Image Adjustments
88
Image Settings
88
Contrast
88
Brightness
89
Saturation
90
Phase
90
Color Temperature (Fixed Values)
91
How to Select
92
Color Temperature (Custom Values)
93
Input Balance
93
Introduction to Input Balance
93
Adjusting the Input Balance
95
Aspect Ratio
97
Timings
99
Source Timings
99
Advanced Timings, Clamp Delay - Clamp Width
100
Image File Services
102
Files and File Manipulations
102
Manual Load File
102
File Load Filter
103
Delete a File
104
Delete All Custom Files
105
Rename Custom Files
105
Copy Custom File
106
Image File Service Options, Load File
107
Image File Service Options, Auto Picture Alignment
108
Save Custom Settings
109
Splash Image
109
10 Layout
111
Layout Menu Overview
111
Introduction
111
Main Window
112
Main Window Source Selection
112
Main Window Size
112
Main Window Position
114
Pip Window
115
Introduction to PIP
115
Picture in Picture Activation
116
Pip Window, Source Selection
116
Pip Window, Size
117
Pip Window, Position
119
Layout File Services
120
Load Layout File
120
Rename Layout File
120
Delete Layout File
121
Delete All Layout Files
122
Copy or Save as Layout File
123
Zoom - Focus - Shift Windows
124
11 Lamp
127
Lamp Menu Overview
127
Lamp Power Mode
127
Lamp Power
128
Auto Dimming When on Pause
129
Auto Dimming When no Signal
130
Auto Dimming When Over-Temperature
130
CLO Mode (Constant Light Output Mode)
131
CLO Targets
133
LPS Power
134
Lamp Identification
134
Z-Axis Adjustment
135
12 Alignment
137
Alignment Menu Overview
137
Orientation
138
Lens Adjustment, Zoom - Focus
139
Lens Adjustment, Shift
140
Lens Adjustment, MID Position
141
Home Lens at Startup
142
Calibrate Lens
142
Warping
143
About Warping
143
Warping Status
144
Rotation
145
Keystone
146
Pin-Barrel Correction
148
Corners Adjustment
149
Warp File Service
150
Blanking Adjustment
151
Contrast-Intensity
153
Gamma
154
Internal Patterns
154
Color Space
155
Scenergix
157
Introduction
157
Preparations
158
Scenergix Activation
158
Scenergix Pattern
159
Scenergix Adjustment Lines
160
White Level Adjustment (Blending Area)
160
Black Level Adjustment
162
13 Projector Control
167
Projector Control Menu Overview
167
Individual Projector Address
168
Projector Common Address
168
Serial Communication
169
Baud Rate Setup
169
Interface Standard
170
Network
171
Introduction to a Network Connection
171
Wired DHCP Set up
172
Wired IP Address Set up
172
Wired Subnet Mask Set up
173
Wired Default Gateway Set up
174
Wireless Network Activation
175
Wireless Access Points Selection and Setup
176
Wireless DHCP Set up
178
Wireless Fixed IP Address Set up
179
Wireless Subnet Mask Set up
180
Wireless Default Gateway Set up
182
IR Control Switching
183
DMX
184
DMX Address
184
DMX Universe
185
DMX Mode
186
Art-Net DMX
186
Front XLR Output Voltage Control
187
Monitor
189
Buttons
190
Standby Button
190
Shortcut Keys
191
Menu Position
192
Local LCD
193
Language Selection
193
Scheduler
194
Add a Task to the List
195
Edit a Task
197
Delete Task
198
Scheduler, on or off
199
Advertisement
Barco HDF W series Service Manual (337 pages)
Brand:
Barco
| Category:
Projector
| Size: 65.46 MB
Table of Contents
Table of Contents
5
1 Safety
9
Safety Instructions
10
2 General
13
Convention Projector Orientation
14
Location of the Main Components of the Projector
15
Spare Parts for HDF Series
18
Projector Block Diagram
19
3 Preventative Maintenance Actions
23
Month Maintenance Actions
24
Month Maintenance Actions
25
Year (or 1500 Hours Runtime) Maintenance Actions
26
Year (or 10000 Hours Runtime) Maintenance Actions
28
Lamp Change Maintenance Actions
29
4 Diagnostic Companion
31
Access to the Diagnostic Companion
32
Working with the Diagnostic Companion
33
5 Troubleshooting
35
Troubleshooting Checklist
37
6 Removal and Installation of the Projector Covers
101
Removal of the
102
Removal of the Side Cover
103
Removal of the Lamp Cover
104
Removal of the Input Cover
105
Installation of the
106
Installation of the Side Cover
107
Installation of the Lamp Cover
108
Installation of the Input Cover
109
7 Power Input
111
Replacing the Input Voltmeter's Fuse
113
Getting Access to the Power Elements
114
Removing the Mains Filter
116
Mounting a New Mains Filter
117
Removing the Mains Switch
118
Mounting the New Mains Switch
119
8 Lamp and Lamp House
121
Introduction HDF Lamp & Lamp House
122
Removal of the Lamp House
123
Installation of the Lamp House
125
Removing the Xenon Lamp from the Lamp House
127
Installing the Xenon Lamp in the Lamp House
131
Resetting the Lamp Parameters
137
Realignment of the Lamp in Its Reflector
139
Cleaning the UV Blocker of the Lamp House
140
Cleaning the Reflector of the Lamp House
141
Lamp Info Module Replacement
142
9 HDF Cold Mirror
143
Introduction HDF Cold Mirror
144
10 Card Cage
145
Introduction HDF Input & Communication Unit
146
Removal of the Input & Communication Unit
148
Installation of the Input & Communication Unit
149
Removal of an Input Module
150
Installation of an Input Module
151
Removal of the Intermediate Board Guidance
152
Installation of the WIFI Module on the Communication Module
154
Installation of the GSM Module on the Communication Module
157
Replacing the PMP Board
160
Replacing the Warp Module
163
Replacing the Deinterlacing Module
164
Replacing the LCD Display Interface
165
Replacing the LCD Display
167
Replacing the Local Keypad
168
Replacing the Local Keypad Backlight
169
Replacement of the SMPS Board
170
11 Lamp Power Supply
173
LPS Module Diagnostic Led's
174
Removal of a LPS Module
176
Installation of a LPS Module
178
12 Start Pulse Generator
183
Introduction
185
Troubleshooting
186
Removal of the Start Pulse Generator
187
Installation of the Start Pulse Generator
189
13 HDF Light Processor
193
Introduction HDF Light Processor
194
Diagnostic
195
Removing the Light Processor
196
Installing the Light Processor
200
Replacement of the Shutter
206
Cleaning the Prism Exit Side
208
Light Sensor Module Replacement
209
Adjusting the Fold Mirror
210
High Contrast Plate Replacement
212
Convergence Controls
213
Converging the Red Pattern Onto the Blue Pattern
215
Converging the Green Pattern Onto the Blue Pattern
217
14 Lenses and Lens Holder
219
Introduction Lens Holder
220
Available Lenses
221
Lens Selection
223
Lens Installation
224
Lens Removal
226
Lens Safety Cable
227
Cleaning the Lens
229
Removing the Lens Holder
230
Mounting a New Lens Holder
233
Scheimpflug Adjustment
234
Replacement of the Vertical Shift Stepper Motor
238
Replacement of the Horizontal Shift Stepper Motor
240
15 Liquid Cooling Circuit
243
Draining the Liquid Cooling Circuit
244
Filling the Liquid Cooling Circuit
248
Refreshing the Liquid Cooling Circuit
253
Expelling Air from the Liquid Cooling Circuit
257
Pressure Verification of the Liquid Cooling Circuit
260
Cleaning the Cooling Pump
261
Replacement of the Pump Motor and Rotor
263
Replacement of the Complete Cooling Pump
267
16 Heat Exchanger
271
Removing the Defective Heat Exchanger
272
Disassembling the Heat Exchanger Assembly
275
Assembling the New Heat Exchanger
277
Mounting the Heat Exchanger Assembly into the Projector
279
Barco HDF W series Safety Manual (8 pages)
Brand:
Barco
| Category:
Projector
| Size: 1.19 MB
Table of Contents
General Considerations
3
General Safety Instructions
3
Notice on Safety
3
Important Safety Instructions
4
To Prevent the Risk of Electrical Shock
4
To Prevent Personal Injury
4
To Prevent Projector Damage
5
Light Beam Hazard Distance (HD)
6
HD in Function of the Lens Throw Ratio (TR)
7
Barco HDF W series Quick Start Manual (2 pages)
Brand:
Barco
| Category:
Projector
| Size: 1.71 MB
Advertisement
Related Products
Barco HDF W26
Barco HDF W22
Barco HDF W30 Flex
Barco HDF-W30LP
Barco HDF Series
Barco CLM HD8 R9050130
Barco HDQ--2K40
Barco HDX series
Barco HDQ 4K35
Barco HDX 4K12
Barco Categories
Projector
Monitor
Projector Accessories
Medical Equipment
Controller
More Barco Manuals
Login
Sign In
OR
Sign in with Facebook
Sign in with Google
Upload manual
Upload from disk
Upload from URL