
Related Manuals for Oce Arizona 500


Summary of Contents for Oce Arizona 500
-
Page 1: User Manual
Using ColorBlend six-color printing technology Océ | Arizona 500 User Manual Revision F • July 26, 2004... - Page 2 Océ Display Graphics Systems © 2004 All Rights Reserved...
-
Page 3: Copyright And Trademarks
Due to continuing research and product improvements, features or product specifications may change at any time without notice. Arizona 500 and ColorBlend are trademarks of Océ Display Graphics Systems. PosterShop is a registered trademark of Onyx Graphics, Inc. öhm GmbH & Co. -
Page 4: Ordering Printer Supplies
Océ Product Support and Documentation For further information on the Arizona 500 printer or for information on other Océ Display Graphics Systems products, please contact: Océ Display Graphics Systems 2811 Orchard Parkway San Jose, CA 95134 U.S.A. Phone: 408-232-4000 Fax: 408-232-4100 Comments on this manual? 0.3.1... -
Page 5: Electromagnetic Compatibility
Product Compliance and Standards Product Compliance and Standards Electromagnetic Compatibility 0.7.1 This equipment generates, uses and radiates radio frequency energy and if not installed and used as designed or intended, may cause interference to radio communications. This equipment has been tested and found to comply with the limits for a Class A computing device. - Page 6 Océ...
-
Page 7: Table Of Contents
Product Description .......... 1-1 Unique Features ..........1-1 New Features..........1-2 Operator Requirements ........1-4 Switching On or Off .......... 1-4 Arizona 500 Technical Specifications....1-5 Components Reference Page ......1-7 Safety Information ..........1-7 Handling Inks............2-1 Ink Supply Tray ..........2-1 Cleaning Solution/Fluid ........2-2 Waste Container ..........2-2... - Page 8 Océ | Table of Contents Operator ............4-6 Print Parameters ..........4-6 Test Prints............4-9 Maintenance ..........4-13 Pre warm ............4-20 Media ............4-21 Ink ..............4-26 About Printer ..........4-28 Units..............4-29 Set Clock ............4-29 Configure I/0 ........... 4-31 Parallel Port Configuration ......4-31 LVD-SCSI-2 Port Configuration ....4-32 Maintenance Guidelines ........
- Page 9 B Print Head Maintenance and Nozzle Recovery Procedures Cleaning Solution/Fluid Usage ......B-1 Material Usage..........B-1 Precautionary Messages ......... B-2 General Recommendations for the Operator ..........B-2 Cleaning the Capping Station ......B-2 Cleaning the Carriage Face Plate....B-3 Cleaning Print Head Nozzle Plates....B-3 Flushing a Print Head ........
- Page 10 Océ | Table of Contents Figure 3-12 Rotate the Take-up Core......3-9 Figure 3-13 Cutting Media Above Take-Up ....3-14 Figure 3-14 Media Routing .........3-17 Figure 3-15 Media Edges Aligned ......3-18 Figure 3-16 Open Paper-feed Access Door ....3-19 Figure 3-17 Closed Paper-feed Access Door..... 3-20 Figure 3-18 Correct Position of the Left Side of the EMTU ..........
- Page 11 Figure A-3 Test Prints Menu........A-4 Figure A-4 Maintenance Menu (Part 1) ....... A-5 Figure A-5 Maintenance Menu (Part 2) ....... A-6 Figure A-6 Prewarm Menu .......... A-7 Figure A-7 Media Menu ..........A-8 Figure A-8 Ink Menu ............ A-9 Figure A-9 About Printer Menu........
- Page 12 Océ | Table of Contents...
-
Page 13: Product Description
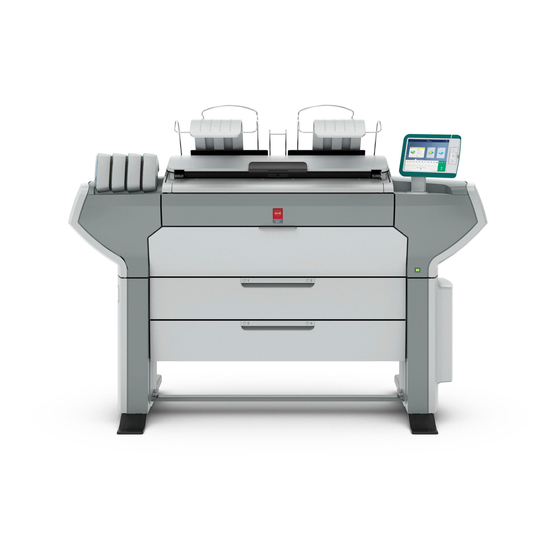
You must comply with these requirements as a condition of receipt and installation of the printer. The Arizona 500 printer is a 75-inch wide format printer that delivers resolutions up to 600 apparent (309 addressable) dpi using ColorBlend six-color (Super CMYK) color- print technology. -
Page 14: New Features
Media Versatility: Accepts media from 36 inches to 75 inches wide. New Features 1.1.2 The Arizona 500 printer features two enhancements, the IR heater and the Print & Go media take-up feature. IR Heater The IR heater is an infrared device that promotes the ink drying process inside the printer. -
Page 15: Figure 1-1 Media Take-Up Roller Holder
Product Description printer can be run with media routed to the EMTU or to the conventional internal roller. The EMTU contains a holder for the conventional roller when it is not in use (see Figure 1-1). Figure 1-1 Media Take-up Roller Holder Firmware changes that accommodate the Print &... -
Page 16: Operator Requirements
Operator maintenance schedule guidelines are included in this manual (see “Maintenance Guidelines” on page 5-1). The diligent application of these guidelines is essential to the optimum performance from your printer. Important: The Arizona 500 printer requires two individuals for loading and unloading media. Switching On or Off The printer is to be powered On/Off only by a trained and qualified service technician (see Figure 1-2). -
Page 17: Arizona 500 Technical Specifications
Arizona 500 Technical Specifications Arizona 500 Technical Specifications Writing Technology .......Piezoelectric inkjet with 504 nozzles per color, six colors (K, C, LC, M, LM, Y) Resolution........600 dpi apparent (309 dpi addressable) Print Mode/Speed ......• Up to 500 square feet (46.5 metres... - Page 18 Graphics Systems • Manufacturer's Address: 2811 Orchard Parkway, San Jose, California 95134 USA • Product Name: Arizona 500 Printer • Model Number: 3012000770 • Agency Compliance: UL, C-UL, CE, FCC, CB Scheme, and AS/NZ: 3548 Note: This equipment has been tested and found to comply with the limits for a Class A digital device, pursuant to part 15 of the FCC Rules.
-
Page 19: Components Reference Page
Risks Associated with Handling Inks The Arizona 500 printer uses solvent-based inks; the liquid and the fumes are combustible. The inks may cause eye irritation or skin irritation upon prolonged or repeated contact. The inks may be absorbed through the skin and may cause respiratory system irritation and nervous system impairment. - Page 20 Océ | Product Overview What to do with Ink Spills on Surfaces Observe precautions as noted above, then: Ventilate the area Contain the spill Cover with absorbent material Collect spilled absorbent material Place in a closed container Clean up residue with water (do not release to waterways or sewer) Incinerate in a permitted hazardous waste incinerator What to do with Ink Spills on Persons •...
-
Page 21: Handling Inks
Ink System Handling Inks The Arizona 500 printer uses solvent-based pigmented inks in cyan (C), magenta (M), yellow (Y), black (K), light magenta (LM) and light cyan (LC) in 1 quart (.95-liter) replaceable supply bottles located internally. Bottles should be visually checked daily. -
Page 22: Cleaning Solution/Fluid
Océ | Ink System Cleaning Solution/Fluid 2.1.2 The cleaning solution/fluid (see Figure 2-2) is used to supply and preserve the capping station foam pads during operation of the printer. The cleaning solution/fluid rides on a level sensing device to detect when it requires attention. When notification is received from the printer, the operator must replace or refill the cleaning solution/fluid container located on the ink supply tray. -
Page 23: Ink Supply Changes
Ink Supply Changes Important: To prolong the life of the waste bottle gasket, the ink should always be wiped off the following areas after emptying the waste bottle and before reinstalling it: • Both sides of the gasket • Inside the cap •... -
Page 24: Figure 2-5 Supply Ink
Océ | Ink System Locate the container on the ink supply tray that requires replacement and remove the lid and quick coupler (see Figure 2-5). Remove the empty bottle. Figure 2-5 Supply Ink The barcode on each bottle must be scanned each time a new bottle of ink is added to the printer. - Page 25 Ink Supply Changes placed loosely back on top of the bottle but not screwed down. If the cap seals too tightly, the printer cannot pump the ink to the reservoirs. Warning: Océ Display Graphics Systems accepts no liability when ink other than Océ...
- Page 26 Océ | Ink System...
-
Page 27: Media Specifications
1-5. Media Handling The Arizona 500 printer loads and prints centered on the media. Do not attempt to left or right justify the media during installation. Take-up cores should always be the same width as the supply media, and the attached media should be centered on the take-up core. -
Page 28: Opening The Door
The first step in loading media is to open the door on the front of the printer. The door hinge mechanism on the Arizona 500 printer is changed from previous models. Begin by releasing the black clips on both sides of the door (see Figure 3-1). -
Page 29: Media Support System
Media Handling Media Support System 3.2.3 Océ Display Graphics Systems strongly recommends that two people change supply and take-up media rolls. The customer’s media support system should be able to support the weight of a full media roll. Position the media support system as close as possible to the printer to limit lifting by the operators when loading/unloading supply and take-up rolls of media (see Figure 3-3). -
Page 30: Mandrel Assembly
The Arizona 500 printer accepts media from 36 inches to 75 inches wide. Specifically, the printer can handle 75, 72, 70, 68, 66, 64, 62, 60, 54, 50, 48, 40 and 36-inch wide rolls of supply media. -
Page 31: Roll-To-Roll Media Installation
Roll-to-Roll Media Installation Roll-to-Roll Media Installation Successful media installation is dependent on several factors, including: • Centering/alignment of the supply media roll on the supply mandrel • Matching lengths of the supply and take-up cores • Aligned installation of the supply and take-up cores on the supply and take-up mandrels Inexact installation may result in media encoder errors, the misreading of the media width, media rippling and/or head strikes. -
Page 32: Loading New Supply Roll
Océ | Media System Figure 3-6 Secure the Mandrel/Media Assembly Caution: Ensure that the loading mechanism lock lever is in its horizontal position. If the lever flips backward out of position, media feed errors can result (see Figure 3-5) and (see Figure 3-6). Lock the mandrel on both sides of the frame. -
Page 33: Figure 3-7 Feeding Media Over The Platen
Roll-to-Roll Media Installation Press ACCEPT. You then see: Use +/- keys, attach takeup, press ACCEPT Feed the media over the supply dancer roller and into the vacuum platen area. To keep the media from falling back, gently feed the media down between the back wall and the supply dancer assembly (see Figure 3-7). -
Page 34: Figure 3-9 Feeding Media Over The Drive Roll
Océ | Media System Install an empty take-up core/mandrel, and secure the hubs. From the front of the printer, push/pull the media towards the drive roller, making sure it passes between the drying duct and the drive roller (see Figure 3-9). Use the +/- buttons to add more or less media during installation. -
Page 35: Figure 3-11 Align And Tape The Media
Roll-to-Roll Media Installation Align the media with the right side take-up core edge, then tape along the core in five places. Tape the leading edge of the media to the core at the right side, the far left side, and in three more places equally spaced at the middle (see Figure 3-11). Figure 3-11 Align and Tape the Media Turn the take-up core with the taped media one revolution (see Figure 3-12). - Page 36 Océ | Media System Close the top cover and the front and rear doors, and press the ACCEPT button on the control panel. You then see: MEDIA MENU print side: first side If you select the first side, go to step 15. Use the +/- buttons to select the second side.
- Page 37 Roll-to-Roll Media Installation Press ACCEPT. You then see: MEDIA MENU conserve media: ON Use the +/- buttons to turn media conservation ON/OFF. The default value is ON. When set to ON, the printer rewinds the substrate to minimize waste before printing the next image.
- Page 38 Océ | Media System Press the ACCEPT button. You then see: MEDIA MENU thickness: (2.00 - 30.00) mil The range for thickness values is 2.00-30.00 mils. The media thickness is typically on the media container label, if any. The media thickness changes by .05 mils. Use the +/- buttons to increment or decrement the thickness setting.
- Page 39 Roll-to-Roll Media Installation When set to OFF, the printer does not rewind the substrate before printing. This setting should be used for media that is very thin or adhesive backed, which may wrinkle during rewinding or become malformed by the heat required to dry the inks.
-
Page 40: Take-Up Roll Reattachment
Océ | Media System Take-up Roll Reattachment 3.3.3 Follow these steps to remove a full/partial take-up roll and reattach media to a new empty take-up core: Press the Load Media button. You then see: Load Media new supply roll? Press the Menu button. You then see: Load Media reattach takeup? Press the ACCEPT button. -
Page 41: Print & Go Media Installation
Print & Go Media Installation Raise the top cover, and pull the pinch roller handle to disengage the rollers (see Figure 3-8). Install an empty take-up core/mandrel, and secure the hubs. Note: Always use a take-up core the same width as the supply media that is being installed. -
Page 42: Installing Supply Media
• Positioning of the Print & Go external media take-up unit (EMTU) square to the front of the Arizona 500 printer Inexact installation may result in media encoder errors, the misreading of the media width, media rippling and/or head strikes. -
Page 43: Figure 3-14 Media Routing
Print & Go Media Installation From the front of the printer, push/pull the media towards the drive roller, making sure it passes between the drying duct and the drive roller (see Figure 3-9). Use the +/- buttons to add more or less media during installation. Route the media under the dancer arm, around the bottom of the rubber feed roller, and out over the top of the pinch roller assembly by lifting the metal roller (see Figure 3-14). -
Page 44: Figure 3-15 Media Edges Aligned
Océ | Media System Ensure the media is aligned by bringing up the bottom of the media and aligning both edges exactly to the edges of the media coming off the rubber drive roller (see Figure 3-15). Figure 3-15 Media Edges Aligned Close the pinch rollers, and flip up all but the two positioned at each edge of the media. -
Page 45: Figure 3-16 Open Paper-Feed Access Door
Print & Go Media Installation Close the IR door fully and open the small paper-feed access door below the heater using the handle (see Figure 3-16). Handle Door open Handle Figure 3-16 Open Paper-feed Access Door 7/26/04 3-19... -
Page 46: Figure 3-17 Closed Paper-Feed Access Door
Océ | Media System Pull the media through the paper-feed access door with at least one foot of media exposed, and close the door (see Figure 3-17). Door closed Handle Figure 3-17 Closed Paper-feed Access Door. Note: Turn the handle clockwise while closing the paper-feed access door. 3-20... -
Page 47: Figure 3-18 Correct Position Of The Left Side Of The Emtu
Print & Go Media Installation Roll the external media take-up unit (EMTU) into position at the side of each IR door rest and against the front of the printer, ensuring the EMTU is square to the printer. Lock the front wheels (see Figure 3-18). Figure 3-18 Correct Position of the Left Side of the EMTU Load an empty take-up core the same width as the supply media. -
Page 48: Figure 3-19 Attaching Media To The Emtu Core
Océ | Media System Pull on both sides of the media evenly. A second person can press the + button to advance the media until you are able to get it over the top of the empty take-up core. Secure the media firmly with tape along the core in five places. Tape the leading edge of the media to the core at the right side, the far left side, and in three more places equally spaced at the middle (see Figure 3-19). - Page 49 Print & Go Media Installation Press ACCEPT. You then see: SECOND SIDE condition media: OFF Use the +/- buttons to turn media conditioning OFF/ON. The default value is OFF. Condition Media assists in accurate two-sided printing where the printed media surface tension of the first side affects the printing of the second side.
- Page 50 Océ | Media System This feature enables the adjustment of media stepping to compensate for variation in media lots and environmental factors. The plus direction lengthens each media step. The minus direction shortens each media step. For additional information, see “Firmware 2.2 Notes” on page C-12. Press ACCEPT.
- Page 51 Print & Go Media Installation Use the +/- buttons to enter the correct core diameter. The value is increased or decreased in .01-inch increments. If you do not know the diameter, use a ruler and measure the outside diameter of the core, and enter the value in this submenu. Press ACCEPT.
-
Page 52: Emtu Take-Up Roll Reattachment
Océ | Media System The feed adjustment feature enables the adjustment of media stepping to compensate for variation in media lots and environmental factors. The plus direction lengthens each media step. The minus direction shortens each media step. For additional information, see “Firmware 2.2 Notes” on page C-121. Press ACCEPT. - Page 53 Print & Go Media Installation Press the LOAD MEDIA button. You then see: Load Media new supply roll? Press the MENU button. You then see: Load Media reattach takeup? Press the ACCEPT button. You then see: Use +/- keys, attach takeup, press ACCEPT Load an empty take-up core the same width as the supply media.
- Page 54 Océ | Media System 3-28...
-
Page 55: Overview
Control Panel Overview The control panel (see Figure 4-1) sends and returns information to and from the Arizona 500 printer. Through the control panel, you set up the user-controllable options. These are organized into three major sections: Copies/Reprints, Operator, and Configure I/O. Figure 4-1 Control Panel 7/26/04... -
Page 56: Control Panel Buttons
Océ | Control Panel Print a Configuration Print (see Figure 4-2) every time you change any settings through the control panel for reference to monitor print quality. The configuration print is approximately 30-inches wide. Figure 4-2 Configuration Print Control Panel Buttons 0.1.1 The MENU button (see Figure 4-3) steps through the available submenus in the menu tree without selecting them. -
Page 57: Figure 4-5 Accept Button
Overview The ACCEPT button (see Figure 4-5) enables you to confirm or enter your selection for that menu. Figure 4-5 Accept Button The LOAD MEDIA button (see Figure 4-6) enables you to load new media or reattach media to the take-up. This button also enables you to navigate backwards through the menu tree when in any submenu. -
Page 58: Cancel Printing
Océ | Control Panel Cancel Printing 0.1.2 In roll-to-roll mode, a print job can be cancelled using the following steps: Press the Cancel button. You then see: press ‘-’ to cancel Press the - button. You then see: CANCELLING PRINT In Print &... -
Page 59: Copies/Reprints
Copies/Reprints The entire menu structure can be printed using the Print Menu Tree function (see “Print Menu Tree” on page 4-13). Copies/Reprints This menu (see “Copies/Reprints Menu” on page A-2) controls the number of copies and specifies the spacing between copies made during each print job. You can also reprint copies of a previous printed image. -
Page 60: Operator
Océ | Control Panel Operator The Operator menu provides access to the following submenus: • Print Parameters - Contains the horizontal and vertical margin values, job statistics (On or Off), stripe (single or dual), quad strike (Off or On), minimal maintenance during print (Off or On), and double print (Off or On) submenus (see “Print Parameters Menu”... - Page 61 Operator Use the +/- buttons to select the required horizontal margin value for a job. Press ACCEPT. You then see: PRINT PARAMETERS ver margins: (0.2" - 4.0") Use the +/- buttons to select the required vertical margin value for a job. Press ACCEPT.
-
Page 62: Job Statistics List
Prior to the second print, the Arizona 500 printer pauses to enable the operator to accurately align the media for the second print. This feature is applicable for very dark images where the media is not able to hold and dry the volume of ink required to produce acceptable output. -
Page 63: Test Prints
WIDE • Min Maint: • Quad Strike: • Double Print: Test Prints 0.4.2 The Test Prints menu enables you to print four documents stored in the Arizona 500 printer: • Nozzle print • Configuration print • Color bars print •... -
Page 64: Figure 4-10 Nozzle Print
Océ | Control Panel Nozzle Print The Nozzle Print menu provides you with information on missing nozzles (see Figure 4-10). The pattern may indicate that maintenance might be required. (No gaps occur between the color sets on an actual Nozzle Print.) Figure 4-10 Nozzle Print 4-10... -
Page 65: Test Prints
Operator Follow these steps to print the Nozzle Print (see Figure 4-10): Navigate to: MAIN MENU operator Press the ACCEPT. You then see: OPERATOR print parameters Press MENU. You then see: OPERATOR test prints Press ACCEPT. You then see: TEST PRINTS nozzle print Press ACCEPT. - Page 66 Océ | Control Panel Press ACCEPT. The Configuration Print begins printing. Color Bars The Color Bars menu prints a set of color bars. The eleven color bars start with Light Magenta and end with Black. Use the color bars to diagnose and calibrate printer inks for optimal performance.
-
Page 67: Maintenance
Refer to the “Operator Maintenance Schedule Guidelines” on page 5-2 for additional information and routine maintenance required on the Arizona 500 printer. Several maintenance functions can be selected from the front panel menus when the machine is idle or while printing. -
Page 68: Maintenance
Océ | Control Panel C LC M LM Y If you press ACCEPT at this setting, the color black is excluded from the purge. The following setting purges the colors cyan, light cyan, magenta, and light magenta: C LC M LM Access Carriage The Access Carriage menu enables the operator to position the carriage for access over the blotting station. -
Page 69: Park Carriage
Operator Park Carriage The Park Carriage menu enables the operator to move the carriage back to the home position or over the capping station. Follow these steps to park the carriage: Navigate to: MAINTENANCE access carriage Press the MENU button. You then see: MAINTENANCE park carriage Press the ACCEPT button. -
Page 70: Low Purge Nozzles
Océ | Control Panel Press ACCEPT. You then see: Inks to High Purge number of purges: (1-10) Press +/- to select the number of purges to be performed (no more than two are recommended). Press ACCEPT. You then see: Inks to High Purge B C LC M LM Y Use the +/- buttons to select the required color or colors to high purge. -
Page 71: Mini Purge Nozzles
Operator Mini Purge Nozzles Warning: Media must be installed prior to performing this function. The carriage is moved to the blotting station, and a low-pressure purge is performed while the nozzle plate is in contact with the blotting cloth. A blot and a spit occur after each mini purge. -
Page 72: Long Purge Nozzles
Océ | Control Panel Long Purge Nozzles Warning: Media must be installed prior to performing this function. A long purge is the same as a low purge, except a nozzle print never follows the long purge. Follow these steps to perform a long purge: Navigate to: MAINTENANCE spit heads... - Page 73 Operator Press the ACCEPT button to pump cleaning solution/fluid. You then see: MAINTENANCE fill reservoir You will hear the waste pump running longer than the solvent pump. Fill Reservoir Follow these steps to manually fill a selected ink reservoir: Navigate to: MAINTENANCE pump solvent Press the MENU button.
-
Page 74: Pre Warm
Océ | Control Panel To set up the Bar Code Practice menu, refer to the menu tree. Follow these steps to practice scanning the bar code: Navigate to: MAINTENANCE fill reservoir Press the MENU button. You then see: MAINTENANCE barcode practice Press the ACCEPT button. -
Page 75: Media
Operator Use the following steps to set the prewarm time: Navigate to: MAIN MENU operator Press the ACCEPT button. You then see: OPERATOR print parameters Press the MENU button three times. You then see: OPERATOR pre warm Press ACCEPT. You then see: PRE WARM pre warmup time: 0 - 150 min Use the +/- buttons to adjust the prewarm-up time. - Page 76 Océ | Control Panel Press the ACCEPT button. You then see: OPERATOR print parameters Press the MENU button four times. You then see: OPERATOR media menu Press ACCEPT. You then see: MEDIA MENU Media table version: XXX The media table contains the printer set-up values that are implemented when a media is selected through the Media Type submenu.
- Page 77 Operator Press ACCEPT. You then see: MEDIA MENU media name Use the +/- buttons to select the media you have loaded. Press ACCEPT. You then see: MEDIA MENU takeup core OD: (3.10” - 4.0”) Use the +/- buttons to enter the correct core diameter. The value is increased or decreased in .01-inch increments.
- Page 78 Océ | Control Panel Media Type: Other Selecting Other enables additional menus for manual media setup. When changing values, holding the +/- buttons continuously increments or decrements the value repeatedly. Follow the steps below for this media type option: Navigate to: MEDIA MENU Other Press the ACCEPT button.
- Page 79 Operator The temperature increments or decrements by 1 degree. The maximum temperature setting is 155 F. Use the +/- buttons to change the temperature º setting. Press ACCEPT. You then see: MEDIA MENU conserve media: ON Use the +/- buttons to turn media conservation ON/OFF. The default value is ON. When set to ON, the printer rewinds the substrate to minimize waste before printing the next image.
-
Page 80: Ink
Océ | Control Panel If no error occurs, you then see: Stabilizing media please wait When stabilizing is complete, printer status information is displayed. Press ACCEPT. You then see: OPERATOR media menu 0.4.6 The Ink menu is used to install new ink bottles. You are required to either scan or manually enter the barcode code found on the side of the ink bottle for each new installation. -
Page 81: Invalid Bar Code
Operator Select a color and press ACCEPT. You then see: Scan barcode (Color) Accept->Manual Entry Scan the ink barcode found on the side of the bottle. Listen for the sound prompts; single tone signifies that the barcode scan was successful whereas a double tone signifies an unsuccessful scan. -
Page 82: About Printer
Océ | Control Panel About Printer 0.4.7 The About Printer menu enables you to view the current printer specifications through the printer control panel. Record this data for future use in case a configuration print was not run at installation or in case this submenu is not available due to outage. Follow these steps to view the About Printer menu: Navigate to: MAIN MENU... -
Page 83: Units
Operator Units 0.4.8 The Units menu enables you to choose between English and metric units. All control panel menus display the preferred units. Setting the Units Follow these steps to select the type of Units displayed on the control panel: Navigate to: MAIN MENU operator... - Page 84 Océ | Control Panel In SET CLOCK, the underscore specifies: • Hours • Minutes Follow these steps to set the date and time: Navigate to: MAIN MENU operator Press the ACCEPT button. You then see: OPERATOR print parameters Press the MENU button eight times. You then see: OPERATOR set clock Press ACCEPT.
-
Page 85: Configure I/0
Configure I/0 Press ACCEPT after changing the minute. You then see: SET CLOCK set time Configure I/0 The Arizona 500 printer has two types of data ports, Centronics parallel and low-voltage differential (LVD) SCSI-2. Parallel Port Configuration 0.5.1 Note: This port is only used by service engineers for downloading firmware. -
Page 86: Lvd-Scsi-2 Port Configuration
Océ | Control Panel LVD-SCSI-2 Port Configuration 0.5.2 The standard 68-pin LVD-SCSI-2 port connects the printer to the PosterShop RIP platform via a standard 68-pin SCSI-2 data cable. The maximum length of this cable is 40 feet (12 meters). Note: NEVER connect or disconnect SCSI cables with the printer or the host PC powered ON. - Page 87 Configure I/0 Press ACCEPT. You then see: SCSI PORT ultra SCSI: (on or off) This parameter pertains to the SCSI card being used on the host PC. This parameter should be set to On so that the host PC and the printer can negotiate the highest transfer speed.
- Page 88 Océ | Control Panel 4-34...
-
Page 89: Maintenance Guidelines
Maintenance Guidelines While Océ Display Graphics Systems furnishes guidelines for periodic maintenance, the optimum maintenance schedule evolves from your observation of the Arizona 500 printer over a period of use. For example, some specified maintenance may be required each time you install a new roll of media. -
Page 90: End Of Day Print Head Protection
A few minutes spent cleaning ensures the highest quality prints. Several areas require maintenance to ensure the highest print quality, and the printer design gives you easy access to all these areas. Diligent application of the Arizona 500 Printer Operator Maintenance Schedule Guidelines ensures optimum performance from your printer. - Page 91 Operator Maintenance Schedule Description Procedure Frequency Carriage Rails Wipe clean with a lint-free cloth and alcohol Once a week only. Use a lint-free cloth saturated (but not dripping) with isopropyl alcohol (91% or higher isopropyl alcohol and 9% or less deionized water).
-
Page 92: Warm-Up Maintenance (Idle Purge)
Automated Maintenance The Arizona 500 printer firmware performs automated maintenance without direct operator intervention when the printer is powered On and while printing. These types of maintenance and duration parameters are set at the factory. -
Page 93: Start Of Print Maintenance
Operator-Performed Maintenance Start of Print Maintenance 5.3.2 A mini purge is performed at the start of every print. Color Start Up Maintenance 5.3.3 As the first bands of the image are rendered, only the black heads are jetting drops due to the stagger of the print head by color. -
Page 94: Figure 5-1 Cleaning The Media Drive Roller
Océ | Printer Maintenance Weekly, the media drive roller should be wiped clean with a sponge/scrubber and 91% or higher isopropyl alcohol only to remove any accumulated paper dust or residue. Figure 5-1 Cleaning the Media Drive Roller Additional Debris Removal If too much media debris accumulates on the components, it can track back onto the media and ruin prints. -
Page 95: Figure 5-3 Press Fresh Tape On The Encoder Wheel
Operator-Performed Maintenance • Encoder wheel - use masking tape (or similar tape) to pick debris off the wheel. Rotate the wheel and use fresh tape until the entire surface of the wheel is clean (see Figure 5-3) and (see Figure 5-4). Figure 5-3 Press Fresh Tape on the Encoder Wheel Figure 5-4 Debris on the Tape 7/26/04... -
Page 96: Capping Station Maintenance
Océ | Printer Maintenance • Media drive roller - follow the general cleaning procedure (see "General Cleaning" on page 5-5) with emphasis on the debris that accumulates on the center of the roller (see Figure 5-5). Figure 5-5 Debris on the Media Driver Roller Capping Station Maintenance The capping station (see Figure 5-6) consists of a single plate with 24 small saturated foam pads (OIN #3011924173). -
Page 97: Maintenance Cloth Station
Maintenance Cloth Station Cleaning the Capping Station Follow these steps to clean the capping station plate: Move the carriage using the Access Carriage menu to expose the capping station surface. Open the right-side end cap doors. Use a lint-free cloth saturated with cleaning solution/fluid, and clean the capping station plate (see Figure 5-6). -
Page 98: Blotting Cloth Installation
Océ | Printer Maintenance heads to dislodge particles blocking the nozzles. The cloth rises via air cylinders to extract ink from the underside of the carriage. Figure 5-7 Maintenance Cloth Station Blotting Cloth Installation 5.6.1 Follow these steps to install the blotting cloth: 1. -
Page 99: Figure 5-8 Blotting Cloth Release Handles
Maintenance Cloth Station Figure 5-8 Blotting Cloth Release Handles Swing back both lever arms, which may be metal or plastic and remove the used blotting cloth roll (see Figure 5-9). Figure 5-9 Lever Arms Warning: Never reinstall a used blotting cloth roll. It contains dried ink and other foreign particles that can damage the print heads. -
Page 100: Figure 5-10 Blotting Cloth Sheet And Support Foam
Océ | Printer Maintenance The blotting cloth rides over a Teflon sheet on top of a foam support pad. Inspect the sheet and support foam before replacing the blotting cloth (see Figure 5-10). Figure 5-10 Blotting Cloth Sheet and Support Foam Wipe down any ink that may have accumulated along the surface of the Teflon sheet while wearing a pair of butyl rubber gloves and using the lint-free cloth saturated with cleaning solution/fluid. -
Page 101: Figure 5-11 Drive Hubs
Maintenance Cloth Station Install the new blotting cloth roll on the lower hub, and capture the left end with the lever arm. Install the empty notched take-up core on the upper hub with drive pins, and capture the left end with the lever arm (see Figure 5-11). Figure 5-11 Drive Hubs Feed the leading edge of the cloth from the backside of the roll up and around the Teflon sheet and foam pad (see Figure 5-12). -
Page 102: Figure 5-13 Feeding The Cloth (Step 2)
Océ | Printer Maintenance Continue pulling the leading edge of the cloth across the Teflon sheet until it reaches the take-up core (see Figure 5-13). Remove the paper backing off the leading edge of the cloth so it can be taped evenly to the empty take-up core. Figure 5-13 Feeding the Cloth (Step 2) Attach the cloth onto the empty core (see Figure 5-14). -
Page 103: Printer Filters
5.7.1 System Filters Four air system filters are required on the Arizona 500 printer. Each filter should be inspected every two months. The filter should be replaced when the filter fabric begins to discolor from the original condition or once every twelve months, whichever comes first. -
Page 104: Figure 5-16 Purolator Hi-40 Heater Filters
Océ | Printer Maintenance Heater Filters Two other drying filters are located on each end of the printer behind the lower cosmetic plastic covers. Each filter should be exchanged for a new one when the filter fabric begins to discolor from the original condition or once every two months. The drying system filter replacement (Dim: 15 in. -
Page 105: Air Pressure Pump Filter
Air Pressure Pump Filter 5.7.2 An air pressure pump filter is required on the Arizona 500 printer. Air passes through the filter when the pump supplies air to the ink reservoirs during print-head primes. The filter is located in the front of the printer inside the lower right bay doors near the air tanks. The replacement is OIN #3011695043. - Page 106 Océ | Printer Maintenance 5-18...
-
Page 107: Overview
Error Messages and Troubleshooting Overview This section covers general problems that may occur with the printer. In most cases, malfunctions that trigger system error messages are caused by human error, a system malfunction, an interface cable malfunction, mechanical printer malfunction and/or printer firmware failure. -
Page 108: If Problems Persist
No media is present on the media supply roll. Install a new media roll. No Power The Arizona 500 printer consumes up to 45 Amps at 200-240 VAC, 50/60 Hz. Total power consumption is 11 KW. The service should be a dedicated supply that is not susceptible to voltage fluctuations. -
Page 109: System Errors
System Errors printer yourself may cause further damage. When you have determined that a service call is required, call as soon as possible. Have the following information ready: Printer model and serial number. They are located on the beam between the rear sliding door and the top door or through the About Printer menu. - Page 110 Océ | Error Messages and Troubleshooting CONTROL PANEL MESSAGE EXPLANATION AND ACTION WARNING If no media is loaded, reload the media. If no media media is loaded, perform the media installa- tion procedure again. WARNING The take-up roll has reached maximum take-up roll full diameter.
- Page 111 System Errors CONTROL PANEL MESSAGE EXPLANATION AND ACTION XX:XX Media: XXX' Used: YY' IR/PZ: Printer has printed dd percent of [job name]. PRN: [job name] dd% Provides printer feedback and status for the operator. XX:XX Media: XXX' Used: YY' IR/PZ: Printer has input (parsed) dd percent of [job INP: [job name] dd% name].
- Page 112 Océ | Error Messages and Troubleshooting CONTROL PANEL MESSAGE EXPLANATION AND ACTION SYSTEM ERROR [press ACCEPT to If the error returns after you press ACCEPT restart] to restart the printer, call your authorized purge air pressure failure service representative. SYSTEM ERROR [press ACCEPT to If the error returns after you press ACCEPT restart] to restart the printer, call your authorized...
- Page 113 System Errors CONTROL PANEL MESSAGE EXPLANATION AND ACTION SYSTEM ERROR [press ACCEPT to If the error returns after you press ACCEPT restart] to restart the printer, call your authorized CARRIAGE SPEED ERROR service representative. SYSTEM ERROR [press ACCEPT to If the error returns after you press ACCEPT restart] to restart the printer, call your authorized CARRIAGE LCA FAILURE...
- Page 114 Océ | Error Messages and Troubleshooting...
- Page 115 Appendix A Menus The Arizona 500 printer software displays a series of menus to facilitate the operation of the printer. The entire menu tree structure can be printed using the Print Menu Tree menu (see “Print Menu Tree” on page 4-13).
-
Page 116: Figure A-1 Copies/Reprints Menu
Océ Figure A-1 Copies/Reprints Menu... -
Page 117: Figure A-2 Print Parameters Menu
Figure A-2 Print Parameters Menu 7/26/04... -
Page 118: Figure A-3 Test Prints Menu
Océ Figure A-3 Test Prints Menu... -
Page 119: Figure A-4 Maintenance Menu (Part 1)
Figure A-4 Maintenance Menu (Part 1) 7/26/04... -
Page 120: Figure A-5 Maintenance Menu (Part 2)
Océ Figure A-5 Maintenance Menu (Part 2) -
Page 121: Figure A-6 Prewarm Menu
Figure A-6 Prewarm Menu 7/26/04... -
Page 122: Figure A-7 Media Menu
Océ Figure A-7 Media Menu... -
Page 123: Figure A-8 Ink Menu
Figure A-8 Ink Menu 7/26/04... -
Page 124: Figure A-9 About Printer Menu
Océ Figure A-9 About Printer Menu A-10... -
Page 125: Figure A-10 Units Menu
Figure A-10 Units Menu 7/26/04 A-11... -
Page 126: Figure A-11 Set Clock Menu
Océ Figure A-11 Set Clock Menu A-12... -
Page 127: Figure A-12 Configure I/O Menu
Figure A-12 Configure I/O Menu 7/26/04 A-13... - Page 128 Océ A-14...
-
Page 129: Cleaning Solution/Fluid Usage
Description: Instructions for properly cleaning and/or flushing ink buildup from the capping station, carriage face plate and the print head nozzle plates on the Arizona 500 printer Materials: Isopropyl Alcohol (91% Isopropyl or higher), 50-ml Syringe (OIN #3012001103), Cleaning Solution/Fluid (part # is ink... -
Page 130: Precautionary Messages
Océ Precautionary Messages Important: Powering off the printer is NOT recommended. • However, if the printer must be powered off for more than one hour and up to one day, you must drain out all the ink from the ink reservoirs (juice boxes), clean the print head nozzle plates, and cover the capping station with polyethylene plastic film. -
Page 131: Cleaning The Carriage Face Plate
Put on the protective butyl gloves before handling any ink residue with a lint-free cloth. Apply cleaning solution/fluid on a lint-free cloth and begin cleaning the capping station as shown in Photo 1. Wipe away the ink buildup on the face of the capping station and inside the ink purge drains. - Page 132 Océ Use an individual, small container of cleaning solution/fluid and a new swab for each color. Only use this cleaning solution/fluid for several cleanings until it becomes slightly discolored. Warning: Never use Isopropyl alcohol on the print head nozzle plates. Access the carriage assembly via the control panel using the Operator/Maintenance/ Access Carriage menu.
-
Page 133: Flushing A Print Head
Starting with the yellow print heads again, dip the yellow swab into its cleaning solution/fluid and gently move the saturated swab across each head nozzle plate several times to remove the softened ink from each head surface. Important: Applying too much force with the swab against the nozzle plate may scratch the surface. -
Page 134: End Of Day Nozzle Protection Procedure
The only recommended material for use is polyethylene plastic film. Important: Before using an unknown type of plastic wrap, you should always test its compatibility with the Arizona 500 printer cleaning solution/fluid for one week to ensure the plastic wrap does not dissolve. We have found that plastic wrap containing polyethylene is most suitable in this application. - Page 135 Cut a 1-foot square sheet of polyethylene plastic film and lay it smoothly over the capping station making sure it covers all corners of the plate, as shown in Photo 5. Apply a couple of drops of cleaning solution/fluid onto the plastic film, directly above each foam pad, to keep each head wet when the carriage is parked.
- Page 136 Océ The printer is now ready to receive the first print of the day. Photo 1...
- Page 137 Photo 2 Photo 3 7/26/04...
- Page 138 Océ Photo 4 Photo 5 B-10...
- Page 139 Appendix C Application Notes Application notes provide information to enhance the usability of the Arizona 500 printer. The following application notes are contained in this appendix: Application Note ................. Page Firmware 2.1 Release Notes............C-2 Two-sided Printing ................C-5 Power Loss Instructions ..............C-10 Firmware 2.2 Release Notes............C-12...
- Page 140 Océ ARIZONA 500 New Features For Exceptional Image Quality In Specific Situations The latest version of the Arizona 500 firmware, V2.1, contains some new features and changes to the operation of the printer. The new features are designed to optimize image quality for specific types of jobs.
- Page 141 Minimal Maintenance - When printing very light density colors. In certain images where there are very light ink densities creating process colors, the automated maintenance may cause a color shift caused by the lower layer of ink having an incremental 10 seconds of drying time while maintenance is done.
- Page 142 Océ Arizona 500. This feature requires user input at the control panel, and direct marking of the media to determine starting points from print to print. With minimal hardware set-up and a little practice, the use of the two-sided printing feature provides an effective means by which to produce two-sided vinyl graphics.
- Page 143 M. From the control panel, select Menu >>> Operator >>> Print Parameters >>> Statistics and turn “Statistics” off. N. In Onyx Rip Queue, highlight the Océ Arizona 500 and select Change. O. From the Change Media and Placement window select Setup.
- Page 144 Z. Send the job to be printed to the Océ Arizona 500. AA. Prior beginning the second side of the print job, the Océ Arizona 500 control panel will prompt you to adjust the second side media into position.
- Page 145 Figure D Figure E Align here for 4-pass printing Align here for 8-pass printing Note: If multiple jobs were printed, repeat Step 3.X for each print job. Transposing Images for Two-Sided Printing Determining the proper rotation for the second side image can be confusing. Creating a mock up may be useful.
- Page 146 Océ However, if the two sided banner is printed from left to right, no rotation is required. As the second side will also be printed from left to right and share the same lower edge. - see Figure H. Figure H...
- Page 147 Preventing Ink Pools During Extended Power Outages The Océ Arizona 500 requires continuous power. But in certain situations, loss of power may be experienced due to uncontrollable events. When this occurs, the vacuum system that maintains the ink in the printer will slowly begin to lose vacuum pressure. As vacuum pressure is lost, the ink will slowly drain out of the printer's print heads.
- Page 148 Océ With PAUSE ON POWER UP: OFF, the printer will automatically refill the ink reservoirs after a power failure and may be susceptible to additional ink loss if other power failures occur. Fig. 1 Fig. 2 Fig. 3 Fig. 4 C-10...
-
Page 149: Blotting Cloth Usage
Firmware release version 2.2 for the Océ Arizona 500 contains a number of enhancements designed to aid in the efficient operation of the printer. Ink Low Indicator This latest version of firmware incorporates new intelligent ink use algorithms that enable the firmware to “learn”... - Page 150 Conserve Media – Default “ON” When the Océ Arizona 500 begins each new print, it will rewind the media to minimize waste. Certain media may have difficulty rewinding and will wrinkle in the process. This is primarily evident in very thin media or adhesive-backed substrates that are malformed by the heat required to dry the inks during the printing process.
- Page 151 When set to ON, the Océ Arizona 500 will advance the media the length of the print and rewind back to the beginning of the image prior to printing.
- Page 152 Océ C-14...
- Page 153 Index Control panel Buttons........... 4-2 About printer menu ......4-28 Display area ........4-1 Access carriage ........4-14 Messages ........6-1 Copies/Reprints menu......4-5 Bar code practice menu...... 4-20 Blotting cloth installation ..... 5-10 Double print .......... 4-8 Buttons Double-sided printing ......C-4 Accept ..........
- Page 154 Océ| Index Handling .........2-1 Installing roll-to-roll supply Low ink ...........6-1 media ........3-5 Menu ..........4-26 Insufficient ........6-1 Safety ..........1-7 Menu ..........4-21 Scanning the barcode ....2-4 Other type ........4-24 Supply bottle removal .....2-4 Print & Go loading method ... 3-15 Tray ..........2-1 Selecting media type....
- Page 155 Power supply requirements ....6-2 Setting the units ......4-29 Preventing ink pools ......C-9 Spit heads........4-17 Prewarm ..........4-20 Take-up roll replacement Print & Go (Print & Go) ......3-26 Description ........1-2 Take-up roll replacement Loading media ......3-15 (roll to roll) ......
- Page 156 Océ| Index Index-4...
Need help?
Do you have a question about the Arizona 500 and is the answer not in the manual?
Questions and answers