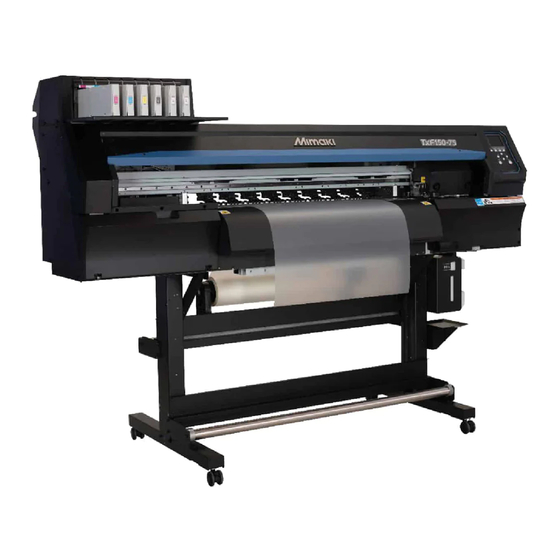
MIMAKI TxF150-75 Operation Manual
Color inkjet printer
Hide thumbs
Also See for TxF150-75:
- Requests for care and maintenance (19 pages) ,
- Operation manual (102 pages) ,
- Requests for care and maintenance (19 pages)

Related Manuals for MIMAKI TxF150-75


Summary of Contents for MIMAKI TxF150-75
- Page 1 Download the latest version of the operation manual from our website. MIMAKI ENGINEERING CO., LTD. URL: https://mimaki.com/ D203671-10 Original instructions...
-
Page 2: Table Of Contents
Contents Introduction ................... v Caution ...................... v Requests ....................v FCC statement (USA) ................v TV and radio interference ................v Compatible ink ................... v Safety Precautions ................vi Symbols ....................vi Working Environment ................ix Place of installation .................. ix Temperature of working environment ............ix Warning Labels .................. - Page 3 If the Positions of Dots Shift .............2-11 Printing Data ..................2-11 Starting printing ..................2-11 Pausing printing ..................2-12 Clearing received data (Data Clear) .............2-12 Cutting media ..................2-12 Chapter 3 Settings Setup Menu ..................3-2 Setup menu table ...................3-2 Registering optimal print conditions to match usage ......3-3 Feed correction ..................3-3 Dot position correction ................3-3 Heater .....................3-4...
- Page 4 Cleaning the wiper and cap ..............4-4 Cleaning the wiper cleaner ..............4-5 Cleaning the wiper ink guard ..............4-5 Cleaning under the carriage ..............4-5 NCU Cleaning ..................4-6 Cleaning the waste ink draining channel ..........4-7 Cleaning head nozzles ................4-7 Preparing the machine if it will not be used over extended periods ..
-
Page 6: Introduction
• Place TVs or radios away from the machine. • Plug TVs or radios into outlets on a different power Mimaki Engineering Co., Ltd. is in no way liable for any supply path than the machine. damages whatsoever (including but not limited to lost... -
Page 7: Safety Precautions
Introduction Safety Precautions Warnings and precautions in use Symbols • The set of power cables provided with the machine is for use only with the machine and cannot be used In this manual, symbols indicate and explain precautions. with other electrical devices. Do not use any power The indicated symbol varies depending on the nature of cables other than the ones provided with the the precaution. - Page 8 • Always plug the power cable into an outlet near to read the Safety Data Sheet (SDS) and the machine, and make sure the power cable can instruction manual for ink. https://mimaki.com/ supply/sds/ be easily unplugged. • Keep ink away from open flame. Also, be sure •...
- Page 9 Be careful about • Do not attempt to refill ink packs or ink cartridges. Mimaki is where media is stored. not responsible for any problems caused by using refilled •...
-
Page 10: Working Environment
The place of installation must have enough space for the machine as well as printing tasks. Total Model Width Depth Height weight TxF150-75 1965 mm 700 mm 1392 mm 126 kg Places where vibration Places directly exposed is generated... -
Page 11: Warning Labels
Introduction Warning Labels Warning labels have been applied to the machine as shown. Make sure you fully understand the details indicated on the various warning labels. If a warning label is illegible due to soiling or has come off, purchase a new one from a dealer or our sales office. When the maintenance cover is open... - Page 12 Introduction Order code Label M903239 M903330 M903405 M906144 M907935 M905811...
-
Page 13: Chapter 1 Before Use
Chapter 1 Before Use About this chapter This chapter describes information to know before use, such as part names and installa- tion instructions. Part Names and Functions ......1-2 Front ..............1-2 Rear/side ............1-3 Operating panel ..........1-4 Media sensor ..........1-6 Carriage ............ -
Page 14: Part Names And Functions
Chapter 1 Before Use Part Names and Functions Front Ink cartridges Each cartridge contains ink of a particular color. Cartridge cover Prevents injury or damage to the machine due to protruding ink cartridges. (located under ink cartridges) Clamp lever (front) Moves the pinch rollers up or down to hold or release the media. -
Page 15: Rear/Side
Chapter 1 Before Use Rear/side Clamp lever (rear) Interlocks with the clamp lever in the front. Blowing fan Blows air to dry ink after printing. Vacuum fan exhaust port Exhaust port for the fan that holds media in place. Roll holder Holds roll media when the ends of the paper core (left and right) are inserted. -
Page 16: Operating Panel
Chapter 1 Before Use Operating panel Use the operating panel to specify print settings or operate the machine. [SEL] key Display Switches the selected function. LOCAL Shows the following items: Function ([FUNC1]–[FUNC3]) • Machine status width:1340mm keys PRINT POST • Width of loaded media 30°... - Page 17 Chapter 1 Before Use *2: Functions assigned to [FUNC1]–[FUNC3] Details of functions assigned to [FUNC1]–[FUNC3] are described below. Icon Details • Display a menu for setting functions. • Display maintenance functions such as test printing or cleaning. • Switch from local to remote mode and start printing. •...
-
Page 18: Media Sensor
Chapter 1 Before Use Media sensor Capping station The media sensor detects when media is present and The capping station consists of ink caps, a wiper for determines the media length. The machine is equipped cleaning print heads, and other parts required for head with one media sensor, on the back of the platen. -
Page 19: Connecting Cables
Chapter 1 Before Use Connecting Cables Disconnecting USB flash drives Before disconnecting USB flash drives from computers that the machine is also connected to, click [Stop] in [Safely remove hardware]. Connecting a USB 2.0 interface cable Failure to observe these instructions may result in [Error 10 Command Error]. -
Page 20: Inserting Ink Cartridges
Overview • The machine's safety rating is based on using ink Green Illuminated Connected via 1000BASE-T recommended by Mimaki. To ensure safe operation, use ink recommend by Mimaki. Connected via a network other than • If the ink cartridges are brought from a cold place... -
Page 21: Inserting Ink Cartridges
This may cause ink to leak from the cartridge. • Do not attempt to refill ink packs or ink cartridges. Mimaki is not responsible for any problems caused by using refilled ink. • Do not touch and avoid soiling ink cartridge PCB contacts. -
Page 22: When Ink Level Low Or Ink Near End Is Displayed
Chapter 1 Before Use When Ink Level Low or Ink Near End is Displayed This machine counts the consumed ink amount. Discrepancies in actual consumed ink amount can occur for some reason. If the warning message appears, take appropriate actions as instructed on the operating panel. Machine operation Message Display condition... -
Page 23: Ink Cartridge Lamps
Chapter 1 Before Use Ink cartridge lamps Replacing Ink The lamps above ink cartridges indicate the status of the • When replacing with a new 600 ml ink cartridge loaded cartridges. case, register the case weight. ( P.3-9 「Replacing with a New Ink Cartridge」 Cartridge lamps •... - Page 24 Chapter 1 Before Use Adjust the shape of the ink pack. Replace with a new ink IC chip. • Slide to the side to remove. Good example Bad example Remove the seal of the double-sided tape. Front and back Inserted are reversed incorrectly left-to- right...
-
Page 25: Menu Mode
Chapter 1 Before Use Menu Mode The machine has four modes. Each menu mode is described below. Not-Ready mode The machine is in this mode before detection of media. Local mode In this mode, the machine is ready to print. All keys are available. The machine can receive data from a computer. The following operations are available in local mode: •... - Page 26 Chapter 1 Before Use 1-14...
-
Page 27: Chapter 2 Basic Operations
Chapter 2 Basic Operations About this chapter This chapter describes ink and media preparation, printing procedures, and setting meth- ods. Workflow ............2-2 Performing head cleaning based on test printing results ............2-10 Turning the Power On/Off ........ 2-3 Feed Correction Settings ........2-10 Turning the power on ........ -
Page 28: Workflow
Chapter 2 Basic Operations Workflow Turning the Power On/Off See "Turning the Power On/Off" ( P.2-3). Loading Media See "Loading Media" ( P.2-4). Test Printing See "Test Printing" ( P.2-8). Head Cleaning See "Head Cleaning" ( P.2-9). Printing Data See "Printing Data" ( P.2-11). -
Page 29: Turning The Power On/Off
Chapter 2 Basic Operations Turning the Power On/ • To use the machine again, press the [END/ POWER] key. Turning the power on The machine has two power switches. [END/POWER] key: Normally, use this key to turn the power on or off. [END/POWER] Main power switch: On the side of the machine. -
Page 30: Loading Media
The base of the head (recommended) (position set as height can be raised by 1– shipped) 2 mm. Contact a Mimaki sales M range 2.5 mm representative for details. H range 3 mm • Mist is more likely to be generated when the "M range"... -
Page 31: Loading Roll Media
Chapter 2 Basic Operations Move the roll holder to the roll loading Loading roll media position. Load roll media on the roll media hanger on the rear of • Make sure the roll stopper is not caught between the machine. the roll stopper arm and the machine. - Page 32 Chapter 2 Basic Operations Raise the clamp lever on the rear of the Make the roll media even, and then lower machine. the clamp lever. • Pull out a little at several positions of the media as needed to confirm that the amount pulled out is essentially even, and then lower the clamp lever.
-
Page 33: Changing The Printing Origin
Chapter 2 Basic Operations Press the [] key to detect the media. Changing the printing origin • The media width is detected. The position of the print origin can be changed. • When the [MEDIA RESIDUAL] maintenance Move the LED pointer to the new position to determine function is set to "ON"... -
Page 34: Preparing The Heater
• The temperature setting in the RIP software takes precedence. If you are using the Mimaki RIP software (RasterLink), the recommended values are stored in the color profile. • It may take several minutes to several tens of minutes to reach the specified temperature, depending on the ambient temperature. -
Page 35: Head Cleaning
Chapter 2 Basic Operations Head Cleaning With the screen in local mode, select [TEST PRINT/CLEANING] > [Test Print], and then press the [ENTER] key. About head cleaning • The Test Print menu is displayed. • To change the test pattern orientation, press []/ Perform the type of cleaning that corresponds to the []. -
Page 36: Feed Correction Settings
Chapter 2 Basic Operations Feed Correction Set- Correcting media-feeding during printing tings You can correct the media feed amount even in remote mode or during printing. You can correct the media feed amount by printing a correction pattern. Correct the media feed amount to Press [ ADJUST] while printing is in suit the type of media you are using. -
Page 37: If The Positions Of Dots Shift
Chapter 2 Basic Operations If the Positions of Dots Printing Data Shift Starting printing Changing the media and print head height and temperature changes around the print head will also alter the drop positions. Correct the drop position to suit •... -
Page 38: Pausing Printing
Chapter 2 Basic Operations Pausing printing Press [LOCAL] while printing is in progress. • Printing is paused. • If data is being sent from a PC, data transmission is paused at the PC. • Press the [REMOTE] key again to resume printing from the point at which it stopped. -
Page 39: Chapter 3 Settings
Chapter 3 Settings About this chapter This chapter describes various settings of the machine. Setup Menu ............3-2 Setting units (temperature/length) ....3-9 Registering and Correcting a Ink Cartridge ......3-9 Setup menu table ..........3-2 Setting the key buzzer ........3-10 Registering optimal print conditions to match us- Setting view feed ........... -
Page 40: Setup Menu
Chapter 3 Settings Setup Menu From the setup menu, you can set the print conditions for media you normally use. Setup menu table • Each of the following setting items can be configured for operation according to setting values used during RIP print- ing from a connected host computer. -
Page 41: Registering Optimal Print Conditions To Match Usage
Chapter 3 Settings Press the [ENTER] key to print the Registering optimal print conditions correction pattern. to match usage With this machine, you can register four separate print Check the correction pattern. conditions (SETUP 1–4) to suit the media used. •... -
Page 42: Heater
Chapter 3 Settings • If the correction value to use does not lie in the Logical seek range of -40 to 40, adjust the printing head height and repeat this process from step 2. Modifies carriage operation during printing. Print direction Carriage movement with logical seek off Unidirectional printing Bidirectional printing... -
Page 43: Margin (Left/Right)
• To give priority to RIP settings, use "Host" as the normally use the default option of "AUTO." setting value. • This function requires Mimaki driver Ver. 4.2.0 or • When the media holder is used in printing, set- higher. -
Page 44: Interval Wiping
Chapter 3 Settings Automatic nozzle checking (Cleaning Check) after auto Select a setting value and press the cleaning can also be set. [ENTER] key. With the screen in local mode, select • Setting value: 3–255 min. / OFF [MENU] > [SETUP], and then press the [ENTER] key. -
Page 45: Machine Setup Menu
Chapter 3 Settings Machine Setup Menu The Machine Setup menu provides a variety of convenient settings. The following items can be set in the machine settings. Machine setup menu table Function name Setting value Default Setting Details 5–60 min. 5 min. Automatically turns off the machine AUTO Power-off ( P.3-9) - Page 46 Chapter 3 Settings Function name Setting value Default Setting Details EVENT MAIL TRANSMIT ON / OFF Sets whether to send email when a TEST specified event occurs. P.3-12) SELECT PRINT ON / OFF Sets whether to send email when EVENT START printing starts.
-
Page 47: Setting Auto Power-Off
Chapter 3 Settings Setting auto power-off Setting the time Automatically turns off the machine after it has been You can set the time (time difference) in the country of use. left idle for the specified time. With the screen in local mode, select With the screen in local mode, select [MENU] >... -
Page 48: Setting The Key Buzzer
Chapter 3 Settings • The weight of the eco cartridge can be registered Place the ink pack and the ink IC chip in as follows: the eco ink cartridge case. (1) In LOCAL mode screen, select [MENU] > P.1-11 「Replacing Ink」 ) [Machine Setup], then press the [ENTER] key. -
Page 49: Setting The Network
Chapter 3 Settings • You can set an IP address when both DHCP and With the screen in local mode, select AutoIP are set to OFF. In other cases, go to step [MENU] > [MACHINE SETUP], and then press the [ENTER] key. Press the key. -
Page 50: Setting The Event Mail Function
• Notifications from the event mail function may not be delivered due to the internet environment, equipment Specify the address and press the [ENTER] failure, power failure, or other factors. Mimaki is not key. liable for any damages or loss caused by non-delivery or •... - Page 51 Chapter 3 Settings Press the [ENTER] key. • Depending on the server used, the machine may not be able to send emails unless you set • Results of transmission are displayed. up an email address corresponding to your • If testing email transmission fails, an error code is account.
- Page 52 Chapter 3 Settings Error code Error code Possible cause Corrective action Network connection error • Confirm that the machine is connected to the network. • Confirm that the machine IP address is correct. • Confirm that the machine is used in an environment where DNS is available.
-
Page 53: Initializing Settings
Chapter 3 Settings Initializing settings Resets setting values to the state at the time of purchase. With the screen in local mode, select [MENU] > [MACHINE SETUP], and then press the [ENTER] key. • The MACHINE SETUP menu is displayed. Select [RESET] and press the [ENTER] key. -
Page 54: Nozzle Check Menu
Chapter 3 Settings Nozzle Check Menu Used to set nozzle clogging detection. Nozzle check menu table Function name Setting value Default Description Nozzle checking during printing ON/OFF Set to check nozzles when the printer is online and about to begin printing. P.3-18) (ON) Check... -
Page 55: Nozzle Check Flow During Printing
Chapter 3 Settings Nozzle check flow during printing Nozzles are checked in the following sequence when printing begins. • To enable, set [Printing Check] to ON. • Retry and auto nozzle recovery are available when this setting is enabled. Nozzle check Judgment Nozzle clogging are detected. -
Page 56: Setting Nozzle Checking During Printing
Chapter 3 Settings Setting nozzle checking during printing Setting judgment conditions Set to ON to check nozzles when the printer is online and Set the conditions that determine nozzle clogging. about to begin printing. With the screen in local mode, select With the screen in local mode, select [MENU] >... -
Page 57: Information Menu
Chapter 3 Settings Information Menu Enables you to check information about the machine. You can check the following items of machine information. Information menu table Item Details USAGE WIPING Indicates the wiping count. WASTE TANK Indicates the waste ink level (as a percentage of the tank capacity) as a guideline. - Page 58 Chapter 3 Settings 3-20...
-
Page 59: Chapter 4 Maintenance
Chapter 4 Maintenance About this chapter This chapter describes the essentials for keeping the machine operating smoothly, such as routine care, and ink cartridge maintenance. Performing Maintenance ........4-3 Auto Maintenance Functions ......4-13 Filling with ink ..........4-14 Maintenance items and timing ......4-3 Replacing Consumables ......... -
Page 60: Maintenance Precautions
Chapter 4 Maintenance Maintenance Precautions • This machine includes parts that must be replaced periodically. We therefore recommend taking out a maintenance contract. Carry out maintenance periodically and replace consumable items to prevent quality defects and acci- dents. • Clean periodically. Debris and dust will accumulate on electrical components when the machine is used for extended periods. -
Page 61: Performing Maintenance
Tools required for maintenance To order replacement consumable items, contact your local dealer or our service office. For more information on consumable items, refer to our website (https://mimaki.com/supply/inkjet.html). • Avoid storing this product in locations accessible to children. • Use the maintenance liquid designed for the machine. -
Page 62: Routine Maintenance
Chapter 4 Maintenance Routine Maintenance Ink maintenance Shake the ink regularly before use. Failure to shake the ink regularly may result in ink sedimentation and reduced print quality. How often to shake the ink varies depending Carriage on the type and color. Ink should be shaken as often as described below. -
Page 63: Cleaning The Wiper Cleaner
Chapter 4 Maintenance Return the wiper to its original position. Ink guard • Holding the wiper by the lugs at both ends, push it Tabs Lugs Cleaning the wiper ink guard Wipe off any adhering ink or dust using a cotton swab or Clean the cap rubber. -
Page 64: Ncu Cleaning
Chapter 4 Maintenance Open the maintenance cover. Wipe off the collected ink and other substances on the edges of the guard plate. (Arrow in red) • Never rub the nozzles. Press the [ENTER] key after cleaning. Close the maintenance cover and press the [ENTER] key. -
Page 65: Cleaning The Waste Ink Draining Channel
Chapter 4 Maintenance Cleaning head nozzles • Insert the cleaning stick as far as the line shown in the illustration. With the screen in local mode, select [MENU] > [MAINTENANCE], and then press the [ENTER] key. • The Maintenance menu is displayed. Select [STATION MAINT.] >... -
Page 66: Preparing The Machine If It Will Not Be Used Over Extended Periods
Chapter 4 Maintenance Preparing the machine if it will not be • If the maintenance liquid cartridge is usable, suck maintenance liquid into a dropper and fill used over extended periods up the cap with it. Fill up the cap with maintenance liquid on the verge of overflow Before leaving the machine idle for a week or more, use from the cap. -
Page 67: Cleaning Media Sensors
Chapter 4 Maintenance attached dust to rub against the head nozzle surface and • If the "Check waste ink" warning message is dis- lead to ejection failures (e.g., nozzle clogging or played, check the waste ink tank. P.4-18 [In deflection). case of messages to check waste ink] •... -
Page 68: Cleaning Exterior Surfaces
Chapter 4 Maintenance Cleaning exterior surfaces When the exterior surfaces of the machine are dirty, wipe with a soft cloth dampened with neutral detergent diluted in water and thoroughly wrung out. • Do not allow liquids to get inside the machine. Otherwise there is a risk of failure, electric shock, or fire. -
Page 69: Maintenance Functions
Chapter 4 Maintenance Maintenance Functions Item Setting Meaning Station Maint. This moves the carriage to allow station and print head maintenance. Carriage Out Station Maint. Cleans around the station, including the cap and wiper. P.4-4 [Cleaning the wiper and cap] P.4-16 [Replacing the CP pad set] P.4-16 [Replacing pinch rollers] P.4-18 [Replacing cutter blades]... -
Page 70: Nozzle Recovery Function
Chapter 4 Maintenance Enter nozzle numbers for nozzle recovery, Nozzle recovery function and then press the [ENTER] key. When nozzle clogging of specific nozzles cannot be (1) Select numbers to enter (1–10) by pressing the corrected, other nozzles working normally can be used []/[] key, and then press the [ENTER] key. -
Page 71: Auto Maintenance Functions
Chapter 4 Maintenance Press the [ENTER] key. Set the pump tube/nozzle washing interval, and then press the [ENTER] key. • Setting value: 24–48 (hr.) Setting values vary depending on the type of ink used. Auto Maintenance Functions Select [LEAVING TIME] and press the Provides a variety of convenient automatic maintenance [ENTER] key. -
Page 72: Filling With Ink
Chapter 4 Maintenance Filling with ink Supplies ink to alleviate nozzle clogging. With the screen in local mode, select [MENU] > [MAINTENANCE], and then press the [ENTER] key. • The Maintenance menu is displayed. Select [FILL UP INK] and press the [ENTER] key. -
Page 73: Replacing Consumables
To order replacement consumable items, contact your local dealer or our service office. For more information on consumable items, refer to our website. https://mimaki.com/supply/inkjet.html Replacing wipers When a [Replace Wiper] warning message is displayed, the wiper must be replaced with a new one. Also at this time, wipe away ink adhering to the bottom of the slider. -
Page 74: Replacing The Cp Pad Set
Chapter 4 Maintenance Exhaust fan BOX CP pad assembly C slider Exhaust fan filter Attach the exhaust box in its original position. Press to engage the tabs • Engage the tabs at the rear of the exhaust box onto the machine, and then push in the front side. Replacing the CP pad set If the CP pad set is very dirty or if ink drips onto the media, replace with a new cap absorber. -
Page 75: Replacing Fan Filters
Chapter 4 Maintenance Remove the pinch rollers. Remove the filter. Blowing fan filter Pinch roller Mount a new filter, along with the fan filter cover. Replace the O-rings and pinch rollers. • Push in the fan filter cover until the tab clicks. Attach the pinch rollers and secure them with the O-rings. -
Page 76: Waste Ink Tank
Chapter 4 Maintenance Waste Ink Tank Ink used during head cleaning and other processes is collected in the waste ink tank at the lower right of the Waste ink machine. tank The machine keeps track of the waste ink level. A "Check Waste Ink Tank"... - Page 77 Chapter 4 Maintenance With the screen in local mode, select [MENU] > [MAINTENANCE], and then press the [ENTER] key. • The Maintenance menu is displayed. Select [STATION MAINT.] > [CARRIAGE OUT] > [STATION MAINT.], and then press the [ENTER] key. •...
-
Page 78: Examples Of Printing Issues
Chapter 4 Maintenance Examples of Printing Issues The following are typical examples of head (nozzle) ejection failure caused by dust or other factors that affect printing. To avoid using the nozzles in this state, check the nozzles regularly before and during printing. Nozzle status can be checked by using the machine's test printing function. -
Page 79: Recovering From Frequent Nozzle Dropout And Nozzle Ejection Failures Of White
Chapter 4 Maintenance Recovering from frequent nozzle dropout and nozzle ejection failures of white 1. Routine maintenance Clean the areas described in this manual. 2. Perform head cleaning (normal/hard) If the nozzle dropout does not recover after repeating the normal cleaning Check results of test printing several times, perform the hard cleaning. - Page 80 Chapter 4 Maintenance 4-22...
-
Page 81: Chapter 5 Troubleshooting
Chapter 5 Troubleshooting About this chapter This chapter describes the essentials for keeping the machine operating smoothly, such as routine care, and ink cartridge maintenance. Troubleshooting ..........5-2 Power does not turn on ........5-2 Printing is not possible ........5-2 Media jams or is dirty ........ -
Page 82: Troubleshooting
Chapter 5 Troubleshooting Troubleshooting Double-check the following points if you suspect mechanical failure. If the corrective action does not resolve the problem, contact your dealer, or our sales office or call center. Power does not turn on This is usually due to incorrect connection of the power cable for the machine or computer. Confirm that the equipment is connected correctly. -
Page 83: Image Quality Is Poor
• Once an ink cartridge warning appears, do not leave the machine in that state over an extended period. Nozzle clog- ging prevention will be disabled. If the nozzles are clogged, the machine must be repaired by a Mimaki service engi- neer. -
Page 84: Warning/Error Messages
Chapter 5 Troubleshooting Warning/Error Messages If a problem arises, the buzzer sounds and a message is displayed. Take appropriate measures based on the message. Warning messages Errors when performing operations Message Cause Corrective action INVALID OPERATION Operation cannot be performed because •... - Page 85 Chapter 5 Troubleshooting Ink errors Ink errors are also displayed in local guidance ( P.3-19 [Displaying information]). Message Cause Corrective action • Reinsert the cartridge that caused the warn- Wrong Ink IC The ink IC chip of the ink cartridge can- ing.
-
Page 86: Error Messages
Chapter 5 Troubleshooting Error messages Respond to error messages as follows. If the message is displayed again despite the measures you have taken, contact your dealer, or our sales office or call center. Message Cause Corrective action ERROR 122 An SDRAM error occurred. CHECK:SDRAM •... - Page 87 Chapter 5 Troubleshooting Message Cause Corrective action ERROR 18a Main PCB V_CORE ERROR 18c An error occurred in the main PCB power Main PCB V12 supply. ERROR 190 Main PCB V42-1 ERROR 192 COMIO PCB V1R2 ERROR 193 COMIO PCB V2R5 An error occurred in the COM16 PCB power supply.
- Page 88 Chapter 5 Troubleshooting Message Cause Corrective action ERROR 509 A position control error occurred. HDC POSCNT ERROR 50a Y-origin could not be detected. Y ORIGIN • Temporarily turn off the main power supply, ERROR 50f and then turn it on again. L-SCALE BLACK If the message appears again, contact your dealer, or our sales office or call center.
- Page 89 Chapter 5 Troubleshooting Message Cause Corrective action ERROR 902 • Clear the data ( P.2-12). There is remaining print data. DATA REMAIN • Temporarily turn off the main power supply, ERROR 90d and then turn it on again. An error occurred in the mounted heads. NO HEAD SELECT If the message appears again, contact your dealer, or our sales office or call center.
- Page 90 Chapter 5 Troubleshooting 5-10...
-
Page 91: Chapter 6 Appendix
Chapter 6 Appendix About this chapter This chapter lists the specifications and functions of the machine. Specifications ........... 6-2 Main unit specifications ........6-2 Ink specifications ..........6-4 Order for Loading Ink Cartridges ..... 6-5 LICENSE Library ..........6-6... -
Page 92: Specifications
Chapter 6 Appendix Specifications Main unit specifications Item TxF150-75 Remarks On-demand piezo head Head (1 head, 8 nozzles; 180 nozzles per line; pitch between nozzles: 180 dpi) x-dpi: 720/1440 Variable dot is sup- Print resolution y-dpi: 720 ported 6 IC chip-equipped... - Page 93 Chapter 6 Appendix Item TxF150-75 Remarks 1) VCCI class A 2) FCC class A 3) IEC 62368-1 ETL compliance 4) CE marking (EMC Directive, Low Voltage Directive, Machinery Compliance with standards Directive, RoHS Directive) 5) CB Report 6) REACH and Energy Star...
-
Page 94: Ink Specifications
Chapter 6 Appendix Ink specifications Item Thermal transfer pigment ink Supply Dedicated ink cartridges Cyan Magenta Color Yellow Black White Ink capacity Color: 600 cc, wh: 500 cc The expiration date is printed on the ink cartridge. Expiration date However, after opening, within one month even it is within the expiration date. 10–35°C / 50–95°F (ave. -
Page 95: Order For Loading Ink Cartridges
Chapter 6 Appendix Order for Loading Ink Cartridges • Load ink cartridges according to the cartridge label colors under the ink station. -
Page 96: License Library
Chapter 6 Appendix LICENSE Library Mimaki printer firmware Copyright @2020 MIMAKI ENGINEERING CO.,LTD. All rights reserved. This product contain open source software listed in the tables below. Component License StarterWare for ARM® based TI Sitara Processors BSD-TI The following license terms and conditions shall apply to the open source software listed in the table above: BSD-TI Copyright(C)2010 Texas Instruments Incorporated - http://www.ti.com/... - Page 97 Index Index results ............2-9 Heater setup ............ 3-4 Adjusting head height ........2-4 If the Positions of Dots Shift ....2-11 Adjustment lever and range ......2-4 Information Menu .......... 3-19 Auto cleaning setup ........3-5 Information menu table ........ 3-19 Auto Maintenance Functions .......
- Page 98 Index Operating panel ......... 1-4 Ink cartridge warning appears ....5-3 Pinch rollers and grit rollers ....... 1-6 Media is dirty ..........5-2 Rear/side ........... 1-3 Media jams ..........5-2 Place of installation Nozzles are clogged ........5-3 ........... ix Power does not turn on ......
- Page 99 TxF150-75 Operation Manual April 2023 Issued by Mimaki Engineering Co., Ltd. Place of issue Mimaki Engineering Co., Ltd. 2182-3 Shigeno-otsu, Tomi-shi, Nagano 389-0512 JAPAN D203671-10-15042023...
- Page 100 ©2023 Mimaki Engineering Co., Ltd.
Need help?
Do you have a question about the TxF150-75 and is the answer not in the manual?
Questions and answers
The white ink indicator lights on the top left are still flashing green while printing in the remote mode