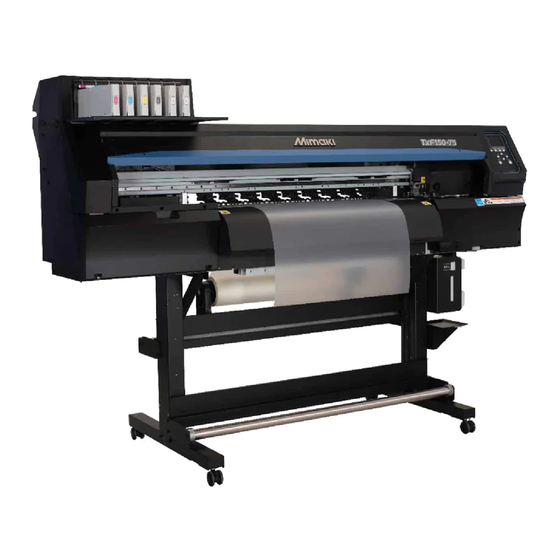
MIMAKI TxF150-75 Requests For Care And Maintenance
Inkjet printer
Hide thumbs
Also See for TxF150-75:
- Operation manual (100 pages) ,
- Requests for care and maintenance (19 pages) ,
- Operation manual (102 pages)
Table of Contents
Advertisement
Quick Links
Requests for Care and Maintenance
This machine is a precision machine equipped with extremely fine mechanisms. Especially, the nozzle surface of the heads from
which the ink is discharged is affected even by a slightest attachment of dust or paper powder and the proper printing results
could not be obtained. With a view to using this machine in a better condition, we would like to recommend performing the
following care and maintenance on daily basis.
Maintenance Precautions
• This machine includes parts that must be replaced periodically. We therefore recommend taking out a maintenance
contract. Carry out maintenance periodically and replace consumable items to prevent quality defects and
accidents.
• Clean periodically. Debris and dust will accumulate on electrical components when the machine is used for extended
periods. There is a risk of failure, electric shock, or fire due to current leakage.
• Do not clean by blowing—e.g., avoid using air blowers. Doing so may lead to failure, electric shock, or fire involving
the machine if airborne debris or dust gets inside electrical components. Wipe using a soft cloth soaked in diluted
neutral detergent and thoroughly wrung out. A vacuum cleaner may also be used for cleaning.
• Do not allow liquids to get inside the machine. Otherwise there is a risk of failure, electric shock, or fire.
• For heavy soiling, wipe using a soft cloth soaked in diluted neutral detergent and thoroughly wrung out.
• Pay close attention to ventilation and be sure to wear safety glasses, gloves, and a mask when handling ink,
maintenance liquid, waste ink, or other solutions used with the machine. Leaking ink may adhere to the skin or get
into the eyes or mouth.
• Never touch the print head nozzle surface. Do not allow water or alcohol to come into contact with the print nozzle
surface. This will increase the risk of machine failure or ejection failures (e.g., nozzle clogging or deflection).
• Do not use cotton swabs to clean around the head or carriage. Fibers from cotton swabs may adhere to the head
nozzle surface and lead to ejection failures (e.g., nozzle clogging or deflection).
• Do not splash ink or maintenance liquid on the covers. Exposure to splashing ink or maintenance liquid may
damage or deform the cover.
• Do not use benzine, thinner, or any chemical agent containing abrasives. Use of these chemicals may result in
damage to or deformation of parts.
• Do not move the carriage by hand. To move the carriage, use the carriage out function on the menu.
Inkjet printer TxF150-75
1
Advertisement
Table of Contents

Related Manuals for MIMAKI TxF150-75


Summary of Contents for MIMAKI TxF150-75
- Page 1 Inkjet printer TxF150-75 Requests for Care and Maintenance This machine is a precision machine equipped with extremely fine mechanisms. Especially, the nozzle surface of the heads from which the ink is discharged is affected even by a slightest attachment of dust or paper powder and the proper printing results could not be obtained.
-
Page 2: Performing Maintenance
Tools required for maintenance To order replacement consumable items, contact your local dealer or our service office. For more information on consumable items, refer to our website (https://mimaki.com/supply/inkjet.html). • Avoid storing this product in locations accessible to children. • Use the maintenance liquid designed for the machine. -
Page 3: Routine Maintenance
Routine Maintenance Ink maintenance Shake the ink regularly before use. Failure to shake the ink regularly may result in ink sedimentation and reduced print quality. How often to shake the ink varies depending on the Carriage type and color. Ink should be shaken as often as described below. For instructions on shaking ink, see "Inserting Ink Cartridges."... - Page 4 Lugs Ink guard Tabs Clean the cap rubber. • Wipe off any adhering ink or dust using a cleaning stick Cleaning the wiper ink guard or tweezers moistened with maintenance liquid. Wipe off the maintenance liquid. Make sure none remains. Wipe off any adhering ink or dust using a cotton swab or tweezers.
- Page 5 Open the maintenance cover. Wipe off the collected ink and other substances on the edges of the guard plate. (Arrow in red) • Never rub the nozzles. Press the [ENTER] key after cleaning. Close the maintenance cover and press the [ENTER] key.
- Page 6 • Insert the cleaning stick as far as the line shown Cleaning head nozzles in the illustration. With the screen in local mode, select [MENU] > [MAINTENANCE], and then press the [ENTER] key. • The Maintenance menu is displayed. Select [STATION MAINT.] > [NOZZLE WASH], and then press the [ENTER] key.
- Page 7 Preparing the machine if it will not be • If the maintenance liquid cartridge is usable, suck maintenance liquid into a dropper and fill used over extended periods up the cap with it. Fill up the cap with maintenance liquid on the verge of overflow Before leaving the machine idle for a week or more, use the from the cap.
-
Page 8: Cleaning The Platen
against the head nozzle surface and lead to ejection failures • If the "Check waste ink" warning message is (e.g., nozzle clogging or deflection). displayed, check the waste ink tank. P.4-18 「In case of messages to check waste ink」 • When the machine is not in use, raise the clamp lever to separate the pinch rollers from the grit rollers. -
Page 9: Cleaning Exterior Surfaces
Replacing wipers When a [Replace Wiper] warning message is displayed, the wiper must be replaced with a new one. Also at this time, wipe away ink adhering to the bottom of the slider. - Page 10 Wiper slider Exhaust fan BOX Exhaust fan filter Insert a new wiper. Attach the exhaust box in its original position. • Holding the wiper by the lugs at both ends, push it in. • Engage the tabs at the rear of the exhaust box onto the machine, and then push in the front side.
-
Page 11: Replacing Fan Filters
Remove the pinch rollers. CP pad assembly C slider Pinch roller Press to engage the tabs Replace the O-rings and pinch rollers. Attach the pinch rollers and secure them with the O-rings. Turn the power on. After replacement, manually return the wiper to the rear. -
Page 12: Waste Ink Tank
Waste Ink Tank Mount a new filter, along with the fan filter cover. Ink used during head cleaning and other processes is • Push in the fan filter cover until the tab clicks. collected in the waste ink tank at the lower right of the machine. - Page 13 • The Maintenance menu is displayed. Select [STATION MAINT.] > [CARRIAGE OUT] > [STATION MAINT.], and then press the [ENTER] Waste ink key. tank • The carriage moves over the platen. • Attach the cap to the removed waste ink tank, and use tape to prevent leakage of Carriage...
- Page 14 Examples of Printing Issues The following are typical examples of head (nozzle) ejection failure caused by dust or other factors that affect printing. To avoid using the nozzles in this state, check the nozzles regularly before and during printing. Nozzle status can be checked by using the machine's test printing function.
- Page 15 2. Perform head cleaning (normal/hard) Check results of test printing If the nozzle dropout does not recover after repeating the normal cleaning several times, perform the hard cleaning. If this does not alleviate nozzle clogging or other issues 3. Perfome white maintenance Check results of test printing ...
- Page 16 2023 MIMAKI ENGINEERING CO., LTD. D203679-10-15042023...
Need help?
Do you have a question about the TxF150-75 and is the answer not in the manual?
Questions and answers