
Related Manuals for urmet domus 1067/032


Summary of Contents for urmet domus 1067/032
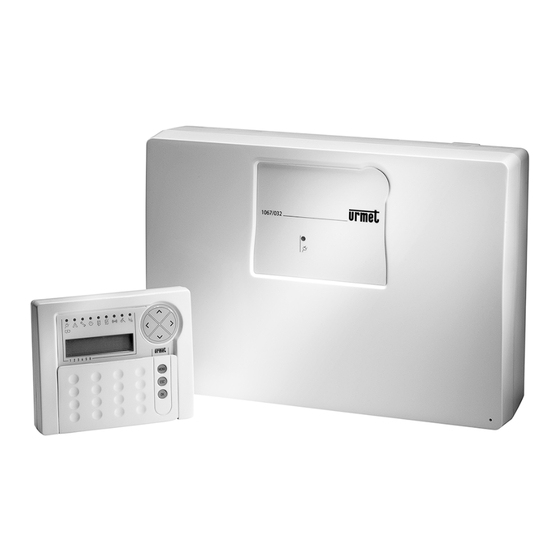
- Page 1 Mod. 1067 DS1067-035A LBT8633 BUS CONTROL PANEL 8/32 INPUTS Ref.1067/032 Ref.1067/042 PROGRAMMING MANUAL...
-
Page 2: Table Of Contents
TABLE OF CONTENTS PREFACE..............................6 NAVIGATION THROUGH MENUS ..................... 6 COMMAND DEVICES..........................8 1067/021 DISPLAY KEYPAD ...................... 8 ELECTRONIC KEY READER 1067/334–1067/335 AND PROXIMITY READER 1067/434 – 1067/435..............................9 1058/035 REMOTE CONTROL....................9 SYSTEM STATUS INFORMATION................... 10 2.4.1 System status display......................... 10 2.4.2 Open inputs display.......................... - Page 3 4.6.4 Bypass allowed ..........................25 4.6.5 Ancillary functions (Gong, Courtesy light, Door opening, Absence of move) ........25 4.6.6 Burglar inputs attributes (Release type, AND / OR zones, AND inputs)..........25 4.6.7 Input associated to a video camera....................25 4.6.8 Input programming ..........................
- Page 4 4.16.7 User a clear-text name ........................58 4.17 KEYS............................58 4.17.1 Key acquisition ........................... 58 4.17.2 Key deleting ............................59 4.17.3 Key configuration ..........................59 4.17.4 Key enabling ............................60 4.17.5 Key disabling............................60 4.18 TIMING PROGRAMMER......................60 4.18.1 Functioning principles......................... 60 4.18.2 Programming procedure........................
- Page 5 5.7.2 Timing programmer enabling ......................77 5.7.3 Timing programmer disabling......................77 INPUTS EXCLUSION AND INCLUSION................... 77 5.8.1 Input exclusion ........................... 77 5.8.2 Input inclusion ............................ 78 PERIODIC TESTS ........................78 5.10 VARIOUS ........................... 78 5.10.1 Display Info ............................78 5.10.2 Buzzer volume adjustment .........................
-
Page 6: Preface
PREFACE STRUCTURE OF THIS MANUAL The manual is divided into chapters and discussed subjects are arranged sequentially to accompany each step of system programming and configuration. Descriptions to design, install and maintain the system are given in Installation Manual, where devices acquiring procedure is indicated. - Page 7 The display of the status of zones and their association to a number of functions during programming is of graphic type. Example: ZN01:... □□ □■... On display 2 line, graphic symbols appear matching digits 1 ÷ 6 present on the mask; The meaning during programming is: □...
-
Page 8: Command Devices
COMMAND DEVICES 1067/021 DISPLAY KEYPAD Ref. Description Use or provided indications Keypad Used to enter the access code, to select some functions and to program the control panel Function keys Used to activate additional system functions. See § 5.3 LCD 2x16 characters display Shows date and time when in stand-by mode, detailed information on system status, the event log and the programming menus. -
Page 9: Electronic Key Reader 1067/334-1067/335 And Proximity Reader 1067/434 - 1067/435
Red LED Off = no tamper tamper memory On = tamper memory See § 2.4.4 Green LED On = system totally armed System status Off = system totally disarmed Blinking = system partially armed See § 2.4.1 Arrow keys Scroll the menu items; change the value of some parameters. MENU key Access to the menu. -
Page 10: System Status Information
SYSTEM STATUS INFORMATION 2.4.1 System status display System status is shown by summarising LED present on keypads and electronic key readers. Every user, included Master and Installer, can display in detail the system status for the parts of his competence (will be displayed only the zones where they can operate). -
Page 11: Alarms, Events And Signalling
ALARMS, EVENTS AND SIGNALLING DESCRIPTION OF ALARMS, EVENTS The 1067 system manages different types of alarms, described below with their characteristics. 3.1.1 Burglar Alarm It is the alarm of anti-burglar system. System 1067 manages one burglar alarm for each zone; to each single zone there can be paired its own output actuators, such as sirens. -
Page 12: Tamper Alarm
3.1.3 Tamper alarm It is the alarm which is generated if somebody tries to tamper the system. It is always (24H) active and is temporarily disabled by putting the system to maintenance status. generated if... • a Tamper is opened (control panel, keypads, or radio devices like 1058/ 101; 201; 405; 035) •... -
Page 13: Panic Alarm
3.1.5 Panic alarm It is an alarm which can be triggered by a user in a situation of danger. It is always (24H) active and is temporarily disabled by putting the system to maintenance status. generated if... • a Panic input is opened •... -
Page 14: Emergency Alarm
3.1.8 Emergency alarm System 1067 provides the capability to generate service signalling for an “emergency request” owing to either actuating a dedicated key or detecting lack of movement in the environments. NOTE: An “emergency request” is only to be considered as an anti-burglar system ancillary function; therefore, system 1067 cannot be used as a remote emergency system according to regulations in force. -
Page 15: Fire Reset Event
3.1.10 Fire reset event • generated if... a fire reset input is opened activates... • for 1 second the outputs programmed as fire reset that have at least one zone shared with the input that generated the event is stored... •... -
Page 16: Telephone Failure Alarm
3.1.15 Telephone failure alarm generated... on PSTN line: • after 3 automatic and consecutive failed PSTN tests • if, with tones control enabled, after an event to be sent, when the line is seized the dial tone is not detected for 3 consecutive times. on GSM channel: •... -
Page 17: Lack Of Power Event
3.1.18 Lack of power event Generated if... • the mains voltage is off for a shorter time than the programmed "Lack of power time” The event is generated regardless of the system status (24h). • Is stored... In the event log •... -
Page 18: Input Exclusion Event
3.1.22 Input exclusion event • generated if... inputs are manually excluded • if the system autoexcludes inputs open at activation (if programmed) • if the system excludes inputs or owing to “alarms count” overflow (if programmed) activates... • excluded input programmed outputs having at least one zone shared with excluded input •... -
Page 19: System Start-Up
SYSTEM START-UP In this chapter are described the necessary programming procedures for 1067 system start-up, after installation of the physical devices. SYSTEM ACCESS CODES For 1067 system management it is possible to use up to 32 different access codes: 1 Installer code, 1 Master code and 30 User codes. - Page 20 MASTER MENU (see § 6.1) Accessed by entering Master code, confirmed with OK, and by pressing MENU key; it includes following functions: • Displaying system status • System Arming / Disarming / Partitioning • Displaying event log • Excluding / including inputs •...
-
Page 21: Alphanumeric Characters Input
ALPHANUMERIC CHARACTERS INPUT With the keypad it is possible to enter alphanumeric characters to store names describing users, zones, outputs, etc. Each name can be made up of 24 characters as a maximum. Keys allow to scroll and select several characters, as shown in the following table. -
Page 22: Zones Programming
ZONES PROGRAMMING 1067 system manages up to 6 zones, whose number is set during the programming procedure. Every system must have at least 1 zone. System inputs, outputs, keypads and readers are freely associated to zones and can also refer to more than one zone. -
Page 23: Wired Input Programming
WIRED INPUT PROGRAMMING System 1067 manages max general use 32 inputs. SAB tamper inputs present in control panel and expansions 1067/008 are not programmable. For more information and connections, refer to Installation manual. 4.6.1 Inputs encoding Every input has two codes: a physical one and a logical one. The two addresses are displayed according to the following diagram: physical address : logical address more in detail:... -
Page 24: Inputs Specialisations
4.6.3 Inputs specialisations Alarm input configuration specifies how, when and what type of alarm is generated. According to the type of generated alarm, the control panel will activate the specific devices (outputs, sirens and communicator). For further details about each function see chapter 3 Alarms, Events and Signalling. Below there are described possible inputs specialisations. -
Page 25: Bypass Allowed
4.6.4 Bypass allowed If an input is prearranged as an input with “bypass allowed”, the input will be subjected to either manual or automatic exclusions. For more details, see § 5.8 Inputs exclusion and inclusion and § 4.5.1 Arming mode – Standard / Autoexclusion / Block arming. -
Page 26: Input Programming
4.6.8 Input programming To program an input follow the instructions below: 1. Enter on keypad the installer code (default 000000) and press OK key. 2. Press MENU key. 3. Press ▼ key until “PROGRAMMING” appears on the display. UT00:INSTALLER 4. Press OK key to confirm. PROGRAMMING 5. -
Page 27: Wired Outputs Programming
23. Press Ok key. “DISPLAY AND” appears. With ▼, ▲ and OK keys it is possible to display AND INPUTS (DISPLAY AND) the AND connections of the input or it is possible to select (SELECT DISPLAY AND AND) to which other input can be connected the input, or disable (DISABLE AND) the AND connection, if present. -
Page 28: Outputs Specialisations
4.7.3 Outputs specialisations Control panel and expansion outputs, both relay and electric, can be programmed to be activated after specific events. For more details on single functions, see chapter 3 Alarms, Events and Signalling. Possible specialisations for outputs are described below. O BURGLAR Burglar outputs are armed if an burglar alarm is generated. - Page 29 O DOOR OPENING Outputs Door Opening are armed if a Door Opening event is generated. O COURTESY LIGHT Courtesy light outputs are armed if a Courtesy light event is generated. O FAILURE Failure outputs are armed if an alarm is generated by a respective Failure input. O TELEPHONE FAILURE Telephone failure outputs are armed if a Telephone failure alarm is detected.
-
Page 30: Output Programming
4.7.4 Output programming To program an output follow the instructions below: 1. Enter on keypad the Installer code (default 000000) and press OK key. 2. Press MENU key. 3. Press ▼ key until “PROGRAMMING” appears on the display. UT00:INSTALLER PROGRAMMING 4. -
Page 31: Keypads Programming
KEYPADS PROGRAMMING To program a keypad follow the instructions below: 1. Enter on the keypad the Installer code (default 000000) and press OK key. 2. Press MENU key. 3. Press ▼ key until “PROGRAMMING” appears on the display. Us00:INSTALLER PROGRAMMING 4. -
Page 32: Readers Programming
23. Press key ▼ until “FUNCTION KEYS” appears. Press OK key and use keys ▼ and ▲ to enable or disable function keys “Fire”, “Silent panic” and “Emergency” (see § 5.3), KP01:KP 01 confirming choices by OK key. FUNCTION KEYS FUNCTION KEYS 24. -
Page 33: Radio Inputs Encoding
4.10.1 Radio inputs encoding Every input has two codes: a physical one and a logical one. The two addresses are displayed according to the following diagram: physical address : logical address more in detail: ddXX InY: InZZ where: • dd is the radio device type associated with a1067/010 (IR, DC, RC) •... -
Page 34: Radio Input Attributes: Bypass Allowed, Release Type, Common Input, And Inputs
4.10.4 Radio input attributes: Bypass allowed, Release type, Common input, AND inputs The table below lists the available programming, according to the type of input: Device 1058/101 1058/201 Programming Value Reed contact Aux contact Notes Bypass not allowed Bypass not allowed Bypass not allowed Bypass allowed Bypass allowed (default) - Page 35 Press OK key to confirm. Select with ▼ key the desired input (DC01;DC02 etc.) SELECT DC DC01:... Press OK key to confirm. Press ▼ key to select the desired type of input DC01:... DC01.In01: In01 10. Press OK key to confirm. DC01.In01: In01 11.
-
Page 36: Radio Output Programming (Sirens)
28. Press OK key to confirm. Give the input a descriptive name, by using the keypad (for further information see § NAME 4.2). Name maximum length is 10 digits. In01:... 29. Press OK key to confirm. “NAME” appears. RADIO DEVICES EW01:EW01 30. -
Page 37: Radio Output Programming
4.10.12 Radio output programming To program an radio output follow the instructions below: Enter on keypad the Installer code (default 000000) and press OK key. Press MENU key. UT00:INSTALLER Press ▼ key until “PROGRAMMING” appears on the display. PROGRAMMING Press OK key to confirm. PROGRAMMING Press ▼... - Page 38 UT00:INSTALLER PROGRAMMING EW01:EW SELECT RC RC01:… SELECT IR RC01:… NAME PROGRAMMING READERS EW01:EW 01 SELECT DC RC01:… NAME SELECT RC PROGRAMMING RADIO DEVICES EW01:EW 01 RC01:… KEYS PROGR. RC02:… RADIO DEVICES EW01:EW SIRENS SELECT RC RC03:… PROGRAMMING ADVANCED EW01:EW 01 SELECT RC SELECT RC RC04:…...
-
Page 39: Advanced Programming
4.12 ADVANCED PROGRAMMING 4.12.1 Remote management system code setting To set the system code used for remote management with FastPro 1067/001 software, follow the instructions below: 1. Enter on the keypad the Installer code (default 000000) and press OK key. 2. -
Page 40: Communicator
To this aim the 1067/032 or 1067/042 control panel will forward all the SMS messages coming from numbers not known by the system (these numbers are not included in the list composed by 12 numbers, described below) to the number stored in position no. -
Page 41: Telephone Number Storing
4.14.3 Telephone number storing To store a telephone number follow the instructions below: 1. Enter on the keypad the Master code (default 111111), or the Installer code (default 000000), and press OK key. 2. Press MENU key. 3. Press ▼ key until “TELEPHONE DIALER” appears on the display UT01:MASTER TELEPHONE DIALER 4. -
Page 42: Telephone Number Change
4.14.4 Telephone number change To change a stored telephone number follow the instructions below: 1. Enter on the keypad the Master code or the Installer code and press OK key. 2. Press MENU key. 3. Press ▼ key until “TELEPHONE DIALER” appears on the display. Us01:MASTER TELEPHONE DIALER 4. - Page 43 Below table shows all pre-recorded messages for events provided for and indicates which pre-recorded messages can be customised by over-registering a message of theirs. Event / alarm Message Customizable Generated for Burglar alarm ■ opening burglar input Burglar alarm device tamper (Tamper, SAB or missing Tamper alarm ■...
-
Page 44: Vocal Messages Listening
4.14.7 Vocal messages listening Warning: to listen to vocal messages it is necessary to use the earphone with microphone to be connected directly to the vocal synthesis card (for installer only). To listen to vocal messages follow the instructions below: 1. -
Page 45: Sms Messages Writing
12. If recording is satisfactory, exit from the menu by pressing repeatedly ESC key, or make again the recording by following the same procedure from step 9. 4.14.9 SMS messages writing 1067/032 or 1067/042 control panel can send SMS messages to programmed telephone numbers, when the following events occur: • Burglar alarm •... -
Page 46: Alarm Sending
4.14.11 Alarm sending The communicator can send events scheduled in 4 different ways: • Vocal: the communicator sends alarms by voice messages, some pre-recorded, some customized by the user. • Numerical: the communicator sends alarms by numerical codes. This mode is used for connection to alarm reception centres: supported protocols are IDP, ADF, C200B. -
Page 47: Sequence Of Alarm Message Sending And Block Of Calls
10. Select with ▼ and ▲ keys if the selected alarm must be sent or not (to the telephone BURGLAR number selected at step 7) and confirm the selection with OK key. SEND 11. Follow the same procedure from step 9 to associate to the telephone number other alarm types (with sending mode selected at step 8). -
Page 48: Gsm Parameters
SIM CARD expiry: it allows to store month and year of prepaid SIM expiration. The first day of the stored month, at 10 o'clock, 1067/032 or 1067/042 control panel will send a warning message to vocal numbers and SMS configured for that event. -
Page 49: Pstn Line Test
4.14.15 PSTN line test 1067/032 or 1067/042 control panel can control periodically the PSTN line, by verifying the dial tone, in order to check if connection is full operating; if it is not operating, it generates a “Telephone Failure” event. This event is generated after 3 unsuccessful consecutive tests. -
Page 50: Periodic Communication Test
4.14.16 Periodic communication test 1067/032 or 1067/042 control panel can automatically call, at fixed time intervals, remote management (modem) or alarm reception centres (numerical) if they need a periodical confirmation for system correct operation. The Periodic communication test can also be toward phone numbers into vocal mode. -
Page 51: Answer Machine
4.14.18 Answer machine To allow that 1067/032 or 1067/042 control panel answers incoming telephone calls on PSTN line, it is necessary to enable the answer machine function. This function is enabled separately for PSTN and GSM network (according to the configuration, the control panel can answer only GSM calls and not PSTN calls, or vice versa). -
Page 52: Return Call
4.14.20 Return call If desired, the installer can enable the Return Call function for remote management operations. In this way it is possible to perform a remote connection to 1067 system with a PC provided with FastPro 1067/001software, to call 1067 control panel and to be immediately and automatically recalled by the control panel. -
Page 53: Phone Lines Enable
4.14.22 Phone lines enable In order to send or receive calls, it is necessary to install the appropriate GSM and/or LAN (Ethernet interface) modules and also to enable the telephone networks to be used. Every telephone network can be enabled separately. More than one line can be enabled. -
Page 54: Idp Message Structure
4.14.23 IDP message structure The control panel sends a message for every single event, in case of multiple events, it sends them all in one single call. For example, in the event of total arming, the control panel sends, in succession during the same call, the arming messages of each zone (in fact there is no total arming or disarming event). -
Page 55: Installer
4.15 INSTALLER 4.15.1 Installer enabling In order to operate on the system, the Installer must be enabled. For security reasons, the Installer enabling expires after inserting a user or Master code or a Key. NOTE: at the first system power-on and after every reset, the Installer is automatically enabled. To enable the Installer follow the instructions below: 1. -
Page 56: Users
4.16 USERS 4.16.1 User enabling In order to operate on the system, users must be enabled. According to default settings all users are disabled. To enable a user follow the instructions below: 1. Enter on the keypad the Master code (default 111111) and press OK key. 2. -
Page 57: How To Associate Users To Zones
4.16.4 How to associate users to zones To associate a user to some zones follow the instructions below: 1. Enter on the keypad the Master code (default 111111) and press OK key. 2. Press MENU key. 3. Press ▼ key until “SETTINGS” appears on the display. Press OK key to confirm. UT01:MASTER SETTINGS 4. -
Page 58: Keys
4.16.7 User a clear-text name To give a user a clear-text name makes his identification easier during enabling, configuration and Event log reading operations. To give a user a clear-text name follow the instructions below: 1. Enter on the keypad the Master code or Installer code or User code and press OK key. 2. -
Page 59: Key Deleting
4.17.2 Key deleting To delete an electronic or proximity key from the system follow the instructions below: 1. Enter on the keypad the Master code or the Installer code and press OK key. 2. Press MENU key. 3. Press ▼ key until “SETTINGS” appears on the display. UT00:INSTALLER 1 4. -
Page 60: Key Enabling
13. If SYSTEM has been selected, choose between “ASSIGN” and “DO NOT ASSIGN”. 14. If ZONES has been selected at step 12, choose the zone from the zones list and then ASSIGN or DO NOT ASSIGN. Follow the same procedure for every zone to be associated. -
Page 61: Programming Procedure
Available commands for the timing programmer are the following: Command Description Notes and examples Zones arm It activates the zone/zones Zones disarm It deactivates the zone/zones Commandable output activation It activates the commandable It is the remote-controlled output. output Commandable output It deactivates the deactivation commandable output... -
Page 62: Command Deleting
11. Press ESC key to go to the upper level of the menu. 12. Press ▼ key; “COMMANDS TYPE” appears. P.O. COMMANDS TYPE 13. Press again OK key and select with ▼ and ▲ keys the day type (working, pre-holiday and COMMANDS TYPE holiday ) to be configured. -
Page 63: Technical Prerequirements For Data Transfer
By using the interface for USB key (Ref. 1067/003) it is for safety reasons possible to save carried out programming into USB key. Instructions for connecting the interface in control panel 1067/032 e 1067/042 are in the Installation manual. It is possible to separately save, in file form: •... -
Page 64: System Test
File saving and restoring operations can take some minutes; during these operations there appears on the display: WAIT PLEASE Warning: as long as USB/KEY interface yellow LED is on (Ref. 1067/003) USB key must not absolutely be removed and control panel must not be powered off! At the end, if the operation was completed correctly, “OK”... -
Page 65: Battery Test
4.20.3 Battery test To control the control panel battery state follow the instructions below: 1. Enter on the keypad the Master code or the Installer code and press OK key. 2. Press MENU key. 3. Press ▼ key until “TEST” appears on the display. UT01:MASTER 4. -
Page 66: Gsm Field Test
4.20.6 GSM field test In order to check GSM signal level follow the instructions below: 1. Enter on the keypad the Master code or the Installer code and press OK key. 2. Press MENU key. 3. Press ▼ key until “TEST” appears on the display. UT01:MASTER 4. - Page 67 UT00:INSTALLER TEST RESULT TEST INPUTS OK TEST TEST INPUTS OK IN02:….. TEST TEST INPUTS TEST INPUTS TEST INPUTS OK TEST INPUTS IN PROGRESS TEST RESULT IN05:….. TEST RESULT TEST INPUTS KO TEST INPUTS KO IN07:… TEST TEST OUTPUTS TEST OUTPUTS CONTEOL PANEL TEST INPUTS KO IN09:…...
-
Page 68: Environmental Listening Test
4.20.8 Environmental listening test If in the system are included one or more keypads connected for environmental listening, it is strongly encouraged to verify that this feature is working properly. For this purpose make a call from a telephone located outside the area to be controlled and follow the procedure described in paragraph 5.6.7 Environmental listening. -
Page 69: System Management
SYSTEM MANAGEMENT ARMING Two configurations are available: complete system arm and partial system arm. Arm with keypad is the most configurable, while arms with electronic or proximity key are the easiest and the most immediate. If during arm there are open inputs, the system operates according to its configuration (Standard type zone, Autoexclusion or System Arm lock). -
Page 70: Partial Arming With Keypad
5.1.4 Partial arming with keypad To partially arm the system, follow the instructions below: 1. Enter on the keypad the Master code or a valid User code. 2. Press ON* key. 3. On the display appears an empty square for each existing and not active zone, associated to the keypad and to the code. -
Page 71: Disarming
DISARMING 5.2.1 Total disarming with keypad To totally disarm the system, follow the instructions below: 1. Enter on the keypad the Master code or a valid User code. 2. Press OFF# key. 3. On the display appears a black square for each existing and active zone, associated to the DISARM keypad and to the code. -
Page 72: Stop Of The Active Alarms
5.2.6 Stop of the active alarms The modes to stop an alarm in progress are described in 3.1 Description of Alarms, Events. However, remember that: • generally, outputs switched to an alarm event (sirens, etc.) go back to a rest condition when on the keypad a valid code is entered;... -
Page 73: Date And Time Changing
DATE AND TIME CHANGING Date and time stored in 1067/032 o 1067/042 control panel are used for the correct operation of the timing programmer and to store events in the event log. In order to change date and time shown on the display follow the procedure described in paragraph 4.4 TIME/DATE SETTING. -
Page 74: User Remote Management
Answering machine skip In order to call 1067/032 or 1067/042 control panel for remote management, by using PSTN line, if on the line there are an answering machine or a fax, the answering machine or the fax must answer after 2 rings at least. It is also necessary to enable the control panel Answer machine function, by programming a number of rings higher than the answering machine ring number. -
Page 75: Commandable Outputs Activation With No Cost
5.6.4 Commandable outputs activation with no cost This feature takes advantage of the Caller ID function of the calling telephone to carry out a fast activation of the programmed commandable outputs. The control panel must be provided with a GSM module with a valid SIM card, the network and the GSM answer machine must be enabled. -
Page 76: Environmental Listening
5.6.6 Table with list of DTMF commands for vocal answer machine Function Menu Accepted digits Operation Vocal messages 1÷6 Arming of all selected zones • List of zones indicated in followed by # the command • Arm result: Zones arming “ARMED EXECUTED”... -
Page 77: Timing Programmer Enabling
5.7.2 Timing programmer enabling To activate the timing programmer it is necessary to enable it. Enabling is possible only if there are programmed timed commands. To enable the timing programmer follow the instructions below: 1. Enter on the keypad the Master code (default 111111) and press OK key. 2. -
Page 78: Input Inclusion
5.8.2 Input inclusion To include again an input follow the instructions below: 1. Enter on the keypad a user code or the Master code (default 111111) and press OK key. 2. Press MENU key. 3. Press ▼ key until “SETTINGS” appears on the display. UT01:MASTER SETTINGS 4. -
Page 79: Buzzer Volume Adjustment
5.10.2 Buzzer volume adjustment It is possible to change the buzzer volume of every single keypad. For buzzer volume adjustment no user codes are needed. To change the buzzer volume follow the instructions below: 1. On the concerned keypad press MENU key. 2. -
Page 80: Device Address Display
5.11.2 Device address display To verify the address of a specific system bus device follow the instructions below: 1. Enter on the keypad the Installer code and press OK key. 2. Press MENU key. 3. Press ▼ key until “MAINTENANCE” appears on the display. UT00:INSTALLER 4. -
Page 81: Global Reset
5.11.5 Global reset With global reset, all control panel configurations are reset to factory settings (inputs, outputs, zones, timing programmer, PSTN/GSM telephone parameters) and all previously acquired devices are removed, by replacing respective configurations with factory settings and deleting the address. To totally reset follow the instructions below: 1. -
Page 82: Menu
MENU MASTER MENU Start selections in Master menu are: It shows system status and allows to modify zone status. SYSTEM STATUS EVENT LOG It allows to read the list of the events stored in the control panel memory. (see § 5.1.1 Event log submenu). SETTINGS It allows to exclude inputs, set current time and date, change Master code, configure user or reset their codes to factory values, acquire configure and delete electronic keys and... -
Page 83: Settings Submenu
6.1.2 Settings submenu LEVEL 2 LEVEL 3 LEVEL 4 LEVEL 5 EXCLUDE / INCLUDE IN01:... IN02:... HOUR-DATE SET HOUR SET DATE SUMMER TIME LEGAL T.MONTH SUMMER T.MONTH SUNDAY CHANGE CODE USERS CONFIGURE USERS UT00: INSTALLER UT01: MASTER ASSIGN UT02:... NAME …... -
Page 84: Test Submenu
6.1.4 Test submenu LEVEL 2 LEVEL 3 LEVEL 4 LEVEL 5 TEST INPUTS TEST OUTPUTS CONTROL PANEL UC.U1: U01 UC.U2: U02 ACTIVATE … DEACTIVATE EXPANSIONS TEST BATTERY RADIO DEVICES EW01:EW 01 ACTIVATE ADVANCED DEACTIVATE VOCAL CALL PROTOCOL CALL GSM FIELD TEST RADIO DEVICES EW01:EW 01 IN PROGRESS... -
Page 85: Installer Menu
INSTALLER MENU Start selections in Installer menu are: SYSTEM STATUS It allows to verify the status of the zones and modify them. EVENT LOG It allows to read and delete the list of events stored in the control panel. (see § 6.2.1 Eventt log submenu ). SETTINGS It allows to exclude inputs, set time and date, change installer code, configure users or reset their codes to default values, acquire configure or delete electonic keys and transponders;... -
Page 86: Settings Submenu
6.2.2 Settings submenu LEVEL 2 LEVEL 3 LEVEL 4 LEVEL 5 EXCLUDE / INCLUDE IN01:... IN02:... … HOUR-DATE SET HOUR SET DATE SUMMER TIME CHANGE CODE LEGAL T.MONTH SUMMER T.MONTH SUNDAY USERS CONFIGURE USERS UT00:INSTALLER UT01: MASTER ASSIGN UT02:... NAME …... -
Page 87: System Programming Submenu
6.2.4 System programming submenu LEVEL 2 LEVEL 3 LEVEL 4 LEVEL 5 ZONES ZONES NO: CONFIG.ZONES ZN01:... … ACTIVATION MODE NAME INPUTS CONTROL PANEL UC.In1: In01 UC.In2: In02 INPUT TYPE … ASSIGN EXPANSIONS CUSTOMIZE KEYS BYPASS ALLOWED READERS ANCILLARY FUNCT. ATTRIBUTES OUTPUTS VIDEO ASSIGN... - Page 88 LEVEL 2 LEVEL 3 LEVEL 4 LEVEL 5 READERS LT01:LT 01 ASSIGN MASKING NAME RADIO DEV. EW01:EW 01 SELECT IR SELECT DC IR01. In1: In01 … ADVANCED SYSTEM CODE SIRENS ASSIGN CUSTOMIZE STATUS REPORT SELECT SIREN SELECT RC SELEC RC DS1067-035A LBT8633...
- Page 89 LEVEL 6 LEVEL 7 LEVEL 8 LEVEL 9 INPUT TYPE ASSIGN CUSTOMIZE BYPASS ALLOWED ANCILLARY FUNCT. ATTRIBUTES VIDEO ASSIGN AND INPUTS NAME HP01.U-: U07 … NAME PROG. TASTI NAME 1 ARM 3 TOGGLE 4 DISARM ASSIGN 2 GENERIC ASSIGN COMMAND TYPE NOT USED DISARM (DISABLE) ARM (ENABLE)
-
Page 90: Parameters Submenu
6.2.5 Parameters submenu LEVEL 2 LEVEL 3 LEVEL 4 LEVEL 5 T. BURGLAR ALARM T. PRE-ALARM T. EMERGENCY ALARM ALARM COUNT T. LACK OF POWER 6.2.6 Telephone dialer submenu LEVEL 2 LEVEL 3 LEVEL 4 LEVEL 5 PHONE NUMBERS TEL. NUMBER T01: T02: …... -
Page 91: Maintenance Submenu
6.2.7 Maintenance submenu LEVEL 2 LEVEL 3 LEVEL 4 LEVEL 5 LANGUAGE KP 01:KP 01 ITALIANO ENGLISH ACQUIRE DELETE ROMANA EXPANSIONS KEYPADS READERS RADIO DEVICES RADIO DEVICES ACQUIRE CONFIGURATION DELETE SHOW ADDRESSES EXPANSIONS KEYPADS READERS RADIO DEVICES SW. REL. CONTROL PANEL EXPANSIONS KEYPADS READERS... -
Page 92: Programming Summary Tables And Factory Setting
PROGRAMMING SUMMARY TABLES AND FACTORY SETTING INSTALLER MENU System code (for FastPro) Default : 99999999 ZONES Zones number Default : 1 Name Type Default Standard USERS Associated zones 1 2 3 4 5 6 Installer 000000 SYSTEM Master 111111 SYSTEM □... -
Page 93: Keys
KEYS Function Associated Zones Zones Accesses Zones - Accesses 1 2 3 4 5 6 □ Key 1 x □ □ □ □ □ □ x □ □ □ □ □ Key 2 □ x □ □ □ □ □ Key 3 □... -
Page 94: Control Panel Inputs
CONTROL PANEL INPUTS Bypass allowed Common input Release SINGLE type Door opening Courtesy light Gong Absence of move Video assign AND input □ □ □ □ □ □ □ □ □ □ □ □ □ □ □ □ □ □ □... -
Page 95: Control Panel Outputs
CONTROL PANEL OUTPUTS □ □ □ □ □ □ □ □ □ □ □ □ □ □ □ □ □ □ □ □ □ □ □ □ □ □ □ □ □ □ □ □ □ □ □ □ □ □... -
Page 96: Expansion Inputs
EXPANSION INPUTS Bypass allowed Common input SINGLE Release type Door opening Coutesy light Gong Abs. of move Video assign AND input □ □ □ □ □ □ □ □ □ □ □ □ □ □ □ □ □ □ □ □... -
Page 97: Expansion Outputs
EXPANSION OUTPUTS □ □ □ □ □ □ □ □ □ □ □ □ □ □ □ □ □ □ □ □ □ □ □ □ □ □ □ □ □ □ □ □ □ □ □ □ □ □ □... -
Page 98: Keypads Inputs
7.10 KEYPADS INPUTS Bypass allowed Common input Release type Door opening Courtesy light Gong Absence of move Video assign AND input □ □ □ □ □ □ □ □ □ □ □ □ □ □ □ □ □ □ □ □... -
Page 99: Radio Expansion Inputs
7.11 RADIO EXPANSION INPUTS Bypass allowed Common input Release type Door opener Courtesy light Gong Abs. of move. Video assign AND input □ □ □ □ □ □ □ □ □ □ □ □ □ □ □ □ □ □ □... -
Page 100: Radio Expansion Outputs (Sirens)
7.12 RADIO EXPANSION OUTPUTS (SIRENS) Name Logical address Physical address Outputs □ □ □ □ □ □ Fire alarm Audible panic Tamper Pre alarm Burglar Siren + Blink Blink Disabled Expansion 1 DEFAULT DS1067-035A LBT8633... -
Page 101: Readers Inputs
7.13 READERS INPUTS Bypass allowed Common input Release type Door opening Courtesy light Gong Absence of move Video assign AND input □ □ □ □ □ □ □ □ □ □ □ □ □ □ □ □ □ □ □ □... - Page 102 Bypass allowed Common input Release type Door opening Courtesy light Gong Absence of move Video assign AND input □ □ □ □ □ □ □ □ □ □ □ □ □ □ □ □ □ □ □ □ □ □ □...
-
Page 103: Keypads -Zones Association
7.14 KEYPADS –ZONES ASSOCIATION Keys function Zones assign Name 1 2 3 4 5 6 □ □ □ □ □ □ KP01 □ □ □ □ □ □ KP02 □ □ □ □ □ □ KP03 □ □ □ □ □ □ KP04 □... -
Page 104: Remote Control-Zones Keys Association
7.16 REMOTE CONTROL-ZONES KEYS ASSOCIATION Associated Zones NAME 1 2 3 4 5 6 □ □ □ □ □ □ □ □ □ □ □ □ □ □ □ □ □ □ □ □ □ □ □ □ □ □ □ □ □ □ □... -
Page 105: Communicator
7.17 COMMUNICATOR Burglar Pre-alarm Technological Fire alarm Panic Silent Panico Medical emergency Hold-op Zone ON-OFF Maintenance Excluded Inputs Include Inputs Tamper Lack of power Low battery System failure Wrong code Notices (SIM expiration) Sending mode Phone line □ □ □ □... - Page 106 PARAMETER DEFAULT Vocal messages sending mode Mode 1 Nation Italy PABX connection disabled PSTN parameter Tones line check disabled Answer control disabled SIM PIN GSM parameter SIM card expiry Incoming SMS disabled PSTN line test System ON disabled hour Period comm. test interval Telephone number Remote control backup...
-
Page 107: Timing Programmer
7.18 TIMING PROGRAMMER Monday Tuesday Wednesday Thursday Friday Saturday Sunday Working Pre-holiday Holiday Default Working Working Working Working Working Pre-holiday Holiday Command Concerned Zones / outputs Hour : Minutes Warning time Default : Disabled DS1067-035A LBT8633... - Page 108 DS1067-035A LBT8633 Area tecnica URMET S.p.A. servizio clienti +39 011.23.39.810 10154 TORINO (ITALY) http://www.urmet.com VIA BOLOGNA 188/C e-mail: info@urmet.com Telef. +39 011.24.00.000 (RIC.AUT.) +39 011.24.00.300 - 323 MADE IN _______ DS1067-035A LBT8633...
Need help?
Do you have a question about the 1067/032 and is the answer not in the manual?
Questions and answers