Table of Contents
Advertisement
Quick Links
PUSH BUTTON PANEL
Features ........................................................................................2
Structure .......................................................................................2
Terminal pins description .............................................................2
Technical characteristics ..............................................................2
Default programming ....................................................................3
Operation ......................................................................................3
Audio adjustment .........................................................................3
INSTALLATION .................................................................................4
Wall mounting ...............................................................................4
Flush mounting .............................................................................5
INSTALLATION .................................................................................7
Wall mounting ...............................................................................7
CONFIGURATION ............................................................................8
ASSOCIATION OF DOOR UNITS BUTTONS TO USERS ................9
PROGRAMMING DATA DELETING .................................................9
2 VOICE - Technical Manual
SECTION 3C
Download from www.urmet.com Technical Manuals area.
SECTION CONTENTS
(REV. A)
2
7
1
sec.3c −−−−
Advertisement
Table of Contents

Summary of Contents for urmet domus 2 VOICE mikra
-
Page 1: Table Of Contents
SECTION 3C (REV. A) PUSH BUTTON PANEL Download from www.urmet.com Technical Manuals area. SECTION CONTENTS MIKRA PUSH BUTTON PANEL Features ..................2 Structure ..................2 Terminal pins description .............2 Technical characteristics ..............2 Default programming ..............3 Operation ..................3 Audio adjustment .................3 INSTALLATION .................4 Wall mounting ................4 Flush mounting ................5 MIKRA EXIGO PUSH BUTTON PANEL... -
Page 2: Mikra Push Button Panel
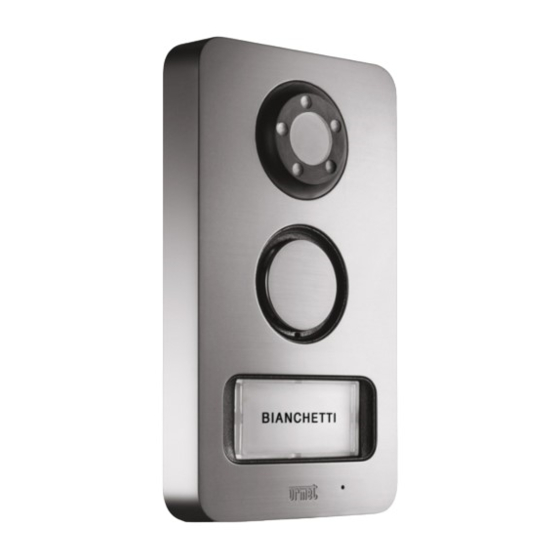
MIKRA PUSH BUTTON PANEL FEATURES - STRUCTURE MIKRA PUSH BUTTON PANEL STRUCTURE Mikra push button panels are made of zama with high resistance against impact and damage. Push button panels are provided with 2 call buttons and can be used in single- or two-family systems (second button excluded with jumper) Front made of zama or as secondary call station. -
Page 3: Default Programming
MIKRA PUSH BUTTON PANEL STRUCTURE DEFAULT PROGRAMMING AUDIO ADJUSTMENT Audio levels are trimmed in factory, so they don’t need to be changed Function Default Dip-switch corresponding in most installations. Call station type Main (OFF) Dip-switch 1 of AUX If it is necessary to change them, use a screwdriver on the suitable adjusting points. -
Page 4: Installation
MIKRA PUSH BUTTON PANEL INSTALLATION INSTALLATION • Fit the name tag on the extractable front panel. WALL MOUNTING • Remove the front panel of the push button panel. • Install the push button panel at the height shown. • Close the push button panel with the metal cover. •... -
Page 5: Flush Mounting
MIKRA PUSH BUTTON PANEL INSTALLATION FLUSH MOUNTING • Put the frame with the base in the fl ush mounting box, and make cables come out of the hole. • Remove the front panel of the push button panel. § The connection cables must protrude from the embedding box for at least 20 cm. - Page 6 MIKRA PUSH BUTTON PANEL INSTALLATION • Close the push button panel with the metal cover. • Screw the frame to the push button panel base. Self-tapping screws 2,9 x 9,5 mm • Screw the frame with the push button panel to the fl ush mounting box.
-
Page 7: Mikra Exigo Push Button Panel
MIKRA EXIGO PUSH BUTTON PANEL INSTALLATION MIKRA EXIGO PUSH BUTTON PANEL • Execute the programming. INSTALLATION FLUSH MOUNTING • Wall the fl ush mounting box Ref. 1145/52 at the indicated height. • Fix the push button panel to the front panel. •... -
Page 8: Configuration
MIKRA PUSH BUTTON PANEL CONFIGURATION CONFIGURATION door unit works as follows in the two cases: • “Privacy”: the electric lock may only be activated by pressing the door opening button on the calling station when an audio ID: door unit identifi er conversation has been established or when after having received •... -
Page 9: Association Of Door Units Buttons To Users
MIKRA PUSH BUTTON PANEL ASSOCIATION OF DOOR UNITS BUTTONS TO USERS - PROGRAMMING DATA DELETING ASSOCIATION OF DOOR UNITS BUTTONS TO PROGRAMMING DATA DELETING USERS To delete all the data programmed in the advanced confi guration, follow the instructions below: In two-family systems with double call station, one station can be •... - Page 10 −−−− sec.3c 2 VOICE - Technical Manual...


Need help?
Do you have a question about the 2 VOICE mikra and is the answer not in the manual?
Questions and answers