YOKOGAWA DL7440 User Manual
Digital oscilloscope
Hide thumbs
Also See for DL7440:
- User manual (55 pages) ,
- User manual (176 pages) ,
- Operation manual (29 pages)
Table of Contents
Advertisement
Quick Links
Download this manual
See also:
Operating Manual
Advertisement
Table of Contents

Related Manuals for YOKOGAWA DL7440


Summary of Contents for YOKOGAWA DL7440
- Page 1 DL7440/DL7480 Digital Oscilloscope IM 701450-01E 5th Edition...
-
Page 2: Product Registration
Product Registration Thank you for purchasing YOKOGAWA products. YOKOGAWA provides registered users with a variety of information and services. Please allow us to serve you best by completing the product registration form accessible from our homepage. http://tmi.yokogawa.com/ PIM 103-03E... - Page 3 Thank you for purchasing the DL7400 (DL7440/DL7480) Digital Oscilloscope. This user’s manual contains useful information about the instrument’s functions and operating procedures and lists the handling precautions of the DL7400. To ensure correct use, please read this manual thoroughly before beginning operation. Keep this manual in a safe place for quick reference in the event a question arises.
- Page 4 Revisions • 1st Edition: February 2003 • 2nd Edition: November 2003 • 3rd Edition: February 2004 • 4th Edition: April 2005 • 5th Edition: June 2009 IM 701450-01E...
-
Page 5: Checking The Contents Of The Package
TRIG GATE IN Made in Japan Made in Japan Model and Suffix Codes Model Suffix Specifications 701450 (DL7440) 4-channel, 4 MW memory model 701460 (DL7440) 4-channel, 16 MW memory model 701470 (DL7480) 8-channel, 4 MW memory model 701480 (DL7480) 8-channel, 16 MW memory model Power cord UL/CSA Standard power cord (Part No.: A1006WD) -
Page 6: Standard Accessories
Checking the Contents of the Package NO. (Instrument Number) When contacting the dealer from which you purchased the instrument, please give them the instrument number. Standard Accessories The standard accessories below are supplied with the instrument. Power Cord (one of the following power cords is supplied according to the instrument’s suffix codes) 400 MHz passive probe... - Page 7 Checking the Contents of the Package Optional Accessories (Sold Separately) The optional accessories below are available for purchase separately. Logic probe 100:1 probe Miniature passive probe FET probe 701980/701981 700978 701941 700939 Differential probe Probe power supply cable Differential probe Differential probe 701920 700925...
-
Page 8: Safety Precautions
If the instrument is used in a manner not specified in this manual, the protection provided by the instrument may be impaired. Yokogawa Electric Corporation assumes no liability for the customer’s failure to comply with these requirements. - Page 9 To prevent the possibility of electric shock or fire, be sure to use the power cord supplied by YOKOGAWA. The main power plug must be plugged into an outlet with a protective earth terminal. Do not disable this protection by using an extension cord without protective earth grounding.
-
Page 10: Conventions Used In This Manual
Conventions Used in This Manual Safety Markings The following markings are used in this manual. Improper handling or use can lead to injury to the user or damage to the instrument. This symbol appears on the instrument to indicate that the user must refer to the user’s manual for special instructions. -
Page 11: Flow Of Operation
Flow of Operation The figure below is provided to familiarize the first-time user with the general flow of the DL7400 operation. For a description of each item, see the relevant section or chapter. Making Preparations for Measurements Making Preparations for Measurements DL7400 installation Section 3.2 Power connection and ON/OFF... -
Page 12: Table Of Contents
Contents Checking the Contents of the Package ..................iii Safety Precautions .........................vi Conventions Used in This Manual ....................viii Flow of Operation ........................... ix Chapter 1 Names and Functions of Parts Front Panel, Rear Panel, and Top Panel ................. 1-1 Panel Keys and Knobs ..................... - Page 13 Contents Chapter 4 Common Operations Operations and Functions of Keys and the Jog Shuttle ........... 4-1 Entering Values and Strings ..................... 4-3 Operating the DL7400 Using a USB Keyboard or a USB Mouse ........4-6 Initializing Settings ......................4-14 Performing Auto Setup ....................4-16 Performing Calibration ....................
- Page 14 Contents Chapter 8 Waveform Display and Information Display Setting the Display Format ....................8-1 Performing Display Interpolation ..................8-4 Accumulating Waveforms ....................8-6 Zooming the Waveform ....................8-8 Displaying X-Y Waveforms .................... 8-12 Taking Snapshots and Clearing Traces ................. 8-15 Changing the Graticule ....................
- Page 15 Contents Chapter 12 Saving and Loading Data 12.1 Storing and Recalling Setup Data .................. 12-1 12.2 Floppy Disk, Zip Disk, and PC Cards ................12-3 12.3 Connecting MO Disk Drives or Hard Disks to the SCSI ..........12-7 12.4 Changing the SCSI ID Number ..................12-8 12.5 Connecting USB Storage to the USB PERIPHERAL Interface ........
- Page 16 Contents Chapter 16 Troubleshooting, Maintenance, and Inspection 16.1 Troubleshooting ......................16-1 16.2 Messages and Corrective Actions .................. 16-2 16.3 Performing a Self-Test ....................16-8 16.4 Checking the System Conditions (Overview) ............... 16-11 16.5 Recommended Replacement Parts ................16-12 Chapter 17 Specifications 17.1 Input Section ........................
-
Page 17: Chapter 1 Names And Functions Of Parts
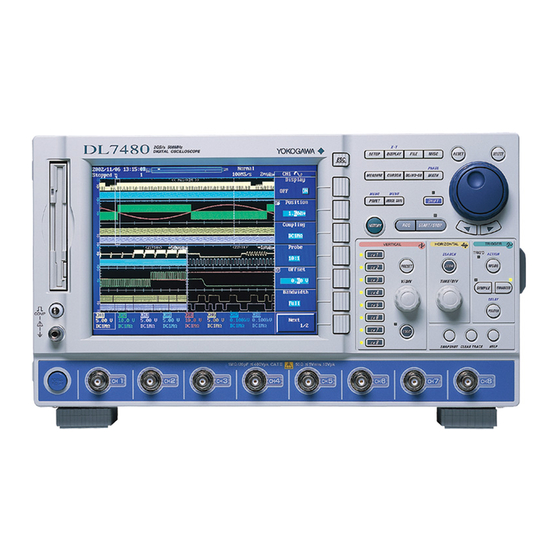
Displays various There are 4 and 8 terminals on the setup menus. For execution keys, the operation of the DL7440 and the DL7480, respectively. pressed key is executed. For a description of the See section 3.4. - Page 18 1.1 Front Panel, Rear Panel, and Top Panel Top Panel Built-in printer (optional) Prints screen images or setup data. See sections 11.1 and 11.2. Handle Inlet holes. See section 3.2. (Inlet holes are also present on the bottom side.) IM 701450-01E...
-
Page 19: Panel Keys And Knobs
V/DIV knob. • The indicator to the left of each CH key illuminates when the channel is ON. * There are four channel keys (CH1 to CH4) and 8 channel keys (CH1 to CH8) on the DL7440 LOGIC and DL7480, respectively. - Page 20 1.2 Panel Keys and Knobs Trigger MODE Key (Sections 6.1 and 7.6) TRIGGER TRIG D Displays a menu used to set the trigger mode and sequential store. ACTION MODE SHIFT+MODE (ACTION) Key (Section 6.16) Displays a menu used to set the action-on-trigger. SIMPLE ENHANCED SIMPLE Key (Sections 6.5 to 6.7)
- Page 21 1.2 Panel Keys and Knobs HISTORY Key (Sections 10.1 to 10.3) Displays a menu used to display and search waveforms using the history memory function. Waveforms that have been sequentially stored can also be displayed and searched. ACQ Key (Sections 5.11 and 7.2 to 7.5) Displays a menu used to set the record length, acquisition mode, interleave mode, sampling mode, time base, and other parameters for waveform acquisition.
-
Page 22: Display
Display Normal Display Screen Record length/display position <When displaying zoom waveforms> <When displaying normal waveforms> Specified record length Z1 zoom position Z2 zoom position The length of the green frame indicates the ratio of the display record Green Green length with respect Display position frame frame... - Page 23 1.3 Display Display Example When Displaying Zoom Waveforms Zoom position of zoom waveform Z1 with respect to the specified or display record length Zoom position of zoom waveform Z2 with respect to the specified or display record length Zoom box Z2 indicating the zoom range of Z2 Zoom box Z1 indicating the T/div of the normal waveform...
- Page 24 11.2) when the waveforms displayed on the screen (screen image) are printed on the built-in printer (optional). List of Setup Data Displayed on Both the DL7440 and the DL7480 Setup data related to the vertical axis, trigger, and horizontal axis of CH1 to CH4 is displayed.
-
Page 25: Chapter 2 Explanation Of Functions
Chapter 2 Explanation of Functions System Configuration and Block Diagram System Configuration USB Peripheral Input interface USB storage USB mouse SCSI (optional) Waveform data Setup data Input Waveform data Screen image data External Setup data Built-in printer (optional) USB keyboard SCSI device Screen image data Screen image print... -
Page 26: Vertical And Horizontal Axes
Vertical Position of the Waveform <For the setup procedure, see section 5.3> Since the DL7400 is capable of displaying 8 channels (4 channels on the DL7440) of input waveforms, the waveforms may overlap making them difficult to be observed. In this case, you can change the display position of waveforms along the vertical axis (vertical position) in the range of ±4 divisions for easier viewing. - Page 27 2.2 Vertical and Horizontal Axes Input Coupling <For the setup procedure, see section 5.4> If you wish to observe just the amplitude of an AC signal, it is best to remove the DC component from the input signal. On the other hand, there are times when you wish to check the ground level or observe the entire input signal (both the DC and AC components).
- Page 28 2.2 Vertical and Horizontal Axes Offset Voltage <For the setup procedure, see section 5.6> When observing a voltage riding on top of a predetermined voltage, an offset voltage can be applied to eliminate the predetermined voltage so that only the changes in the signal can be observed with higher vertical axis sensitivity.
- Page 29 2.2 Vertical and Horizontal Axes Horizontal Axis (Time Axis) Selecting the Time Base <For the setup procedure, see section 5.11> By default, the sampling timing of the measured waveform is controlled by the internal clock signal generated from the time base circuit within the DL7400 (see the block diagram in section 1.1).
- Page 30 2.2 Vertical and Horizontal Axes Relationship between the Specified Record Length, Time Axis Setting, Sample Rate, and Display Record Length If you change the time axis setting with respect to the specified record length of the acquisition memory, the sample rate and display record length change. (For more details about this relationship, see appendix 1.
- Page 31 2.2 Vertical and Horizontal Axes Time Axis Setting and Roll Mode Display If T/div is set to a certain range (see appendix 1), the waveforms are displayed in roll mode. In roll mode, the displayed waveform is not updated using triggers (update mode).
-
Page 32: Trigger
Trigger A trigger is a cue used to display the waveform on the screen. The trigger is activated when the specified trigger condition is met. At this point, the waveform is ready to be displayed on the screen. Trigger Source, Trigger Slope, and Trigger Level Trigger Source Trigger source refers to the signal that is used in checking the trigger condition. - Page 33 2.3 Trigger Enhanced Trigger Multiple conditions or a special-purpose condition can be specified as a trigger condition. A->B(N) Trigger <For the setup procedure, see section 6.8> A trigger is activated the n time condition B becomes true after condition A has become true.
- Page 34 2.3 Trigger Pattern Trigger <For the setup procedure, see section 6.10> With pattern triggers, the trigger source is set to multiple signals. A trigger is activated when all of the trigger conditions of the trigger sources are met or when the trigger conditions are no longer met.
- Page 35 2.3 Trigger OR Trigger <For the setup procedure, see section 6.12> A trigger is activated when any of the edge or window conditions specified on each channel are met. For example, a trigger can be activated on the rising edge of CH1 or CH2.
- Page 36 2.3 Trigger Logic Trigger <For the setup procedure, see section 6.15> The DL7400 has two logic probe input connectors, A and B. Each pod can receive 8 bits of logic signals. A trigger is activated on the rising or falling edge of the clock bit while the condition consisting of the combination of H, L, and Don’t Care of Pod A and B (16 bits) is met.
- Page 37 2.3 Trigger Single (N) Mode Waveforms are acquired and stored in different memory areas each time a trigger is activated the specified number of times. Then, acquisition is stopped, and all the acquired waveforms are displayed. For details on the acquisition method of waveforms in Single (N) mode, see “Sequential Store”...
- Page 38 2.3 Trigger HF Rejection <For the setup procedure, see sections 6.5, 6.8 to 6.12> Turn HF rejection ON when eliminating high frequency components above 15 kHz or 20 MHz from the trigger source. This prevents triggers from being activated at unexpected points due to the effect of high frequency noise.
-
Page 39: Waveform Acquisition And Display Conditions
Waveform Acquisition and Display Conditions Record Length <For the setup procedure, see section 7.2> The term record length refers to the number of data points acquired per channel in the acquisition memory. The record lengths that can be specified (specified record length) are 1 kW (1000 points), 10 kW, 50 kW, 100 kW, 250 kW, 500 kW, 1 MW, 2 MW, 4 MW, 8 MW, and 16 MW. - Page 40 2.4 Waveform Acquisition and Display Conditions Envelope Mode In normal mode and averaging mode, the sample rate (the number of times data is acquired per second in the acquisition memory) drops if T/div is increased (see appendix 1). However, in envelope mode, the maximum and minimum values are determined from the data sampled at 1 GS/s or 800 MS/s at time intervals one half that of the sampling period (inverse of the sample rate) of normal mode regardless of the interleave mode setting (ON or OFF).
- Page 41 2.4 Waveform Acquisition and Display Conditions Sequential Store <For the setup procedure, see section 7.6> This function stores waveform data in the acquisition memory the specified number of times and displays the data when in realtime sampling mode. The operation stops when acquisition is finished.
- Page 42 2.4 Waveform Acquisition and Display Conditions Display Format <For the setup procedure, see section 8.1> Splitting the Screen The screen can be split evenly so that input waveforms and computed waveforms can be easily viewed. The screen can be divided into the following: Single (no division), Dual (two divisions), Triad (three divisions), Quad (four divisions), Hexa (six divisions), and Octal (eight divisions, DL7480 only) Waveform Mapping...
- Page 43 2.4 Waveform Acquisition and Display Conditions Zooming the Waveform <For the setup procedure, see section 8.4> The displayed waveform can be expanded along the time axis. This function is useful when the waveform acquisition time is set long and you wish to observe a particular section of the waveform closely.
- Page 44 2.4 Waveform Acquisition and Display Conditions Snapshot and Clear Trace <For the setup procedure, see section 8.6> Snapshot When the trigger mode is set to a mode other than Single or Single (N), the displayed waveforms are periodically updated or displayed in roll mode. By using the snapshot function, you can temporarily hold the waveform (snapshot waveform) that would be cleared when the screen is updated on the screen.
-
Page 45: Waveform Computation
Phase Shift <For the setup procedure, see section 9.8> The phase of the waveform of CH1 to CH4 on the DL7440 and CH1 to CH8 on the DL7480 can be shifted and displayed. The phase shifted waveform is used in the computation (computed waveform). - Page 46 2.5 Waveform Computation Power Spectrum Computation <For the setup procedure, see section 9.6> The power spectrum of the input signal can be computed and displayed by taking the FFT (Fast Fourier Transform). This is useful when you wish to check the frequency distribution of the input signal.
- Page 47 2.5 Waveform Computation User-Defined Computation (Optional) <For the setup procedure, see section 9.9> You can define computing equations by combining the following operators: +, –, *, /, ABS (absolute value), SQRT (square root), LOG (logarithm), EXP (exponent), NEG (negation), SIN (sine), COS (cosine), TAN (tangent), ATAN(arc tangent), PH (phase), DIF (differentiation), DDIF(2nd order differentiation), INTG (integration), IINTG(double integration), BIN (binary computation), P2 (square), P3 (cube), F1(...
- Page 48 2.5 Waveform Computation Peak Computation Determines the maximum value at each point of the computed data and displays the waveform. For every computation, the new computed value is compared to the past value and the larger one is displayed. 3 sets of FFT data Displays the maximum value of each point 2-24...
-
Page 49: Analyzing And Searching Waveforms
Analyzing and Searching Waveforms Displaying History Waveforms <For the setup procedure, see section 10.1> Past waveform data (history waveforms) stored in the acquisition memory can be displayed when waveform acquisition is stopped. You can display a specified history waveform from the data (up to 4096 waveforms, or the number of triggers) stored in the acquisition memory. - Page 50 2.6 Analyzing and Searching Waveforms Search & Zoom When waveform acquisition is stopped, you can search the displayed waveforms (within the display record length. See appendix 1.) and display the waveforms that match the search conditions expanded on the screen. Edge Search <For the setup procedure, see section 10.4>...
- Page 51 2.6 Analyzing and Searching Waveforms Parallel Pattern Search <For the setup procedure, see section 10.4> Search is performed on whether the parallel status pattern of the waveforms (status pattern of the waveforms at the same point) is the same as the status pattern set in advance.
- Page 52 2.6 Analyzing and Searching Waveforms Pulse Width Search <For the setup procedure, see section 10.4> Search is performed on whether the pulse width of the waveform above or below a specified level is shorter or longer than the specified determination time. Pulse>Time Pulse<Time Time Out...
- Page 53 2.6 Analyzing and Searching Waveforms Cursor Measurements <For the setup procedure, see section 10.5> Cursors can be placed on the displayed waveform (within the display record length. See appendix 1) and various types of measured values at the cross point of the cursor and waveform can be displayed.
-
Page 54: Automated Measurement Of Waveform Parameters,Go/No-Go Determination
2.6 Analyzing and Searching Waveforms Automated Measurement of Waveform Parameters Automated Measurement of Waveform Parameters <For the setup procedure, see section 10.6> Automated measurement can be performed on various measurement parameters on the displayed waveform (within the display record length, see appendix 1). Up to 24000 values of the results of automated measurements can be saved to a file (see section 12.10). - Page 55 2.6 Analyzing and Searching Waveforms When Own is selected as the waveform used to determine the cycle In the left figure, the number of Applicable cycles cycles of the channel whose cycle is the slowest (CH3) is 4. Therefore, statistical processing is performed on the 4 oldest cycles of data for CH1 Applicable cycles...
-
Page 56: Communication
Communication Communication Using Commands (GP-IB, USB, or Ethernet) <For the setup procedure, see the Communication Interface User’s Manual CD-ROM> The DL7400 comes standard with a GP-IB and a USB interface. An Ethernet interface is available as an option. Using communication commands, you can output waveform data to a PC for data analysis or control the DL7400 using an external controller to carry out waveform measurements. - Page 57 2.7 Communication Transmitting E-Mails <For the setup procedure, see section 13.5> Information from the DL7400 can be transmitted periodically in an e-mail message to a specified mail address. You can also transmit information such as the trigger time in an e-mail message as an action for the GO/NO-GO determination or action-on-trigger.
-
Page 58: Other Useful Functions
Other Useful Functions Entering Values and Text Using the USB Keyboard <For the setup procedure, see section 4.3> You can connect a USB keyboard and enter file names and comments. In addition, the functions of each key on the front panel of the DL7400 are assigned to the keys on the keyboard. -
Page 59: Saving And Loading Data From The Storage Medium
The DL7400 can be controlled from a PC using Wirepuller, a free software program, when connected via the GP-IB, USB, or Ethernet interface. The software program can be downloaded from the following Web pages. • English version: http://www.yokogawa.com/tm/Bu/software.htm • Japanese version: http://www.yokogawa.co.jp/Measurement/F-SOFT/ 2-35... -
Page 60: Chapter 3 Making Preparations For Measurements
Do not remove the case from the instrument. Some sections inside the instrument have high voltages and are extremely dangerous. For internal inspection or adjustment, contact your nearest YOKOGAWA dealer. Unplug If Abnormal Behavior Occurs If you notice smoke or unusual odors coming from the instrument, immediately turn OFF the power and unplug the power cord. - Page 61 3.1 Handling Precautions When Carrying the Instrument Remove the power cord and connecting cables. Always carry the instrument by the handle on the right side as you face the instrument (as shown below), or carry it with both hands. Cleaning When cleaning the case or the operation panel, first remove the power cord from the AC outlet.
-
Page 62: Installing The Instrument
Installing the Instrument WARNING To avoid danger, never use the instrument with the rear panel facing down, as the cooling vents will be obstructed. Installation Conditions Install the instrument in a place that meets the following conditions. Flat, Even Surface Install the instrument with the correct orientation on a stable, horizontal surface. - Page 63 3.2 Installing the Instrument Ambient Temperature and Humidity Ambient temperature 5 to 40°C Ambient humidity 20 to 80% RH (when the printer is not used) 35 to 80% RH (when using the printer) In either case, no condensation should be present. Note •...
-
Page 64: Connecting The Power Supply And Turning On/Off The Power Switch
OFF. • To prevent the possibility of electric shock or fire, be sure to use the power cord for the instrument that was supplied by YOKOGAWA. • Make sure to perform protective earth grounding to prevent electric shock. Connect the power cord to a three-prong power outlet with a protective earth terminal. - Page 65 (see section 16.2) when the power switch is turned ON. If this happens, you must quickly have the lithium battery replaced. The user cannot replace the battery. For battery replacement, contact your nearest YOKOGAWA dealer. For information regarding battery life, see section 16.5.
-
Page 66: Connecting The Probe
Connect the probe (or other input cables such as the BNC cable) to any of the input terminals (4 terminals marked as CH1 to CH4 on the DL7440 and 8 terminals marked CH1 to CH8 on the DL7480) at the bottom section of the front panel. The input impedance is 1 MΩ±1.0% and approximately 20 pF or 50 Ω±1.0%. - Page 67 • Correct measured values cannot be displayed when using a probe with an attenuation other than 1:1, 10:1, 100:1, and 1000:1. • For current probes, use 700937, 701930, 701931, 701932, or 701933 by YOKOGAWA. Setting the Probe Attenuation/Current-to-Voltage Conversion Ratio Follow the procedures given in section 5.5 and set the attenuation/current-to-voltage...
- Page 68 3.4 Connecting the Probe When using the current probe (700937, 701930, 701931, 701932, or 701933), the number of probes that can be used is limited by the current generated by the device under measurement (current measured by the current probe). The characteristics of the measured current versus the current consumption of an active probe that can be connected to the DL7400 are shown below.
-
Page 69: Compensating The Probe (Phase Correction)
Compensating the Probe (Phase Correction) CAUTION Do not apply external voltage to the probe compensation signal output terminal. This may cause damage to the internal circuitry. Procedure Turn ON the power switch. Connect the probe to the input terminal to which the signal is to be applied. Connect the tip of the probe to the probe compensation signal output terminal and the ground wire to the functional ground terminal. -
Page 70: Connecting Logic Probes (Optional)
Doing so may cause the leads from satisfying the specification. Each pod (A or B) consists of 8 logic input terminals. You can select the threshold level on the DL7440/DL7480 menu from CMOS (5 V), CMOS (3.3 V), ECL, and user-defined (see section 5.10). - Page 71 3.6 Connecting Logic Probes (Optional) Connection Procedure Turn OFF the DL7400. Connect the B9852VN cable to the logic probe. Connect the B9852VM probe tip (B9852VL if the logic probe is 701980) and the B9852VU earth lead to the logic probe. To observe high-speed signals, connect the B9852VV earth lead (for terminal) to the GND terminal of the B9852VM probe tip.
-
Page 72: Setting The Date And Time
Setting the Date and Time Procedure • To exit the menu during operation, press ESC located SETUP DISPLAY FILE MISC RESET SELECT above the soft keys. PHASE • In the procedural explanation below, the term MEASURE CURSOR GO/NOGO MATH jog shuttle & SELECT refers to the operation of selecting/setting items and entering values using the MENU MENU... - Page 73 3.7 Setting the Date and Time Using the NTP Server or SNTP Server to Set the Date/Time (Firmware Version 1.30 or Later) Turn the jog shuttle to move the cursor to Type, and press SELECT to select SNTP. Use jog shuttle & SELECT to set the Time Hour of Time Difference from GMT in the range of –12 to 13.
-
Page 74: Chapter 4 Common Operations
Chapter 4 Common Operations Operations and Functions of Keys and the Jog Shuttle Basic Key Operations Displaying the Setup Menu of the Panel Keys Press the desired panel operation key. The setup menu for that key appears. Press the soft key corresponding to the desired setup menu item. Setup menu When controlled by the jog shuttle,... - Page 75 4.1 Operations and Functions of Keys and the Jog Shuttle Operations on the Setup Dialog Box In the explanations in this manual, “jog shuttle & SELECT” refers to the following operation. Open the setup dialog box using basic key operations or other means. Turn the jog shuttle to move the cursor to the desired item.
-
Page 76: Entering Values And Strings
Entering Values and Strings Entering Values Entering Values Directly Using the Dedicated Knobs The dedicated knobs indicated below can be turned to directly enter values. • V/DIV knob • TIME/DIV knob VERTICAL HORIZONTAL TRIGGER TRIG D SEARCH ACTION PRESET ZOOM MODE V/DIV TIME/DIV... - Page 77 4.2 Entering Values and Strings Entering Strings The keyboard displayed on the screen is used to enter character strings such as file names and comments. The jog shuttle, SELECT, and arrow keys are used to operate the keyboard to enter the character strings. Operating the Keyboard Turn the jog shuttle to move the cursor to the character to be entered.
- Page 78 4.2 Entering Values and Strings Temporary Storage of Character Strings Up to 8 confirmed strings are automatically stored. When the number of confirmed strings exceeds 8, the strings are deleted in order starting from the oldest string. For items with a string set as a default value such as channel labels, up to 8 strings including the initial string can be temporarily stored.
-
Page 79: Operating The Dl7400 Using A Usb Keyboard Or A Usb Mouse
• For USB keyboards that have been tested for compatibility, contact your nearest YOKOGAWA dealer. USB PERIPHERAL Connector Connect the USB keyboard to the USB PERIPHERAL connector on the rear panel. There are two USB PERIPHERAL connectors (ports). - Page 80 4.3 Operating the DL7400 Using a USB Keyboard or a USB Mouse Connection Procedure When connecting a USB keyboard, directly connect the keyboard to the DL7400 using a USB cable as shown below. You can connect the USB cable regardless of whether the power to the DL7400 is ON or OFF (supports hot-plugging).
- Page 81 4.3 Operating the DL7400 Using a USB Keyboard or a USB Mouse Entering Values from a USB Keyboard You can enter values from a USB keyboard for items with the icon. Value entered using the keyboard Press the corresponding key and then enter the value using the USB keyboard.
- Page 82 A USB wheel mouse conforming to USB HID Class Version 1.1 can be used. Note • For USB mouse devices that have been tested for compatibility, contact your nearest YOKOGAWA dealer. • Some items cannot be specified when using a mouse without a wheel. Connection Procedure When connecting a USB mouse, directly connect the mouse to the USB PERIPHERIAL connector using a USB cable.
- Page 83 4.3 Operating the DL7400 Using a USB Keyboard or a USB Mouse USB Mouse Operation Operations Similar to the Front Panel Keys (Top Menu) • Displaying the Top Menu Right-click on the screen. The front panel key names on the DL7400 are displayed as the top menu.
- Page 84 4.3 Operating the DL7400 Using a USB Keyboard or a USB Mouse Setup Menu Operation (Similar to the Soft Key Operation) • Selecting an Item on the Setup Menu Left-click the item you wish to select on the setup menu. If another menu appears when you select an item, move the pointer to the new menu displaying the item you wish to select and left-click the item.
- Page 85 4.3 Operating the DL7400 Using a USB Keyboard or a USB Mouse Selecting Toggle Box Items on the Dialog Box Left-click the item you wish to select. The item is selected. Click the selected item again to deselect it. To close the dialog box, point to an area outside the dialog box and left- click.
- Page 86 4.3 Operating the DL7400 Using a USB Keyboard or a USB Mouse Setting V/div and T/div • Setting V/div When the waveform of a channel measuring a voltage is displayed, point near the V/ div value displayed at the bottom of the screen. The pointer changes to Left-click on the V/div value of the channel you wish to set.
-
Page 87: Initializing Settings
Initializing Settings Procedure • To exit the menu during operation, press ESC located SETUP DISPLAY FILE MISC RESET SELECT above the soft keys. PHASE • For a description of the operation using a USB keyboard or MEASURE CURSOR GO/NOGO MATH a USB mouse, see section 4.3. - Page 88 4.4 Initializing Settings Explanation You can restore the factory default settings. This is useful when you wish to clear previous settings or start measurement from scratch. Initialization Initialization refers to the act of restoring the factory default settings. For a description of the factory default settings, see appendix 5. Items That Cannot Be Initialized •...
-
Page 89: Performing Auto Setup
Performing Auto Setup Procedure • To exit the menu during operation, press ESC located SETUP DISPLAY FILE MISC RESET SELECT above the soft keys. PHASE • For a description of the operation using a USB keyboard or MEASURE CURSOR GO/NOGO MATH a USB mouse, see section 4.3. - Page 90 4.5 Performing Auto Setup Explanation The auto setup function automatically sets the key settings such as V/div, T/div, and trigger level that are appropriate for the input signal. Before auto setup After auto setup Center Position after Auto Setup The center position after auto setup is 0 V. Applicable Channels Auto setup is performed on all channels.
- Page 91 4.5 Performing Auto Setup Setup Data after Executing Auto Setup Waveform acquisition/display conditions Acquisition mode Normal Acquisition Count Infinite Record length 10 k Interleave mode Time base Accumulate mode Zoom target Channels that are turned ON Waveforms whose Allocation on the ZOOM menu is OFF are not displayed.
-
Page 92: Performing Calibration
Performing Calibration Procedure • To exit the menu during operation, press ESC located SETUP DISPLAY FILE MISC RESET SELECT above the soft keys. PHASE • For a description of the operation using a USB keyboard or MEASURE CURSOR GO/NOGO MATH a USB mouse, see section 4.3. - Page 93 4.6 Performing Calibration Explanation Calibration The following items are calibrated. Perform calibration when you wish to measure waveforms with high accuracy. • Ground level and gain of the vertical axis • Trigger threshold level • Time measurement value during repetitive sampling Note The calibration described above is performed automatically when the power switch is turned Precautions to Be Taken When Performing Calibration...
-
Page 94: Correcting The Delay Time Of The Input Signals
Press the Target CH soft key. The Target CH menu appears. Press the CH1 to CH8/4, Pod A, or Pod B to select the target channel. You can select up to channel CH4 and CH8 on the DL7440 and DL7480, respectively. Turn the jog shuttle to set the Deskew Time. - Page 95 You can correct the delay time of CH1 to CH8/4, Pod A, or Pod B. You can select up to CH4 and CH8 on the DL7440 and DL7480, respectively. Selectable Range of Skew Correction The correction time can be set in the following range.
-
Page 96: Using The Help Function
Using the Help Function Procedure VERTICAL TRIGGER HORIZONTAL • To exit the menu during operation, press ESC located TRIG D SEARCH ACTION above the soft keys. PRESET ZOOM MODE • For a description of the operation using a USB keyboard or V/DIV TIME/DIV a USB mouse, see section 4.3. -
Page 97: Chapter 5 Vertical And Horizontal Axes
Press one of the CH1 to CH8/4 and LOGIC keys to select the channel. The CH menu or LOGIC menu appears. You can select up to channel CH4 and CH8 on the DL7440 and DL7480, respectively. Press the Display (when CH1 to CH8/4 is selected) or Mode (when Logic is selected) soft key to select ON or OFF. -
Page 98: Setting V/Div
Press one of the CH1 to CH8/4 keys to select the channel. The CH menu appears. You can select up to channel CH4 and CH8 on the DL7440 and DL7480, respectively. Turn the V/DIV knob to set the V/div value. - Page 99 5.2 Setting V/div Explanation The V/div (A/div when current probes are used) setting is used to adjust the displayed amplitude of the waveform for easy viewing. You can set the value in terms of the voltage (current) per division of the screen grid. There are two methods for setting this value.
-
Page 100: Setting The Vertical Position Of The Waveform
Press one of the CH1 to CH8/4 keys to select the channel. The CH menu appears. You can select up to channel CH4 and CH8 on the DL7440 and DL7480, respectively. Press the Position soft key. Turn the jog shuttle to set the vertical position. - Page 101 5.3 Setting the Vertical Position of the Waveform Note • The waveform data that goes off the waveform display frame from moving the vertical position is handled as overflow data. • If the display waveform goes out of the waveform display frame from moving the vertical position during waveform acquisition, a chopped waveform is displayed as shown in the following figure even if the vertical position is returned to its original position after stopping the acquisition.
-
Page 102: Setting The Input Coupling
Press one of the CH1 to CH8/4 keys to select the channel. The CH menu appears. You can select up to channel CH4 and CH8 on the DL7440 and DL7480, respectively. Press the Coupling soft key. The Coupling menu appears. - Page 103 5.4 Setting the Input Coupling Explanation Selecting the Input Coupling You can select the method of coupling the input signal to the vertical control circuit. AC1MΩ Acquires and displays only the AC component of the input signal. DC1MΩ Acquires and displays all the components (DC and AC) of the input signal (1-MΩ input). DC50Ω...
-
Page 104: Selecting The Probe Attenuation/Current-To-Voltage Conversion Ratio
Press one of the CH1 to CH8/4 keys to select the channel. The CH menu appears. You can select up to channel CH4 and CH8 on the DL7440 and DL7480, respectively. Press the Probe soft key. The Probe menu appears. -
Page 105: Setting The Offset Voltage
Setting the Offset Voltage Press one of the CH1 to CH8/4 keys to select the channel. You can select up to channel CH4 and CH8 on the DL7440 and DL7480, respectively. Press the Offset soft key. Turn the jog shuttle to set the offset voltage. - Page 106 5.6 Setting the Offset Voltage Note • Only the waveform display position changes when acquisition is stopped. The new offset voltage is applied to the acquired data the next time waveform acquisition is started. • You can select whether to apply the offset voltage to cursor measurement values, automated measurement values of waveform parameters, and computation.
-
Page 107: Using The Preset Function
Press the CH1 to CH8/4 soft key to select the channel for setting the preset. Pressing All will select all the channels. You can select up to CH4 and CH8 on the DL7440 and DL7480, respectively. CH6 to CH8 appear when you press the To Page 2 soft key. - Page 108 5.7 Using the Preset Function Selecting the Probe Attenuation/Current-to-Voltage Conversion Ratio Press the Probe soft key. The Probe menu appears. Press the soft key corresponding to the desired attenuation/current-to-voltage conversion ratio. Proceed to step 12 unless USER type is selected. Setting the V/div Value, Offset Voltage, and Trigger Type under USER Press the V/div soft key.
- Page 109 5.7 Using the Preset Function Explanation The key settings of V/div, input coupling, trigger level, and other items are automatically set to the optimum values (or arbitrary values) for the CMOS signal or ECL signal. You can also automatically set to the optimum values for the current probe 700937, 701930 or 701931 (sold separately).
-
Page 110: Setting Bandwidth Limits
Press one of the CH1 to CH8/4 keys to select the channel. The CH menu appears. You can select up to channel CH4 and CH8 on the DL7440 and DL7480, respectively. Press the Bandwidth soft key. The Bandwidth menu appears. -
Page 111: Using The Linear Scaling Function
Press one of the CH1 to CH8/4 keys to select the channel. The CH menu appears. You can select up to channel CH4 and CH8 on the DL7440 and DL7480, respectively. Press the Next (1/2) soft key Press the Linear Scale AX+B soft key to select ON. - Page 112 5.9 Using the Linear Scaling Function Explanation The computation shown below is executed using the specified coefficient A and offset B. The cursor measurement values and automated measurement values of waveform parameters are displayed using the scaled values. A unit can be attached to the scaled values.
-
Page 113: Turning On/Off The Logic Input And Setting The Threshold Level
5.10 Turning ON/OFF the Logic Input and Setting the Threshold Level Procedure VERTICAL HORIZONTAL TRIGGER • To exit the menu during operation, press ESC located TRIG D SEARCH ACTION above the soft keys. • In the procedural explanation below, the term PRESET ZOOM MODE... - Page 114 5.10 Turning ON/OFF the Logic Input and Setting the Threshold Level Turning ON/OFF Each Bit Press the Display soft key. The Display dialog box appears. Use the jog shuttle to select the bit, and then press SELECT to select ON or OFF.
- Page 115 5.10 Turning ON/OFF the Logic Input and Setting the Threshold Level Explanation Each bit of the optional logic input can be turned ON/OFF, and the threshold level can be specified. Turning ON/OFF the Logic Input If you turn ON the logic input, a logic waveform display frame opens. Note To display the logic waveform display frame on a full screen, press the Format soft key and select Only (see section 8.1).
-
Page 116: Selecting The Time Base
5.11 Selecting the Time Base <For a description of this function, refer to page 2-5.> Procedure • To exit the menu during operation, press ESC located SETUP DISPLAY FILE MISC RESET SELECT above the soft keys. PHASE • For a description of the operation using a USB keyboard or MEASURE CURSOR GO/NOGO... - Page 117 5.11 Selecting the Time Base Explanation Selecting the Time Base You can select the time base that is used as a timing reference for acquiring waveform data. Internal clock signal Clock signal applied to the external clock input terminal When Setting the External Clock Signal as the Time Base Apply a clock signal of the following specifications to the EXT CLOCK IN/EXT TRIG IN/ TRIG GATE IN terminal (shared with the external trigger input) on the rear panel.
-
Page 118: Setting T/Div
5.12 Setting T/div <For a description of this function, refer to page 2-5.> Procedure VERTICAL HORIZONTAL TRIGGER • To exit the menu during operation, press ESC located TRIG D SEARCH ACTION above the soft keys. PRESET ZOOM MODE • For a description of the operation using a USB keyboard or V/DIV TIME/DIV a USB mouse, see section 4.3. -
Page 119: Chapter 6 Triggers
Chapter 6 Triggers Selecting the Trigger Mode <For a description of this function, refer to page 2-12.> Procedure VERTICAL TRIGGER HORIZONTAL • To exit the menu during operation, press ESC located TRIG D SEARCH ACTION above the soft keys. PRESET ZOOM MODE •... - Page 120 If the time axis setting is in the range in which the display mode is set to roll mode, the display is set to roll mode. * You can select up to CH4 and CH8 on the DL7440 and DL7480, respectively. Normal Mode The display is updated only when the trigger conditions are met.
-
Page 121: Setting The Trigger Position
Setting the Trigger Position <For a description of this function, refer to page 2-13.> Procedure VERTICAL TRIGGER HORIZONTAL • To exit the menu during operation, press ESC located TRIG D SEARCH ACTION above the soft keys. PRESET ZOOM MODE • For a description of the operation using a USB keyboard or a USB mouse, see section 4.3. - Page 122 6.2 Setting the Trigger Position Explanation Trigger Position Trigger position = Trigger point + trigger delay You can select the location of the trigger position on the screen. If the trigger delay is 0 s, the trigger position and the trigger point match. For the operating procedure of the trigger delay, see section 6.3.
-
Page 123: Setting The Trigger Delay
Setting the Trigger Delay Procedure VERTICAL TRIGGER HORIZONTAL • To exit the menu during operation, press ESC located TRIG D SEARCH ACTION above the soft keys. PRESET ZOOM MODE • For a description of the operation using a USB keyboard or V/DIV TIME/DIV a USB mouse, see section 4.3. -
Page 124: Setting The Hold Off Time
Setting the Hold Off Time Procedure For Simple Triggers VERTICAL HORIZONTAL TRIGGER • To exit the menu during operation, press ESC located TRIG D SEARCH ACTION above the soft keys. PRESET ZOOM MODE • For a description of the operation using a USB keyboard or V/DIV TIME/DIV a USB mouse, see section 4.3. - Page 125 6.4 Setting the Hold Off Time For Enhanced Triggers VERTICAL HORIZONTAL TRIGGER • To exit the menu during operation, press ESC located TRIG D SEARCH ACTION above the soft keys. PRESET ZOOM MODE • For a description of the operation using a USB keyboard or V/DIV TIME/DIV a USB mouse, see section 4.3.
- Page 126 6.4 Setting the Hold Off Time Explanation As shown in the figure below, this setting prevents a trigger from being activated for a specified time, even when the trigger conditions are met during this time. This is useful when you wish to activate the trigger in sync with a periodic signal. Repetition period: T Trigger level Input signal...
-
Page 127: Setting The Edge Trigger (Simple)
Press the soft key corresponding to the desired trigger source. • You can select up to channel CH4 and CH8 on the DL7440 and DL7480, respectively. • To set CH7 and CH8, press the To Page 2 soft key to display the page 2 menu. - Page 128 6.5 Setting the Edge Trigger (SIMPLE) Setting the Trigger Slope Press the Slope soft key to select , , or Setting the Trigger Coupling Press the Coupling soft key to select DC or AC. Note The trigger coupling setting applies to both simple and enhanced triggers. Setting the HF Rejection Press the HF Reject soft key.
- Page 129 Trigger Source You can select from CH1 to CH8/4. You can select up to channel CH4 and CH8 on the DL7440 and DL7480, respectively. • For the procedure of setting the external signal applied to the EXT TRIG IN terminal on the rear panel as the trigger source (setting the trigger source to EXT), see section 6.6.
-
Page 130: Setting The External Trigger (Simple)
Setting the External Trigger (SIMPLE) Procedure VERTICAL HORIZONTAL TRIGGER • To exit the menu during operation, press ESC located TRIG D SEARCH ACTION above the soft keys. PRESET ZOOM MODE • For a description of the operation using a USB keyboard or V/DIV TIME/DIV a USB mouse, see section 4.3. - Page 131 6.6 Setting the External Trigger (SIMPLE) Setting the Probe Attenuation Press the Probe soft key to select 1:1 or 10:1. Setting the Hold Off Set the hold off time according to the procedures given in section 6.4. Explanation The setting is for activating a trigger using the external signal applied to the EXT TRIG IN terminal on the rear panel of the DL7400.
-
Page 132: Activating Triggers On The Commercial Power Supply (Simple)
Activating Triggers on the Commercial Power Supply (SIMPLE) Procedure VERTICAL HORIZONTAL TRIGGER • To exit the menu during operation, press ESC located TRIG D SEARCH ACTION above the soft keys. PRESET ZOOM MODE • For a description of the operation using a USB keyboard or V/DIV TIME/DIV a USB mouse, see section 4.3. -
Page 133: Setting The A->B(N) Trigger (Enhanced)
Setting the A->B(N) Trigger (ENHANCED) <For a description of this function, refer to page 2-9.> Procedure VERTICAL TRIGGER HORIZONTAL • To exit the menu during operation, press ESC located TRIG D SEARCH ACTION above the soft keys. PRESET ZOOM MODE •... - Page 134 6.8 Setting the A->B(N) Trigger (ENHANCED) Setting the Level, Hysteresis, Trigger Coupling, and HF Rejection Press the Level/Coupling soft key. The Level/Coupling dialog box opens. Setting the Level Use jog shuttle & SELECT to set the level of each channel. Setting the Hysteresis Use jog shuttle &...
- Page 135 6.8 Setting the A->B(N) Trigger (ENHANCED) Note • The status settings of conditions A and B apply to A->B(N) and A Delay B. • The trigger level, hysteresis, trigger coupling, and HF rejection settings apply to both simple and enhanced triggers. Explanation This setting is for activating a trigger the N time condition B becomes true after...
-
Page 136: Setting The A Delay B Trigger (Enhanced)
Setting the A Delay B Trigger (ENHANCED) <For a description of this function, refer to page 2-9.> Procedure VERTICAL HORIZONTAL TRIGGER • To exit the menu during operation, press ESC located TRIG D SEARCH ACTION above the soft keys. PRESET ZOOM MODE •... - Page 137 6.9 Setting the A Delay B Trigger (ENHANCED) Setting the Level, Hysteresis, Trigger Coupling, and HF Rejection Press the Level/Coupling soft key. The Level/Coupling dialog box opens. Like in the case of the A->B(N) trigger, set the level, hysteresis, trigger coupling, and HF rejection.
- Page 138 6.9 Setting the A Delay B Trigger (ENHANCED) Explanation This setting is for activating a trigger the first time condition B becomes true after condition A has become true and the preset time has elapsed. Conditions A and B You can select the status of each channel. Above the preset trigger level Below the preset trigger level Don’t Care...
-
Page 139: Setting The Pattern Trigger (Enhanced)
6.10 Setting the Pattern Trigger (ENHANCED) <For a description of this function, refer to page 2-10.> Procedure VERTICAL TRIGGER HORIZONTAL • To exit the menu during operation, press ESC located TRIG D SEARCH ACTION above the soft keys. PRESET ZOOM MODE •... - Page 140 Use jog shuttle & SELECT to set Clock CH to CH1 to CH8/4. You can select up to channel CH4 and CH8 on the DL7440 and DL7480, respectively. Use jog shuttle & SELECT to set the trigger slope of the clock channel to Use jog shuttle &...
- Page 141 6.10 Setting the Pattern Trigger (ENHANCED) Explanation This setting is for activating a trigger when all the conditions specified on multiple trigger sources are met or not met. Trigger Status You can select the trigger status of the trigger source. When the trigger source level is above the specified trigger level When the trigger source level is below the specified trigger level Don’t care...
- Page 142 6.10 Setting the Pattern Trigger (ENHANCED) Trigger Level The selectable range is 8 divisions within the screen. The resolution is 0.01 divisions. For example, the resolution for 2 mV/div is 0.02 mV. Hysteresis Sets a width to the trigger level so that triggers are not activated by small changes in the trigger signal.
-
Page 143: Setting The Width (Pulse
6.11 Setting the Width (Pulse<Time, Pulse>Time, T1<Pulse<T2, and Time Out) Trigger (ENHANCED) <For a description of this function, refer to page 2-10.> Procedure VERTICAL HORIZONTAL TRIGGER • To exit the menu during operation, press ESC located TRIG D SEARCH ACTION above the soft keys. - Page 144 6.11 Setting the Width (Pulse<Time, Pulse>Time, T1<Pulse<T2, and Time Out) Trigger (ENHANCED) Setting the Status of Each Channel Press the Set Pattern soft key. The Set Pattern dialog box opens. Use jog shuttle & SELECT to set the status of each channel to H, L, or X (IN, OUT, or X if Window is ON).
- Page 145 6.11 Setting the Width (Pulse<Time, Pulse>Time, T1<Pulse<T2, and Time Out) Trigger (ENHANCED) Turn the jog shuttle to set the determination time. Pressing RESET resets the determination time to 0.001 us (0.002 us for Time2). Setting the Window Press the Window soft key to select ON or OFF. •...
- Page 146 6.11 Setting the Width (Pulse<Time, Pulse>Time, T1<Pulse<T2, and Time Out) Trigger (ENHANCED) Explanation This setting is for activating a trigger by determining whether the time over which the specified condition is met or not met is shorter or longer than the determination time set in advance.
- Page 147 6.11 Setting the Width (Pulse<Time, Pulse>Time, T1<Pulse<T2, and Time Out) Trigger (ENHANCED) Hysteresis Sets a width to the trigger level so that triggers are not activated by small changes in the trigger signal. Approximately 0.3 divisions of hysteresis around the trigger level. Approximately 1 division of hysteresis around the trigger level.
-
Page 148: Setting The Or Trigger (Enhanced)
6.12 Setting the OR Trigger (ENHANCED) <For a description of this function, refer to page 2-11.> Procedure VERTICAL HORIZONTAL TRIGGER • To exit the menu during operation, press ESC located TRIG D SEARCH ACTION above the soft keys. • In the procedural explanation below, the term PRESET ZOOM MODE... - Page 149 6.12 Setting the OR Trigger (ENHANCED) Setting the Level, Hysteresis, Trigger Coupling, and HF Rejection Press the Level/Coupling soft key. The Level/Coupling dialog box opens. Like in the case of the A->B(N) trigger, set the level, hysteresis, trigger coupling, and HF rejection. •...
- Page 150 6.12 Setting the OR Trigger (ENHANCED) Explanation This setting is for activating a trigger on the OR logic of the edge trigger or the OR logic of the window trigger of each channel. Slope of the Edge Trigger of Each Channel You can select the slope of the edge trigger of each channel.
-
Page 151: Setting The Window Trigger (Enhanced)
6.13 Setting the Window Trigger (ENHANCED) Procedure VERTICAL TRIGGER HORIZONTAL • To exit the menu during operation, press ESC located TRIG D SEARCH ACTION above the soft keys. • In the procedural explanation below, the term PRESET ZOOM MODE jog shuttle & SELECT refers to the operation of V/DIV TIME/DIV selecting/setting items and entering values using the... - Page 152 This setting is for activating a trigger using a window trigger on the input signal of CH1 to CH8/4. You can select up to CH4 and CH8 on the DL7440 and DL7480, respectively. Trigger Condition You can set a trigger condition for each trigger.
- Page 153 6.13 Setting the Window Trigger (ENHANCED) Window A window is defined by its center level and width. Selectable Range of Center The selectable range is 8 divisions within the screen. The resolution is 0.01 divisions. For example, the resolution for 1 V/div is 0.01 V. Selectable Range of Width The selectable range is ±0.5 to ±4 divisions around the center level.
-
Page 154: Setting The Tv Trigger (Enhanced)
6.14 Setting the TV Trigger (ENHANCED) Procedure VERTICAL HORIZONTAL TRIGGER • To exit the menu during operation, press ESC located TRIG D SEARCH ACTION above the soft keys. PRESET ZOOM MODE • For a description of the operation using a USB keyboard or V/DIV TIME/DIV a USB mouse, see section 4.3. - Page 155 6.14 Setting the TV Trigger (ENHANCED) Selecting the Polarity Press the Polarity soft key to select the polarity. Setting the Trigger Level Press the Level soft key. Turn the jog shuttle to set the trigger level. Pressing RESET sets the trigger level to 0.5 divisions or 1.0 division depending on the TV Type (broadcast type).
- Page 156 6.14 Setting the TV Trigger (ENHANCED) Selecting Frame Skip Press the Frame Skip soft key to select frame skip. Explanation This setting is for activating a trigger on a video signal applied to CH1. Broadcast Types That TV Trigger Supports You can select the broadcast type.
- Page 157 6.14 Setting the TV Trigger (ENHANCED) Line Number A trigger is activated at the start of the line of the selected number. NTSC: 5 to 1054 The following line numbers are those when the field number is set to 1 (if the field number is set to 2, the numbers are assigned sequentially by setting 268 to 5).
- Page 158 6.14 Setting the TV Trigger (ENHANCED) 480/60p: 8 to 2251 Line numbers inside the parentheses cannot be set. Line number 524 525 2207 2208 2209 2251 Frame Skip This function is used to skip frames such as when the color burst is inverted every frame. You can select the number of frames at which this operation is repeated.
-
Page 159: Setting The Logic Trigger (Enhanced, Optional)
6.15 Setting the Logic Trigger (ENHANCED, Optional) <For a description of this function, refer to page 2-12.> Procedure VERTICAL HORIZONTAL TRIGGER • To exit the menu during operation, press ESC located TRIG D SEARCH ACTION above the soft keys. • In the procedural explanation below, the term PRESET ZOOM MODE... - Page 160 6.15 Setting the Logic Trigger (ENHANCED, Optional) Activating a Trigger Only on the Status Pattern Use jog shuttle & SELECT to set Clock Bit to None. Use jog shuttle & SELECT to set the status of each bit to H, L, or X. Use jog shuttle &...
- Page 161 6.15 Setting the Logic Trigger (ENHANCED, Optional) Explanation This setting is for activating a trigger on the edge of a specified bit while the combination of the H, L, and Don’t care of Pod A and B (16 bits) are met. Logic Condition Status of Each Pod Above the specified threshold level*...
-
Page 162: Setting The Action-On-Trigger
6.16 Setting the Action-on-Trigger Procedure MENU MENU PRINT IMAGE SAVE SHIFT HISTORY START/STOP VERTICAL HORIZONTAL TRIGGER • To exit the menu during operation, press ESC located TRIG D SEARCH ACTION above the soft keys. PRESET ZOOM MODE • For a description of the operation using a USB keyboard or a USB mouse, see section 4.3. - Page 163 6.16 Setting the Action-on-Trigger Explanation This setting is for performing a specified action each time the trigger is activated. Action to Be Performed When the Trigger Condition Is Met The specified action is performed whenever a trigger is activated. Buzzer Sounds a buzzer.
-
Page 164: Setting The Trigger Gate
6.17 Setting the Trigger Gate Procedure • To exit the menu during operation, press ESC located SETUP DISPLAY FILE MISC RESET SELECT above the soft keys. PHASE • For a description of the operation using a USB keyboard or MEASURE CURSOR GO/NOGO MATH... - Page 165 6.17 Setting the Trigger Gate Explanation Trigger Gate Set the timing when the specified trigger condition is activated. When the trigger condition is met, the waveform is acquired. Active High When the external signal is low, the waveform is not acquired even when the trigger condition is met.
-
Page 166: Chapter 7 Waveform Acquisition
Chapter 7 Waveform Acquisition Starting/Stopping Waveform Acquisition Procedure • To exit the menu during operation, press ESC located SETUP DISPLAY FILE MISC RESET SELECT above the soft keys. PHASE • For a description of the operation using a USB keyboard or MEASURE CURSOR GO/NOGO... -
Page 167: Setting The Record Length
Setting the Record Length <For a description of this function, refer to page 2-15.> Procedure • To exit the menu during operation, press ESC located SETUP DISPLAY FILE MISC RESET SELECT above the soft keys. PHASE • For a description of the operation using a USB keyboard or MEASURE CURSOR GO/NOGO... -
Page 168: Using Interleave Mode
2 GS/s. The channels that cannot be used when interleave mode is turned ON are CH2, CH4, CH6, and CH8 (CH2 and CH4 on the DL7440). If the optional logic input is available, POD B cannot be used. For a description of the limitations of the record length, sample rate, and other items when interleave mode is turned ON, see appendix 1. -
Page 169: Turning On/Off Repetitive Sampling Mode
Turning ON/OFF Repetitive Sampling Mode <For a description of this function, refer to page 2-15.> Procedure • To exit the menu during operation, press ESC located SETUP DISPLAY FILE MISC RESET SELECT above the soft keys. PHASE • For a description of the operation using a USB keyboard or MEASURE CURSOR GO/NOGO... - Page 170 7.4 Turning ON/OFF Repetitive Sampling Mode Note • When the record length is 16 MW, you cannot switch repetitive sampling mode ON/OFF. The menu indicates OFF. • When repetitive sampling mode is turned ON, the sample rate is set greater than or equal to 2 GS/s (greater than or equal to 5 GS/s when interleave mode is ON) for certain T/div settings.
-
Page 171: Setting The Acquisition Mode
Setting the Acquisition Mode <For a description of this function, refer to page 2-15.> Procedure • To exit the menu during operation, press ESC located SETUP DISPLAY FILE MISC RESET SELECT above the soft keys. PHASE • For a description of the operation using a USB keyboard or MEASURE CURSOR GO/NOGO... - Page 172 7.5 Setting the Acquisition Mode Setting the Attenuation Constant (When the Acquisition Mode Is Average and Count Is Infinite) Press the Weight soft key. Turn the jog shuttle to set the attenuation constant. Explanation You can select the acquisition mode from the following. The default setting is normal mode. Normal Mode Sampled data is stored in the acquisition memory without special processing.
- Page 173 7.5 Setting the Acquisition Mode Box Average At sample rates that allow box averaging, data is normally sampled at 1 GS/s or 800 MS/s regardless of the interleave mode setting (ON or OFF), and the sampled data is decimated according to the T/div setting and stored to the acquisition memory. The internal sample rate is the same as the envelope mode.
- Page 174 7.5 Setting the Acquisition Mode Acquisition Count You can set the acquisition count. If you set the value to Infinite, acquisition will continue until you press the START/STOP key. The default setting is Infinite. You cannot change the acquisition count while measurement is in progress. Stop the measurement first. Normal, Envelope, and Box Average 2 to 65536 (1 step), Infinite Averaging...
-
Page 175: Performing Sequential Store (Single(N) Mode)
Performing Sequential Store (SINGLE(N) Mode) <For a description of this function, refer to page 2-17.> Procedure VERTICAL HORIZONTAL TRIGGER • To exit the menu during operation, press ESC located TRIG D SEARCH ACTION above the soft keys. PRESET ZOOM MODE •... - Page 176 7.6 Performing Sequential Store (SINGLE(N) Mode) Acquisition Count You can set the acquisition count. The acquisition count that can be specified varies depending on the specified record length as follows. Count When in Normal Mode Count When in Box Average Mode Specified Record 16 MW memory 4 MW memory 16 MW memory...
-
Page 177: Chapter 8 Waveform Display And Information Display
Chapter 8 Waveform Display and Information Display Setting the Display Format Procedure Setting the Display Format of Normal Waveforms • To exit the menu during operation, press ESC located SETUP DISPLAY FILE MISC RESET SELECT above the soft keys. • In the procedural explanation below, the term PHASE MEASURE CURSOR... - Page 178 8.1 Setting the Display Format Setting the Display Format of Logic Waveforms VERTICAL HORIZONTAL TRIGGER • To exit the menu during operation, press ESC located TRIG D SEARCH ACTION above the soft keys. PRESET ZOOM MODE • For a description of the operation using a USB keyboard or a USB mouse, see section 4.3.
- Page 179 8.1 Setting the Display Format Explanation You can select the number of windows into which the normal analog waveform (normal waveform) display window is divided. The position of the waveform of each channel varies depending on the display format. You can also select the display format when displaying logic waveforms and normal waveforms.
-
Page 180: Performing Display Interpolation
Performing Display Interpolation <For a description of this function, refer to page 2-18.> Procedure • To exit the menu during operation, press ESC located SETUP DISPLAY FILE MISC RESET SELECT above the soft keys. PHASE • For a description of the operation using a USB keyboard or MEASURE CURSOR GO/NOGO... - Page 181 8.2 Performing Display Interpolation Explanation Interpolation Method Any area along the time axis having less than 500 points in 10 divisions (less than 250 points in the Z1 and Z2 window when displaying Main&Z1&Z2) is recognized as an interpolation area. If you leave interpolation off, these points will appear as discrete dots (so that the display will show gaps between dots or vertical lines).
-
Page 182: Accumulating Waveforms
Accumulating Waveforms Procedure • To exit the menu during operation, press ESC located SETUP DISPLAY FILE MISC RESET SELECT above the soft keys. PHASE • For a description of the operation using a USB keyboard or MEASURE CURSOR GO/NOGO MATH a USB mouse, see section 4.3. - Page 183 8.3 Accumulating Waveforms Explanation Normally, the display is updated every time a trigger is activated making it difficult to capture transient conditions such as sudden distortion of waveforms. By using the accumulate function, the waveform display of the acquired data remains on the screen for the specified time.
-
Page 184: Zooming The Waveform
Zooming the Waveform <For a description of this function, refer to page 2-19.> Procedure VERTICAL HORIZONTAL TRIGGER • To exit the menu during operation, press ESC located TRIG D SEARCH ACTION above the soft keys. • In the procedural explanation below, the term PRESET ZOOM MODE... - Page 185 8.4 Zooming the Waveform Setting the Waveform to Be Zoomed Press the Allocation soft key. The Allocation dialog box appears. Use jog shuttle & SELECT to select the waveform to be zoomed. • If All ON is executed using jog shuttle & SELECT, all the waveforms currently displayed are selected.
- Page 186 8.4 Zooming the Waveform Setting the Zoom Position Press the Z1 Position/Z2 Position soft key to set the jog shuttle control to Z1 Position. If you select Z1 on the Mode menu, Z1 Position is displayed. If you select Z2, Z2 Position is displayed.
- Page 187 8.4 Zooming the Waveform Explanation Zoomed waveforms of two locations can be displayed simultaneously (dual zoom). You can also specify which channels to zoom. Zoom is possible until the number of displayed points is 50 (40 depending on the time axis setting). Zoom Mode (Display Method of Zoomed Waveforms) Main Displays only the main (unzoomed) waveform.
-
Page 188: Displaying X-Y Waveforms
Displaying X-Y Waveforms <For a description of this function, refer to page 2-19.> Procedure • To exit the menu during operation, press ESC located SETUP DISPLAY FILE MISC RESET SELECT above the soft keys. PHASE • For a description of the operation using a USB keyboard or MEASURE CURSOR GO/NOGO... - Page 189 8.5 Displaying X-Y Waveforms Selecting the X-Y Waveform Press the Select soft key to select the X-Y waveform to be set. Press the Display soft key to turn ON/OFF the X-Y waveform display. Setting the X-Axis and Y-Axis Press the X Trace soft key. The X Trace menu appears. Select the waveform to be assigned to the X-axis.
- Page 190 8.5 Displaying X-Y Waveforms Explanation Display Mode You can select the display mode. T-Y&X-Y The top window displays T-Y (normal) waveforms. The bottom window displays X-Y waveforms. Displays only X-Y waveforms. Displays only T-Y waveforms. X-Axis Mode You can select the X-axis mode. Single Sets the X-axis trace of XY1 and XY2 common.
-
Page 191: Taking Snapshots And Clearing Traces
Taking Snapshots and Clearing Traces <For a description of this function, refer to page 2-20.> Procedure VERTICAL TRIGGER HORIZONTAL For a description of the operation using a USB keyboard or a TRIG D SEARCH ACTION USB mouse, see section 4.3. PRESET ZOOM MODE... -
Page 192: Changing The Graticule
Changing the Graticule Procedure • To exit the menu during operation, press ESC located SETUP DISPLAY FILE MISC RESET SELECT above the soft keys. PHASE • For a description of the operation using a USB keyboard or MEASURE CURSOR GO/NOGO MATH a USB mouse, see section 4.3. -
Page 193: Turning On/Off The Scale Display
Turning ON/OFF the Scale Display Procedure • To exit the menu during operation, press ESC located SETUP DISPLAY FILE MISC RESET SELECT above the soft keys. PHASE • For a description of the operation using a USB keyboard or MEASURE CURSOR GO/NOGO MATH... -
Page 194: Setting Waveform Labels And Turning On/Off The Display
Press one of the CH1 to CH8/4 keys to select the channel to which a waveform label is to be assigned. You can select up to CH4 and CH8 on the DL7440 and DL7480, respectively. Press the Next (1/2) soft key. The page 2 menu appears. - Page 195 8.9 Setting Waveform Labels and Turning ON/OFF the Display Turning ON/OFF the Waveform Label Display • To exit the menu during operation, press ESC located SETUP DISPLAY FILE MISC RESET SELECT above the soft keys. PHASE • For a description of the operation using a USB keyboard or MEASURE CURSOR GO/NOGO...
-
Page 196: Turning On/Off The Translucent Display
8.10 Turning ON/OFF the Translucent Display Procedure • To exit the menu during operation, press ESC located SETUP DISPLAY FILE MISC RESET SELECT above the soft keys. PHASE • For a description of the operation using a USB keyboard or MEASURE CURSOR GO/NOGO... -
Page 197: Chapter 9 Waveform Computation
Chapter 9 Waveform Computation Entering Normal Computation Mode, Displaying Computed Waveforms, and Assigning Labels to Computed Waveforms Procedure • To exit the menu during operation, press ESC located SETUP DISPLAY FILE MISC RESET SELECT above the soft keys. • In the procedural explanation below, the term PHASE MEASURE CURSOR... - Page 198 9.1 Entering Normal Computation Mode, Displaying Computed Waveforms, and Assigning Labels to Computed Waveforms Assigning Labels to Computed Waveforms Press Math1 Label. A keyboard used to enter values and strings appears. Use jog shuttle & SELECT to set the label. When the user-defined computation option is installed Explanation...
-
Page 199: Adding, Subtracting, And Multiplying Waveforms
Adding, Subtracting, and Multiplying Waveforms Procedure • To exit the menu during operation, press ESC located SETUP DISPLAY FILE MISC RESET SELECT above the soft keys. • In the procedural explanation below, the term PHASE jog shuttle & SELECT refers to the operation of MEASURE CURSOR GO/NOGO... - Page 200 9.2 Adding, Subtracting, and Multiplying Waveforms Explanation This section describes the procedures for selecting addition, subtraction, or multiplication in normal computation mode. If the user-defined computation option is installed, you must first enter normal computation mode as described in section 9.1. For a description of the setup procedure for user-defined computation, see section 9.9.
- Page 201 9.2 Adding, Subtracting, and Multiplying Waveforms Note If the scaling method is switched from manual to auto, the center and sensitivity values that you specified when in manual mode are set to auto scaled values. Unit of Computed Waveforms Units can be assigned to computed waveforms Math1 and Math2 using up to 4 characters.
-
Page 202: Performing Binary Computation
Performing Binary Computation Procedure • To exit the menu during operation, press ESC located SETUP DISPLAY FILE MISC RESET SELECT above the soft keys. • In the procedural explanation below, the term PHASE jog shuttle & SELECT refers to the operation of MEASURE CURSOR GO/NOGO... - Page 203 9.3 Performing Binary Computation Explanation This section describes the procedures for setting the binary computation in normal computation mode. If the user-defined computation option is installed, you must first enter normal computation mode as described in section 9.1. For a description of the setup procedure of user-defined computation, see section 9.9.
-
Page 204: Inverting Waveforms
Inverting Waveforms Procedure • To exit the menu during operation, press ESC located SETUP DISPLAY FILE MISC RESET SELECT above the soft keys. • In the procedural explanation below, the term PHASE jog shuttle & SELECT refers to the operation of MEASURE CURSOR GO/NOGO... - Page 205 9.4 Inverting Waveforms Explanation This section describes the procedure for setting the computation that inverts waveforms in normal computation mode. If the user-defined computation option is installed, you must first enter normal computation mode as described in section 9.1. For a description of the setup procedure of user-defined computation, see section 9.9.
-
Page 206: Differentiating And Integrating Waveforms
Differentiating and Integrating Waveforms Procedure • To exit the menu during operation, press ESC located SETUP DISPLAY FILE MISC RESET SELECT above the soft keys. • In the procedural explanation below, the term PHASE jog shuttle & SELECT refers to the operation of MEASURE CURSOR GO/NOGO... - Page 207 9.5 Differentiating and Integrating Waveforms Explanation This section describes the procedures for setting the differentiation or integration computation in normal computation mode. If the user-defined computation option is installed, you must first enter normal computation mode as described in section 9.1. For a description of the setup procedure of user-defined computation, see section 9.9.
-
Page 208: Performing Power Spectrum Computation (Fft)
Performing Power Spectrum Computation (FFT) <For a description of this function, refer to page 2-22.> Procedure • To exit the menu during operation, press ESC located SETUP DISPLAY FILE MISC RESET SELECT above the soft keys. • In the procedural explanation below, the term PHASE jog shuttle &... - Page 209 9.6 Performing Power Spectrum Computation (FFT) Explanation This section describes the procedures for setting the power spectrum computation (FFT) in normal computation mode. If the user-defined computation option is installed, you must first enter normal computation mode as described in section 9.1. For a description of the setup procedure of user-defined computation, see section 9.9.
- Page 210 9.6 Performing Power Spectrum Computation (FFT) Selecting the Time Window You can select the time window. Rect (Rectangular) Best suited for transient signals that attenuate completely within the time window. Hanning Best suited for continuous and non-periodic signals. Flattop Best suited for improving the accuracy of the level even if the frequency resolution is to be compromised.
-
Page 211: Smoothing Waveforms
Smoothing Waveforms Procedure • To exit the menu during operation, press ESC located SETUP DISPLAY FILE MISC RESET SELECT above the soft keys. • In the procedural explanation below, the term PHASE jog shuttle & SELECT refers to the operation of MEASURE CURSOR GO/NOGO... - Page 212 9.7 Smoothing Waveforms Explanation This section describes the procedures for setting the smoothing operation in normal computation mode. If the user-defined computation option is installed, you must first enter normal computation mode as described in section 9.1. For a description of the setup procedure of user-defined computation, see section 9.9.
-
Page 213: Shifting The Phase
Press one of the CH1 to CH8(4) soft keys to select the channel on which the amount of shift is to be specified. You can select up to CH4 and CH8 on the DL7440 and DL7480, respectively. CH5 to CH8 appear when you press the Next (1/2) soft key. - Page 214 The phase-shifted waveform is displayed The phase-shifted waveform is not displayed Target Channels for Phase Shifting The target channels for phase shifting are CH1 to CH4 on the DL7440 and CH1 to CH8 on the DL7480. Amount of Shift You can set the amount of shift.
-
Page 215: Performing User-Defined Computation (Optional)
Performing User-Defined Computation (Optional) <For a description of this function, refer to page 2-23.> Procedure • To exit the menu during operation, press ESC located SETUP DISPLAY FILE MISC RESET SELECT above the soft keys. • In the procedural explanation below, the term PHASE jog shuttle &... - Page 216 9.9 Performing User-Defined Computation (Optional) Defining the Equation Use jog shuttle & SELECT to select UserDef. The equation definition dialog box opens. Enter the equation (using up to 55 characters). The entered equation is displayed in the Expression box of the Math1 User Define Setup dialog box.
- Page 217 9.9 Performing User-Defined Computation (Optional) Setting the Following Items Used in the User-Defined Equation • FFT Set the number of computed points and the time window when computing LS- to CH- in the table of operators given on pages 9-24 and 9-25. •...
- Page 218 9.9 Performing User-Defined Computation (Optional) Setting Constants K1 to K8 Press the Constant soft key. A Constant dialog box opens. Use jog shuttle & SELECT to set constants K1 to K8. Press ESC. The Constant dialog box closes. Set constants K1 to K8. Setting the Threshold Level for Binary Computation Press the Threshold soft key.
- Page 219 9.9 Performing User-Defined Computation (Optional) Performing Averaging and Peak Computation of Computed Waveforms (Computed Results) Press the Average soft key. The Average dialog box appears. Use jog shuttle & SELECT to select averaging or peak computation. • If you select averaging (linear averaging, exponential averaging, or cycle averaging), enter settings corresponding to the averaging type according to the following steps.
- Page 220 9.9 Performing User-Defined Computation (Optional) Explanation This section describes the setup procedures in user-defined computation (option) mode. For the setup procedure in normal computation mode, see sections 9.1 to 9.8. Note When user-defined computation is in progress, ∗ is displayed in the upper left corner of the screen.
- Page 221 DL7480: One channel from CH1 to CH8, Pod A and Pod B Math2 DL7440: One channel from CH1 to CH4 , Pod A, Pod B, and Math1 DL7480: One channel from CH1 to CH8 , Pod A, Pod B, and Math1 •...
- Page 222 9.9 Performing User-Defined Computation (Optional) Exponent of 10 You can set the exponent of 10 by using the “E” displayed in the equation definition dialog box. For example, 1¥10 can be entered as 1E3. Note When the waveform to be computed is phase shifted (see section 9.8), the phase-shifted waveform is used in the computation.
- Page 223 9.9 Performing User-Defined Computation (Optional) Digital Filter • The table below shows the selectable filter types, filter frequency bandwidths, and cutoff frequency types. Filter Type Frequency Bandwidth Type Cutoff Frequency Setting Gauss LowPass Set the high cutoff frequency in CutOff1. Sharp LowPass Set the high cutoff frequency in CutOff1.
- Page 224 9.9 Performing User-Defined Computation (Optional) Cycle Averaging • Divides one period of computed data into the specified number of data points (Cycle Count). This is done across multiple periods of data from the start to the end position of the computation. Then, the average of the data points at the same position across multiple periods is determined.
- Page 225 9.9 Performing User-Defined Computation (Optional) D/A Conversion of the Logic Data The logic data measured using the logic probe is handled as digital data of 8 bits or less or 12 bits or less, and an analog waveform is displayed through D/A conversion. The DA8 and DA12 operators are available on DL7400 firmware version 2.16 or later.
-
Page 226: Chapter 10 Analyzing And Searching Waveforms
Chapter 10 Analyzing and Searching Waveforms 10.1 Displaying History Waveforms <For a description of this function, refer to page 2-17.> Procedure • To exit the menu during operation, press ESC located SETUP DISPLAY FILE MISC RESET SELECT above the soft keys. •... - Page 227 10.1 Displaying History Waveforms Selecting the Highlighted Waveform Press the Select Record soft key. Turn the jog shuttle to select the number of the record to be highlighted. The waveform of the selected record number is highlighted. Selecting the Waveforms to be Displayed on the History Map Displaying the History Map Press the Start Record/End Record soft key to set the jog shuttle control to Start Record or End Record.
- Page 228 10.1 Displaying History Waveforms Explanation This section describes the procedures for displaying history waveforms. The waveforms that have been sequentially stored can also be displayed in the same fashion. Number of History Waveforms The table below shows the number of history waveforms that can be stored and held in the acquisition memory according to the maximum record length and specified record length of each model.
- Page 229 10.1 Displaying History Waveforms Note Notes When Using the History Memory Function • The history memory function cannot be used if the acquisition mode is Average. • The history memory function cannot be used when in repetitive sampling mode. • If waveform acquisition is aborted, only the waveforms that have been acquired completely can be displayed.
-
Page 230: Searching The History Waveforms Using Zones (History Search)
10.2 Searching the History Waveforms Using Zones (History Search) <For a description of this function, refer to page 2-25.> Procedure • To exit the menu during operation, press ESC located SETUP DISPLAY FILE MISC RESET SELECT above the soft keys. PHASE •... - Page 231 Press the CH1 to CH8/4, Math1, or Math2 soft key to select the search target waveform. • On the DL7440, select CH1 to CH4, Math1, or Math2. • On the DL7480, select CH1 to CH8, Math1, or Math2. CH7, CH8, Math1, and Math2 appear when you press the To Page 2 soft key.
- Page 232 10.2 Searching the History Waveforms Using Zones (History Search) Setting the Range of the Search Zone Press the Upper/Lower soft key to set the jog shuttle control to Upper, Lower, or both Upper and Lower. • If you select Upper, you can move the top edge of the zone. •...
- Page 233 10.2 Searching the History Waveforms Using Zones (History Search) Repeat steps 5 to 13 to set Zone1 to Zone4. Selecting the Search Logic Press the Logic soft key to select AND or OR. Executing/Aborting the Search Press the Search Exec soft key. The search is executed, and the ,words Search Exec change to Search Abort.
- Page 234 You can select the search target waveform. If a waveform that meets the search condition is found, other history waveforms at the same time as the found waveform are also displayed. DL7440 You can select the target waveform from CH1 to CH4, Math1, and Math2. DL7480 You can select the target waveform from CH1 to CH8, Math1, and Math2.
-
Page 235: Searching History Waveforms Using Waveform Parameters (History Search)
10.3 Searching History Waveforms Using Waveform Parameters (History Search) <For a description of this function, refer to page 2-25.> Procedure • To exit the menu during operation, press ESC located SETUP DISPLAY FILE MISC RESET SELECT above the soft keys. PHASE •... - Page 236 Press the CH1 to CH8/4, Math1, or Math2 soft key to select the search target waveform. • On the DL7440, select CH1 to CH4, Math1, or Math2. • On the DL7480, select CH1 to CH8, Math1, or Math2. CH7, CH8, Math1, and Math2 appear when you press the To Page 2 soft key.
- Page 237 10.3 Searching History Waveforms Using Waveform Parameters (History Search) Setting the Determination Range of the Measured Value of the Search Measurement Parameter Press the Upper/Lower soft key to set the jog shuttle control to Upper or Lower. • If you select Upper, you can move the upper limit of the determination range. •...
- Page 238 10.3 Searching History Waveforms Using Waveform Parameters (History Search) Executing/Aborting the Search Press the Search Exec soft key. The search is executed, and the words Search Exec change to Search Abort. To abort the search, press the Search abort soft key. The search is aborted, and the words Search Abort change to Search Exec.
- Page 239 If a waveform that meets the search condition is found, other history waveforms at the same time as the found waveform are also displayed. Search Target Waveform DL7440 You can select the target waveform from CH1 to CH4, Math1, and Math2. DL7480 You can select the target waveform from CH1 to CH8, Math1, and Math2.
-
Page 240: Searching Waveforms Using The Search And Zoom Function
10.4 Searching Waveforms Using the Search and Zoom Function <For a description of this function, refer to page 2-26.> Procedure MENU MENU PRINT IMAGE SAVE SHIFT HISTORY START/STOP VERTICAL HORIZONTAL TRIGGER • To exit the menu during operation, press ESC located TRIG D SEARCH ACTION... - Page 241 10.4 Searching Waveforms Using the Search and Zoom Function Setting the Search Conditions Press the Setup soft key. The Setup dialog box opens. Setting the Search Target Waveform, Level, Slope, and Hysteresis for Detecting Edges Use jog shuttle & SELECT to select the search target waveform (Source box). Use jog shuttle &...
- Page 242 10.4 Searching Waveforms Using the Search and Zoom Function Executing/Aborting the Search Press the Exec soft key. The search is executed, and the word Exec change to Abort. Each time a waveform that matches the search condition is detected, the search is aborted, and the word Abort changes to Exec.
- Page 243 If you select CH1 to CH8/4, proceed to step 7. • You can select up to CH4 and CH8 on the DL7440 and DL7480, respectively. • Setting the Interval for Detecting Patterns (When None Is Selected) Use jog shuttle & SELECT to set the interval for detecting the pattern (Interval box).
- Page 244 10.4 Searching Waveforms Using the Search and Zoom Function Setting the Search Target Waveform and Level for Determining the Status Use jog shuttle & SELECT to select the search target waveform (Source box). If the search target was set to the logic input (Pod A and Pod B), select the bit to be searched, and proceed to step 13.
- Page 245 If you select CH1 to CH8/4, proceed to step 6. • You can select up to channel CH4 and CH8 on the DL7440 and DL7480, respectively. Setting the Detection Slope, Level, and Hysteresis of the Selected Synchronization Clock Signal (When CH1 to CH8/4 Is Selected) Use jog shuttle &...
- Page 246 10.4 Searching Waveforms Using the Search and Zoom Function Setting the Determination Pattern, Level, and Hysteresis of the Status of Waveforms (CH, Math, Pod A and Pod B) Other Than the Waveform of the Channel Selected as the Synchronization Clock Signal Use jog shuttle &...
- Page 247 10.4 Searching Waveforms Using the Search and Zoom Function Pulse Width Search Press SHIFT+ZOOM (SEARCH). The SEARCH menu appears. Selecting the “Width” Search Type Press the Type soft key. The Type menu appears. Press the Width soft key. Setting the Search Conditions Press the Setup soft key.
- Page 248 10.4 Searching Waveforms Using the Search and Zoom Function When the determination type When the determination is set to Pulse<Time, Pulse>Time, type is set to T1<Pulse<T2 or Time out Select the search target waveform. Set the search start point. Set the level used to determine Set the pulse width used as a determination reference.
- Page 249 10.4 Searching Waveforms Using the Search and Zoom Function Setting the Auto Scroll Conditions Press the Direction soft key to set the auto scroll direction to << or >>. Press the Speed soft key. Turn the jog shuttle to set the auto scroll speed. Selecting the Window for Displaying the Auto Scrolled Waveform (Zoom Waveform Display Frame) The procedure is the same as step 12 on page 10-16.
- Page 250 The following conditions can be specified. Search Target Waveform You can select the search target waveform. DL7440 You can select the target waveform from CH1 to CH4, Math1, and Math2. DL7480 You can select the target waveform from CH1 to CH8, Math1, and Math2.
- Page 251 The following conditions can be specified. Clock Channel Detects the status pattern in sync with the selected clock signal (clock channel). DL7440 You can select from CH1 to CH4, and None. DL7480 You can select from CH1 to CH8, and None.
- Page 252 • For all other cases, it is not detected as a synchronization clock. Search Target Waveform You can select the search target waveform. DL7440 You can select the target waveform from CH1 to CH4, Math1, Math2, Pod A, and Pod B. DL7480 You can select the target waveform from CH1 to CH8, Math1, Math2, Pod A, and Pod B.
- Page 253 10.4 Searching Waveforms Using the Search and Zoom Function Status Determination Pattern You can set four types, A to D, of status determination patterns. The status of 64 points can be specified using the H (High), L (Low), and X (Don’t Care) designations. Status when the waveform is greater than Thr Upper (1 in the case of logic input) Status when the waveform is less than Thr Lower (0 in the case of logic input) No determination.
- Page 254 The following conditions can be specified. Clock Channel Detects the status pattern in sync with the selected clock signal (clock channel). DL7440 You can select from CH1 to CH4, and None. DL7480 You can select from CH1 to CH8, and None.
- Page 255 10.4 Searching Waveforms Using the Search and Zoom Function • Level You can set the level used to determine whether the status is high or low. The selectable range is 8 divisions within the screen. The resolution is 0.01 divisions. •...
- Page 256 10.4 Searching Waveforms Using the Search and Zoom Function Search Target Waveform You can select the search target waveform. DL7440 You can select the target waveform from CH1 to CH4, Math1, and Math2. DL7480 You can select the target waveform from CH1 to CH8, Math1, and Math2.
- Page 257 10.4 Searching Waveforms Using the Search and Zoom Function Search Conditions of Auto Scroll The following conditions can be specified. When auto scroll is in progress, you can only set the direction and speed of the auto scroll operation. Auto Scroll Direction You can select the auto scroll direction.
-
Page 258: Making Cursor Measurements
10.5 Making Cursor Measurements <For a description of this function, refer to page 2-29.> Procedure • To exit the menu during operation, press ESC located SETUP DISPLAY FILE MISC RESET SELECT above the soft keys. • In the procedural explanation below, the term PHASE jog shuttle &... - Page 259 Press the CH1 to CH8/4, Math1, or Math2 soft key to select the waveform to be measured. • On the DL7440, select CH1 to CH4, Math1, or Math2. • On the DL7480, select CH1 to CH8, Math1, or Math2. CH7, CH8, Math1, and Math2 appear when you press the To Page 2 soft key.
- Page 260 • On the DL7440, select All, CH1 to CH4, Math1, Math2, Pod A, Pod B, or Pod A & Pod B. Math1, Math2, Pod A, Pod B, and Pod A & Pod B appear when you press the Next (1/2) soft key.
- Page 261 10.5 Making Cursor Measurements Selecting the Display Format of the Logic Input (When X-Y Waveforms Are Not Displayed) Press the Logic Setup soft key. The Logic Setup dialog box opens. Use jog shuttle & SELECT to select the notation system. Use jog shuttle &...
- Page 262 Press the CH1 to CH8/4, Math1, or Math2 soft key to select the waveform to be measured. • On the DL7440, select CH1 to CH4, Math1, or Math2. • On the DL7480, select CH1 to CH8, Math1, or Math2. CH7, CH8, Math1, and Math2 appear when you press the To Page 2 soft key.
- Page 263 10.5 Making Cursor Measurements Moving the Cursors Turn the jog shuttle to move the cursor. The Position value changes. When X-Y waveforms When X-Y waveforms are not displayed are displayed Jumping the Cursor to the Zoom Waveform Display Frame (When X-Y Waveforms Are Not Displayed) Press the Cursor Jump soft key.
- Page 264 • On the DL7440, select All, CH1 to CH4, Math1, Math2, Pod A, Pod B, or Pod A & Pod B. Math1, Math2, Pod A, Pod B, and Pod A & Pod B appear when you press the Next (1/2) soft key.
- Page 265 10.5 Making Cursor Measurements Setting the Cursor, Reference Cursor, and Reference Angle Moving the Cursors Press the Cursor1/Cursor2 soft key to set the jog shuttle control to Cursor1, Cursor2, or both Cursor1 and Cursor2. • Select Cursor1 to move Cursor1. •...
- Page 266 10.5 Making Cursor Measurements Explanation This section explains the setup procedures for placing cursors on the displayed waveform (within the display record length, see appendix 1) and displaying various types of measured values at the cross point of the cursor and waveform. The following four types of cursors are available.
- Page 267 10.5 Making Cursor Measurements When X-Y Waveforms Are Displayed Horizontal cursor: Measures the Y-axis value at the cursor position. Y-axis value of Cursor1 Y-axis value of Cursor2 The difference between the Y-axis values of Cursor1 and Cursor2 Vertical cursor: Measures the X-axis value at the cursor position. X-axis value of Cursor1 X-axis value of Cursor2 The difference between the X-axis values of Cursor1 and Cursor2...
- Page 268 10.5 Making Cursor Measurements Combining of the Bit Data The data of Pod A and Pod B can be combined and handled as 16-bit data. Handling of the OFF Bit • In binary notation, a dash is displayed at the bit. •...
- Page 269 10.5 Making Cursor Measurements • When Pod A & Pod B (Combined Data of Pod A and Pod B) Is Being Measured and OFF Bits Exist Cursor 1 Cursor 2 PodA PodB When the read direction of the bit data is A0 -> A7, B0 -> B7 Binary Y1:01-01-101-11-01 Y2:10-10-100-00-01-...
- Page 270 10.5 Making Cursor Measurements Note • The measured values of the X-axis (horizontal axis and time axis) are displayed relative to the trigger position. • If measurement is not possible, *** is displayed in the measured value display area. • Logic waveforms (optional) cannot be selected in horizontal cursor and marker cursor measurements.
-
Page 271: Automated Measurement Of Waveform Parameters
Press the CH1 to CH8/4, Math1, or Math2 soft key to select the waveform to be measured. • On the DL7440, select CH1 to CH4, Math1, or Math2. • On the DL7480, select CH1 to CH8, Math1, or Math2. CH6, CH7, CH8, Math1, and Math2 appear when you press the To Page 2 soft key. - Page 272 Press the CH1 to CH8/4, Math1, or Math2 soft key to select the waveform to be measured. • On the DL7440, select CH1 to CH4, Math1, or Math2. • On the DL7480, select CH1 to CH8, Math1, or Math2. CH7, CH8, Math1, and Math2 appear when you press the To Page 2 soft key.
- Page 273 Press the CH1 to CH8/4, Math1, or Math2 soft key to select the waveform to be set. • On the DL7440, select CH1 to CH4, Math1, or Math2. • On the DL7480, select CH1 to CH8, Math1, or Math2. CH7, CH8, Math1, and Math2 appear when you press the To Page 2 soft key.
- Page 274 10.6 Automated Measurement of Waveform Parameters Setting Distal, Mesial, and Proximal Unit and Values Press the Dist/Prox Mode soft key to select % or Unit. • If you select %, you can set the distal, mesial, and proximal values in percentages by taking the high level and low level of the waveform to be set to be 100% and 0%, respectively.
- Page 275 10.6 Automated Measurement of Waveform Parameters Explanation This section explains the setup procedures for performing automated measurement on various measurement parameters on the displayed waveform (within the display record length, see appendix 1). Up to 24000 data points of the results of automated measurements can be saved to a file (see section 12.10).
- Page 276 10.6 Automated Measurement of Waveform Parameters Time-Axis Parameters Average period within Rise time [s] Rise: AvgPeriod: the measurement range [Hz] Fall time [s] (PR–A)* Fall: Time width above the mesial value [s] Freq: Frequency [Hz] 1/Period +Width: (+Wd)* Period [s] Period: –Width: Time width below the mesial value [s]...
- Page 277 10.6 Automated Measurement of Waveform Parameters Delay between Waveforms The time difference between the rising or falling edge between waveforms and the time difference from the trigger point to the rising or falling edge of waveforms can be measured. Measurement range 1st time N1th time Reference waveform setup example...
- Page 278 10.6 Automated Measurement of Waveform Parameters Measurement Range The selectable range is ±5 divisions, and the resolution is 10 divisions÷the display record length. The right end of the measurement range (Time Range2) must be greater than or equal to the left end of the measurement range (Time Range1). Distal, Mesial, and Proximal Values You can select the method of assigning the three levels that are used as references in measurements such as the rise and fall times.
-
Page 279: Performing Statistical Processing Of The Measured Values Of Waveform Parameters
10.7 Performing Statistical Processing of the Measured Values of Waveform Parameters <For a description of this function, refer to page 2-30.> Procedure • To exit the menu during operation, press ESC located SETUP DISPLAY FILE MISC RESET SELECT above the soft keys. PHASE •... - Page 280 Press the Own, CH1 to CH8(4), Math1, or Math2 soft key to select the waveform used to determine the cycle. • On the DL7440, you can select from Own, CH1 to CH4, Math1, and Math2. • On the DL7480, you can select from Own, CH1 to CH8, Math1, and Math2. CH6, CH7, CH8, Math1, and Math2 appear when you press the To Page 2 soft key.
- Page 281 10.7 Performing Statistical Processing of the Measured Values of Waveform Parameters Executing/Aborting Measurement per Cycle and Statistical Processing within the Measurement Range Press the START/STOP key to stop waveform acquisition. Press the Measure Exec soft key. Measurement per cycle and statistical processing within the measurement range are performed on the displayed waveform from the left end to the right end of the screen (from the oldest waveform).
- Page 282 10.7 Performing Statistical Processing of the Measured Values of Waveform Parameters Searching the Maximum or Minimum Values of the Four Measurement Parameters Being Displayed Press the Max/Min Item1 soft key. The measured values of the 1 measurement parameter from the left of the list are searched, and the cursor (highlight) moves to the measured value with the maximum or minimum mark (↑...
- Page 283 10.7 Performing Statistical Processing of the Measured Values of Waveform Parameters Performing Measurement and Statistical Processing of History Waveforms Press the History Statistics soft key. Perform the following setup procedures as necessary. For the operating procedure, see section 10.6. • Selecting the measurement parameters (steps 4 to 8 on page 10-46). •...
- Page 284 CH8/4*, Math1, or Math2. Statistical processing is performed on the measurement target waveform that was selected in section 10.6. * On the DL7440, the waveform is CH1 to CH4, Math1, or Math2. On the DL7480, the waveform is CH1 to CH8, Math1, or Math2.
- Page 285 Performs automated measurement of waveform parameters on all target waveforms per cycle of the specified channel, and performs statistical processing. You can select up to channel CH4 and CH8 on the DL7440 and DL7480, respectively. Determines the cycle for each target waveform, performs automated measurement of waveform parameters for each cycle, and performs statistical processing.
-
Page 286: Performing Automated Measurements Of Waveform Parameters On Dual Areas
10.8 Performing Automated Measurements of Waveform Parameters on Dual Areas Procedure • To exit the menu during operation, press ESC located SETUP DISPLAY FILE MISC RESET SELECT above the soft keys. • In the procedural explanation below, the term PHASE MEASURE CURSOR GO/NOGO... - Page 287 • Set the unit (Unit box) as necessary. * On the DL7440, you can select from CH1 to CH4, Math1, Math2, None or Const1 to Const4. On the DL7480, you can select from CH1 to CH8, Math1, Math2, None or Const1 to Const4.
- Page 288 10.8 Performing Automated Measurements of Waveform Parameters on Dual Areas Setting the Measurement Range Area2 of the Second Measurement Parameter Press the Time Range3/Time Range4 soft key to set the jog shuttle control to Time Range3, Time Range4, or both Time Range3 and Time Range 4. •...
- Page 289 CH8(4)*, Math1, Math2, None or Const1 to Const4. * On the DL7440, you can select from CH1 to CH4, Math1, Math2, None or Const1 to Const4. On the DL7480, you can select from CH1 to CH8, Math1, Math2, None or Const1 to Const4.
- Page 290 10.8 Performing Automated Measurements of Waveform Parameters on Dual Areas Turning ON/OFF the Computation Parameters The display of the computation parameters User1 to User4 can be turned ON/OFF separately. Displays the measurement parameter. Does not display the measurement parameter. Unit of Computation Parameters Units can be assigned to computation parameters User1 to User4 using up to 4 characters.
-
Page 291: Performing Go/No-Go Determination Using Zones
Press the CH1 to CH8/4, Math1, or Math2 soft key to select the reference waveform for creating the zone. The Edit menu appears. • On the DL7440, select CH1 to CH4, Math1, or Math2. • On the DL7480, select CH1 to CH8, Math1, or Math2. CH7, CH8, Math1, and Math2 appear when you press the To Page 2 soft key. - Page 292 10.9 Performing GO/NO-GO Determination Using Zones Trace menu on the DL7480 Editing the Entire Zone Press the Edit soft key to select Whole. Press the Upper/Lower or Left/Right soft key to set the jog shuttle control to Upper, Lower, Left, or Right. •...
- Page 293 10.9 Performing GO/NO-GO Determination Using Zones Registering the Edited Zone Press the Store as soft key. The Store as menu appears. Press one of the soft keys from Zone1 to Zone6 to select the registration destination. Press the Store Exec soft key. The edited zone is registered to the selected destination.
- Page 294 • Select whether the waveform exiting the determination zone (OUT) or entering the determination zone (IN) (Condition box) makes the condition true. * On the DL7440, you can select from CH1 to CH4, Math1, and Math2. On the DL7480, you can select from CH1 to CH8, Math1, and Math2.
- Page 295 • You can select the reference waveform for creating determination zones from CH1 to CH8/4*, Math1, and Math2. * On the DL7440, you can select from CH1 to CH4, Math1, and Math2. On the DL7480, you can select from CH1 to CH8, Math1, and Math2.
- Page 296 10.9 Performing GO/NO-GO Determination Using Zones Determination Operation You can select whether to repeat the determination operation. Single Performs the determination operation once. Continue Repeats the determination operation until the waveform acquisition count (described later) is reached. If the waveform acquisition count is set to Infinite, determination operation repeats until it is aborted. Waveform Acquisition Count You can set the number of waveform acquisitions.
-
Page 297: Performing Go/No-Go Determination Using Measured Waveform Parameters
10.10 Performing GO/NO-GO Determination Using Measured Waveform Parameters Procedure • To exit the menu during operation, press ESC located SETUP DISPLAY FILE MISC RESET SELECT above the soft keys. • In the procedural explanation below, the term PHASE jog shuttle & SELECT refers to the operation of MEASURE CURSOR GO/NOGO... - Page 298 (OUT) or entering the range (IN) (Condition box) makes the condition true. * On the DL7440, you can select from CH1 to CH4, Math1, and Math2. On the DL7480, you can select from CH1 to CH8, Math1, and Math2.
- Page 299 The waveform on which GO/NO-GO parameter determination is performed is CH1 to CH8/4*, Math1, or Math2. * On the DL7440, the waveform is CH1 to CH4, Math1, or Math2. On the DL7480, the waveform is CH1 to CH8, Math1, or Math2.
- Page 300 10.10 Performing GO/NO-GO Determination Using Measured Waveform Parameters Determination Operation, Waveform Acquisition Count, DL7400 Action When the Condition Is Met, and Determination Range They are the same as the GO/NO-GO determination using zones. See section 10.9. Executing/Aborting GO/NO-GO Determination • When executed, the determination count, the number of times the condition is met, and the determination result, determination target waveform, measurement parameter, and measured value of each determination parameter are displayed on the screen.
-
Page 301: Analyzing And Searching Spi Signals
10.11 Analyzing and Searching SPI Signals Procedure MENU MENU PRINT IMAGE SAVE SHIFT HISTORY START/STOP VERTICAL HORIZONTAL TRIGGER TRIG D SEARCH ACTION • To exit the menu during operation, press ESC located above the soft keys. PRESET ZOOM MODE • In the procedural explanation below, the term V/DIV TIME/DIV jog shuttle &... - Page 302 Use jog shuttle & SELECT to select the CS signal from CH4 to CH8 (CH4) (CH Level box). The only channel that can be used on the DL7440 is CH4. You can select from CH4 to CH8 on the DL7480.
- Page 303 10.11 Analyzing and Searching SPI Signals • When Using the Logic Input (Optional) Signal for the CS Signal Use jog shuttle & SELECT to select whether to make the logic input a CS signal (ON/OFF) (A0 to A7 box). Select whether the logic input signal is to be a CS signal (ON/OFF).
- Page 304 10.11 Analyzing and Searching SPI Signals Executing/Aborting Analysis Stop waveform acquisition after displaying the data to be analyzed. Press the Analyze Exec soft key. The analysis of the I/O data is executed. The words Analyze Exec change to Analyze Abort. To abort the analysis of the I/O data, press the Analyze Abort soft key.
- Page 305 10.11 Analyzing and Searching SPI Signals Viewing the Details of the Analysis Data Press the Detail soft key. A Detail dialog box opens. The analysis data of the same analysis number that is highlighted in the list in step 24 or 28 is displayed highlighted. Press the Hex or Bin soft key to select the notation used to display the analysis data (Data1 and Data2).
- Page 306 10.11 Analyzing and Searching SPI Signals Use jog shuttle & SELECT to set the determination pattern for each byte in hexadecimal or binary (Data Pattern box). When determination is not to be performed, select X. Press ESC. The Detail dialog box closes. Set the search type to Frame Pattern or Indefinite State.
- Page 307 10.11 Analyzing and Searching SPI Signals Explanation This section explains the setup procedure for analyzing or searching the SPI Bus signal while displaying the signal. SPI Signal Analysis and Search Function Analysis Function When waveform acquisition is stopped, the signal data stored to the acquisition memory (including the data stored as history waveforms) can be analyzed.
- Page 308 10.11 Analyzing and Searching SPI Signals • Hysteresis You can set the hysteresis on the level for detecting the synchronization clock. The selectable range is 0.3 divisions to 4.0 divisions. The resolution is 0.1 divisions. • When the level of the clock signal changes from below the specified lower limit of hysteresis to above and including the upper limit of hysteresis, it is detected as a synchronization clock.
- Page 309 10.11 Analyzing and Searching SPI Signals • Enable Status of the CS Signal You can select the enable status of the CS signal. The setting applies to all CS signals. For a channel signal, this is the status when the signal is higher than the level for determining the status of the CS signal.
- Page 310 10.11 Analyzing and Searching SPI Signals • When the total analysis data is greater than 80000 bytes The displayed result varies depending on the number of analysis data in the Pre and Post sections as follows: When the Pre section contains 44000 points and the Post section contains 44000 points, 40000 data points in the Pre section and 40000 data points in the Post section are displayed.
- Page 311 10.11 Analyzing and Searching SPI Signals Data1 and Data2 Values The Data1 and Data2 values are displayed in hexadecimal. Below are some exceptions. • When the data is less than 8 bits, “–” is displayed. • When indefinite data (bit whose status is neither 1 or 0) exists, “∗” is displayed. Indefinite data is considered the same status as the previous bit for the analysis.
- Page 312 10.11 Analyzing and Searching SPI Signals Detailed List of Analysis Data More detailed information of the analysis data can be listed. The following information can be displayed. • Analysis number • Time from the reference point Displays the time from the reference point to the first bit of each data point. •...
- Page 313 10.11 Analyzing and Searching SPI Signals Note • Indefinite data is always considered matched to the specified status. • If analysis is performed with CS signal set to ON, the data being analyzed is considered to be delimited at the point where the status of the CS signal changes. In this case, search is also performed by considering the data to be delimited at that point.
-
Page 314: Chapter 11 Printing Screen Images
(Optional) Printer Roll Paper The DL7400 uses a dedicated roll paper provided by YOKOGAWA. Do not use other types of roll paper. When you are using the printer for the first time, use the roll paper that came with the package. Order extra rolls from your nearest YOKOGAWA dealer. - Page 315 11.1 Installing the Roll Paper into the Built-in Printer (Optional) To open the printer cover, lift the handle on the Lock release lever left side of the printer cover while pressing the lock release lever to the OPEN direction. Handle Printer cover Move the release arm located on the right near the front to the MAN FEED position.
-
Page 316: Printing Using The Built-In Printer (Optional)
11.2 Printing Using the Built-in Printer (Optional) Procedure • To exit the menu during operation, press ESC located SETUP DISPLAY FILE MISC RESET SELECT above the soft keys. • In the procedural explanation below, the term PHASE jog shuttle & SELECT refers to the operation of MEASURE CURSOR GO/NOGO... - Page 317 11.2 Printing Using the Built-in Printer (Optional) Turning ON/OFF the Additional Information and Comments Press the Information soft key to select ON or OFF. Press the Comment soft key. A keyboard used to enter values and strings appears. Use jog shuttle & SELECT to set the comment. Previewing the Print Image Press the Preview soft key.
- Page 318 11.2 Printing Using the Built-in Printer (Optional) Explanation Print Format In addition to normal printing (1 page per screen), “long printing” that allows the waveforms of the specified print range to be printed by expanding the time axis is available. The magnification varies depending on the T/div setting and the record length. Magnification The range is from 2 to 500000 times.
-
Page 319: Printing Using A Usb Printer
11.3 Printing Using a USB Printer Procedure • To exit the menu during operation, press ESC located SETUP DISPLAY FILE MISC RESET SELECT above the soft keys. • In the procedural explanation below, the term PHASE jog shuttle & SELECT refers to the operation of MEASURE CURSOR GO/NOGO... - Page 320 11.3 Printing Using a USB Printer Selecting the Page Description Language or Printer Type Press the Format soft key. The Format menu appears. Press ESC-P, ESC-P2, LIPS3, PCL5, or BJ to select the page description language or printer type. Turning ON/OFF Color Printing (Selectable if the page description language or printer type is set to ESC-P, ESC- P2, PCL5, or BJ in step 7) Press the Color soft key to select ON or OFF.
- Page 321 11.3 Printing Using a USB Printer Selecting the Print Resolution (Selectable only if the page description language or printer type is set to BJ in step 7) Press the Resolution soft key. The Resolution menu appears. Press the 180dpi, 300dpi, 360dpi, or 600dpi soft key to set the output resolution.
- Page 322 Connect only the printers that are allowed. • For details on USB printers that have been tested for compatibility, contact your nearest YOKOGAWA dealer. Connection Procedure When connecting a USB printer, directly connect the printer to the DL7400 using a USB cable as shown below.
- Page 323 Images may not print properly on some printers. Use USB printers that have been tested for compatibility. For details on USB printers that have been tested for compatibility, contact your nearest YOKOGAWA dealer. • You can also print to a USB printer that is connected to your PC. In this case, save the screen image data to a floppy disk, Zip disk, PC card, or other storage medium (see section 12.12), load the data into your PC, and print the data.
-
Page 324: Printing Using A Network Printer (Optional)
11.4 Printing Using a Network Printer (Optional) Procedure • To exit the menu during operation, press ESC located SETUP DISPLAY FILE MISC RESET SELECT above the soft keys. • In the procedural explanation below, the term PHASE jog shuttle & SELECT refers to the operation of MEASURE CURSOR GO/NOGO... - Page 325 11.4 Printing Using a Network Printer (Optional) Turning ON/OFF Color Printing (Selectable only if the page description language or printer type is set to PCL5, ESC-P, ESC-P2, or BJ in step 6) Press the Color soft key to select ON or OFF. Setting Comments Press the Comment soft key.
- Page 326 11.4 Printing Using a Network Printer (Optional) Explanation Like the built-in printer, you can print the screen image on a network printer* via the Ethernet network. * Printing is possible on a printer or via a printer server supporting the TCP/IP protocol. Page Description Language or Printer Type You can select the page description language and printer type.
-
Page 327: Chapter 12 Saving And Loading Data
Chapter 12 Saving and Loading Data 12.1 Storing and Recalling Setup Data Procedure • To exit the menu during operation, press ESC located SETUP DISPLAY FILE MISC RESET SELECT above the soft keys. PHASE • For a description of the operation using a USB keyboard or MEASURE CURSOR GO/NOGO... - Page 328 12.1 Storing and Recalling Setup Data Recalling Setup Data Press one of the soft keys Recall #1 to Recall #3 to recall the setup data. Explanation Stored Items All of the information that you entered using the soft key menu or jog shuttle menu, START/STOP, and the ON/OFF conditions of channels are stored.
-
Page 329: Floppy Disk, Zip Disk, And Pc Cards
12.2 Floppy Disk, Zip Disk, and PC Cards Three types of built-in storage are available: a floppy disk drive or a Zip disk drive (either type is selected at the time of purchase) or a PC card drive. For a description of the Zip disk drive, see page 12-4. - Page 330 12.2 Floppy Disk, Zip Disk, and PC Cards General Handling Precautions of Floppy Disks Floppy disks with bad sectors cannot be used on the DL7400. Format the floppy disk using your PC or other device before use. For the general handling precautions of the floppy disk, read the instruction manual that came with the floppy disk.
- Page 331 The DL7400 supports flash ATA cards (PC card TYPE II) and compact flash (using the PC card TYPE II adapter). In addition, some of the Flash ATA HDD cards can be used. For details, contact your nearest YOKOGAWA dealer. Note To use the PC card on the PC, use a PC that supports the PC card.
- Page 332 12.2 Floppy Disk, Zip Disk, and PC Cards Inserting the PC Card With the front side of the PC card facing toward you, insert the PC card into the drive. The PC card drive is located on the rear panel of the DL7400. Note Insert the PC card all the way in.
-
Page 333: Connecting Mo Disk Drives Or Hard Disks To The Scsi
For details on which devices can be connected, contact your nearest YOKOGAWA dealer as listed on the back cover of this manual. For general handling precautions for the connected SCSI device, see the instruction manual that is provided with the device. -
Page 334: Changing The Scsi Id Number
12.4 Changing the SCSI ID Number Procedure • To exit the menu during operation, press ESC located SETUP DISPLAY FILE MISC RESET SELECT above the soft keys. PHASE • For a description of the operation using a USB keyboard or MEASURE CURSOR GO/NOGO... -
Page 335: Connecting Usb Storage To The Usb Peripheral Interface
12.5 Connecting USB Storage to the USB PERIPHERAL Interface Specifications of the USB PERIPHERAL Interface Item Specifications Connector type USB type A connector (receptacle) Electrical and mechanical USB Rev. 1.1 Data rate 12 Mbps max. Power supply 5 V, 500 mA* (per port) Number of ports * Devices with maximum consumption currents exceeding 100 mA cannot be connected to two ports at the same time. -
Page 336: Formatting The Storage Medium
12.6 Formatting the Storage Medium CAUTION • Do not remove the storage medium (disk) or turn OFF the power when the access indicator or icon of the storage medium is blinking. Doing so can damage the storage medium or destroy the data on the medium. •... - Page 337 12.6 Formatting the Storage Medium Selecting the Storage Medium to Be Formatted Press the Function soft key. The Function menu appears. Press the Format soft key. A media list is displayed in the File List window. Net Drives cannot be formatted. Turn jog shuttle to select the storage medium to be formatted.
- Page 338 12.6 Formatting the Storage Medium Selecting the USB Storage Format Press the Format soft key. The Format menu appears. Selecting the Number of Partitions Turn the jog shuttle to select a value in the range of 1 to 3. Storage media that are already partitioned can be selected and formatted as separate storage media, but the separate storage media cannot be partitioned further.
- Page 339 12.6 Formatting the Storage Medium Explanation Formatting a Floppy Disk When using a new floppy disk, you must format it. You can format the disk to 2HD 1.44M. Formatting a Zip Disk When using a new Zip disk, you need to format it. The format of both the 250-MB and 100-MB Zip disks is FDISK 1 partition.
- Page 340 12.6 Formatting the Storage Medium Media Information Lists the information about the selected medium. Media Name Name of the medium. Media Size Total size. Used Space Size of the used area. Vacant Space Size of the free area. Partition Size Number of partitions.
-
Page 341: Saving/Loading The Setup Data
12.7 Saving/Loading the Setup Data CAUTION Do not remove the storage medium (disk) or turn OFF the power when the access indicator or icon of the storage medium is blinking. Doing so can damage the storage medium or destroy the data on the medium. Procedure •... - Page 342 12.7 Saving/Loading the Setup Data Setting the File Name and Comment Press the File Name soft key. The File Name & Comment dialog box opens. Use jog shuttle & SELECT to set the auto naming function. • If you select ON, the auto naming function is enabled. •...
- Page 343 12.7 Saving/Loading the Setup Data Loading the Setup Data Press the Load soft key. The Load menu and the File List window appear. Selecting the Load Source Medium/Directory The procedure is the same as steps 6 and 7 on page 12-15. Selecting the File to Be Loaded Turn jog shuttle to select a file.
- Page 344 12.7 Saving/Loading the Setup Data Explanation Setup Data That Are Saved The setup data existing at the time the store operation is executed can be saved. However, setup data such as the date/time, communications, and SCSI ID numbers is not saved. Data Size The size of the setup data is approximately 47 KB.
- Page 345 12.7 Saving/Loading the Setup Data Properties Displays the following information about the selected file: the name, extension, the file size, the date the file was saved, the attribute, the comment, etc. Note • An error occurs if a key other than the Abort key is pressed while saving or loading a file. •...
-
Page 346: Saving/Loading The Waveform Data
12.8 Saving/Loading the Waveform Data CAUTION Do not remove the storage medium (disk) or turn OFF the power when the access indicator or icon of the storage medium is blinking. Doing so can damage the storage medium or destroy the data on the medium. Procedure •... - Page 347 12.8 Saving/Loading the Waveform Data Saving the Waveform Data Selecting the Data Type Press the Data Type soft key. The Data Type menu appears. Press the Binary, ASCII, or Float soft key to select the data type. Only the data saved in binary can be loaded (as described later). Selecting the Waveform to Be Saved Press the Save soft key.
- Page 348 12.8 Saving/Loading the Waveform Data Selecting the Save Destination Medium/Directory Press the File List soft key. The File List window appears. Use jog shuttle & SELECT to select the save destination medium (indicated by brackets). Selecting the Save Destination Directory (Perform this operation when directories are present on the medium.) Use jog shuttle &...
- Page 349 12.8 Saving/Loading the Waveform Data Executing the Save Operation Press the Save Exec soft key. The data is saved to the directory indicated by Path=..At the same time, the Save Exec soft key changes to the Abort soft key. While the data is being saved, the icon is displayed at the upper left corner of the screen.
- Page 350 • On the DL7440, you can select from All, CH1 to CH4, Math1, Math2, Pod A, and Pod B. Math1, Math2, Pod A, and Pod B appear when you press the Next (1/2) soft key.
- Page 351 • You can save all the waveforms or the selected waveform from CH1 to CH8(4)*, Math1, Math2, Pod A, and Pod B. * You can select up to CH4 or CH8 on the DL7440 and DL7480, respectively. • The setup data including vertical axis, horizontal axis, and trigger of the waveform to be saved is also saved.
- Page 352 12.8 Saving/Loading the Waveform Data Range of Waveform to Be Saved You can select the range (area) of a waveform to be saved. Only the data that has been saved by selecting Binary in the aforementioned section “Data Type and Extension” can be loaded into the DL7400.
- Page 353 12.8 Saving/Loading the Waveform Data Properties Displays the following information about the selected file: the name, extension, the file size, the date the file was saved, the attribute, the comment, etc. Unload When waveform data is loaded and displayed, newly acquired waveforms are not displayed even when waveform acquisition is started.
-
Page 354: Saving/Loading The Snapshot Waveforms
12.9 Saving/Loading the Snapshot Waveforms CAUTION Do not remove the storage medium (disk) or turn OFF the power when the access indicator or icon of the storage medium is blinking. Doing so can damage the storage medium or destroy the data on the medium. Procedure •... - Page 355 12.9 Saving/Loading the Snapshot Waveforms Aborting the Save Operation Press the Abort soft key. The save operation is aborted. At the same time, the Abort soft key changes to the Save Exec soft key. Specifying the File to Be Displayed in the File List Window and Viewing File Properties The procedure is the same as steps 22 to 25 on page 12-23.
- Page 356 12.9 Saving/Loading the Snapshot Waveforms Clearing Waveforms After step 3 of page 12-28, press the Unload soft key. The Unload menu is displayed. Press the Trace soft key. The Trace menu appears. Press the All or Snap1 to Snap4 soft key to select the load destination to be unloaded.
-
Page 357: Saving The Results Of The Automated Measurement Of Waveform Parameters
12.10 Saving the Results of the Automated Measurement of Waveform Parameters CAUTION Do not remove the storage medium (disk) or turn OFF the power when the access indicator or icon of the storage medium is blinking. Doing so can damage the storage medium or destroy the data on the medium. Procedure •... - Page 358 12.10 Saving the Results of the Automated Measurement of Waveform Parameters Specifying the File to Be Displayed in the File List Window and Viewing File Properties The procedure is the same as steps 22 to 25 on page 12-23. Explanation The results of the automated measurement of waveform parameters can be saved to a file in CSV format (.csv extension) to a floppy disk, Zip disk, PC card, external SCSI device, or USB storage device.
-
Page 359: Saving The Detailed Analysis List Of Spi Signals
12.11 Saving the Detailed Analysis List of SPI Signals CAUTION Do not remove the storage medium (disk) or turn OFF the power when the access indicator or icon of the storage medium is blinking. Doing so can damage the storage medium or destroy the data on the medium. Procedure •... - Page 360 12.11 Saving the Detailed Analysis List of SPI Signals Executing the Save Operation Press the Save Exec soft key. The data is saved to the directory indicated by Path=..At the same time, the Save Exec soft key changes to the Abort soft key. Aborting the Save Operation Press the Abort soft key.
-
Page 361: Saving Screen Image Data
12.12 Saving Screen Image Data CAUTION Do not remove the storage medium (disk) or turn OFF the power when the access indicator or icon of the storage medium is blinking. Doing so can damage the storage medium or destroy the data on the medium. Procedure •... - Page 362 12.12 Saving Screen Image Data Selecting the Save Destination Medium Press the File List soft key. The save destination File List window appears. Use jog shuttle & SELECT to select the save destination medium (indicated by brackets). Selecting the Save Destination Directory Perform this operation when directories are present on the medium.
- Page 363 12.12 Saving Screen Image Data Explanation The screen image data can be stored to a specified storage medium. You can select a storage medium of floppy disk, Zip disk, PC card, external SCSI device, or network drive (when the Ethernet interface option is installed). For details on saving data to the network drive, see section 13.3.
- Page 364 12.12 Saving Screen Image Data File Name Number of characters and types that can be used Number of Characters Characters That Can Be Used 1 to 14 characters 0 to 9, A to Z, %, _, ( , ) Auto Naming When Auto Naming is turned ON, files with a four digit number from 0000 to 2499 (0000 to 1249 for binary format) are automatically created when saving the data.
-
Page 365: Displaying Thumbnails Of The Saved Screen Image Data
12.13 Displaying Thumbnails of the Saved Screen Image Data CAUTION Do not remove the storage medium (disk) or turn OFF the power when the access indicator or icon of the storage medium is blinking. Doing so can damage the storage medium or destroy the data on the medium. Procedure •... - Page 366 12.13 Displaying Thumbnails of the Saved Screen Image Data Listing the Thumbnails of Specified Data Format Press the File List soft key. The File List window appears. Turn jog shuttle to select the directory containing the thumbnails you wish to display.
- Page 367 12.13 Displaying Thumbnails of the Saved Screen Image Data Displaying Thumbnails from the FILE Menu Press FILE. The FILE menu appears. Press the File Item soft key. The File Item menu appears. Press the Image soft key. Press the Format soft key. The Format menu appears. Press the TIFF, BMP, Post Script, PNG, or JPEG soft key to select the thumbnail format.
- Page 368 12.13 Displaying Thumbnails of the Saved Screen Image Data Explanation Thumbnails of the screen image data that are saved on a storage medium can be displayed. Thumbnail Display from the IMAGE Menu Thumbnail Screen Thumbnails are displayed for the screen image data files (files with .TIF, .BMP, .PS, .PNG, and .JPG extensions) in the directory selected using File List in the IMAGE menu.
-
Page 369: Changing The File Attributes And Deleting Files
12.14 Changing the File Attributes and Deleting Files CAUTION Do not remove the storage medium (disk) or turn OFF the power when the access indicator or icon of the storage medium is blinking. Doing so can damage the storage medium or destroy the data on the medium. Procedure •... - Page 370 12.14 Changing the File Attributes and Deleting Files Deleting Files Press the Function soft key. The Function menu appears. Press the Delete soft key. Selecting/Resetting the File to Be Deleted One at a Time Turn jog shuttle to select a file. Press the Set/Reset soft key.
- Page 371 12.14 Changing the File Attributes and Deleting Files Explanation Selecting the Storage Medium and Directory Storage media to and from which saving and loading are possible are displayed on the File List window. Display Examples of Storage Media Floppy disk Zip disk PC_Card PC card...
- Page 372 12.14 Changing the File Attributes and Deleting Files Properties Displays the following information about the selected file: the name, extension, the file size, the date the file was saved, the attribute, the comment, etc. Note • Files cannot be deleted while the waveform acquisition is in progress. •...
-
Page 373: Copying Files
12.15 Copying Files CAUTION Do not remove the storage medium (disk) or turn OFF the power when the access indicator or icon of the storage medium is blinking. Doing so can damage the storage medium or destroy the data on the medium. Procedure •... - Page 374 12.15 Copying Files Selecting/Resetting the Copy Source Files at Once Turn jog shuttle to select a file, directory, or medium. Press the All set soft key. Asterisks (∗) are displayed to the left of every file in the directory containing the selected file or directory to indicate that they will be copied.
- Page 375 12.15 Copying Files Explanation Selecting the Copy Source Files You can copy all files that have an asterisk to the left of the file name. There are two ways to select the files to be copied. Selecting the files one at a time Press the Set/Reset soft key to place ∗...
-
Page 376: Changing The Directory Or File Name Of The Storage Medium And Creating Directories
12.16 Changing the Directory or File Name of the Storage Medium and Creating Directories CAUTION Do not remove the storage medium (disk) or turn OFF the power when the access indicator or icon of the storage medium is blinking. Doing so can damage the storage medium or destroy the data on the medium. - Page 377 12.16 Changing the Directory or File Name of the Storage Medium and Creating Directories Selecting the Storage Medium/Directory The procedure is the same as steps 14 to 15 on page 12-22. Changing the File Attribute The procedure is the same as steps 4 and 5 on page 12-43. Renaming a Directory or File (Excluding Net Drive) Turn jog shuttle to select a directory name or file name.
- Page 378 12.16 Changing the Directory or File Name of the Storage Medium and Creating Directories Creating a Directory Display the Function menu according to steps 1 to 3 on page 12-50. Press the Make Dir soft key. Selecting the Storage Medium/Directory The procedure is the same as steps 14 and 15 on page 12-22.
- Page 379 12.16 Changing the Directory or File Name of the Storage Medium and Creating Directories Renaming a Directory or File Number and types of characters that can be used Item Number of Characters Characters That Can Be Used* File name 1 to 14 characters 0 to 9, A to Z, %, _, ( , ), - * However, a directory name that starts with “ND”...
-
Page 380: Chapter 13 Ethernet Communications (Optional)
Chapter 13 Ethernet Communications (Optional) 13.1 Connecting the DL7400 to the Network Ethernet Interface Specifications A 100BASE-TX port is provided on the rear panel of the DL7400. Item Specifications Number of communication ports Electrical and mechanical specifications Conforms to IEEE802.3 Transmission system Ethernet (100BASE-TX/10BASE-T) Transmission rate... - Page 381 13.1 Connecting the DL7400 to the Network Connection Procedure When Connecting to a Network PC or Workstation Turn OFF the DL7400. Connect one end of the UTP (or STP) cable to the ETHERNET 100BASE-TX terminal on the rear panel. Connect the other end of the UTP (or STP) cable to a hub or router. Turn ON the DL7400.
-
Page 382: Setting Up Tcp/Ip
13.2 Setting Up TCP/IP Procedure • To exit the menu during operation, press ESC located SETUP DISPLAY FILE MISC RESET SELECT above the soft keys. • In the procedural explanation below, the term PHASE jog shuttle & SELECT refers to the operation of MEASURE CURSOR GO/NOGO... - Page 383 13.2 Setting Up the TCP/IP Setting the IP Address If DHCP was set to OFF in step 4, set the IP address. Use jog shuttle & SELECT to set the IP Address. Enter using values in the range of 0 to 255. Setting the Subnet Mask If DHCP was set to OFF in step 4, set the subnet mask.
- Page 384 13.2 Setting Up the TCP/IP Explanation The following TCP/IP settings must be entered to use the Ethernet communications functions on the DL7400. IP address Subnet mask Default gateway IP Address (Internet Protocol Address) You can assign an IP address to the DL7400. The default setting is 0.0.0.0. The IP address is an ID that is assigned to each device on an IP network such as the internet or an intranet.
- Page 385 13.2 Setting Up the TCP/IP DNS (Domain Name System) DNS is a system used to associate names used on the Internet called host names and domain names with IP addresses. Given AAA.BBBBB.com, AAA is the host name and BBBBB.com is the domain name. Instead of using the IP address, which is a sequence of numbers, the host name and domain name can be used to access the network.
- Page 386 13.2 Setting Up the TCP/IP The following procedure describes the steps for Windows 95/98/ME. For Windows NT/2000 Pro/XP, carry out equivalent steps accordingly. 1. Choose Settings > Control Panel from the Start menu to open the Control Panel folder. 2. Double-click the Network icon to display the following network setup dialog box. 3.
-
Page 387: Saving And Loading Waveform/Setup/Image Data On A Network Drive (Ftp Client Function)
13.3 Saving and Loading Waveform/Setup/Image Data on a Network Drive (FTP Client Function) Procedure • To exit the menu during operation, press ESC located SETUP DISPLAY FILE MISC RESET SELECT above the soft keys. • In the procedural explanation below, the term PHASE jog shuttle &... - Page 388 13.3 Saving and Loading Waveform/Setup/Image Data on a Network Drive (FTP Client Function) Saving/Loading the Waveform Data or Setup Data Press FILE. The FILE menu appears. Press the Utility soft key. The File List window appears. Use jog shuttle & SELECT to select NetWork. Perform the save or load operation according to the procedures given in sections 12.7 to 12.11.
- Page 389 13.3 Saving and Loading Waveform/Setup/Image Data on a Network Drive (FTP Client Function) Note • An FTP server software must be running on the PC or workstation to which the DL7400 is to be connected. In addition, the following points need attention regarding the server program settings.
-
Page 390: Entering Settings For Printing Screen Images On The Network Printer (Lpr Client Function)
13.4 Entering Settings for Printing Screen Images on the Network Printer (LPR Client Function) Procedure • To exit the menu during operation, press ESC located SETUP DISPLAY FILE MISC RESET SELECT above the soft keys. • In the procedural explanation below, the term PHASE jog shuttle &... -
Page 391: Sending Periodic Or Action Mail (Smtp Client Function)
13.5 Sending Periodic or Action Mail (SMTP Client Function) Procedure • To exit the menu during operation, press ESC located SETUP DISPLAY FILE MISC RESET SELECT above the soft keys. • In the procedural explanation below, the term PHASE jog shuttle & SELECT refers to the operation of MEASURE CURSOR GO/NOGO... - Page 392 13.5 Sending Periodic or Action Mail (SMTP Client Function) Sending a Test Mail Turn the jog shuttle to move the cursor to Mail Test and press SELECT to send a test mail to the specified recipient. Setting the Conditions for Sending Mail (Action Mail) Perform steps 1 to 6 on the previous page.
- Page 393 13.5 Sending Periodic or Action Mail (SMTP Client Function) Transmission Interval (Interval for Periodic Mail Only) You can select the mail transmission interval. OFF, 1H, 2H, 3H, 4H, 6H, 8H, 12H, or 24H • If you select OFF, periodic mails cannot be transmitted. •...
- Page 394 13.5 Sending Periodic or Action Mail (SMTP Client Function) Example of Transmitted Content Periodic Mail [Comment] aaaaaa [ACQ Status] Stopped [GO/NOGO Status] Success: 140 Fail: 21 Max (C1) 4.16667V SDv (C2) 697.941mV Freq(C3) 500.0000kHz +Wd (C4) 1.00 us> ErrNo 004 Completed GO/NO-GO. ErrNo 806 GO/NO-GO is in execution.
-
Page 395: Accessing The Dl7400 From A Pc Or Workstation (Ftp Server Function)
13.6 Accessing the DL7400 from a PC or Workstation (FTP Server Function) Procedure • To exit the menu during operation, press ESC located SETUP DISPLAY FILE MISC RESET SELECT above the soft keys. • In the procedural explanation below, the term PHASE jog shuttle &... - Page 396 13.6 Accessing the DL7400 from a PC or Workstation (FTP Server Function) Displaying the Log List Press the Connect Log List soft key. The data and time, user name, and IP address of the 24 recent accesses are displayed. Note •...
-
Page 397: Using The Web Server Function
13.7 Using the Web Server Function You can use the Web server function on the DL7400 to display the screen image of the DL7400 on your PC’s Web browser and perform file operations on the DL7400 using the keys displayed in the Web browser. This section contains the following information. -
Page 398: System Requirements
13.7 Using the Web Server Function System Requirements PC Environment Microsoft Windows 98 Second Edition, Microsoft Windows NT 4.0, Microsoft Windows Millennium Edition, Microsoft Windows 2000 Professional, or Microsoft Windows XP Professional. Internal Memory 64 MB or more recommended. Communication Port Ethernet communication port that supports 10BASE-T or 100BASE-TX. - Page 399 • The Web server function cannot be used while the DL7440/DL7480 is printing or operating files (file operation from the front panel key or file transfer using the FTP server function), or while the Windows network drive is being used.
- Page 400 13.7 Using the Web Server Function Preparations for Using the Web Server Function Connecting the PC and the DL7400 to the Network Connect the PC and the DL7400 to the network. For the connection procedure, see section 13.1. Preparations on the DL7400 Setting the Communication Interface to Network •...
- Page 401 13.7 Using the Web Server Function Preparations on the PC Power up the PC and log on. If the PC is running Windows NT, Windows 2000, or Windows XP, log on as an administrator. If you do not log on as an administrator, you may not be able to install files that are required for using the Web server function (see the next page).
- Page 402 13.7 Using the Web Server Function Installing Files Required for the Web Server • Using the DL7400 and the PC While Connected to the Internet When you use the Web server function for the first time, the files required for the Web browser are installed automatically from the Microsoft Web site.
- Page 403 PC when using the Web server function for the first time, install the files beforehand according to the following procedure. Download the following file from the YOKOGAWA Web site (http:// www.yokogawa.co.jp/Measurement/F-SOFT/). DL7400 Series Web server function library installer YOKOGAWA T&M Web Runtime: ytmwrun.exe...
- Page 404 13.7 Using the Web Server Function Click Custom Level. The Security Settings dialog box opens. Enter the security settings as shown in the following table. Item Security Level Run ActiveX controls and plug-ins Enable Script ActiveX controls marked safe for scripting Enable Download signed ActiveX controls Prompt...
- Page 405 13.7 Using the Web Server Function Using the Web Server Function Using the FTP Server Function (on a Web Browser) Before using this function, check that the communication interface of the DL7400 is set to Network (see page 13-21). Click the FTP icon on the Web server window. A window for viewing the storage media of the DL7400 (storage media view window) appears.
- Page 406 Click the Data Capture icon on the Web server window. The Data Capture window showing the screen image of the DL7400 and the control panel that allows data saving and loading appears. Web Server Window Dual Capture Window DL7440/DL7480 screen image Control panel 13-27 IM 701450-01E...
- Page 407 13.7 Using the Web Server Function Displaying and Saving the Screen Image (Image Control) The screen image of the DL7400 can be displayed on the PC screen and saved. • Updating the Screen Image (Monitor & Capture) Play Click Play. The update indicator illuminates in green, and the updating of the screen image at the specified display update interval starts (see below).
- Page 408 13.7 Using the Web Server Function Saving Data in the PC and Loading Setup Data from the PC into the DL7400 (Data Control) • Saving Data in the PC (Capture) Data Type Select the type of data to be saved from Waveform Binary, Waveform ASCII, Waveform Float, Setup, and Measure.
- Page 409 From the channel box, select the channel for turning ON/OFF the display and setting the vertical position. Chan1 to Chan8 (channels 1 to 8) * Chan1 to Chan4 (channels 1 to 4) on the DL7440. Display ON/OFF To display the waveform of the selected channel (turn it ON), select the Display check box.
- Page 410 , Math1, Math2 (computed waveforms), Pod A , and Pod B 1 All, 1 to 4 (channels 1 to 4) on the DL7440. 2 Pod A and Pod B apply if the logic input option is installed. Selecting the Save Area (Range) Select the area in which the target waveform to be saved is displayed.
- Page 411 13.7 Using the Web Server Function Displaying the Measurement Trend of Waveform Parameters Before using this function, check that the communication interface of the DL7400 is set to Network (see page 13-21). Click the Measurement Trend icon on the Web server window. The Measurement Trend window in which the trend display of the waveform parameter values can be set appears.
- Page 412 From the Trace box, select the target waveform for the trend display Chan1 to Chan8 (channels 1 to 8), Math1 to Math8 (computed waveforms) * Chan1 to Chan4 (channels 1 to 4), Math1, and Math2 on the DL7440. Selecting the Waveform Parameter From the Parameter box, select the target waveform parameter of the trend display (same expression as the communication command).
- Page 413 13.7 Using the Web Server Function Turning ON/OFF the Statistics Display • Displays the statistics (Max, Min, and Average) of the waveform parameters retrieved into the PC. • To display the statistics, select the Statistics check box. Clear the check box to not display the statistics.
- Page 414 13.7 Using the Web Server Function Using Control Scripts Before using this function, check that the communication interface of the DL7400 is set to Network (see page 13-21). Click the Control Script icon on the Web server window. The Control Script window used to send communication commands (see the Communication Interface User’s Manual (IM701450-17E)) to the DL7400 and display the responses from the DL7400 appears.
- Page 415 13.7 Using the Web Server Function Sending Commands (*Command IEEE 488.2) • Entering the Transmission Commands Enter the commands in the transmission command entry area. The maximum number of input characters is 50,000 (50 KB). • Sending Commands Click Send. The commands in the transmission command entry area are sent collectively in the order displayed in the area.
- Page 416 13.7 Using the Web Server Function Displaying the Log Before using this function, check that the communication interface of the DL7400 is set to Network (see page 13-21). Click the Log icon on the Web server window. The Log window that can display the past log of errors that occurred on the DL7400, GO/NO-GO determination, and action-on- trigger appears.
- Page 417 13.7 Using the Web Server Function Log Display Example The following figure shows an example displaying the log of GO/NO-GO determination. Displays “Executing...” while GO/NO-GO determination is in progress or when action-on-trigger is in execution. If screen image data or waveform data files are being saved in the GO/NO-GO determination or action-on-trigger, the files can be saved on the PC from the Log display window.
- Page 418 13.7 Using the Web Server Function Displaying Instrument Information Before using this function, check that the communication interface of the DL7400 is set to Network (see page 13-21). Click the Information icon on the Web server window. The Information window that displays the DL7400 model (Model), the maximum record length available (Record Length), the storage media type (Media), the presence of options (Option), ROM version (firmware version, software version, and product ID), and other information appears.
- Page 419 13.7 Using the Web Server Function Viewing the Link Before using this function, check that the communication interface of the DL7400 is set to Network (see page 13-21). Click the Link icon on the Web server window. You can view the Web page for the DL7400.
-
Page 420: Setting The Time Difference From Gmt (Greenwich Mean Time)
13.8 Setting the Time Difference from GMT (Greenwich Mean Time) Procedure • To exit the menu during operation, press ESC located SETUP DISPLAY FILE MISC RESET SELECT above the soft keys. • In the procedural explanation below, the term PHASE jog shuttle &... - Page 421 13.8 Setting the Time Difference from GMT (Greenwich Mean Time) Explanation Set the time difference from GMT (Greenwich Mean Time). Make sure to set this value if you are using the Web server function. Setting the Time Difference from GMT (Greenwich Mean Time) Set the time difference in the range of –12 hours 00 minutes to 13 hours 00 minutes.
-
Page 422: Checking The Presence Of The Ethernet Interface (Optional) And The Mac Address
• Ether:Yes(/C10) is displayed only if the Ethernet interface option is installed. • If XXXXXX_XXX_XXX is displayed for the MAC address, contact your nearest YOKOGAWA dealer. Explanation You can check the presence of the Ethernet interface (optional) and the MAC address. -
Page 423: Setting The Ftp Passive Mode And Lpr/Smtp Timeout
13.10 Setting the FTP Passive Mode and LPR/SMTP Timeout Procedure • To exit the menu during operation, press ESC located SETUP DISPLAY FILE MISC RESET SELECT above the soft keys. • In the procedural explanation below, the term PHASE jog shuttle & SELECT refers to the operation of MEASURE CURSOR GO/NOGO... - Page 424 13.10 Setting the FTP Passive Mode and LPR/SMTP Timeout Explanation You can enter special settings related to the FTP client, LPR, and SMTP. Normally, these parameters do not need to be specified. Turning ON/OFF the FTP Passive Mode Turn this function ON when using the DL7400 behind a firewall* that requires the passive mode.
-
Page 425: Using The Storage Medium As A Windows Network Drive (Firmware Version 1.30 Or Later)
13.11 Using the Storage Medium as a Windows Network Drive (Firmware Version 1.30 or Later) The external storage medium of the DL7440/DL7480 can be used as a network drive on a PC running Windows XP. Procedure Setting the DL7440/DL7480 Setup TCP/IP and user account and connect to the network according to the procedures given in section 13.2, “Setting Up TCP/IP”... - Page 426 • Change the directory structure of the DL7440/DL7480 drive from the PC. • If you attempt to move a large file from the PC to the DL7440/DL7480, the file may be lost due to the limitations of Windows. • You cannot manipulate the files simultaneously from multiple PCs.
-
Page 427: Chapter 14 Rear Panel Auxiliary I/O Section
Chapter 14 Rear Panel Auxiliary I/O Section 14.1 External Trigger Input, External Clock Input, and Trigger Gate Input CAUTION Only input signals that meet the specifications below. Otherwise, undesirable signal such as excessive voltage may damage the DL7400. External Trigger Input Terminal This terminal is used when an external signal is used as a trigger source (see section 6.6). - Page 428 14.1 External Trigger Input, External Clock Input, and Trigger Gate Input Trigger Gate Input Terminal The terminal is used when you wish to activate the trigger using an external signal (see section 6.17). This terminal is also used as the external trigger input terminal (EXT TRIG IN) and the external clock input terminal (EXT CLOCK IN).
-
Page 429: Trigger Output
14.2 Trigger Output CAUTION Never apply external voltage to the TRIG OUT terminal. Doing so can cause damage to the DL7400. Trigger Output Terminal A TTL level signal is output when a trigger is activated. The signal level is normally high and goes low when a trigger is activated. - Page 430 14.2 Trigger Output Low Level/High Level Hold Time Trigger occurrence Trigger occurrence Trigger output (Post-trigger time + internal processing time) Pre-trigger time + internal processing time Trigger Trigger Pre-trigger Post-trigger Pre-trigger Post-trigger Waveform acquisition *1 HIGH (high level) interval Indicates the pre-trigger and internal processing time. 100 ns minimum. *2 LOW (low level) interval Indicates the post-trigger and internal processing time.
-
Page 431: Video Signal Output (Video Out (Vga))
14.3 Video Signal Output (VIDEO OUT (VGA)) CAUTION • Connect the cable after turning OFF the DL7400 and the monitor. • Do not short the VIDEO OUT (VGA) terminal or apply external voltage to it. Doing so can cause damage to the DL7400. Video Signal Output Connector The DL7400 display can be output to a monitor through the RGB output. -
Page 432: Chapter 15 Other Operations
Chapter 15 Other Operations 15.1 Changing the Message Language and Turning ON/OFF the Click Sound Procedure • To exit the menu during operation, press ESC located SETUP DISPLAY FILE MISC RESET SELECT above the soft keys. PHASE • For a description of the operation using a USB keyboard or MEASURE CURSOR GO/NOGO... -
Page 433: Changing The Usb Keyboard Language And Checking The Connected Usb Keyboard
The character that is entered through each key of the USB keyboard varies depending on the keyboard type. For details, see appendix 6. Checking the Connected Keyboard The USB devices that are connected can be listed. Note For USB keyboards that have been tested for compatibility, contact your nearest YOKOGAWA dealer. 15-2 IM 701450-01E... -
Page 434: Measuring The Offset Voltage And Applying The Offset Voltage To
15.3 Measuring the Offset Voltage and Applying the Offset Voltage to the Computed Results Procedure • To exit the menu during operation, press ESC located SETUP DISPLAY FILE MISC RESET SELECT above the soft keys. PHASE • For a description of the operation using a USB keyboard or MEASURE CURSOR GO/NOGO... -
Page 435: Setting The Screen Color And Intensity
15.4 Setting the Screen Color and Intensity Procedure • To exit the menu during operation, press ESC located SETUP DISPLAY FILE MISC RESET SELECT above the soft keys. • In the procedural explanation below, the term PHASE jog shuttle & SELECT refers to the operation of MEASURE CURSOR GO/NOGO... - Page 436 15.4 Setting the Screen Color and Intensity Setting the Intensity Press the Intensity soft key. The Intensity menu appears. Press the Menu soft key. Turn the jog shuttle to set the intensity of the menu screen. Likewise, set the intensity of Waveform, Snap, Grid, and Cursor. Explanation Display Color You can set the screen color using a ratio of red (R), green (G), and blue (B) for each...
-
Page 437: Turning Off The Backlight And Setting The Brightness Of The Backlight
15.5 Turning OFF the Backlight and Setting the Brightness of the Backlight Procedure • To exit the menu during operation, press ESC located SETUP DISPLAY FILE MISC RESET SELECT above the soft keys. PHASE • For a description of the operation using a USB keyboard or MEASURE CURSOR GO/NOGO... - Page 438 15.5 Turning OFF the Backlight and Setting the Brightness of the Backlight Explanation Turning ON/OFF the Backlight You can turn ON/OFF the LCD backlight. • Pressing the LCD OFF EXEC soft key turns OFF the backlight. • Pressing any panel key turns the backlight ON allowing the screen to be viewed. Backlight Auto OFF The backlight automatically turns OFF if there is no key operation for the specified time.
-
Page 439: Chapter 16 Troubleshooting, Maintenance, And Inspection
16.1 Troubleshooting • If a message is displayed on the screen, read the following pages. • If servicing is necessary, or if the instrument is not operating correctly after performing the corrective actions below, contact your nearest YOKOGAWA dealer. Reference Description... -
Page 440: Messages And Corrective Actions
The messages can be displayed either in English or Japanese (see section 15.1). If the corrective action requires servicing, contact your nearest YOKOGAWA dealer. In addition to the messages listed below, there are communication error messages. - Page 441 Storage media failure. Check the format type of the floppy disk. 12.6 Cannot load this file format. Files saved on other models (such as YOKOGAWA – DL/AG Series) cannot be loaded. File is now being accessed. Wait a moment. Execute after the access is finished.
- Page 442 16.2 Messages and Corrective Actions Code Message Corrective Action Sections The printer has malfunctioned. Servicing required. – Printer error. – – Turn the power of the printer from OFF to ON. Printer offline. – – Out of paper. – – Printer is in use.
- Page 443 16.2 Messages and Corrective Actions Code Message Corrective Action Sections Analyzed data does not exist. Execute analysis. 10.11 Execute the analysis. Cannot connect to the server. Check network configuration and connection. Chapter 13 Not yet connected to the ftp server. Check network configuration and connection.
- Page 444 16.2 Messages and Corrective Actions Code Message Corrective Action Sections It is not possible to make a setting that will Set the trigger mode to a mode other than Single (N). result in the repetitive mode when the trigger mode is set to Single(N). Cannot specify A→B(N) Turn OFF the trigger gate.
- Page 445 16.2 Messages and Corrective Actions Error in System Operation (900 to 908, 912 to 914) Code Message Corrective Action Sections Failed to backup setup data. Will initialize. Servicing required. – The backup battery may be flat. Fan stopped; Turn OFF the power immediately. –...
-
Page 446: Performing A Self-Test
16.3 Performing a Self-Test Procedure • To exit the menu during operation, press ESC located SETUP DISPLAY FILE MISC RESET SELECT above the soft keys. PHASE • For a description of the operation using a USB keyboard or MEASURE CURSOR GO/NOGO MATH a USB mouse, see section 4.3. - Page 447 16.3 Performing a Self-Test Executing the Key Test Press the Test Item soft key. The Test Item menu appears. Press the Key Board soft key. The Key Board menu appears. Press the Test Exec soft key. The Key Board Test window appears. When you press a panel key, the character of the same key name is highlighted in the Key Board Test window.
- Page 448 Printer Test Tests whether the built-in printer is operating properly. If the tint is printed correctly, the operation is normal. If printing is not correct, contact your nearest YOKOGAWA dealer. Accuracy Test Tests the accuracy of the A/D converter. If “Failed” is displayed, contact your nearest YOKOGAWA dealer.
-
Page 449: Checking The System Conditions (Overview)
16.4 Checking the System Conditions (Overview) Procedure • To exit the menu during operation, press ESC located SETUP DISPLAY FILE MISC RESET SELECT above the soft keys. PHASE • For a description of the operation using a USB keyboard or MEASURE CURSOR GO/NOGO... -
Page 450: Recommended Replacement Parts
LCD backlight Approx. 25000 hours under normal use The following items are expendable items. It is recommended that the parts be replaced according to the period indicated below. Contact your nearest YOKOGAWA dealer for replacement parts. Parts Name Recommended Replacement Period... -
Page 451: Chapter 17 Specifications
17.1 Input Section Item Specifications Number of input channels DL7440 (4-channel model, models 7071450 and 701460): 4 (CH1 to CH4) DL7480 (8-channel model, models 7071470 and 701480): 8 (CH1 to CH8) Input coupling AC 1MΩ, DC 1MΩ, DC 50Ω, and GND... -
Page 452: Logic Input Section (Optional)
17.2 Logic Input Section (Optional) Item Specifications Probes that can be used 701980 /701981 (8-bit input) Maximum toggle frequency When using the 701980: 100 MHz, when using the 701981: 250 MHz Number of inputs 16 (when two logic probes are used) Maximum input voltage ±40 V (DC+ACpeak) or 28 Vrms when the frequency is 1 kHz or less. - Page 453 17.3 Trigger Section Item Specifications Trigger type Edge: Activate the trigger on the edge of a single trigger source. A->B(N): Trigger occurs n time condition B becomes true after condition A becomes true. Count: 1 to 10 Condition A: Enter/Exit Condition B: Enter/Exit A Delay B:...
-
Page 454: Time Axis
17.4 Time Axis Item Specifications Time axis range 1 ns/div to 50 s/div (when the record length is greater than or equal to 10 kW) 1 ns/div to 5 s/div (when the record length is equal to 1 kW) Time base accuracy ±(0.005%) Time axis precision ±(0.005% + 50 ps + 1 digit) - Page 455 17.6 Function Vertical and Horizontal Axes Item Specifications Channel ON/OFF ON/OFF on each channel CH1 to CH8/4 Input filter Set 100-MHz or 20-MHz bandwidth limit on each channel CH1 to CH8/4*. Vertical position Waveforms can be moved vertically in the range of ±4 div from the center of the waveform display frame. Linear scaling Set the scaling factor, offset value, and unit on each channel CH1 to CH8/4 Roll mode...
- Page 456 17.6 Function Item Specifications SPI signal analysis/search Data analysis and search by applying Clock to CH1, Data1 to CH2, Data2 to CH3, and CS signals to CH4 to CH8 or bit 0 to bit 7 of logic input (optional) Pod A. Analysis function: Display the status of Data1, Data2, and CS in unit of bytes (8 bits) of serial data.
-
Page 457: Built-In Printer (Optional)
17.7 Built-in Printer (Optional) Item Specifications Printing system Thermal line dot system Dot density 8 dots/mm Paper width 112 mm 17.8 Storage Built-in Floppy Disk Drive* Item Specifications Number of drives Size 3.5 inch Capacity 1.44 MB Select the floppy disk drive or Zip drive for the built-in storage medium drive at the time of purchase. Built-in Zip Drive* Item Specifications... -
Page 458: Usb Peripheral Interface
17.9 USB Peripheral Interface Item Specifications Connector type USB type A connector (receptacle) Electrical and mechanical Conforms to USB Revision 1.1 specifications Data rate 12 Mbps max. Supported keyboards 104 keyboard (US), 109 keyboard (Japanese), and 89 keyboard (US and Japanese) conforming to USB HID Class Version 1.1 Supported printers ESC/P, ESC/P2, LIPS3, PCL5, and BJ (can be used on models that support the BJC-35V... -
Page 459: Computer Interface
17.11 Computer Interface GP-IB Item Specifications Electrical and mechanical Conforms to IEEE St’d 488-1978 (JIS C 1901-1987). specifications Functional specifications SH1, AH1, T6, L4, SR1, RL1, PP0, DC1, DT0, and C0 Protocol Conforms to IEEE St’d 488.2-1987. Code ISO (ASCII) code Mode Addressable mode Address... -
Page 460: General Specifications
17.12 General Specifications Item Specifications Standard operating conditions Ambient temperature: 23±2°C Ambient humidity: 55±10% RH Error in supply voltage and frequency: Within 1% of rating Warm-up time At least 30 minutes Storage conditions Temperature: –20 to 60°C, –20 to 50°C (for the -J2: built-in Zip drive model) Humidity: 20 to 80% RH (no condensation) Operating Conditions... - Page 461 • SCSI connector Use a SCSI shielded cable and attach a ferrite core (TDK: ZCAT2035- 0930A, YOKOGAWA: A1190MN) on one end (DL7400 end). • USB PERIPHERAL connector Attach a ferrite core (TDK: ZCAT1325-0530A, YOKOGAWA: A1181MN) on one end (DL7400 end) of the USB cable •...
-
Page 462: External Dimensions
17.13 External Dimensions Unit: mm Rear View 100-120/220-240V AC 320VA MAX 50/60Hz ETHERNET GP-IB(IEEE488) 100BASE-TX SCSI LINK PROBE POWER VIDEO OUT (VGA) PERIPHERAL LOGIC PROBE WARNING Do not operate within reading safety precautions in user s manual. TRIG OUT EXT CLOCK IN EXT TRIG IN TRIG GATE IN <40Vpk 1MΩ... -
Page 463: Appendix
Appendix Appendix 1 Relationship between the Time Axis Setting, Sample Rate and Record Length Specified Record Length: 1 kW Rep: Repetitive sampling mode When set to envelope mode When set to a mode other than envelope mode When interleave mode is OFF When interleave mode is ON Setting When interleave... -
Page 464: Relationship Between The Time Axis Setting, Sample Rate And Record Length
Appendix 1 Relationship between the Time Axis Setting, Sample Rate and Record Length Specified Record Length: 10 kW Rep: Repetitive sampling mode When set to envelope mode When set to a mode other than envelope mode Setting When interleave mode is OFF When interleave mode is ON When interleave When interleave... - Page 465 Appendix 1 Relationship between the Time Axis Setting, Sample Rate and Record Length Specified Record Length: 50 kW Rep: Repetitive sampling mode When set to envelope mode When set to a mode other than envelope mode When interleave mode is OFF When interleave mode is ON Setting When interleave...
- Page 466 Appendix 1 Relationship between the Time Axis Setting, Sample Rate and Record Length Specified Record Length: 100 kW Rep: Repetitive sampling mode When set to envelope mode When set to a mode other than envelope mode When interleave mode is OFF When interleave mode is ON When interleave When interleave...
- Page 467 Appendix 1 Relationship between the Time Axis Setting, Sample Rate and Record Length Specified Record Length: 250 kW Rep: Repetitive sampling mode When set to envelope mode When set to a mode other than envelope mode When interleave mode is OFF When interleave mode is ON Setting When interleave...
- Page 468 Appendix 1 Relationship between the Time Axis Setting, Sample Rate and Record Length Specified Record Length: 500 kW Rep: Repetitive sampling mode When set to a mode other than envelope mode When set to envelope mode When interleave mode is OFF When interleave mode is ON Setting When interleave...
- Page 469 Appendix 1 Relationship between the Time Axis Setting, Sample Rate and Record Length Specified Record Length: 1 MW Rep: Repetitive sampling mode When set to envelope mode When set to a mode other than envelope mode When interleave mode is OFF* When interleave mode is ON Setting When interleave...
- Page 470 Appendix 1 Relationship between the Time Axis Setting, Sample Rate and Record Length Specified Record Length: 2 MW Rep: Repetitive sampling mode When set to envelope mode When set to a mode other than envelope mode When interleave mode is OFF When interleave mode is ON Setting When interleave...
- Page 471 Appendix 1 Relationship between the Time Axis Setting, Sample Rate and Record Length Specified Record Length: 4 MW Rep: Repetitive sampling mode When set to a mode other than envelope mode When set to envelope mode When interleave mode is OFF When interleave mode is ON Setting When interleave...
- Page 472 Appendix 1 Relationship between the Time Axis Setting, Sample Rate and Record Length Specified Record Length: 8 MW Rep: Repetitive sampling mode When set to envelope mode When set to a mode other than envelope mode When interleave mode is OFF When interleave mode is ON Setting When interleave...
- Page 473 Appendix 1 Relationship between the Time Axis Setting, Sample Rate and Record Length Specified Record Length: 16 MW Rep: Repetitive sampling mode When set to envelope mode When set to a mode other than envelope mode Setting When interleave mode is OFF When interleave mode is ON When interleave When interleave...
-
Page 474: Appendix 2 How To Calculate The Area Of A Waveform
Appendix 2 How to Calculate the Area of a Waveform Int1TY Total Area for Positive Side Only: S Int2TY Total Area for both Positive and Negative Sides: S –S Int1XY (1) Multiple Loops (2) Non-Closed Curve Area S= S Area S= n×S Area Enclosed by n: Number of Loops a Curve Connecting... - Page 475 Appendix 2 How to Calculate the Area of a Waveform Int2XY (1) When Only One Y Data Corresponds to X Data X Axis (Y=0) Stop Point Area S= –S Start Point Area S=S Stop Point Start Point X Axis (Y=0) X Axis (Y=0) Start Point Area S=S...
- Page 476 Appendix 3 ASCII Header File Format //YOKOGAWA ASCII FILE FORMAT $PublicInfo FormatVersion 1.11 Model DL7440 Endian DataFormat Trace GroupNumber TraceTotalNumber 6 DataOffset $Group1 TraceNumber BlockNumber TraceName BlockSize 1002 1002 1002 1002 VResolution 1.5625000E+00 1.5625000E+00 1.5625000E+00 1.5625000E+00 VOffset 0.0000000E+00 0.0000000E+00 0.0000000E+00 0.0000000E+00...
-
Page 477: Ascii Header File Format
1.01 DisplayBlockSize 1002 1002 1002 1002 DisplayPointNo. PhaseShift PTraceName MATH1 MATH2 (Note) The header file is a common file used by YOKOGAWA’s measuring instruments. Therefore, data that is not required by the DL7400 (0s) is also included. App-15 IM 701450-01E... -
Page 478: Appendix 3 Ascii Header File Format
Appendix 3 ASCII Header File Format $PublicInfo (Common Information) FormatVersion: Header file version number (common to YOKOGAWA’s header files) Model: Model name Endian: Endian mode when saving data (Big/Ltl) DataFormat: Storage format of the binary waveform data (Trace/Block) GroupNumber: The number of “$Group”s indicated below... - Page 479 Appendix 3 ASCII Header File Format Creation of ASCII Header File When waveform data (Waveform) is stored to a floppy disk, the following two files will be created automatically in the DL_WAVE directory. • Waveform display data file (*.wvf) • ASCII header file (*.hdr) The waveform data file can be recalled to the instrument using the FILE menu.
-
Page 480: Appendix 4 User-Defined Computation
Appendix 4 User-Defined Computation Digital Filter Type Type Bandwidth Gauss Low-pass Sharp Low-pass, high-pass, and band-pass IIR (Butterworth) Low-pass, high-pass, and band-pass Filter Order See the following table for the filter orders 30% (Cutoff*) Gauss Low-pass Sharp Low-pass High-pass Low-pass High-pass * The cutoff percentage is with respect to the sample rate. - Page 481 Appendix 4 User-Defined Computation Hilbert Function (HLBT) Normally, when we analyze a real time signal, it is convenient to think of this signal as the real part of a complex function and do the actual analysis using the complex function. If the real time signal is considered to be the real part of the function, the imaginary part can be determined with the Hilbert transform of the real part.
- Page 482 Appendix 4 User-Defined Computation Differentiation and Integration (DIF, DDIF, INTG, and IINTG) Differentiation (DIF, DDIF) The computation of the first order and second order differentiation uses the 5 order Lagrange interpolation formula to derive a point of data from the 5 points around the point.
- Page 483 Appendix 4 User-Defined Computation Integration (INTG, IINTG) The first and second order integrated values are derived using the trapezoidal rule. • Equation for First Order Integration (INTG) Point x Point x Point x )h + )h = I Point x •...
- Page 484 Appendix 4 User-Defined Computation Pulse Width Computation The signal is converted to binary values by comparing to a preset threshold level, and the time of the pulse width is plotted as the Y-axis value for that interval. The following 8 intervals are available.
- Page 485 Appendix 4 User-Defined Computation FFT Function Each frequency component G of a linear spectrum is represented by G=R+jI (R: real part, I: imaginary part). Linear Spectrum Linear spectrum is a spectrum that can be directly determined with the FFT. The magnitude and phase of each frequency component included in the measured waveform can be found.
- Page 486 Appendix 4 User-Defined Computation Cross Spectrum Cross spectrum is determined from 2 signals. It is found by taking the product of the linear spectrum of one signal(Gy) and the complex conjugate (Gx*) of the linear spectrum of the other signal (Gx). If the linear spectrums of the 2 signals are represented by Gx = Rx+jIx Gy = Ry+jIy...
- Page 487 Appendix 4 User-Defined Computation Coherence Function This expresses the ratio of the output power generated with the input signal to the transfer system and the total output power. Coherence function = Gyx×Gyx*/(Gxx×Gyy) Item Equation Computation Amplitude CH-MAG (Ryx +Iyx )/(Gxx×Gyy) If the output signal is due entirely to the input signal, the coherence function becomes 1.
-
Page 488: Appendix 5 List Of Default Settings
Appendix 5 List of Default Settings The initial settings may differ depending on installed options. Be sure to check your instrument’s specifications before referring to the list. Soft Key Default Setting Soft Key Default Setting CH1 to 8 HISTORY Display Select Record Position 0.00 div... - Page 489 Appendix 5 List of Defaults Soft Key Default Setting PHASE Mode PRINT MENU Print to Built-In Format Normal Information IMAGE SAVE MENU Format TIFF Color File Name 0000 App-27 IM 701450-01E...
-
Page 490: Appendix 6 Key Assignments Of The Usb Keyboard
Appendix 6 Key Assignments of the USB Keyboard 104 Keyboard (US) When Pressed with the Control Key When the Soft Keyboard Is Displayed Other +Shift* +Shift* +Shift* ACQ menu Same as left MATH menu Same as left Execute COPY Same as left DISPLAY menu Same as left ENHANCED menu... - Page 491 Appendix 6 Key Assignments of the USB Keyboard Select soft key1 Same as left Select soft key1 Same as left Select soft key1 Same as left Select soft key2 Same as left Select soft key2 Select soft key2 Same as left Same as left Select soft key3 Same as left...
- Page 492 Appendix 6 Key Assignments of the USB Keyboard 109 Keyboard (Japanese) When Pressed with the Control Key When the Soft Keyboard Is Displayed Other +Shift* +Shift* +Shift* ACQ menu Same as left MATH menu Same as left Execute COPY Same as left DISPLAY menu Same as left Same as left...
- Page 493 Appendix 6 Key Assignments of the USB Keyboard Select soft key1 Same as left Select soft key1 Same as left Select soft key1 Same as left Select soft key2 Same as left Select soft key2 Select soft key2 Same as left Same as left Select soft key3 Same as left...
- Page 494 Index Index analysis reference point ..........10-84 Symbols Analyze Setup ..............10-76 AND ............10-14, 10-70, 10-74 – ..................9-3 angle cursor ............2-29, 10-41 * ................... 9-3 anonymous ............... 13-8 + ..................9-3 Area ................10-62 .BMP ................12-37 area, calculation of ............
- Page 495 Cycle Statistics ..............10-55 displayed parameters, number of ........10-50 Distal ..............10-49, 10-53 divided windows, number of ..........8-3 DL7400 environment ............13-20 DL7440 .................. ii Data Byte ................ 10-80 DL7480 .................. ii Data Capture ..............13-27 DNS ................ 13-4, 13-6 data compression ............
- Page 496 Index front panel ................1-1 Edge ................10-15 FTP client ..............2-32, 13-8 edge search ............2-26, 10-25 FTP passive mode ............13-45 edge trigger ................. 2-8 FTP server ........2-33, 13-8, 13-10, 13-16 Edit .................. 10-67 FTP server function ............13-26 email transmission ............
- Page 497 Index Image Save ............6-45, 10-71 Link ................. 13-40 immunity ................17-11 Lissajous waveform ............2-19 IN ..............6-34, 10-8, 10-13 List .................. 10-79 indefinite data ..............10-86 list display ............... 10-60 Indefinite State ..............10-87 lithium battery ..............3-6 Infinite ................
- Page 498 Index MENU ................. 1-5 partition ................12-13 Mesial ..............10-49, 10-53 Pass-Thru ................. 9-15 message language ............15-1 passive probe ................ iv messages ..............15-1, 16-2 Password ............13-10, 13-17 MISC ................... 1-5 Pattern ................6-21 MODE ................. 1-4 Pattern Format ..............10-80 MODEL ..................
- Page 499 Index Pulse<Time ..........2-10, 6-28, 10-30 sampling mode ............2-6, 2-15 Pulse>Time ..........2-10, 6-28, 10-30 sampling theorem ............... 2-6 purple characters ..............4-1 Save to File ............6-45, 10-71 scale .................. 2-20 Scale Value ............. 1-6, 2-20, 8-17 scaling ................. 2-4, 9-4 scaling (computed waveform) ...........
- Page 500 Index single mode ............... 2-12, 6-2 time axis scale ..............2-5 Single(N) ................7-10 time axis setting, sample rate, and record length, ..App-1 skew correction ..............4-22 Time Base ..............2-5, 5-20 Slope ................. 2-8, 6-10 time base ................5-21 smoothing ..............
- Page 501 Index User Account ............13-16, 13-17 User Define Setup ............. 9-19 Z1 Mag ................8-9 User Name ............13-16, 13-17 Zip disk ................12-4 user-defined computation ..........2-23 Zone ..............10-5, 10-66 Utility ................12-41 zone search ..............2-25 UTP ................... 13-1 ZOOM .................
Need help?
Do you have a question about the DL7440 and is the answer not in the manual?
Questions and answers