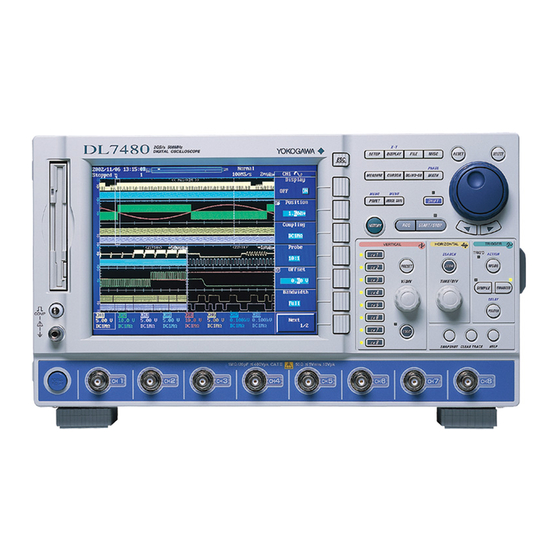
YOKOGAWA DL7440 Operation Manual
Digital oscilloscope
Hide thumbs
Also See for DL7440:
- User manual (55 pages) ,
- User manual (176 pages) ,
- User manual (501 pages)
Table of Contents
Advertisement
Quick Links
Download this manual
See also:
User Manual
Advertisement
Table of Contents

Related Manuals for YOKOGAWA DL7440


Summary of Contents for YOKOGAWA DL7440
- Page 1 DL7440/DL7480 Digital Oscilloscope IM 701450-02E 2nd Edition...
-
Page 2: Foreword
Foreword Thank you for purchasing the DL7400 (DL7440/DL7480) Digital Oscilloscope. This operation guide is designed to bring first-time users quickly up to speed with the basic operations of the DL7400. There are two other manuals for the DL7400 in addition to this operation guide: the DL7400 User’s Manual (IM701450-01E) that explains all of the functions of the instrument, and the Communications Interface User’s Manual (IM701450-17E) that provides a more in-depth... -
Page 3: Table Of Contents
Contents Foreword ................... 1 Flow of Operation ..............3 Names and Functions of Front Panel Controls ......4 Parts of the Screen ..............7 Basic Key and Jog Shuttle Operation ........10 Introduction to Main Functions ..........12 Working with the DL7400 ............17 •... -
Page 4: Flow Of Operation
Flow of Operation Flow of Operation Flow of Operation Flow of Operation The chart below is provided to give first-time users an easy-to-understand glimpse of the overall flow of the DL7400’s operation. It is not intended to describe the flow of operations exactly as they are presented in this manual. For details about specific items introduced in the pages within, refer to the corresponding chapter or section in the user’s manual as indicated by the arrows ( ). -
Page 5: Names And Functions Of Front Panel Controls
* The DL7440 has four channel keys, and the DL7480 has eight. Hereafter, the expression CH1 to CH8(4) will * In the probe attenuation ratio/current-to-voltage... - Page 6 Names and Functions of Front Panel Controls Common Operations and Acquisition, Display, Computation, Analysis, and Searching GO/NO-GO key Sections 10.9, 10.10 Displays a setting menu for GO/NO-GO determination. (SHIFT +) DISPLAY key (SHIFT +) MATH key Sections 9.1 to 9.9 Sections 8.1 to 8.3, 8.5, and 8.7 to 8.10 Displays a setting menu for waveform computations.
- Page 7 Names and Functions of Front Panel Controls Calibration, Ethernet Communications, and Other Operations MISC key Sections 3.7, 4.6, 6.17, 12.4, 16.3, 16.4, and chapters 13 and 15 of the Communications User’s Manual Displays a menu for settings related to the date/time, calibration, trigger gate, SCSI ID number, Ethernet communications, message language, click sound ON/OFF, USB keyboard language, use of offset voltage measurement/computation results, screen colors/brightness, backlight, self test, and remote control.
-
Page 8: Parts Of The Screen
Parts of the Screen Parts of the Screen Parts of the Screen Parts of the Screen This section introduces the menus and symbols appearing on the DL7400 screen. For details about specific items introduced in the pages within, refer to the corresponding chapter or section in the user’s manual as indicated by the arrows ( or Common Parts of the Screen Record length/display position... - Page 9 Parts of the Screen Screen When Displaying Zoomed Waveforms User’s manual section 8.4, “Zooming the Waveform” The zoom position of zoomed waveform Z1 within the specified or displayed record length The zoom position of zoomed waveform Z2 within the specified or displayed record length Zoom box Z2 showing Zoom box Z1 the Z2 zoom area...
- Page 10 Parts of the Screen Screen When Displaying X-Y Waveforms User’s manual section 8.5, “Displaying X-Y Waveform” Main (normal) waveform display area Waveform assigned to Y- axis X-Y waveform Y axis scale display frame Waveform assigned to X-axis X axis scale IM 701450-02E...
-
Page 11: Basic Key And Jog Shuttle Operation
Basic Key and Jog Shuttle Operation Basic Key and Jog Shuttle Operation Basic Key and Jog Shuttle Operation Basic Key and Jog Shuttle Operation This section explains the basics of using the keys and jog shuttle for entering settings on the DL7400. Basic Key Operation Working with the Setup Menu ACQ menu (the menu displayed by pressing the ACQ key) - Page 12 Basic Key and Jog Shuttle Operation Basic Jog Shuttle Operation Selecting an Item Entering Numerical Values Restores the setting to its initial value. RESET SELECT RESET SELECT Jog shuttle Jog shuttle Decreases (or slows down) the Move to the next item up. setting value.
-
Page 13: Introduction To Main Functions
Introduction to Main Functions Introduction to Main Functions Introduction to Main Functions Introduction to Main Functions Trigger User’s manual chapter 6, “Triggers” There are two main categories of triggers: simple triggers and enhanced triggers. If the signal input to the If the signal input to the measurement input EXT TRIG IN terminal... - Page 14 Introduction to Main Functions Zooming a Waveform along the Horizontal (Time) Axis User’s manual section 8.4, ”Zooming the Waveform” You can expand (zoom) a displayed waveform along the time axis. Two areas of a waveform can be zoomed at the same time.
-
Page 15: Cursor Measurements
Introduction to Main Functions Search and Zoom User’s manual section 10.4, “Searching Waveforms Using the Search and Zoom Function” You can search saved waveforms and zoom-display those that match the search criteria. The following five search methods are available. Performs a search based on the Performs a search based on whether Performs a search based on whether number of times that a waveform falls... - Page 16 Introduction to Main Functions Automatic Measurement of Waveform Parameters User’s manual section 10.6, “Automatic Measurement of Waveform Parameters” This function automatically measures certain properties of a waveform such as the maximum level and frequency. There are 27 parameters that can be measured (including between-waveform delay). Up to 12 of those parameters can be displayed on the screen.
- Page 17 Introduction to Main Functions GO/NO-GO Determination User’s manual section 10.9, “Performing GO/NO-GO Determination Using Zones” User’s manual section 10.10, “Performing GO/NO-GO Determination Using Measured Waveform Parameters” This function determines whether a waveform enters or does not enter a specified range, and then performs (GO) or does not perform (NO-GO) a certain action.
-
Page 18: Working With The Dl7400
Working with the DL7400 Working with the DL7400 Working with the DL7400 Working with the DL7400 This section provides an example of how you can observe a probe compensation signal being output from the DL7400. Preparing for an Observation Connecting the Power Supply User’s manual section 3.3, “Connecting the Power Supply and Turning ON/OFF the Power Switch”... -
Page 19: Connecting The Probe
Working with the DL7400 Connecting the Probe User’s manual section 3.4, “Connecting the Probe” User’s manual section 3.5, “Compensating the Probe (Phase Correction)” Before connecting the probe, you must read the warnings in the user’s manual listed in section 3.5, “Compensating the Probe (Phase Correction).” Probe compensation Functional ground terminal signal output terminal... -
Page 20: Displaying A Waveform On The Screen
Working with the DL7400 Displaying a Waveform on the Screen This section explains how to perform convenient, basic setting initialization and autosetup when you want to display common repeating waveforms such as sine waves and square waves. Initializing Settings User’s manual section 4.4, “Initializing Settings” The procedure below restores the settings that are controlled using the front panel keys to their factory default values. -
Page 21: Changing Waveform Display Conditions
Working with the DL7400 Changing Waveform Display Conditions This section explains how to split the screen, and how to change settings such as the voltage or vertical axis sensitivity and vertical position, or the time or horizontal axis. Setting the Screen Divisions to Single User’s manual section 8.1, “Setting the Display Format”... - Page 22 Working with the DL7400 Bringing the Waveform’s Entire Amplitude into View by Lowering the Vertical Position User’s manual section 5.3, “Setting the Vertical Position of the Waveform” Press the CH1 key. Turn the jog shuttle counterclockwise to set Position to –2.50 div. Lowering the vertical position allows the entire amplitude of the waveform to be displayed.
- Page 23 Working with the DL7400 Changing the Time Axis Setting from 100 ms/div to 500 µs/div User’s manual section 5.12, “Setting T/div” The display reverts from roll mode back to update mode, and five periods worth of the waveform is displayed. TIME/DIV Turn the TIME/DIV knob clockwise to set the time axis setting to 500 µs/div.
-
Page 24: Changing Trigger Settings
Working with the DL7400 Changing Trigger Settings Trigger settings determine which waveforms of the loaded measurement signals to display, and at which times. The following are the most commonly used trigger settings. Trigger Types The two main types of triggers are simple triggers and enhanced triggers. For details, see page 12 of this guide. Trigger Source A trigger source is a signal to which trigger activation conditions are applied. - Page 25 Working with the DL7400 Shifting the Trigger Position to the Left by Two Divisions User’s manual section 6.2, “Setting the Trigger Position” By shifting the waveform to the left by just 2 div, the part of the waveform after the trigger (post trigger) becomes much easier to see.
-
Page 26: Measuring A Waveform
Working with the DL7400 Measuring a Waveform This section explains how to use the vertical cursors to measure the voltage and period of the displayed waveform. In addition to cursor measurement, the DL7400 also has functions such as automatic measurement of waveform parameters and computation functions that are useful for taking pulse waveform and other types of measurements. -
Page 27: Zooming A Waveform Along The Time Axis
Working with the DL7400 Zooming a Waveform along the Time Axis This section describes how to zoom a portion of the displayed waveform along the time axis. Setting the Zoom Factor User’s manual section 8.4, “Zooming the Waveform” You can display two zoomed waveform portions of the original (normal) waveform. The portion of the original waveform that is zoomed is shown by the “zoom box.”... -
Page 28: Printing And Saving A Waveform
Working with the DL7400 Printing and Saving a Waveform This section describes how to print out the displayed waveform on the built-in printer (when the /B5 option is installed) or save it to a storage medium. You can also print waveforms to a USB or network printer (with the /C10 option installed). Or, if you specified other storage media (floppy disk or Zip disk at the time of purchase, or PC card), you can also save to the installed medium. - Page 29 Working with the DL7400 Saving Waveform Data to a Storage Medium User’s manual section 12.8, “Saving/Loading the Waveform Image Data” You can save the waveform data displayed on screen to a storage medium. When the waveform is saved, its vertical axis, horizontal axis, and trigger settings are also saved.
Need help?
Do you have a question about the DL7440 and is the answer not in the manual?
Questions and answers