Table of Contents
Advertisement
Advertisement
Table of Contents

Related Manuals for Christie CP2208-LP


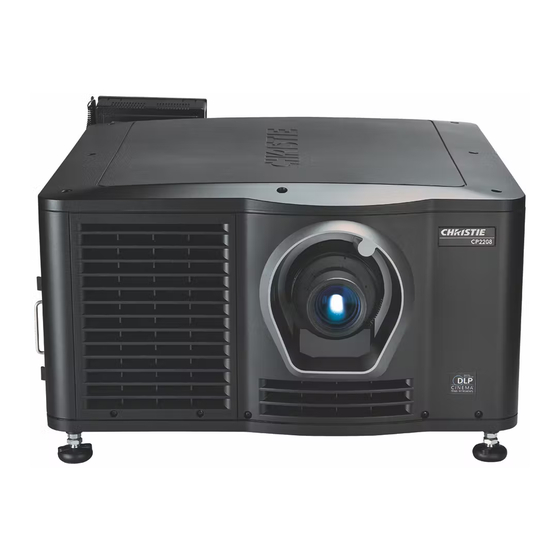
Summary of Contents for Christie CP2208-LP
- Page 1 S e r vi ce Ma n u a l 020-102263-01 CP2208-LP...
- Page 2 The warranty does not apply to any product where the serial number has been removed or obliterated. The warranty also does not apply to any product sold by a reseller to an end user outside of the country where the reseller is located unless (i) Christie has an office in the country where the end user is located or (ii) the required international warranty fee has been paid.
-
Page 3: Table Of Contents
Parts and module replacement........29 CP2208-LP Service Manual 020-102263-01 Rev. 1 (09-2016) Copyright 2016 Christie Digital Systems USA Inc. All rights reserved. ©... - Page 4 Replacing the light sensor module........61 CP2208-LP Service Manual 020-102263-01 Rev. 1 (09-2016) Copyright 2016 Christie Digital Systems USA Inc. All rights reserved. ©...
- Page 5 Physical specifications..........89 CP2208-LP Service Manual 020-102263-01 Rev. 1 (09-2016) Copyright 2016 Christie Digital Systems USA Inc. All rights reserved. ©...
- Page 6 Electro-magnetic compatibility........93 CP2208-LP Service Manual 020-102263-01 Rev. 1 (09-2016) Copyright 2016 Christie Digital Systems USA Inc. All rights reserved. ©...
-
Page 7: Introduction
CP2208-LP projectors . Every effort has been made to make sure the information in this document is accurate and complete. However, due to continuing research all information is subject to change without notice. Christie assumes no responsibility for omissions or inaccuracies. -
Page 8: Projector Components (Rear)
Air filter Projector components (rear) Learn about the components on the back of the projector. Service access door Power cord and AC receptacle CP2208-LP Service Manual 020-102263-01 Rev. 1 (09-2016) Copyright 2016 Christie Digital Systems USA Inc. All rights reserved. ©... -
Page 9: Service Guidelines
To download the latest interconnect diagram or line drawings, visit www.christiedigital.com. Servicing live equipment Only Christie accredited technicians who are knowledgeable about the hazards associated with hazardous voltage, ultraviolet exposure, and high temperatures are authorized to assemble, install, and service Christie equipment. - Page 10 (electrically insulated) footwear, safety glasses, and gloves rated for the working voltage of the equipment you are servicing. CP2208-LP Service Manual 020-102263-01 Rev. 1 (09-2016) Copyright 2016 Christie Digital Systems USA Inc. All rights reserved. ©...
-
Page 11: Important Safeguards
Christie products must be installed and serviced by Christie qualified technicians. • Only Christie qualified technicians who are knowledgeable about the hazards associated with laser use, high-voltage, and high temperatures generated by the product are authorized to assemble, install, and service the Christie Laser Projection System. -
Page 12: Ac/Power Precautions
SHOCK HAZARD! The AC power cord must be inserted into an outlet with grounding. • SHOCK HAZARD! A dedicated, protected earth wire must be installed on the product by Christie qualified technicians or electricians before it can be connected to power. -
Page 13: Product Labels
Electric shock hazard. To avoid personal injury, disconnect all power sources before performing maintenance or service. Electrocution hazard. To avoid personal injury, always disconnect all power sources before performing maintenance or service procedures. CP2208-LP Service Manual 020-102263-01 Rev. 1 (09-2016) Copyright 2016 Christie Digital Systems USA Inc. All rights reserved. ©... -
Page 14: Mandatory Action
Consult the user manual. Consult the service manual. Electrical labels Indicates the presence of a protective earth ground. Indicates the presence of an earth ground. CP2208-LP Service Manual 020-102263-01 Rev. 1 (09-2016) Copyright 2016 Christie Digital Systems USA Inc. All rights reserved. ©... -
Page 15: Additional Hazard Labels
Indicates a light hazard. Do not look directly into the lens. The extreme high brightness can cause permanent eye damage. RG3 IEC 62471-5:2015 Laser label CLASS 1 LASER PRODUCT IEC 60825-1:2014 CP2208-LP Service Manual 020-102263-01 Rev. 1 (09-2016) Copyright 2016 Christie Digital Systems USA Inc. All rights reserved. ©... -
Page 16: Service Setups
1. Remove the top skin. (on page 32) 2. Display the RGB-12bit-Full Screen White test pattern. (on page 87) 3. Note the location of the following screws: CP2208-LP Service Manual 020-102263-01 Rev. 1 (09-2016) Copyright 2016 Christie Digital Systems USA Inc. All rights reserved. ©... -
Page 17: Calibrating The Yellow Notch Filter Color
To display the red test pattern, in the red area of the chromaticity image tap the option button. g) Measure the red chromaticity with the colorimeter. h) Record the red chromaticity value. CP2208-LP Service Manual 020-102263-01 Rev. 1 (09-2016) Copyright 2016 Christie Digital Systems USA Inc. All rights reserved. ©... - Page 18 In the left pane, tap Config 2. d) Complete the following fields: Field Description Measured Color The measured color gamut data (MCGD) file you created in step 5.. CP2208-LP Service Manual 020-102263-01 Rev. 1 (09-2016) Copyright 2016 Christie Digital Systems USA Inc. All rights reserved. ©...
- Page 19 The bottom row of the right-eye sub-field should be pure white for the left-most 75% of the pixel row and pure black for the remainder of the row. CP2208-LP Service Manual 020-102263-01 Rev. 1 (09-2016) Copyright 2016 Christie Digital Systems USA Inc. All rights reserved. ©...
- Page 20 Launch Dialog ( icon. g) To activate the channel, tap Activate. 7. Display the RGB-12bit-Full Screen White test pattern (on page 87). CP2208-LP Service Manual 020-102263-01 Rev. 1 (09-2016) Copyright 2016 Christie Digital Systems USA Inc. All rights reserved. ©...
-
Page 21: Adjusting Dmd Convergence
14 FL for standard 2D • ~25-30 FL for single projector 3D with a silver screen • Operate the projector for 15 minutes or longer. CP2208-LP Service Manual 020-102263-01 Rev. 1 (09-2016) Copyright 2016 Christie Digital Systems USA Inc. All rights reserved. ©... -
Page 22: Evaluating The Convergence
In the following example, red is twisted counterclockwise and blue is high and to the left with no apparent twist. CP2208-LP Service Manual 020-102263-01 Rev. 1 (09-2016) Copyright 2016 Christie Digital Systems USA Inc. All rights reserved. ©... -
Page 23: Adjusting The Forematter Board Convergence
The blue formatter board physical design is different, but the adjustment functions are the same. The vertical and twist adjustments work together on the horizontal axis. CP2208-LP Service Manual 020-102263-01 Rev. 1 (09-2016) Copyright 2016 Christie Digital Systems USA Inc. All rights reserved. ©... - Page 24 CP2208-LP Service Manual 020-102263-01 Rev. 1 (09-2016) Copyright 2016 Christie Digital Systems USA Inc. All rights reserved. ©...
-
Page 25: Evaluating The Convergence Adjustments
Remove the light dump. Remove the two screws securing the shutter assembly. g) Move the douser to the open or closed position. CP2208-LP Service Manual 020-102263-01 Rev. 1 (09-2016) Copyright 2016 Christie Digital Systems USA Inc. All rights reserved. ©... -
Page 26: Activating Marriage
4. Tap Finish. 5. Verify that the marriage ring is installed correctly and an anti-tamper alarm does not appear on the TPC. CP2208-LP Service Manual 020-102263-01 Rev. 1 (09-2016) Copyright 2016 Christie Digital Systems USA Inc. All rights reserved. ©... -
Page 27: Projector Connections
A red LED indicates a communication error. A flashing red LED indicates the PIB is not installed correctly. If the LED is not illuminated, the PIB is inactive. CP2208-LP Service Manual 020-102263-01 Rev. 1 (09-2016) Copyright 2016 Christie Digital Systems USA Inc. All rights reserved. ©... - Page 28 You must turn on the light source manually. Connects the projector to 3D devices. Connects the projector to Christie or third-party automation equipment. Connects the projector to a 10Base-T/100Base-TX Ethernet connection. Connects the projector to high-definition cinema sources. The connectors can be used together to deliver Dual Link HD-SDI following the SMPTE 372M standard.
-
Page 29: Parts And Module Replacement
• Needle nose pliers • Cable ties • Rubber standoffs Index of parts and modules The following table lists the parts and modules for CP2208-LP. Description Part number Filters CP2208-LP Service Manual 020-102263-01 Rev. 1 (09-2016) Copyright 2016 Christie Digital Systems USA Inc. All rights reserved. - Page 30 Light module 003-121287-XX Light driver module 003-121290-XX Printed circuit boards and sensors Integrated cinema processor 003-101342-XX Temperature sensor 003-100618-XX Backplane PCB 003-111666-XX CP2208-LP Service Manual 020-102263-01 Rev. 1 (09-2016) Copyright 2016 Christie Digital Systems USA Inc. All rights reserved. ©...
- Page 31 1.62-2.7 .69” DLPCine Zoom 108-496100-XX 2.09-3.9 .69” DLPCine Zoom 108-497101-XX Rack stand 108-416102-XX Ball joint and arm assembly 159-101103-XX Integrated media block (IMB) 108-384107-XX CP2208-LP Service Manual 020-102263-01 Rev. 1 (09-2016) Copyright 2016 Christie Digital Systems USA Inc. All rights reserved. ©...
-
Page 32: Projector Covers And Feet
The top skin provides access to the interior of the project. Estimated replacement time: 4 minutes 1. Loosen the ten captive screws securing the top skin. 2. Remove the top skin. CP2208-LP Service Manual 020-102263-01 Rev. 1 (09-2016) Copyright 2016 Christie Digital Systems USA Inc. All rights reserved. ©... -
Page 33: Removing The Service Door
3. Loosen the two captive screws on the bottom of the card cage air filter cover. 4. Pull the cover out and down. CP2208-LP Service Manual 020-102263-01 Rev. 1 (09-2016) Copyright 2016 Christie Digital Systems USA Inc. All rights reserved. ©... - Page 34 6. Remove the four screws that secure the skin to the projector structure. 7. Remove the three screws from the front skin and the one screw behind the filter cover. CP2208-LP Service Manual 020-102263-01 Rev. 1 (09-2016) Copyright 2016 Christie Digital Systems USA Inc. All rights reserved. ©...
-
Page 35: Removing The Touch Panel Controller
1. Disconnect the TPC interface cable from the port on the side of the projector. 2. Slide the mounting bracket from the bracket support. 3. Remove the mounting bracket from the TPC. CP2208-LP Service Manual 020-102263-01 Rev. 1 (09-2016) Copyright 2016 Christie Digital Systems USA Inc. All rights reserved. ©... -
Page 36: Removing The Card Cage Skin
3. Remove the two screws above the card cage. 4. Remove the card cage (on page 63). 5. Remove the four screws securing the skin to the projector. CP2208-LP Service Manual 020-102263-01 Rev. 1 (09-2016) Copyright 2016 Christie Digital Systems USA Inc. All rights reserved. ©... -
Page 37: Removing The Rear Skin
4. Remove the four screws securing the skin to the corner brackets. 5. Remove the five screws from the bottom edge of the skin. CP2208-LP Service Manual 020-102263-01 Rev. 1 (09-2016) Copyright 2016 Christie Digital Systems USA Inc. All rights reserved. ©... -
Page 38: Removing The Exhaust Panel Skin
2. Remove the top skin (on page 32). 3. Remove the rear skin (on page 37). 4. Remove the two screws securing the skin to the corner bracket. CP2208-LP Service Manual 020-102263-01 Rev. 1 (09-2016) Copyright 2016 Christie Digital Systems USA Inc. All rights reserved. ©... - Page 39 5. Remove the three screws from the exhaust panel skin. 6. Pull the skin forward and out. 7. To re-install, complete these steps in reverse order. CP2208-LP Service Manual 020-102263-01 Rev. 1 (09-2016) Copyright 2016 Christie Digital Systems USA Inc. All rights reserved. ©...
-
Page 40: Removing The High Security, Rear, And Light Engine Covers
7. Remove the two screws connecting the light engine cover to the center structure. 8. Lift the light engine cover up and out. 9. To re-install the covers, complete these steps in reverse order. CP2208-LP Service Manual 020-102263-01 Rev. 1 (09-2016) Copyright 2016 Christie Digital Systems USA Inc. All rights reserved. ©... -
Page 41: Replacing A Projector's Foot
5. Hold the foot with a ratchet (A) and turn the top locking nut (B) to remove it. 6. Remove the foot. 7. To install the new foot, repeat these steps in the reverse order. CP2208-LP Service Manual 020-102263-01 Rev. 1 (09-2016) Copyright 2016 Christie Digital Systems USA Inc. All rights reserved. ©... -
Page 42: Filtration
The filter is located on the left side of the projector behind the air filter cover. Use only high efficiency Christie approved filters. 1. Loosen the two captive screws on the bottom of the filter cover. CP2208-LP Service Manual 020-102263-01 Rev. 1 (09-2016) Copyright 2016 Christie Digital Systems USA Inc. All rights reserved. ©... -
Page 43: Inspecting The Light Engine Compartment Filter
The filter is located on the right side of the projector behind the service access panel. 1. Loosen the two captive screws on the service access door and remove it. CP2208-LP Service Manual 020-102263-01 Rev. 1 (09-2016) Copyright 2016 Christie Digital Systems USA Inc. All rights reserved. ©... -
Page 44: Inspecting The Rear Radiator Filter
The rear radiator filter is located at the rear of the projector, next to the radiator assembly. 1. Loosen the two screws on the filter cover and remove it. CP2208-LP Service Manual 020-102263-01 Rev. 1 (09-2016) Copyright 2016 Christie Digital Systems USA Inc. All rights reserved. ©... -
Page 45: Cleaning A Washable Filter
4. Rinse the filter thoroughly by holding it on an angle under cool running water. The air flow arrow on the side of the filter should face down. CP2208-LP Service Manual 020-102263-01 Rev. 1 (09-2016) Copyright 2016 Christie Digital Systems USA Inc. All rights reserved. ©... - Page 46 If the paper towel remains dry, the filter can be installed in the projector. 9. Record the date the filter was cleaned. 10. Replace the filter following the instructions for the specific filter. CP2208-LP Service Manual 020-102263-01 Rev. 1 (09-2016) Copyright 2016 Christie Digital Systems USA Inc. All rights reserved. ©...
-
Page 47: Ventilation And Cooling
(fans 1 and 2) Fans 1 and 2 provide air cooling for the power factor correction (PFC) unit and the power supply (PS) unit. CP2208-LP Service Manual 020-102263-01 Rev. 1 (09-2016) Copyright 2016 Christie Digital Systems USA Inc. All rights reserved. ©... -
Page 48: Replacing The Light Engine Intake Fan (Fan 3)
9. Disconnect the inline connector. 10. Remove the two captive screws securing the fan to the center structure. CP2208-LP Service Manual 020-102263-01 Rev. 1 (09-2016) Copyright 2016 Christie Digital Systems USA Inc. All rights reserved. ©... -
Page 49: Replacing The Light Engine Blower Fan (Fan 4)
Replacing the light engine blower fan (fan 4) The light engine blower fan receives filtered air from the front air filter and an intake duct. CP2208-LP Service Manual 020-102263-01 Rev. 1 (09-2016) Copyright 2016 Christie Digital Systems USA Inc. All rights reserved. ©... -
Page 50: Replacing The Card Cage Fan Pack (Fans 5, 6, 7, And 8)
The fan pack is located directly behind the card cage air filter on the front of the projector and consist of four fans. CP2208-LP Service Manual 020-102263-01 Rev. 1 (09-2016) Copyright 2016 Christie Digital Systems USA Inc. All rights reserved. ©... -
Page 51: Replacing The Low Voltage Power Supply Fan (Fan 9)
13. To re-install the fan pack, complete these steps in reverse order. Replacing the low voltage power supply fan (fan Fan 9 provides air cooling to the low voltage power supply (LVPS) system. CP2208-LP Service Manual 020-102263-01 Rev. 1 (09-2016) Copyright 2016 Christie Digital Systems USA Inc. All rights reserved. ©... -
Page 52: Replacing The Radiator Fans
3. Remove the two screws securing the radiator cover. 4. Remove the four screws securing the radiator support bracket 5. Remove the radiator fan support bracket: CP2208-LP Service Manual 020-102263-01 Rev. 1 (09-2016) Copyright 2016 Christie Digital Systems USA Inc. All rights reserved. ©... -
Page 53: Replacing The Replacing The Pw Heat Pipe Fans (H-Pipe Top And H-Pipe Bot)
2. Remove the rear skin (on page 37). 3. Remove the two screws securing the fan bracket. 4. Disconnect the inline connectors for both fans. CP2208-LP Service Manual 020-102263-01 Rev. 1 (09-2016) Copyright 2016 Christie Digital Systems USA Inc. All rights reserved. ©... -
Page 54: Replacing The Ph Heat Sink Fans (Ph Hsink Top And Ph Hsink Bot)
Estimated replacement time: 22 minutes. 1. Remove the exhaust panel skin (on page 38). 2. Remove the two screws securing the fan bracket. CP2208-LP Service Manual 020-102263-01 Rev. 1 (09-2016) Copyright 2016 Christie Digital Systems USA Inc. All rights reserved. ©... -
Page 55: Replacing The Liquid Cooling Module
9. Remove the four screws securing the pump. 10. Remove the liquid cooling module. 11. To replace the liquid cooling module, complete these steps in reverse order. CP2208-LP Service Manual 020-102263-01 Rev. 1 (09-2016) Copyright 2016 Christie Digital Systems USA Inc. All rights reserved. ©... -
Page 56: Electronics
2. Remove the high security cover (on page 40). 3. Reach into the projector and pull the lever to release the marriage/security ring. CP2208-LP Service Manual 020-102263-01 Rev. 1 (09-2016) Copyright 2016 Christie Digital Systems USA Inc. All rights reserved. ©... - Page 57 5. Pull the projector intelligence board outward out of the card cage. 6. To replace the projector intelligence board, complete these steps in reverse order. CP2208-LP Service Manual 020-102263-01 Rev. 1 (09-2016) Copyright 2016 Christie Digital Systems USA Inc. All rights reserved. ©...
-
Page 58: Replacing The Integrated Media Block
6. To replace the IMB, complete these steps in reverse order. After replacing the board, activate marriage (on page 26) so you can continue to play encrypted content. CP2208-LP Service Manual 020-102263-01 Rev. 1 (09-2016) Copyright 2016 Christie Digital Systems USA Inc. All rights reserved. ©... -
Page 59: Replacing The Integrated Cinema Processor
3. Reach into the projector and pull the lever to release the marriage/security ring. 4. Pull the ejectors on the projector intelligence board outward. CP2208-LP Service Manual 020-102263-01 Rev. 1 (09-2016) Copyright 2016 Christie Digital Systems USA Inc. All rights reserved. ©... -
Page 60: Replacing The Backplane
11. To install the backplane, complete these steps in reverse order. After replacing the backplane, activate marriage (on page 26) so you can continue to play encrypted content. CP2208-LP Service Manual 020-102263-01 Rev. 1 (09-2016) Copyright 2016 Christie Digital Systems USA Inc. All rights reserved. ©... -
Page 61: Replacing The Remote Temperature Sensor Modules
Replacing the remote temperature sensor modules Remote temperature sensors are located throughout the projector, but the ones service by Christie (that are not included in the light module) are red, green, blue, prism and ambient intake. 1. Locate the remote temperature sensor module (red, green, blue and prism are located on the light engine and the ambient intake is located at the radiator intake). -
Page 62: Replacing The Fuse Boards
11. Remove the marriage interlock switch from the housing. 12. To replace the marriage interlock switch, complete these steps in reverse order. CP2208-LP Service Manual 020-102263-01 Rev. 1 (09-2016) Copyright 2016 Christie Digital Systems USA Inc. All rights reserved. ©... -
Page 63: Replacing The Laser Driver Board
5. Disconnect the three light engine harnesses. 6. Disconnect the harness from the backplane. 7. Remove the five screws securing the card cage. CP2208-LP Service Manual 020-102263-01 Rev. 1 (09-2016) Copyright 2016 Christie Digital Systems USA Inc. All rights reserved. ©... - Page 64 10. Tilt the card cage up and pull out to remove it. 11. To replace the card cage, complete these steps in reverse order. CP2208-LP Service Manual 020-102263-01 Rev. 1 (09-2016) Copyright 2016 Christie Digital Systems USA Inc. All rights reserved. ©...
-
Page 65: Adjusting Boresight
3. Set the zoom of the lens so the test pattern fills the screen size. 4. Set the lens focus to the middle of its range. 5. Loosen the three set screws (A, B, C). CP2208-LP Service Manual 020-102263-01 Rev. 1 (09-2016) Copyright 2016 Christie Digital Systems USA Inc. All rights reserved. ©... - Page 66 8. To focus the position III boresight guide, adjust the top boresight cap screw (F). Turning the screws in small amounts (1/4 to 1/8 of a turn) allows you to make precise adjustments. CP2208-LP Service Manual 020-102263-01 Rev. 1 (09-2016) Copyright 2016 Christie Digital Systems USA Inc. All rights reserved. ©...
-
Page 67: Replacing The High Security Door Interlock Switch
5. Remove the two nuts securing the switch to the frame and then remove the interlock switch. 6. To replace the high security door interlock switch, complete these steps in reverse order. CP2208-LP Service Manual 020-102263-01 Rev. 1 (09-2016) Copyright 2016 Christie Digital Systems USA Inc. All rights reserved. ©... -
Page 68: Optics
Typically, optical components do not need to be cleaned frequently if they are installed and operated in a location that meets or exceeds the environmental standard recommended by Christie. Christie recommends that all cinema projectors are installed and operated in an environment that meets or exceeds Underwriters Laboratories (UL) standard 609.50 Pollution Degree 2 and ISO Class 9 Standard... -
Page 69: Replacing Fold Mirror One
10. To replace the fold mirror, complete these steps in reverse order. When reinstalling the fold mirror, make sure the reflective surface faces inward. CP2208-LP Service Manual 020-102263-01 Rev. 1 (09-2016) Copyright 2016 Christie Digital Systems USA Inc. All rights reserved. ©... -
Page 70: Replacing Fold Mirror Two
4. Remove the rear skin (on page 37). 5. Disconnect the inline connectors of the PH HSINK TOP (fan 11) and PH HSINK BOT (fan 12) fans. CP2208-LP Service Manual 020-102263-01 Rev. 1 (09-2016) Copyright 2016 Christie Digital Systems USA Inc. All rights reserved. ©... - Page 71 10. Disconnect the following connections from the laser driver board: • CN200 • CN206 • CN207 • CN208 • CN209 • CN220 • CN806 • CN809 CP2208-LP Service Manual 020-102263-01 Rev. 1 (09-2016) Copyright 2016 Christie Digital Systems USA Inc. All rights reserved. ©...
-
Page 72: Aligning The Light Module
6. Loosen the locking screws on the brackets connecting the light module to the illumination optics system (IOS) (A-F), light module adjuster assembly (G-I), the L1 lens, and the fold mirror. CP2208-LP Service Manual 020-102263-01 Rev. 1 (09-2016) Copyright 2016 Christie Digital Systems USA Inc. All rights reserved. ©... - Page 73 Optics CP2208-LP Service Manual 020-102263-01 Rev. 1 (09-2016) Copyright 2016 Christie Digital Systems USA Inc. All rights reserved. ©...
- Page 74 10. Set the nominal position between each light module adjuster wheel and the metal base plate by turning the wheel until you can just fit a 5 mm Allen key underneath it. CP2208-LP Service Manual 020-102263-01 Rev. 1 (09-2016) Copyright 2016 Christie Digital Systems USA Inc. All rights reserved. ©...
- Page 75 20. Fully tighten the L1 lens screws. 21. Quarter-turn each light module bracket screw (A-F) until the brackets are secured in place. CP2208-LP Service Manual 020-102263-01 Rev. 1 (09-2016) Copyright 2016 Christie Digital Systems USA Inc. All rights reserved. ©...
-
Page 76: Replacing The Shutter Assembly
4. Remove the high security and light engine covers (on page 40). 5. Remove the light engine blower assembly. 6. Loosen the captive screw securing the light dump and remove it. CP2208-LP Service Manual 020-102263-01 Rev. 1 (09-2016) Copyright 2016 Christie Digital Systems USA Inc. All rights reserved. ©... - Page 77 13. Remove the shutter assembly by removing the two screws securing the shutter bracket to the new light engine. 14. To replace the light engine assembly, complete these steps in reverse order. CP2208-LP Service Manual 020-102263-01 Rev. 1 (09-2016) Copyright 2016 Christie Digital Systems USA Inc. All rights reserved. ©...
-
Page 78: Replacing The Lens
12. Tighten the lens mount cap screws for added stability. 13. Replace the lens surround. 14. Remove the lens cap from the front of the lens. CP2208-LP Service Manual 020-102263-01 Rev. 1 (09-2016) Copyright 2016 Christie Digital Systems USA Inc. All rights reserved. ©... -
Page 79: Replacing The Lens Mount
1. Remove the top skin (on page 32). 2. Remove the front skin (on page 33). 3. Loosen the captive screw and remove the top skin off the YNF. CP2208-LP Service Manual 020-102263-01 Rev. 1 (09-2016) Copyright 2016 Christie Digital Systems USA Inc. All rights reserved. ©... -
Page 80: Replacing The Illumination Optic System
2. Remove the three 2 mm hex head screws connecting the contrast aperture to the frame the of illumination optic system (IOS). CP2208-LP Service Manual 020-102263-01 Rev. 1 (09-2016) Copyright 2016 Christie Digital Systems USA Inc. All rights reserved. ©... - Page 81 Optics 3. Remove the contrast aperture. 4. To replace the contrast aperture, complete these steps in reverse order. CP2208-LP Service Manual 020-102263-01 Rev. 1 (09-2016) Copyright 2016 Christie Digital Systems USA Inc. All rights reserved. ©...
-
Page 82: Power Supplies
5. Remove the two standby power supply bracket screws and remove the bracket. 6. Remove the standby power supply. 7. To replace the standby power supply, complete these steps in reverse order. CP2208-LP Service Manual 020-102263-01 Rev. 1 (09-2016) Copyright 2016 Christie Digital Systems USA Inc. All rights reserved. ©... -
Page 83: Replacing The Ac Input Assembly
6. Remove the two counter sunk screws (A) on the AC mounting bracket. 7. Remove the two 3 mm hex head screws (B) securing the AC mounting bracket. CP2208-LP Service Manual 020-102263-01 Rev. 1 (09-2016) Copyright 2016 Christie Digital Systems USA Inc. All rights reserved. ©... - Page 84 8. Pull the assembly forward and down to gain access to connectors. 9. Disconnect the inline switch harness connector. 10. Disconnect the AC input power cord connector. CP2208-LP Service Manual 020-102263-01 Rev. 1 (09-2016) Copyright 2016 Christie Digital Systems USA Inc. All rights reserved. ©...
-
Page 85: Replacing The Power Factor Correction Unit
PFC unit. 10. Remove the two screws securing the AC input cover plate. 11. Remove the two screws securing the middle cover plate. CP2208-LP Service Manual 020-102263-01 Rev. 1 (09-2016) Copyright 2016 Christie Digital Systems USA Inc. All rights reserved. ©... -
Page 86: Replacing The Power Supply Unit
15. Transfer the PS unit alignment bracket over to the new service assembly. 16. To replace the PS unit, complete these steps in reverse order. CP2208-LP Service Manual 020-102263-01 Rev. 1 (09-2016) Copyright 2016 Christie Digital Systems USA Inc. All rights reserved. ©... -
Page 87: Test Patterns
Some test patterns fill the screen instead of a portion of it. 1. In the touch panel controller (TPC) task bar, tap the Test Pattern icon: 2. Tap All Test Patterns. CP2208-LP Service Manual 020-102263-01 Rev. 1 (09-2016) Copyright 2016 Christie Digital Systems USA Inc. All rights reserved. ©... - Page 88 3. To turn the test pattern on, in the Preferred Test Patterns pane, double-tap the test pattern. 4. Tap Full Screen (Ignore screen file settings). CP2208-LP Service Manual 020-102263-01 Rev. 1 (09-2016) Copyright 2016 Christie Digital Systems USA Inc. All rights reserved. ©...
-
Page 89: Specifications
Current consumption 10 A maximum (at 200 VAC) Power consumption 2000 W maximum Current rating of AC input IEC-320-C19/16 A of IEC inlet CP2208-LP Service Manual 020-102263-01 Rev. 1 (09-2016) Copyright 2016 Christie Digital Systems USA Inc. All rights reserved. ©... -
Page 90: Environmental Specifications
Learn the display specifications of the projector. Panel resolution and refresh rate Pixel format (H x V square pixels) 2048 x 1080 Processing path 23.97 - 240Hz CP2208-LP Service Manual 020-102263-01 Rev. 1 (09-2016) Copyright 2016 Christie Digital Systems USA Inc. All rights reserved. ©... -
Page 91: Control Signal Compatibility
Flow Control Hardware (RTS/CTS) Data Format 1 start bit, 8 data bits, 1 stop bit, no parity Communication Protocol Christie Serial Protocol CP2208-LP Service Manual 020-102263-01 Rev. 1 (09-2016) Copyright 2016 Christie Digital Systems USA Inc. All rights reserved. ©... -
Page 92: Touch Panel Controller Specifications
This product is designed and built to comply with all relevant directives, standards, safety, health and environmental rules and regulations required for the product to be sold in: USA/Canada, EU, CP2208-LP Service Manual 020-102263-01 Rev. 1 (09-2016) Copyright 2016 Christie Digital Systems USA Inc. All rights reserved. ©... -
Page 93: Electro-Magnetic Compatibility
China Ministry of Information Industry Order No. 32 (01/2016) on Management Methods for the Control of Pollution from Electrical and Electronic Products. CP2208-LP Service Manual 020-102263-01 Rev. 1 (09-2016) Copyright 2016 Christie Digital Systems USA Inc. All rights reserved. ©... - Page 94 Corporate offi ces Worldwide offi ces USA – Cypress Australia Eastern Europe and India Singapore ph: 714-236-8610 ph: +61 (0) 7 3624 4888 Russian Federation ph: +91 (080) 6708 9999 ph: +65 6877-8737 ph: +36 (0) 1 47 48 100 Canada –...
Need help?
Do you have a question about the CP2208-LP and is the answer not in the manual?
Questions and answers