Christie CP2208 User Manual
Hide thumbs
Also See for CP2208:
- User manual (108 pages) ,
- Service manual (89 pages) ,
- Installation and setup manual (35 pages)
Table of Contents
Advertisement
Quick Links
Advertisement
Table of Contents
Troubleshooting

Related Manuals for Christie CP2208


Summary of Contents for Christie CP2208
- Page 1 U s e r M a n u a l 020-101916-01 CP2208...
- Page 2 The warranty does not apply to any product where the serial number has been removed or obliterated. The warranty also does not apply to any product sold by a reseller to an end user outside of the country where the reseller is located unless (i) Christie has an office in the country where the end user is located or (ii) the required international warranty fee has been paid.
-
Page 3: Table Of Contents
Adjust the Image ..........36 CP2208 User Manual... - Page 4 Modify an existing lamp file ........56 CP2208 User Manual...
- Page 5 View projector information ......... 69 CP2208 User Manual...
- Page 6 ......... . 84 CP2208 User Manual...
- Page 7 Christie IMB ........
- Page 8 Christie IMB specifications ........
- Page 9 Anti-tampering circuitry ........109 CP2208 User Manual...
-
Page 10: Installation And Setup
Only accredited Christie technicians who are knowledgeable about the hazards associated with high-voltage, ultraviolet exposure, and the high temperatures generated by the projector lamp are authorized to assemble, install, and service the projector. In addition, only Christie accredited personnel are authorized to perform security procedures such as marriage. -
Page 11: Ac/Power Precautions
The lamp is under significant pressure when hot and cold, and may explode, causing personal injury and/or property damage. Any lamp used in the CP2208 is under high pressure and must be handled with great care at all times. Lamps may explode if dropped or mishandled. -
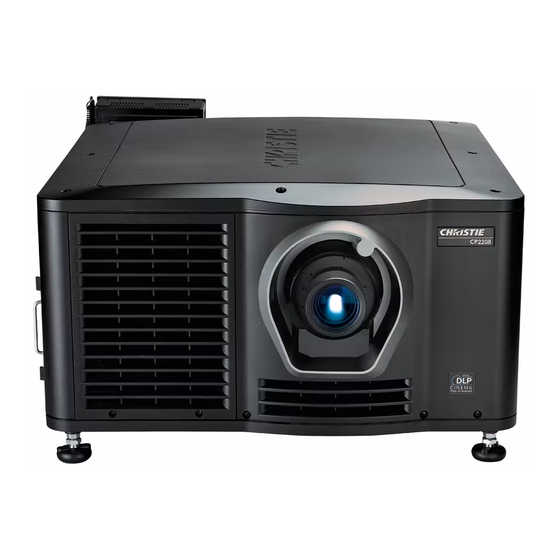
Page 12: Projector Components - Front
See Adjust tilt and level the projector on page Air Filter Vertical Lens Adjuster Adjusts the vertical position of the lens. Horizontal Lens Adjuster Top Lid Adjusts the horizontal position of the lens. CP2208 User Manual 020-101916-01 Rev. 1 (06-2015) -
Page 13: Projector Components - Rear
2. Position the projector so it is centered and parallel with the theatre screen. If space is limited, aim the projector slightly off-center and use lens offset to center the image on the screen. CP2208 User Manual 020-101916-01 Rev. 1 (06-2015) -
Page 14: Stack Projectors
Installation and Setup Stack projectors To stack CP2208 projectors, use the stacking kit provided with the projector. The CP2208 stacking kit includes these parts: Stacking Cup x 4 Locking Bracket x 4 M6 Screw x 4 When stacking projectors, the optical axis of the projectors must be parallel to one another. The maximum tilt for stacked projectors is 13 degrees. - Page 15 Turn the locking bracket so the flanges of the locking bracket fit tightly below the stacking cup tabs. CP2208 User Manual 020-101916-01 Rev. 1 (06-2015)
-
Page 16: Adjust Tilt And Level The Projector
Use the lens mount to align the images of stacked projectors and not projector tilt. If tilt is required to fit the image to the screen, tilt only the lower projector. The front-to-back tilt of the projector must not exceed 15°. CP2208 User Manual 020-101916-01 Rev. 1 (06-2015) -
Page 17: Install The Touch Panel Controller
The lens seals the projection head, preventing contaminants from entering the main electronics area. Do not operate the projector without a lens installed. Install a lens plug when you install or transport the projector. CP2208 User Manual 020-101916-01 Rev. 1 (06-2015) - Page 18 Lens caps must be removed or they can melt and damage the lens. 5. Insert the lens straight into the lens mount opening without turning. Magnets inside the lens mount help position the lens. CP2208 User Manual 020-101916-01 Rev. 1 (06-2015)
-
Page 19: Install The Lamp
Install the lamp Danger! Failure to comply with the following results in serious injury. This procedure should only be performed by a Christie accredited technician. High-pressure lamp may explode if improperly handled. Always wear approved protective safety clothing whenever the lamp door is open or when handling the lamp. - Page 20 Installation and Setup 6. Loosen the two thumbscrews and open the fire wall door. 7. Loosen the two thumbscrews and open the lamp access door. CP2208 User Manual 020-101916-01 Rev. 1 (06-2015)
- Page 21 Insert your right index and middle finger through the back of the reflector and guide the lamp onto the cathode clamp. Be careful not to hit the lamp against the reflector. CP2208 User Manual 020-101916-01 Rev. 1 (06-2015)
-
Page 22: Connect Devices To The Projector
12. Close and lock the rear access door. Ensure the hex key is placed back into its holder before closing the rear access door. Connect devices to the projector To display content, you must connect a device that is capable of storing or playing content to the projector. CP2208 User Manual 020-101916-01 Rev. 1 (06-2015) -
Page 23: Projector Connections
SM Run - A heartbeat indicator that flashes green when the security manager (SM) is running. FIPS - Indicates the FIPS (Federal Information Processing Standards Publications) security status. If the LED is red, an error has occurred. Restart the IMB. If the LED remains red, return the IMB to Christie Digital. -
Page 24: Connect The Projector To A Computer
IMB Health - The LED is green when the Christie IMB is operating correctly. Indicates the marriage state. In full power mode, a green LED indicates that the projector is properly married. A red LED indicates marriage is broken and you cannot use the Christie IMB to display encrypted content. -
Page 25: Connect The Projector To Direct-Attached Storage
Installation and Setup turned on before the projector is turned on. Christie recommends that you select a static IP address, see the Christie Integrated Media Block User Manual (P/N: 020-100845-XX). 1. Follow the instructions provided by the manufacturer of your NAS to ensure it is set up and operating correctly. -
Page 26: Connect The Projector To A Digital Cinema Audio Processor
Warning! Failure to comply with the following could result in serious injury. The dedicated earth wire can only be installed by a Christie accredited service technician or an electrician. The protected earth wire must be green/yellow 12 AWG minimum. See Projector Specifications on page 99 for power requirements. - Page 27 8. If you are using an Uninterrupted Power Supply (UPS) to power the main electronics, move the AC switch to A + B and connect the power cord provided with the UPS to the B outlet. AC Switch 100-240V secondary inlet 200-240V main inlet CP2208 User Manual 020-101916-01 Rev. 1 (06-2015)
-
Page 28: Turn The Projector On
1. Log on to the projector with marriage permissions. See Log on to the projector on page 2. Tap Menu > Service Setup > IMB Marriage. 3. Complete the Marriage wizard. 4. Click Finish. CP2208 User Manual 020-101916-01 Rev. 1 (06-2015) -
Page 29: Add The Projector To A Network
The baud rate of the serial port. The default is 115200. Enable SNMP Enables SNMP. SNMP V2 / SNMP V3 The SNMP protocol type. Contact Christie for the SNMP V3 user ID and password. Management IP The IP address where SNMP information and notifications are sent. -
Page 30: Turn The Lamp On
4. Record the number in the Intensity field. 5. Tap Display Full Screen White Test Pattern. 6. Complete a coarse lamp adjustment: a. Locate the Y axis adjustment label on the operator side of the projector. CP2208 User Manual 020-101916-01 Rev. 1 (06-2015) -
Page 31: Adjust The Image To Fit Your Screen
2. Display a RGB-12bit-Full Screen White test pattern and center the image: a. Tap the Test Pattern icon ( ) in the task bar. b. Tap All Test Patterns. c. Tap RGB-12bit-Full Screen White. CP2208 User Manual 020-101916-01 Rev. 1 (06-2015) - Page 32 See Adjust horizontal boresight on page 40 if a large horizontal angular offset to the screen is required. CP2208 User Manual 020-101916-01 Rev. 1 (06-2015)
-
Page 33: Align Dual Projector Images
Move the front or the rear of the top projector to the right or left so the projected image is aligned horizontally with the image of the bottom projector. 8. Align the top and bottom projector images vertically: CP2208 User Manual 020-101916-01 Rev. 1 (06-2015) -
Page 34: Load A Reald 3D Eq Configuration File
1. Insert a USB flash drive with the RealD 3D EQ configuration file into the USB port on the side of the touch panel controller (TPC). 2. Tap Menu > Christie IMB > System. 3. Tap General > Config Files. - Page 35 USB flash drive. See the Christie Integrated Media Block User Manual (P/N: 020-100845- XX). 3. Verify the content plays correctly and the KDM is correct. See the Christie Integrated Media Block User Manual (P/N: 020-100845-XX). 4. Create a play list. A play list is a list of content files including trailers, features, and automated events that play in an order that you define.
-
Page 36: Adjust The Image
Adjust tilt and level the projector on page Correct dual projector horizontal keystone 1. On both projectors, turn the lamp on and open the douser. See Turn the lamp on on page 30 CP2208 User Manual 020-101916-01 Rev. 1 (06-2015) -
Page 37: Correct Dual Projector Vertical Keystone
Turn a test pattern on or off on page 75 4. On the bottom projector, display the DC2K Framing Red test pattern. See Turn a test pattern on or off on page 75 CP2208 User Manual 020-101916-01 Rev. 1 (06-2015) -
Page 38: Correct Vignetting
When adjusting boresight, you must maintain the boresight distance from the lens to the prism plane set by Christie. For example, when you move the top screw outward, turn the bottom two boresight screws to maintain the overall distance. - Page 39 8. When the top and bottom of the image are equally in focus lock the set screw to hold it in position. Recheck the image. 9. If additional adjustment is required, see Adjust horizontal boresight on page 10. Replace the lens surround. CP2208 User Manual 020-101916-01 Rev. 1 (06-2015)
-
Page 40: Adjust Horizontal Boresight
When adjusting boresight, you must maintain the boresight distance from the lens to the prism plane set by Christie. For example, when you move the top screw outward, turn the bottom two boresight screws to maintain the overall distance. -
Page 41: Adjust Dmd Convergence
Normally, the three colors should overlap precisely to form pure white lines throughout the image and one or more poorly converged individual colors may appear adjacent to some or all of the lines. Contact your Christie accredited service technician to correct DMD convergence issues. - Page 42 (D). Set Screw (x2) Cap Screw (x2) 6. Equally turn the set screw (A) and cap screw (B) in opposite directions until the black corner is removed. 7. Replace the top lid. CP2208 User Manual 020-101916-01 Rev. 1 (06-2015)
-
Page 43: Color Calibration
1. Turn the lamp on and allow it to operate for 20 minutes. 2. On the touch pad controller, tap Menu > Administrator Setup > Foot Lamberts Calibration. 3. Complete the Foot Lamberts Calibration wizard. CP2208 User Manual 020-101916-01 Rev. 1 (06-2015) -
Page 44: Access The Projector And Run Diagnostics
This starts the projector, turns the lamp on, and opens the douser. When using the emergency start button, you cannot change channels. The Main screen Use the Main screen of the Touch Panel Controller (TPC) to access power, lamp, douser, channel, and test pattern settings. CP2208 User Manual 020-101916-01 Rev. 1 (06-2015) - Page 45 Turns the lamp on or off. To prevent accidental activation, you must press and hold the on or off buttons. A boot delay occurs if Lamp OFF Lamp ON you select lamp on before pressing power on. CP2208 User Manual 020-101916-01 Rev. 1 (06-2015)
-
Page 46: Log On To The Projector
Tap Menu > Status. The Status window displays information about the status of projector components. The right pane lists projector components and their status. The left pane displays detailed information about individual projector items. CP2208 User Manual 020-101916-01 Rev. 1 (06-2015) -
Page 47: Run The Projector Interrogator
Run the projector interrogator Image disruption can occur if you run the interrogator during a show. To run the Christie IMB interrogator, see the Christie Integrated Media Block User Manual (P/N: 020-100845-XX) The interrogator captures diagnostic information that you can use to assist Christie service personnel diagnose and correct projector issues. -
Page 48: Retrieve System Logs
When an alarm occurs, an Alarms window with a red border appears with a description of the alarm condition, state, and time and date of the alarm. The window only displays alarms you have not CP2208 User Manual 020-101916-01 Rev. 1 (06-2015) -
Page 49: Turn The Projector Off
10 minutes. After this cool down period, the projector enters standby mode. 3. If you are servicing the projector, or removing the protective cover, disconnect AC and turn the breaker OFF. CP2208 User Manual 020-101916-01 Rev. 1 (06-2015) -
Page 50: Manage The Dlp
Run a DLP self test to test the functionality of the Integrated Cinema Processor (ICP) and DLP. 1. Tap Menu > Diagnostics > DLP Management. 2. Tap DLP Self Test. 3. Tap Yes. 4. Tap Clear Results to close the Results pane. CP2208 User Manual 020-101916-01 Rev. 1 (06-2015) -
Page 51: Download An Icp Certificate
Use this procedure to disable the Signature Test. 1. Tap Menu > Diagnostics > DLP Management. 2. Tap Bypass Signature Test. 3. Tap Yes. To re-enable the ICP signature test, clear the Bypass Signature Test check box. CP2208 User Manual 020-101916-01 Rev. 1 (06-2015) -
Page 52: Work With Channels
6. Tap Config 2 in the left pane and then complete these fields: Field Description Measured Color The Measured Color Gamut Data (MCGD) file used to calculate target color processing. CP2208 User Manual 020-101916-01 Rev. 1 (06-2015) - Page 53 Automatically performs scan type detection. This feature is supported Detection for PIBS1 inputs only. Use PCT Applies Christie Pureformity Color Technology (PCT) to the channel. PCT File Identifies the Christie Pureformity Color Technology (PCT) file associated with the channel. 7. Tap 3D Control in the left pane if the channel will be used to display 3D content. Complete...
-
Page 54: Activate A Channel
3. Tap Defaults. 4. Tap Default Current Channel to restore the default settings to the selected channel. - or - Tap Default All Channels to restore the default settings to all channels. 5. Tap OK. CP2208 User Manual 020-101916-01 Rev. 1 (06-2015) -
Page 55: Change The Channel Icon
3. To remove a channel from the Preferred Channels pane, tap and drag a channel from the Selected Channel Buttons (Drag and Drop) pane to the recycle bin in the bottom right corner. CP2208 User Manual 020-101916-01 Rev. 1 (06-2015) -
Page 56: Manage Lamp Information
3. Tap Save As. 4. Enter a name for the lamp file in the Filename field. 5. Tap OK. Modify an existing lamp file 1. Tap Menu > Advanced Setup > Lamp Power/LiteLOC Setup. CP2208 User Manual 020-101916-01 Rev. 1 (06-2015) -
Page 57: Enable Or Disable Liteloc On A Lamp File
1. Tap Menu > Advanced Setup > Lamp Power/LiteLOC Setup. 2. Increase or decrease the Power % value. View lamp information To view information about the lamps previously installed in the projector: Tap Menu > Advanced Setup > Lamp History. CP2208 User Manual 020-101916-01 Rev. 1 (06-2015) -
Page 58: Receive An Alarm When A Lamp Reaches Its Expiry Date
The reason the lamp was changed. Lamp Expiry (Hours) The number of hours the lamp can operate before replacement. Hours Used The number of hours the lamp has operated before installation. 4. Tap Save. CP2208 User Manual 020-101916-01 Rev. 1 (06-2015) -
Page 59: Verify Current Lamp Intensity
Manage Lamp Information Verify current lamp intensity Tap Menu > Advanced Setup > Lamp Power/LiteLOC Setup. The current light intensity value appears in the Intensity field. CP2208 User Manual 020-101916-01 Rev. 1 (06-2015) -
Page 60: Manage Projector Setting Files
1. Tap Menu > Advanced Setup > Source File Setup. 2. Select a source file in the Current Source File list. 3. Modify the Resolution, Offset, or Aspect Ratio values. 4. Tap Save. CP2208 User Manual 020-101916-01 Rev. 1 (06-2015) -
Page 61: Create A Screen File
4. Enter a name for the MCGD file in the Filename field and then tap OK. 5. Tap the option button in the red area of the chromaticity image to display the red test pattern. 6. Measure the red chromaticity with the colorimeter. CP2208 User Manual 020-101916-01 Rev. 1 (06-2015) -
Page 62: Modify A Mcgd File
Select the test pattern that matches the color you are measuring. 11. Tap Save. Modify a TCGD file 1. Tap Menu > Advanced Setup > TCGD File Setup. 2. Select a TCGD file in the Current Target (TCGD) File list. CP2208 User Manual 020-101916-01 Rev. 1 (06-2015) - Page 63 Manage Projector Setting Files 3. Modify the TCGD file settings. 4. Tap Save. CP2208 User Manual 020-101916-01 Rev. 1 (06-2015)
-
Page 64: Work With The Scheduler
11. Tap Save. 12. Tap OK to return to the calendar view. Edit a scheduled event You need Administrator or Service permissions to complete this procedure. 1. Tap Menu > Administrator Setup > Scheduler. CP2208 User Manual 020-101916-01 Rev. 1 (06-2015) -
Page 65: Delete A Scheduled Event
2. Tap Delete All. 3. Tap Yes. Turn the scheduler off You need Administrator or Service permissions to complete this procedure. 1. Tap Administrator Setup > Scheduler. 2. Tap to clear the Enable Scheduler checkbox. CP2208 User Manual 020-101916-01 Rev. 1 (06-2015) -
Page 66: View And Modify Projector Settings
Calibrate Screen Opens the Calibrate window and starts the TPC calibration. IMB Powered in Standby Mode When selected the Christie IMB remains on when the projector enters standby mode. Adjust projector time settings You need Administrator or Service permissions to complete this procedure. -
Page 67: Modify Projector Communication Settings
The baud rate of the serial port. The default is 115200. Enable SNMP Enables SNMP. SNMP V2 / SNMP V3 The SNMP protocol type. Contact Christie for the SNMP V3 user ID and password. Management IP The IP address where SNMP information and notifications are sent. -
Page 68: Access A Network Device
URL field and enter the URL for the network device. 6. Tap Enter. Access a network device Tap Menu > Network Devices > Christie ACT To interact with the device tap in the top right corner of the window. -
Page 69: View Microsoft Windows Explorer
1. Tap Menu > Advanced Setup > Lens Setup. 2. Select a lens type in the Primary Lens list. 3. Tap the Launch Dialog icon and enter the lens serial number. 4. Tap Enter. 5. Tap Save. CP2208 User Manual 020-101916-01 Rev. 1 (06-2015) -
Page 70: Manage User Accounts
Username field and enter the user name. 4. Tap Enter. 5. Repeat steps 3 and 4 for the Password and Confirm Password fields. 6. Select access permissions for the user in the Permissions list. 7. Tap Accept. CP2208 User Manual 020-101916-01 Rev. 1 (06-2015) -
Page 71: Change A User Account Password Or Permissions
You need Administrator or Service permissions to complete this procedure. 1. Tap Menu > Administrator Setup > User Accounts. 2. Tap a user name in the Username list. 3. Tap Delete. 4. Tap Yes. CP2208 User Manual 020-101916-01 Rev. 1 (06-2015) -
Page 72: Backup, Restore, And Upgrade Projector Files
You need Administrator or Service permissions to complete this procedure. 1. Tap Menu > Administrator Setup > Upgrade. 2. Tap an upgrade file in the Available Upgrade Files list. 3. Tap Next. 4. Tap a component in the Component list. CP2208 User Manual 020-101916-01 Rev. 1 (06-2015) -
Page 73: Back Up Projector Settings And Information
You need Service permissions to complete this procedure. You can restore configuration, reference, channel, and user files. 1. Tap Menu > Service Setup > File Management. 2. Select a file type to restore in the Select type list. 3. Tap Reset Defaults. 4. Tap Yes. CP2208 User Manual 020-101916-01 Rev. 1 (06-2015) -
Page 74: Move Files To The Projector
1. Tap Menu > Service Setup > File Maintenance. 2. Select a file type in the File Type list. 3. Tap and drag a file from the Projector Files pane to the trash can icon. 4. Tap Yes. CP2208 User Manual 020-101916-01 Rev. 1 (06-2015) -
Page 75: Test Patterns
) icon in the task bar. 2. Tap All Test Patterns. 3. Double-tap a test pattern in the Preferred Test Patterns pane to turn it on. 4. Tap Full Screen (Ignore screen file settings). CP2208 User Manual 020-101916-01 Rev. 1 (06-2015) -
Page 76: View 3D Content
View 3D Content This section provides information and procedures for setting up and managing 3D presentations. Display requirements To display 3D images with the CP2208 projector, you require these items: • A 3D hardware system: • Pi-Cell polarizer for display on a screen that has a silver polarization-preserving surface for use with passive glasses (RealD). -
Page 77: Hardware Setup
XL box None Wheel Polarizing Mounted mounted in mounted in installed in plates in front Components front of the front of the front of the of lenses projection projection projector lens lens Silver Screen CP2208 User Manual 020-101916-01 Rev. 1 (06-2015) -
Page 78: Configure Dual Projectors For 3D
1. Connect one end of a 50 ohm BNC cable to the Sync Out connector on the master projector and then connect the other end to the Gen Lock connector on the slave projector. 2. On the master projector touch panel controller (TPC), tap Menu > Christie IMB > System > Multi Projector. -
Page 79: Create A High Frame Rate 3D File
LCD shutter glasses, Z screen, or rotating 3D wheel to synchronize the output. See Dark Time and Output Delay Notes below. Values between 0 and 65535 are accepted. Tap the Launch Dialog button to enter the dark time value. CP2208 User Manual 020-101916-01 Rev. 1 (06-2015) -
Page 80: Edit The Default 3D Lamp File
Edit the 3D flat 1998 x 1080 channel 1. Tap Menu > Channel Setup. 2. Select 3D Flat 1998x1080 in the Channel Name list. 3. Tap Config 1 in the left pane and edit these settings: CP2208 User Manual 020-101916-01 Rev. 1 (06-2015) -
Page 81: Edit The 3D Scope 2048 X 858 Channel
Select 3D Onsite in the Measured Color list. If this option is not available, see Define a measured color gamut data file on page 13-80. b. Select DC28_DCIXYZE_314_351 in the Target Color list. c. Select YCxCz Inverse ICT in the Color Space list. CP2208 User Manual 020-101916-01 Rev. 1 (06-2015) -
Page 82: Display 3D Diagnostic Test Patterns
Alternates between two images. Verify 3D cinema content 1. Put on a pair of 3D glasses. 2. Play the 3D content. 3. Verify the left and right eye display correctly. 4. If the image is reversed: CP2208 User Manual 020-101916-01 Rev. 1 (06-2015) -
Page 83: 3D Troubleshooting
No 3D effect 1. Tap Menu > Channel Setup. 2. Select a 3D channel in the Channel Name list. 3. Tap 3D Control in the left pane. 4. Verify Enable 3D is selected. CP2208 User Manual 020-101916-01 Rev. 1 (06-2015) -
Page 84: Ghosting / Cross-Talk
1. Tap Menu > Channel Setup. 2. Select a 3D channel in the Channel Name list. 3. Tap 3D Control in the left pane. 4. Select Left (L1R1 L2R2) in the L/R Display Sequence list. CP2208 User Manual 020-101916-01 Rev. 1 (06-2015) -
Page 85: Maintenance
Always wear latex lab gloves. These are the recommend tools for removing dust or grease: • Soft camel-hair brush • Dust-free blower - filtered dry nitrogen blown through an anti-static nozzle. CP2208 User Manual 020-101916-01 Rev. 1 (06-2015) -
Page 86: Clean The Lens
2. Wrap a lens tissue around a swab and soak it in lens cleaning solution. The tissue should be damp but not dripping. 3. Gently wipe the surface using a figure eight motion. Repeat until the blemish is removed. CP2208 User Manual 020-101916-01 Rev. 1 (06-2015) -
Page 87: Replace The Lamp
Wear authorized protective clothing whenever the lamp door is open and when handling the lamp. Never twist or bend the quartz lamp body. Use the correct wattage lamp supplied by Christie. 3) Ensure those within the vicinity of the projector are also wearing protective safety clothing. 4) Never attempt to remove the lamp when it is hot. - Page 88 Place the lamp, within the case, on the floor where it cannot fall or be bumped. Handle box with extreme caution - the lamp is hazardous even when packaged. Dispose of lamp box according to local area safety regulations. CP2208 User Manual 020-101916-01 Rev. 1 (06-2015)
-
Page 89: Install The New Lamp
1. Remove the tape from the ends of the protective case. 2. Remove the plastic packing material from the lamp. 3. Remove the cathode nut from the lamp before removing it from the case. CP2208 User Manual 020-101916-01 Rev. 1 (06-2015) -
Page 90: Replace The Card Cage Filter
Replace the card cage filter Caution! Failure to comply with the following could result in minor or moderate injury. Use only high efficiency Christie approved filters. Never operate the projector without the filter installed. Always discard used air filters. CP2208 User Manual... -
Page 91: Replace The Light Engine Compartment Filter
Replace the light engine compartment filter 1. Remove the top lid. 2. Reach into the projector and then loosen the first service panel screw. 3. Open the integrator rod access door and loosen the second service panel screw. CP2208 User Manual 020-101916-01 Rev. 1 (06-2015) -
Page 92: Replace The Lens
7. Pull the lens out of the lens mount and then install a small lens cap on the rear of the lens. 8. Remove the small rear cap from the new lens. Keep the front cap on. CP2208 User Manual 020-101916-01 Rev. 1 (06-2015) - Page 93 10. Secure the lens clamp by rotating it clockwise with a hex key. 11. Tighten the lens mount cap screws for added stability. 12. Replace the lens surround. 13. Remove the lens cap from the front of the lens. CP2208 User Manual 020-101916-01 Rev. 1 (06-2015)
-
Page 94: Troubleshooting
This section provides information and procedures for resolving common projector issues. If you are unable to resolve your issue, contact Christie support. In order that a support representative can better assist you, have the model and serial number of your projector ready. For contact information for your region, see the back cover of this document. -
Page 95: Lamp Functionality
Listen for a clicking noise that indicates the ballast is attempting to strike the lamp. If you do not hear a clicking noise, there might be a problem with the ballast. Contact a Christie accredited service technician to resolve the issue. -
Page 96: Blank Screen, No Display Of Cinema Image
Increase the lamp power. Lamps which are near end of service may not operate reliably at a lower power setting. • Fold mirror misalignment. Contact your Christie accredited service technician to resolve the issue. •... -
Page 97: Display Is Noisy
Portions of the display are cut off or warped to the opposite edge If you have resized the image, adjust the resizing settings until the entire image is visible and centered. Inconsistent picture quality Verify the quality of the signal from the input source. CP2208 User Manual 020-101916-01 Rev. 1 (06-2015) -
Page 98: During Playback, Flashes Of Light Appear On The Screen
A license is required to play high frame rate 3D content. To determine if you have a 3D license, tap Christie IMB > System > Licenses. If you have a 3D license, it appears in the licenses list. My hard drive is not detected when I ingest content The file system might be corrupted. -
Page 99: Projector Specifications
Projector Specifications This section provides detailed CP2208 specifications. Due to continuing research, specifications are subject to change without notice. CP2208 User Manual 020-101916-01 Rev. 1 (06-2015) -
Page 100: Display
45 bits total linear, 15 bits per RGB component White point Nominal White (full white, after calibration to Telecine mode, Theatres) x = 0.314 ± 0.006 y = 0.351 ± 0.006 Gamma Theater (nominal) 2.6 ± 5% Control signal compatibility CP2208 User Manual 020-101916-01 Rev. 1 (06-2015) -
Page 101: Ethernet Port
3D sync terminal pin map on page 76 Interface Proprietary 3D connector Connector 15-pin subminiature D, female Bit Rate 1,200 bps Data Format 1 start bit, 8 data bits, 1 stop bit, no parity Communication Protocol RS232 and GPIO CP2208 User Manual 020-101916-01 Rev. 1 (06-2015) -
Page 102: Touch Panel Controller
2700 W maximum Current Rating of AC Input IEC-320-C19/20 A Line Cord Plug Type NEMA 6-20P Below 200VAC, when the lamp is ignited, a 25 A input surge current might occur for three seconds. CP2208 User Manual 020-101916-01 Rev. 1 (06-2015) -
Page 103: Ups Ac Input (B)
1500 hours Projectors typically force a 10 minute cool down period. Ensure you do not re-strike the lamp any sooner than two minutes into this cool down period since hot re-strikes reduce lamp life. CP2208 User Manual 020-101916-01 Rev. 1 (06-2015) -
Page 104: Physical Specifications
(SJ/ T11363-2006), and the applicable product marking requirements (SJ/T11364-2006) Marking This product shall conform to all relevant Chinese standards, safety, health and environmental concerns and bear the following marking at product launch: • CP2208 User Manual 020-101916-01 Rev. 1 (06-2015) -
Page 105: Environment
Zoom Lenses • 1.2 - 1.72.69” DLPCine Zoom Lens (108-458108-01) • 1.33 - 2.1.69” DLPCine Zoom Lens (108-459109-01) • 1.62 - 2.7.69” DLPCine Zoom Lens (108-460101-01) • 2.09 - 3.9.69” DLPCine Zoom Lens (108-461102-01) CP2208 User Manual 020-101916-01 Rev. 1 (06-2015) -
Page 106: Christie Imb Specifications
X'Y'Z' (4:4:4) SMPTE compatible cinema formats - 3D video The hardware configuration of the projector in which the Christie IMB is installed can affect frame rate performance. To support 3D playback the projector must be in line interleave mode. To display 3D content at frame rates above 30.0, you must use a Christie IMB with the high frame rate upgrade... -
Page 107: Supported Audio Formats
Projector Specifications Supported audio formats The Christie IMB supports eight channel pairs of AES/3 digital audio output on a standard D-SUB 25-pin connector. Specification Sample Rate Bit Depth SMPTE 428-2-2006 48.000 kHz 24-bits SMPTE 428-2-2006 96.000 kHz 24-bits AES3 port PIN map... -
Page 108: Nas Requirements
PIN map on page 107. Security policy In accordance with the requirements of Federal Information Processing Standard (FIPS) 140-2, a security policy has been defined and published for the Christie IMB. This security policy identifies CP2208 User Manual 020-101916-01 Rev. 1 (06-2015) - Page 109 A rechargeable battery keeps anti-tamper monitoring active when the Christie IMB is removed from the projector. If the Christie IMB is not installed within a year, the battery can fail and you must return the Christie IMB to Christie Digital. To allow the Christie IMB to remain out of a projector beyond a year, a charging connector allows the battery to be recharged.
- Page 110 Corporate offi ces Worldwide offi ces USA – Cypress Australia Eastern Europe and India Singapore ph: 714-236-8610 ph: +61 (0) 7 3624 4888 Russian Federation ph: +91 (080) 6708 9999 ph: +65 6877-8737 ph: +36 (0) 1 47 48 100 Canada –...
Need help?
Do you have a question about the CP2208 and is the answer not in the manual?
Questions and answers