Table of Contents
Advertisement
Quick Links
Advertisement
Table of Contents

Related Manuals for Christie CP2208-LP


Summary of Contents for Christie CP2208-LP
- Page 1 Ins t allat ion an d Set up M a n u al 020-102152-03 CP2208-LP...
- Page 2 The warranty does not apply to any product where the serial number has been removed or obliterated. The warranty also does not apply to any product sold by a reseller to an end user outside of the country where the reseller is located unless (i) Christie has an office in the country where the end user is located or (ii) the required international warranty fee has been paid.
-
Page 3: Table Of Contents
Adjusting boresight..........24 CP2208-LP Installation and Setup Manual 020-102152-03 Rev. 1 (05-2017) Copyright 2017 Christie Digital Systems USA Inc. All rights reserved. ©... - Page 4 Environmental..........37 CP2208-LP Installation and Setup Manual 020-102152-03 Rev. 1 (05-2017) Copyright 2017 Christie Digital Systems USA Inc. All rights reserved. ©...
-
Page 5: Safety Precautions
Safety precautions Learn about the safety precautions related to the Christie CP2208-LP projector. Product labels Learn about the labels that may be used on the product. Labels on your product may be yellow or black and white. General hazards General hazard. -
Page 6: Mandatory Action
Indicates a light hazard. Do not look directly into the lens. The extreme high brightness can cause permanent eye damage. RG3 IEC 62471-5:2015 Laser labels CLASS 1 LASER PRODUCT IEC 60825-1 CP2208-LP Installation and Setup Manual 020-102152-03 Rev. 1 (05-2017) Copyright 2017 Christie Digital Systems USA Inc. All rights reserved. ©... -
Page 7: Important Safeguards
Always install safety straps when the frame and projector are installed overhead. • Only Christie qualified technicians who are knowledgeable about the hazards associated with laser use, high-voltage, and high temperatures generated by the product are authorized to assemble, install, and service the Christie Laser Projection System. -
Page 8: Ac/Power Precautions
• SHOCK HAZARD! A dedicated, protected ground or earth wire must be installed on the product by Christie qualified technicians or electricians before it can be connected to power. • SHOCK HAZARD! Disconnect the product from AC before moving, servicing, cleaning, removing components, or opening any enclosure. - Page 9 0 to 0.8 lens 1.33-2.1:1, 0.69" DLPCine zoom 108-495109-XX 0 to 1.0 lens 1.62-2.7:1, 0.69" DLPCine zoom 108-496100-XX 0 to 1.3 lens CP2208-LP Installation and Setup Manual 020-102152-03 Rev. 1 (05-2017) Copyright 2017 Christie Digital Systems USA Inc. All rights reserved. ©...
- Page 10 Safety precautions Projection lens Part number Zone A (m) 2.09-3.9:1, 0.69" DLPCine zoom 108-497101-XX 0 to 1.9 lens CP2208-LP Installation and Setup Manual 020-102152-03 Rev. 1 (05-2017) Copyright 2017 Christie Digital Systems USA Inc. All rights reserved. ©...
-
Page 11: Introduction
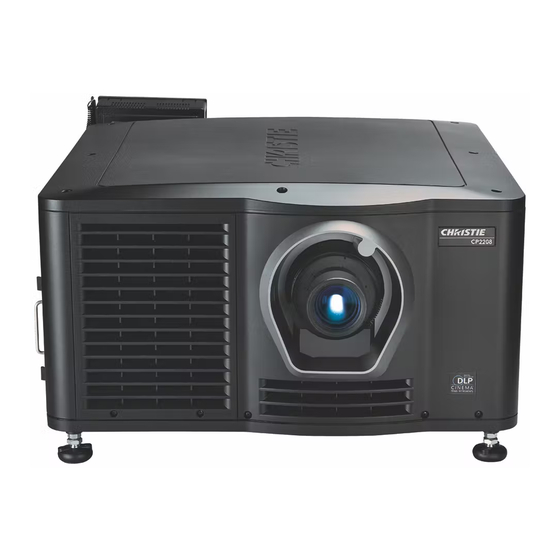
Introduction This manual is intended for professionally trained operators of Christie high-brightness projection systems. This manual provides setup instructions. For all other projector functions, refer to the CP2208-LP User Manual (P/N: 020-102150-XX). Projector components (front) Learn about the components on the front of the projector. -
Page 12: Projector Components (Rear)
Projector components (rear) Learn about the components on the back of the projector. Service access door Power cord and AC receptacle CP2208-LP Installation and Setup Manual 020-102152-03 Rev. 1 (05-2017) Copyright 2017 Christie Digital Systems USA Inc. All rights reserved. ©... -
Page 13: Installing And Setting Up
Before lifting and positioning the projector, refer to the light intensity hazard distance clearance requirements (on page 8). 1. Position each person at the corners of the projector. CP2208-LP Installation and Setup Manual 020-102152-03 Rev. 1 (05-2017) Copyright 2017 Christie Digital Systems USA Inc. All rights reserved. ©... -
Page 14: Adjusting Tilt And Leveling The Projector
1. To adjust the height of the projector, loosen the lock nut on the adjustable feet on the bottom of the projector. 19 mm (0.75 in.) wrench CP2208-LP Installation and Setup Manual 020-102152-03 Rev. 1 (05-2017) Copyright 2017 Christie Digital Systems USA Inc. All rights reserved. ©... -
Page 15: Installing The Touch Panel Controller
2. Slide the mounting bracket into the bracket support. 3. Connect the connector from the touch panel controller to the port on the side of the projector. CP2208-LP Installation and Setup Manual 020-102152-03 Rev. 1 (05-2017) Copyright 2017 Christie Digital Systems USA Inc. All rights reserved. ©... -
Page 16: Installing The Lens
5. Insert the lens straight into the lens mount opening without turning. Magnets inside the lens mount help position the lens. CP2208-LP Installation and Setup Manual 020-102152-03 Rev. 1 (05-2017) Copyright 2017 Christie Digital Systems USA Inc. All rights reserved. ©... - Page 17 6. Insert and tighten the two lens mount hex screws shipped separately with the projector. 7. Lock the lens assembly in place with a hex key. 8. Replace the lens surround. CP2208-LP Installation and Setup Manual 020-102152-03 Rev. 1 (05-2017) Copyright 2017 Christie Digital Systems USA Inc. All rights reserved. ©...
-
Page 18: Connecting Power
• SHOCK HAZARD! A dedicated, protected ground or earth wire must be installed on the product by Christie qualified technicians or electricians before it can be connected to power. • SHOCK HAZARD! Only use the AC power cord provided with the product or recommended by Christie. -
Page 19: Turning The Projector On
1. On the TPC, tap Menu > Login. 2. From the Username list, select a user name. Each user account has set user access permissions. CP2208-LP Installation and Setup Manual 020-102152-03 Rev. 1 (05-2017) Copyright 2017 Christie Digital Systems USA Inc. All rights reserved. ©... -
Page 20: Activating Marriage
4. Tap Finish. 5. Verify that the marriage ring is installed correctly and an anti-tamper alarm does not appear on the TPC. CP2208-LP Installation and Setup Manual 020-102152-03 Rev. 1 (05-2017) Copyright 2017 Christie Digital Systems USA Inc. All rights reserved. ©... -
Page 21: Completing A Full Lens Calibration
2. From the Primary Lens list, select a lens. 3. In the Intelligent Lens System area, tap Full Calibration. 4. Tap Yes. CP2208-LP Installation and Setup Manual 020-102152-03 Rev. 1 (05-2017) Copyright 2017 Christie Digital Systems USA Inc. All rights reserved. ©... -
Page 22: Adjusting The Image
If the image is not focused and centered on the screen, complete one of these procedures: a) If the image appears distorted and resembles a trapezoid, correct the keystone effect (on page 23). CP2208-LP Installation and Setup Manual 020-102152-03 Rev. 1 (05-2017) Copyright 2017 Christie Digital Systems USA Inc. All rights reserved. ©... -
Page 23: Correcting Vignetting
• To correct the vertical tilt of the projector, adjust the back feet up or down (on page 14). CP2208-LP Installation and Setup Manual 020-102152-03 Rev. 1 (05-2017) Copyright 2017 Christie Digital Systems USA Inc. All rights reserved. ©... -
Page 24: Adjusting Boresight
4. Set the lens focus to the middle of its range. 5. Loosen the three set screws (A, B, C). CP2208-LP Installation and Setup Manual 020-102152-03 Rev. 1 (05-2017) Copyright 2017 Christie Digital Systems USA Inc. All rights reserved. ©... - Page 25 8. To focus the position III boresight guide, adjust the top boresight cap screw (F). Turning the screws in small amounts (1/4 to 1/8 of a turn) allows you to make precise adjustments. CP2208-LP Installation and Setup Manual 020-102152-03 Rev. 1 (05-2017) Copyright 2017 Christie Digital Systems USA Inc. All rights reserved. ©...
-
Page 26: Calibrating Screen Brightness (Fl)
The light meter value is an arbitrary unit of measure, not lumens or fL. CP2208-LP Installation and Setup Manual 020-102152-03 Rev. 1 (05-2017) Copyright 2017 Christie Digital Systems USA Inc. All rights reserved. ©... - Page 27 9. On the Light Power/LiteLOC Setup screen, tap Save As. 10. In the Filename field, type a name for the light source file. 11. Tap OK. CP2208-LP Installation and Setup Manual 020-102152-03 Rev. 1 (05-2017) Copyright 2017 Christie Digital Systems USA Inc. All rights reserved. ©...
-
Page 28: Connecting Devices To The Projector And Establishing Communication
Indicates the status of the regulator. A solid blue LED indicates the regulator is enabled. If the LED is not illuminated, the regulator is not enabled. CP2208-LP Installation and Setup Manual 020-102152-03 Rev. 1 (05-2017) Copyright 2017 Christie Digital Systems USA Inc. All rights reserved. ©... - Page 29 You must turn on the light source manually. Connects the projector to 3D devices. Connects the projector to Christie or third-party automation equipment. Connects the projector to a 10Base-T/100Base-TX Ethernet connection. Connects the projector to high-definition cinema sources. The connectors can be used together to deliver Dual Link HD-SDI following the SMPTE 372M standard.
-
Page 30: Connecting The Projector To A Computer
The baud rate of the serial port. The default is 115200. Enable SNMP Enables SNMP. SNMP V2 / SNMP V3 The SNMP protocol type. Contact Christie for the SNMP V3 user ID and password. Management IP The IP address where SNMP information and notifications are sent. -
Page 31: Playing Content
Install an Integrated Media Block (IMB). b) Connect the projector to a network-attached storage (NAS) or direct attached storage (DAS) device. CP2208-LP Installation and Setup Manual 020-102152-03 Rev. 1 (05-2017) Copyright 2017 Christie Digital Systems USA Inc. All rights reserved. ©... -
Page 32: Test Patterns
3. To turn the test pattern on, in the Preferred Test Patterns pane, double-tap the test pattern. 4. Tap Full Screen (Ignore screen file settings). CP2208-LP Installation and Setup Manual 020-102152-03 Rev. 1 (05-2017) Copyright 2017 Christie Digital Systems USA Inc. All rights reserved. ©... -
Page 33: Specifications
10 A maximum (at 200 VAC) Power consumption 2000 W maximum Current rating of AC input IEC-320-C19/16 A of IEC inlet CP2208-LP Installation and Setup Manual 020-102152-03 Rev. 1 (05-2017) Copyright 2017 Christie Digital Systems USA Inc. All rights reserved. ©... -
Page 34: Environmental Specifications
Panel resolution and refresh rate Pixel format (H x V square pixels) 2048 x 1080 Processing path 23.97 - 240Hz CP2208-LP Installation and Setup Manual 020-102152-03 Rev. 1 (05-2017) Copyright 2017 Christie Digital Systems USA Inc. All rights reserved. ©... -
Page 35: Control Signal Compatibility
Hardware (RTS/CTS) Data Format 1 start bit, 8 data bits, 1 stop bit, no parity Communication Protocol Christie Serial Protocol CP2208-LP Installation and Setup Manual 020-102152-03 Rev. 1 (05-2017) Copyright 2017 Christie Digital Systems USA Inc. All rights reserved. ©... -
Page 36: Touch Panel Controller Specifications
1.2-1.72 .69” DLPCine Zoom (108-494108-XX) • 1.33-2.1 .69” DLPCine Zoom (108-495109-XX) • 1.62-2.7 .69” DLPCine Zoom (108-496100-XX) • 2.09-3.9 .69” DLPCine Zoom (108-497101-XX) CP2208-LP Installation and Setup Manual 020-102152-03 Rev. 1 (05-2017) Copyright 2017 Christie Digital Systems USA Inc. All rights reserved. ©... -
Page 37: Regulatory
(01/2016) on the control of pollution caused by electronic information products, hazardous substances concentration limits (GB/T 26572 - 2011), and the applicable product marking requirement (SJ/T 11364 - 2014) CP2208-LP Installation and Setup Manual 020-102152-03 Rev. 1 (05-2017) Copyright 2017 Christie Digital Systems USA Inc. All rights reserved. ©... - Page 38 Corporate offi ces Worldwide offi ces USA – Cypress Australia Eastern Europe and India Singapore ph: 714-236-8610 ph: +61 (0) 7 3624 4888 Russian Federation ph: +91 (080) 6708 9999 ph: +65 6877-8737 ph: +36 (0) 1 47 48 100 Canada –...
Need help?
Do you have a question about the CP2208-LP and is the answer not in the manual?
Questions and answers