Toshiba e-STUDIO520 Service Handbook
Multifunctional digital systems
Hide thumbs
Also See for e-STUDIO520:
- Service manual (466 pages) ,
- User functions manual (202 pages) ,
- Network administration manual (124 pages)

Related Manuals for Toshiba e-STUDIO520


Summary of Contents for Toshiba e-STUDIO520
- Page 1 SERVICE HANDBOOK MULTIFUNCTIONAL DIGITAL SYSTEMS e-STUDIO520/600/720/850 e-STUDIO523/603/723/853 Model: DP-5200/6000/7200/8500 Publish Date: March 2005 File No. SHE040005I0 R04102168901-TTEC Ver09_2007-11...
- Page 2 © 2005 - 2007 TOSHIBA TEC CORPORATION All rights reserved Under the copyright laws, this manual cannot be reproduced in any form without prior written permission of TOSHIBA TEC CORPORATION. No patent liability is assumed, however, with respect to the use of the information contained herein.
- Page 3 GENERAL PRECAUTIONS REGARDING THE SERVICE FOR e-STUDIO520/523/600/603/720/723/850/853 The installation and service should be done by a qualified service technician. 1) Transportation/Installation When transporting/installing the equipment, employ four persons and be sure to move it by the casters while lifting the stoppers.
- Page 4 If these parts are short-circuited and their functions become ineffective, they may result in fatal accidents such as burnout. Do not allow a short-circuit or do not use the parts not recommended by Toshiba TEC Corporation. 4) Cautionary Labels During servicing, be sure to check the rating plate and cautionary labels such as “Unplug the power cable during service”, “CAUTION.
- Page 5 5) Disposal of the Equipment, Supplies, Packing Materials, Used Batteries and IC-RAMs Regarding the recovery and disposal of the equipment, supplies, packing materials, used batter- ies and IC-RAMs including lithium batteries, follow the relevant local regulations or rules. Caution: Dispose of used batteries and IC-RAMs including lithium batteries according to this manual. Attention: Se débarrasser de batteries et IC-RAMs usés y compris les batteries en lithium selon ce manuel.
- Page 7 3.6 Measurement at Replacement of High-Voltage Transformer ..........3-33 3.6.1 Measurement ......................3-33 3.7 Adjustment of the Scanner Section ................... 3-37 3.7.1 Carriages ........................ 3-37 3.7.2 Lens unit ......................... 3-41 3.7.3 Scan motor ......................3-44 © 2005 - 2007 TOSHIBA TEC CORPORATION All rights reserved e-STUDIO520/523/600/603/720/723/850/853 CONTENTS 05/05...
- Page 8 4.8.3 Checking and cleaning of drum cleaning blade and transfer belt cleaning blade... 4-38 4.8.4 Handling of drum cleaning brush and transfer belt cleaning brush ......4-38 4.8.5 Handling of transfer belt ..................4-38 e-STUDIO520/523/600/603/720/723/850/853 © 2005 - 2007 TOSHIBA TEC CORPORATION All rights reserved CONTENTS 05/05...
- Page 9 8.1.3 Setting procedure ..................... 8-5 8.1.4 Order Sheet Format ....................8-13 8.2 Service Notification ......................8-15 8.2.1 Outline ........................8-15 8.2.2 Setting ........................8-15 8.2.3 Items to be notified ....................8-21 © 2005 - 2007 TOSHIBA TEC CORPORATION All rights reserved e-STUDIO520/523/600/603/720/723/850/853 CONTENTS 05/06...
- Page 10 9. DATA CLONING with USB STORAGE DEVICE ............9-1 10. WIRE HARNESS CONNECTION DIAGRAMS ............10-1 10.1 AC Wire Harness ....................... 10-1 10.2 DC Wire Harness....................... Appendix 10.3 Electric Parts Layout....................Appendix e-STUDIO520/523/600/603/720/723/850/853 © 2005 - 2007 TOSHIBA TEC CORPORATION All rights reserved CONTENTS 05/11...
-
Page 11: Wire Harness Connection Diagrams
SPECIFICATIONS/ACCESSORIES/OPTIONS/ SUPPLIES ERROR CODE AND SELF-DIAGNOSTIC MODE ADJUSTMENT PREVENTIVE MAINTENANCE (PM) TROUBLESHOOTING FIRMWARE UPDATING POWER SUPPLY UNIT REMOTE SERVICE DATA CLONING with USB STORAGE DEVICE 10. WIRE HARNESS CONNECTION DIAGRAMS 05/11... -
Page 13: Specifications/Accessories/Options/Supplies
* Tandem LCF: This means 2 drawers and a tandem LCF. In this manual, a standard LCF is called the Tandem LCF (T-LCF), and MP-4004A/L is called the Option LCF (O-LCF). © 2005 - 2007 TOSHIBA TEC CORPORATION All rights reserved e-STUDIO520/523/600/603/720/723/850/853 SPECIFICATIONS/ACCESSORIES/OPTIONS/SUPPLIES... - Page 14 Top side B5-R, LT-R discharging Back side discharging B4, FOLIO, Top side discharging COMPUTER Back side discharging A3, LD Top side discharging Back side discharging e-STUDIO520/523/600/603/720/723/850/853 © 2005 - 2007 TOSHIBA TEC CORPORATION All rights reserved SPECIFICATIONS/ACCESSORIES/OPTIONS/SUPPLIES 1 - 2 07/11...
- Page 15 * Values may vary depending on its use condition and environment. * When the RADF is used, each copy speed per minute of e-STUDIO520/523/600/603/720/723/850/ 853 has reached 52/60/72/85 sheets. These copy speeds can be realized only in the following con- ditions.
- Page 16 B4, FOLIO, Top side discharging COMPUTER Back side discharging A3, LD Top side discharging Back side discharging * Tolerance: Within -0.5 from +1 e-STUDIO520/523/600/603/720/723/850/853 © 2005 - 2007 TOSHIBA TEC CORPORATION All rights reserved SPECIFICATIONS/ACCESSORIES/OPTIONS/SUPPLIES 1 - 4 07/11...
- Page 17 B4, FOLIO, Top side discharging COMPUTER Back side discharging A3, LD Top side discharging Back side discharging * Tolerance: Within -0.5 from +1 © 2005 - 2007 TOSHIBA TEC CORPORATION All rights reserved e-STUDIO520/523/600/603/720/723/850/853 SPECIFICATIONS/ACCESSORIES/OPTIONS/SUPPLIES 1 - 5 07/11...
- Page 18 B4, FOLIO, Top side discharging COMPUTER Back side discharging A3, LD Top side discharging Back side discharging * Tolerance: Within -0.5 from +1 e-STUDIO520/523/600/603/720/723/850/853 © 2005 - 2007 TOSHIBA TEC CORPORATION All rights reserved SPECIFICATIONS/ACCESSORIES/OPTIONS/SUPPLIES 1 - 6 07/11...
- Page 19 Toshiba Tec • First copy time ....e-STUDIO520/523/600/603/720/723: Approx. 4.0 sec. or less e-STUDIO850/853: Approx. 3.5 sec. or less (A4/LT, 1st drawer, 100%, original placed manually, Top side discharge) • Warming-up time ..e-STUDIO520/523: Approx. 130 sec.
- Page 20 • Power consumption ..2.0 kW or less * The electric power is supplied to the options through the equipment. * 1.5 kW or less: TWD version of e-STUDIO520/600/720 only e-STUDIO520/523/600/603/720/723/850/853 © 2005 - 2007 TOSHIBA TEC CORPORATION All rights reserved...
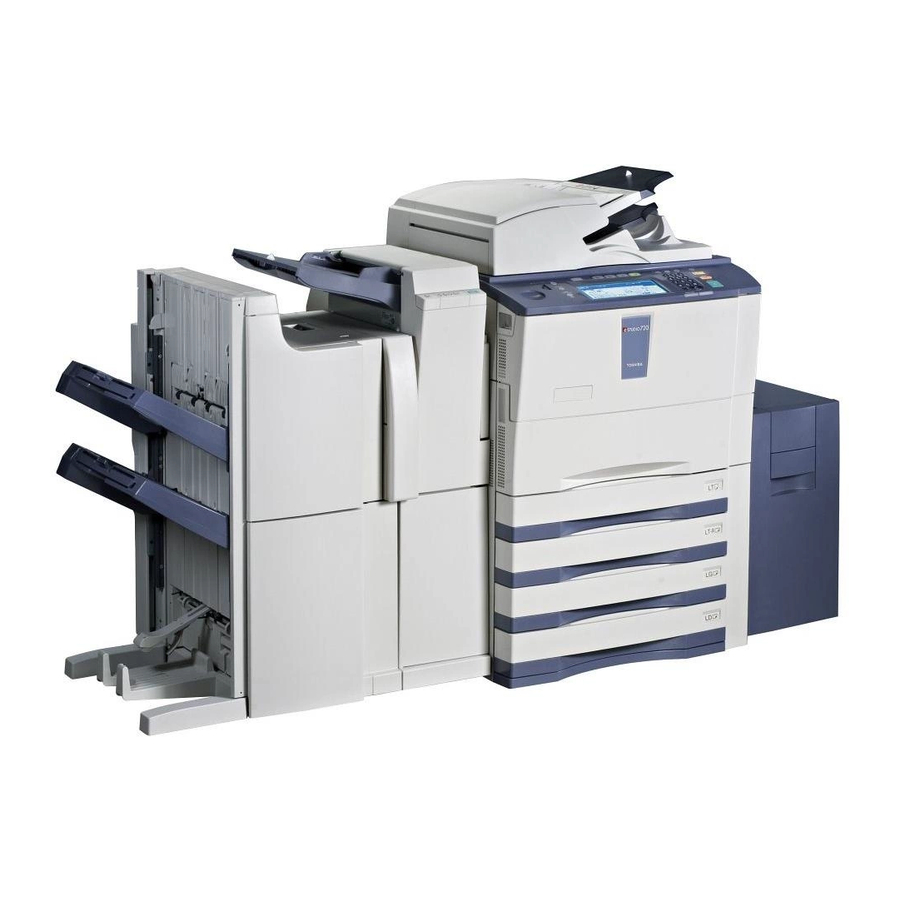
- Page 21 • Dimensions of the equipment ... See the figure below (W 698 x D 789 x H 1213 (mm)) 1213 mm 698 m m 7 89 m m Fig. 1-1 © 2005 - 2007 TOSHIBA TEC CORPORATION All rights reserved e-STUDIO520/523/600/603/720/723/850/853 SPECIFICATIONS/ACCESSORIES/OPTIONS/SUPPLIES 1 - 9...
-
Page 22: Accessories
1 pc. (for ASU, MJD, DMJ, KRD) Approval sheet 1 pc. (for CND) Envelope 1 pc. (for CND) Packing list 1 pc. (for CND) Label 2 pc. (for MJD) e-STUDIO520/523/600/603/720/723/850/853 © 2005 - 2007 TOSHIBA TEC CORPORATION All rights reserved SPECIFICATIONS/ACCESSORIES/OPTIONS/SUPPLIES 1 - 10 06/09... -
Page 23: Options
Memory (GC-1230) is required to be installed. * To enable an XPS file to be printed by the Printer ELK (GM-1110) or Printer/Scanner ELK (GM- 2110), the Memory (GC-1230) is required to be installed. © 2005 - 2007 TOSHIBA TEC CORPORATION All rights reserved e-STUDIO520/523/600/603/720/723/850/853 SPECIFICATIONS/ACCESSORIES/OPTIONS/SUPPLIES... -
Page 24: Supplies
PS-ZT6000 (for TNA, NAD) e-STUDIO523/603/723/853: PS-ZT6000D (for CND) PS-ZT7200 (for TNA, NAD, ARD) PS-ZT7200E (for MJD, DMJ) Toner bag PS-TB6510E (for MJD, DMJ) PS-TB6510 (for other) e-STUDIO520/523/600/603/720/723/850/853 © 2005 - 2007 TOSHIBA TEC CORPORATION All rights reserved SPECIFICATIONS/ACCESSORIES/OPTIONS/SUPPLIES 1 - 12 07/11... -
Page 25: System List
System List Fig. 1-2 © 2005 - 2007 TOSHIBA TEC CORPORATION All rights reserved e-STUDIO520/523/600/603/720/723/850/853 SPECIFICATIONS/ACCESSORIES/OPTIONS/SUPPLIES 1 - 13 07/11... - Page 26 © 2005 - 2007 TOSHIBA TEC CORPORATION All rights reserved SPECIFICATIONS/ACCESSORIES/OPTIONS/SUPPLIES 1 - 14...
-
Page 27: Error Code And Self-Diagnostic Mode
2nd drawer misfeeding (paper not reaching 2nd Ch.5.1.2 drawer feed sensor): Paper does not reach the 2nd drawer feed sensor during the feeding at the 2nd drawer. © 2005 - 2007 TOSHIBA TEC CORPORATION All rights reserved e-STUDIO520/523/600/603/720/723/850/853 ERROR CODE AND SELF-DIAGNOSTIC MODE 2 - 1... - Page 28 Paper which has passed the 1st drawer transport sensor does not reach the regis- tration sensor during the feeding at the Option LCF. e-STUDIO520/523/600/603/720/723/850/853 © 2005 - 2007 TOSHIBA TEC CORPORATION All rights reserved ERROR CODE AND SELF-DIAGNOSTIC MODE 2 - 2...
- Page 29 3rd drawer / Tan- dem LCF transport sensor during the feeding at the 3rd drawer. © 2005 - 2007 TOSHIBA TEC CORPORATION All rights reserved e-STUDIO520/523/600/603/720/723/850/853 ERROR CODE AND SELF-DIAGNOSTIC MODE 2 - 3...
- Page 30 The bypass feed unit cover has opened during printing. E470 Left lower cover (exit cover) open jam: The exit Ch.5.1.3 cover has opened during printing. e-STUDIO520/523/600/603/720/723/850/853 © 2005 - 2007 TOSHIBA TEC CORPORATION All rights reserved ERROR CODE AND SELF-DIAGNOSTIC MODE 2 - 4...
- Page 31 E716 Tray lowering movement time-out: The lifting tray Ch.5.1.4 does not reach the lifting tray lower limit detection sensor. © 2005 - 2007 TOSHIBA TEC CORPORATION All rights reserved e-STUDIO520/523/600/603/720/723/850/853 ERROR CODE AND SELF-DIAGNOSTIC MODE 2 - 5...
- Page 32 The trailing edge of the original does not pass the original intermediate transport sensor after its leading edge has reached the original intermedi- ate transport sensor. e-STUDIO520/523/600/603/720/723/850/853 © 2005 - 2007 TOSHIBA TEC CORPORATION All rights reserved ERROR CODE AND SELF-DIAGNOSTIC MODE 2 - 6...
- Page 33 SYS board and LGC board at the end of the printing. © 2005 - 2007 TOSHIBA TEC CORPORATION All rights reserved e-STUDIO520/523/600/603/720/723/850/853 ERROR CODE AND SELF-DIAGNOSTIC MODE 2 - 7...
- Page 34 Ch.5.1.5 [ 4 ] ECC0 Inserter Unit misfeeding Ch.5.1.5 [ 4 ] ECD0 Inserter Unit door open jam Ch.5.1.5 [ 4 ] e-STUDIO520/523/600/603/720/723/850/853 © 2005 - 2007 TOSHIBA TEC CORPORATION All rights reserved ERROR CODE AND SELF-DIAGNOSTIC MODE 2 - 8...
-
Page 35: Service Call
Transfer belt cam motor abnormality: The transfer belt Ch.5.1.13 cam motor does not run normally when the power is turned ON or the copying is started. © 2005 - 2007 TOSHIBA TEC CORPORATION All rights reserved e-STUDIO520/523/600/603/720/723/850/853 ERROR CODE AND SELF-DIAGNOSTIC MODE 2 - 9... - Page 36 Communication error between Engine-CPU and IPC Ch.5.1.9 board C580 Communication error between IPC board and Finisher Ch.5.1.9 C590 Communication error between Engine-CPU and Laser- Ch.5.1.9 e-STUDIO520/523/600/603/720/723/850/853 © 2005 - 2007 TOSHIBA TEC CORPORATION All rights reserved ERROR CODE AND SELF-DIAGNOSTIC MODE 2 - 10...
- Page 37 [e-STUDIO850] CAF0 Inter-page correction error of primary scanning: Inter- Ch.5.1.11 page primary scanning control does not end normally. [e-STUDIO850] © 2005 - 2007 TOSHIBA TEC CORPORATION All rights reserved e-STUDIO520/523/600/603/720/723/850/853 ERROR CODE AND SELF-DIAGNOSTIC MODE 2 - 11 06/09...
- Page 38 PC board. CC40 Swing motor abnormality: The swing motor does not run Ch.5.1.12 normally or the swing unit does not move normally. e-STUDIO520/523/600/603/720/723/850/853 © 2005 - 2007 TOSHIBA TEC CORPORATION All rights reserved ERROR CODE AND SELF-DIAGNOSTIC MODE 2 - 12...
- Page 39 Ch.5.1.13 F103 HDD data transfer time-out: Data reading or writing is not Ch.5.1.13 executed in a specified period of time. © 2005 - 2007 TOSHIBA TEC CORPORATION All rights reserved e-STUDIO520/523/600/603/720/723/850/853 ERROR CODE AND SELF-DIAGNOSTIC MODE 2 - 13 07/04...
- Page 40 Database abnormality: Databases do not run normally. Ch.5.1.13 F130 Invalid MAC address Ch.5.1.13 F200 Data overwrite kit (GP-1060) is taken off Ch.5.1.13 e-STUDIO520/523/600/603/720/723/850/853 © 2005 - 2007 TOSHIBA TEC CORPORATION All rights reserved ERROR CODE AND SELF-DIAGNOSTIC MODE 2 - 14 05/05...
-
Page 41: Error In Internet Fax / Scanning Function
Internet FAX transmission failure when processing FAX job received Ch.5.1.14 [ 1 ] 1CC0 Job canceling 1CC1 Power failure Ch.5.1.14 [ 1 ] © 2005 - 2007 TOSHIBA TEC CORPORATION All rights reserved e-STUDIO520/523/600/603/720/723/850/853 ERROR CODE AND SELF-DIAGNOSTIC MODE 2 - 15 07/11... - Page 42 Ch.5.1.14 [ 2 ] (RFC: 552) 2553 Mailbox name not allowed Destination mail address error Ch.5.1.14 [ 2 ] (RFC: 553) e-STUDIO520/523/600/603/720/723/850/853 © 2005 - 2007 TOSHIBA TEC CORPORATION All rights reserved ERROR CODE AND SELF-DIAGNOSTIC MODE 2 - 16 07/11...
- Page 43 2BF2 Maximum number of folders has Exceeding maximum number of folders Ch.5.1.14 [ 3 ] been exceeded (list Maximum) © 2005 - 2007 TOSHIBA TEC CORPORATION All rights reserved e-STUDIO520/523/600/603/720/723/850/853 ERROR CODE AND SELF-DIAGNOSTIC MODE 2 - 17 07/11...
- Page 44 Process failure of FAX job received Ch.5.1.14 [ 4 ] 2CC0 Job canceled Job canceling 2CC1 Power failure occurred Power failure Ch.5.1.14 [ 4 ] e-STUDIO520/523/600/603/720/723/850/853 © 2005 - 2007 TOSHIBA TEC CORPORATION All rights reserved ERROR CODE AND SELF-DIAGNOSTIC MODE 2 - 18 07/11...
- Page 45 2DA4 Sent Fax Documents in shared Manual deletion of transmitted FAX doc- folder deleted upon user's uments completed properly. request. © 2005 - 2007 TOSHIBA TEC CORPORATION All rights reserved e-STUDIO520/523/600/603/720/723/850/853 ERROR CODE AND SELF-DIAGNOSTIC MODE 2 - 19 07/11...
- Page 46 (90%). 2DC0 Job canceled Job canceling 2DC1 Power failure occurred Power failure Ch.5.1.14 [ 5 ] e-STUDIO520/523/600/603/720/723/850/853 © 2005 - 2007 TOSHIBA TEC CORPORATION All rights reserved ERROR CODE AND SELF-DIAGNOSTIC MODE 2 - 20 07/11...
- Page 47 Warning of partial mail interruption Ch.5.1.14 [ 6 ] aborted since the partial mail set- ting has been changed to Dis- able. © 2005 - 2007 TOSHIBA TEC CORPORATION All rights reserved e-STUDIO520/523/600/603/720/723/850/853 ERROR CODE AND SELF-DIAGNOSTIC MODE 2 - 21 07/11...
- Page 48 Decode Error has been detected Ch.5.1.14 [ 6 ] in the received mail. This mail could not be transferred to the administrator. e-STUDIO520/523/600/603/720/723/850/853 © 2005 - 2007 TOSHIBA TEC CORPORATION All rights reserved ERROR CODE AND SELF-DIAGNOSTIC MODE 2 - 22...
- Page 49 Offramp Destination Error has Ch.5.1.14 [ 6 ] been detected in the received mail. This mail could not be trans- ferred to the administrator. © 2005 - 2007 TOSHIBA TEC CORPORATION All rights reserved e-STUDIO520/523/600/603/720/723/850/853 ERROR CODE AND SELF-DIAGNOSTIC MODE 2 - 23...
- Page 50 File I/O is recov- 3F20 Ch.5.1.14 [ 6 ] ered. 3F30 Ch.5.1.14 [ 6 ] 3F40 Ch.5.1.14 [ 6 ] e-STUDIO520/523/600/603/720/723/850/853 © 2005 - 2007 TOSHIBA TEC CORPORATION All rights reserved ERROR CODE AND SELF-DIAGNOSTIC MODE 2 - 24...
-
Page 51: Printer Function Error
Limit over error: The number of output pages has exceeded the one speci- Ch.5.1.14 [ 6 ] fied with the department code. © 2005 - 2007 TOSHIBA TEC CORPORATION All rights reserved e-STUDIO520/523/600/603/720/723/850/853 ERROR CODE AND SELF-DIAGNOSTIC MODE 2 - 25... - Page 52 Secondary scanning reproduction ratio (Display in hexadecimal) (Nx256)+(Nx16)+N Mode 0: Unused 1: Unused 2: Black 3: Unused 4: Unused 5: Gray scale e-STUDIO520/523/600/603/720/723/850/853 © 2005 - 2007 TOSHIBA TEC CORPORATION All rights reserved ERROR CODE AND SELF-DIAGNOSTIC MODE 2 - 26...
-
Page 53: Self-Diagnosis Modes
(Press to display the message on the control panel.) Button on touch panel (Press to display the screen on the control panel at power-ON.) © 2005 - 2007 TOSHIBA TEC CORPORATION All rights reserved e-STUDIO520/523/600/603/720/723/850/853 ERROR CODE AND SELF-DIAGNOSTIC MODE... - Page 54 State transition diagram of self-diagnosis modes Fig. 2-1 *1 Turn OFF the power after using the self-diagnosis modes, and leave the equipment to the user. e-STUDIO520/523/600/603/720/723/850/853 © 2005 - 2007 TOSHIBA TEC CORPORATION All rights reserved ERROR CODE AND SELF-DIAGNOSTIC MODE 2 - 28...
-
Page 55: Input Check (Test Mode 03)
Items to be checked and the condition of the equipment when the buttons [A] to [H] are highlighted are listed in the following pages. © 2005 - 2007 TOSHIBA TEC CORPORATION All rights reserved e-STUDIO520/523/600/603/720/723/850/853 ERROR CODE AND SELF-DIAGNOSTIC MODE... - Page 56 LCF bottom sensor Bottom position Other than bottom position LCF empty sensor No paper Paper present LCF tray sensor Tray opened Tray closed e-STUDIO520/523/600/603/720/723/850/853 © 2005 - 2007 TOSHIBA TEC CORPORATION All rights reserved ERROR CODE AND SELF-DIAGNOSTIC MODE 2 - 30...
- Page 57 Not connected Connected Fuser unit switch Connected Not connected Web motor connection signal Not connected Connected Developer unit switch Not connected Connected © 2005 - 2007 TOSHIBA TEC CORPORATION All rights reserved e-STUDIO520/523/600/603/720/723/850/853 ERROR CODE AND SELF-DIAGNOSTIC MODE 2 - 31...
- Page 58 Transfer belt release detection sensor Other than release Release position position Transfer belt contact detection sensor Other than contact Contact position position e-STUDIO520/523/600/603/720/723/850/853 © 2005 - 2007 TOSHIBA TEC CORPORATION All rights reserved ERROR CODE AND SELF-DIAGNOSTIC MODE 2 - 32...
- Page 59 Bit 1 Bit 0 Original tray width sensor Bit 1 Bit 0 Original tray width sensor (lower bits) Bit 1 Bit 0 © 2005 - 2007 TOSHIBA TEC CORPORATION All rights reserved e-STUDIO520/523/600/603/720/723/850/853 ERROR CODE AND SELF-DIAGNOSTIC MODE 2 - 33...
- Page 60 Temperature/humidity sensor (displays humidity Humidity [%RH] inside of the equipment) Drum thermistor (displays drum surface temper- Temperature [°C] ature) e-STUDIO520/523/600/603/720/723/850/853 © 2005 - 2007 TOSHIBA TEC CORPORATION All rights reserved ERROR CODE AND SELF-DIAGNOSTIC MODE 2 - 34...
- Page 61 • It may take some time (2 sec. to 10 sec.) before this check is completed depending on the USB stor- age device. © 2005 - 2007 TOSHIBA TEC CORPORATION All rights reserved e-STUDIO520/523/600/603/720/723/850/853 ERROR CODE AND SELF-DIAGNOSTIC MODE 2 - 35...
-
Page 62: Output Check (Test Mode 03)
[0][3] Test mode Operation Operation OFF/ON (Code) [START] [START] [CLEAR] standby [POWER] (Exit) Procedure 4 [0][3] [POWER] OFF [START] (Code) [POWER] e-STUDIO520/523/600/603/720/723/850/853 © 2005 - 2007 TOSHIBA TEC CORPORATION All rights reserved ERROR CODE AND SELF-DIAGNOSTIC MODE 2 - 36... - Page 63 Transport motor ON (feeding speed) Code No. 134 function OFF Transport motor ON (ADU feeding Code No. 135 function OFF speed) © 2005 - 2007 TOSHIBA TEC CORPORATION All rights reserved e-STUDIO520/523/600/603/720/723/850/853 ERROR CODE AND SELF-DIAGNOSTIC MODE 2 - 37...
- Page 64 Scan motor ON (automatically stops at limit position; speed can be changed with the [ZOOM] button) SLG board cooling fan ON/OFF Exposure lamp ON/OFF Tandem LCF tray-up motor up/down LCF tray motor tray-up e-STUDIO520/523/600/603/720/723/850/853 © 2005 - 2007 TOSHIBA TEC CORPORATION All rights reserved ERROR CODE AND SELF-DIAGNOSTIC MODE 2 - 38...
- Page 65 IH board cooling fan (low speed) ON/OFF Reverse section cooling fan-1 (front side) ON/OFF Reverse section cooling fan-2 (front side) ON/OFF © 2005 - 2007 TOSHIBA TEC CORPORATION All rights reserved e-STUDIO520/523/600/603/720/723/850/853 ERROR CODE AND SELF-DIAGNOSTIC MODE 2 - 39...
-
Page 66: Test Print Mode (Test Mode 04)
Secondary scanning direction 33 gradation steps Gamma adjustment pattern (dither) Secondary scanning direction 33 gradation steps Gamma adjustment check pattern and dither process check pattern e-STUDIO520/523/600/603/720/723/850/853 © 2005 - 2007 TOSHIBA TEC CORPORATION All rights reserved ERROR CODE AND SELF-DIAGNOSTIC MODE 2 - 40... -
Page 67: Adjustment Mode (05)
(Key in a value) (Test copy) Stores value [CLEAR] in RAM (Corrects value) [CLEAR] (Corrects value) *Press [FUNCTION CLEAR] to enter minus (-). © 2005 - 2007 TOSHIBA TEC CORPORATION All rights reserved e-STUDIO520/523/600/603/720/723/850/853 ERROR CODE AND SELF-DIAGNOSTIC MODE 2 - 41... - Page 68 In that case, turn ON the power normally, leave the equipment for approx. 3 minutes after it has become ready state and then start up the adjustment mode again. e-STUDIO520/523/600/603/720/723/850/853 © 2005 - 2007 TOSHIBA TEC CORPORATION All rights reserved ERROR CODE AND SELF-DIAGNOSTIC MODE 2 - 42...
- Page 69 Duplex scanning from the RADF is performed and then duplex printing from the specified drawer is performed. Any number of originals can be used for this test. © 2005 - 2007 TOSHIBA TEC CORPORATION All rights reserved e-STUDIO520/523/600/603/720/723/850/853 ERROR CODE AND SELF-DIAGNOSTIC MODE 2 - 43...
- Page 70 Take off the devel- oper unit to enable this code. (Ch.3.6) e-STUDIO520/523/600/603/720/723/850/853 © 2005 - 2007 TOSHIBA TEC CORPORATION All rights reserved ERROR CODE AND SELF-DIAGNOSTIC MODE 2 - 44 05/05...
- Page 71 253-1 Upper limit The upper limit bit value ment <0-255> of the developer bias control voltage is output. © 2005 - 2007 TOSHIBA TEC CORPORATION All rights reserved e-STUDIO520/523/600/603/720/723/850/853 ERROR CODE AND SELF-DIAGNOSTIC MODE 2 - 45 05/11...
- Page 72 (Low voltage) face potential sensor is displayed. Drum surface potential sensor output <0-999> (Latest value) (High voltage) e-STUDIO520/523/600/603/720/723/850/853 © 2005 - 2007 TOSHIBA TEC CORPORATION All rights reserved ERROR CODE AND SELF-DIAGNOSTIC MODE 2 - 46 07/11...
- Page 73 LED light amount adjust- control adjustment ment (to use the reflec- tion amount from the drum surface as a refer- ence) is displayed. © 2005 - 2007 TOSHIBA TEC CORPORATION All rights reserved e-STUDIO520/523/600/603/720/723/850/853 ERROR CODE AND SELF-DIAGNOSTIC MODE 2 - 47 07/11...
- Page 74 <0-20> increases by “1”, the alignment inal aligning amount increases by approx. for double 0.5 mm. sided orig- <0-20> inal e-STUDIO520/523/600/603/720/723/850/853 © 2005 - 2007 TOSHIBA TEC CORPORATION All rights reserved ERROR CODE AND SELF-DIAGNOSTIC MODE 2 - 48 07/11...
- Page 75 Per- form this adjustment when the RADF board or volume is replaced, or when the code (05-352) is performed. © 2005 - 2007 TOSHIBA TEC CORPORATION All rights reserved e-STUDIO520/523/600/603/720/723/850/853 ERROR CODE AND SELF-DIAGNOSTIC MODE 2 - 49 07/11...
- Page 76 0.4 Tandem start position mm to the trailing edge <0-40> adjustment side of the paper. e-STUDIO520/523/600/603/720/723/850/853 © 2005 - 2007 TOSHIBA TEC CORPORATION All rights reserved ERROR CODE AND SELF-DIAGNOSTIC MODE 2 - 50 07/11...
- Page 77 Duplex feeding <0-40> 446-0 Drive Fine adjust- Normal ment of drum speed <0-255> motor rota- 446-1 Increased tion speed speed <0-255> © 2005 - 2007 TOSHIBA TEC CORPORATION All rights reserved e-STUDIO520/523/600/603/720/723/850/853 ERROR CODE AND SELF-DIAGNOSTIC MODE 2 - 51...
- Page 78 220 mm to 329 mm <0-63> Short size-1: 205 mm to 219 mm Short size-2: 160 mm to 204 mm Postcard: 159 mm or shorter e-STUDIO520/523/600/603/720/723/850/853 © 2005 - 2007 TOSHIBA TEC CORPORATION All rights reserved ERROR CODE AND SELF-DIAGNOSTIC MODE 2 - 52...
- Page 79 205 mm to 219 mm paper) <0-63> Short size-2: 458-4 Postcard 160 mm to 204 mm <0-63> Postcard: 159 mm or shorter © 2005 - 2007 TOSHIBA TEC CORPORATION All rights reserved e-STUDIO520/523/600/603/720/723/850/853 ERROR CODE AND SELF-DIAGNOSTIC MODE 2 - 53...
- Page 80 464-1 Drawer rotation speed feeding <0-255> speed 464-2 ADU feed- ing speed <0-255> 464-3 Option LCF feed- <0-255> ing speed e-STUDIO520/523/600/603/720/723/850/853 © 2005 - 2007 TOSHIBA TEC CORPORATION All rights reserved ERROR CODE AND SELF-DIAGNOSTIC MODE 2 - 54 05/06...
- Page 81 <0-63> tion section 471-2 Short size- (3rd drawer / <0-63> Tandem LCF 471-3 Short size- (Thick paper <0-63> 471-4 Postcard <0-63> © 2005 - 2007 TOSHIBA TEC CORPORATION All rights reserved e-STUDIO520/523/600/603/720/723/850/853 ERROR CODE AND SELF-DIAGNOSTIC MODE 2 - 55...
- Page 82 475-1 Drawer rotation speed feeding <0-255> speed 475-2 ADU feed- ing speed <0-255> 475-3 Option LCF feed- <0-255> ing speed e-STUDIO520/523/600/603/720/723/850/853 © 2005 - 2007 TOSHIBA TEC CORPORATION All rights reserved ERROR CODE AND SELF-DIAGNOSTIC MODE 2 - 56 05/06...
- Page 83 LCD. Drive Fine adjustment of drum motor rotation speed <0-255> © 2005 - 2007 TOSHIBA TEC CORPORATION All rights reserved e-STUDIO520/523/600/603/720/723/850/853 ERROR CODE AND SELF-DIAGNOSTIC MODE 2 - 57 05/06...
- Page 84 498-1 Short size writing start front side by 0.0423 mm. (A4/LT or <0-255> position at smaller) duplex feed- e-STUDIO520/523/600/603/720/723/850/853 © 2005 - 2007 TOSHIBA TEC CORPORATION All rights reserved ERROR CODE AND SELF-DIAGNOSTIC MODE 2 - 58 05/06...
- Page 85 Text/Photo When the value tion/Back- <0-255> increases, the back- ground peak ground becomes more Photo adjustment brightened. <0-255> Text <0-255> © 2005 - 2007 TOSHIBA TEC CORPORATION All rights reserved e-STUDIO520/523/600/603/720/723/850/853 ERROR CODE AND SELF-DIAGNOSTIC MODE 2 - 59 05/06...
- Page 86 Gamma bal- Low den- SYS/ ance adjust- sity <0-255> ment 599-1 Medium SYS/ (PCL/Text) density <0-255> 599-2 High den- SYS/ sity <0-255> e-STUDIO520/523/600/603/720/723/850/853 © 2005 - 2007 TOSHIBA TEC CORPORATION All rights reserved ERROR CODE AND SELF-DIAGNOSTIC MODE 2 - 60...
- Page 87 Upper limit When the value value in toner- <0-255> decreases, the density of saving period the printed text becomes lower. <0-255> © 2005 - 2007 TOSHIBA TEC CORPORATION All rights reserved e-STUDIO520/523/600/603/720/723/850/853 ERROR CODE AND SELF-DIAGNOSTIC MODE 2 - 61...
- Page 88 Fine adjust- the “dark” steps ment of “man- becomes darker. Text/Photo ual density”/ <0-255> Dark step value e-STUDIO520/523/600/603/720/723/850/853 © 2005 - 2007 TOSHIBA TEC CORPORATION All rights reserved ERROR CODE AND SELF-DIAGNOSTIC MODE 2 - 62...
- Page 89 When the value tion/Back- <0-255> increases, the back- ground peak ground becomes more Text adjustment brightened. <0-255> Photo <0-255> Gray scale <0-255> © 2005 - 2007 TOSHIBA TEC CORPORATION All rights reserved e-STUDIO520/523/600/603/720/723/850/853 ERROR CODE AND SELF-DIAGNOSTIC MODE 2 - 63...
- Page 90 <11-99> (Photo) 867-1 300-400 <11-99> 867-2 600 dpi <11-99> 868-0 Image Sharpness 150-200 adjustment <11-99> (Gray scale) 868-1 300-400 <11-99> e-STUDIO520/523/600/603/720/723/850/853 © 2005 - 2007 TOSHIBA TEC CORPORATION All rights reserved ERROR CODE AND SELF-DIAGNOSTIC MODE 2 - 64...
- Page 91 Mode 1 <0-255> increases, the back- Background ground becomes more Custom peak adjust- brightened. Mode 2 <0-255> ment Custom Mode 3 <0-255> © 2005 - 2007 TOSHIBA TEC CORPORATION All rights reserved e-STUDIO520/523/600/603/720/723/850/853 ERROR CODE AND SELF-DIAGNOSTIC MODE 2 - 65...
- Page 92 <0-255> increases, the image Fine adjust- becomes darker. Custom ment of “auto- Mode 2 <0-255> matic density” Custom Mode 3 <0-255> e-STUDIO520/523/600/603/720/723/850/853 © 2005 - 2007 TOSHIBA TEC CORPORATION All rights reserved ERROR CODE AND SELF-DIAGNOSTIC MODE 2 - 66...
- Page 93 2 <0-40> item on each 4566-2 Thick media type paper 3 <0-40> (Tandem LCF) 4566-3 OHP film <0-40> © 2005 - 2007 TOSHIBA TEC CORPORATION All rights reserved e-STUDIO520/523/600/603/720/723/850/853 ERROR CODE AND SELF-DIAGNOSTIC MODE 2 - 67 06/09...
- Page 94 204 mm or shorter adjustment at the registra- 4581-1 Short size tion section <0-63> (Option LCF / Thick paper 1) e-STUDIO520/523/600/603/720/723/850/853 © 2005 - 2007 TOSHIBA TEC CORPORATION All rights reserved ERROR CODE AND SELF-DIAGNOSTIC MODE 2 - 68 06/09...
- Page 95 Thick paper 2) Short size 1 : <0-63> 205 mm to 219 mm Short size 2 : 204 mm or shorter © 2005 - 2007 TOSHIBA TEC CORPORATION All rights reserved e-STUDIO520/523/600/603/720/723/850/853 ERROR CODE AND SELF-DIAGNOSTIC MODE 2 - 69 06/09...
- Page 96 4591-2 Short size (4th drawer / <0-63> Thick paper 3) 4591-3 Short size <0-63> 4591-4 Post card <0-63> e-STUDIO520/523/600/603/720/723/850/853 © 2005 - 2007 TOSHIBA TEC CORPORATION All rights reserved ERROR CODE AND SELF-DIAGNOSTIC MODE 2 - 70 06/09...
- Page 97 Thick paper 3) Short size 1 : <0-63> 205 mm to 219 mm Short size 2 : 204 mm or shorter © 2005 - 2007 TOSHIBA TEC CORPORATION All rights reserved e-STUDIO520/523/600/603/720/723/850/853 ERROR CODE AND SELF-DIAGNOSTIC MODE 2 - 71 06/09...
- Page 98 <0-63> tion section 4597-2 Short size (4th drawer / <0-63> OHP) 4597-3 Short size <0-63> 4597-4 Post card <0-63> e-STUDIO520/523/600/603/720/723/850/853 © 2005 - 2007 TOSHIBA TEC CORPORATION All rights reserved ERROR CODE AND SELF-DIAGNOSTIC MODE 2 - 72 06/09...
- Page 99 Short size 2 : 4599-4 Post card 160 mm to 204 mm <0-63> Post Card : 159 mm tor shorter © 2005 - 2007 TOSHIBA TEC CORPORATION All rights reserved e-STUDIO520/523/600/603/720/723/850/853 ERROR CODE AND SELF-DIAGNOSTIC MODE 2 - 73 06/09...
-
Page 100: Setting Mode (08)
(Stores value Sets or in RAM) changes value [CLEAR] [CLEAR] (Corrects value) (Corrects value) * Press [FUNCTION CLEAR] to enter minus (-). e-STUDIO520/523/600/603/720/723/850/853 © 2005 - 2007 TOSHIBA TEC CORPORATION All rights reserved ERROR CODE AND SELF-DIAGNOSTIC MODE 2 - 74... - Page 101 *1. Press [MONITOR/PAUSE] to enter “-”, when entering telephone number. *2. The data are stored in SYS-RAM in procedure 11 and stored in NIC-RAM in procedure 12. © 2005 - 2007 TOSHIBA TEC CORPORATION All rights reserved e-STUDIO520/523/600/603/720/723/850/853 ERROR CODE AND SELF-DIAGNOSTIC MODE...
- Page 102 [Digital key] [Digital key] [POWER] [START] [START] [POWER] (Code) (Sub-code) OFF/ON [INTERRUPT] (Exit) Adjustment value [CLEAR] cannot be changed (Corrects value) e-STUDIO520/523/600/603/720/723/850/853 © 2005 - 2007 TOSHIBA TEC CORPORATION All rights reserved ERROR CODE AND SELF-DIAGNOSTIC MODE 2 - 76...
- Page 103 6: 3min. 7: 4min. 8: 5min. 9: 7min. 10: 10min. 11: 15min. 12: 20min. 13: 30min. 14: 45min. 15: 60min. © 2005 - 2007 TOSHIBA TEC CORPORATION All rights reserved e-STUDIO520/523/600/603/720/723/850/853 ERROR CODE AND SELF-DIAGNOSTIC MODE 2 - 77 07/05...
- Page 104 <0-300> shift width can be set by (Drawer) increments of 0.1 mm in the Tab Print Mode. e-STUDIO520/523/600/603/720/723/850/853 © 2005 - 2007 TOSHIBA TEC CORPORATION All rights reserved ERROR CODE AND SELF-DIAGNOSTIC MODE 2 - 78 07/04...
- Page 105 Paper size for 4th drawer EUR: A4 Press the button on the feeding UC: LG LCD to select the size. JPN: B4 © 2005 - 2007 TOSHIBA TEC CORPORATION All rights reserved e-STUDIO520/523/600/603/720/723/850/853 ERROR CODE AND SELF-DIAGNOSTIC MODE 2 - 79 07/04...
- Page 106 Paper size (8.5”X8.5”) 216/216 feeding feeding/widthwise direction <182- 432/140- 297> Paper Paper size (Non-standard) 432/279 feeding feeding/widthwise direction <148- 432/105- 297> e-STUDIO520/523/600/603/720/723/850/853 © 2005 - 2007 TOSHIBA TEC CORPORATION All rights reserved ERROR CODE AND SELF-DIAGNOSTIC MODE 2 - 80...
- Page 107 Display/0 clearing <8 digits> registration sensor is Mainte- Error history display Displaying of the latest nance 20 errors data © 2005 - 2007 TOSHIBA TEC CORPORATION All rights reserved e-STUDIO520/523/600/603/720/723/850/853 ERROR CODE AND SELF-DIAGNOSTIC MODE 2 - 81 07/11...
- Page 108 TopAccess, the data being regis- tered is automatically reset. This period is set at this code. (Unit: Minute) e-STUDIO520/523/600/603/720/723/850/853 © 2005 - 2007 TOSHIBA TEC CORPORATION All rights reserved ERROR CODE AND SELF-DIAGNOSTIC MODE 2 - 82 07/04...
- Page 109 Fil- retention period <0-999> period when creating a user box. 0: Not deleted 1 to 999: Retention period (Unit: Day) © 2005 - 2007 TOSHIBA TEC CORPORATION All rights reserved e-STUDIO520/523/600/603/720/723/850/853 ERROR CODE AND SELF-DIAGNOSTIC MODE 2 - 83 06/09...
- Page 110 Default setting of rotation 0: 0 degree interface angle of original <0-3> 1: 90 degrees 2: 180 degrees 3: 270 degrees e-STUDIO520/523/600/603/720/723/850/853 © 2005 - 2007 TOSHIBA TEC CORPORATION All rights reserved ERROR CODE AND SELF-DIAGNOSTIC MODE 2 - 84 05/11...
- Page 111 1: Finisher tray 1 2: Finisher tray 2 3: Not used 4: Not used 5: Not used 6: Exit tray © 2005 - 2007 TOSHIBA TEC CORPORATION All rights reserved e-STUDIO520/523/600/603/720/723/850/853 ERROR CODE AND SELF-DIAGNOSTIC MODE 2 - 85 05/11...
- Page 112 FOLIO large-sized paper (08- 305-7 353). 305-8 305-9 305-10 305-11 COMP 305-12 13”LG 305-13 8.5” x 8.5” 305-14 305-15 305-16 Others e-STUDIO520/523/600/603/720/723/850/853 © 2005 - 2007 TOSHIBA TEC CORPORATION All rights reserved ERROR CODE AND SELF-DIAGNOSTIC MODE 2 - 86...
- Page 113 FOLIO large-sized paper (08- 307-7 353). 307-8 307-9 307-10 307-11 COMP 307-12 13”LG 307-13 8.5” x 8.5” 307-14 307-15 307-16 Others © 2005 - 2007 TOSHIBA TEC CORPORATION All rights reserved e-STUDIO520/523/600/603/720/723/850/853 ERROR CODE AND SELF-DIAGNOSTIC MODE 2 - 87...
- Page 114 FOLIO large-sized paper (08- 312-7 353). 312-8 312-9 312-10 312-11 COMP 312-12 13”LG 312-13 8.5” x 8.5” 312-14 312-15 312-16 Others e-STUDIO520/523/600/603/720/723/850/853 © 2005 - 2007 TOSHIBA TEC CORPORATION All rights reserved ERROR CODE AND SELF-DIAGNOSTIC MODE 2 - 88...
- Page 115 314-6 FOLIO paper (08-353). 314-7 314-8 314-9 314-10 314-11 COMP 314-12 13”LG 314-13 8.5” x 8.5” 314-14 314-15 314-16 Others © 2005 - 2007 TOSHIBA TEC CORPORATION All rights reserved e-STUDIO520/523/600/603/720/723/850/853 ERROR CODE AND SELF-DIAGNOSTIC MODE 2 - 89...
- Page 116 320-2 Counter Total set as large-sized <8 digits> paper Total: Total number out- put pages of all paper sizes. e-STUDIO520/523/600/603/720/723/850/853 © 2005 - 2007 TOSHIBA TEC CORPORATION All rights reserved ERROR CODE AND SELF-DIAGNOSTIC MODE 2 - 90...
- Page 117 323-2 Counter Total paper <8 digits> Total: Total number out- put pages of all paper sizes. © 2005 - 2007 TOSHIBA TEC CORPORATION All rights reserved e-STUDIO520/523/600/603/720/723/850/853 ERROR CODE AND SELF-DIAGNOSTIC MODE 2 - 91...
- Page 118 329-2 Counter Total set as large-sized <8 digits> paper Total: Total number out- put pages of all paper sizes. e-STUDIO520/523/600/603/720/723/850/853 © 2005 - 2007 TOSHIBA TEC CORPORATION All rights reserved ERROR CODE AND SELF-DIAGNOSTIC MODE 2 - 92...
- Page 119 335-1 Counter Small FAX functions. <8 digits> 335-2 Counter Total <8 digits> © 2005 - 2007 TOSHIBA TEC CORPORATION All rights reserved e-STUDIO520/523/600/603/720/723/850/853 ERROR CODE AND SELF-DIAGNOSTIC MODE 2 - 93 07/04...
- Page 120 <8 digits> output pages of duplex printing. Counter Counter for RADF Counts the number of <8 digits> originals fed from RADF e-STUDIO520/523/600/603/720/723/850/853 © 2005 - 2007 TOSHIBA TEC CORPORATION All rights reserved ERROR CODE AND SELF-DIAGNOSTIC MODE 2 - 94...
- Page 121 Counter Number of errors in HDD The number of error is (Printer) <8 digits> reset at HDD format- ting. © 2005 - 2007 TOSHIBA TEC CORPORATION All rights reserved e-STUDIO520/523/600/603/720/723/850/853 ERROR CODE AND SELF-DIAGNOSTIC MODE 2 - 95 07/11...
- Page 122 <Default value> that the cleaning web is contents e-STUDIO600: consumed <8 digits> 500,000 e-STUDIO720: 575,000 e-STUDIO850: 600,000 (Setting value X 1 sheet) e-STUDIO520/523/600/603/720/723/850/853 © 2005 - 2007 TOSHIBA TEC CORPORATION All rights reserved ERROR CODE AND SELF-DIAGNOSTIC MODE 2 - 96...
- Page 123 UC, EUR: 4 e-STUDIO600/603 JPN: 1 UC, EUR: 4 e-STUDIO720/723 JPN: 2 UC, EUR: 4 e-STUDIO850/853 JPN: 2 UC, EUR: 4 © 2005 - 2007 TOSHIBA TEC CORPORATION All rights reserved e-STUDIO520/523/600/603/720/723/850/853 ERROR CODE AND SELF-DIAGNOSTIC MODE 2 - 97 07/11...
- Page 124 4: 160°C 5: 165°C 6: 170°C 7: 175°C 8: 180°C 9: 185°C 10: 190°C 11: 195°C 12: 200°C 13: 205°C 14: 210°C e-STUDIO520/523/600/603/720/723/850/853 © 2005 - 2007 TOSHIBA TEC CORPORATION All rights reserved ERROR CODE AND SELF-DIAGNOSTIC MODE 2 - 98 07/11...
- Page 125 4: 160°C 5: 165°C 6: 170°C 7: 175°C 8: 180°C 9: 185°C 10: 190°C 11: 195°C 12: 200°C 13: 205°C 14: 210°C © 2005 - 2007 TOSHIBA TEC CORPORATION All rights reserved e-STUDIO520/523/600/603/720/723/850/853 ERROR CODE AND SELF-DIAGNOSTIC MODE 2 - 99 07/11...
- Page 126 4: 160°C 5: 165°C 6: 170°C 7: 175°C 8: 180°C 9: 185°C 10: 190°C 11: 195°C 12: 200°C 13: 205°C 14: 210°C e-STUDIO520/523/600/603/720/723/850/853 © 2005 - 2007 TOSHIBA TEC CORPORATION All rights reserved ERROR CODE AND SELF-DIAGNOSTIC MODE 2 - 100...
- Page 127 (the drive counts of the hop- per motor) is corrected. Smaller-Toner supply amount-Larger 3 1 0 7 6 5 4 © 2005 - 2007 TOSHIBA TEC CORPORATION All rights reserved e-STUDIO520/523/600/603/720/723/850/853 ERROR CODE AND SELF-DIAGNOSTIC MODE 2 - 101...
- Page 128 1: 5°C 2: 9°C 3: 10°C 4: 12°C 5: 14°C 6: 15°C 7: 16°C 8: 17°C 9: 18°C 10: 19°C 11: 20°C e-STUDIO520/523/600/603/720/723/850/853 © 2005 - 2007 TOSHIBA TEC CORPORATION All rights reserved ERROR CODE AND SELF-DIAGNOSTIC MODE 2 - 102...
- Page 129 Sets the number of feeding number set- paper <0-5> times of the feeding ting retry from the 1st 463-1 Others (1st drawer) drawer. <0-5> © 2005 - 2007 TOSHIBA TEC CORPORATION All rights reserved e-STUDIO520/523/600/603/720/723/850/853 ERROR CODE AND SELF-DIAGNOSTIC MODE 2 - 103...
- Page 130 0: A4/LT 1:Tandem LCF feeding source <0-6> 2: 1st drawer 3: 2nd drawer 4: 3rd drawer 5: 4th drawer 6: Option LCF e-STUDIO520/523/600/603/720/723/850/853 © 2005 - 2007 TOSHIBA TEC CORPORATION All rights reserved ERROR CODE AND SELF-DIAGNOSTIC MODE 2 - 104...
- Page 131 <0-1> tus of polygonal motor on standby. 0: Rotated (The rota- tional speed is set at 08-489.) 1: Stopped © 2005 - 2007 TOSHIBA TEC CORPORATION All rights reserved e-STUDIO520/523/600/603/720/723/850/853 ERROR CODE AND SELF-DIAGNOSTIC MODE 2 - 105...
- Page 132 0: Error diffusion 1: Dither User Default setting of density 0: Automatic interface adjustment <0-1> 1: Manual (Center) e-STUDIO520/523/600/603/720/723/850/853 © 2005 - 2007 TOSHIBA TEC CORPORATION All rights reserved ERROR CODE AND SELF-DIAGNOSTIC MODE 2 - 106 07/11...
- Page 133 Default setting of RADF 0: Continuous feeding interface mode <0-1> (by pressing the [START] button) 1: Single feeding (by setting original on the tray) © 2005 - 2007 TOSHIBA TEC CORPORATION All rights reserved e-STUDIO520/523/600/603/720/723/850/853 ERROR CODE AND SELF-DIAGNOSTIC MODE 2 - 107...
- Page 134 Department management 0: Invalid interface setting (Printer) <0-1> 1: Valid User Department management 0: Invalid interface setting (Scanner) <0-1> 1: Valid e-STUDIO520/523/600/603/720/723/850/853 © 2005 - 2007 TOSHIBA TEC CORPORATION All rights reserved ERROR CODE AND SELF-DIAGNOSTIC MODE 2 - 108 05/11...
- Page 135 36: -6.0h 37: -6.5h 38: -7.0h 39: -7.5h 40: -8.0h 41: -8.5h 42: -9.0h 43: -9.5h 44: -10.0h 45: -10.5h 46: -11.0h 47: -11.5h © 2005 - 2007 TOSHIBA TEC CORPORATION All rights reserved e-STUDIO520/523/600/603/720/723/850/853 ERROR CODE AND SELF-DIAGNOSTIC MODE 2 - 109...
- Page 136 1: Right page to left page User 2 in 1/4 in 1 page allocating 0: Horizontal interface order setting <0-1> 1: Vertical e-STUDIO520/523/600/603/720/723/850/853 © 2005 - 2007 TOSHIBA TEC CORPORATION All rights reserved ERROR CODE AND SELF-DIAGNOSTIC MODE 2 - 110 07/04...
- Page 137 Filing. General /SHA partition clearing Initializes the shared folder. General System all clearing The system FRAM stor- age area is cleared. © 2005 - 2007 TOSHIBA TEC CORPORATION All rights reserved e-STUDIO520/523/600/603/720/723/850/853 ERROR CODE AND SELF-DIAGNOSTIC MODE 2 - 111...
- Page 138 0: Not displayed 1: Displayed General Banner advertising display Maximum 27 letters (one-byte character) General Banner advertising display Maximum 27 letters (one-byte character) e-STUDIO520/523/600/603/720/723/850/853 © 2005 - 2007 TOSHIBA TEC CORPORATION All rights reserved ERROR CODE AND SELF-DIAGNOSTIC MODE 2 - 112...
- Page 139 Sets when the end of period end <0-59> trial period is notified. 0: On the day it ends 1 to 59: n days before © 2005 - 2007 TOSHIBA TEC CORPORATION All rights reserved e-STUDIO520/523/600/603/720/723/850/853 ERROR CODE AND SELF-DIAGNOSTIC MODE 2 - 113 05/06...
- Page 140 1: Interrupts printing 704-1 Printing / 0: Continues printing BOX print- <0-1> by switching sort setting 1: Interrupts printing e-STUDIO520/523/600/603/720/723/850/853 © 2005 - 2007 TOSHIBA TEC CORPORATION All rights reserved ERROR CODE AND SELF-DIAGNOSTIC MODE 2 - 114...
- Page 141 65535> Mainte- HTTP proxy ID setting Maximum 30 letters nance Mainte- HTTP proxy password set- Maximum 30 letters nance ting © 2005 - 2007 TOSHIBA TEC CORPORATION All rights reserved e-STUDIO520/523/600/603/720/723/850/853 ERROR CODE AND SELF-DIAGNOSTIC MODE 2 - 115 07/04...
- Page 142 Order quantity of toner car- <1-99> (Remote) tridge Mainte- Information about supplies nance Condition number of toner <1-99> (Remote) cartridge e-STUDIO520/523/600/603/720/723/850/853 © 2005 - 2007 TOSHIBA TEC CORPORATION All rights reserved ERROR CODE AND SELF-DIAGNOSTIC MODE 2 - 116 06/09...
- Page 143 (Remote) (Hour/Hour/Minute/Minute) Mainte- Destination E-mail address Maximum 192 letters nance (Remote) Mainte- Destination E-mail address Maximum 192 letters nance (Remote) © 2005 - 2007 TOSHIBA TEC CORPORATION All rights reserved e-STUDIO520/523/600/603/720/723/850/853 ERROR CODE AND SELF-DIAGNOSTIC MODE 2 - 117 07/04...
- Page 144 When the “Forcible end of trial period” is per- formed, “0” is set in the code (08-673) to end up the trial period forcibly. e-STUDIO520/523/600/603/720/723/850/853 © 2005 - 2007 TOSHIBA TEC CORPORATION All rights reserved ERROR CODE AND SELF-DIAGNOSTIC MODE 2 - 118...
- Page 145 <0-255> ter of the paper is cor- rected. <Default value> e-STUDIO520/523: 105 e-STUDIO600/603: 105 e-STUDIO720/723: 105 e-STUDIO850/853: 139 © 2005 - 2007 TOSHIBA TEC CORPORATION All rights reserved e-STUDIO520/523/600/603/720/723/850/853 ERROR CODE AND SELF-DIAGNOSTIC MODE 2 - 119 07/11...
- Page 146 UC, EUR: 10 e-STUDIO600/603 JPN: 6 UC, EUR: 10 e-STUDIO720/723 JPN: 6 UC, EUR: 10 e-STUDIO850/853 JPN: 10 UC, EUR: 10 e-STUDIO520/523/600/603/720/723/850/853 © 2005 - 2007 TOSHIBA TEC CORPORATION All rights reserved ERROR CODE AND SELF-DIAGNOSTIC MODE 2 - 120 07/11...
- Page 147 UC, EUR: 0 e-STUDIO600/603 JPN: 1 UC, EUR: 0 e-STUDIO720/723 JPN: 1 UC, EUR: 0 e-STUDIO850/853 JPN: 0 UC, EUR: 0 © 2005 - 2007 TOSHIBA TEC CORPORATION All rights reserved e-STUDIO520/523/600/603/720/723/850/853 ERROR CODE AND SELF-DIAGNOSTIC MODE 2 - 121...
- Page 148 UC, EUR: 2 e-STUDIO600/603 JPN: 5 UC, EUR: 2 e-STUDIO720/723 JPN: 5 UC, EUR: 2 e-STUDIO850/853 JPN: 2 UC, EUR: 2 e-STUDIO520/523/600/603/720/723/850/853 © 2005 - 2007 TOSHIBA TEC CORPORATION All rights reserved ERROR CODE AND SELF-DIAGNOSTIC MODE 2 - 122 07/11...
- Page 149 Version of UI data in VXXX.XXX X FROM displayed at power- Version Version of UI data lan- VXXX.XXX X guage 7 in HDD © 2005 - 2007 TOSHIBA TEC CORPORATION All rights reserved e-STUDIO520/523/600/603/720/723/850/853 ERROR CODE AND SELF-DIAGNOSTIC MODE 2 - 123 06/09...
- Page 150 0: Pause the job 1: Stop the job e-STUDIO520/523/600/603/720/723/850/853 © 2005 - 2007 TOSHIBA TEC CORPORATION All rights reserved ERROR CODE AND SELF-DIAGNOSTIC MODE 2 - 124...
- Page 151 33: ITC Zapf Dingbats 34: ISO 8859/10 Latin 6 35: PC-775 36: PC-1004 37: Symbol 38: Windows Baltic 39: Wingdings © 2005 - 2007 TOSHIBA TEC CORPORATION All rights reserved e-STUDIO520/523/600/603/720/723/850/853 ERROR CODE AND SELF-DIAGNOSTIC MODE 2 - 125 06/09...
- Page 152 000.000.000.000) 1010 Network Gateway 000.000.000.000- 255.255.255.255 (Default value 000.000.000.000) 1011 Network Availability of IPX 1: Available <1-2> 2: Not available e-STUDIO520/523/600/603/720/723/850/853 © 2005 - 2007 TOSHIBA TEC CORPORATION All rights reserved ERROR CODE AND SELF-DIAGNOSTIC MODE 2 - 126 05/11...
- Page 153 Availability of HTTP server 1: Available <1-2> 2: Not available 1031 Network Port number to NIC HTTP server <1- 65535> © 2005 - 2007 TOSHIBA TEC CORPORATION All rights reserved e-STUDIO520/523/600/603/720/723/850/853 ERROR CODE AND SELF-DIAGNOSTIC MODE 2 - 127 05/11...
- Page 154 Maximum 31 letters 1063 Network MIB function 1: Valid <1-2> 2: Invalid 1065 Network Setting of read Community public Maximum 31 letters e-STUDIO520/523/600/603/720/723/850/853 © 2005 - 2007 TOSHIBA TEC CORPORATION All rights reserved ERROR CODE AND SELF-DIAGNOSTIC MODE 2 - 128 05/11...
- Page 155 1091 Network Printer user password of Maximum 31 letters 1092 Network TCP port number to FTP print server <1- 65535> © 2005 - 2007 TOSHIBA TEC CORPORATION All rights reserved e-STUDIO520/523/600/603/720/723/850/853 ERROR CODE AND SELF-DIAGNOSTIC MODE 2 - 129 06/09...
- Page 156 Link local host name MFP_seri Maximum 127 letters The network - related serial number of the equipment appears at "serial" e-STUDIO520/523/600/603/720/723/850/853 © 2005 - 2007 TOSHIBA TEC CORPORATION All rights reserved ERROR CODE AND SELF-DIAGNOSTIC MODE 2 - 130 05/11...
- Page 157 Controller) name No.1 of authentication 1123 Network Windows domain of device 3: ON authentication <3-4> (Domain selected) 4: OFF (Work group selected) © 2005 - 2007 TOSHIBA TEC CORPORATION All rights reserved e-STUDIO520/523/600/603/720/723/850/853 ERROR CODE AND SELF-DIAGNOSTIC MODE 2 - 131 07/11...
- Page 158 <0-1> can be restricted to the privilege administrator. 0: No restriction 1: Permitted only under administra- tor's privilege e-STUDIO520/523/600/603/720/723/850/853 © 2005 - 2007 TOSHIBA TEC CORPORATION All rights reserved ERROR CODE AND SELF-DIAGNOSTIC MODE 2 - 132...
- Page 159 1376 Counter Counter for toner cartridge The number of the rotation <8 digits> toner cartridge rotation is counted. © 2005 - 2007 TOSHIBA TEC CORPORATION All rights reserved e-STUDIO520/523/600/603/720/723/850/853 ERROR CODE AND SELF-DIAGNOSTIC MODE 2 - 133...
- Page 160 The counter starts process- (OHP film) <8 digits> counting up when the registration sensor is turned ON in the OHP mode. e-STUDIO520/523/600/603/720/723/850/853 © 2005 - 2007 TOSHIBA TEC CORPORATION All rights reserved ERROR CODE AND SELF-DIAGNOSTIC MODE 2 - 134 05/11...
- Page 161 In case "0" is set as a setting value, however, the feeding retry continues regardless of the counter setting value. © 2005 - 2007 TOSHIBA TEC CORPORATION All rights reserved e-STUDIO520/523/600/603/720/723/850/853 ERROR CODE AND SELF-DIAGNOSTIC MODE 2 - 135 06/09...
- Page 162 100-100> than 2 is set for "Back". 1430 User Margin width interface (Bookbinding margin) <2-30> e-STUDIO520/523/600/603/720/723/850/853 © 2005 - 2007 TOSHIBA TEC CORPORATION All rights reserved ERROR CODE AND SELF-DIAGNOSTIC MODE 2 - 136 05/11...
- Page 163 1448 Network IPP administrator pass- This should be the word password of an account which can control all IPP jobs. © 2005 - 2007 TOSHIBA TEC CORPORATION All rights reserved e-STUDIO520/523/600/603/720/723/850/853 ERROR CODE AND SELF-DIAGNOSTIC MODE 2 - 137 06/09...
- Page 164 Display of paper size set- JPN: 0 0: Not displayed interface ting by installation opera- UC: 1 1: Displayed tion of drawers <0-1> e-STUDIO520/523/600/603/720/723/850/853 © 2005 - 2007 TOSHIBA TEC CORPORATION All rights reserved ERROR CODE AND SELF-DIAGNOSTIC MODE 2 - 138 05/11...
- Page 165 1494 General Limitation check method 0: Checked at every <0-1> page printed 1: Checked at every job printed © 2005 - 2007 TOSHIBA TEC CORPORATION All rights reserved e-STUDIO520/523/600/603/720/723/850/853 ERROR CODE AND SELF-DIAGNOSTIC MODE 2 - 139 06/09...
- Page 166 3: 500 is opened during toner car- 4: 1000 5: 1500 tridge replacement 6: 2000 7: No limit i99999999) [Unit: Sheets] e-STUDIO520/523/600/603/720/723/850/853 © 2005 - 2007 TOSHIBA TEC CORPORATION All rights reserved ERROR CODE AND SELF-DIAGNOSTIC MODE 2 - 140 06/09...
- Page 167 FAX printing settings. printing 1535-7 1-UP / (1-UP / Simplex <8 digits> Duplex print- printing ing) © 2005 - 2007 TOSHIBA TEC CORPORATION All rights reserved e-STUDIO520/523/600/603/720/723/850/853 ERROR CODE AND SELF-DIAGNOSTIC MODE 2 - 141 06/09...
- Page 168 This setting is whether Wireless LAN setting <1-3> the wireless LAN con- nection is enabled or disabled. 1: Unset 2: Enabled 3: Disabled e-STUDIO520/523/600/603/720/723/850/853 © 2005 - 2007 TOSHIBA TEC CORPORATION All rights reserved ERROR CODE AND SELF-DIAGNOSTIC MODE 2 - 142 07/11...
- Page 169 MAC Frame size <1-1398> size used in the wire- less LAN connection. The data is fragmented into this size. 1398: 1398 bytes © 2005 - 2007 TOSHIBA TEC CORPORATION All rights reserved e-STUDIO520/523/600/603/720/723/850/853 ERROR CODE AND SELF-DIAGNOSTIC MODE 2 - 143 06/09...
- Page 170 The encryption capabil- Security level <1-3> ity output in TLS clien- tHello message can be selected. 1: LOW 2: MIDDLE 3: HIGH e-STUDIO520/523/600/603/720/723/850/853 © 2005 - 2007 TOSHIBA TEC CORPORATION All rights reserved ERROR CODE AND SELF-DIAGNOSTIC MODE 2 - 144...
- Page 171 1721 Network IP address range for IP fil- IP filter maximum area (Maximum area 1) 000.000.000.000- 255.255.255.255 (Default value: 000.000.000.000) © 2005 - 2007 TOSHIBA TEC CORPORATION All rights reserved e-STUDIO520/523/600/603/720/723/850/853 ERROR CODE AND SELF-DIAGNOSTIC MODE 2 - 145 06/09...
- Page 172 1731 Network IP address range for IP fil- IP filter maximum area (Maximum area 6) 000.000.000.000- 255.255.255.255 (Default value: 000.000.000.000) e-STUDIO520/523/600/603/720/723/850/853 © 2005 - 2007 TOSHIBA TEC CORPORATION All rights reserved ERROR CODE AND SELF-DIAGNOSTIC MODE 2 - 146 06/09...
- Page 173 IPP server OFF/ON setting <1-2> 2: Disabled 1743 Network SSL setting SSL IPP server port IPP server port number <1- number 65535> © 2005 - 2007 TOSHIBA TEC CORPORATION All rights reserved e-STUDIO520/523/600/603/720/723/850/853 ERROR CODE AND SELF-DIAGNOSTIC MODE 2 - 147 06/09...
- Page 174 (44) = Primary and Sec- ondary Wins NAME 1: Enabled 2: Disabled This value is used only when DHCP is enabled. e-STUDIO520/523/600/603/720/723/850/853 © 2005 - 2007 TOSHIBA TEC CORPORATION All rights reserved ERROR CODE AND SELF-DIAGNOSTIC MODE 2 - 148 06/09...
- Page 175 2: Disabled This value is used only when DHCP is enabled. 1768 Network Previous IP address 000.000.000.000- 255.255.255.255 (Default value: 000.000.000.000) © 2005 - 2007 TOSHIBA TEC CORPORATION All rights reserved e-STUDIO520/523/600/603/720/723/850/853 ERROR CODE AND SELF-DIAGNOSTIC MODE 2 - 149 07/04...
- Page 176 IC card 0002: Use the Data Area Address Infor- mation of a noncon- tact IC card e-STUDIO520/523/600/603/720/723/850/853 © 2005 - 2007 TOSHIBA TEC CORPORATION All rights reserved ERROR CODE AND SELF-DIAGNOSTIC MODE 2 - 150 07/04...
- Page 177 * If the 2nd block/area is not used, set the SSTU to "FFFF" (hexadeci- mal number), the bse to"FFF" (hexadecimal number). © 2005 - 2007 TOSHIBA TEC CORPORATION All rights reserved e-STUDIO520/523/600/603/720/723/850/853 ERROR CODE AND SELF-DIAGNOSTIC MODE 2 - 151 07/04...
- Page 178 0: [FileName]-[Data]- [Page] 1: [FileName]-[Page]- [Data] 2: [Data]-[FileName]- [Page] 3: [Data]-[Page]-[File- Name] 4: [Page]-[FileName]- [Data] 5: [Page]-[Data]-[File- Name] 6: [HostName]_[Data]- [Page] e-STUDIO520/523/600/603/720/723/850/853 © 2005 - 2007 TOSHIBA TEC CORPORATION All rights reserved ERROR CODE AND SELF-DIAGNOSTIC MODE 2 - 152 06/09...
- Page 179 1: Disabled control (Contrast voltage) 1810 Image Image quality closed-loop 0: Enabled quality control <0-1> 1: Disabled control (Laser power) © 2005 - 2007 TOSHIBA TEC CORPORATION All rights reserved e-STUDIO520/523/600/603/720/723/850/853 ERROR CODE AND SELF-DIAGNOSTIC MODE 2 - 153 06/09...
- Page 180 Image quality control auto- 0: Enabled quality start setting <0-1> 1: Disabled control (When power is turned ON first in a day) e-STUDIO520/523/600/603/720/723/850/853 © 2005 - 2007 TOSHIBA TEC CORPORATION All rights reserved ERROR CODE AND SELF-DIAGNOSTIC MODE 2 - 154 07/11...
- Page 181 UC, EUR: 6 e-STUDIO600/603 JPN: 5 UC, EUR: 6 e-STUDIO720/723 JPN: 5 UC, EUR: 6 e-STUDIO850/853 JPN: 5 UC, EUR: 6 © 2005 - 2007 TOSHIBA TEC CORPORATION All rights reserved e-STUDIO520/523/600/603/720/723/850/853 ERROR CODE AND SELF-DIAGNOSTIC MODE 2 - 155 07/11...
- Page 182 Green Mark Program <0-1> 1: Enabled 1909 Paper Paper feeding timing cor- Setting value X 10msec feeding rection setting <0-3> e-STUDIO520/523/600/603/720/723/850/853 © 2005 - 2007 TOSHIBA TEC CORPORATION All rights reserved ERROR CODE AND SELF-DIAGNOSTIC MODE 2 - 156 07/11...
- Page 183 ID is <0-2> 1: Execution impossi- not entered ble (pooled in the invalid queue) 2: Forcible deletion © 2005 - 2007 TOSHIBA TEC CORPORATION All rights reserved e-STUDIO520/523/600/603/720/723/850/853 ERROR CODE AND SELF-DIAGNOSTIC MODE 2 - 157 07/04...
- Page 184 2: AZERTY layout 1936 Network AppleTalk Device Name MFP_seri Maximum 32 letters The Network-related serial number of the equipment appears at "Serial". e-STUDIO520/523/600/603/720/723/850/853 © 2005 - 2007 TOSHIBA TEC CORPORATION All rights reserved ERROR CODE AND SELF-DIAGNOSTIC MODE 2 - 158 07/04...
- Page 185 SMB signature for SMB cli- 1: Auto <1-3> 2: Valid 3: Invalid 1952 Network Device name for device Maximum 128 letters authentication © 2005 - 2007 TOSHIBA TEC CORPORATION All rights reserved e-STUDIO520/523/600/603/720/723/850/853 ERROR CODE AND SELF-DIAGNOSTIC MODE 2 - 159 06/09...
- Page 186 Key in the value 10 <30-160> times as the desired font size. (e.g.: Key in "45" for a font size 4.5.) e-STUDIO520/523/600/603/720/723/850/853 © 2005 - 2007 TOSHIBA TEC CORPORATION All rights reserved ERROR CODE AND SELF-DIAGNOSTIC MODE 2 - 160 06/09...
- Page 187 Key in the value 10 <30-160> times as the desired font size. (e.g.: Key in "45" for a font size 4.5.) © 2005 - 2007 TOSHIBA TEC CORPORATION All rights reserved e-STUDIO520/523/600/603/720/723/850/853 ERROR CODE AND SELF-DIAGNOSTIC MODE 2 - 161 07/04...
- Page 188 Windows domain authenti- 1: Auto cation of device/user <1-3> 2: Kerberos authentication 3: NTLMv2 3725 Network IPP max connection <1-16> e-STUDIO520/523/600/603/720/723/850/853 © 2005 - 2007 TOSHIBA TEC CORPORATION All rights reserved ERROR CODE AND SELF-DIAGNOSTIC MODE 2 - 162 07/04...
- Page 189 Secondary DDNS 3748 General Secure DDNS Secondary Login password for Login Password <1-128> login with the Second- ary DDNS © 2005 - 2007 TOSHIBA TEC CORPORATION All rights reserved e-STUDIO520/523/600/603/720/723/850/853 ERROR CODE AND SELF-DIAGNOSTIC MODE 2 - 163 07/04...
- Page 190 DPWS Scan 65535> 3761 Network DPWS Security Discovery 3702 Port number used for Port Number <1- DPWS Security Discov- 65535> e-STUDIO520/523/600/603/720/723/850/853 © 2005 - 2007 TOSHIBA TEC CORPORATION All rights reserved ERROR CODE AND SELF-DIAGNOSTIC MODE 2 - 164 07/11...
- Page 191 1: Enabled 2: Disabled 3775 Network Stateless Address Auto Stateless Address Auto Configuration <1-2> Configuration is switched. 1: Enabled 2: Disabled © 2005 - 2007 TOSHIBA TEC CORPORATION All rights reserved e-STUDIO520/523/600/603/720/723/850/853 ERROR CODE AND SELF-DIAGNOSTIC MODE 2 - 165 07/04...
- Page 192 Print, Scan and Secu- rity related with DPWS. 1: Multi (IPv4 and IPv6) 2: IPv4 e-STUDIO520/523/600/603/720/723/850/853 © 2005 - 2007 TOSHIBA TEC CORPORATION All rights reserved ERROR CODE AND SELF-DIAGNOSTIC MODE 2 - 166 07/11...
- Page 193 When Direct SMTP Direct SMTP communica- <0-1> communication is per- tion formed, an attached image is encrypted. 0: Disabled 1: Enabled © 2005 - 2007 TOSHIBA TEC CORPORATION All rights reserved e-STUDIO520/523/600/603/720/723/850/853 ERROR CODE AND SELF-DIAGNOSTIC MODE 2 - 167 07/11...
- Page 194 Fax/ Internet Fax is switched. 0: High speed/Low image quality 1: Standard 2: Low speed/High image quality e-STUDIO520/523/600/603/720/723/850/853 © 2005 - 2007 TOSHIBA TEC CORPORATION All rights reserved ERROR CODE AND SELF-DIAGNOSTIC MODE 2 - 168 07/04...
- Page 195 Network Mode switching for Role 0: Require eBMUser- Based Access Control <0-1> Role attribute function 1: User available LDAP attribute © 2005 - 2007 TOSHIBA TEC CORPORATION All rights reserved e-STUDIO520/523/600/603/720/723/850/853 ERROR CODE AND SELF-DIAGNOSTIC MODE 2 - 169 07/04...
- Page 196 FAX mistransmission pre- vention functions when setting FAX destina- tions. 0: OFF (Disabled) 1: ON (Enabled) e-STUDIO520/523/600/603/720/723/850/853 © 2005 - 2007 TOSHIBA TEC CORPORATION All rights reserved ERROR CODE AND SELF-DIAGNOSTIC MODE 2 - 170 07/11...
- Page 197 3: March 4: April 5: May 6: June 7: July 8: August 9: September 10: October 11: November 12: December © 2005 - 2007 TOSHIBA TEC CORPORATION All rights reserved e-STUDIO520/523/600/603/720/723/850/853 ERROR CODE AND SELF-DIAGNOSTIC MODE 2 - 171 07/11...
- Page 198 0: Sunday 1: Monday 2: Tuesday 3: Wednesday 4: Thursday 5: Friday 6: Saturday e-STUDIO520/523/600/603/720/723/850/853 © 2005 - 2007 TOSHIBA TEC CORPORATION All rights reserved ERROR CODE AND SELF-DIAGNOSTIC MODE 2 - 172 07/11...
- Page 199 Simplex <8 digits> sheets using [4IN1]. printing 6810-7 1-UP / Counts the number of Simplex <8 digits> output pages. printing © 2005 - 2007 TOSHIBA TEC CORPORATION All rights reserved e-STUDIO520/523/600/603/720/723/850/853 ERROR CODE AND SELF-DIAGNOSTIC MODE 2 - 173 07/11...
- Page 200 STAGE SSL When remote scanning <0-1> is performed, the SSL communication is car- ried out. 0: Disabled 1: Enabled (SSL com- munication) e-STUDIO520/523/600/603/720/723/850/853 © 2005 - 2007 TOSHIBA TEC CORPORATION All rights reserved ERROR CODE AND SELF-DIAGNOSTIC MODE 2 - 174...
- Page 201 Scan to E- mail and Internet Fax is performed, the interval is set. 0 min - 15 min © 2005 - 2007 TOSHIBA TEC CORPORATION All rights reserved e-STUDIO520/523/600/603/720/723/850/853 ERROR CODE AND SELF-DIAGNOSTIC MODE 2 - 175 07/11...
- Page 202 Displaying equipment Equipment information nance information <0-2> stored in NVRAM is dis- played. 0: Unset 1: e-STUDIO520/600/ 720/850 2: e-STUDIO523/603/ 723/853 e-STUDIO520/523/600/603/720/723/850/853 © 2005 - 2007 TOSHIBA TEC CORPORATION All rights reserved ERROR CODE AND SELF-DIAGNOSTIC MODE 2 - 176 07/11...
- Page 203 08-1503 was per- formed. 1518 Pixel Toner cartridge reference Displays the date on counter count started date which 08-1503 was per- formed. © 2005 - 2007 TOSHIBA TEC CORPORATION All rights reserved e-STUDIO520/523/600/603/720/723/850/853 ERROR CODE AND SELF-DIAGNOSTIC MODE 2 - 177...
- Page 204 Displays the average counter (Service technician refer- <0- pixel count in the printer ence) 10000> function and service technician reference. [Unit: 0.01%] e-STUDIO520/523/600/603/720/723/850/853 © 2005 - 2007 TOSHIBA TEC CORPORATION All rights reserved ERROR CODE AND SELF-DIAGNOSTIC MODE 2 - 178 05/06...
- Page 205 Displays the latest pixel counter (Toner cartridge reference) <0- count in the copy func- 10000> tion and toner cartridge reference. [Unit: 0.01%] © 2005 - 2007 TOSHIBA TEC CORPORATION All rights reserved e-STUDIO520/523/600/603/720/723/850/853 ERROR CODE AND SELF-DIAGNOSTIC MODE 2 - 179 05/06...
- Page 206 1651-6 30.1-40% <8 digits> [Unit: page] 1651-7 40.1-60% <8 digits> 1651-8 60.1-80% <8 digits> 1651-9 80.1- <8 digits> 100% e-STUDIO520/523/600/603/720/723/850/853 © 2005 - 2007 TOSHIBA TEC CORPORATION All rights reserved ERROR CODE AND SELF-DIAGNOSTIC MODE 2 - 180 05/06...
- Page 207 When “0” is set at one of sub-codes 0, 3, 6 and 7, the rest of them are automatically updated to “0”. (Exceptions: 08-1228, 08-1252) © 2005 - 2007 TOSHIBA TEC CORPORATION All rights reserved e-STUDIO520/523/600/603/720/723/850/853 ERROR CODE AND SELF-DIAGNOSTIC MODE...
- Page 208 (e-STUDIO520/600/720/850) or (e-STUDIO523/603/723/853)> Sub-codes 0, 2, 3, 5, 6, 7, 8: 0/0/0/0 Sub-code 1: 450,000/500,000/ 575,000/600,000 Sub-code 4: 495,000/495,000/ 495,000/410,000 e-STUDIO520/523/600/603/720/723/850/853 © 2005 - 2007 TOSHIBA TEC CORPORATION All rights reserved ERROR CODE AND SELF-DIAGNOSTIC MODE 2 - 182 07/11...
- Page 209 <Default value of code 1234 brush (e-STUDIO520/600/720/850) or (e-STUDIO523/603/723/853)> Sub-codes 0, 2, 3, 5, 8: 0/0/0/0 Sub-code 1: 450,000/500,000/ 575,000/600,000 Sub-code 4: 495,000/495,000/ 495,000/410,000 © 2005 - 2007 TOSHIBA TEC CORPORATION All rights reserved e-STUDIO520/523/600/603/720/723/850/853 ERROR CODE AND SELF-DIAGNOSTIC MODE 2 - 183 07/11...
- Page 210 1286-0,1,2,8 1287 <Default value of code 1286 (RADF) (e-STUDIO520/600/720/850) or (e-STUDIO523/603/723/853)> Sub-codes 0, 2, 8: 0/0/0/0 Sub-code 1: 50,000/50,000/50,000/ 50,000 e-STUDIO520/523/600/603/720/723/850/853 © 2005 - 2007 TOSHIBA TEC CORPORATION All rights reserved ERROR CODE AND SELF-DIAGNOSTIC MODE 2 - 184 07/11...
- Page 211 1305 <Default value of code 1304 (Tandem LCF) (e-STUDIO520/600/720/850) or (e-STUDIO523/603/723/853)> Sub-codes 0, 2, 8: 0/0/0/0 Sub-code 1: 400,000/400,000/ 400,000/400,000 © 2005 - 2007 TOSHIBA TEC CORPORATION All rights reserved e-STUDIO520/523/600/603/720/723/850/853 ERROR CODE AND SELF-DIAGNOSTIC MODE 2 - 185 07/11...
- Page 212 1325 <Default value of code 1324 (Bypass feed) (e-STUDIO520/600/720/850) or (e-STUDIO523/603/723/853)> Sub-codes 0, 2, 8: 0/0/0/0 Sub-code 1: 100,000/100,000/ 100,000/100,000 e-STUDIO520/523/600/603/720/723/850/853 © 2005 - 2007 TOSHIBA TEC CORPORATION All rights reserved ERROR CODE AND SELF-DIAGNOSTIC MODE 2 - 186 07/11...
- Page 213 (e-STUDIO520/600/720/850) or (e-STUDIO523/603/723/853)> Sub-codes 0, 2, 3, 5, 6, 7, 8: 0/0/0/0 Sub-code 1: 450,000/500,000/ 575,000/600,000 Sub-code 4: 470,000/470,000/ 470,000/390,000 © 2005 - 2007 TOSHIBA TEC CORPORATION All rights reserved e-STUDIO520/523/600/603/720/723/850/853 ERROR CODE AND SELF-DIAGNOSTIC MODE 2 - 187 07/11...
- Page 214 Key in “1” to copy the value of the total counter (LGC board) (A) onto the value of the backup counter (SYS board) (B). Fig. 2-4 e-STUDIO520/523/600/603/720/723/850/853 © 2005 - 2007 TOSHIBA TEC CORPORATION All rights reserved ERROR CODE AND SELF-DIAGNOSTIC MODE 2 - 188 06/09...
- Page 215 Note: Note: The screen returns to the code entry screen without copying (overwriting) the value when the [CANCEL] button is pressed. © 2005 - 2007 TOSHIBA TEC CORPORATION All rights reserved e-STUDIO520/523/600/603/720/723/850/853 ERROR CODE AND SELF-DIAGNOSTIC MODE 2 - 189...
-
Page 216: Pixel Counter
This function enables you to know how each user uses the equipment and to grasp the tendency of toner consumption (number of output pages per cartridge). e-STUDIO520/523/600/603/720/723/850/853 © 2005 - 2007 TOSHIBA TEC CORPORATION All rights reserved ERROR CODE AND SELF-DIAGNOSTIC MODE 2 - 190... - Page 217 /PHOTO Center Original mode Density setting Fig. 2-6 Factors affecting toner consumption and the tendency © 2005 - 2007 TOSHIBA TEC CORPORATION All rights reserved e-STUDIO520/523/600/603/720/723/850/853 ERROR CODE AND SELF-DIAGNOSTIC MODE 2 - 191 06/09...
- Page 218 “1.49” is added to the print count when printing on B4 size. (area ratio to A4: 149%) “1.27” is added to the print count when printing on LG size. (area ratio to LT: 127%) e-STUDIO520/523/600/603/720/723/850/853 © 2005 - 2007 TOSHIBA TEC CORPORATION All rights reserved ERROR CODE AND SELF-DIAGNOSTIC MODE 2 - 192...
- Page 219 The average value of all pixel count data after each reference data is cleared is calculated and displayed. Latest pixel count (%) The value is displayed for printing just before the pixel counter is confirmed. © 2005 - 2007 TOSHIBA TEC CORPORATION All rights reserved e-STUDIO520/523/600/603/720/723/850/853 ERROR CODE AND SELF-DIAGNOSTIC MODE 2 - 193...
- Page 220 08-1502: All information related to the service technician reference pixel count is cleared. 08-1503: All information related to the toner cartridge reference pixel count is cleared. e-STUDIO520/523/600/603/720/723/850/853 © 2005 - 2007 TOSHIBA TEC CORPORATION All rights reserved ERROR CODE AND SELF-DIAGNOSTIC MODE 2 - 194...
- Page 221 Standard number of output pages X/10 6% 12% Pixel count (%) Fig. 2-7 Pixel count and number of output pages per cartridge © 2005 - 2007 TOSHIBA TEC CORPORATION All rights reserved e-STUDIO520/523/600/603/720/723/850/853 ERROR CODE AND SELF-DIAGNOSTIC MODE 2 - 195 06/09...
- Page 222 The following screen is displayed when the service technician reference is selected in the setting mode (08-1505). Fig. 2-9 Information screen of service technician reference e-STUDIO520/523/600/603/720/723/850/853 © 2005 - 2007 TOSHIBA TEC CORPORATION All rights reserved ERROR CODE AND SELF-DIAGNOSTIC MODE 2 - 196...
- Page 223 12345 23456 12345 45678 Latest Pixel Count [%] 20040711 12345 23456 12345 45678 Fig. 2-11 Data list of service technician reference © 2005 - 2007 TOSHIBA TEC CORPORATION All rights reserved e-STUDIO520/523/600/603/720/723/850/853 ERROR CODE AND SELF-DIAGNOSTIC MODE 2 - 197...
- Page 224 4: 20.1 - 25% 5: 25.1 - 30% 6: 30.1 - 40% 7: 40.1 - 60% 8: 60.1- 80% 9: 80.1 - 100% e-STUDIO520/523/600/603/720/723/850/853 © 2005 - 2007 TOSHIBA TEC CORPORATION All rights reserved ERROR CODE AND SELF-DIAGNOSTIC MODE 2 - 198...
- Page 225 The date (08-1502 was performed) is stored. Toner cartridge reference cleared date The toner cartridge reference cleared date is displayed. The date (08-1503 was performed) is stored. © 2005 - 2007 TOSHIBA TEC CORPORATION All rights reserved e-STUDIO520/523/600/603/720/723/850/853 ERROR CODE AND SELF-DIAGNOSTIC MODE 2 - 199...
-
Page 226: Classification List Of Adjustment Mode (05) / Setting Mode (08)
[Distortion] 308 [Reproduction ratio] 340 [Function] 1498, 1926, 3847, 3848, 3849 [Destination] 701 [Default setting] 274, 275 [Priority drawer] 689 e-STUDIO520/523/600/603/720/723/850/853 © 2005 - 2007 TOSHIBA TEC CORPORATION All rights reserved ERROR CODE AND SELF-DIAGNOSTIC MODE 2 - 200 07/11... - Page 227 451-0 to 1, 453-0 to 1, 454-0 to 1, 456-0 to 1, 464-0 to 3, 475-0 to 3, 478-0 to 3, 481, 482, 483, 484, 485, 486, 487, 488, 489, 490, 493 © 2005 - 2007 TOSHIBA TEC CORPORATION All rights reserved e-STUDIO520/523/600/603/720/723/850/853 ERROR CODE AND SELF-DIAGNOSTIC MODE...
- Page 228 [Transporting] 357, 358, 365, 366 [Sensor/EEPROM] 352, 356, 367, 368 Finisher [Binding/Folding position] 468-0 to 2 [Stapling] 704-0 to 1 [Hole punching] 9847 e-STUDIO520/523/600/603/720/723/850/853 © 2005 - 2007 TOSHIBA TEC CORPORATION All rights reserved ERROR CODE AND SELF-DIAGNOSTIC MODE 2 - 202...
- Page 229 1042, 1100, 1101, 1102, 1111, 3741 [SNTP] 1441, 1442, 1444, 1445, 1446, 3740, 3845 [Telnet] 3864, 3865, 3866, 3867, 3868 © 2005 - 2007 TOSHIBA TEC CORPORATION All rights reserved e-STUDIO520/523/600/603/720/723/850/853 ERROR CODE AND SELF-DIAGNOSTIC MODE 2 - 203 07/11...
- Page 230 1673, 1674, 1675, 1676, 1677, 1678 Bluetooth [Data encryption] 1715 [Installation status] 1709 [Setting] 1710, 1711, 1712, 1713, 1714 [Time-out] 1716, 1717 [BIP] 1719, 1941 e-STUDIO520/523/600/603/720/723/850/853 © 2005 - 2007 TOSHIBA TEC CORPORATION All rights reserved ERROR CODE AND SELF-DIAGNOSTIC MODE 2 - 204...
- Page 231 Electronic Fil- [Setting] 267, 270, 950, 976, 985 Data overwrite [FRAM] 1427 [HDD] 1422, 1424, 1426 [SRAM] 1428 [Releasing F200] 633 © 2005 - 2007 TOSHIBA TEC CORPORATION All rights reserved e-STUDIO520/523/600/603/720/723/850/853 ERROR CODE AND SELF-DIAGNOSTIC MODE 2 - 205 07/11...
- Page 232 [KSSM] 1984, 1985, 1986, 1987, 1988, 1989, 1990, 1991, 1992, 1993, 1994 [Remote scanning] 3850, 9828 [Filing box] 9882 [FROM] 9885 e-STUDIO520/523/600/603/720/723/850/853 © 2005 - 2007 TOSHIBA TEC CORPORATION All rights reserved ERROR CODE AND SELF-DIAGNOSTIC MODE 2 - 206 07/11...
-
Page 233: Adjustment
B indicates the output voltage of the auto-toner sensor (2.30 V in the above case). The drum, developer unit, etc. are in operation. • C indicates the latest adjustment value. © 2005 - 2007 TOSHIBA TEC CORPORATION All rights reserved e-STUDIO520/523/600/603/720/723/850/853 ADJUSTMENT 3 - 1... - Page 234 Key in code [290] and press the [START] button. When the message "WAIT" goes off, turn the power OFF by shutdown. Install the toner cartridge. e-STUDIO520/523/600/603/720/723/850/853 © 2005 - 2007 TOSHIBA TEC CORPORATION All rights reserved ADJUSTMENT 3 - 2 05/05...
-
Page 235: Image Dimensional Adjustment
By pressing the [FAX] button, immediately after starting the Adjustment Mode (05), single-sided test copying can be performed (nor- mal copy mode). © 2005 - 2007 TOSHIBA TEC CORPORATION All rights reserved e-STUDIO520/523/600/603/720/723/850/853 ADJUSTMENT... - Page 236 If the test copy does not satisfy the specified values, 100% return to step 1 and COPYING repeat the adjustment procedure. Power OFF/ON : Exit the Adjustment Mode. Fig. 3-6 e-STUDIO520/523/600/603/720/723/850/853 © 2005 - 2007 TOSHIBA TEC CORPORATION All rights reserved ADJUSTMENT 3 - 4...
-
Page 237: Paper Alignment At The Registration Roller
Paper alignment at the registration roller can be adjusted in the following procedure by performing the code 05-480. Select the drawer. Fig. 3-7 Select the paper size. Fig. 3-8 © 2005 - 2007 TOSHIBA TEC CORPORATION All rights reserved e-STUDIO520/523/600/603/720/723/850/853 ADJUSTMENT 3 - 5... - Page 238 Key in the adjustment value. Fig. 3-10 Press the [ENTER] button to finish the adjustment. * Press the [FUNCTION CLEAR] button to return to the previous menu. e-STUDIO520/523/600/603/720/723/850/853 © 2005 - 2007 TOSHIBA TEC CORPORATION All rights reserved ADJUSTMENT 3 - 6...
- Page 239 Short size2: 160-204 mm (6.3-8.0 inches) Post card: 159 mm or shorter (6.2 inches or shorter) 2. The adjustment of “Post card” is for Japan only. © 2005 - 2007 TOSHIBA TEC CORPORATION All rights reserved e-STUDIO520/523/600/603/720/723/850/853 ADJUSTMENT 3 - 7...
- Page 240 * As a tentative countermeasure, the service life of the feed roller can be extended by increas- ing the aligning amount. e-STUDIO520/523/600/603/720/723/850/853 © 2005 - 2007 TOSHIBA TEC CORPORATION All rights reserved ADJUSTMENT 3 - 8...
-
Page 241: Printer Related Adjustment
Refer to “[D] Secondary scanning data laser writing start position” 52 ± 0.5mm Refer to “[E] Primary scanning data laser writing start position at duplexing” © 2005 - 2007 TOSHIBA TEC CORPORATION All rights reserved e-STUDIO520/523/600/603/720/723/850/853 ADJUSTMENT 3 - 9... - Page 242 Press [ENTER] or [INTERRUPT] (Stored in memory). Note: Note: Make sure the first line of the grid pattern is printed out since the line is occasionally vanished. e-STUDIO520/523/600/603/720/723/850/853 © 2005 - 2007 TOSHIBA TEC CORPORATION All rights reserved ADJUSTMENT 3 - 10 07/11...
- Page 243 0 to 40 A4/LT 0 to 40 Bypass feed A3/LD 0 to 40 Duplexing A3/LD 0 to 40 Paper fed from the 2nd/4th drawer 0 to 80 © 2005 - 2007 TOSHIBA TEC CORPORATION All rights reserved e-STUDIO520/523/600/603/720/723/850/853 ADJUSTMENT 3 - 11...
- Page 244 Press [1] ([3] for duplexing) [FAX] (A grid pattern is printed out.) * The larger the adjustment value is, the longer the distance D becomes (approx. 0.4 mm/step). e-STUDIO520/523/600/603/720/723/850/853 © 2005 - 2007 TOSHIBA TEC CORPORATION All rights reserved ADJUSTMENT 3 - 12...
- Page 245 [0] [5] [Power ON] [1] ([3](05-445, 498) for duplex) [FAX] 05-401 (2nd/4th drawer, A3/LD) 200±0.5 mm (e-STUDIO 520/523/600/603/720/723: 0.3 mm/step, e-STUDIO 850/853: 0.1 mm/step) © 2005 - 2007 TOSHIBA TEC CORPORATION All rights reserved e-STUDIO520/523/600/603/720/723/850/853 ADJUSTMENT 3 - 13 07/11...
-
Page 246: Scanner Related Adjustment
Make a copy, compare the result with the original and make an adjustment if the image is distorted. Image distortion Feeding direction Step 1 Feeding direction Step 2 Fig. 3-13 e-STUDIO520/523/600/603/720/723/850/853 © 2005 - 2007 TOSHIBA TEC CORPORATION All rights reserved ADJUSTMENT 3 - 14... - Page 247 • Step 2 In case of C: Tighten the mirror-1 adjustment screw (CW). In case of D: Loosen the mirror-1 adjustment screw (CCW). Fig. 3-15 © 2005 - 2007 TOSHIBA TEC CORPORATION All rights reserved e-STUDIO520/523/600/603/720/723/850/853 ADJUSTMENT 3 - 15...
- Page 248 * The larger the adjustment value is, the higher the reproduction ratio and the longer the dis- tance A become. (e-STUDIO 520/523/600/603/720/723: 0.3 mm/step, e-STUDIO 850/853: 0.1 mm/step) Copied image of the ruler Feeding direction Fig. 3-16 e-STUDIO520/523/600/603/720/723/850/853 © 2005 - 2007 TOSHIBA TEC CORPORATION All rights reserved ADJUSTMENT 3 - 16 07/11...
- Page 249 * The smaller the adjustment value is, the more the image is shifted to the left and the distance B becomes narrower (0.169 mm/step). Copied image of the ruler Feeding direction Fig. 3-17 © 2005 - 2007 TOSHIBA TEC CORPORATION All rights reserved e-STUDIO520/523/600/603/720/723/850/853 ADJUSTMENT 3 - 17...
- Page 250 * The smaller the adjustment value is, the lower the reproduction ratio becomes (0.46 mm/ step). Copied image of the ruler Feeding direction Fig. 3-18 e-STUDIO520/523/600/603/720/723/850/853 © 2005 - 2007 TOSHIBA TEC CORPORATION All rights reserved ADJUSTMENT 3 - 18...
- Page 251 * The larger the adjustment value is, the more the image is shifted to the trailing edge (0.143 mm/step). Copied image of the ruler Feeding direction Fig. 3-19 © 2005 - 2007 TOSHIBA TEC CORPORATION All rights reserved e-STUDIO520/523/600/603/720/723/850/853 ADJUSTMENT 3 - 19...
- Page 252 (“100% A” is displayed.) * The larger the adjustment value is, the wider the blank area becomes (approx. 0.04 mm/ step). Feeding direction Fig. 3-20 e-STUDIO520/523/600/603/720/723/850/853 © 2005 - 2007 TOSHIBA TEC CORPORATION All rights reserved ADJUSTMENT 3 - 20...
- Page 253 (“100% A” is displayed.) * The larger the adjustment value is, the wider the blank area at the right side becomes (approx. 0.04 mm/step). Feeding direction Fig. 3-21 © 2005 - 2007 TOSHIBA TEC CORPORATION All rights reserved e-STUDIO520/523/600/603/720/723/850/853 ADJUSTMENT 3 - 21...
- Page 254 (“100% A” is displayed.) * The larger the adjustment value is, the wider the blank area at the trailing edge becomes (approx. 0.04 mm/step). Feeding direction Fig. 3-22 e-STUDIO520/523/600/603/720/723/850/853 © 2005 - 2007 TOSHIBA TEC CORPORATION All rights reserved ADJUSTMENT 3 - 22...
-
Page 255: Image Quality Adjustment (Copying Function)
Shut down (turn the power OFF), back ON, and then perform the copying job. If the desired image density has not been attained, repeat step (1) to (5). © 2005 - 2007 TOSHIBA TEC CORPORATION All rights reserved e-STUDIO520/523/600/603/720/723/850/853 ADJUSTMENT... -
Page 256: Gamma Slope Adjustment
Make a test copy and compare the image obtained with the current settings; if necessary, make adjust- ment using the following procedure. <Procedure> Procedure is same as that of P.3-23 "3.3.1 Density adjustment". e-STUDIO520/523/600/603/720/723/850/853 © 2005 - 2007 TOSHIBA TEC CORPORATION All rights reserved ADJUSTMENT 3 - 24... -
Page 257: Setting Range Correction
Make a test copy and compare the image obtained with the current settings; if necessary, make adjust- ment using the following procedure. <Procedure> Procedure is same as that of P.3-23 "3.3.1 Density adjustment". © 2005 - 2007 TOSHIBA TEC CORPORATION All rights reserved e-STUDIO520/523/600/603/720/723/850/853 ADJUSTMENT 3 - 25... -
Page 258: Adjustment Of Smudged/Faint Text
Make a test copy and compare the image obtained with the current settings; if necessary, make adjust- ment using the following procedure. <Procedure> Procedure is same as that of P.3-23 "3.3.1 Density adjustment". e-STUDIO520/523/600/603/720/723/850/853 © 2005 - 2007 TOSHIBA TEC CORPORATION All rights reserved ADJUSTMENT 3 - 26... -
Page 259: Image Quality Adjustment (Printing Function)
596-1 597-1 598-1 599-1 Medium density adjusted becomes darker. Acceptable values: 596-2 597-2 598-2 599-2 High density 0 to 255. (Default: 128) © 2005 - 2007 TOSHIBA TEC CORPORATION All rights reserved e-STUDIO520/523/600/603/720/723/850/853 ADJUSTMENT 3 - 27... -
Page 260: Image Density Adjustment
The smaller the value is, the lighter the density of image becomes. Acceptable values: 0 to 255. <Procedure> Procedure is same as that of P.3-27 "3.4.1 Adjustment of smudged/faint text". e-STUDIO520/523/600/603/720/723/850/853 © 2005 - 2007 TOSHIBA TEC CORPORATION All rights reserved ADJUSTMENT 3 - 28... -
Page 261: Image Quality Adjustment (Scanning Function)
Shut down (turn the power OFF), back ON, and then perform the scanning job. If the desired image density has not been attained, repeat step (1) to (5). © 2005 - 2007 TOSHIBA TEC CORPORATION All rights reserved e-STUDIO520/523/600/603/720/723/850/853 ADJUSTMENT... -
Page 262: Sharpness Adjustment
Shut down (turn the power OFF), back ON, and then perform the scanning job. If the desired image density has not been attained, repeat step (1) to (7). e-STUDIO520/523/600/603/720/723/850/853 © 2005 - 2007 TOSHIBA TEC CORPORATION All rights reserved ADJUSTMENT 3 - 30... -
Page 263: Setting Range Correction
Acceptable values: 0 to 255 (Default: text/photo: 40, photo: 16, text: 48, Gray Scale:16) <Procedure> Procedure is same as that of P.3-29 "3.5.1 Density adjustment". © 2005 - 2007 TOSHIBA TEC CORPORATION All rights reserved e-STUDIO520/523/600/603/720/723/850/853 ADJUSTMENT 3 - 31... -
Page 264: Background Adjustment
Item to be Remarks adjusted Text/Photo Photo Text Gray Scale Background 1 to 9: adjustment The larger the value is, the back- ground becomes lighter. e-STUDIO520/523/600/603/720/723/850/853 © 2005 - 2007 TOSHIBA TEC CORPORATION All rights reserved ADJUSTMENT 3 - 32... -
Page 265: Measurement At Replacement Of High-Voltage Transformer
[ 2 ] Installing Jig Put in the door switch jig and slide it down. Rotate the jig counterclockwise by 90 degrees. Door switch jig Fig. 3-23 © 2005 - 2007 TOSHIBA TEC CORPORATION All rights reserved e-STUDIO520/523/600/603/720/723/850/853 ADJUSTMENT 3 - 33 05/04... - Page 266 Fig. 3-24 Connection for developer bias measurement ( + ) : Shaft of the upper developer sleeve (-) : Ground to the machine frame Fig. 3-25 e-STUDIO520/523/600/603/720/723/850/853 © 2005 - 2007 TOSHIBA TEC CORPORATION All rights reserved ADJUSTMENT 3 - 34...
- Page 267 In this case, the image quality can be improved by adjusting the leading edge void width wider. Also, it can be improved by changing the transfer bias ON timing using the setting code 08-841. © 2005 - 2007 TOSHIBA TEC CORPORATION All rights reserved e-STUDIO520/523/600/603/720/723/850/853...
- Page 268 ON timing. Transfer ability Approx. 7.1 mm faster than the Approx. 8.2 mm faster than the improves standard ON timing. standard ON timing. e-STUDIO520/523/600/603/720/723/850/853 © 2005 - 2007 TOSHIBA TEC CORPORATION All rights reserved ADJUSTMENT 3 - 36 07/11...
-
Page 269: Adjustment Of The Scanner Section
Adjustment of the carriage wire tension is not necessary since a certain tension is applied to the car- riage wires by the tension springs. Note: Note: Make sure the tension applied to the wire is normal. © 2005 - 2007 TOSHIBA TEC CORPORATION All rights reserved e-STUDIO520/523/600/603/720/723/850/853 ADJUSTMENT 3 - 37... - Page 270 Make sure that the sections A and B of the carriage-2 touch with the exit side frame. Carriage-1 [ Front ] [ Rear ] Exit side frame Bracket Bracket Fig. 3-30 e-STUDIO520/523/600/603/720/723/850/853 © 2005 - 2007 TOSHIBA TEC CORPORATION All rights reserved ADJUSTMENT 3 - 38...
- Page 271 2 turns 2 turns Ball terminal Ball terminal No space between turns Hook Hook Color: Silver Color: Black [ Rear ] [ Front ] Fig. 3-31 © 2005 - 2007 TOSHIBA TEC CORPORATION All rights reserved e-STUDIO520/523/600/603/720/723/850/853 ADJUSTMENT 3 - 39...
- Page 272 The wire should come out of the slot of the wire holder jig and be passed through between the arm and the jig. Wire holder jig Fig. 3-32 e-STUDIO520/523/600/603/720/723/850/853 © 2005 - 2007 TOSHIBA TEC CORPORATION All rights reserved ADJUSTMENT 3 - 40...
-
Page 273: Lens Unit
When replacing the unit, do not loosen or remove the 10 screws indicated with the arrows. Fig. 3-33 • Handle the unit with care. Do not hold the lens and adjusted part (hold the unit as shown below). Fig. 3-34 © 2005 - 2007 TOSHIBA TEC CORPORATION All rights reserved e-STUDIO520/523/600/603/720/723/850/853 ADJUSTMENT 3 - 41... - Page 274 If each mark on the rulers differs, perform the adjustment with the following procedures. <Procedure> Take off the original glass and lens cover. Loosen 4 screws fixing the lens unit. Screw Screw Lens unit Fig. 3-36 e-STUDIO520/523/600/603/720/723/850/853 © 2005 - 2007 TOSHIBA TEC CORPORATION All rights reserved ADJUSTMENT 3 - 42...
- Page 275 Attach the lens cover and original glass. Make a copy to confirm the reproduction ratio. Repeat the procedure 1 to 5 until the marks on the copied ruler and actual ruler match. © 2005 - 2007 TOSHIBA TEC CORPORATION All rights reserved e-STUDIO520/523/600/603/720/723/850/853...
-
Page 276: Scan Motor
Install the belt tension jig (spring). Loosen 2 screws. Then tighten these screws when the belt is tensed enough. Screw Belt tension jig Scan motor Screw Fig. 3-38 e-STUDIO520/523/600/603/720/723/850/853 © 2005 - 2007 TOSHIBA TEC CORPORATION All rights reserved ADJUSTMENT 3 - 44... -
Page 277: Adjustment Of The Paper Feeding System
3) Tighten the screw. 3) Tighten the screws. ( A ) ( B ) ( B ) ( A ) Fig. 3-41 Fig. 3-42 © 2005 - 2007 TOSHIBA TEC CORPORATION All rights reserved e-STUDIO520/523/600/603/720/723/850/853 ADJUSTMENT 3 - 45 05/04... - Page 278 (In case of No. 5, 6 and 7, place the bracket upside down to install it.) Bracket Protruded distance Max 7 Min 1 Screw Fig. 3-44 e-STUDIO520/523/600/603/720/723/850/853 © 2005 - 2007 TOSHIBA TEC CORPORATION All rights reserved ADJUSTMENT 3 - 46...
-
Page 279: Separation Roller Pressure Force Adjustment
(but the roller life may become shorter). Note: Note: The recommended moving distance of the bracket is within 2 scale marks. Fig. 3-46 © 2005 - 2007 TOSHIBA TEC CORPORATION All rights reserved e-STUDIO520/523/600/603/720/723/850/853 ADJUSTMENT 3 - 47 06/09... - Page 280 Mylar): 7.9±0.2 mm * If the distance C is 7.0 mm or shorter, the Mylar must be replaced. Fig. 3-47 e-STUDIO520/523/600/603/720/723/850/853 © 2005 - 2007 TOSHIBA TEC CORPORATION All rights reserved ADJUSTMENT 3 - 48 06/09...
-
Page 281: Adjustment Of Developer Unit
Adjustment of Developer Unit None of the doctor-sleeve gap, drum sleeve gap and developer sleeve pole position needs to be adjusted. © 2005 - 2007 TOSHIBA TEC CORPORATION All rights reserved e-STUDIO520/523/600/603/720/723/850/853 ADJUSTMENT 3 - 49... -
Page 282: Adjustment Of Fuser Unit
If |F-R| >= 0.5mm, lift up the upper separation finger unit and loosen the fixing screw of the pres- sure spring on the side with the wider nip width. One half turn corresponds to narrowing the nipped section by about 0.5mm. e-STUDIO520/523/600/603/720/723/850/853 © 2005 - 2007 TOSHIBA TEC CORPORATION All rights reserved ADJUSTMENT 3 - 50... - Page 283 If |F-R|<0.5mm, the adjustment is completed. Close the RADF and make five blank copies with A3/LD size to clean the heat and pressure rollers. Upper separation finger unit Fig. 3-49 © 2005 - 2007 TOSHIBA TEC CORPORATION All rights reserved e-STUDIO520/523/600/603/720/723/850/853 ADJUSTMENT 3 - 51...
-
Page 284: Setting Of Fuser/Pressure Roller Temperature
(08-845, 847). To improve the fusing quality, change the setting value to "12" (110°C). Note: Note: The frequency of pre-running is increased when the starting temperature of the pressure roller pre-runningduring ready is increased. e-STUDIO520/523/600/603/720/723/850/853 © 2005 - 2007 TOSHIBA TEC CORPORATION All rights reserved ADJUSTMENT 3 - 52 05/04... -
Page 285: Adjustment Of Fuser Entrance Guide
4 and the adjustment has been made) Fuser entrance guide Fuser entrance guide 4 ( Max 1.7 mm ) 4 ( Min 0.4mm ) Pressure roller Pressure roller Fig. 3-51 © 2005 - 2007 TOSHIBA TEC CORPORATION All rights reserved e-STUDIO520/523/600/603/720/723/850/853 ADJUSTMENT 3 - 53... -
Page 286: High-Fusing Mode
The setting of 08-433 is reflected when "Thick paper 3" is selected. Note: Note: 08-417 of (1) and 08-433 of (2) can be combined. e-STUDIO520/523/600/603/720/723/850/853 © 2005 - 2007 TOSHIBA TEC CORPORATION All rights reserved ADJUSTMENT 3 - 54... -
Page 287: Changing Printing Speed
5 minutes after the warming-up time. 3. When the setting value "2" is selected, the printing speed slows down if the fuser roller tem- perature drops. © 2005 - 2007 TOSHIBA TEC CORPORATION All rights reserved e-STUDIO520/523/600/603/720/723/850/853 ADJUSTMENT... -
Page 288: Adjustment Of The Radf
Remove the platen sheet during adjustment. <Procedure> Open the RADF and remove the positioning pin hole covers. Fig. 3-52 Attach 2 positioning pins to the equipment. Positioning pin Fig. 3-53 e-STUDIO520/523/600/603/720/723/850/853 © 2005 - 2007 TOSHIBA TEC CORPORATION All rights reserved ADJUSTMENT 3 - 56... - Page 289 2 screws: Half turn (status of temporary fixing). Stepped screw: 1 turn Fig. 3-55 Remove the stepped screw at the rear of right-hand hinge. Fig. 3-56 © 2005 - 2007 TOSHIBA TEC CORPORATION All rights reserved e-STUDIO520/523/600/603/720/723/850/853 ADJUSTMENT 3 - 57...
- Page 290 (For the front side, also adjust the RADF position right and left.) Make sure not to dis- locate the positions of the pin and hole at the rear side. Fig. 3-59 e-STUDIO520/523/600/603/720/723/850/853 © 2005 - 2007 TOSHIBA TEC CORPORATION All rights reserved ADJUSTMENT 3 - 58...
- Page 291 Align the platen sheet against the left and rear side of the original glass. Close the RADF slowly. Open the RADF to check that the platen sheet is correctly attached. Fig. 3-62 © 2005 - 2007 TOSHIBA TEC CORPORATION All rights reserved e-STUDIO520/523/600/603/720/723/850/853 ADJUSTMENT 3 - 59...
-
Page 292: Adjustment Of Radf Height
Adjust the height of the hinge by turning the height adjusting screw on the hinge. CW: The height of the hinge becomes high. CCW: The height of the hinge becomes low. Adjustment screw Fig. 3-64 e-STUDIO520/523/600/603/720/723/850/853 © 2005 - 2007 TOSHIBA TEC CORPORATION All rights reserved ADJUSTMENT 3 - 60... -
Page 293: Skew Adjustment
White arrow: feeding direction Paper Original Fig. 3-65 Simplex Duplex (reverse) ( A ) ( A ) ( B ) ( B ) Fig. 3-66 Fig. 3-67 © 2005 - 2007 TOSHIBA TEC CORPORATION All rights reserved e-STUDIO520/523/600/603/720/723/850/853 ADJUSTMENT 3 - 61... - Page 294 When adjusting, refer to the hinge position (scribed line) and be sure not to move it from the hinge position ±0.5 mm or further. Otherwise, image failures such as a jitter may occur. Paper Original Fig. 3-68 Adjustment screw Fig. 3-69 e-STUDIO520/523/600/603/720/723/850/853 © 2005 - 2007 TOSHIBA TEC CORPORATION All rights reserved ADJUSTMENT 3 - 62...
-
Page 295: Automatic Adjustment Of Sensors And Initialization Of Eeprom
Error such as paper jamming or miss detection for paper size may occur if the automatic sensor adjust- ment and the tray width adjustment are not performed after the above mentioned parts were replaced. © 2005 - 2007 TOSHIBA TEC CORPORATION All rights reserved e-STUDIO520/523/600/603/720/723/850/853... -
Page 296: Adjustment Of Reverse Solenoid
Ends faced-up When the large original exit driven roller and large original exit roller are disengaged, tighten and fix the screws. Fig. 3-72 e-STUDIO520/523/600/603/720/723/850/853 © 2005 - 2007 TOSHIBA TEC CORPORATION All rights reserved ADJUSTMENT 3 - 64... - Page 297 When the large original exit flapper is pulled out completely, tighten and fix the screw. Ends faced-up Fig. 3-74 © 2005 - 2007 TOSHIBA TEC CORPORATION All rights reserved e-STUDIO520/523/600/603/720/723/850/853 ADJUSTMENT 3 - 65...
-
Page 298: Adjustment Of Radf Opening/Closing Switch
Adjust the bracket position so that the switch is turned ON when the height A becomes 40-45 mm (within the empty weight falling limit). Glass surface Fig. 3-75 e-STUDIO520/523/600/603/720/723/850/853 © 2005 - 2007 TOSHIBA TEC CORPORATION All rights reserved ADJUSTMENT 3 - 66... -
Page 299: Adjustment Of Original Tray Width
Fig. 3-76 Extend the original guide to the limit. Input the code "368". Press the [START] button. Turn the power OFF by shut down. Fig. 3-77 © 2005 - 2007 TOSHIBA TEC CORPORATION All rights reserved e-STUDIO520/523/600/603/720/723/850/853 ADJUSTMENT 3 - 67... -
Page 300: Adjustment Of Finisher
Shift all bits on SW3 to OFF, and turn OFF the host machine once. This causes the finisher to execute automatic adjustment, in which the tray unit will shift. e-STUDIO520/523/600/603/720/723/850/853 © 2005 - 2007 TOSHIBA TEC CORPORATION All rights reserved ADJUSTMENT 3 - 68... -
Page 301: Adjusting The Alignment Position
Press SW1 and SW2 simultaneously to store the adjustment value (this will lower the swinging guide). Shift all bits of SW3 OFF, and install the rear cover of the finisher unit. © 2005 - 2007 TOSHIBA TEC CORPORATION All rights reserved e-STUDIO520/523/600/603/720/723/850/853 ADJUSTMENT... -
Page 302: Adjusting The Staple Position (Stapler Movement Range)
If the stapling position is correct, set all bits on SW3 to OFF to end the adjustments. If you need to change the stapling position,on the other hand, go to the next step. e-STUDIO520/523/600/603/720/723/850/853 © 2005 - 2007 TOSHIBA TEC CORPORATION All rights reserved ADJUSTMENT 3 - 70... - Page 303 The settings held by the finisher controller PCB are changed as soon as SW1 or SW2 is pressed. As such, to recover the previous settings after the press, you must press the other of the two switches as many times as you pressed previously. © 2005 - 2007 TOSHIBA TEC CORPORATION All rights reserved e-STUDIO520/523/600/603/720/723/850/853 ADJUSTMENT...
-
Page 304: Adjusting The Buffer Roller Winding Amount
Remove the stack of sheets from the finisher delivery taking care to prevent the offset of the out- put sheets from changing. e-STUDIO520/523/600/603/720/723/850/853 © 2005 - 2007 TOSHIBA TEC CORPORATION All rights reserved ADJUSTMENT 3 - 72... - Page 305 The adjustment width is 0.72mm for each N=1. (10) Turn the host machine OFF, and then set SW3 on the finisher controller PCB as indicated. Fig. 3-87 © 2005 - 2007 TOSHIBA TEC CORPORATION All rights reserved e-STUDIO520/523/600/603/720/723/850/853 ADJUSTMENT 3 - 73...
- Page 306 (12) Repeat steps 1) though 6) twice. Check that the winding amount is within the standard in both times. (13) Turn the host machine OFF, and set all bits of SW3 to OFF. This completes the adjustment. e-STUDIO520/523/600/603/720/723/850/853 © 2005 - 2007 TOSHIBA TEC CORPORATION All rights reserved ADJUSTMENT 3 - 74...
-
Page 307: Adjustment Of Saddle Stitch Finisher
Before inserting the paper, mark the top of the paper (you will be using two sheets of A3 or LD paper). Mark A3/LD paper Insert direction Fig. 3-90 © 2005 - 2007 TOSHIBA TEC CORPORATION All rights reserved e-STUDIO520/523/600/603/720/723/850/853 ADJUSTMENT 3 - 75... - Page 308 Close the inlet door while holding it down with your hand. Press SW2 on the saddle stitcher controller PCB. • The saddle stitcher unit will "stitch" the sheets, and fold and deliver the stack automatically. e-STUDIO520/523/600/603/720/723/850/853 © 2005 - 2007 TOSHIBA TEC CORPORATION All rights reserved ADJUSTMENT 3 - 76...
- Page 309 Example: If L is 1 mm, provide “+1 mm”. Mark Negative Width Adjustment Stitching position Folding position Unit: mm Example: If L is 0.5 mm, provide “-0.5 mm”. Fig. 3-91 © 2005 - 2007 TOSHIBA TEC CORPORATION All rights reserved e-STUDIO520/523/600/603/720/723/850/853 ADJUSTMENT 3 - 77...
-
Page 310: Stitching Position (Adjusting Center Stitching)
(10) Set bits 1 through 4 on DIPSW1 to OFF. 3.13.2 Stitching Position (adjusting center stitching) Use the host machine adjustment mode to perform the following: e-STUDIO520/523/600/603/720/723/850/853 © 2005 - 2007 TOSHIBA TEC CORPORATION All rights reserved ADJUSTMENT 3 - 78... -
Page 311: Adjustment Of Hole Punch Unit
Set bits 1 through 6 of DIPSW3 on the finisher controller PCB as indicated. Fig. 3-92 Press SW1 on finisher controller PCB. Pressing this switch automatically adjusts sensor output. Set all bits on DIPSW3 to OFF © 2005 - 2007 TOSHIBA TEC CORPORATION All rights reserved e-STUDIO520/523/600/603/720/723/850/853 ADJUSTMENT 3 - 79... -
Page 312: Registering The Number Of Punch Holes
2-hole OFF OFF SW1 (MJ-6003E) 2-/3-hole OFF OFF SW2 (MJ-6003N) 4-hole ON OFF SW1 (MJ-6003F) 4-hole ON ON SW1 (MJ-6003S) Set all bits on DIPSW3 to OFF. e-STUDIO520/523/600/603/720/723/850/853 © 2005 - 2007 TOSHIBA TEC CORPORATION All rights reserved ADJUSTMENT 3 - 80... -
Page 313: Checking The Sensitivity Level Of The Transmission Sensor
Number of LED Lightings Sensor not dirty Lit 1X Sensor slightly dirty Lit 2X Sensor dirty Lit 3X Set all bits on DIPSW3 to OFF. © 2005 - 2007 TOSHIBA TEC CORPORATION All rights reserved e-STUDIO520/523/600/603/720/723/850/853 ADJUSTMENT 3 - 81... -
Page 314: Adjustment Of Inserter
Move the tray guide to the position where its width becomes the narrowest, and press the start key. The mode LED display switches. (The mode LED1, 4 blink.) Move the tray guide to the position where its width becomes the broadest. e-STUDIO520/523/600/603/720/723/850/853 © 2005 - 2007 TOSHIBA TEC CORPORATION All rights reserved ADJUSTMENT 3 - 82... -
Page 315: Input Check 1
Mode LED blinking at 500msec. cycle: High speed 1 Mode LED blinking at 250msec. cycle: High speed 2 Mode LED blinking at 100msec. cycle: High speed 3 © 2005 - 2007 TOSHIBA TEC CORPORATION All rights reserved e-STUDIO520/523/600/603/720/723/850/853 ADJUSTMENT 3 - 83... - Page 316 Transport motor rotated forward (high speed Transport motor stopped Transport motor rotated forward (high speed Transport motor stopped Transport motor rotated forward (high speed Transport motor stopped Fan motor ON e-STUDIO520/523/600/603/720/723/850/853 © 2005 - 2007 TOSHIBA TEC CORPORATION All rights reserved ADJUSTMENT 3 - 84...
-
Page 317: Check Of Sensor Operations 1
Sensor status LED1 Light OFF Empty sensor OFF Light ON Empty sensor ON LED2 Light OFF Paper length sensor OFF Light ON Paper length sensor ON © 2005 - 2007 TOSHIBA TEC CORPORATION All rights reserved e-STUDIO520/523/600/603/720/723/850/853 ADJUSTMENT 3 - 85... -
Page 318: Check Of Sensor Operations 2
Dip-switch 2 ON LED3 Light OFF Dip-switch 3 OFF Light ON Dip-switch 3 ON LED4 Light OFF Dip-switch 4 OFF Light ON Dip-switch 4 ON e-STUDIO520/523/600/603/720/723/850/853 © 2005 - 2007 TOSHIBA TEC CORPORATION All rights reserved ADJUSTMENT 3 - 86... -
Page 319: Adjustment Of Lcf (Mp-4004)
Move the adjustment board to the front side (Arrow (B) in the upper figure). [ Rear ] Feeding direction Center [ Front ] Fig. 3-96 © 2005 - 2007 TOSHIBA TEC CORPORATION All rights reserved e-STUDIO520/523/600/603/720/723/850/853 ADJUSTMENT 3 - 87... - Page 320 3 mm respectively. Front cover Fig. 3-98 e-STUDIO520/523/600/603/720/723/850/853 © 2005 - 2007 TOSHIBA TEC CORPORATION All rights reserved ADJUSTMENT 3 - 88...
-
Page 321: Lcf Slant Adjustment
Turn to the right: Stopper moves downward. Turn to the left : Stopper moves upward. Note: Note: When moving the equipment, need to move the stopper upward. Fig. 3-99 © 2005 - 2007 TOSHIBA TEC CORPORATION All rights reserved e-STUDIO520/523/600/603/720/723/850/853 ADJUSTMENT 3 - 89... - Page 322 © 2005 - 2007 TOSHIBA TEC CORPORATION All rights reserved ADJUSTMENT 3 - 90...
-
Page 323: Preventive Maintenance (Pm)
* The screen goes back to the main screen when the counter clear is executed or the [CANCEL] button is pressed after moving from the main screen, while it goes back to the sub screen after moving from the sub screen. © 2005 - 2007 TOSHIBA TEC CORPORATION All rights reserved e-STUDIO520/523/600/603/720/723/850/853 PREVENTIVE MAINTENANCE (PM) - Page 324 When the replacement date for the sub unit is different, press the [SUB UNIT] button to move to the sub screen and see each information, otherwise information is not displayed e-STUDIO520/523/600/603/720/723/850/853 © 2005 - 2007 TOSHIBA TEC CORPORATION All rights reserved PREVENTIVE MAINTENANCE (PM) 4 - 2...
- Page 325 The paper source differs depending on the structure of options, however, “0.0k” is displayed in “OUTPUT PAGES (k)” and its standard number of output pages is displayed in “PM OUT- PUT PAGES (k)” even for the installed paper source. © 2005 - 2007 TOSHIBA TEC CORPORATION All rights reserved e-STUDIO520/523/600/603/720/723/850/853 PREVENTIVE MAINTENANCE (PM)
- Page 326 Displaying of the standard number of drive counts (x 1,000) to replace the sub unit (parts) Displaying of the number of output pages counts, drive counts and previous replacement date for a chosen sub unit e-STUDIO520/523/600/603/720/723/850/853 © 2005 - 2007 TOSHIBA TEC CORPORATION All rights reserved PREVENTIVE MAINTENANCE (PM) 4 - 4...
- Page 327 When the [INITIALIZE] button is pressed, “Present number of output pages counts” and “Present driving counts” are cleared and “Previous replacement date” is updated. © 2005 - 2007 TOSHIBA TEC CORPORATION All rights reserved e-STUDIO520/523/600/603/720/723/850/853 PREVENTIVE MAINTENANCE (PM)
- Page 328 O-LCF feed unit [O-LCF] O-LCF pickup roller [PICK UP ROLLER (O-LCF)] O-LCF feed roller [FEED ROLLER (O-LCF)] O-LCF separation roller [SEP ROLLER (O-LCF)] e-STUDIO520/523/600/603/720/723/850/853 © 2005 - 2007 TOSHIBA TEC CORPORATION All rights reserved PREVENTIVE MAINTENANCE (PM) 4 - 6 05/06...
-
Page 329: Work Flow Of Parts Replacement
Check the drive counts of all parts at PM support mode. Does it exceed the specified drive count? Replace the part. Check the part and equipment according to the “TROUBLESHOOTING”. © 2005 - 2007 TOSHIBA TEC CORPORATION All rights reserved e-STUDIO520/523/600/603/720/723/850/853 PREVENTIVE MAINTENANCE (PM) 4 - 7... -
Page 330: General Descriptions For Pm Procedure
Plug in the equipment after the maintenance has been finished. Then turn ON the power and make some copies to confirm that the equipment is working properly. e-STUDIO520/523/600/603/720/723/850/853 © 2005 - 2007 TOSHIBA TEC CORPORATION All rights reserved PREVENTIVE MAINTENANCE (PM) 4 - 8... -
Page 331: Operational Items In Overhauling
Replace them with new ones if necessary. Check the performance of all the switches and sensors. Replace them with new ones if neces- sary. Clean inside the equipment thoroughly. © 2005 - 2007 TOSHIBA TEC CORPORATION All rights reserved e-STUDIO520/523/600/603/720/723/850/853 PREVENTIVE MAINTENANCE (PM) 4 - 9... -
Page 332: Preventive Maintenance Checklist
500,000 sheets e-STUDIO720/723: every 575,000 sheets e-STUDIO850/853: every 600,000 sheets • Values under “Replacement” indicate the replacement cycle for the e-STUDIO520/ e-STUDIO600/e-STUDIO720/e-STUDIO850 or e-STUDIO523/e-STUDIO603/e-STUDIO723/ e-STUDIO853. • The replacement cycle of the parts in the feeding section equals to the number of sheets fed from each paper source. - Page 333 Replacement Operation Parts list Items to check Cleaning Lubrication Remarks (x 1,000 sheets) check <P-I> Discharge LED Drum shaft Ozone filter 450/500/575/ P33-I25 © 2005 - 2007 TOSHIBA TEC CORPORATION All rights reserved e-STUDIO520/523/600/603/720/723/850/853 PREVENTIVE MAINTENANCE (PM) 4 - 11...
- Page 334 Developer motor unit Developer material 450/500/575/ Front shield Oil seal (9 pcs.) 900/1000/1150/ 1200 Guide roller B or A Toner filter 450/500/575/ P42-I24 e-STUDIO520/523/600/603/720/723/850/853 © 2005 - 2007 TOSHIBA TEC CORPORATION All rights reserved PREVENTIVE MAINTENANCE (PM) 4 - 12...
- Page 335 P27-I9 Cleaning web 450/500/575/ P27-I11 Web pushing roller 450/500/575/ P27-I12 Thermistor (4 pcs.) P27-I6,I28 Fuser unit entrance/ exit guide Web motor worm gear © 2005 - 2007 TOSHIBA TEC CORPORATION All rights reserved e-STUDIO520/523/600/603/720/723/850/853 PREVENTIVE MAINTENANCE (PM) 4 - 13...
- Page 336 P20-I8 section follower roller (8 pcs.) Reverse section B or A mylar (2pcs.) Bearing for GCB bushing Bearing of plastic bushing Paper guide e-STUDIO520/523/600/603/720/723/850/853 © 2005 - 2007 TOSHIBA TEC CORPORATION All rights reserved PREVENTIVE MAINTENANCE (PM) 4 - 14...
- Page 337 P. Finisher (MJ-1027/1028) Replacement Operation Parts list Items to check Cleaning Lubrication Remarks (x 1,000 sheets) check <P-I> Feed belt P15-I2 Paddle P16-I33 © 2005 - 2007 TOSHIBA TEC CORPORATION All rights reserved e-STUDIO520/523/600/603/720/723/850/853 PREVENTIVE MAINTENANCE (PM) 4 - 15...
- Page 338 A8 A6 G4 G3 E1 F5 L14,L6 H1,H5 L12,L1 D6, D7 M6 M6 M10,M9 Fig. 4-6 Front side (NAD and SAD models) e-STUDIO520/523/600/603/720/723/850/853 © 2005 - 2007 TOSHIBA TEC CORPORATION All rights reserved PREVENTIVE MAINTENANCE (PM) 4 - 16...
- Page 339 L14, L6 H1,H5 L12, L1 D6,D7 M6 M6 M10, M9 Fig. 4-7 Front side (TWD, ASD, ASU, AUD, MJD, CND and KRD models) © 2005 - 2007 TOSHIBA TEC CORPORATION All rights reserved e-STUDIO520/523/600/603/720/723/850/853 PREVENTIVE MAINTENANCE (PM) 4 - 17...
- Page 340 L10,L11 Fig. 4-8 Rear side e-STUDIO520/523/600/603/720/723/850/853 © 2005 - 2007 TOSHIBA TEC CORPORATION All rights reserved PREVENTIVE MAINTENANCE (PM) 4 - 18...
- Page 341 Fig. 4-9 Reversing Automatic Document Feeder © 2005 - 2007 TOSHIBA TEC CORPORATION All rights reserved e-STUDIO520/523/600/603/720/723/850/853 PREVENTIVE MAINTENANCE (PM) 4 - 19...
- Page 342 O5 O2 Fig. 4-10 Large Capacitor Feeder (MP-4004) e-STUDIO520/523/600/603/720/723/850/853 © 2005 - 2007 TOSHIBA TEC CORPORATION All rights reserved PREVENTIVE MAINTENANCE (PM) 4 - 20...
- Page 343 Fig. 4-11 Finisher (MJ-1027/1028) © 2005 - 2007 TOSHIBA TEC CORPORATION All rights reserved e-STUDIO520/523/600/603/720/723/850/853 PREVENTIVE MAINTENANCE (PM) 4 - 21...
- Page 344 Take off the cleaner unit. Then release the hook to take off the dustproof slit glass unit and clean the face and back side of the dustproof slit glass. Dustproof slit glass unit Fig. 4-13 e-STUDIO520/523/600/603/720/723/850/853 © 2005 - 2007 TOSHIBA TEC CORPORATION All rights reserved PREVENTIVE MAINTENANCE (PM) 4 - 22...
- Page 345 The quantity of molykote should be smaller than that to be applied to the other parts. © 2005 - 2007 TOSHIBA TEC CORPORATION All rights reserved e-STUDIO520/523/600/603/720/723/850/853...
- Page 346 If any mark which was made by the finger appears on the printed image, clean the tip of the finger. e-STUDIO520/523/600/603/720/723/850/853 © 2005 - 2007 TOSHIBA TEC CORPORATION All rights reserved PREVENTIVE MAINTENANCE (PM) 4 - 24...
- Page 347 Paddle shaft ............2 pcs. Upper developer sleeve (rear side) ....1 pc. Lower developer sleeve (rear side) ....1 pc. Transport sleeve (front side) ......1 pc. © 2005 - 2007 TOSHIBA TEC CORPORATION All rights reserved e-STUDIO520/523/600/603/720/723/850/853 PREVENTIVE MAINTENANCE (PM) 4 - 25...
- Page 348 Apply a coating of grease (Alvania No.2) to the entire periphery of the mixer shaft before attaching the bearing. Mixer Shaft Bearing Fig. 4-21 e-STUDIO520/523/600/603/720/723/850/853 © 2005 - 2007 TOSHIBA TEC CORPORATION All rights reserved PREVENTIVE MAINTENANCE (PM) 4 - 26...
- Page 349 Remove 1 screw and take off the cover of the supply opening. Vacuum off the toner in the auger section. Cover Auger section Fig. 4-24 © 2005 - 2007 TOSHIBA TEC CORPORATION All rights reserved e-STUDIO520/523/600/603/720/723/850/853 PREVENTIVE MAINTENANCE (PM) 4 - 27...
- Page 350 Replace the finger if the toner is stick- ing to it heavily. e-STUDIO520/523/600/603/720/723/850/853 © 2005 - 2007 TOSHIBA TEC CORPORATION All rights reserved PREVENTIVE MAINTENANCE (PM) 4 - 28...
- Page 351 Be sure to replace both of the cleaning web and the web pushing roller at the same time, since the cleaning web may be caught by the web pushing roller if this roller is continu- ously used. © 2005 - 2007 TOSHIBA TEC CORPORATION All rights reserved e-STUDIO520/523/600/603/720/723/850/853 PREVENTIVE MAINTENANCE (PM)
- Page 352 If the cleaning web which has exceeded its life span is used continuously, this could damage the fuser roller. Replace the cleaning web as soon as possible when it is finished. e-STUDIO520/523/600/603/720/723/850/853 © 2005 - 2007 TOSHIBA TEC CORPORATION All rights reserved PREVENTIVE MAINTENANCE (PM) 4 - 30...
- Page 353 << Method of applying white grease (Molykote X5-6020) >> Take off the developer motor unit. Remove 2 E-rings and take off the pulleys and belt. Belt Pulley E-ring Fig. 4-29 © 2005 - 2007 TOSHIBA TEC CORPORATION All rights reserved e-STUDIO520/523/600/603/720/723/850/853 PREVENTIVE MAINTENANCE (PM) 4 - 31 05/04...
- Page 354 Clean the frame if needed because paper dust brushed off with the corresponding brush accumulates on the lower frame of the registration rollers. (Cleaning period guideline: Every two or three times of Preventive Maintenance.) e-STUDIO520/523/600/603/720/723/850/853 © 2005 - 2007 TOSHIBA TEC CORPORATION All rights reserved PREVENTIVE MAINTENANCE (PM) 4 - 32 05/05...
- Page 355 Pickup roller ROL-BELT-PICK ROL-KIT-81CST Feed roller ASYS-ROL-FEED Separation roller ASYS-ROL-SPT Pickup roller ASYS-ROL-FEED ROL-KIT-4004 Feed roller ASYS-ROL-FEED-LCF Separation roller ASYS-ROL-SPT-LCF Pickup roller ASYS-ROL-PICK-L © 2005 - 2007 TOSHIBA TEC CORPORATION All rights reserved e-STUDIO520/523/600/603/720/723/850/853 PREVENTIVE MAINTENANCE (PM) 4 - 33...
-
Page 356: Jig List
Downloading jig (DLM board) Downloading JIG-2 (6 Flash ROMs) Downloading JIG-1 (2 Flash ROMs) ROM writer adapter (For 1881) ROM writer adapter (For 1931) e-STUDIO520/523/600/603/720/723/850/853 © 2005 - 2007 TOSHIBA TEC CORPORATION All rights reserved PREVENTIVE MAINTENANCE (PM) 4 - 34... - Page 357 P201-I1 P201-I2 P201-I4 P201-I5 P201-I6 P201-I7 P202-I1 P202-I2 P202-I3 P202-I4,I5 Fig. 4-31 © 2005 - 2007 TOSHIBA TEC CORPORATION All rights reserved e-STUDIO520/523/600/603/720/723/850/853 PREVENTIVE MAINTENANCE (PM) 4 - 35...
-
Page 358: Grease List
Item Silicon oil ASM-SILICON-1M 100cc Bottle Launa 40 OIL-LAUNA40-100 100cc Oiler White grease (Molykote X5-6020) MOLYKOTE-100 100g Tube Alvania No.2 ASM-PG-ALV2 100g Tube e-STUDIO520/523/600/603/720/723/850/853 © 2005 - 2007 TOSHIBA TEC CORPORATION All rights reserved PREVENTIVE MAINTENANCE (PM) 4 - 36... -
Page 359: Precautions For Storing And Handling Supplies
Do not leave drums in a brightly lit place for a long time. Otherwise the drum will fatigue, and will not produce sufficient image density immediately after being installed in the machine. However, this effect may decrease as time elapses. © 2005 - 2007 TOSHIBA TEC CORPORATION All rights reserved e-STUDIO520/523/600/603/720/723/850/853 PREVENTIVE MAINTENANCE (PM) -
Page 360: Checking And Cleaning Of Drum Cleaning Blade And Transfer Belt Cleaning Blade
3) Do not touch the transfer belt with alcohol or other organic solvents. 4) Do not apply external pressure that might scratch the transfer belt. e-STUDIO520/523/600/603/720/723/850/853 © 2005 - 2007 TOSHIBA TEC CORPORATION All rights reserved PREVENTIVE MAINTENANCE (PM) 4 - 38... -
Page 361: Checking And Cleaning Of Fuser Roller And Pressure Roller
Be careful not to rub the teflon-coated surface with your fingernails or hard objects because it is easily damaged. Do not apply the silicon oil to the fuser roller. © 2005 - 2007 TOSHIBA TEC CORPORATION All rights reserved e-STUDIO520/523/600/603/720/723/850/853... -
Page 362: Checking And Replacing Of Cleaning Web
Be sure to reset the counter of the cleaning web counter in the PM Support mode (6S) when the cleaning web roller has been replaced. e-STUDIO520/523/600/603/720/723/850/853 © 2005 - 2007 TOSHIBA TEC CORPORATION All rights reserved PREVENTIVE MAINTENANCE (PM) 4 - 40... -
Page 363: Troubleshooting
6) Replace the transport motor driving PC board. 7) Replace the LGC board. Is the drum separation finger solenoid working? (Perform the output check in the test mode: 03-111,161) © 2005 - 2007 TOSHIBA TEC CORPORATION All rights reserved e-STUDIO520/523/600/603/720/723/850/853 TROUBLESHOOTING 5 - 1... - Page 364 (Refer to 3.6.1 in this manual about the details of the code 08-841.) e-STUDIO520/523/600/603/720/723/850/853 © 2005 - 2007 TOSHIBA TEC CORPORATION All rights reserved TROUBLESHOOTING 5 - 2 05/04...
- Page 365 4) Check if the conductor pattern on the LGC board is not short- or open-circuited. 5) Replace the LGC board 1) Check if the separation finger for the fuser unit is working normally. 2) Replace the LGC board © 2005 - 2007 TOSHIBA TEC CORPORATION All rights reserved e-STUDIO520/523/600/603/720/723/850/853 TROUBLESHOOTING 5 - 3...
- Page 366 1st drawer transport sensor 03-[FAX]OFF/[1]/[C] 2nd drawer transport sensor 03-[FAX]OFF/[2]/[C] 3rd drawer / tandem LCF transport sensor 03-[FAX]OFF/[3]/[C] 4th drawer transport sensor 03-[FAX]OFF/[4]/[C] Intermediate transport sensor 03-[FAX]OFF/[1]/[A] e-STUDIO520/523/600/603/720/723/850/853 © 2005 - 2007 TOSHIBA TEC CORPORATION All rights reserved TROUBLESHOOTING 5 - 4...
- Page 367 4) Check if the conductor pattern on the LGC board is short circuited or open circuited. 5) Replace the registration sensor. 6) Replace the LGC board. 1) Check the transport roller. Replace it if it is worn out. © 2005 - 2007 TOSHIBA TEC CORPORATION All rights reserved e-STUDIO520/523/600/603/720/723/850/853 TROUBLESHOOTING 5 - 5...
- Page 368 Check if the spring of the follower roller of the intermediate transport roller is working prop- erly. Check if the registration roller (rubber) is rotating smoothly. e-STUDIO520/523/600/603/720/723/850/853 © 2005 - 2007 TOSHIBA TEC CORPORATION All rights reserved TROUBLESHOOTING 5 - 6...
- Page 369 4) Check if the width of the side guides of the drawer is too narrow. 5) Check the motor-related adjustment value. Check if the spring of the follower roller of the intermediate transport roller is working prop- erly. © 2005 - 2007 TOSHIBA TEC CORPORATION All rights reserved e-STUDIO520/523/600/603/720/723/850/853 TROUBLESHOOTING 5 - 7...
- Page 370 5) Replace the 1st drawer transport clutch. 6) Replace the LGC board. Check if the spring of the follower roller of the intermediate transport roller is working prop- erly. e-STUDIO520/523/600/603/720/723/850/853 © 2005 - 2007 TOSHIBA TEC CORPORATION All rights reserved TROUBLESHOOTING 5 - 8...
- Page 371 8) Replace the transport motor driving PC board. Check if the spring of the follower roller of the intermediate transport roller is working prop- erly. © 2005 - 2007 TOSHIBA TEC CORPORATION All rights reserved e-STUDIO520/523/600/603/720/723/850/853 TROUBLESHOOTING 5 - 9...
- Page 372 3) Check if the paper is not the one with printing on its back side. 4) Check if the width of the side guides of the drawer is too narrow. e-STUDIO520/523/600/603/720/723/850/853 © 2005 - 2007 TOSHIBA TEC CORPORATION All rights reserved TROUBLESHOOTING 5 - 10...
- Page 373 5) Check if the conductor pattern on the LCF and LGC boards is not short circuited or open circuited. 6) Replace the external LCF feed clutch. 7) Replace the LCF board. 8) Replace the LGC board. © 2005 - 2007 TOSHIBA TEC CORPORATION All rights reserved e-STUDIO520/523/600/603/720/723/850/853 TROUBLESHOOTING 5 - 11...
- Page 374 3) Check the condition of the external LCF feed roller and separation roller and clean or replace them. Check if the registration roller (rubber) is rotating smoothly. e-STUDIO520/523/600/603/720/723/850/853 © 2005 - 2007 TOSHIBA TEC CORPORATION All rights reserved TROUBLESHOOTING 5 - 12...
- Page 375 1) Check the condition of the feed roller, separation roller and pickup roller of each paper source, and clean or replace them. 2) Check the transport roller. Clean or replace it. © 2005 - 2007 TOSHIBA TEC CORPORATION All rights reserved e-STUDIO520/523/600/603/720/723/850/853 TROUBLESHOOTING...
- Page 376 1) Check the condition of the feed roller, separation roller and pickup roller of each paper source, and clean or replace them. 2) Check the PFP transport roller. Clean or replace it. e-STUDIO520/523/600/603/720/723/850/853 © 2005 - 2007 TOSHIBA TEC CORPORATION All rights reserved TROUBLESHOOTING 5 - 14...
- Page 377 Is the Mylar at the reverse section normal? Replace the Mylar. Check the condition of the roller at the horizontal transport section and clean or replace it. © 2005 - 2007 TOSHIBA TEC CORPORATION All rights reserved e-STUDIO520/523/600/603/720/723/850/853 TROUBLESHOOTING 5 - 15...
- Page 378 9) Check the installation state of the horizontal transport section driving clutch-1. Check the condition of the rollers at the horizontal transport section and clean or replace them. e-STUDIO520/523/600/603/720/723/850/853 © 2005 - 2007 TOSHIBA TEC CORPORATION All rights reserved TROUBLESHOOTING 5 - 16...
- Page 379 8) Check if the front side timing belt is put on properly. Check the condition of the rollers at the horizontal transport section and clean or replace them. © 2005 - 2007 TOSHIBA TEC CORPORATION All rights reserved e-STUDIO520/523/600/603/720/723/850/853 TROUBLESHOOTING...
- Page 380 5) Replace the sensor. 6) Replace the LGC board. 1) Check if any multiple paper is fed from the drawer. 2) Replace the LGC board. e-STUDIO520/523/600/603/720/723/850/853 © 2005 - 2007 TOSHIBA TEC CORPORATION All rights reserved TROUBLESHOOTING 5 - 18...
- Page 381 1st drawer transport sensor 03-[FAX]OFF/[1]/[C] 2nd drawer transport sensor 03-[FAX]OFF/[2]/[C] 3rd drawer / tandem LCF transport sensor 03-[FAX]OFF/[3]/[C] 4th drawer transport sensor 03-[FAX]OFF/[4]/[C] Intermediate transport sensor 03-[FAX]OFF/[1]/[A] © 2005 - 2007 TOSHIBA TEC CORPORATION All rights reserved e-STUDIO520/523/600/603/720/723/850/853 TROUBLESHOOTING 5 - 19...
- Page 382 1) Check if there is no mechanical loading at the exit/reversal gate. 2) Check the myler at the reverse section and clean or replace it. e-STUDIO520/523/600/603/720/723/850/853 © 2005 - 2007 TOSHIBA TEC CORPORATION All rights reserved TROUBLESHOOTING 5 - 20...
- Page 383 2) Check if there is no abnormality and extraneous material at the guide and myler in front of the exit roller. 3) Check if there is no mechanical loading at the exit follower roller. © 2005 - 2007 TOSHIBA TEC CORPORATION All rights reserved e-STUDIO520/523/600/603/720/723/850/853 TROUBLESHOOTING...
- Page 384 2) Check if there is no abnormality and extraneous material at the guide and myler in front of the exit roller. * Perform 05-447 for thick paper to increase the value by 2 to 4. e-STUDIO520/523/600/603/720/723/850/853 © 2005 - 2007 TOSHIBA TEC CORPORATION All rights reserved TROUBLESHOOTING 5 - 22...
- Page 385 5) Replace the 1st drawer transport sensor. 6) Replace the LGC board. If any paper remains in the equipment or drawer, remove it. Check the rollers. Clean or replace them. © 2005 - 2007 TOSHIBA TEC CORPORATION All rights reserved e-STUDIO520/523/600/603/720/723/850/853 TROUBLESHOOTING 5 - 23...
- Page 386 4) Check if the conductor pattern on the LGC board is short circuited or open circuited. 5) Replace the registration sensor. 6) Replace the LGC board. Check the rollers. Clean or replace them. e-STUDIO520/523/600/603/720/723/850/853 © 2005 - 2007 TOSHIBA TEC CORPORATION All rights reserved TROUBLESHOOTING 5 - 24...
-
Page 387: Paper Misfeeding
Check if the spring of the follower roller of the intermediate transport roller is working prop- erly. Check the transport roller. Clean or replace it. © 2005 - 2007 TOSHIBA TEC CORPORATION All rights reserved e-STUDIO520/523/600/603/720/723/850/853 TROUBLESHOOTING 5 - 25... - Page 388 5) Replace the LGC board. Check if the spring of the follower roller of the intermediate transport roller is working prop- erly. Replace the registration roller(rubber) if not solved. e-STUDIO520/523/600/603/720/723/850/853 © 2005 - 2007 TOSHIBA TEC CORPORATION All rights reserved TROUBLESHOOTING 5 - 26...
- Page 389 5) Replace the bypass feed clutch and bypass feel sensor. 6) Replace the LGC board. Check the bypass transport roller, feed separation and separation rollers. Clean or replace them. © 2005 - 2007 TOSHIBA TEC CORPORATION All rights reserved e-STUDIO520/523/600/603/720/723/850/853 TROUBLESHOOTING 5 - 27...
- Page 390 Check the 1st drawer feed roller, separation roller and pickup roller. Clean or replace them. * Check if the paper weight is within the specified range. e-STUDIO520/523/600/603/720/723/850/853 © 2005 - 2007 TOSHIBA TEC CORPORATION All rights reserved TROUBLESHOOTING 5 - 28...
- Page 391 Check the 2nd drawer feed roller, separation roller and pickup roller. Clean or replace them. * Check if the paper weight is within the specified range. © 2005 - 2007 TOSHIBA TEC CORPORATION All rights reserved e-STUDIO520/523/600/603/720/723/850/853 TROUBLESHOOTING 5 - 29...
- Page 392 Check the 3rd drawer / Tandem LCF feed roller, separation roller and pickup roller. Clean or replace them. * Check if the paper weight is within the specified range. e-STUDIO520/523/600/603/720/723/850/853 © 2005 - 2007 TOSHIBA TEC CORPORATION All rights reserved TROUBLESHOOTING 5 - 30...
- Page 393 Check the 4th drawer feed roller, separation roller and pickup roller. Clean or replace them. * Check if the paper weight is within the specified range. © 2005 - 2007 TOSHIBA TEC CORPORATION All rights reserved e-STUDIO520/523/600/603/720/723/850/853 TROUBLESHOOTING 5 - 31...
- Page 394 2) Check the LCF feed roller, separation roller and pickup roller. Clean or replace them. * Check if the paper weight is within the specified range. e-STUDIO520/523/600/603/720/723/850/853 © 2005 - 2007 TOSHIBA TEC CORPORATION All rights reserved TROUBLESHOOTING 5 - 32...
-
Page 395: Cover Open Jam
4) Check if the conductor pattern on the LGC board is short circuited or open circuited. 5) Replace the feed cover sensor. 6) Replace the LGC board. Replace the LGC board. © 2005 - 2007 TOSHIBA TEC CORPORATION All rights reserved e-STUDIO520/523/600/603/720/723/850/853 TROUBLESHOOTING 5 - 33... - Page 396 4) Check if the conductor patterns on the LGC board are short- or open- circuited. 5) Replace the bypass feed unit cover sensor. 6) Replace the LGC board. Replace the LGC board. e-STUDIO520/523/600/603/720/723/850/853 © 2005 - 2007 TOSHIBA TEC CORPORATION All rights reserved TROUBLESHOOTING 5 - 34...
- Page 397 4) Check if the conductor pattern on the LGC board is short- or open- circuited. 5) Replace the exit cover switch. 6) Replace the LGC board. Replace the LGC board. © 2005 - 2007 TOSHIBA TEC CORPORATION All rights reserved e-STUDIO520/523/600/603/720/723/850/853 TROUBLESHOOTING 5 - 35...
-
Page 398: Transport Jam (Radf)
5) Check if the conductor pattern on the ADF board is short circuited or open circuited. 6) Replace the original empty sensor. 7) Replace the ADF board. Replace the ADF board. e-STUDIO520/523/600/603/720/723/850/853 © 2005 - 2007 TOSHIBA TEC CORPORATION All rights reserved TROUBLESHOOTING 5 - 36 05/06... - Page 399 [E724] Original stopping at registration sensor [E731] Original stopping at large original exit sensor Are the registration roller, read roller and exit roller stained? Clean the rollers. © 2005 - 2007 TOSHIBA TEC CORPORATION All rights reserved e-STUDIO520/523/600/603/720/723/850/853 TROUBLESHOOTING 5 - 37...
- Page 400 7) Replace the ADF board. 8) Check if the conductor pattern on the SLG board is short circuited or open circuited. 9) Replace the SLG board. e-STUDIO520/523/600/603/720/723/850/853 © 2005 - 2007 TOSHIBA TEC CORPORATION All rights reserved TROUBLESHOOTING 5 - 38 05/05...
- Page 401 Are the connector of the sensors disconnected? Connect the connector. In case of [E761],[E764],[E766],[E768], perform the automatic adjustment of RADF sensor. In case of [E762],[E763],[E765],[E767], replace the sensor. © 2005 - 2007 TOSHIBA TEC CORPORATION All rights reserved e-STUDIO520/523/600/603/720/723/850/853 TROUBLESHOOTING 5 - 39...
- Page 402 Is the RADF opening/closing switch working improperly? Replace the RADF opening/closing switch. Is 24V supplied from the copier? Replace the ADF board. Check if the power at the copier is ON. e-STUDIO520/523/600/603/720/723/850/853 © 2005 - 2007 TOSHIBA TEC CORPORATION All rights reserved TROUBLESHOOTING 5 - 40...
- Page 403 Is the harness between the ADF board and APS operation sensor open-circuited? Replace the harness. Is the APS operation sensor working improperly? Replace the APS operation sensor. Replace the ADF board. © 2005 - 2007 TOSHIBA TEC CORPORATION All rights reserved e-STUDIO520/523/600/603/720/723/850/853 TROUBLESHOOTING 5 - 41...
-
Page 404: Finisher Jam
1) Connect the connector of the inlet sensor securely. 2) Attach the actuator securely if its shaft is out of place. 3) Replace the inlet sensor. Replace the finisher controller PC board. e-STUDIO520/523/600/603/720/723/850/853 © 2005 - 2007 TOSHIBA TEC CORPORATION All rights reserved TROUBLESHOOTING 5 - 42... - Page 405 1) Connect the connectors of the sensors securely. 2) Attach the actuators securely if their shafts are out of place. 3) Replace the sensors. Replace the finisher controller PC board. © 2005 - 2007 TOSHIBA TEC CORPORATION All rights reserved e-STUDIO520/523/600/603/720/723/850/853 TROUBLESHOOTING 5 - 43...
- Page 406 1) Connect the connectors of the sensors securely. 2) Attach the actuators securely if their shafts are out of place. 3) Replace the sensors. Replace the finisher controller PC board. e-STUDIO520/523/600/603/720/723/850/853 © 2005 - 2007 TOSHIBA TEC CORPORATION All rights reserved TROUBLESHOOTING 5 - 44...
- Page 407 1) Connect the connectors of the door switch and the front door switch securely. 2) Replace the upper/front door switches. Replace the finisher controller PC board. © 2005 - 2007 TOSHIBA TEC CORPORATION All rights reserved e-STUDIO520/523/600/603/720/723/850/853 TROUBLESHOOTING 5 - 45...
- Page 408 1) Connect the connector of the inlet sensor securely. 2) Attach the actuator securely if its shaft is out of place. 3) Replace the inlet sensor. Replace the finisher controller PC board. e-STUDIO520/523/600/603/720/723/850/853 © 2005 - 2007 TOSHIBA TEC CORPORATION All rights reserved TROUBLESHOOTING 5 - 46...
- Page 409 1) Connect the connectors of the stitcher home position switches securely. 2) Replace the stitcher home position switches. Replace the saddle stitcher controller PC board. © 2005 - 2007 TOSHIBA TEC CORPORATION All rights reserved e-STUDIO520/523/600/603/720/723/850/853 TROUBLESHOOTING 5 - 47...
- Page 410 Are the cover opening sensors working properly? 1) Connect the connectors of the cover opening sensors securely. 2) Replace the cover opening sensors. Replace the finisher controller PC board. e-STUDIO520/523/600/603/720/723/850/853 © 2005 - 2007 TOSHIBA TEC CORPORATION All rights reserved TROUBLESHOOTING 5 - 48...
- Page 411 1) Connect the connectors of the sensors securely. 2) Attach the actuators securely if their shafts are out of place. 3) Replace the sensors. Replace the saddle stitcher controller PC board. © 2005 - 2007 TOSHIBA TEC CORPORATION All rights reserved e-STUDIO520/523/600/603/720/723/850/853 TROUBLESHOOTING 5 - 49...
- Page 412 1) Connect the connectors of the sensors securely. 2) Attach the actuators securely if their shafts are out of place. 3) Replace the sensors. Replace the saddle stitcher controller PC board. e-STUDIO520/523/600/603/720/723/850/853 © 2005 - 2007 TOSHIBA TEC CORPORATION All rights reserved TROUBLESHOOTING 5 - 50...
- Page 413 1) Connect the connector of the sensor securely. 2) Attach the actuator securely if its shaft is out of place. 3) Replace the sensor. Replace the finisher controller PC board. © 2005 - 2007 TOSHIBA TEC CORPORATION All rights reserved e-STUDIO520/523/600/603/720/723/850/853 TROUBLESHOOTING 5 - 51...
- Page 414 Is the harness between the inserter control board and separation sensor open-circuited? Replace the harness. Is the separation sensor working improperly? Replace the separation sensor. Replace the inserter control board. e-STUDIO520/523/600/603/720/723/850/853 © 2005 - 2007 TOSHIBA TEC CORPORATION All rights reserved TROUBLESHOOTING 5 - 52...
- Page 415 Is the harness between the inserter control board and transport sensor is open-circuited? Replace the harness. Is the transport sensor working impropely? Replace the transport sensor. Replace the inserter control board. © 2005 - 2007 TOSHIBA TEC CORPORATION All rights reserved e-STUDIO520/523/600/603/720/723/850/853 TROUBLESHOOTING 5 - 53...
- Page 416 Is the problem solved by opening the inserter jam access cover? 1) Check the installation state of the cover. 2) Replace the cover switch and plate spring. e-STUDIO520/523/600/603/720/723/850/853 © 2005 - 2007 TOSHIBA TEC CORPORATION All rights reserved TROUBLESHOOTING 5 - 54...
- Page 417 Connect the pin or replace the harness. 1) Replace the IPC board. 2) Replace the LGC board. 3) Replace the finisher controller PC board. © 2005 - 2007 TOSHIBA TEC CORPORATION All rights reserved e-STUDIO520/523/600/603/720/723/850/853 TROUBLESHOOTING 5 - 55...
-
Page 418: Paper Feeding System Related Service Call
2) Check if the paper is not caught in the coupling when the tray goes up. 3) Check if the conductor pattern on the LGC board is short circuited or open circuited. 4) Replace the LGC board. e-STUDIO520/523/600/603/720/723/850/853 © 2005 - 2007 TOSHIBA TEC CORPORATION All rights reserved TROUBLESHOOTING 5 - 56... - Page 419 1) Check if the driving mechanism is abnormal. 2) Check if the conductor pattern on the LGC board is short circuited or open circuited. 3) Replace the LGC board. © 2005 - 2007 TOSHIBA TEC CORPORATION All rights reserved e-STUDIO520/523/600/603/720/723/850/853 TROUBLESHOOTING...
- Page 420 1) Check if the driving mechanism is abnormal. 2) Check if the conductor pattern on the LGC board is short circuited or open circuited. 3) Replace the LGC board. e-STUDIO520/523/600/603/720/723/850/853 © 2005 - 2007 TOSHIBA TEC CORPORATION All rights reserved TROUBLESHOOTING 5 - 58...
- Page 421 6) Replace the LGC board. 1) Check if the tray lifting mechanism has no abnormality. 2) Replace the LCF board. 3) Replace the LGC board. © 2005 - 2007 TOSHIBA TEC CORPORATION All rights reserved e-STUDIO520/523/600/603/720/723/850/853 TROUBLESHOOTING 5 - 59...
-
Page 422: Scanning System Related Service Call
1) Check if the connector pin is disconnected and the harness is short circuited or open cir- cuited. 2) Check if the conductor pattern on the SLG board is short circuited or open circuited. 3) Replace the SLG board. e-STUDIO520/523/600/603/720/723/850/853 © 2005 - 2007 TOSHIBA TEC CORPORATION All rights reserved TROUBLESHOOTING 5 - 60... - Page 423 1) Check if the connector pins are disconnected and the harnesses are short circuited or open circuited. 2) Check if the conductor pattern on the SLG board is short circuited or open circuited. 3) Replace the SLG board. © 2005 - 2007 TOSHIBA TEC CORPORATION All rights reserved e-STUDIO520/523/600/603/720/723/850/853 TROUBLESHOOTING 5 - 61...
-
Page 424: Fuser Unit Related Service Call
Change the current status counter value "1" or "2" to "0", then press [ENTER] or [INTERRUPT] (to cancel [C411/C412]). Turn the power OFF and then back ON. Make sure that the equipment enters the normal ready state. e-STUDIO520/523/600/603/720/723/850/853 © 2005 - 2007 TOSHIBA TEC CORPORATION All rights reserved TROUBLESHOOTING 5 - 62... - Page 425 3. Clear the status counter Change the current status counter value (08-400) "5", "6" , "7" , "8" , "18" , "20" , "24" , "26" or "28" to "0" © 2005 - 2007 TOSHIBA TEC CORPORATION All rights reserved e-STUDIO520/523/600/603/720/723/850/853...
- Page 426 Check if the conductor pattern on the board is short- or open-circuited. Replace the IH control board. 3. Clear the status counter Change the values "14" of the status counter (08-400) to "0". e-STUDIO520/523/600/603/720/723/850/853 © 2005 - 2007 TOSHIBA TEC CORPORATION All rights reserved TROUBLESHOOTING 5 - 64...
- Page 427 Check if the harness between the connector of the LGC board and the fuser unit is not open cir- cuited. Replace the LGC board. Replace the fuser unit. © 2005 - 2007 TOSHIBA TEC CORPORATION All rights reserved e-STUDIO520/523/600/603/720/723/850/853 TROUBLESHOOTING 5 - 65...
-
Page 428: Communication Related Service Call
Check if the conductor pattern around IC9, IC25, IC32 and CN204 on the PLG board is not short- or opencircuited. Check if the connector CN103, CN104 on the SYS board is disconnected. Replace the LGC board. Replace the PLG board. e-STUDIO520/523/600/603/720/723/850/853 © 2005 - 2007 TOSHIBA TEC CORPORATION All rights reserved TROUBLESHOOTING 5 - 66... - Page 429 Check the version of the scanner ROM version on the SLG board. Replace the SYS board. Replace the SLG board. (10) Replace the LGC board. © 2005 - 2007 TOSHIBA TEC CORPORATION All rights reserved e-STUDIO520/523/600/603/720/723/850/853 TROUBLESHOOTING 5 - 67...
-
Page 430: Radf Related Service Call
Check the circuits and connectors on the ADF board, mainly IC6, IC11 and CN15, for short cir- cuits and open circuits. Replace the original length detection sensor. Replace the ADF board. e-STUDIO520/523/600/603/720/723/850/853 © 2005 - 2007 TOSHIBA TEC CORPORATION All rights reserved TROUBLESHOOTING 5 - 68... - Page 431 Is the loading of the lifting tray abnormal, adjust the mechanical loading. Remove, if any, extraneous materials. 1) Replace the lifting tray lower limit detection sensor. 2) Replace the ADF board. © 2005 - 2007 TOSHIBA TEC CORPORATION All rights reserved e-STUDIO520/523/600/603/720/723/850/853 TROUBLESHOOTING 5 - 69...
- Page 432 [C870] Temperature detection error Check if the conductor pattern around thermistor(TH1) on the ADF board is not short cir- cuited or open circuited. Replace the ADF board. e-STUDIO520/523/600/603/720/723/850/853 © 2005 - 2007 TOSHIBA TEC CORPORATION All rights reserved TROUBLESHOOTING 5 - 70...
-
Page 433: Laser Optical Unit Related Service Call
4) Check if the conductor pattern on the PLG board is short circuited or open circuited. 5) Replace the laser optical unit. 6) Replace the PLG board. Is the deformed image output? © 2005 - 2007 TOSHIBA TEC CORPORATION All rights reserved e-STUDIO520/523/600/603/720/723/850/853 TROUBLESHOOTING 5 - 71 07/11... - Page 434 6) Check if the laser unit cooling fan is not stopped. 7) Check if the intake area of the laser unit cooling fan is not blocked. 8) Replace the laser optical unit. e-STUDIO520/523/600/603/720/723/850/853 © 2005 - 2007 TOSHIBA TEC CORPORATION All rights reserved TROUBLESHOOTING 5 - 72 07/11...
- Page 435 4) Check if the metal plates of the transport system are grounded securely. 5) Check if the equipment is grounded securely? 6) Replace the laser optical unit. © 2005 - 2007 TOSHIBA TEC CORPORATION All rights reserved e-STUDIO520/523/600/603/720/723/850/853 TROUBLESHOOTING 5 - 73...
- Page 436 Is the harness between the PLG board and SYS board open-circuited or the connector dis- connected? Replace the harness. Reconnect the connector. 1) Replace the PLG board. 2) Replace the SYS board. e-STUDIO520/523/600/603/720/723/850/853 © 2005 - 2007 TOSHIBA TEC CORPORATION All rights reserved TROUBLESHOOTING 5 - 74 07/11...
-
Page 437: Finisher Related Service Call
Fix the mechanism including the shutter upper/lower bars and gears of the feed roller-2. Is the shutter open sensor (PI5) working normally? Replace the sensor. Replace the finisher controller PC board. © 2005 - 2007 TOSHIBA TEC CORPORATION All rights reserved e-STUDIO520/523/600/603/720/723/850/853 TROUBLESHOOTING 5 - 75... - Page 438 Replace the finisher controller PC board. Is the wiring between the delivery motor and finisher controller PC board correct? Correct the wiring. Replace the motor. e-STUDIO520/523/600/603/720/723/850/853 © 2005 - 2007 TOSHIBA TEC CORPORATION All rights reserved TROUBLESHOOTING 5 - 76...
- Page 439 Is the tray 2 home position sensor (PI25) working properly? Replace the tray 2 home position sensor. Is the tray 2 lifting mechanism working properly? Correct the defect of the mechanism. © 2005 - 2007 TOSHIBA TEC CORPORATION All rights reserved e-STUDIO520/523/600/603/720/723/850/853 TROUBLESHOOTING 5 - 77...
- Page 440 Is the tray lifting mechanism working properly? Correct the defect of the mechanism. Is the tray coming close detection switch working properly? Replace the switch. Replace the finisher controller PC board. e-STUDIO520/523/600/603/720/723/850/853 © 2005 - 2007 TOSHIBA TEC CORPORATION All rights reserved TROUBLESHOOTING 5 - 78...
- Page 441 Is the wiring between the finisher controller PC board and the stapler normal? Correct the wiring. Is the problem solved by replacing the stapler? Replace the finisher controller PC board. © 2005 - 2007 TOSHIBA TEC CORPORATION All rights reserved e-STUDIO520/523/600/603/720/723/850/853 TROUBLESHOOTING 5 - 79...
- Page 442 Is there any mechanical problem with the stapler stand motion path? Fix the mechanism. Try replacing the staple shift motor. Is the problem corrected? Replace the finisher controller PC board. e-STUDIO520/523/600/603/720/723/850/853 © 2005 - 2007 TOSHIBA TEC CORPORATION All rights reserved TROUBLESHOOTING 5 - 80...
- Page 443 Is the voltage between J6-2(+) and J6-4(-) on the finisher controller PC board 5V DC? Replace the finisher controller PC board. Replace the height sensor. © 2005 - 2007 TOSHIBA TEC CORPORATION All rights reserved e-STUDIO520/523/600/603/720/723/850/853 TROUBLESHOOTING 5 - 81...
- Page 444 Is there any problem with the paper pushing plate drive mechanism? Fix the mechanism. Is the problem solved by replacing the paper pushing plate motor (M8S)? e-STUDIO520/523/600/603/720/723/850/853 © 2005 - 2007 TOSHIBA TEC CORPORATION All rights reserved TROUBLESHOOTING 5 - 82...
- Page 445 Replace the front or rear stitcher. Check the wiring between the stitcher and saddle stitcher controller PC board. If there is no problem, replace the controller PC board. © 2005 - 2007 TOSHIBA TEC CORPORATION All rights reserved e-STUDIO520/523/600/603/720/723/850/853 TROUBLESHOOTING...
- Page 446 Is the guide plate drive mechanism normal? Fix the mechanism. Is the problem solved by replacing the guide motor (M3S)? Replace the saddle stitcher controller PC board. e-STUDIO520/523/600/603/720/723/850/853 © 2005 - 2007 TOSHIBA TEC CORPORATION All rights reserved TROUBLESHOOTING 5 - 84...
- Page 447 Is the paper positioning plate drive mechanism normal? Fix the mechanism. Is the problem solved by replacing the paper positioning plate motor (M4S)? Replace the saddle stitcher controller PC board. © 2005 - 2007 TOSHIBA TEC CORPORATION All rights reserved e-STUDIO520/523/600/603/720/723/850/853 TROUBLESHOOTING 5 - 85...
- Page 448 Replace the saddle stitcher controller PC board. Is J9-11 on the saddle stitcher controller PC board properly connected to the ground? Replace the saddle stitcher controller PC board. e-STUDIO520/523/600/603/720/723/850/853 © 2005 - 2007 TOSHIBA TEC CORPORATION All rights reserved TROUBLESHOOTING 5 - 86...
- Page 449 Replace the saddle stitcher controller PC board. Is J9-14 on the saddle stitcher controller PC board properly connected to the ground? Replace the saddle stitcher controller PC board. © 2005 - 2007 TOSHIBA TEC CORPORATION All rights reserved e-STUDIO520/523/600/603/720/723/850/853 TROUBLESHOOTING...
- Page 450 Measure the voltage of J11-12 on the saddle switcher controller PC board when the front door is opened. Is it 5V? The front door opening/closing sensor is broken. Replace it. Replace the saddle stitcher controller PC board. e-STUDIO520/523/600/603/720/723/850/853 © 2005 - 2007 TOSHIBA TEC CORPORATION All rights reserved TROUBLESHOOTING 5 - 88...
- Page 451 Measure the voltage between J3-2 (+) and J3-1 (-) on the finisher controller PC board. Is it DC 5V? Replace the finisher controller PC board. Replace the saddle stitcher controller PC board. © 2005 - 2007 TOSHIBA TEC CORPORATION All rights reserved e-STUDIO520/523/600/603/720/723/850/853 TROUBLESHOOTING 5 - 89...
- Page 452 Is the swing guide closed detection switch-2 (MS6) correctly pressed? Fix the mechanism. Replace the finisher controller PC board. [Procedure 3] Is the swing motor clock sensor (PI20) working normally? e-STUDIO520/523/600/603/720/723/850/853 © 2005 - 2007 TOSHIBA TEC CORPORATION All rights reserved TROUBLESHOOTING 5 - 90...
- Page 453 Is the problem solved by replacing the horizontal registration motor (M2P)? Is the problem solved by replacing the punch motor? Replace the finisher controller PC board. © 2005 - 2007 TOSHIBA TEC CORPORATION All rights reserved e-STUDIO520/523/600/603/720/723/850/853 TROUBLESHOOTING 5 - 91...
- Page 454 Is there any mechanical problem with the path of the alignment plate? Fix the mechanism. 1) Replace the front alignment motor (M11). 2) Replace the finisher controller PC board. e-STUDIO520/523/600/603/720/723/850/853 © 2005 - 2007 TOSHIBA TEC CORPORATION All rights reserved TROUBLESHOOTING 5 - 92 06/10...
- Page 455 Is the conductor pattern around Q11, Q16 and CN8 on the inserter control board short cir- cuited or open circuited? Replace the inserter fan. Replace the inserter control board. © 2005 - 2007 TOSHIBA TEC CORPORATION All rights reserved e-STUDIO520/523/600/603/720/723/850/853 TROUBLESHOOTING 5 - 93...
- Page 456 Check the assembly and repair the mechanism. Does it improve when the Knurled belt motor (M13) is replaced? Replace the finisher controller PC board. e-STUDIO520/523/600/603/720/723/850/853 © 2005 - 2007 TOSHIBA TEC CORPORATION All rights reserved TROUBLESHOOTING 5 - 94 06/10...
- Page 457 If the error has still not been recovered in step 2, check if there is any defect in the LGC board, IPC board or finisher control board. If not, replace the LGC board, IPC board or finisher control board. © 2005 - 2007 TOSHIBA TEC CORPORATION All rights reserved e-STUDIO520/523/600/603/720/723/850/853 TROUBLESHOOTING...
-
Page 458: Service Call For Others
Check if the main charger wire is broken or the main charger grid is deformed. Check if any foreign matters is on the main charger win or the main charger grid. Replace the High-voltage transformer. Replace the LGC board. e-STUDIO520/523/600/603/720/723/850/853 © 2005 - 2007 TOSHIBA TEC CORPORATION All rights reserved TROUBLESHOOTING 5 - 96... - Page 459 In case that the used toner transport motor does not drive or [CD4] is not released when power is turned ON again, do the above procedure after manually turning the pulley beside the motor toward the direction of arrow (counterclockwise) several times. © 2005 - 2007 TOSHIBA TEC CORPORATION All rights reserved e-STUDIO520/523/600/603/720/723/850/853 TROUBLESHOOTING...
- Page 460 Is the disconnected? Check if the connector of the LGC board and connector Pins are not disconnected. Replace the hopper motor. Replace the LGC board. e-STUDIO520/523/600/603/720/723/850/853 © 2005 - 2007 TOSHIBA TEC CORPORATION All rights reserved TROUBLESHOOTING 5 - 98...
- Page 461 Check if the connector J111 on the SYS board is disconnected. Replace the harness. Initialize the HDD. (Key in “2” at 08-690.) Replace the HDD. Replace the SYS board. © 2005 - 2007 TOSHIBA TEC CORPORATION All rights reserved e-STUDIO520/523/600/603/720/723/850/853 TROUBLESHOOTING 5 - 99 05/11...
- Page 462 Clear the service call “F200”. (Key in “0” at 08-633.) * When the Data overwrite kit (GP-1060) is taken off from the equipment, the service call “F200” occurs. e-STUDIO520/523/600/603/720/723/850/853 © 2005 - 2007 TOSHIBA TEC CORPORATION All rights reserved TROUBLESHOOTING 5 - 100...
-
Page 463: Error In Internet Fax / Scanning Function
If the error still occurs, turn the power OFF and then back ON, and perform the job again. [1C15] Exceeding file capacity Reset and extend the “Maximum send to E-mail/iFAX size” or reduce the number of pages and perform the job again. © 2005 - 2007 TOSHIBA TEC CORPORATION All rights reserved e-STUDIO520/523/600/603/720/723/850/853 TROUBLESHOOTING 5 - 101... - Page 464 [1C64] Terminal mail address unset Reset the Terminal mail address. Turn the power OFF and then back ON. Perform the job in error again. e-STUDIO520/523/600/603/720/723/850/853 © 2005 - 2007 TOSHIBA TEC CORPORATION All rights reserved TROUBLESHOOTING 5 - 102 05/05...
- Page 465 Set the SMTP valid and perform the job again. [1C71] SMTP authentication ERROR Check that SMTP authentication method, login name and password are correct, then perform authenti- cation again. © 2005 - 2007 TOSHIBA TEC CORPORATION All rights reserved e-STUDIO520/523/600/603/720/723/850/853 TROUBLESHOOTING 5 - 103...
- Page 466 Reset the “Received Fax Forward”. [1CC1] Power failure Check if the power cable is connected properly and it is inserted securely. Check if the power voltage is unstable. e-STUDIO520/523/600/603/720/723/850/853 © 2005 - 2007 TOSHIBA TEC CORPORATION All rights reserved TROUBLESHOOTING 5 - 104 05/05...
- Page 467 Or divide the original data into several pieces and retransmit them. [2553] Destination mail address error (RFC: 553) Check if there is an illegal character in the mail box in the mail server. © 2005 - 2007 TOSHIBA TEC CORPORATION All rights reserved e-STUDIO520/523/600/603/720/723/850/853 TROUBLESHOOTING...
- Page 468 If it can be printed out, perform the job in error again. If it can not be printed out, replace the main memory. If the recovery is still not completed, perform the HDD formatting (08-690). e-STUDIO520/523/600/603/720/723/850/853 © 2005 - 2007 TOSHIBA TEC CORPORATION All rights reserved TROUBLESHOOTING 5 - 106...
- Page 469 Backup the documents in the box or folder to PC or delete them. [2BF2] Exceeding maximum number of folders Backup the folders in the box or folder to PC or delete them. © 2005 - 2007 TOSHIBA TEC CORPORATION All rights reserved e-STUDIO520/523/600/603/720/723/850/853 TROUBLESHOOTING...
- Page 470 Check if the access privilege to the storage directory is writable. Check if the server or local disk has a sufficient space in disk capacity. e-STUDIO520/523/600/603/720/723/850/853 © 2005 - 2007 TOSHIBA TEC CORPORATION All rights reserved TROUBLESHOOTING 5 - 108...
- Page 471 Turn the power OFF and then back ON. Perform the job in error again. [2C66] Server time-out error Check if the SMTP server is operating properly. © 2005 - 2007 TOSHIBA TEC CORPORATION All rights reserved e-STUDIO520/523/600/603/720/723/850/853 TROUBLESHOOTING 5 - 109...
- Page 472 Check that both the POP Before SMTP setting and POP3 setting are correct, then perform authentica- tion again. [2C80] E-mail transmission failure when processing E-mail job received Reset the “Received InternetFax Forward”. e-STUDIO520/523/600/603/720/723/850/853 © 2005 - 2007 TOSHIBA TEC CORPORATION All rights reserved TROUBLESHOOTING 5 - 110...
- Page 473 Reset the setting of the mail box or “Received InternetFax Forward”. [2CC1] Power failure Check if the power cable is connected properly and it is inserted securely. Check if the power voltage is unstable. © 2005 - 2007 TOSHIBA TEC CORPORATION All rights reserved e-STUDIO520/523/600/603/720/723/850/853 TROUBLESHOOTING 5 - 111...
- Page 474 Check if there are no other running jobs and perform the HDD formatting (08-690). If the recovery is still not completed, replace the SYS board. e-STUDIO520/523/600/603/720/723/850/853 © 2005 - 2007 TOSHIBA TEC CORPORATION All rights reserved TROUBLESHOOTING 5 - 112...
- Page 475 Reduce the number of pages of the job in error and perform the job again. Check if the server or local disk has a sufficient space in disk capacity. © 2005 - 2007 TOSHIBA TEC CORPORATION All rights reserved e-STUDIO520/523/600/603/720/723/850/853...
- Page 476 Check if the setting of SMB is valid. [2DC1] Power failure Check if the power cable is connected properly and it is inserted securely. Check if the power voltage is unstable. e-STUDIO520/523/600/603/720/723/850/853 © 2005 - 2007 TOSHIBA TEC CORPORATION All rights reserved TROUBLESHOOTING 5 - 114...
- Page 477 [3B20] [3B21] [3B22] Content-Type error The format of the attached file is not supported by this equipment (TIFF-FX). Request the sender to retransmit the file in TIFF-FX. © 2005 - 2007 TOSHIBA TEC CORPORATION All rights reserved e-STUDIO520/523/600/603/720/723/850/853 TROUBLESHOOTING 5 - 115...
- Page 478 [3C70] Power failure error Check if the mail is recovered after turning ON the power again. Request the sender to retransmit the mail if it is not recovered. e-STUDIO520/523/600/603/720/723/850/853 © 2005 - 2007 TOSHIBA TEC CORPORATION All rights reserved TROUBLESHOOTING 5 - 116...
- Page 479 Install the print kit and perform the job again. Install the Expansion Memory (GC-1230) and perform the job again. Register it officially and perform the job again. © 2005 - 2007 TOSHIBA TEC CORPORATION All rights reserved e-STUDIO520/523/600/603/720/723/850/853 TROUBLESHOOTING 5 - 117...
- Page 480 If the error still occurs, turn the power OFF and then back ON, and perform the job again. [A290] Limit over ERROR [A291] Limit over ERROR [A292] Limit over ERROR Clear the limit counter. e-STUDIO520/523/600/603/720/723/850/853 © 2005 - 2007 TOSHIBA TEC CORPORATION All rights reserved TROUBLESHOOTING 5 - 118...
-
Page 481: Troubleshooting For Image Quality Control
2) If the test print is normal, check the surface of the image quality sen- sor, clean it or replace it, and then perform the image quality control enforcement / condition check (image check; described later). © 2005 - 2007 TOSHIBA TEC CORPORATION All rights reserved e-STUDIO520/523/600/603/720/723/850/853 TROUBLESHOOTING... - Page 482 Replace the laser unit, and perform the image quality control enforcement / condition check (image check; described later). Replace the HVT board, and perform the image quality control enforcement / condition check (image check; described later). e-STUDIO520/523/600/603/720/723/850/853 © 2005 - 2007 TOSHIBA TEC CORPORATION All rights reserved TROUBLESHOOTING 5 - 120...
- Page 483 Replace the open-circuited harness, and then perform the image quality control enforcement / condition check (image check; described later). Is the power voltage for the 12V power normal? © 2005 - 2007 TOSHIBA TEC CORPORATION All rights reserved e-STUDIO520/523/600/603/720/723/850/853 TROUBLESHOOTING...
- Page 484 * When the value for 05-242 (Drum surface potential sensor control status) is other than "0", there is a problem on the drum surface potential control. Clear the problem with the troubleshooting for surface potential control related. e-STUDIO520/523/600/603/720/723/850/853 © 2005 - 2007 TOSHIBA TEC CORPORATION All rights reserved TROUBLESHOOTING 5 - 122...
- Page 485 * When the value for 05-242 (Drum surface potential sensor control status) is other than "0", there is a problem on the drum surface potential control. Clear the problem with the troubleshooting for surface potential control related. © 2005 - 2007 TOSHIBA TEC CORPORATION All rights reserved e-STUDIO520/523/600/603/720/723/850/853 TROUBLESHOOTING...
-
Page 486: Troubleshooting For Surface Potential Control
/ condition check (described later). 3) If the problem still occurs, replace the LGC board, and perform the drum surface potential sensor control/condition check (described later). e-STUDIO520/523/600/603/720/723/850/853 © 2005 - 2007 TOSHIBA TEC CORPORATION All rights reserved TROUBLESHOOTING 5 - 124... - Page 487 * When 05-291 (Status of image quality control) is other than "0", there is a problem with the image quality control. Clear the problem with the trouble shooting for the image qual- ity control related. © 2005 - 2007 TOSHIBA TEC CORPORATION All rights reserved e-STUDIO520/523/600/603/720/723/850/853 TROUBLESHOOTING...
-
Page 488: Troubleshooting For Remaining Toner Detection Sensor
The Auto Supply Order function does not work. Countermeasure 1) Check if the connector or connector pins on the toner drive are disconnected. 2) Replace the remaining toner detection sensor. e-STUDIO520/523/600/603/720/723/850/853 © 2005 - 2007 TOSHIBA TEC CORPORATION All rights reserved TROUBLESHOOTING 5 - 126... -
Page 489: Troubleshooting For The Image
Is there a blotch on the image? Perform troubleshooting for blotched image. Is the image transferred normally? Perform troubleshooting for abnor- mal transfer. © 2005 - 2007 TOSHIBA TEC CORPORATION All rights reserved e-STUDIO520/523/600/603/720/723/850/853 TROUBLESHOOTING 5 - 127... - Page 490 PM life? Is the storage environment of the Use the toner cartridge stored in the toner cartridge 35°C or less without environment within specification. dew? e-STUDIO520/523/600/603/720/723/850/853 © 2005 - 2007 TOSHIBA TEC CORPORATION All rights reserved TROUBLESHOOTING 5 - 128...
- Page 491 (to shift) the toner density basically. If it is shifted, make sure that the image may be improper in a few minutes after shifting. © 2005 - 2007 TOSHIBA TEC CORPORATION All rights reserved e-STUDIO520/523/600/603/720/723/850/853...
- Page 492 Check the image processing param- Check the encircled areas A and B in eters. the image, and change the sharp- ness intensity in the sharpness adjustment mode. e-STUDIO520/523/600/603/720/723/850/853 © 2005 - 2007 TOSHIBA TEC CORPORATION All rights reserved TROUBLESHOOTING 5 - 130...
- Page 493 Replace the cleaning web. life? Using the specified cleaning web? Use the specified cleaning web. Is there any trouble with the ther- Clean or replace the thermistor. mistor? © 2005 - 2007 TOSHIBA TEC CORPORATION All rights reserved e-STUDIO520/523/600/603/720/723/850/853 TROUBLESHOOTING 5 - 131...
- Page 494 Use the specified developer material rial and toner? and toner. Scanner Are the original glass (especially the Clean them. position of shading correction plate), mirror and lens dirty? e-STUDIO520/523/600/603/720/723/850/853 © 2005 - 2007 TOSHIBA TEC CORPORATION All rights reserved TROUBLESHOOTING 5 - 132...
- Page 495 Drum Is the drum surface wet or dirty? Wipe the drum with a piece of dry cloth. Do not use alcohol or other organic solvents. © 2005 - 2007 TOSHIBA TEC CORPORATION All rights reserved e-STUDIO520/523/600/603/720/723/850/853 TROUBLESHOOTING 5 - 133...
- Page 496 Check the setting and correct it. roller in each paper type normal? 08-410, 412, 413, 437, 1804 Using the recommended paper? Use the recommended paper. e-STUDIO520/523/600/603/720/723/850/853 © 2005 - 2007 TOSHIBA TEC CORPORATION All rights reserved TROUBLESHOOTING 5 - 134...
- Page 497 Are the connectors securely con- Connect the connectors securely. boards and harnesses nected? Replace the harness. Check if the harnesses connecting the boards are open circuited. © 2005 - 2007 TOSHIBA TEC CORPORATION All rights reserved e-STUDIO520/523/600/603/720/723/850/853 TROUBLESHOOTING 5 - 135...
- Page 498 Are the connectors securely con- Connect the connectors securely. boards and harnesses nected? Replace the harness. Check if the harnesses connecting the boards are open circuited. e-STUDIO520/523/600/603/720/723/850/853 © 2005 - 2007 TOSHIBA TEC CORPORATION All rights reserved TROUBLESHOOTING 5 - 136...
- Page 499 Cleaner Is there any foreign matter, which Remove the foreign matter. contacts the drum on the cleaner stay? © 2005 - 2007 TOSHIBA TEC CORPORATION All rights reserved e-STUDIO520/523/600/603/720/723/850/853 TROUBLESHOOTING 5 - 137...
- Page 500 Is the high-voltage transformer out- Replace the transformer. (Main charger / Developer put defective? bias / Transfer charger) Feed system Is the aligning amount proper? Adjust the aligning amount. e-STUDIO520/523/600/603/720/723/850/853 © 2005 - 2007 TOSHIBA TEC CORPORATION All rights reserved TROUBLESHOOTING 5 - 138...
- Page 501 Pre-registration guide Is the pre-registration guide properly Correct it. installed? Carriage-1 Is the carriage-1 slanted? Adjust the carriage-1. © 2005 - 2007 TOSHIBA TEC CORPORATION All rights reserved e-STUDIO520/523/600/603/720/723/850/853 TROUBLESHOOTING 5 - 139...
- Page 502 Is the fuser roller surface dirty or Clean or replace the fuser roller. damaged? Is the fuser roller thermistor dirty? Clean the fuser roller thermistor. e-STUDIO520/523/600/603/720/723/850/853 © 2005 - 2007 TOSHIBA TEC CORPORATION All rights reserved TROUBLESHOOTING 5 - 140...
- Page 503 Replace the drum if the scratch has surface? reached the aluminum base. Scanner Is there a foreign matter on the car- Remove the foreign matter. riage rail? © 2005 - 2007 TOSHIBA TEC CORPORATION All rights reserved e-STUDIO520/523/600/603/720/723/850/853 TROUBLESHOOTING 5 - 141...
- Page 504 Is there any dent on the surface of Replace the drum. the photoconductive drum? Is there any film forming on the pho- Clean or replace the drum. toconductive drum? e-STUDIO520/523/600/603/720/723/850/853 © 2005 - 2007 TOSHIBA TEC CORPORATION All rights reserved TROUBLESHOOTING 5 - 142...
- Page 505 (to shift) the toner density basically. If it is shifted, make sure that the image may be improper in a few minutes after shifting. © 2005 - 2007 TOSHIBA TEC CORPORATION All rights reserved e-STUDIO520/523/600/603/720/723/850/853...
- Page 506 Replace the transformer. (Transfer charger) put defective? Note: Note: Refer to 3.6.1 of chapter 3 for the poor image transfer at the paper leading edge. e-STUDIO520/523/600/603/720/723/850/853 © 2005 - 2007 TOSHIBA TEC CORPORATION All rights reserved TROUBLESHOOTING 5 - 144...
- Page 507 Remove foreign matters if there is normally? any. Scanner section Are the original glass (especially the Clean them. position of shading correction plate), mirror and lens dirty? © 2005 - 2007 TOSHIBA TEC CORPORATION All rights reserved e-STUDIO520/523/600/603/720/723/850/853 TROUBLESHOOTING 5 - 145...
- Page 508 If any abnormal image appears, check the harness connection between the LGC board and the high-voltage transformer, power sup- ply and stain on the main charger wire. e-STUDIO520/523/600/603/720/723/850/853 © 2005 - 2007 TOSHIBA TEC CORPORATION All rights reserved TROUBLESHOOTING 5 - 146...
- Page 509 (to shift) the toner density basically. If it is shifted, make sure that the image may be improper in a few minutes after shifting. © 2005 - 2007 TOSHIBA TEC CORPORATION All rights reserved e-STUDIO520/523/600/603/720/723/850/853...
- Page 510 Is the feed clutch working properly? Check the circuit or feed clutch, and replace them if necessary. Pre-registration guide Is the pre-registration guide installed Install the guide properly. properly? e-STUDIO520/523/600/603/720/723/850/853 © 2005 - 2007 TOSHIBA TEC CORPORATION All rights reserved TROUBLESHOOTING 5 - 148 05/04...
- Page 511 Is there any problem with the drive Check the drive system of the drum. system of the drum? Clean or replace the gears if they have stains or scratches. © 2005 - 2007 TOSHIBA TEC CORPORATION All rights reserved e-STUDIO520/523/600/603/720/723/850/853 TROUBLESHOOTING 5 - 149...
- Page 512 Check and replace the drum if neces- sary. Toner recovery auger Is the toner recovered normally? Clean the toner recovery auger. Check the pressure of the cleaning blade. e-STUDIO520/523/600/603/720/723/850/853 © 2005 - 2007 TOSHIBA TEC CORPORATION All rights reserved TROUBLESHOOTING 5 - 150 05/04...
- Page 513 (espe- cially the position of shading correction plate) dirty? Exposure lamp Is the exposure lamp discolored or Replace the exposure lamp. degraded? © 2005 - 2007 TOSHIBA TEC CORPORATION All rights reserved e-STUDIO520/523/600/603/720/723/850/853 TROUBLESHOOTING 5 - 151 06/09...
- Page 514 Replace the transfer belt. mal life span? High-voltage transformer Is the output from the high-voltage Adjust the output. Replace the trans- (Transfer charger) transformer normal? former if necessary. e-STUDIO520/523/600/603/720/723/850/853 © 2005 - 2007 TOSHIBA TEC CORPORATION All rights reserved TROUBLESHOOTING 5 - 152...
-
Page 515: Replacement Of Pc Boards And Hdd
FAX saved data (Confidential / Bulletin board data) Print them. (The data cannot be backed up.) Registration data for FAX transmission (Delayed transmission / Recovery transmission) The data cannot be backed up. © 2005 - 2007 TOSHIBA TEC CORPORATION All rights reserved e-STUDIO520/523/600/603/720/723/850/853 TROUBLESHOOTING 5 - 153... - Page 516 F-code information, Template registering information, Address book Restore them in the “Administrator” menu of TopAccess Department management data Import them in the “Administrator” menu of TopAccess. e-STUDIO520/523/600/603/720/723/850/853 © 2005 - 2007 TOSHIBA TEC CORPORATION All rights reserved TROUBLESHOOTING 5 - 154 05/04...
- Page 517 Press the [ADMIN] button, enter the password, and then press the [ENTER] button. Press the [FAX] button and then the [TERMINAL ID] button to set each item. Press the [INITIAL SETUP] button to set each item. © 2005 - 2007 TOSHIBA TEC CORPORATION All rights reserved e-STUDIO520/523/600/603/720/723/850/853 TROUBLESHOOTING...
-
Page 518: Replacing Sys Board
(10) Turn the power OFF. * If the FAX board has not been installed, skip to step (14). (11) Start up with the FAX Clearing Mode (1*) e-STUDIO520/523/600/603/720/723/850/853 © 2005 - 2007 TOSHIBA TEC CORPORATION All rights reserved TROUBLESHOOTING 5 - 156 07/11... -
Page 519: Cautions When Data Overwrite Kit (Gp-1060) Is Installed
08-1427 (Forcible NVRAM data all clearing) • 08-1428 (Forcible SRAM backup data all clearing) Caution If these codes are performed, the equipment cannot be started up. © 2005 - 2007 TOSHIBA TEC CORPORATION All rights reserved e-STUDIO520/523/600/603/720/723/850/853 TROUBLESHOOTING 5 - 157 05/11... -
Page 520: Replacing Nvram
(12) Turn the power OFF. (13) Turn the power ON. (14) Set the dial type. [USER FUNCTIONS] → [ADMIN] → [FAX] → [INITIAL SETUP] e-STUDIO520/523/600/603/720/723/850/853 © 2005 - 2007 TOSHIBA TEC CORPORATION All rights reserved TROUBLESHOOTING 5 - 158 07/11... -
Page 521: Hdd Information Display
This value tends to increase at HDD failure. Current Pending Sector Count The number of candidate sectors to This value tends to increase at be reassigned HDD failure. © 2005 - 2007 TOSHIBA TEC CORPORATION All rights reserved e-STUDIO520/523/600/603/720/723/850/853 TROUBLESHOOTING 5 - 159 05/06... - Page 522 This attribute is a measure of the total number of errors found in data transfer in the Ultra-DMA mode. Write Error Rate This attribute is a measure of the write error rate. e-STUDIO520/523/600/603/720/723/850/853 © 2005 - 2007 TOSHIBA TEC CORPORATION All rights reserved TROUBLESHOOTING 5 - 160...
-
Page 523: Other Errors
Wireless LAN did not succeed even though “NIC INITIALIZING” disappears. * The connection to the Wireless LAN cannot be made if the Access Point to be connected is not found or security settings are not correct. © 2005 - 2007 TOSHIBA TEC CORPORATION All rights reserved e-STUDIO520/523/600/603/720/723/850/853 TROUBLESHOOTING... - Page 524 © 2005 - 2007 TOSHIBA TEC CORPORATION All rights reserved TROUBLESHOOTING 5 - 162...
-
Page 525: Firmware Updating
Updating with the download jig P.6-3 "6.1 Firmware Updating with Download Jig" • Updating with the USB Storage Device P.6-39 "6.2 Firmware Updating with USB Storage Device" © 2005 - 2007 TOSHIBA TEC CORPORATION All rights reserved e-STUDIO520/523/600/603/720/723/850/853 FIRMWARE UPDATING 6 - 1 07/11... - Page 526 © 2005 - 2007 TOSHIBA TEC CORPORATION All rights reserved FIRMWARE UPDATING 6 - 2...
-
Page 527: Firmware Updating With Download Jig
P.6-5 "6.1.1 PWA-DWNLD-350-JIG2 (48 MB) <Master data>" P.6-11 "6.1.2 PWA-DWNLD-350-JIG2 (48 MB) <System ROM / Engine ROM / Scanner ROM / Laser ROM / PFC ROM>" P.6-28 "6.1.4 K-PWA-DLM-320" © 2005 - 2007 TOSHIBA TEC CORPORATION All rights reserved e-STUDIO520/523/600/603/720/723/850/853 FIRMWARE UPDATING 6 - 3... - Page 528 P.6-26 "6.1.3 Writing the data to the download jig (PWA-DWNLD-350-JIG)" K-PWA-DLM-320 Connector Mark for ROM installation direction Fig. 6-2 Jig board: K-PWA-DLM-320 Important: Pay attention to the direction of the ROM. e-STUDIO520/523/600/603/720/723/850/853 © 2005 - 2007 TOSHIBA TEC CORPORATION All rights reserved FIRMWARE UPDATING 6 - 4 05/05...
-
Page 529: Pwa-Dwnld-350-Jig2 (48 Mb)
Remove the cover plate. Cover plate Fig. 6-3 Connect the download jig with the jig connector (CN107) on the SYS board. Connector Fig. 6-4 © 2005 - 2007 TOSHIBA TEC CORPORATION All rights reserved e-STUDIO520/523/600/603/720/723/850/853 FIRMWARE UPDATING 6 - 5... - Page 530 Downloading starts automatically and the processing status is displayed on LCD screen. Fig. 6-5 “Update Completed!!” is displayed at the bottom of the LCD screen after the updating is com- pleted properly. Fig. 6-6 e-STUDIO520/523/600/603/720/723/850/853 © 2005 - 2007 TOSHIBA TEC CORPORATION All rights reserved FIRMWARE UPDATING 6 - 6...
- Page 531 08-937: Version of Web UI data language 4 in HDD 08-938: Version of Web UI data language 5 in HDD 08-939: Version of Web UI data language 6 in HDD © 2005 - 2007 TOSHIBA TEC CORPORATION All rights reserved e-STUDIO520/523/600/603/720/723/850/853 FIRMWARE UPDATING...
- Page 532 The processing status is displayed as follows on the LCD screen during the update. The device check starts. When the device check completes, copying the data to HDD starts. e-STUDIO520/523/600/603/720/723/850/853 © 2005 - 2007 TOSHIBA TEC CORPORATION All rights reserved FIRMWARE UPDATING 6 - 8...
- Page 533 When copying all the files completes, the backup of the RIP font starts. When the backup of the RIP font completes, the update completes with the following screen. © 2005 - 2007 TOSHIBA TEC CORPORATION All rights reserved e-STUDIO520/523/600/603/720/723/850/853 FIRMWARE UPDATING 6 - 9...
- Page 534 * If an error occurs, the following error message is displayed and the update is interrupted. e-STUDIO520/523/600/603/720/723/850/853 © 2005 - 2007 TOSHIBA TEC CORPORATION All rights reserved FIRMWARE UPDATING 6 - 10 05/05...
- Page 535 Write the ROM data to be updated to the download jig. P.6-26 "6.1.3 Writing the data to the download jig (PWA-DWNLD-350-JIG)" Shut down the equipment. © 2005 - 2007 TOSHIBA TEC CORPORATION All rights reserved e-STUDIO520/523/600/603/720/723/850/853 FIRMWARE UPDATING 6 - 11...
- Page 536 Remove the cover plate. Cover plate Fig. 6-8 Connect the download jig with the jig connector (CN107) on the SYS board. Connector Fig. 6-9 e-STUDIO520/523/600/603/720/723/850/853 © 2005 - 2007 TOSHIBA TEC CORPORATION All rights reserved FIRMWARE UPDATING 6 - 12 05/05...
- Page 537 3. PFC Firmware Update Engine ROM 5. Engine Firmware Update 4. Engine Firmware Update Scanner ROM 6. Scanner Firmware Update 5. Scanner Firmware Update © 2005 - 2007 TOSHIBA TEC CORPORATION All rights reserved e-STUDIO520/523/600/603/720/723/850/853 FIRMWARE UPDATING 6 - 13 06/09...
- Page 538 When the FROM basic section software version to be updated is "V1.03 / 8.30" or earlier: Fig. 6-12 When the FROM basic section software version to be updated is "V1.04 / 2.38" or later: Fig. 6-13 e-STUDIO520/523/600/603/720/723/850/853 © 2005 - 2007 TOSHIBA TEC CORPORATION All rights reserved FIRMWARE UPDATING 6 - 14 06/09...
- Page 539 ..PFC Update ..Completed Engine MAIN Update Flash Update Engine MAIN Update Completed Scanner Firm Update Flash Update Scanner Firm Update Completed © 2005 - 2007 TOSHIBA TEC CORPORATION All rights reserved e-STUDIO520/523/600/603/720/723/850/853 FIRMWARE UPDATING 6 - 15 06/09...
- Page 540 Is the download jig connected properly? • Is the updating data written to the download jig properly? • Do the download jig and the equipment operate properly? e-STUDIO520/523/600/603/720/723/850/853 © 2005 - 2007 TOSHIBA TEC CORPORATION All rights reserved FIRMWARE UPDATING 6 - 16 06/09...
- Page 541 Turn ON the power while [0] button and [8] button are pressed simultaneously. • Key in “947”, and then press the [START] button. • Press the [INITIALIZE] button. © 2005 - 2007 TOSHIBA TEC CORPORATION All rights reserved e-STUDIO520/523/600/603/720/723/850/853 FIRMWARE UPDATING 6 - 17 06/09...
- Page 542 08-903: Engine ROM version <Updating Scanner ROM> 08-905: Scanner ROM version <Updating Laser ROM> 08-904: Laser ROM version <Updating PFC ROM> 08-906: PFC ROM version e-STUDIO520/523/600/603/720/723/850/853 © 2005 - 2007 TOSHIBA TEC CORPORATION All rights reserved FIRMWARE UPDATING 6 - 18 05/05...
- Page 543 Below is an example of the changes of the LCD screen during update. Note that the screen order may be different from the actual one, because a parallel update is performed in the process. © 2005 - 2007 TOSHIBA TEC CORPORATION All rights reserved e-STUDIO520/523/600/603/720/723/850/853 FIRMWARE UPDATING...
- Page 544 [UI Update] update will start. When the [System ROM]-[UI Update] has been updated, “UI Data Update…Completed” is dis- played and the [System Firmware Update] update will start. e-STUDIO520/523/600/603/720/723/850/853 © 2005 - 2007 TOSHIBA TEC CORPORATION All rights reserved FIRMWARE UPDATING 6 - 20 05/05...
- Page 545 [PFC ROM] update will start. When the [PFC ROM] has been updated, “PFC Firm Update…Completed” is displayed and the [Engine ROM] update will start. © 2005 - 2007 TOSHIBA TEC CORPORATION All rights reserved e-STUDIO520/523/600/603/720/723/850/853 FIRMWARE UPDATING 6 - 21...
- Page 546 * “Update Failed.” is displayed at the bottom of the LCD screen when the updating is not completed properly. “Failed” appears next to the failed item on the status display. e-STUDIO520/523/600/603/720/723/850/853 © 2005 - 2007 TOSHIBA TEC CORPORATION All rights reserved FIRMWARE UPDATING 6 - 22...
- Page 547 Below is an example of the changes of the LCD screen during update. Turn ON the power while [8] button and [9] button are pressed simultaneously Select items to be updated and press the [START] button. © 2005 - 2007 TOSHIBA TEC CORPORATION All rights reserved e-STUDIO520/523/600/603/720/723/850/853 FIRMWARE UPDATING 6 - 23...
- Page 548 “OS UI Update…Completed” is displayed. When the [Scanner ROM] has been updated, “Scanner Firm Update..Flash Update” is changed to “Scanner Firm Update.. Completed”. e-STUDIO520/523/600/603/720/723/850/853 © 2005 - 2007 TOSHIBA TEC CORPORATION All rights reserved FIRMWARE UPDATING 6 - 24 06/09...
- Page 549 * “Update Failed.” is displayed at the bottom of the LCD screen when the updating is not completed properly. “Failed” appears next to the failed item on the status display. Failed items Error message © 2005 - 2007 TOSHIBA TEC CORPORATION All rights reserved e-STUDIO520/523/600/603/720/723/850/853 FIRMWARE UPDATING 6 - 25...
-
Page 550: Writing The Data To The Download Jig (Pwa-Dwnld-350-Jig)
1881 model 1881 model 1931 model 1931 ( LV6 5 0 ) ( LV 6 5 0 ) Fig. 6-24 PWA-DL-ADP-350-1931 Fig. 6-23 PWA-DL-ADP-350-1881 e-STUDIO520/523/600/603/720/723/850/853 © 2005 - 2007 TOSHIBA TEC CORPORATION All rights reserved FIRMWARE UPDATING 6 - 26... - Page 551 ROM5 ROM6 Note: Note: Be sure not to confuse different ROM Versions since the file name is identical although the ROM version is different. © 2005 - 2007 TOSHIBA TEC CORPORATION All rights reserved e-STUDIO520/523/600/603/720/723/850/853 FIRMWARE UPDATING 6 - 27...
-
Page 552: K-Pwa-Dlm-320
Install the ROM to the download jig. Make sure the direction is correct ( P.6-4 "Fig. 6-2 Jig board: K-PWA-DLM-320"). Shut down the equipment. e-STUDIO520/523/600/603/720/723/850/853 © 2005 - 2007 TOSHIBA TEC CORPORATION All rights reserved FIRMWARE UPDATING 6 - 28... - Page 553 Do the download jig and the equipment operate properly? Turn OFF the power, remove the download jig and install the connector cover. Close the front cover. © 2005 - 2007 TOSHIBA TEC CORPORATION All rights reserved e-STUDIO520/523/600/603/720/723/850/853 FIRMWARE UPDATING 6 - 29...
- Page 554 Shut down the equipment. Take off the top right cover. Top right cover Fig. 6-27 Take off the right upper cover. Right upper cover Fig. 6-28 e-STUDIO520/523/600/603/720/723/850/853 © 2005 - 2007 TOSHIBA TEC CORPORATION All rights reserved FIRMWARE UPDATING 6 - 30...
- Page 555 (10) Turn OFF the power, remove the download jig and install the cover plate, the right upper cover and the top right cover. (11) Close the front cover. © 2005 - 2007 TOSHIBA TEC CORPORATION All rights reserved e-STUDIO520/523/600/603/720/723/850/853 FIRMWARE UPDATING...
- Page 556 Do the download jig and the equipment operate properly? Turn OFF the power, remove the download jig and install the connector cover. (10) Close the front cover. e-STUDIO520/523/600/603/720/723/850/853 © 2005 - 2007 TOSHIBA TEC CORPORATION All rights reserved FIRMWARE UPDATING 6 - 32...
- Page 557 Do the download jig and the equipment operate properly? Turn OFF the power, remove the download jig and install the connector cover. Close the front cover. © 2005 - 2007 TOSHIBA TEC CORPORATION All rights reserved e-STUDIO520/523/600/603/720/723/850/853 FIRMWARE UPDATING 6 - 33...
- Page 558 Turn ON the power while [0] button and [8] button are pressed simultaneously. Updating starts automatically and the LED on the download jig lights. e-STUDIO520/523/600/603/720/723/850/853 © 2005 - 2007 TOSHIBA TEC CORPORATION All rights reserved FIRMWARE UPDATING 6 - 34...
- Page 559 Turn OFF the power, remove the download jig. Close the front cover. (10) Install the finisher rear cover and the saddle stitcher PCB cover. © 2005 - 2007 TOSHIBA TEC CORPORATION All rights reserved e-STUDIO520/523/600/603/720/723/850/853 FIRMWARE UPDATING 6 - 35...
- Page 560 Do the download jig and the equipment operate properly? Turn OFF the power, remove the download jig. Close the front cover. (10) Install the inserter rear cover. e-STUDIO520/523/600/603/720/723/850/853 © 2005 - 2007 TOSHIBA TEC CORPORATION All rights reserved FIRMWARE UPDATING 6 - 36 05/05...
- Page 561 Fig. 6-36 Turn ON the power while [0] button and [8] button are pressed simultaneously. Updating starts automatically and the LED on the download jig lights. © 2005 - 2007 TOSHIBA TEC CORPORATION All rights reserved e-STUDIO520/523/600/603/720/723/850/853 FIRMWARE UPDATING 6 - 37...
- Page 562 08-907: RADF ROM version <Updating Finisher ROM> 08-908: Finisher ROM version <Updating Inserter ROM> 08-909: Inserter ROM version <Updating FAX ROM> 08-915: FAX ROM version e-STUDIO520/523/600/603/720/723/850/853 © 2005 - 2007 TOSHIBA TEC CORPORATION All rights reserved FIRMWARE UPDATING 6 - 38 05/11...
-
Page 563: Firmware Updating With Usb Storage Device
Scanner ROM Scanning section control PC board (SLG board) Laser ROM Laser control PC board (PLG board) PFC ROM Logic PC board (LGC board) © 2005 - 2007 TOSHIBA TEC CORPORATION All rights reserved e-STUDIO520/523/600/603/720/723/850/853 FIRMWARE UPDATING 6 - 39 07/05... - Page 564 Do not update the firmware by any storage device other than a flash memory (such as a USB connection type memory card reader, CD/DVD drive or hard disk) since it is never guaran- teed. e-STUDIO520/523/600/603/720/723/850/853 © 2005 - 2007 TOSHIBA TEC CORPORATION All rights reserved FIRMWARE UPDATING 6 - 40 05/05...
- Page 565 • Be careful not to mix up the "mentusb.o" file because there is a file whose name is the same in the localization tool. © 2005 - 2007 TOSHIBA TEC CORPORATION All rights reserved e-STUDIO520/523/600/603/720/723/850/853 FIRMWARE UPDATING 6 - 41...
- Page 566 Connect the USB storage device to the USB connector (host) on the SYS board. USB connector ( host ) USB storage device Fig. 6-39 e-STUDIO520/523/600/603/720/723/850/853 © 2005 - 2007 TOSHIBA TEC CORPORATION All rights reserved FIRMWARE UPDATING 6 - 42...
- Page 567 "mentusb.o" file exists, or the loading of the update program fails, the following screen appears. In this case, check if the update program is correctly stored and repeat step (5) and after. Fig. 6-42 © 2005 - 2007 TOSHIBA TEC CORPORATION All rights reserved e-STUDIO520/523/600/603/720/723/850/853 FIRMWARE UPDATING 6 - 43...
- Page 568 5. PFC Firmware Update firmImage2.bin is written. 6. Engine Firmware Update firmImage2.bin is written. 7. Scanner Firmware Update firmImage2.bin is written. e-STUDIO520/523/600/603/720/723/850/853 © 2005 - 2007 TOSHIBA TEC CORPORATION All rights reserved FIRMWARE UPDATING 6 - 44 07/05...
- Page 569 USB storage device and connect it again within 3 minutes, or turn OFF the power of the equipment and connect the device properly. Then repeat the procedure from (5). Fig. 6-45 © 2005 - 2007 TOSHIBA TEC CORPORATION All rights reserved e-STUDIO520/523/600/603/720/723/850/853 FIRMWARE UPDATING...
- Page 570 "mentusb.o" and "dlFirmWare_520_850", which are the files for update program, in the specified folder and repeat step (5) and after. Fig. 6-47 e-STUDIO520/523/600/603/720/723/850/853 © 2005 - 2007 TOSHIBA TEC CORPORATION All rights reserved FIRMWARE UPDATING 6 - 46 07/05...
- Page 571 Example: Updating the master data and system ROM When the FROM basic section software version of the equipment is "V1.03 / 8.30" or earlier: Fig. 6-48 © 2005 - 2007 TOSHIBA TEC CORPORATION All rights reserved e-STUDIO520/523/600/603/720/723/850/853 FIRMWARE UPDATING 6 - 47...
- Page 572 When the FROM basic section software version of the equipment is "V1.04 / 2.38" or later: Fig. 6-49 (Updating all the items is taken as an example and explained in the following procedures.) e-STUDIO520/523/600/603/720/723/850/853 © 2005 - 2007 TOSHIBA TEC CORPORATION All rights reserved FIRMWARE UPDATING 6 - 48 06/09...
- Page 573 ..PFC Update ..Completed Engine MAIN Update Flash Update Engine MAIN Update Completed Scanner Firm Update Flash Update Scanner Firm Update Completed © 2005 - 2007 TOSHIBA TEC CORPORATION All rights reserved e-STUDIO520/523/600/603/720/723/850/853 FIRMWARE UPDATING 6 - 49 06/09...
- Page 574 ..PFC Update ..Completed Engine MAIN Update Flash Update Engine MAIN Update Completed Scanner Firm Update Flash Update Scanner Firm Update Completed e-STUDIO520/523/600/603/720/723/850/853 © 2005 - 2007 TOSHIBA TEC CORPORATION All rights reserved FIRMWARE UPDATING 6 - 50 06/09...
- Page 575 Is the data file written properly on the USB storage device? • Is the USB storage device installed properly? • Do the USB storage device and equipment operate properly? © 2005 - 2007 TOSHIBA TEC CORPORATION All rights reserved e-STUDIO520/523/600/603/720/723/850/853 FIRMWARE UPDATING 6 - 51 06/09...
- Page 576 Turn ON the power while [0] button and [8] button are pressed simultaneously. • Key in “947”, and then press the [START] button. • Press the [INITIALIZE] button. e-STUDIO520/523/600/603/720/723/850/853 © 2005 - 2007 TOSHIBA TEC CORPORATION All rights reserved FIRMWARE UPDATING 6 - 52 06/09...
- Page 577 08-903: Engine ROM version <Updating Scanner ROM> 08-905: Scanner ROM version <Updating Laser ROM> 08-904: Laser ROM version <Updating PFC ROM> 08-906: PFC ROM version © 2005 - 2007 TOSHIBA TEC CORPORATION All rights reserved e-STUDIO520/523/600/603/720/723/850/853 FIRMWARE UPDATING 6 - 53...
- Page 578 When the device is recognized properly, the screen for selecting update items is displayed. e-STUDIO520/523/600/603/720/723/850/853 © 2005 - 2007 TOSHIBA TEC CORPORATION All rights reserved FIRMWARE UPDATING 6 - 54 06/09...
- Page 579 [UI Update] update will start. When the [System ROM]-[UI Update] has been updated, “UI Data Update…Completed” is dis- played and the [System Firmware Update] update will start. © 2005 - 2007 TOSHIBA TEC CORPORATION All rights reserved e-STUDIO520/523/600/603/720/723/850/853 FIRMWARE UPDATING 6 - 55...
- Page 580 When the [Master Data] has been updated, “HD Data Update…Completed” is displayed. When the [Scanner ROM] has been updated, “Scanner Firm Update..Flash Update” is changed to “Scanner Firm Update..Completed”. e-STUDIO520/523/600/603/720/723/850/853 © 2005 - 2007 TOSHIBA TEC CORPORATION All rights reserved FIRMWARE UPDATING 6 - 56...
- Page 581 [PFC ROM] update will start. When the [PFC ROM] has been updated, “PFC Firm Update…Completed” is displayed and the [Engine ROM] update will start. © 2005 - 2007 TOSHIBA TEC CORPORATION All rights reserved e-STUDIO520/523/600/603/720/723/850/853 FIRMWARE UPDATING 6 - 57...
- Page 582 * “Update Failed.” is displayed at the bottom of the LCD screen when the updating is not completed properly. “Failed” appears next to the failed item on the status display. e-STUDIO520/523/600/603/720/723/850/853 © 2005 - 2007 TOSHIBA TEC CORPORATION All rights reserved FIRMWARE UPDATING 6 - 58...
- Page 583 USB storage device connected to the equipment is started. When the device is recognized properly, the screen for selecting update items is displayed. © 2005 - 2007 TOSHIBA TEC CORPORATION All rights reserved e-STUDIO520/523/600/603/720/723/850/853 FIRMWARE UPDATING 6 - 59...
- Page 584 “OS UI Update…Completed” is dis- played. When the [Scanner ROM] has been updated, “Scanner Firm Update..Flash Update” is changed to “Scanner Firm Update.. Completed”. e-STUDIO520/523/600/603/720/723/850/853 © 2005 - 2007 TOSHIBA TEC CORPORATION All rights reserved FIRMWARE UPDATING 6 - 60 06/09...
- Page 585 When the [Engine ROM] has been updated, “Engine MAIN Update..Flash Update” is changed to “Engine MAIN Update.. Completed”. When all data has been updated, “Update Completed” is displayed. © 2005 - 2007 TOSHIBA TEC CORPORATION All rights reserved e-STUDIO520/523/600/603/720/723/850/853 FIRMWARE UPDATING 6 - 61 06/09...
- Page 586 * “Update Failed.” is displayed at the bottom of the LCD screen when the updating is not completed properly. “Failed” appears next to the failed item on the status display. Failed items Error message e-STUDIO520/523/600/603/720/723/850/853 © 2005 - 2007 TOSHIBA TEC CORPORATION All rights reserved FIRMWARE UPDATING 6 - 62 06/09...
- Page 587 Turn ON the power while [3] button and [CLEAR] button are pressed simultaneously. • The following screen is displayed. Fig. 6-58 Select the item with the digital keys and press the [START] button. © 2005 - 2007 TOSHIBA TEC CORPORATION All rights reserved e-STUDIO520/523/600/603/720/723/850/853 FIRMWARE UPDATING 6 - 63...
- Page 588 © 2005 - 2007 TOSHIBA TEC CORPORATION All rights reserved FIRMWARE UPDATING 6 - 64...
-
Page 589: Power Supply Unit
The following are 3 output channels for the cover switch line. +5.1 V +5.1VH : CN403 Pin 5 Output to the PLG board © 2005 - 2007 TOSHIBA TEC CORPORATION All rights reserved e-STUDIO520/523/600/603/720/723/850/853 POWER SUPPLY UNIT 7 - 1... - Page 590 For the PLG board +5.1VH, +24VD, +36VC CN404 For the SLG board, ADF board (RADF) +24VE, +24VG, +36VD CN409 For the finisher +24VF e-STUDIO520/523/600/603/720/723/850/853 © 2005 - 2007 TOSHIBA TEC CORPORATION All rights reserved POWER SUPPLY UNIT 7 - 2...
-
Page 591: Fuse
Cleaning brush drive motor Transfer belt cam motor Transport motor Exit motor Reverse motor Auto-toner sensor Drum surface potential sensor Main switch High-voltage transformer Discharge LED © 2005 - 2007 TOSHIBA TEC CORPORATION All rights reserved e-STUDIO520/523/600/603/720/723/850/853 POWER SUPPLY UNIT 7 - 3... - Page 592 Polygonal motor F7 : 8A (Semi time-lag) (Only for e-STUDIO520/523/600/603/720/ 723 model) +36VD SLG board Scan motor F7 : 8A (Semi time-lag) e-STUDIO520/523/600/603/720/723/850/853 © 2005 - 2007 TOSHIBA TEC CORPORATION All rights reserved POWER SUPPLY UNIT 7 - 4 07/11...
-
Page 593: Configuration Of Power Supply Unit
Configuration of Power Supply Unit Regulator Regulator Fig. 7-1 © 2005 - 2007 TOSHIBA TEC CORPORATION All rights reserved e-STUDIO520/523/600/603/720/723/850/853 POWER SUPPLY UNIT 7 - 5... - Page 594 © 2005 - 2007 TOSHIBA TEC CORPORATION All rights reserved POWER SUPPLY UNIT 7 - 6...
-
Page 595: Remote Service
If some problems occur and the order cannot be placed after registering an order as a job, refer to the standard countermeasure for the FAX/E-mail transmission failure. © 2005 - 2007 TOSHIBA TEC CORPORATION All rights reserved e-STUDIO520/523/600/603/720/723/850/853 REMOTE SERVICE... -
Page 596: Setting Item
When changing the setting value from “2” (default) to “0”, the Auto Supply Order setting screen is displayed. (* HTTP has not been supported yet.) e-STUDIO520/523/600/603/720/723/850/853 © 2005 - 2007 TOSHIBA TEC CORPORATION All rights reserved REMOTE SERVICE 8 - 2... - Page 597 *2 Even when “FAX” is selected, the order is not placed without entering the FAX number. *3 Even when “MAIL” is selected, the order is not placed without entering the E-mail address. © 2005 - 2007 TOSHIBA TEC CORPORATION All rights reserved e-STUDIO520/523/600/603/720/723/850/853...
- Page 598 3) Output of setting list of the Auto Supply Order Keying in the following buttons and keys prints the setting list. [USER FUNCTIONS] [USER] [LISTS] [*] [#] [*] [*] [3] [8] [START] e-STUDIO520/523/600/603/720/723/850/853 © 2005 - 2007 TOSHIBA TEC CORPORATION All rights reserved REMOTE SERVICE 8 - 4...
-
Page 599: Setting Procedure
Administrator Password and press the [ENTER] button. * Confirm the password to the administrator. Fig. 8-2 Press the [SERVICE] button in the ADMIN screen. © 2005 - 2007 TOSHIBA TEC CORPORATION All rights reserved e-STUDIO520/523/600/603/720/723/850/853 REMOTE SERVICE 8 - 5... - Page 600 The SERVICE screen is displayed. Fig. 8-3 Press the [SUPPLY ORDER SETUP] button. Fig. 8-4 Press the [ORDER INFORMATION] button. e-STUDIO520/523/600/603/720/723/850/853 © 2005 - 2007 TOSHIBA TEC CORPORATION All rights reserved REMOTE SERVICE 8 - 6...
- Page 601 Press the [CANCEL] button to cancel this register, and then the screen returns to the (7) SER- VICE screen.) (13) The CUSTOMER/SUPPLIER screen is displayed. Fig. 8-6 © 2005 - 2007 TOSHIBA TEC CORPORATION All rights reserved e-STUDIO520/523/600/603/720/723/850/853 REMOTE SERVICE 8 - 7...
- Page 602 [OFF] / [ALWAYS] / [ON ERROR]--- Whichever you press, the result list is printed. (18) Press the [ENTER] button to register and complete the order information setting. e-STUDIO520/523/600/603/720/723/850/853 © 2005 - 2007 TOSHIBA TEC CORPORATION All rights reserved REMOTE SERVICE 8 - 8...
- Page 603 (19) The SERVICE screen is returned. Fig. 8-8 (20) Press the [SUPPLY ORDER SETUP] button. Fig. 8-9 (21) Press the [TONER ORDERING] button. © 2005 - 2007 TOSHIBA TEC CORPORATION All rights reserved e-STUDIO520/523/600/603/720/723/850/853 REMOTE SERVICE 8 - 9...
- Page 604 [ON]/[OFF]--- Allows you to select whether each part to be ordered is placed automatically or not. (25) Press the [ENTER] button to register the setting of toner order. e-STUDIO520/523/600/603/720/723/850/853 © 2005 - 2007 TOSHIBA TEC CORPORATION All rights reserved REMOTE SERVICE 8 - 10...
- Page 605 (30) Press the [USER FUNCTION] button to be switched from the ADMIN screen on touch panel and returned to the BASIC screen, so that the setting of Auto Supply Order is finished. © 2005 - 2007 TOSHIBA TEC CORPORATION All rights reserved e-STUDIO520/523/600/603/720/723/850/853...
- Page 606 1-99 [CONDITION] TONER 1-99 [QUANTITY] USED TONER CONTAINER Maximum 20 digits [PART NUMBER] USED TONER CONTAINER 1-99 [CONDITION] USED TONER CONTAINER 1-99 [QUANTITY] e-STUDIO520/523/600/603/720/723/850/853 © 2005 - 2007 TOSHIBA TEC CORPORATION All rights reserved REMOTE SERVICE 8 - 12 07/11...
-
Page 607: Order Sheet Format
..............DEVICE DESCRIPTION :XXXXXXXXXXXXXXXXXXXXXXX SERIAL NUMBER :XXXXXXXXXXXXXXXXXXXXXXX DEVICE FAX NUMBER :XXXXXXXXXXXXXXXXXXXXXXX DEVICE E-MAIL ADDRESS :XXXXXXXXXXXXXXXXXXXXXXX TOTAL PRINT COUNTER 999999999 SCAN COUNTER 999999999 Fig. 8-14 © 2005 - 2007 TOSHIBA TEC CORPORATION All rights reserved e-STUDIO520/523/600/603/720/723/850/853 REMOTE SERVICE 8 - 13... - Page 608 ..............DEVICE DESCRIPTION :XXXXXXXXXXXXXXXXXXXXXXX SERIAL NUMBER :XXXXXXXXXXXXXXXXXXXXXXX DEVICE FAX NUMBER :XXXXXXXXXXXXXXXXXXXXXXX DEVICE E-MAIL ADDRESS :XXXXXXXXXXXXXXXXXXXXXXX TOTAL PRINT COUNTER 999999999 SCAN COUNTER 999999999 Fig. 8-16 e-STUDIO520/523/600/603/720/723/850/853 © 2005 - 2007 TOSHIBA TEC CORPORATION All rights reserved REMOTE SERVICE 8 - 14...
-
Page 609: Service Notification
The screen to set this function is not displayed at the default setting. Set this screen to be displayed with the following code (08). 08-774 Setting of notification display 0: Invalid (Default) 1: Valid © 2005 - 2007 TOSHIBA TEC CORPORATION All rights reserved e-STUDIO520/523/600/603/720/723/850/853 REMOTE SERVICE 8 - 15... - Page 610 [ENTER] button. • Confirm the password to the administrator. Fig. 8-17 Press the [SERVICE] button. Fig. 8-18 Press the [SERVICE NOTIFICATION] button. Fig. 8-19 e-STUDIO520/523/600/603/720/723/850/853 © 2005 - 2007 TOSHIBA TEC CORPORATION All rights reserved REMOTE SERVICE 8 - 16...
- Page 611 E-mail addresses and press the [ENTER] button. (Maximum 3 addresses can be set.) Fig. 8-21 • Press the [FAX NUMBER] button, key in the FAX number and then press the [ENTER] button. Fig. 8-22 © 2005 - 2007 TOSHIBA TEC CORPORATION All rights reserved e-STUDIO520/523/600/603/720/723/850/853 REMOTE SERVICE 8 - 17...
- Page 612 More than one day can be selected. * This does not affect the settings of "Notify Date 1" and "Notify Date 2". e-STUDIO520/523/600/603/720/723/850/853 © 2005 - 2007 TOSHIBA TEC CORPORATION All rights reserved REMOTE SERVICE 8 - 18...
- Page 613 After all the settings are completed, press the [ENTER] button. The display returns to the screen in step (5). © 2005 - 2007 TOSHIBA TEC CORPORATION All rights reserved e-STUDIO520/523/600/603/720/723/850/853 REMOTE SERVICE...
- Page 614 Total counter transmission interval setting 00:00-23:59 (Hour/Hour/Minute/Minute) Service Call Transmit setting 0: OFF (Invalid) 1: ON (Valid) PM Counter Transmit setting 0: OFF (Invalid) 1: ON (Valid) e-STUDIO520/523/600/603/720/723/850/853 © 2005 - 2007 TOSHIBA TEC CORPORATION All rights reserved REMOTE SERVICE 8 - 20 07/05...
-
Page 615: Items To Be Notified
Printer Error History: Date Time ErrorCode ----------------------------------------------- 12/13/2006 16:44 F110 12/12/2006 22:28 F110 (*1) 12/12/2006 22:23 F110 11/15/2006 22:23 F110 10/25/2006 11:12 F110 Fig. 8-26 © 2005 - 2007 TOSHIBA TEC CORPORATION All rights reserved e-STUDIO520/523/600/603/720/723/850/853 REMOTE SERVICE 8 - 21 07/05... - Page 616 PM count present value PM driving count setting value PM driving count present value History of error *1 The latest 20 errors are displayed. e-STUDIO520/523/600/603/720/723/850/853 © 2005 - 2007 TOSHIBA TEC CORPORATION All rights reserved REMOTE SERVICE 8 - 22 07/05...
- Page 617 ERROR CODE DATE TIME ERROR CODE 06/12/13 16:44 F110 06/12/12 22:28 F110 06/12/12 22:23 F110 (*2) 06/11/15 22:23 F110 06/10/25 11:12 F110 Fig. 8-27 © 2005 - 2007 TOSHIBA TEC CORPORATION All rights reserved e-STUDIO520/523/600/603/720/723/850/853 REMOTE SERVICE 8 - 23 07/05...
- Page 618 PM count present value PM driving count setting value PM driving count present value History of error *2 The latest 20 errors are displayed. e-STUDIO520/523/600/603/720/723/850/853 © 2005 - 2007 TOSHIBA TEC CORPORATION All rights reserved REMOTE SERVICE 8 - 24 07/05...
- Page 619 Printer Error History: Date Time ErrorCode ------------------------------------------ 12/13/2006 16:44 F110 12/12/2006 22:28 F110 (*1) 12/12/2006 22:23 F110 11/15/2006 22:23 F110 10/25/2006 11:12 F110 Fig. 8-28 © 2005 - 2007 TOSHIBA TEC CORPORATION All rights reserved e-STUDIO520/523/600/603/720/723/850/853 REMOTE SERVICE 8 - 25 07/05...
- Page 620 Error message: The content of error is displayed. Supplier information Customer information Service technician information History of error *1 The latest 20 errors are displayed. e-STUDIO520/523/600/603/720/723/850/853 © 2005 - 2007 TOSHIBA TEC CORPORATION All rights reserved REMOTE SERVICE 8 - 26 07/05...
- Page 621 In this case, ask the administrator to enable it on the TopAccess menu. • Delete the backed up data in the USB storage device after the data cloning. © 2005 - 2007 TOSHIBA TEC CORPORATION All rights reserved e-STUDIO520/523/600/603/720/723/850/853 DATA CLONING with USB STORAGE DEVICE...
- Page 622 (GM-4010) are used, the data must be backed up after all the "dongles" are disconnected from the USB connector (host) and only the USB storage device is connected. e-STUDIO520/523/600/603/720/723/850/853 © 2005 - 2007 TOSHIBA TEC CORPORATION All rights reserved DATA CLONING with USB STORAGE DEVICE 9 - 2...
- Page 623 Note: Note: After the item is selected with the digital keys, displaying the next menu may take a long time. © 2005 - 2007 TOSHIBA TEC CORPORATION All rights reserved e-STUDIO520/523/600/603/720/723/850/853 DATA CLONING with USB STORAGE DEVICE 9 - 3...
- Page 624 "*". (The items "4", "5" and "6" are selected in the screen by default.) Fig. 9-4 e-STUDIO520/523/600/603/720/723/850/853 © 2005 - 2007 TOSHIBA TEC CORPORATION All rights reserved DATA CLONING with USB STORAGE DEVICE 9 - 4 05/11...
- Page 625 Select "6: User Info" only. E.g.: In case of backing up the department management and user management information Fig. 9-5 © 2005 - 2007 TOSHIBA TEC CORPORATION All rights reserved e-STUDIO520/523/600/603/720/723/850/853 DATA CLONING with USB STORAGE DEVICE 9 - 5...
- Page 626 (10) "Back Up Completed" is displayed on the LCD screen when the backup has been properly com- pleted. Fig. 9-7 (11) Turn the power OFF and remove the USB storage device. e-STUDIO520/523/600/603/720/723/850/853 © 2005 - 2007 TOSHIBA TEC CORPORATION All rights reserved DATA CLONING with USB STORAGE DEVICE 9 - 6 05/11...
- Page 627 When “Disable” is set for the [Data Cloning Function] in TopAccess, the following screen is displayed. Contact and ask the administrator to change the setting on TopAccess. Fig. 9-9 © 2005 - 2007 TOSHIBA TEC CORPORATION All rights reserved e-STUDIO520/523/600/603/720/723/850/853 DATA CLONING with USB STORAGE DEVICE...
- Page 628 <Backing up Option: Fax setting> Select "5: FAX Kit" only. <Backing up Option: WirelessLAN/Bluetooth setting> Select "6: WirelessLAN/Bluetooth Kit" only. e-STUDIO520/523/600/603/720/723/850/853 © 2005 - 2007 TOSHIBA TEC CORPORATION All rights reserved DATA CLONING with USB STORAGE DEVICE 9 - 8 05/11...
- Page 629 (17) "Back Up Completed" is displayed on the LCD screen when the backup has been properly com- pleted. Fig. 9-12 (18) Turn the power OFF and remove the USB storage device. © 2005 - 2007 TOSHIBA TEC CORPORATION All rights reserved e-STUDIO520/523/600/603/720/723/850/853 DATA CLONING with USB STORAGE DEVICE 9 - 9...
- Page 630 When “Disable” is set for the [Data Cloning Function] in TopAccess, the following screen is displayed. Contact and ask the administrator to change the setting on TopAccess. Fig. 9-14 e-STUDIO520/523/600/603/720/723/850/853 © 2005 - 2007 TOSHIBA TEC CORPORATION All rights reserved DATA CLONING with USB STORAGE DEVICE 9 - 10 07/11...
- Page 631 (23) Press the [Start] button. The backup starts and the backing up status is displayed on the LCD screen. Fig. 9-16 © 2005 - 2007 TOSHIBA TEC CORPORATION All rights reserved e-STUDIO520/523/600/603/720/723/850/853 DATA CLONING with USB STORAGE DEVICE 9 - 11...
- Page 632 (24) "Back Up Completed" is displayed on the LCD screen when the backup has been properly com- pleted. Fig. 9-17 (25) Turn the power OFF and remove the USB storage device. e-STUDIO520/523/600/603/720/723/850/853 © 2005 - 2007 TOSHIBA TEC CORPORATION All rights reserved DATA CLONING with USB STORAGE DEVICE 9 - 12 05/11...
- Page 633 (GM-4010) are used, the data must be restored after all the "dongles" are disconnected from the USB connector (host) and only the USB storage device is connected. © 2005 - 2007 TOSHIBA TEC CORPORATION All rights reserved e-STUDIO520/523/600/603/720/723/850/853 DATA CLONING with USB STORAGE DEVICE...
- Page 634 Note: After the item is selected with the digital keys, displaying the next menu may take a long time. e-STUDIO520/523/600/603/720/723/850/853 © 2005 - 2007 TOSHIBA TEC CORPORATION All rights reserved DATA CLONING with USB STORAGE DEVICE 9 - 14 07/11...
- Page 635 "*". (The items "4", "5" and "6" are selected in the screen by default.) Fig. 9-21 © 2005 - 2007 TOSHIBA TEC CORPORATION All rights reserved e-STUDIO520/523/600/603/720/723/850/853 DATA CLONING with USB STORAGE DEVICE 9 - 15...
- Page 636 Select "6: User Info" only. E.g.: In case of restoring the department management and user management information Fig. 9-22 e-STUDIO520/523/600/603/720/723/850/853 © 2005 - 2007 TOSHIBA TEC CORPORATION All rights reserved DATA CLONING with USB STORAGE DEVICE 9 - 16 05/11...
- Page 637 [COUNTER] → [DEPARTMENT SETTING] → Enter the password → [RESET ALL COUNTERS] * Enable the department management when the [RESET ALL COUNTERS] button is set to be disabled. © 2005 - 2007 TOSHIBA TEC CORPORATION All rights reserved e-STUDIO520/523/600/603/720/723/850/853 DATA CLONING with USB STORAGE DEVICE...
- Page 638 The screen to select the setting restore item is displayed. In this screen, the items to be restored are shown after the mark "*". (No items are selected in the screen by default.) Fig. 9-27 e-STUDIO520/523/600/603/720/723/850/853 © 2005 - 2007 TOSHIBA TEC CORPORATION All rights reserved DATA CLONING with USB STORAGE DEVICE 9 - 18 07/11...
- Page 639 (15) Press the [Start] button. The restore starts and the restoring status is displayed on the LCD screen. Fig. 9-28 © 2005 - 2007 TOSHIBA TEC CORPORATION All rights reserved e-STUDIO520/523/600/603/720/723/850/853 DATA CLONING with USB STORAGE DEVICE 9 - 19...
- Page 640 (16) "Restore Completed" is displayed on the LCD screen when the restore has been properly com- pleted. Fig. 9-29 (17) Turn the power OFF and remove the USB storage device. e-STUDIO520/523/600/603/720/723/850/853 © 2005 - 2007 TOSHIBA TEC CORPORATION All rights reserved DATA CLONING with USB STORAGE DEVICE 9 - 20 05/11...
- Page 641 The screen to select the SRAM data restore item is displayed. In this screen, the item to be restored is shown after the mark "*". (The item is not selected in the screen by default.) Fig. 9-32 © 2005 - 2007 TOSHIBA TEC CORPORATION All rights reserved e-STUDIO520/523/600/603/720/723/850/853 DATA CLONING with USB STORAGE DEVICE...
- Page 642 (23) "Restore Completed" is displayed on the LCD screen when the restore has been properly com- pleted. Fig. 9-34 (24) Turn the power OFF and remove the USB storage device. e-STUDIO520/523/600/603/720/723/850/853 © 2005 - 2007 TOSHIBA TEC CORPORATION All rights reserved DATA CLONING with USB STORAGE DEVICE 9 - 22 05/11...
- Page 643 Model check error ERROR 9 Version check error ERROR 10 Destination check error ERROR 11 Serial number check error © 2005 - 2007 TOSHIBA TEC CORPORATION All rights reserved e-STUDIO520/523/600/603/720/723/850/853 DATA CLONING with USB STORAGE DEVICE 9 - 23 05/11...
- Page 644 Date: MON SEP 26 18:34:40 2005 • File format (user_data.txt, setting_data.txt, sram_data.txt: all in common) Line 1: Version Line 2: Serial number Line 3: Date e-STUDIO520/523/600/603/720/723/850/853 © 2005 - 2007 TOSHIBA TEC CORPORATION All rights reserved DATA CLONING with USB STORAGE DEVICE 9 - 24...
-
Page 645: Ac Wire Harness
10.1 AC Wire Harness White Black Black White White Blue Brown Brown Blue Blue Brown Black Blue White Brown Brown Blue Blue Fig. 10-1 © 2005 - 2007 TOSHIBA TEC CORPORATION All rights reserved e-STUDIO520/523/600/603/720/723/850/853 WIRE HARNESS CONNECTION DIAGRAMS 10 - 1 06/09... - Page 646 © 2005 - 2007 TOSHIBA TEC CORPORATION All rights reserved WIRE HARNESS CONNECTION DIAGRAMS 10 - 2...
- Page 647 10.2 DC Wire Harness 06/09...
- Page 648 17) Reversing automatic document feeder (RADF) 17) Reversing automatic document feeder (RADF) a. e-STUDIO600/720: JPD model b. e-STUDIO850: JPD model c. e-STUDIO520: TNA/NAD model, d. e-STUDIO520: AUD/DAU/MJD/DMJ model, a. Sensor c. Motor, sensor, switch, solenoid, PC board e-STUDIO600/720: TNA/NAD/SAD/TWD model,...
Need help?
Do you have a question about the e-STUDIO520 and is the answer not in the manual?
Questions and answers