Advertisement
Quick Links
Advertisement
Chapters

Related Manuals for Suzuki DR350


Summary of Contents for Suzuki DR350
- Page 1 9 9 5 0 0 - 430 1 9 - 0 3 E *...
- Page 3 FOREWORD GROUP INDEX The SUZUKI DR350 was designed to offer su GENERAL INFORMA TION perior performance through lightweight design, four stroke-po wer, engine counter-balancer, PERIODIC MAINTENANCE drysump lubrication s ystem and link t ype rear AND TUNE-UP PROCEDURE suspention. ENGINE This service manual has been produced primari...
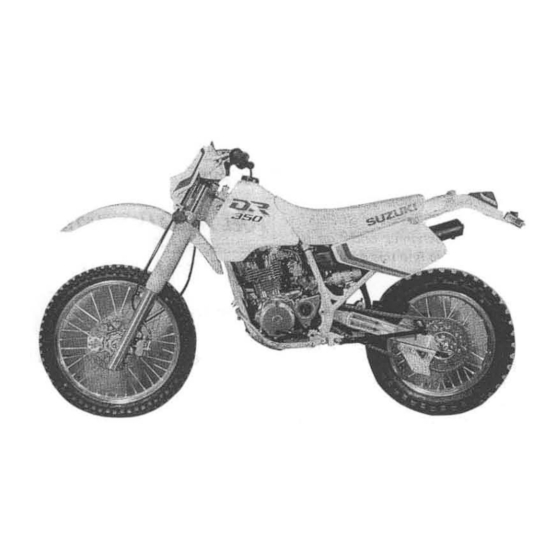
- Page 4 V I EW O F D R350L L E FT S I D E R I G HT S I D E...
-
Page 5: General Informa Tion
GENERAL INFORMA TION VlN A ND SERIA L NUMBER LOCA TlONS 1 - 1 FUEL A ND OIL RECOMMENDA TIONS . 1 - 1 BREA K-IN PROCEDURES 1 -2 SPECIA L MA TERIA LS PRECA UTIONS A ND GENERA L INS TRUCTIONS 1 -5 SPECIFICA TlONS . - Page 7 'OW·30 SUZUKI recomends the use of S U Z U K I PERFO R M A N C E 4 MOTOR O I L or an oil which is rated S E or S F u ne r the A P I TEMP.
- Page 8 Mating surface of left and 3-36 right halves of crankcase SUZUKI B O N D N O . 1 20 7 B SUZUKI B O N D N O . 1 2 1 5 9 9 1 04-3 1 1 40 9 9000-3 1 1 1 0 •...
- Page 9 9 9000-32030 9 9000-321 20 • Front fork oil 1 -2 6- 1 4 SUZUKI FORK O I L SUZUKI FORK O I L 99000-99044- 1 ( 1 . 0 L) 99000-99044- 1 0G ( 1 . 0 L) •...
- Page 10 RE PLAC E M E N T PARTS When you replace any parts, use only genuine S U Z U K I replacement parts, o r their equivalent. Genuine SUZUKI parts are high q u a l ity parts which are designed and bu ilt s pecifi...
- Page 11 G E N ERAL I N FO RM ATION '·6 S PE C I F I CATI O N S ELECTRICAL D EM ENSIONS A N D DRY MASS (8 5 . 2 i n ) I g nition type ..S U Z U K I " P E l " Overa l l length .
-
Page 14: Periodic Maintenance Chart
2·1 PERIODIC MAINTENANCE A N D TUNE·UP PROCEDU RES PER I O D I C MAINTENANCE S C H E D U LE The chart below l ists the recommended intervals for a l l the requ ired periodic service work necessary to keep the m otorcycle o perating at peak performance and economy . -
Page 15: Lubrication Points
PERIODIC MAINTENANCE A N D TUNE·UP PROCEDURES 2·2 LUBRICATION POINTS Proper lu brication is i m portant for smooth o peration and long l ife of each warking part of the motorcycle. Major lubrication points are indicated belo w . Clutch cable eel bearing Side stand pivot... - Page 16 2·3 P ER I O D I C MAINTEN A N C E A N D TUNE·UP PROCEDURES MAINTENAN C E AN D T U N E-UP PROCE D U RES This section describes the servicing procedures for each item of the Periodic Maintenance requirements.
- Page 17 PERIODIC MAINTENANCE AN D TUNE·UP PROCEDURES 2·4 VALVE CLEARA N C E Inspect I nitial 5 Hours a n d Every 60 Hours Excessive valve clearance resu lts in valve noise and i nsuffi cient valve clearance resu lts in valve damage and reduced power.
-
Page 18: Spark Arrester
2·5 PERIODIC MAINTENANCE ANO TUNE·UP PROCEDURES S PA R K PLUG Inspect Every 30 Hours and Replace Every 60 Hours The plug g a p is adjusted to 0. 8 - 0 . 9 m m ( 0 . 0 3-0 . 04 i n ) . The gap i s correctly adjusted with a thickness gauge. - Page 19 PERIODIC MAINTENANCE A N D TUN E·UP PROCEDURES 2·6 A I R CLEAN E R Inspect each time the motorcycle i s rdden and clean as necesSary If the air cleaner is clogged with d ust, intake resistance will be increased with a resultant d ecrease in power output and •...
- Page 20 2·7 PERIODIC MAINTENANCE A N D TUNE·UP PROCEDURES E N G I N E O I L, OIL F I LTER AND OIL S T RAI N ER Replace ( Change) oil and oil filter Initial 5 Hours and Every 60 Hours Clean oil strainer I nitial 5 Hours and Every 60 Hours The oil should be changed while the engine is h o t .
- Page 21 P ERIO DIC MAINTENANCE A N D TUNE·UP PROCEDURES 2·8 CARBU RETOR Inspect Initial 5 Hours and Every 30 Hours THROTTLE CABLE ADJUSTMENT A twin throttle cable system is used in this motorcycle . Ca is for p u l l i n g and cable is for retu rning.
- Page 22 2·9 PERIO DIC MAINTENANCE A N D TUNE·UP PROCE DURES F U E L L I N E Inspect Initial 5 Hours and Every 3 0 Hours Replace Every � years Inspect the fuel line for damage and fuel leakage . I f any defects a re fou n d , t h e fuel l in e m u st be repl aced .
- Page 23 Do not use any oil sold commercially as "drive chain oil " . Such oil can damage the "0" rings (or seals). The standard drive chain is DAIDO D . I . D . 520VC5 or T AKASAGO RK520S0 SUZUKI recommends that the above-mentioned standard drive chain be used for the replacement.
- Page 24 . Specification a n d classification : DOT 4 99000-23 1 1 0 SUZUKI BRAKE FLU I D WARNIN G : The brake system of this motorcycle i s filled with a glycol...
- Page 25 P E R I O D I C MAINTENANCE A N D TUNE·UP PROCEDURES 2·1 2 BLEEDING AIR FROM THE BRAKE FLUID CIRCUIT Air trapped in the fluid circuit acts l ike a cushion to a bsorb a large proportion of the pressure d eveloped by the master cylinder and thus interferes with the full braking performance of the brake caliper.
- Page 26 1 1 0/1 00-1 8 64M for rear. The use of tires other than the those specified may cause instability . It is highly recommended to use a SUZUKI Genuine Tire . SPOKE NIPPLES Inspect each time the motorcycle is ridden .
- Page 27 PERIODIC MAINTENANCE A N D TU N E·UP PROCEDURES 2· 1 4 STE E RI N G I nspect I nitial Hours and Every Hours Steering should be adjusted properly for smooth turning of ha ndlebar and safe runni n g . Overti ght steeri ng prevents smooth turning of the handlebar and too l oose steering will cause the handlebar to vibrate.
-
Page 28: Chassis Bolts And Nuts
2- 1 5 PERIO DIC MAINTENANCE A N D TUN E -U P P R O C E D U RES CHASSIS BOLTS AND NUTS 5 Hours ry 60 H ou rs Tighten I nitial The n uts and bolts listed below a re i m portant safety p a rts . They m u st be retightened when n eces sary to the specified torque with a torque wren c h . - Page 29 P ER I O DIC MAINTENANCE A N D T U N E- U P PROCEDURES 2- 1 6...
-
Page 31: Table Of Contents
ENGINE ENGINE COMPONENTS REMO VA B LE WITH THE ENGINE IN PLA CE ....... 3- ENGINE REMO V A L AND REMOUNTING . -
Page 32: Engine Components Remo Va B Le With The Engine In Pla Ce
3·, ENGINE E N G I N E C O M PO N ENTS R E M OVA B L E WITH T H E E N G I N E I N PLACE The parts listed below can be removed and reinstal l e d without removing the engine from the fra m e . Refer t o t h e p a g e listed in t h i s section f o r remova l i nstructio n . - Page 34 • 3-3 E N G I N E • Disco n nect the cl utch cable along with the release arm. Disconnect the crankc a se breather hose. • Remove the oil hose connector mounting bolts • • Remove the gearshift l ever, engine s procket cover and left footrest.
- Page 35 E N G I N E 3·4 • E N G I N E R E M O U NT I N G Remount t h e engine in the reverse order o f engine remova l . I nsta l l t h e brackets , spacers, bo lts and n u t properly a s shown i n t h e i l l u stration .
- Page 36 • ENGINE 3·5 After remou nting the engine, fol lowing adj ustments a re necessary. * De-com pression cable play (Refer to page 2- 6 . ) * Clutch cable play (Refer to page 2-9 . ) * Drive chain slack (Refer to page 2- 1 0. ) * I d l ing s peed ( Refer to page 2-8 .
-
Page 37: Engine Disa Ssembly
E N G I N E 3·6 • ENG INE DISASSEMBLY • Remove the oil pipe. Remove the cran kcase breather pipe. • Loosen the bolt CD a nd remove the chain tensioner mount ing bolt. • • Remove the valve inspection caps ( I ntake and E x h aust) . Remove the spark pl u g . - Page 38 • 3·7 E N G I N E • Remove the d e-co m p o shaft return spring by removi n g t h e n u t CD. Loosen the cylinder head cover bolts in the ascending ord er numbers and remove the cylinder head cover.
- Page 39 • E N G I N E 3·8 Place a clean rag over the cylinder base to prevent the • piston pin circlips from d ro pping into crankcase. Remove the piston pin circ l i ps with long-nose pliers . Remove the piston pin with a proper d rift.
- Page 40 • 3·9 E N G I N E Flatten t h e l o c k washer and remove t h e clutch sleeve h u b n ut w i t h t h e s pecial too l . 09920-53 7 1 0 : Clutch sleeve h u b holder •...
- Page 42 • 3· 1 1 E N G I N E • • Remove the gearshift fork shafts a n d gearshift forks . Remove the g earsh ift cam . Remove the d rivesh a f t assembly a n d cou ntersh aft as sembly.
- Page 43 • E N G I N E 3- 1 2 Remove the oil p u m p N o . 2 . • • Remover t h e inner rotor CD a n d outer rotor Remove the p i n @ . •...
- Page 44 • ENGINE 3· 1 3 Rem ove the o i l filter cap. • Remove the oil filter. • Remove the O-ri n g . CAUTION : The removed O-ring should be replaced with new one. • Remove the m a gn eto coi l .
-
Page 45: Engine Components Inspec Tion A Nd . Ser Vicing
ENGINE 3- 1 4 EN G I N E C O M PO N ENTS I N S PECT I O N A N D S ERVI C I N G CYLI N D E R H EAD C OV E R S ERVI C I N G CAUTION : Be sure to identify each removed part as to its location, and lay the parts out in groups designated as "Exhaust"... -
Page 46: Rocker A
ROC K E R A R M A N D S H A FT REAS S E M BLY Apply S U ZU K I M O LY PASTE to the rocker arm shafts . • 99000-25 1 40 : SUZUKI MOLY PASTE Insert the rocker arm shafts with their threaded hole end positioned outside . -
Page 47: Cylinder Hea
ENGINE 3· 1 6 • • CYLI N D ER H EAD S E RV I C I N G Compress t h e valve springs with the s pecial too l s . Remove the valve cotters. 099 1 6- 1 45 1 0 Valve spring compressor 099 1 6- 1 49 1 0 Attachment... - Page 48 ENGINE 3· 1 7 VA LVE STEM R U N O UT Support the valve with "V" b locks, as s h o w n , and check its runout with a dial gauge. The valve must be replaced if the runout exceeds the limit .
- Page 49 ENGINE 3· 1 8 • VALVE G U I D E S E RV I C I N G Remove t h e valve g u ide with the special tool . 099 1 6-443 1 0 Valve guide remover •...
- Page 50 • 3· 1 9 E N G I N E Lubricate each stem seal with engine oil,and insta l l the seal . CAUTIO N : Install the n e w stem seals. VALVE A N D S EAT C O N D I T I O N VALV E S EAT W I DTH Coat the valve seat with prussian blue u n iformly.
- Page 51 ENGINE 3·20 NO TE! The valve sea t con tact area must be inspected after each cut. I nsert with a slight rotation, the solid pilot that g ives a snug fit. The shoulder on the p ilot shou ld be about 1 0 mm ( 0 .
- Page 52 M O LY PASTE) a l l a round and a l o n g the full stem length without any break. Similarly oil the lip of the stem sea l . 99000-25 1 40 : SUZUKI MOLY PASTE CAUTION : When inserting each valve, take care not to damage the lip •...
-
Page 53: Ca Msha F T
09900-2230 1 Plastigauge of cylinder head and co ver. Do not ap ply SUZUKI 80ND No. 120 78/ 1 2 1 5 until after the oil clearance has been determined. If the camsh aft journal oil clearance measured exceeds the limit, measure the outside dia meter of camshaft . -
Page 54: Cylinder
ENGINE 3·23 CAM S HA FT R U N O U T Measure t h e runout with a d i a l gauge. Replace t h e camshaft if the ru nout exceeds the limit. Service Limit : 0 . 1 0 mm (0 .004 i n ) 09900-207 0 1 Magnetic stand 09900-20606 : Dial gauge ( 1 / 1 00 m m ) - Page 56 ENGINE 3-25 Piston ring end gap Service Limit 1 st and 2nd : 0 . 7 0 mm (0. 028 in) 09900-20803 Thickness gauge OVER� I Z E R I N G S 0.5. OVERSIZE PISTON RINGS The following two types of oversize piston rings are u sed . They bear the following identification n u m be rs .
-
Page 57: Conr
E N G I N E 3·26 CO N R O D S M A L L E N D I . D . Using a caliper g a u g e , measure the conrod s m a l l e n d insdie d i ameter. -
Page 58: Clutch
3·27 E N G I N E CLUTCH D RI V E PLATE M easure the thickness and claw width of each d rive p late with vernier cali pers. Replace d rive p l ates found to h ave worn down to the l i mit. -
Page 59: Tra Nsmission
ENGINE 3-28 C L UTCH R E L EA S E P I N I O N A N D RAC K Rotate the clutch release pinion by hand to inspect for a smooth rotation . If a la rge resistance is felt to rotatio n , in s pect the pinion and rack for damage or wear . - Page 60 After installing a circlip, always insure that it is completely seated in its groove and securely fitted . NO TE: Before installing the gears, coat ligh tly moly paste or engine oil to the driveshaft and countershaft. 99000-25 1 40 SUZUKI MOLY PASTE...
- Page 61 • E N G I N E 3·30 � T h rust When insta l l i n g a new circ l i p , pay attention to the d i rec tion of the circ l i p . Fit it to the side where the thrust is as shown in figure.
- Page 62 ENGINE 3·3 1 BALA N C E R S HA FT AND G EA R S ® CD Cran k balancer shaft @ Bearing, L @ Bearing,R @ Key ® Washer ® Balancer driven gear (j) Driven gear inner race ®...
-
Page 63: Engine Rea Ssembly
Coat S U P E R G REASE " A " to the l i p of each o i l s ea l . 99000-25030 SUZUKI S UPER GREASE " A " ( U . S . A . ) 99000-250 1 0 SUZUKI SUPER GREASE "... -
Page 64: Ba La Ncer Sha Ft A Nd Gea Rs
• 3·33 E N G I N E Decide the width between the webs referring to the figure below when rebuilding the crankshaft . ± STD width between webs : 60.0 0 . 1 m m ( 2 .362 ± 0 . 004 i n ) •... -
Page 65: Gea Rshift Ca M And Forks
E N G I N E 3·34 G EARSH I FT CAM A N D F O R KS ® � � � @ Gearshift cam Gearshift shaft ® Fork shaft No. 1 ® Return spring @ Gearshift fork N o . 2 @ Gearshift arm stopper @ C a m driven gear securing bolt @ G ea rshift fork N o . -
Page 66: Oil Pump A Nd Oil Sump Fil Ter
3·35 E N G I N E O i l PU M P AND OIL S U M P Fi lT E R CD O i l p u m p No. 1 @ Oil pump d riven gear @ Outer rotor @ I nner rotor ®... -
Page 67: Cra Nkca Se
, and assemble the cases within few minutes . 99 1 04-3 1 1 40 : SUZUKI BOND N o . 1 20 7 B (U . S .A . ) 99000-3 1 1 1 0 : SUZUKI BOND No . 1 2 1 5 (Others) -
Page 68: Ca M Cha In A Nd Prima Ry Drive Gea
• ENGINE 3·37 Tighten the balancershaft bolt to the specified torque with the special too l . Tightening torque : 40 - 60 N ' m (4. 0 - 6 .0 kg-m, 29 . 0 - 43 . 5 Ib-ft) 099 1 0-20 1 1 5 :Conrod holder •... - Page 69 • ENGINE 3·38 A pply small q u antity of TH READ LOCK S U PE R 1 3031 1 3 2 2 " t o t h e c a m pawel l ifter securing screws CD and cam d riven gear securing bolt @. 99000-32030 TH READ LOCK SUPER "...
- Page 70 • 3·39 ENGINE Apply a small q u a ntity T H R EA D LOCK S U P E R " 1 303" to the kick stopper b olts and tighten the m . 99000-32030 : THREAD LOCK SUPER " 1 303" •...
-
Page 71: Clutch
ENGINE 3·40 CLUTCH Clutch release arm @ Oil seal o Clutch release pinion @ Clutch pressure plate ® Release bearing ® Clutch release rack (J) Clutch d riven plate ® Clutch drive plate ® Lock washer @ Clutch sleeve hub ®... -
Page 72: Oil Fil Ter
• 3·41 ENGINE Tighten the clutch spring mou nting bolts diagonally with the special too l . 0991 0-20 1 1 5 Conrod holder • Fit the two dowel pins to the crankcase and attach new g asket. CAUTION : U se a new gasket t o prevent oil leakage. -
Page 73: Ma Gneto
E N G I N E 3·42 • M AG N ETO Fit the key CD in the key slot on the crankshaft, then in stal l the magneto rotor. CAUTION : Degrease the tapered portion of the magneto rotor and also the crankshaft. -
Page 74: Cylinder
PI STO N The following are reminders for piston i nsta l l ation: • Rub a small q uantity of SUZUKI M O LY PASTE onto the piston pin. • PlaGe a clean rag over the cylinder base to prevent the piston pin circlips from d ropping into the crankcase . -
Page 75: Cylinder Hea D
ENGINE 3·44 • CY L I N D E R H EA D With t h e h e a d snugly seated on t h e cylinder, secure i t b y tightening t h e bolts d i agonal l y . Tig hten each bolt to the specified torq u e . -
Page 76: Cylinder Hea D Co Ver
U niformly apply S U Z U K I B O N D N o . 1 20 7 B/ 1 2 1 5 to the cyl inder head cover surface. 9 9 1 04-3 1 1 40 SUZUKI BOND No. 1 20 7 B ( U .S . A . ) 99000-3 1 1 1 0 SUZUKI BOND No. 1 2 1 5 (Others) -
Page 77: Ca M Cha In Tensioner A Djuster
ENGINE 3·46 NO TE: Do not apply SUZUKI BOND No. 1 20 7BI1 2 1 5 to the cam • shaft end cap. I nstal l the d owel pins. • Fit the four new gaskets CD to the head cover bolts cor... -
Page 78: Oil Pipe
• ENGINE 3·47 I nsert the spring into the cam chain tensioner a n d tighten t h e spring holder bolt t o t h e s pecitied torq u e . Tightening torque : 7 - 9 N ' m •... -
Page 79: Ma Gneto Co Ver
ENGINE 3·48 • M AG N ETO COVER I nsta l l the stator, c l a m p pick-u p coil and grommet cor rectly. ( Refer to page 7- 1 0. ) • Fit the two dowel pins and new gasket. •... - Page 81 FUEL AND LUBRICA TION S YS TEM FUEL COCK........4- 1 CA RBURETOR .
-
Page 82: Fuel Cock
4· ' FUEL A N D LU BRICATIO N SYSTEM F U E L C O C K • • • • "O F F " R ES "ON" " " I N S PECTI O N AND CLEA N I N G If the fuel stra iner is darty with sediment or rust, fuel will •... -
Page 83: Ca Rburetor
F U E L A N D L UBRICATI O N SYSTEM 4-2 CARBU R ET O R CONSTR U C T I O N S CD Carburetor top cap o Throttle valve lever @ Throttle valve bracket @ Jet needle ®... -
Page 84: Specifica Tions
4·3 F U E l A N D LU BRICATION SYSTEM SPECI F I CATI O N S SPECIFICA TION ITEM Carbu retor type M I K U N I TM 33SS 1 . 0 . No. 1 400 3 3 mm Bore size Idle r/min 400 ±... -
Page 85: Remo Va L
F U E L AND LUBRI CATION SYSTEM 4·4 • R E M OVAL Remove the carburetor . ( Refer to page 3-2 . ) • OISAS S E M B L Y Remove the th rottle cable holder. • Remove the top c a p . - Page 86 • 4·5 FUEL A N D LUBRICATION SYSTEM • Separate the th rottle lever arm a n d throttle valve @ by removi ng the bolts with a 2 . 5 m m hexagon w rench . Separate the jet need le @ and th rottle valve @ . •...
-
Page 87: Inspec Tion
• FUEL A N D LUBRICATI O N SYSTEM 4-6 • Remove the need le jet from the bore side_ Remove the pilot jet @ and pilot screw @. • Remove the starter p l u nger assembly @. CAUTION : Do not attempt to disassem ble the four screws ®... -
Page 88: Rea Ssembly A Nd Remounting
4·7 F U E L A N D L U BRICATION SYSTEM REAS S E M B LY A N D R E M O U NTI N G Reassemble and remount the carburetor i n the reverse ord er of removal and d isassembly, and follolJl{in g a djustments are necessary after remounting the carburetor. - Page 89 FUEl A N D LUBRICATIO N SYSTEM 4·8 E N I G N E L U B R I CATI O N SYSTEM C H A RT ' I ' CAM CHAIN ..CONROD SMALL E N D \' : .
- Page 90 4-9 FUel A N D LUBRICATION SYSTEM...
- Page 91 ELEC TRICAL S YS TEM IGNITION S YS TEM....... 5 - 1 DISCRIP TION .
-
Page 92: Ignition S Ys Tem
5· 1 E lECTRICAL SYSTEM I G N ITI O N SYSTEM DISCR I PT I O N The capacitor d ischarged ignition system consists o f a magneto, C O l u nit, ignition coil a n d spark plug . The electrical energy generated by the magneto charges the capacitor. - Page 93 NO TE: As capacitors, diodes, etc. are used inside this COl unit, the resistance values will deffer when an ohmmeter other than SUZUKI pocket tester is used. NO TE: Remove the spark plug and place the spark plug on the cylinder head co ver kick the engine and check the sparks of the spark plug.
-
Page 94: Lighting S Ys Tem
5·3 ElECTRICAL SYSTEM LIGHTI N G SYSTE M REGULATOR MAGN ETO H EADLIGHT TAI LLIGHT • I N S PE CT I O N LIGHTING PERFORMANCE C H ECK • • Connect the p robes of the pocket tester to the taillight lead wires (Y and B/W) . -
Page 95: La Mps
E lECTRICAL SYSTEM 5-4 • • Regulator check Remove the frame cover and seat. Disconnect the lead wires . Check the continuity and measure the resistance values with a pocket tester. 09900-25002 Pocket tester Unit : Approx. kQ Probe of tester to: o t;... - Page 97 CHASSIS FRONT WHEEL ........6- REMO VA L ........INSPEC TION A ND DISA SSEMBL Y .
-
Page 98: Front Wheel
6-1 CHASSIS FRONT W H E E L ® Apply SUZUKI Super grease " A" : 99000-2 5030 (U . S . A . ) Tightening torq u e 9 9000- 2 50 1 0 (Others) N . ,m I T E M... -
Page 99: Inspec Tion A Nd Disa Ssembl Y
CHASSIS 6·2 I N SPECT I O N A N D DISAS S E M B LY Play WHEEL BEARING I nspect the play of bearing inner ring by hand while mount ed in the whee l . Rotate the inner ring by hand to inspect i f any abnormal noise occurs or rotating smoothly. -
Page 100: Rea Ssembl Y A Nd Remounting
6-3 CHASS IS SPOKE N I PPLE Check to be sure that all nipples are tight, and retighten them as necessary with the special tool _ Tightening torque : 2 - 4 N - m ( 0 . 2 - 0 .4 kg-m, 1 . 5 - 3 . 0 Ib-ft) 09940-60 1 1 3 : Spoke nipple wrench TIRE Refer to page 2- 1 3 . - Page 101 • 6·4 C HASSIS When installing the odometer gear box, align the two drive pawls G) with the two recesses 0 of the wheel hub. CAUTION: After touching the odometer gear box (]) to the stopper @, • tighten the axle shaft . When remounti n g the axle holder on the front fork, first tighten the holder n uts for upside as shown i n t h e illus...
-
Page 102: Front Brake
6-5 CHASSIS F R O N T B RAKE Tightening torque I T E M N ' m kg-m Ib-ft 6 - 9 0. 5 - 0 . 8 4 . 5 - 6 . 5 20 - 2 5 1 4. -
Page 103: Brake Pa D Repla Cemen T
CHASSIS 6-6 • BRAKE PAD R EPLAC E M ENT • Slightly loosen the pad mounting bolts G) to facilitate later d isassembly. Remove the caliper by removing the caliper mou nting bolts @. NO TE: Do not operate the brake lever while dismounting the caliper. •... -
Page 104: Ca Liper A Nd Disc Inspec Tion
6·7 CHASSIS CALI P E R A N D D I S C I N S PECTI O N Inspect the caliper cylinder bore wall for nicks, scratches or other d a m a g e . I nspect each piston f o r d a m a g e and wear. I nspect each rubber part for damage a n d wear. -
Page 105: Ca Liper Rea Ssembl Y A Nd Remounting
CHASSIS 6·8 CALIPER REASSEM BLY A N D R E M O U N T I N G Reassemble a n d remount t h e caliper i n the reverse o rd e r of removal , a n d also carry out the following steps: CAUTION : Wash the caliper components with fresh brake fluid before reassembly. -
Page 106: Ma S Ter Cylinder Inspec Tion
• 6·9 CHASSIS • Remove the reservoi r cap and d i a p h ragm . Drain brake fluid . • • Remove the dust boot. Remove the circlip with the special too l . • 09900-06 1 08 : Snap ring pliers Remove the piston/primary cup with return s pring . -
Page 107: Front Fork
CHASSIS 6- 1 0 F R O NT F O R K Tightening torque I b-ft I T E M N - m kg-m 2 1 . 5 - 29 . 0 30 - 40 3 . 0 - 4 . 0 2 1 . - Page 108 • 6· 1 1 CHASSIS Loosen the front fork u pper and lower c l a m p bolts and remove the front fork. NO TE: Slightly loosen the front fork cap bolt facilita te later disas sembly, before loosening the lower clamp bolt. •...
-
Page 109: Inspec Tion
• CHASSIS 6- 1 2 Separate the inner tube from the outer tube. CAUTION: When separating the inner tube from the outer tube, both antifriction metals may be damaged and must be replaced with new ones_ • Separate the spring adjuster G) by removing the E-ring @. I N S PECT I O N DAMPER ROD RING Inspect the damper rod ring for wear and damag e . -
Page 110: Rea Ssembl Y And Remounting
6· 1 3 C H ASSIS FORK SPRING Measure the fork spring free length , If it is shorter that the service l imit, replace it. Service Limit : 608 m m (23.9 in) REAS S E M B LY A N D R E M O U N T I N G Reassemble and remount the front fork i n the reverse order •... - Page 111 Fork oil type : Fork oil # 1 0 • 99000-99044- 1 0G : SUZUKI FORK OIL # 1 0 Hold the front fork vertical and adjust the fork oil level with the special too l .
- Page 112 CHASSIS 6· 1 5 ADJ U S T M E N T After installing the front fork, adjust the s p ri n g p re-load and damping force as fol lows. SPRI NG PRE-LOAD ADJUSTMENT There a re fou r g rooved l ines on the side of the adjuster. Po sition 0 provides the maximum spring pre-load a n d position Position 6 5 provides the m i n i m u m spring pre-load .
-
Page 113: S Teerings Tem
C HASSIS 6 - 1 6 STEERI N G STEM Tightening torque ITEM Ib-ft N - m kg-m 1 3 . 0 - 20 . 0 1 8 - 28 1 . 8 - 2 . 8 80 - 1 00 8 .0 - 1 0 . - Page 114 CHASSIS 6-1 7 • • Discon nect the headlight lead wires. Remove the headlight housing with head light by remov ing the scre w . • • Remove the two brake hose guides. Remove the odometer bracket with the odometer a n d c a b l e .
-
Page 115: Inspec Tion
• CHASSIS 6·1 8 • Remove thE:! u pper beari n g . Remove t h e upper bearing race and lower beari n g race with the s pecial tool s . 09941 -549 1 1 : Bearing outer race remover 09941 -749 1 0 : Steering bearing remover and installer •... - Page 116 6· 1 9 CHASSIS • STEERING STEM N U T Tighten t h e steering stem nut with t h e s pecial tool t o the s p e c i f i e d torq u e ( 40 - 5 0 N ' m , 4 . 0 - 5 . 0 k g - m , 29 .
-
Page 117: Rea Rwheel
C HASSIS 6-20 REAR W H EEL G : Apply SUZUKI S U PER G REASE " A" 9 9000-2 5030 ( U . S . A . ) 9 9000- 2 50 1 0 ( Others) Tightening torque Th 1 303/ 1 324 : Apply T H READ LOC K SUPER... -
Page 118: Inspec Tion A Nd Disa Ssembl
CHASSIS 6·2 1 I N S PE C T I O N A N D D ISASS E M B LY Play WHEEL H U B BEARI N G Inspect the play o f the wheel h u b bearings by hand w h i l e mou nted i n t h e wheel h u b . - Page 119 • CHASSIS 6·22 I nsta ll the wheel bearing with the special too l s . -..09924-845 1 0 : Bearing installer 09924-845 2 1 Bearing installer CAUTION: First install the wheel bearing for right side . Left side Left side Right side Right side...
-
Page 120: Rea Rbrake
CHASSIS 6·23 REAR BRAKE S G : Apply S U Z U KI S I LI C O N E G REASE ( 99000- 2 5 1 00) Th 1 342 Apply THREA D LOCK " 1 342" ( 99000- 3 2050) . - Page 121 CHASSIS 6·24 • • BRAKE PAD R E P LAC E M ENT Remove the rear wheel. ( Refer to page 6-20 . ) Remove the c a l i per cover. NO TE: Do not operate the brake while dismounting the rear wheel. •...
-
Page 123: Ma S Ter Cylinder Remo Va L A Nd Disa Ssembl Y
CHASSIS 6·26 • M ASTE R CYLI N D ER R E M OVAL A N D D I SASS E M B L Y Remove the reservoir tan k mounting bolt. • • Remove the cotter pin and p i n . Place a cloth u n derneath t h e u nion bolt on the master cylinder to catch spilled d rops of brake fluid . -
Page 124: Ma S Ter Cylinder Inspection
6-21 CHASSIS MAST E R CYLI N D E R I N S PECTI O N I nspect t h e cylinder bore wall for any scratches or other damage. Inspect the piston surface for scratches or other d a m ag e . Inspect the primary c u p for damage. -
Page 125: Rea R S Winga Rm A Nd Suspension
CHASSIS 6·28 REAR SWI N GARM AN D S U S PE N S I O N Tightening torq ue ITEM N ' m kg-m Ib-ft 48 - 7 2 4 . 8 - 7 . 2 34. 5 - 5 2 . 0 60 - 96 6 . -
Page 126: Rem Oval
6·29 CHASSIS • • REM OVAL • Remove the rear w heel . ( Refer to page 6-20 . ) Remove t h e chain g u i d e . Remove the rear brake h o s e with c a l i p e r from the hose guides. -
Page 127: Inspection A Nd Disa Ssembl Y
• CHASSIS 6·30 • • Remove the chain buffer. Remove the chain case. Remove the suspension mounting nut a n d bolt. • Remove the shock absorber with the reservoir tank. I N S PECT I O N AND D ISASSEM BLY Inspect the shock a bsorber for oil l eakage or other damage. - Page 128 6·3 1 CHAS S I S CAUTION : Do not attempt to remove the bolts, right and left . Swin garm is not disassembly. CUSHION LEVER Inspect the respective cushion lever bearings by hand while they are i n the cushion l ever. Rotate each bearing s pacer to i nspect for abnormal noise and smooth rotation.
-
Page 129: Rea Ssembl Y A Nd Remoun Ting
CHASSIS 6·32 REASS EM B LY A N D R E M O U T I N G Reassemble a n d remount the rear suspension in the reverse • order of removal and d isassembly, and also carry out the following steps . -
Page 130: Rea Ssembling Informa Tion
6-33 CHASSIS Right hand Left hand REAS S E M B LI N G I N F O R MATI O N � ITEM Ib-ft N - m kg-m 4 8 - 7 2 4 . 8 - 7 . 2 34. - Page 131 CHASSIS 6·34 Rear shock absorber � I Protrusion of tank Bracket VIEW A...
- Page 133 SER VICING INFORM A TION- TROUBLESHOO TING ....... . . 7- WIRING DIA GRA M .
- Page 134 7 · 1 SERVIC I N G I N FORMATION TROU BL ES H O OTI N G E N G I N E Complai nt Symptom and possible causes Remedy Engine will not Valve clearance out of adjustment. Adjust. start, or is hard Worn valve guides or poor seating of valves.
- Page 135 S E RVICING I N FORMATION Symptom and possible causes Complaint Remedy Noisy engine_ Noise seems to come from clutch Worn splines of countershaft or h u b . Replace. Worn teeth of clutch plates. Replace. Distorted clutch plates, d rive and drive n . Replace.
- Page 136 SERVICI N G I N F O RMATI O N 7·3 Com plant Remedy Symptom and possible causes Valve spring weakened . Replace. Engine runs Valve timing out of adjustment. Adjust. poorly in high- Spark plug gap too narrow. Adjust or replace. speed range.
- Page 137 SERVIC I N G I N FORMATION CARB U R ETOR Complaint Symptom and possible causes Remedy Starter jet is clogged . Clea n . Trouble with Starter pipe is clogged. Clean . starting. Air leaking from a joint between starter body and Check starter body and carburator.
- Page 138 SERVI C I N G I N F O R M ATION ELECTRI CA L Complaint Symptom and possible causes Remedy Defective ignition coil. Replace. No sparking or Defective sprak plug. Replace. poor sparking . Defective pick-up coil or COl unit. Replace.
- Page 139 S E RVICIN G I N FORMATION 7·6 CHASSIS Complaint Symptom and possible causes Remedy Steering stem nut overtightened. Adjust. Handling feels too Worn roller bearing or race in steering ste m . Replace. heavy. Distorted steering stem . Replace. Not enough pressure in tires.
- Page 140 7·7 SERVI C I N G I NFORMATION BRAKES Complaint Symptom and possible causes Remedy Refi l l to l evel m ark. Not enough brake fluid in the reservoir. Poor braking . Air trapped in brake fluid circuit. Bleed air out. Pads worn down.
- Page 141 I G N I T I O N C O I L � l> � H E A D L I G H T l> TAI LLI G H T � !§ � � � � . . . �� �...
- Page 143 SERVI C I N G I NFORMATIO N 7- 1 0 Stat or coil lead wire Clamp p ' -up cOil Pick-up coil lamp Magneto lead wire V I E W A Ignition coil Clamp Spark plug cap...
- Page 144 7-1 1 SERVICI N G I N FORM ATION Brake hose guide Front brake hose Clutch cable Throttle cable guide Brake lever De-comp. lever Throttle cable (pulling cable) Throttle cable (returning cable ) Clutch cable guide Clutch cable Throttle cable (pulling cable) De-comp.
- Page 145 SERVICING I N FORMATION 7· 1 2 Pass through the brake hose in fran of the throttle cable, clutch cable and de com p . cable . Hose guide When tighten the brake hose clamp, align the bottom ® of the thick hose tube with bottom of the clamp.
- Page 146 7·1 3 SERVIC I N G I N FORMATION SPECIAL TO O LS 09900-20202 M icrometer 09900-20 1 0 1 09900-09003 ( 2 5-50 m m ) 1m act driver set Varnier calipers 09900-20205 M icrometer 0 - 2 5 mm 09900-2070 1 Magnetic stand 099 1 0-606 1 1...
- Page 147 SERVIC I N G I N FORMATION 7 · 1 4 099 1 6-34580 0 9 9 1 6-443 1 0 09920- 1 3 1 20 099 1 7- 1 49 1 0 Valve guide reamer Valve guide re- 099 1 6-845 1 0 Cra nkcase separatorl ( 1 0.
- Page 148 SERVI C I N G I N FO RM ATIO N 7- 1 5 T I G HTEN I N G TO RQU E E N G I N E kg-m ITEM N 'm Ib-ft 8 - 1 2 0 . 8 - 1 . 2 6 .
- Page 149 SERVICIN G I N FORMATION 7· 1 6 CHASSIS ITEM N·m kg- m Ib-ft 50 - 80 5.0 - 8.0 36.0 - 5 8.0 Front axle sh aft 6 - 8 0. 6 - 0. 8 4. 5 - 6.0 Front axle p i n c h n ut 30 - 40 3.0 - 4.
- Page 150 7- 1 7 SERVIC I N G INFORMATION TIGHTE N I N G TORQUE C H A RT For other bolts and nuts not listed in the preced ing page, refer to this chart : Conventional o r "4" m a rked bolt "7"...
- Page 151 S E RVICING I N FORMATI O N 7· 1 8 S E RVICE DATA VALVE G U I D E U n it : m m (in) STANDARD ITEM 30. 6 V alve diam. I N . ( 1 . 20) 2 7 .
- Page 152 7· 1 9 SERVIC I N G I N F ORMATION CAM S H A FT CYL I N D ER H EA D U n it : m m (in) STAN DARD LIMIT ITEM 3 3 . 4 3 0 - 3 3 . 4 70 33.
- Page 153 SERVICI N G I NFORMATION 7·20 STANDARD ITEM LIMIT Piston ring to g roove 0. 1 80 1 st clearance (0. 007) 0. 1 50 ( 0 . 006) 1 . 0 1 - 1 . 03 Piston ring groove width 1 st ( 0 .
- Page 154 7·2 1 SERVICING I N FORMATION CLUTCH U nit: m m (in) ITEM STANDARD LIMIT Cl utch l ever play 1 0 - 1 5 ( 0 . 4 - 0 . 6) 2 . 42 Drive plate thickness 2 . 7 2 - 2 . 88 ( 0 .
- Page 155 SERVICING I N FORMATIO N 7·22 CARBURET O R ITEM SPECIFICA TION Carburetor type M I K U N I TM 33SS Bore size 3 3 mm 1 . 0 . No 1 400 Idle r/min. 400 ± 1 00 r/mi n ±...
- Page 156 7·23 SERVIC I N G I N FORMATION WATTA G E U n it : W SPECIFICATION ITEM Headlight Tai l light B RAKE W H E E L U nit: m m (in) STA N DARD LIM IT ITEM 0 - 0 .
- Page 157 SERVICING IN FORMATION 7·24 S U S P E N S I O N U n it: m m (inl ITEM STAN DARD LIMIT NOTE Front fork stroke ( 1 1 . 0) Front fork spring free length ( 2 3 . 9) 1 45 Front fork oil level ( 5 .
- Page 158 7·25 SERVICING I N FORMATION FUEL + O I L ITEM SPECIFICATION NOTE Fuel type U se only u n leaded gasoline of at least 8 7 R ;M p u m p octane ( method) or 9 1 octane or higher rated by the research method.
- Page 159 IMPOR TA N T A ll street-legal SUZUKI motorcycles with engine displacemen t o f 50cc or greater are subject to Environmental Protection A gency emission regulations. These regu lations set specific standards for exhaust emission output levels as well as partic...
-
Page 160: View Of Dr350S
8-1 DR350S VIEW OF D R3 50S L E FT S I D E R I G HT S I D E... -
Page 161: Specifica Tions
DR350S 8·2 SPECI FICATIONS DEMENSION ES AND DRY MASS ELECTRICAL Overa l l length ..* 2 2 3 5 mm ( 8 8 . 0 i n ) I g n ition type ..SUZU K I " P E l " Overall width . - Page 162 8·3 DR350S SERVI C E DATA U n i t : m m ( i n ) VALVE G U I D E ITEM STA N DARD LIMIT Valve diam . 30. 6 I N . ( 1 . 20) 2 7 .
- Page 163 DR350S 8·4 CAMS HAFT CYLI N DE R H EAD U n it : mm (in) ITEM STANDARD LIMIT Cam height 3 3 . 43 0 - 33 . 470 3 3 . 1 3 I N . ( 1 . 3 1 6 1 - 1 . 3 1 7 7 ) ( 1 .
- Page 164 8·5 DR350S LIMIT ITEM STANDARD 0 . 1 80 Piston ring to groove 1 st ( 0 . 00 7) clearance 0 . 1 50 ( 0 . 006) Piston ring g roove width 1 . 0 1 - 1 . 03 1 st ( 0 .
- Page 165 DR350S 8·6 C L UTCH U nit: mm (in) ITEM STANDARD LIMIT C l utch lever play 1 0 - 1 5 (0. 4 - 0. 6) Drive pl ate thickness 2 . 7 2 - 2 . 8 8 2 .
- Page 166 8·7 DR350S CARBURETOR SPECIFICA TION ITEM U . S . A . California model only ..Carburetor type * M I K U N I BST33SS ..Bore size 3 3 mm 1 . 0 . N o * 1 40 2 * 1 40 3 ..
- Page 167 DR350S 8·8 WATTAGE U n it : W ITEM SPECIFICATION Headlight * 5 5 Position l ig ht Tail /Brake light *5/2 1 Turn signal l ight * 2 1 Tachometer l i g ht * 1 . 7 Speedometer l ight Turn sig nal i n dicator light *1 .
- Page 168 8·9 DR350S U n it : mm (in) LIMIT ITEM STAN DARD * 80/ 1 00- 2 1 5 1 P Tire size Front * 1 1 0/90- 1 8 6 1 P Rear * 3 . 0 Tire tread depth Front ( 0 .
- Page 169 DR350S 8- 1 0 F U E L + OI L SPECIFICATION ITEM NOTE U se o n ly u n leaded gasoline of at least 87 Fuel type pump octane ( method) or 9 1 octane or higher rated by the research method. Gasoline conta i n i n g MTBE ( M ethyl Tertiary For U .
- Page 170 8·1 1 DR350S TIG HTEN I N G TORQU E E N G I N E Ib-ft ITEM N 'm kg-m 8 - 1 2 0 . 8 - 1 . 2 6 . 0 - 8 . 5 Cylinder head cover bolt Camshaft sprocket bolt 1 4 - 1 6 1 .
- Page 171 DR350S 8· 1 2 C HASSI S I T E M kg-m N ·m Ib-ft Front axle shaft 50 - 80 5 . 0 - 8 . 0 3 6 . 0 - 5 8 . 0 Front axle p i n c h n ut 6 - 8 0 .
- Page 172 8· 1 3 DR350S PERIO D I C MAINTENANCE S C H E D U LE I M PORTANT: The periodic maintenance intervals and service requirements h ave been establish ed in accordance with EPA regulations. Following these instructions will ensure that the motorcycle will not exceed emission standards and it will also ensure the reliability and performance of the motorcycl e .
- Page 173 DR350S 8· 1 4 BATTERY Inspect Every 6 000 km (4 000 m iles, 1 2 months) • Remove the left frame cover. • Check the battery voltage with a pocket tester. 09900-25002 Pocket tester If the voltag e reading is below 1 2. 0 V, this battery needs recharging.
- Page 174 8· 1 5 DR350S CARBU RETOR Inspect Initial 1 000 km (600 miles, 2 months) and Every 6 000 km (4 000 miles, 1 2 months) TH ROTTLE CABLE PLAY The throttle cable should be adjusted to h ave a play ® of 0.
- Page 175 The standard tire fitted on this motorcycle, is 80/ 1 00-2 1 5 1 P for front and 1 1 0/90- 1 8 6 1 P for rear. The use of tires other than the those specified may cuase instability . It is highly recommended to use a SUZUKI Genuine Tire.
- Page 177 DR350S 8- 1 8 KICK IDLE G EAR CD Kick i d l e gear @ Retainer @ Bushing @ Spacer ® Driveshaft • Remove the kick idle gear CD by removing the retainer @ _...
- Page 178 8- 1 9 DR350S CARBU RETO R CONSTRUCTION CD Top cap @ Spring @ Jet needle @ Diaphragm ® Piston valve ® Needle jet (j) Main jet ® Pilot jet ® Starter plunger @) Throttle valve ® Pilot screw @ Float @ Throttle stop screw @ Throttle valve shaft @ Needle valve...
- Page 179 DR350S 8·20 SPECIFICATION ITEM U . S . A . California model only Carburetor type M I K U N I BST33SS 33 m m Bore size 1 4D 2 1 4D 3 I . D . No. 1 500 ± 1 00 r/m i n Idle r/min 1 .
- Page 180 8-2 1 DR350S REM OVAL Disconnect the fuel hose CD . • Remove the throttle cable @ . • • Loosen the clamp screws and remove the carburetor. DISAS S E M BLY Remove the top cap. • • Remove the diaphragm with piston valve. •...
- Page 181 DR350S 8·22 Remove the main jet CD . • • Remove the starter plunger. Remove the throttle valve by removing the screws @ . • • Remove the throttle valve shaft and return spring by removing the E-ring @ . I N S PECTION A N D ADJ U STMENT Check fol lowing items for any damage or cloggin g .
- Page 182 8·23 DR350S N EE D LE VALVE I N S PECTION If foreign m atter i s caught between the valve seat a n d the needle, the gasoline will continue flowing and cause it to over flow. If the seat and needle are worn beyond the permissi ble l imits, similar trouble will occur.
- Page 183 If persons, who are u naware of these special carburetor servicing requirements tamper with the car buretors the Suzuki dealer should restore the carburetors to their original condition o r if u nable to ef fect repairs , contact the distributors representative for further tech nical information and assistance .
- Page 184 8·25 DR350S I G N ITIO N SYSTEM �r":--- --" "'- -()- - E n g i n e stop s witch B IY C O l u n it I g n ition c o i l r - - - - - - - - - - - - - -, �...
- Page 185 As capacitors, zener diodes, etc. are used insid this unit, the : Brown resistance values will deffer when an ohmmeter other than :Green :White SUZUKI pocket tester is used. B/W : Black with White tracer BIY :Black with Yellow tracer BI/B :Blue with Black tracer BI/R :Blue with Red tracer...
- Page 186 8·27 DR350S CHARGI N G SYSTEM DES C R I PTI O N The circuit o f the charging system i s indicated i n figure, which is composed o f a n A C generator, regu- lator/rectifier u nit and battery. The AC current generated from AC generator is rectified by rectifier and is turned into D C cu rrent, then it charges the battery .
- Page 187 DR350S 8·28 When the engine speed increases and the load decreases, the battery charge voltage will increase due to the generated voltage by the g enerator. The battery will continue to be charged by the gener ®) ated voltage u ntil the battery voltage (voltage between @ and reaches the value set of the control circuit in the regulator, then a signal from the circuit will flow to the SCR.
- Page 188 8·29 DR350S AC GENERATOR NO-LOAD PERFORMANCE • Remove the seat. Disconnect the AC generator lead wire coupler. • Start the engine a n d keep it running at 5 000 r/min . • • Measure the AC voltage between the three yellow lead wires with the pocket tester.
- Page 189 1 5 - 50 CAUTION : As SCR and diodes are used inside this regulator/rectifier unit, the resistance values will differ when an ohmmeter other than SUZUKI pocket tester is used . LAM PS TAI l/BRAKE LIGHT H EADLI G H T CAUTIO N : Do not overtighten t h e lens fitting screws.
- Page 190 8·3 1 DR350S SPEEDO M ETER A N D TAC H O M ETER...
- Page 191 DR350S 8·32 SWITCH ES Inspect each switch for continuity with the pocket tester referring to the chart. If any abnormality is found, replace the respective switch assemblies with new ones. 09900-25002 Pocket tester POSITION POSITION H O R N SWITCH IG N ITION SWITCH B/BI ON ( P u s h )
- Page 192 B·33 DR350S WIRE COLOR : Black FRONT B RAKE SWITCH : Blue Term i n a l T e r m i n a l : Brown POSITION : Green : Gray (Squeeze l ever) : Light blue : Light green O F F : Orange : Red...
- Page 193 ..caps. (V ) • Using SUZUKI pocket tester, measure the battery voltage. (at 2 5 ° C) seconds The tester should indicate more than 1 2. 5V (DC) as shown in the Fig . If the battery voltages is lower than the spe cifi...
- Page 194 8·35 DR350S SERVI CI N G Visually inspect the surface o f the battery container. If a ny signs of crackin g or electrolyte leakage from the sides of the battery have occurred, replace the battery with a new one. If the battery terminals are found to be coated with rust or an acidic white powdery substance, then this can be cleaned away with sandpaper.
- Page 195 DR350S 8·36 FRONT FORK " " STAN DARD SUSPENSION SETTING Fork spring Service Limit : 602 mm (23 . 7in) FRONT REAR Fork oil type : Fork oil # 1 0 Spring pre· Damping force Spring set Damping force load adjuster adjuster length adjuster...
- Page 196 B·37 DR35PS TROU BLES HOOTING ELECTRICAL Remedy Complaint Symptom and possible causes Generator does not Open or short i n lead wires, or loose lead connictions. Repair, replace or retighten. charge. Shorted, grounded or open generator coils. Replace. Shorted or punctured regulator/rectifier. Replace.
- Page 197 m � � � n 2::! :t> 2 2 G) � C :t> ); � � 9 d i 1j.l...!.f f .L � ��bQI 0. » != S :t> � � B � 0 ---- -- --<:31- • ---i:3r- B\i' --Di-- �...
- Page 199 DR350 S 8-40 WIRE, CABLE A N D HOSE ROUTIN G WIRE ROUTING Clamp Turn signal light (RI Clamp Tail/Brake light License light Turn signal light I R I . I LI License light Clamp Clamp Tail/Brake light License light...
- Page 200 DR350S 8·4 1 N e utral i n d o Icator s w itch l e a d w i re C l a m p...
- Page 203 DR350 S 8·44 CAN ISTER H O S E ROUTI N G ( California model only) W i r i n g h a rness Thro tt l e c a b l e C l a m p W i r i n g h a rn e s s Surge hose---+-�D�...
- Page 205 DR350M ('9 1-MODEL) CONTENTS " SPECIFICA TIONS 9- 2 SER VICE DA TA 9- 1 0 ENGINE MO UN TING 9- 1 1 KICK IDLE GEA R 9- 12 WIRE ROUTING...
-
Page 207: Service Data
D R 350M ('9 1 -MO D E l) 9-2 SERVICE DATA VALVE + G U I D E Unit: mm ( i n ) ITEM STANDARD LIMIT 30. 6 Valve diam. I N . ( 1 . 20) 2 7 . 0 ( 1 . - Page 208 9·3 D R 35 0M ('9 1 ·M O D E L) CAMSHAFT CYLINDER HEAD Unit: mm (in) STANDARD LIMIT ITEM 33.430 - 3 3 . 470 33. 1 3 Cam height I N . ( 1 . 3043) ( 1 . 3 1 6 1 - 1 . 3 1 77) 33.460 - 33.
- Page 209 D R 350M ('9 1 -M O D E L) 9-4 ITEM STANDARD LIMIT Piston ring to groove clearance 0. 1 80 1 st (0.007) 0. 1 50 (0.006) Piston ring g roove width 1 . 0 1 - 1 . 03 1 st (0.
- Page 210 9-5 D R 3 5 0M ('9 1 -M O D E L) CLUTCH U n it : mm (in) ITEM STANDARD LIMIT 1 0 - 1 5 Clutch lever play (0. 4 - 0 . 6) 2 . 4 2 Drive plate thickness 2 .
- Page 211 D R 350M ('9 1 -M O D E l) 9-6 CARBURETOR ITEM SPECIFICATION M I K U N I TM 33SS Carburetor type Bore size 33 mm 1 . 0 . 1 400 400 ± 1 00 r/min Idle r/min. ±...
- Page 212 9-7 D R 350M ('9 1 -M O D E U WATTAGE Unit: W SPECIFICATION ITEM 5 � Headlight Taillight BRAKE + W HEEL U nit: mm (in) ITEM STAN DARD LIMIT Brake lever play 0 - 0 . 3 (0 - 0.
- Page 213 D R 350M ('9 1 -M O D E L) 9-8 SUSPENSION U nit: mm (in) STANDARD LIMIT ITEM NOTE Front fork stroke ( 1 1 . 0) Front fork spring free length ( 23 . 9 ) 1 45 Front fork oil level ( 5 .
- Page 214 9-9 D R 350M ('9 1 -M D D E L ) FUEL + OI L SPECIFICATION NOTE ITEM Use only unleaded g asoline of at least 8 7 Fuel type ( R iM method) or 9 1 octane or p u m p octane higher rated by the research method .
- Page 215 D R 35 0M ('9 1 -M O D E l) 9-1 0 ENG I N E M O U NTIN G Tightening torque ITEM N ' m kg-m I b-ft G) , ® 3 7 - 45 3 . 7 - 4. 5 2 7 .
- Page 216 9·1 1 D R 3 50M ('9 1 ·M O D E l ) KICK IDLE G EAR CD Kick idte gear o Retainer o Bushing @ Spacer ® Driveshaft • Remove the kick idle gear CD by removing the retainer @ .
- Page 219 DR350SM ('9 1-MODEL) SPECIFIC A TIONS ....... 1 0- SER VICE DA TA ....... . . 1 0- 2 ENGINE MOUNTING .
- Page 220 1 0- 1 D R 35 0SM ( '9 1 -M O D E l) SPECIFICATIONS DIMENSIONS A N D D RY MASS 2 335 mm (9 1 .9 i n ) ..E 1 5 , 1 7 , 1 8 , 2 2 Overa l l length .
- Page 221 D R 350SM ('9 1 ·M O D E L ) 1 0·2 SERVICE DATA VALVE + G U I D E U n it : m m (in) L I M I T ITEM STA N DA R D Valve dia m .
- Page 222 1 0-3 D R 3 50SM ('9 1 -M O D E L ) CAMSHAFT CYLI N D E R H E AD U nit: m m (in) LIMIT STANDARD ITEM 33. 1 3 33.430 - 3 3 . 470 Cam height I N .
- Page 223 D R J50 SM ('9 1 -MO D E L ) 1 0-4 ITEM STANDARD LIMIT Piston ring to g roove clearance 0 . 1 80 1 st (0.007) 0. 1 50 (0.006) Piston ring g roove width 1 . 0 1 - 1 . 03 1 st (0.040 - 0 .
- Page 224 1 0·5 D R 350SM ('9 1 ·M O D E L) CLUTCH Unit: mm (in) L I M I T I T E M STANDARD 1 0 - 1 5 Clutch lever play (0. 4 - 0 . 6) 2 .
- Page 225 D R 350SM ('9 1 -M O D E U 1 0-6 CARBU RETOR SPECIFICA TION ITEM E-33 E-03 <- Carburetor type M I K U N I BST33SS <- Bore size 33 m m I . D . No 1 4D 3 1 4D 2 <-...
- Page 226 1 0-7 D R 350SM ('9 1 -M O D E L) S P E C I F I CA T I O N I T E M E-02,04, 1 6, E - 28 E- 1 8 E - 1 5 , 2 2 E-24 �...
- Page 227 D R 350SM ('9 1 -M O D E L ) 1 0-8 SPECiFICA TION ITEM E-02, 04, 1 5, 1 6, 1 7, 1 8, E - 03, 2 8 , 3 3 2 1 , 2 2 , 24, 2 5 , 34 <- High beam indicator light 1 .
- Page 228 1 0-9 D R 350SM ('9 1 -M O D E L ) S U S PE N S I O N U n it: m m (in) ITEM LIMIT N OT E STA N DARD Front fork stroke ( 1 1 . 0) Front fork spring free length ( 2 3 .
-
Page 229: Engine Moun Ting
D R 350SM ('9 1 -M O D E l ) 1 0- 1 0 ENGINE M OU NTIN G Tighten ing torque ITEM N · m kg-m Ib-ft (D,@ 3 7 -4 5 3 . 7 - 4 . 5 2 7 . - Page 230 1 0-1 1 D R 350SM ( '9 1 -M O D E L ) W I R E R O U T I N G Clamp R egu l ator / Rectifier COl u n it Clamp Wiring harness C O l u n it - - ...
- Page 231 D R 350SM ('9 1 -M O D E l) 1 0- 1 2 CAN ISTER H O S E ROUTI N G (California model only) I n g harness Clamp Throttle Pury air hose Wiring harness Surge hose Surge hose Wiring harness ng harness Purge hose...
- Page 233 DR350N/DR350SN ('92-MODELJ SPECIFICA TIONS ......1 1- SER VICE DA TA ....... . 1 1- 3 THRO TTL E CA BLE A DJUS TMEN T (DR350SN) .
-
Page 234: Carburetor
1 1 - 1 DR350NIDR350SN ('92-M O DEL) D I M E N S I O N S A N D D R Y M ASS S PE C I F I CATI O N S ( D R350N ) 2 1 65 mm (82.5 i n ) Overal l length . - Page 235 DR350N/DR350SN ('92-M O D E l) 1 1 -2 S PECI FI CATI O N S ( D R 3 50SN ) D I M E NSIONS A N D D R Y MASS Overal l length ... . 2335 mm (9 1 .9 i n ) .
- Page 236 1 1 ·3 DR350N/DR350SN (,92·MODEL) S E RV I C E DATA ( D R350N ) U nit: m m (in) VALVE + G U I D E LIMIT STANDARD ITEM 30. 6 Valve d i a m . I N . ( 1 .
- Page 237 1 1 ·4 DR350N/DR350SN (,92·MODEL) CAMSHAFT + CYLI N D ER H EA D U nit: mm (in) LIMIT ITEM STA N D A R D 33. 1 3 Cam height 3 3 . 4 30 - 33 . 4 70 I N .
- Page 238 1 1 ·5 DR350N/DR350SN ('92·MODEL) LIMIT STAN DARD ITEM 0. 1 80 Piston ring to groove cl earance 1 st ( 0 . 007) 0. 1 50 (0.006) 1 . 0 1 - 1 . 03 Piston ring groove width 1 st ( 0 .
- Page 239 DR350N/DR350S N ('92·MODEl) 1 1 ·6 CLUTCH U n it : mm (in) LIMIT ITEM STANDARD 1 0 - 1 5 Cl utch lever play (00 4 - 0 . 6) 2 . 7 2 - 2 . 8 8 2 0 42 Drive plate thickness (0.
- Page 240 1 1 ·7 DR350N/DR350SN ('92·M O D E l) CAR B U R ET O R SPECIFICA T I O N ITEM M I K U N I TM33 S S Carburetor type 33 mm Bore size 1 400 1 . 0 . No 400 ±...
- Page 241 DR350N/DR350SN ('92·MO DEL) 1 1 ·8 WATTAGE U nit: W S PECI F I CA TION ITEM Headlight Taillight BRAKE + WH EEL U n it: m m (in) STA N DARD LI M IT ITEM 0 - 0 . 3 Brake lever play ( 0 - 0 .
- Page 242 1 1 -9 DR350NIDR350SN ('92-MODEL) S U S P E N S I O N Unit: mm (in) I T E M NOTE STA N D A R D LI M IT Front fork stroke ( 1 1 . 0) Front fork spring free length ( 2 3 .
- Page 243 DR350N/DR350SN ('92·MODEL) 1 1 · 1 0 F U E L + OI L I T E M SPECI FICATION NOTE Fuel type Use only unleaded gasoline of at least 8 7 p u m p octane method) or 9 1 octane or higher rated by the research method .
- Page 244 1 1 · 1 1 DR350N(DR350SN (,92·MO DEL) SERV I C E DATA ( D R350S N ) VALVE + G U I D E Unit: m m (in) ITEM STANDARD LIMIT 30. 6 Valve diam . I N . ( 1 .
- Page 245 DR350N/DR350SN ('9 2·MODElI 1 1 · 1 2 CAMSHAFT + CYL I N D E R H EA D Unit: mm (in) STANDARD ITEM LIMIT 33.430- 33. 470 Cam height 33. 1 3 I N . ( 1 . 3 1 6 1 - 1 . 3 1 77) ( 1 .
- Page 246 1 1 - 1 3 DR350N/DR350SN ('92-MODEL) LIMIT STANDARD ITEM 0 . 1 80 Piston ring to g roove cleara nce 1 st ( 0 . 007) 0. 1 50 ( 0 . 006) 1 . 0 1 - 1 . 03 Piston ring g roove width 1 st ( 0 .
- Page 247 DR350N/DR350SN ('92·MODH) 1 1 · 1 4 CLUTCH U n it : m m (in) STANDARD LIMIT ITEM 1 0 - 1 5 Clutch l ever play (0.4 - 0 . 6) 2 . 7 2 - 2 . 8 8 2 .
- Page 248 1 1 · 1 5 DR350N/DR350SN ('9 2·MODEL) SPECIFICA TION ITEM E-03 E-33 E-28 0 - 6 ( N . J . ) Needle j et ..Throttle valve (Th . V . ) # 1 1 5 ..
-
Page 249: Battery
DR350NIDR350SN ('92·MODEL) 1 1 · 1 6 ELECTRICAL U nit: mm (in) SPECI FICA TION N OTE ITEM 5 ° B . T . O . C . below 2 300 r/min and Ignition timing 30o B. T . O . C . a bove 4 300 r/min N O . - Page 250 1 1 · 1 7 DR350N/DR350SN (,92·MODEL) BRAKE + W H EEL U nit: m m (in) ITEM STANDARD LIMIT Brake lever p lay 0 - 0 . 3 ( 0 - 0 . 0 1 ) Rear brake p edal height (0.
- Page 251 1 1 · 1 B DR350N/DR350SN ('92·MODEL) SUSPENSION U n it: mm (in) STANDARD LIMIT ITEM NOTE Front fork stroke ( 1 1 .0) Front fork spring free length ( 23. 7) * 1 52 Front fork oil level ( 6 . 0) 1 000 kPa Rear shock absorber gas pressure ( 1 0 kg/cm2, 1 42 psi)
- Page 252 1 1 · 1 9 DR350N/DR350SN ('9 2·MODEL) TH ROTTLE CA BLE ADJ USTM E N T ( D R3 5 0 S N ) ( Except f o r Australia) A tw i n th rott l e cab le system is used i n th is moto rcycle. Cable is for p u l l i ng and cable i s fo r returning.
- Page 253 ::::S O 0.." Do) 'T1 � c » :l:J � � 2 » ... " � ffii " 0 » � � G') :l:J g- » (J'1 @taw 13 ---=- . �:.=® " " � � ..--<3I- ew '=®...
- Page 254 1 1 ·21 iJR350N/DR350SN ('92·MODEL) CABLE R O U TI N G De-camp. cable guide Throttle ca e 5 - 1 0 m m...
-
Page 255: Wiring Dia Gra M
DR350P / SP ( ' 9 3-MOD E L) FOREWORD This chapter describes service data and servicing procedures which differ from those of the DR350N/SN ('92-MODEL). Please refer to the sections 1 through 1 1 for details which are not given in this section. NO TE: Any differences between DR350N/SN and DR350P/SP in specifications and service data are clearly indicated with the asterisk marks... -
Page 256: Specifica Tions
1 2- 1 DR350P/SP ('93- M O D E Ll S PE C I F I CA TI O N S D R 3 5 0 P DIM ENSIONS A N D DRY MASS Overa l l length .. -
Page 257: Dr350Sp
....... SUZUKI " P E l " I g n ition timing ...... -
Page 258: Ser Vice Da Ta
1 2·3 DR350P/SP ('93· M O D E L) SERVI C E DATA D R3 5 0 P VALVE + G U I D E U nit: mm ( i n ) I T E M STANDARD LI M IT 30. - Page 259 DR350 PISP ('93·MOD El) 1 2·4 CAMSHAFT + CYLIN D ER H EAD U nit: mm (in) ITEM STAN DARD LI M I T Cam height 3 3 . 430 - 3 3 . 470 33. 1 3 I N .
- Page 260 1 2·5 DR350P/SP ('93·M O D E l) L I M IT ITEM STAN DARD Piston ring to g roove clearance 0. 1 80 1 st (0. 007) 0. 1 50 (0. 006) 1 . 0 1 - 1 . 03 Piston ring g roove width 1 st (0.040 - 0 .041 )
- Page 261 D R 3 50PISP ('93-M ODELI 1 2-6 CLUTCH Unit: mm (in ITEM STAN DARD LI M IT Clutch lever play 1 0 - 1 5 (0.4 - 0 . 61 Drive plate thickness 2 . 7 2 - 2 . 88 2 .
- Page 262 1 2· 7 DR350P/SP ('93·M O DEL) CAR B U R ET O R S PECI FICATION ITEM Carbu retor type TM33 SS Bore size 33 mm I . D . No 1 4DO Idle r/min. 400 ± 1 00 r/mi n 1 4.
- Page 263 1 2·8 DR350P/SP ('93·M O DE L) WATTAGE Unit: W ITEM SPECIFICATI O N Headlight Taillight BRAKE + WH EEL U nit: m m (in) I T E M STAN DARD LI M IT Brake l ever play 0 - 0 . 3 ( 0 - 0.
- Page 264 1 2·9 DR350P/SP (,93·M O D E L) SUSPE N S I O N U n it : m m (in) STANDARD LIMIT N O T E ITEM Front fork stroke ( 1 1 . 0 ) Front fork spring free length ( 2 3 .
- Page 265 DR350PISP ('93·MODE L) 1 2· 1 0 F U EL + O I L I T E M SPECIFICA TION N OTE Fuel type Use only u nleaded gasoline of at least 8 7 R �M p u m p octane ( method) or 9 1 octane or higher rated by the research method .
-
Page 266: Dr350Sp
1 2· 1 1 D R 3 50P/SP ('93·MO D E L) D R 3 5 0 S P VALVE + G U I D E Unit: mm (in) STANDARD LIMIT ITEM 30. 6 Valve d i a m . I N . - Page 267 DR350P/SP ('93·MODEL) 1 2· 1 2 CAM S HAFT + CYLI N D E R H EAD Unit: m m (in) ITEM STANDARD LIMIT 3 3 . 430 - 33 . 4 70 Cam height 33. 1 3 I N . ( 1 .
- Page 268 1 2· 1 3 DR350P/SP ('93·M O D E l) ITEM STANDARD LIMIT Piston ring . to groove clearance 0. 1 80 1 st (0.007) 0. 1 50 (0.006) 1 . 0 1 - 1 . 03 Piston ring groove width 1 st (0.040 - 0.041 ) 1 .
- Page 269 1 2· 1 4 D R350P/SP ('93·MODEL) CLUTCH Unit: m m (in) ITEM STANDARD LIMIT Clutch lever play 1 0 - 1 5 (0. 4 - 0 . 6 ) Drive plate thickness 2 . 7 2 - 2 . 8 8 2 .
- Page 270 1 2· 1 5 DR350P/SP ('93·M ODEl) SPECIFICATION ITEM E-03 E-33 E- 28 0 - 5 <- * 0 - 5 Needle jet (N . J . ) <- <- (Th . V . ) # 1 1 5 Throttle valve <- # 3 7 .
- Page 271 1 2·1 6 DR350P1SP ('93·MODEL) ELECTRICAL U nit: m m (in) ITEM SPECIFICA TION NOTE Ignition timing *30 o B.T. D . C. a bove 4 300 r/min N D . : X2 7 EPR - U 9 Spark plug Type N .
- Page 272 1 2· 1 7 DR3 50P/SP ('93·MO DElI BRAKE + W H E E L Unit: m m (in) STAN DARD LIMIT ITEM Brake lever play 0 - 0. 3 (0 - 0 . 0 1 ) Rear brake pedal height (0.
- Page 273 1 2- 1 8 DR350P/SP ('93-M O D E l) SU SPENSI O N U n it: mm ( i n ) ITEM STANDARD LIMIT NOTE Front fork stroke ( 1 1 . 0) Front fork spring free length ( 2 3 . 7) Front fork oil level 1 52 ( 6 .
-
Page 274: Oil Check Ba Ll
1 2· 1 9 DR350P/SP ('93·M O D E L) O I L C H E C K BALL REM OVAL • Drain engine oil . Remove the rear brake master cylinder b olts . • Remove the c l utch cable b ra c ket bolts . •... -
Page 275: Emission Control Ca Rburetor Components
The jet needle is a lso of special m anufacture . Only one clip position is provided on the jet needle. If replacement becomes necessary the jet needle m ay only be replaced with a n equivalent performing replacement component. Suzuki recommends that Genuine Suzuki Parts be utilized whenever possi ble for the best possible performance and d urability . -
Page 276: Ma Gneto
1 2·21 DR350P/SP ('93·M O D E lI MAG N ETO M AG N ETO C O I L • Remove t h e frame covers a n d seat. Disconnect the magneto lead wires. • Measure the resistance between the lead wires with a pocket tester as shown in the illustrati o n . - Page 277 NO TE: As capacitors, diodes, e tc. are used inside this CDI unit, the resis tance values will deffer when an ohmmeter o ther than SUZUKI pocket tester is used. NO TE: Remo ve the spark plug and place the spark plug on the cylinder head co ver kick the engine and check the sparks o f the spark plug.
-
Page 278: Rea R Shock A Bsorber (Dr350P)
1 2·23 DR350P/SP ('93·M O D E L) REAR S H O C K ABSO R B E R ( D R 3 50 P ) S H O C K A BS O R B E R S PRI N G PRE-LOAD ADJ US T M E N T Using the universal c l a m p wrench, adjust t h e s pring tension of the shock absorber by turning the spring pre-load adjuster... - Page 279 � � I G N I T I O N COil c � "0 l> � � l> H E A D L I G H T TAILL I G H T -=® � � � � � < � E N G I N E STOP B U TTON �...
- Page 284 1 3- 1 D R350RISER ('94- M O D E lJ SPECI FICAT I O N S D R 3 5 0 R DIMENSIONS A N D DRY M A S S 2 1 6 5 mm ( 8 2 . 5 i n ) Overall length .
- Page 285 D R350RISER (,94-M O D E L) 1 3-2 DR350SER DIM ENSIONS A N D D R Y MASS Overall length ......2 335 mm ( 9 1 .
- Page 286 1 3·3 DR350RISER ('94· M D D E L) SERVI C E DATA D R 3 5 0 R VALVE + G U I D E U n it : m m (in) ITEM STANDARD LIMIT Valve d i a m . 30.
- Page 287 DR350RISER ('94· M O DE L) 1 3·4 CAMSHAFT + CYLI N DER H EAD U nit: m m ( i n ) ITEM STAN DARD LIMIT Cam height * 3 3 0 450 - 3 3 0 490 *33. 1 50 I N .
- Page 288 1 3·5 DR350RISER ('94·M O D E l) ITEM LIMIT STAN DARD 0. 1 80 Piston ring to groove 1 st clearance ( 0 . 00 7 ) 0. 1 50 2 n d (0. 006) Piston ring g roove width 1 .
- Page 289 DR350RISER ('94·MODEL) 1 3·6 C LUTCH U n it : mm ( i n ) ITEM STAN DARD LIMIT Cl utch lever play 1 0 - 1 5 ( 0. 4 - 0 . 6) D rive p late thic kness 2 .
- Page 290 1 3·7 DR350RISER ('94·MODE L) CARBURETOR SPECIFICA TION ITEM TM33 SS Carburetor type 33 mm Bore size 1 4D O I . D . No 400 ± 1 00 r/min I d l e r/m i n . Float h eight 1 4.
- Page 291 DR350R[SER ('94· M ODEL) 1 3·8 WATTAG E Unit: W ITEM SPECIFICA TION H eadlight Taillight BRAKE + W H E E L U n it : mm (in) STANDARD ITEM LIMIT 0 . 1 - 0 . 3 Brake lever play ( 0 .
- Page 292 1 3·9 DR350RISER ('94· M O D E L) S U S P E N S I O N U n it : mm (in) ITEM STAN DARD LIMIT N OTE Front fork stroke 2 80 ( 1 1 . 0) * 5 5 1 Front fork s pring free length E-03, 2 8...
- Page 293 DR350RIS E R ('94· M O D E L) 1 3· 1 0 FUEL + O I L ITEM SPECIFICATION NOTE Use only u nleaded gasoline of at least 87 Fuel type pump octan e method) or 9 1 octane or higher rated by the research method .
- Page 294 1 3· 1 1 DR3 50RISE R (,94· M O D E L) DR350SER VALVE + G U I D U nit: m m (in) STANDARD LIMIT ITEM 30. 6 Valve diam . I N . ( 1 . 20) 2 7 .
- Page 295 DR35 0 R/SER ('94-MODEL) 1 3- 1 2 CAMSHAFT CYLI N D ER H EA D U n it : m m ( i n ) ITEM STANDARD LIMIT I N _ Cam height 3 3 . 1 50 3 3 . 4 5 0 - 3 3 . 490 ( 1 .
- Page 296 1 3· 1 3 DR350RISER ('94·MOD E L) ITEM STA N DARD LIM IT Piston ring to g roove 0 . 1 80 1 st clearance ( 0 . 007) 0. 1 50 2 n d (0. 006) Piston ring g roove width 1 .
- Page 297 D R350RIS E R (,94· M O D E L) 1 3· 1 4 CLUTCH U n it : m m (in) ITEM STAN DARD LIMIT Cl utch lever play 1 0 - 1 5 (0- 4 - 0 . 6) D rive plate thi ckness 2 .
- Page 298 1 3· 1 5 DR350RISER ('94· M O D E L) CARBURETOR SPECIFICATION ITEM E-04, 2 1 , 34 , 94 E-03 E-33 Carburetor type BST33SS 3 3 mm Bore size * 1 4E K * 1 4EP I . D . N o . * 1 4ES Idle r/min .
- Page 299 DR350RISER (,94·MODEL) 1 3· 1 6 ELECTRICAL U nit: m m (in) ITEM SPECIFICATION NOTE Ignition timing 30 D B . T. O . C . a bove 4 300 rlmin Spark plug N O : U 2 7 ET R Type N G K : C R 9 E K 0.
- Page 300 1 3- 1 7 DR350RISER ('94-M O D E L) BRAKE WHEEL U n it : m m (in) LIMIT ITEM STANDARD Brake lever play 0 . 1 - 0 . 3 ( 0 . 004- 0 . 0 1 0) Rear brake pedal height ( 0 .
- Page 301 D R3 50RISE R ('94· M O D El) 1 3· 1 8 SUSPEN S I O N U n i t : m m ( i n ) ITEM STANDARD LIMIT NOTE Front fork stroke ( 1 1 .0) Front fork spring free length ( 2 3 .
- Page 302 1 3- 1 9 DR350RISER ('94-MODEl) TIGHTEN I N G TO RQU E ( DR350SER) E N G I N E kg-m Ib-ft ITEM N ' m Cylinder head cover bolt 1 .0 7 _ 0 Camshaft sprocket bolt 1 . 5 1 1 .
- Page 303 DR350R{SER (,94·MODEL) 1 3·20 PERIO DIC M AINTENANCE SCH ED U LE ( DR350SER) I M PORTANT: T h e perio d ic maintenance intervals a n d service requirements have been established in accordance with EPA regulations . Following these instructions will ensure that the motorcycle wil l not exceed emission stan d ards and i t will also ensure the reliability and performance o f the motorcycle.
- Page 304 1 3· 2 1 DR350RISER ('94·MODE L) CAM SHAFT/AUTO MATIC DE-CO M P . ASS EMBLY Apply SUZUKI MOLY PASTE ( 99000-2 5 1 40) Th 1 303: Apply THREAD LOCK SUPER " 1 303" ( 99000-32030) Tightening torque ITEM...
- Page 305 09900-2230 1 : Plastigauge must be removed from fitting surfaces of cylinder head and cover. Do not ap ply SUZUKI 80ND No. 12078/1 2 1 5 until after the oil clearance has been determined. If the camshaft journal oil clearance measured exceeds the l imit, measure the outside diameter of camshaft.
- Page 306 1 3·23 DR3 50R[SER (,94·MODEl) CAMSHAFT RUNOUT Measure the runout with a dial gauge. Replace the camshaft if the runout exceeds the limit. Service Limit: 0 . 1 0 mm (0.004 in) 09900-20701 : Magnetic stand 09900-20606: Dial gauge ( 1 /1 00 mm) AUTOMATIC DE-COMP.
- Page 307 DR350RISER ('94·MODEl) 1 3·24 STARTER CLUCH ( DR350SER) REM OVAL Drain engine oil. • • Remove the frame covers . • Remove the seat. • Disconnect the magneto lead wires after moving the COl u nit. • Remove the gearshift lever. •...
- Page 308 1 3·25 DR350RISER ('94· M O DElI Remove the starter gear and bearing. • Remove the three bolts with 6 mm hexagon wrench and • 2 7 mm box-end wrench. Remove the starter clutch holder CD and starter clutch @ . •...
- Page 309 DR35 0RISER ('94·MODEL) 1 3·26 Install the starter gear CD to the stater clutc h . • Check that t h e rotor @ turns i n t h e direction of the arrow • mark @ on the starter clutch holder while holding the start and that the rotor @ never turns in the o ppo...
- Page 310 1 3·27 DR350 RISE R ('94·MODE L) TRANS M ISSION ASSEM BLY CD Spacer @ Retainer @ Spacer @) Driveshaft ® Countershaft Note: "D " means the outer diameter of washers. I nstall the spacer CD to the d riveshaft @ before installing •...
- Page 311 If persons, who are u naware of these special carburetor servicing requirements tamper with the car buretors the Suzuki dealer should restore the carbu retors to their original condition or if u nable to ef fect repairs, contact the distributors representative for further technical information and assistance .
- Page 312 1 3·29 DR350RISER ('94· M O D El) IGN ITI O N AN D STARTER SYSTEM ( DR350SER) DESCRIPT I O N The capacitor d ischarged ignition system consists o f a signal generator, C O l u nit, ignition coil and spark plug .
- Page 313 DR350RISER ('94·MOD ElI 1 3·30 GEN ERAT O R ( DR350SER) GEN ERAT O R STATOR COIL Remove the frame covers and seat . • Disconnect the generator lead wires . • Measure the resistance between the lead wires with a pocket tester as shown in the illustration .
- Page 314 NO TE: As capacitors, diodes, etc. are used inside this CDI unit, the resistance values will deffer when an ohmmeter other than SUZUKI pocket tester is used. NOTE: Remove the spark plug and place the spark plug on the cylinder head cover kick the engine and check the sparks of the spark plug.
- Page 315 DR350R[SER ('94· M O DEL) 1 3·32 STARTER M OTOR ( DR350SER) STARTE R MOTOR R E MOVAL AN D DISASS E M BL Y • Remove the exhaust m uffler. Remove the engine oil pipe CD after loosening the clutch •...
- Page 316 1 3·33 DR350RISER ('94· M O DEl) • Remove the cam chain tensioner adjuster. • Disconnect the starter m otor lead wire • Remove t h e starter motor. • Remove the bolts. • Disassemble the starter motor. STARTER M OT O R I N S PECTIO N CARBON BRUSH When the brushes a re worn, the motor will be unable to produce sufficient torque, and the engine wil l be difficult to...
- Page 317 Replace the O-ring with new ones to prevent oil leakage and moisture. ARMATURE Apply a small quantity of moly paste to the armature e n d . • 99000-25 1 40 : SUZUKI Moly Paste When installing the motor housing and housing end, align • the marks .
- Page 318 1 3·35 DR350RISER (,94·MODEl) STARTER RELAY AN D S I DE-STAN D/IG N ITION I NTERLOCK RELAY ( DR350SER) STARTER RELAY I N S PECTIO N Discon nect the lead wire of starter m otor at starter relay. • • Turn on the ignition switch, inspect the contin uity between the terminals, positive and negative, when squeezing the clutch lever and pushing the starter button .
- Page 319 DR350RISER {'94- M O DE ll 1 3-36 BATTERY ( D R3 50SER) SPECIFICATIO N S YTX7L-BS Type designation Capacity 1 2V 2 1 - 6 kC (6 Ah)/1 0HR Standard e lectrol yte S . G . 1 . 320 20 °...
- Page 320 1 3·37 DR350RISER ('94· M O D E L) FRONT FORK ( DR350R) Tightening torque I T E M N · m kg-m 3. 5 3. 5 0. 7 REM OVAL A N D D I SASSEM BLY • Remove the front wheel . •...
- Page 321 DR350RISER ('94· M O D E l) 1 3·38 Remove the front fork by loosening the u pper and lower • clamp bolts. NO TE: Slightly loosen the front fork cap facilitate later disassem bly, before loosening the lo wer clamp bolts. Remove the front fork cap CD by loosening the lock nut @ .
- Page 322 1 3·39 DR350RIS ER ('94· M O DE l) • Remove the inner rod . CAUTION : Do not attempt to disassemble the inner rod . It is not serv iceable. • Remove the boot by loosening the clamp screws. Remove the d ust seal •...
- Page 323 DR350RISER ('94·MODEL) 1 3·40 INSPECTIO N DAMPER ROD RING I nspect the damper rod ring for wear or damage. DAMPER ROD BOLT/DAMPING FORCE ADJUSTER Inspect the damper rod bolt/damping force adjuster for wear or damage. DAMPER ROD Move the inner rod by hand to inspect it if operating smoothly. INNER AND OUTER TUBE Inspect the inner tube and outer tube sliding surfaces for any scuffing or flaws.
- Page 324 1 3-41 DR350RISER {'94- M O DElI REASS E M BLY AN D R E M O U N T I N G Reassemble and remount the front fork in the reverse order of removal and disassembly, and a lso carry out the follow ing steps: INNER TUBE M ETAL \nsta\\ the meta\ '0"...
- Page 325 DR350RISER ('94·MODEl) 1 3·42 FORK OIL • Place the front fork vertically with full compressed position . Pou r fork oil u ntil its flow from the hole CD on inner rod • as shown in the illustration, and then pour fork oil to the inner tube.
- Page 326 1 3·43 DR350RIS ER ('94· M O D E l) I NNER RO D AND LOCK N UT Install the s pecial tool CD and pull u p the inner rod . • 09940-52840 : Front fork inner rod holder Adjust the height @ of the inner rod by adjusting the lock •...
- Page 327 DR350RIS ER ('94·MO D El) 1 3·44 REAR S H O C K ABSO RBER Adjust t h e spring pre-load a n d damping force as follows . D R350R SPRING PRE-LOAD ADJ U ST M E N T •...
- Page 328 1 3-45 DR350RISER ('94-MODEL) DR350SER SPR I N G PRE-LOAD AN D DAM PIN G FORCE ADJ U ST M E N T Standard spring pre-set length: DR350SER: 253 .4 mm ( 1 0 . 0 in) 099 1 0-606 1 1 : Universal clamp wrench CAUTION : After adjusting the pre-load, tighten the spring adjuster lock ring securely.
- Page 329 ::JJ E N G I N E KILL FRONT BRAKE STARTER SWITCH LIGHT SWITCH BUTTON REAR SIDE-STAND BRAKE TURN » LIGHT SIGNAL SIDE -STAND SWITCH IGNITION SWITCH SWITCH ::JJ » � SPEEDOMETER LIGHT TACHOMETER LIGHT � TURN SIGNAL INDICATOR LIGHT HIGH BEAM INDICATOR LIGHT NEUTRAL INDICATOR LIGHT �...
- Page 331 DR350RIS E R ('94-MO D E L) 1 3-48 Starter motor lead wire Clamp Generator Clamp Carbu retor overflow hose ( Except for california model)
- Page 332 1 3·49 DR350RISER (,94· M O D E l) CABLE ROUTI N G ( DR350SER) Clutch c a b l e B r a k e h o s e 1 B � Throttle cable W i , i n g h ' ) ''' C lutch c a b l e Throttle cable Wiring h a r n ess...
-
Page 333: Dr350P
DR350RI S E R ('94-MODEl) 1 3-50 CARBU R ETO R HOSE RO UTIN G DR350R Cylinder head breather hose Crankcase breather hose Pass through the air vent hose ( R) between the crankcase and frame. RH LH - VIEW VIEW Carburetor clamp position DR350SER... - Page 335 DR350S/SES ( '95-MODEL) FOREWORD This section describes service data and servicing procedures which differ from those of the DR350RISER ('94-MODEL). NO TE: Please refer to the sections through for details which are not given in this section. SPE CI F IC A Tl O N S ............... 14- SER V ICE D A T A .
- Page 336 1 4· 1 DR350S/SES ('95·MODEL) S PECI F I CATIONS D R 3 5 0 S DIMENSIONS A N D DRY MASS Overall length ......2 1 6 5 mm ( 8 5 .
- Page 337 DR3 50S/SES ('95-MOD El) 1 4-2 D R 3 50SES DIMENSIONS A N D D R Y MASS Overall length ......2 3 3 5 mm ( 9 1 .
-
Page 338: Dr350Sp
1 4·3 D R 3 50S{SES ('95·M O DE L) SERVICE DATA DR350S VALVE G U I D E U nit: mm (in) ITEM STANDARD LIMIT Valve d iam . 30.6 I N . ( 1 . 20) 2 7 . 0 ( 1 . - Page 339 DR350S/SES ('95·MODE L) 1 4·4 CAMSHAFT + CYL I N D E R H EA D U nit: mm (in) ITEM STANDARD LIMIT Cam height 3 3 . 4 50 - 33. 490 33. 1 50 I N . ( 1 . 3 1 69 - 1 . 3 1 85) ( 1 .305 1 ) 3 3 .
- Page 340 1 4-5 DR350SISES ('95-MODEl) ITEM STANDARD LIMIT Piston ring to g roove clearance 0. 1 80 1 st (0.007) 0. 1 50 (0. 006) Piston ring g roove width 1 . 0 1 - 1 . 03 1 st (0.040 - 0.041 ) 1 .
- Page 341 DR350S[SES ('95·M O D E L) 1 4·6 CLUTCH Unit: mm (in) ITEM STANDARD LIMIT Clutch lever play 1 0 - 1 5 (0. 4 - 0 . 6) Drive plate thickness 2 . 7 2 - 2 . 88 2 .
- Page 342 1 4· 7 DR350S/SES ('95·M O D E l) CARBU RETOR ITEM SPECIFICATION T M 3 3 SS Carburetor type Bore size 33 mm 1 400 1 . 0 . Idle r/min . 400 ± 1 00 r/min 1 . 0 mm (0. 56 ± 0 . 04 i n ) Float height 1 4.
- Page 343 1 4·B DR350S/SES ('95·MO DEl) WATTAG E U nit: W ITEM SPECIFICATION Headlight Taillight BRAKE W H E E L U n it : m m (iii) ITEM STANDARD LIMIT 0 . 1 - 0 . 3 Brake l ever play ( 0 .
-
Page 344: Tire Pressure
1 4·9 DR350S/SES ('95·MODEl) SUSPENSION U nit: m m (in) ITEM STANDARD LI MIT NOTE Front fork stroke ( 1 1 .0) Front fork spring free length 5 5 1 E-0 1 ,03 ( 2 1 . 7) E-94 ( 2 3 . 9 ) Front fork oil level 1 44 E-O l , 03... - Page 345 DR350S/SES ('95· M O DE l) 1 4· 1 0 FUEL + OI L ITEM SPECIFICATION NOTE Fuel type Use only unleaded gasoline of at least 87 ( � pump octane method) or 9 1 octane or higher rated by the research method . Gasoline containing MTBE ( M ethyl Tertiary E-03 Butyl Ether), less than...
- Page 346 1 4· 1 1 DR3 50S/S E S ('95· M O D E L) DR3 50SES VALVE + G U I D E Unit: mm (in) ITEM STANDARD LIMIT 30. 6 Valve d i a m . I N . ( 1 .
- Page 347 DR350S/SES ('95·MO D E L) 1 4· 1 2 CAMSHAFT + CYLIN DER H EAD U n it: mm (in) ITEM STANDARD LIMIT Cam height 3 3 . 4 50 - 33 . 490 33. 1 50 I N . ( 1 .
- Page 348 1 4· 1 3 DR3 50S/SES ('95·M O D E l) LIMIT ITEM STANDARD 0. 1 80 Piston ring to g roove clearance 1 st ( 0 . 007) 0 . 1 50 ( 0 . 006) 1 . 0 1 - 1 . 03 Piston ring g roove width 1 st (0.040 - 0.041 )
- Page 349 DR350S/SES (,95·MOD E l) 1 4· 1 4 CLUTCH U n it: m m (in) ITEM STANDARD LIMIT Clutch lever play 1 0 - 1 5 ( 9 . 4 -0. 6) Drive plate thickness 2 . 7 2 - 2 . 88 2 .
- Page 350 1 4· 1 5 DR350S/SES (,95· M O D E L) CARBU RETO R SPECIFICA TION ITEM E-02,04, 2 1 , 34 , 9 4 E-03 E-33 � � BST33SS Carburetor type � � 33 mm Bore size 1 4EK 1 4EP 1 4ES I .
- Page 351 DR350S/SES ('95·M O D El) 1 4· 1 6 ELECTRICAL U nit: m m (in) ITEM NOTE SPECIFICATION Ignition timing 30 o B .T. O . C . above 4 300 r/min Spark plug N O : U 2 7ETR Type N G K : CR9EK 0.
- Page 352 14· 1 7 DR350S/SES ('95· M O O E L) B RA K E + W H EEL Unit: mm (in) ITEM STANDARD LIMIT Brake lever play 0. 1 - 0 . 3 �� (0.004 - 0 . 0 1 0) Rear brake pedal height �- ( 0 .
- Page 353 DR350 S/SES ('95· M O DE L) 1 4· 1 8 SUSPENS I O N U nit: mm (in) ITEM STANDARD LIMIT NOTE Front fork stroke ( 1 1 . 0) Front fork spring free length ( 2 3 . 7)
- Page 354 1 4· 1 9 DR350S/SES ('9 5·M O DE l) CAR BU RETOR Pi lOT SCREW REMOVAL A N D I NSTAllATION • Remove the plug by ca refu l l y punching a hole i n it using an awl o r s u itable tool . Before removing the pilot screw, determ ine the setting •...
-
Page 355: Wire Routing
DR350S/SES ('9 5· M O D E l) 1 4·20 WIRE R O U T I N G Starter motor lead wire Clamp Generator Clamp Battery ground wire Carburetor overflow hose ( Except for california model) -
Page 356: Cable Routing
1 4·21 DR350S/SES ('95·M O D E L) CABLE ROUTING C l utch c a b l e Brake h o s e � Throttle cable 5 - 1 0 W ; c; n g h a '" Clutch cable Throt tle c a b l e W i r i n g h a rness C l a m p... - Page 357 DR350 T/SET ('96-MODEL) SPECI F IC A T IO N S ............... 1 5-...
- Page 358 1 5· 1 DR350T/SET ('96·MOD E L) S PECIFICATI O N S DR3 50T DIMENSIONS A N D D R Y MASS Overall length ......2 1 6 5 mm ( 8 5 .
- Page 359 DR350T/SET ('96-MO D E lI 1 5-2 D R 3 50SET DIMENSIONS A N D DRY MASS Overall length ......2 335 m m ( 9 1 .
- Page 360 1 5·3 DR350T/S ET ('96·MO D H) S ERVI C E DATA D R 3 50T VALVE + G UI D E U n it : mm (in) STANDARD LIMIT ITEM Valve diam . 30 . 6 I N . ( 1 .
- Page 361 DR350T/S ET ('96-M O D EL) 1 5-4 CAMSHAFT + CYLI N D E R H EAD U nit: m m (in) ITEM STANDARD LIMIT Cam height 33.450 - 33 . 490 33. 1 50 I N . ( 1 . 3 1 69 - 1 . 3 1 8 5) ( 1 .
- Page 362 1 5·5 DR350T/SET ('96· M O D E L) LIMIT ITEM STANDARD 0. 1 80 Piston ring to g roove clearance 1 st (0.007) 0. 1 50 (0.006) Piston rin g g roove width 1 . 0 1 - 1 . 03 1 st (0.040 - 0.041 ) 1 .
- Page 363 DR350T/SET (,96·MODE L) 1 5·6 CLUTCH Unit: mm (in) STANDARD ITEM LIMIT 1 0 - 1 5 Clutch lever play (0 . 4 - 0 . 6) 2 . 7 2 - 2 . 88 Drive plate thickness 2 . 42 (0.
- Page 364 1 5· 7 D R350T[SET ('96·MO D EL) CARBURETOR SPECIFICATION ITEM Carburetor type T M 33 SS Bore size 33 m m I . D . No 1 4DO Idle r/min . 400 ± 1 00 r/min Float height 1 4. 2 ±...
- Page 365 DR350T/SET ('96·M O D EL) 1 5·8 WATTAG E U nit: W ITEM SPECIFICATION Headlight Taillight BRAKE + W H E E L U nit: m m (in) ITEM STANDARD LIMIT Brake lever play 0 . 1 - 0 . 3 (0.004 - 0.
- Page 366 1 5·9 DR350T/SET ('9 6· M O D E l) SUSPEN SION U nit: mm (in) ITEM STANDARD LIMIT NOTE Front fork stroke 2 80 ( 1 1 . 0) Front fork spring free length 5 5 1 E-O l ,03 ( 2 1 .
- Page 367 DR350T/SET ('96·M O D E l) 1 5· 1 0 FUEL + OI L ITEM SPECIFICATION NOTE Use only unleaded gasoline of at least 87 Fuel type R ; M pump octane ( method) or 9 1 octan e or higher rated by the research method .
- Page 368 1 5· 1 1 DR35DT/SET ('96·M O D E L) D R3 50SET VALVE + G U I D E U n it: m m (in) ITEM STANDARD LIMIT Valve diam . 30. 6 I N . ( 1 . 20) 2 7 .
- Page 369 DR350T/SET ('96·MO D E L) 1 5· 1 2 CAMSHAFT + CYLI N D E R H EAD U n it : mm (in) ITEM STANDARD LIMIT Cam height 33.450 - 3 3 . 490 3 3 . 1 50 I N .
- Page 370 1 5· 1 3 DR350T{SET ('96·M O D E L) LIMIT ITEM STANDARD 0. 1 80 Piston ring to g roove clearance 1 st (0.007) 0. 1 50 (0.006) Piston ring g roove width 1 . 0 1 - 1 . 03 1 st (0.040 - 0.
- Page 371 DR350T/S ET ('96·MO DEL) 1 5· 1 4 CLUTCH U nit: m m (in) ITEM STANDARD LI MIT 1 0 - 1 5 Cl utch lever play ( 0 0 4 - 0 . 6 ) 2 . 7 2 - 2 . 88 Drive plate thickness 2 0 42 (0.
- Page 372 1 5- 1 5 DR350T/SET ('96-MOD El) CARBU RETOR SPECIFICA TION ITEM E-03 E-33 E-02,04,34 � � BST33SS Carburetor type � � 33 mm Bore size * 1 4D9 1 4EP 1 4ES I . D . N o . �...
- Page 373 DR350T/SET ('96·MODEL) 1 5· 1 6 CARBU RETO R SPECIFICATION ITEM E-94 BST33SS Carburetor type 33 mm Bore size 1 4EK 1 4EM I . D . No. 500 ± 1 00 r/m i n . I d le r/min. Float height 1 4.
- Page 374 1 5· 1 7 DR350T/SET ('96·M OD El) WATTAG E U n i t : W SPECIFICA TION ITEM E-03 , 24, 2 8 , 33 The others <- Headlight <- Position light <- 5/2 1 Tail /Brake light <- Turn signal light <- Tachometer light...
- Page 375 DR350T/SET ('96·M O D E L) 1 5· 1 8 ITEM STANDARD LIMIT Wheel rim size Front 2 1 x 1 . 60 1 8 x 2 . 1 5 Rear Tire size & type 80/ 1 00- 2 1 5 1 P Dunlop D60 l J ( E - 03, 2 8 , 33) Front Dunlop K 560J (others)
- Page 376 1 5· 1 9 DR350T/SET ('96·M O D E l) FUEL + OIL SPECIFICATION NOTE ITEM Use only unleaded g asoline of at least 87 Fuel type or 9 1 octane or higher pump octane rated by the research method. Gasol ine containing MTBE ( M ethyl Tertiary E-03 , 3 3 Butyl Ether) , less t h a n 1 0 % ethanol , or less...
- Page 377 This section describes se vice data and servicing procedures which differ from those of the DR350T/SET ( '96-MODEL). NO TE: A n y differences between DR350 T/SET ('96-MODEL) and DR350 V/SEV ('9 7-MODEL) in specifica tions and service data are clearly indicated with the asterisk marks Please refer to the sections through 1 5 for details which are not given in this section.
-
Page 378: S Pe Ci F Ica Tl On
1 6· 1 DR350V/SEV ('97·M O D El) SPECI F I CATIONS DR3 50V DIMENSIONS A N D D R Y MASS • Overall length 2 1 6 5 m m ( 8 5 . 2 i n ) Overall width ......8 8 5 m m ( 3 4 . -
Page 379: Dr3 50Sev
DR350V/SEV ('9 7·M ODEL) 1 6·2 DR3 50SEV DIMENSIONS A N D DRY MASS Overall length ......2 3 3 5 mm ( 9 1 . -
Page 380: S E Rvi C E Data
1 6·3 DR350V/SEV (,97·M O D E L) S E RVI C E DATA VAlVE + G U I D E U nit: mm (in) ITEM STANDARD LIMIT Valve d ia m . 30. 6 I N . ( 1 . 20) 2 7 . - Page 381 DR350V/S EV ('97·MODEl) 1 6-4 CAMSHAFT + CYLI N D E R H EA D U n it : m m ( i n ) ITEM STAN DARD LI MIT Cam height 3 3 . 4 50 - 33 . 490 3 3 .
- Page 382 1 6·5 DR350V/SEV ('97·M O D E l) STAN DARD LIMIT ITEM 0. 1 80 Piston ring to g roove 1 st ( 0 . 007) clearance 0. 1 50 ( 0 . 006) 1 . 0 1 - 1 . 03 Piston ring g roove width 1 st ( 0 .
-
Page 383: D R 3 5 0 V
1 6·6 DR350V/SEV ('97· M O D E L) C LUTCH U nit: m m ( i n ) ITEM STANDARD LIMIT Clutch lever play 1 0 - 1 5 ( 0 . 4 - 0. 6 ) Drive plate thickness 2 . - Page 384 1 6·7 DR3 50V/SEV ('97·M O D E L) CARBU RETO R S PECIFICATIO N ITEM E-33 E-0 1 , 03, 2 8 * BST33SS Carbu retor type T M 3 3 S S 3 3 m m Bore size 1 40 0 * 1 40B 1 .
- Page 385 DR350V/S EV ('97·M O D H) 1 6·8 WATTAG E U nit: W ITEM SPECIFICAT I O N Headlight Taillight B RAKE + WH E E L U nit: m m ( i n ) STAN DARD LIMIT ITEM Brake lever play 0.
- Page 386 1 6·9 D R3 50V/SEV ('97·MODEL) SUSPENSION U n it : mm ( i n ) ITEM LIMIT NOTE STAN DARD Front fork stroke 2 8 0 ( 1 1 . 0) Front fork s p ring free l ength * 52 5 ( 20.
- Page 387 DR350V/SEV ('97· M O D EL) 1 6· 1 0 F U E L + OI L ITEM SPECIFICATION NOTE Fuel type U se only u nleaded gasoline of at least 87 pump octane ( method) or 9 1 octane or higher rated by the research method .
-
Page 388: D R 3 50 Se
1 6- 1 1 DR 350V/SEV ('97·M O D EL) DR3 50SEV VALVE + G U I D E Unit: mm (in) LIMIT ITEM STANDARD Valve d i a m . 30.6 I N . ( 1 . 20) 2 7 . 0 ( 1 .06) Valve clearance (when cold) 0 . - Page 389 1 6· 1 2 DR350V/SEV ('91·MDDE L) CAMSHAFT + CYLI N D E R H EAD Unit: m m (in ) ITEM STANDARD LIMIT Cam height 3 3 . 4 50 - 33 . 490 3 3 . 1 50 I N .
- Page 390 1 6· 1 3 DR350V/SEV r97· M O D E l) ITEM LIMIT STAN DARD 0 . 1 80 Piston ring to g roove clearance 1 st (0.007) 0. 1 50 (0.006) Piston ring groove width 1 . 0 1 - 1 . 03 1 st ( 0 .
- Page 391 DR3 50V/SEV ('97-MODEL) 1 6- 1 4 C L UTCH U n it : m m (in) ITEM STAN DARD LIMIT 1 0 - 1 5 Clutch lever play (0.4- 0 . 6 ) D rive plate thickn ess 2 . 7 2 - 2 . 8 8 2 .
- Page 392 1 6· 1 5 DR350V/SEV (,97· M O D E L) CARBURETOR SPECIFICATION ITEM E-28 E-33 E-03 Carbu retor type BST33SS Bore size 3 3 mm * *- I . D . N o . 1 4E P 1 4ES Idle r/m i n .
- Page 393 D R3 50V/SEV (,97· M O D E L) 1 6· 1 6 CARBURETO R SPECIFICATION ITEM E-94 E-24 Carbu retor type BST33SS Bore size 33 mm I . D . N o . 1 4EK 1 4E M I d l e r/min . 500 ±...
- Page 394 1 6· 1 7 DR350V/SEV (,97·MODEl) WATTAGE U nit: W SPECIFICATION ITEM E-03, 24, 28,33 The others Headlight Position light Tail/Bra ke l ig ht 5/2 1 Turn signal l ig ht Tachometer l ig ht Speedometer l ig ht 1 .
- Page 395 DR3 50V/SEV ('97·M O D E l) 1 6· 1 8 ITEM STANDARD LIMIT Wheel rim size Front J 2 1 x 1 . 60 Rear J 1 8 x 2 . 1 5 Tire size & type 80/ 1 00- 2 1 5 1 P Front Dunlop D 60 1 J ( E-03, 28, 33) Dunlop K 5 60J (others)
- Page 396 1 6· 1 9 DR350V/SEV ('97· M O D E l) FUEL + OI L NOTE ITEM SPECIFICATION Fuel type U se only u nl eaded gasoline of at l east 87 ( R � pump octane or 9 1 octane or higher rated by the research method.
-
Page 397: Front B Ra Ke Ca L Ip Er
� © 1 . 8 1 3. 0 Brake fluid (DOT4) ® 2 . 3 1 6. 5 SUZUKI SILICONE G R EASE (99000-25 1 00 ) ® 1 . 3 9 . 5 THREAD LOCK " 1 342" (99000·32050) -
Page 398: Front Fork
1 6·2 1 DR3 50V/SEV (,97·MO D E L) FRONT FORK ( For DR350V) CD O-ring @ Washer @ Spring @ Damper ® I nner tube ® Dust seal o Stopper ring ® Oil seal ® Oil lock piece @ Outer tube ITEM N ·... - Page 399 DR3 50V/SEV ('97·M O D E l) 1 6·22 • Remove the front brake caliper mounting bolts. • Remove the brake hose holder and speedometer cable guide. • Remove the front fork by loosening the upper and l ower clamp bolts . NO TE: Slightly loosen the front fork cap facilitate later disassem...
- Page 400 1 6-23 DR350V/SEV ('97-MO DEl) Remove the damper rod bolt/damping force adjuster CD and • gasket @ _ Remove the d am per assembly_ • CAUT I O N Do not attempt to disassemble the damper assembly. It is not serviceable . Remove the boot by loosening the clamp screws.
- Page 402 ® Apply g rease to the lip of oil sea l . • � 99000-25030: SUZUKI SUPER GREASE "A" OIL SEAL STOPPER RING AND DUST SEAL I nstall the oil seal stopper ring @ . • CAUTI O N Make sure that the oil seal stopper ring fitted securely.
- Page 403 DR3 50V/SEV ('97·M O D E L) 1 6·26 FORK OIL • Place the front fork vertically. Pour fork oil to the inner tube. • • For the fork oil, be sure to use a front fork oil whose vis cosity rating meets specifications below .
- Page 405 This section describes se vice data and servicing procedures which differ from those of the DR350V /SE V ('97-MODEL). NO TE: A n y differences between DR350 V/SE V ('9 7-MODEL) and DR350 W / X/SEW /SEX ('98, '99-MODELS) in specifications and service data are clearly indicated with the asterisk marks Please refer to the sections 1 through 1 6 for details which are not given in this section.
- Page 406 1 7- 1 SPEC I F I CATI O N S D R 3 50W/X DIM ENSIONS AND D R Y MASS Overall length ......* 2 2 5 0 mm ( 8 8 .
- Page 407 1 7·2 DIMENSIONS A N D DRY MASS DR3 50SEW/SEX • Overall length 2 3 3 5 mm ( 9 1 . 9 in) . . . E- 1 8, 2 2 2 2 3 5 mm ( 8 8 . 0 i n ) . . . Others Overall width .
- Page 408 1 7·3 SERVI C E D ATA DR3 50W/X VALVE + G U I D E Unit: m m (in) ITEM LIMIT STANDARD Valve d i a m . 30. 6 I N . ( 1 . 20) 2 7 . 0 ( 1 .
- Page 409 1 7·4 CAMS HAFT + CYLI N D E R H EA D U n it: m m (in) ITEM STAN DARD LIMIT Cam height 3 3 . 45 0 - 3 3 . 490 3 3 . 1 50 I N .
- Page 410 1 7·5 ITEM LIMIT STAN DARD Piston ring to g roove 0. 1 80 1 st clearance (0.007) 0. 1 50 ( 0 . 006) Piston ring g roove width 1 . 0 1 - 1 . 03 1 st (0.040 - 0 .
- Page 411 1 7·6 C LUTCH U n it: m m (in) ITEM STANDARD LIMIT Clutch lever play 1 0 - 1 5 ( 0 . 4 - 0 . 6 ) Drive plate thickness 2 . 7 2 - 2 . 88 2 .
- Page 412 1 7·7 CARBU RETOR SPECIFICATION ITEM E-24 E-33 E-O l , 03, 28 Carburetor type T M 3 3S S BST33SS Bore size 3 3 m m 1 . 0 . N o 1 400 * 1 4D C 1 4D B I d l e r/m i n .
- Page 413 1 7·8 WATTAG E U n it : W SPECI FICA TION ITEM E-24 E-0 1 , 03, 2 8 , 3 3 Headlig ht * 60 * 5 5 Brake l i ght/Tail light * 2 1 /5 Taillight Turn signal light * 2 1 Speedometer light...
- Page 414 1 7·9 STAN DARD LIMIT ITEM 2 . 0 Wheel rim runout Axial ( 0 . 08) 2 . 0 Radial (0.08) 0 . 2 5 Wheel axle runout Front ( 0. 0 1 0) 0 . 2 5 Rear ( 0.
- Page 415 1 7· 1 0 TIRE PRES S U R E F o r E-0 1 ,03,28 COLD I N FLATIO N k Pa kg/cm2 T I R E PRESS U R E FRONT 1 00 1 .0 REAR 1 00 1 .0 For E-24 COLD IN FLATION...
- Page 416 1 7· 1 1 D R 3 50SEW /SEX VALVE U nit: m m (in) + G U I D LIMIT ITEM STANDARD Valve d i a m . 30. 6 I N . ( 1 . 20) 2 7 . 0 ( 1 .
- Page 417 1 7· 1 2 CAMSHAFT + CYLIN DE R H EA D Unit: m m (in) STANDARD LIMIT ITEM Cam height 33.450- 33.490 3 3 . 1 50 I N . ( 1 . 3 1 6 9 - 1 . 3 1 85) ( 1 , 305 1 ) 33.
- Page 418 1 7· 1 3 LIMIT STANDARD ITEM 0. 1 80 Piston ring to groove clearance 1 st ( 0 . 007) 0. 1 50 (0.006) 1 .0 1 - 1 . 03 Piston ring g roove width 1 st ( 0 . 040 - 0.041 ) 1 .
- Page 419 1 7· 1 4 C LUTCH U nit: m m (in) LIMIT ITEM STANDARD Clutch lever play 1 0 - 1 5 ( 0 . 4 - 0 . 6 ) Drive plate thickness 2 . 7 2 - 2 . 8 8 2 .
- Page 420 1 7· 1 5 CARBU RETOR SPECIFICATION ITEM E-28 E-33 E-03 � � Carburetor type BST33SS � � Bore size 33 mm � 1 4E P 1 4E S 1 . 0 . No . � � Idle r/min . 500 ±...
- Page 421 1 7· 1 6 CARBURETOR SPECIFICATION ITEM E-94 E-24 BST33SS Carburetor type 33 m m Bore size 1 4E K 1 4E M I . D . No. 500 ± 1 00 r/min. I d l e r/min. 1 4. 6 ± 1 . 0 mm Float height (0.
- Page 422 1 7· 1 7 WATTAGE Unit: W SPECIFICATION ITEM E-03, 24, 2 8 , 3 3 The others H eadlight Position light Tail/Bra ke l ight 5/2 1 Turn signal light Tachometer light Speedometer light 1 . 7 x 2 Turn signal indicator light 1 .
- Page 423 1 7· 1 8 ITEM STANDARD · LIMIT Wheel rim size Front J 2 1 x 1 . 60 Rear J 1 8 x 2. 1 5 Tire size & type 801 1 00-2 1 5 1 P Front D u nlop D 60 1 J ( E-03, 2 8 , 33) Dunlop K 560J (others) 1 1 0/90- 1 8 61 P Rear...
- Page 424 1 7· 1 9 FUEl + Oil SPECIFICATION NOTE ITEM Use only u n l eaded gasoline of at least 87 Fuel type ( R -; M ) or 9 1 octane or higher pump octane rated by the research method. Gasoline containing MTBE (Methyl Tertia ry E-03, 3 3 Butyl Ether) , less t h a n 1 0% ethanol , or less...
- Page 425 1 7·20 FRONT FORK . . . For D R350SEW /SEX ( E-03 , 28 and 3 3 ) G) O-ring @ Washer @ Spring @ Damper ® I nner tube ® Dust seal (j) Stopper ring ® Oil seal ®...
- Page 426 1 7· 2 1 ADJUSTMENT After installing the front fork, adjust the both damping force as fol lows. DAMPING FORCE ADJUSTMENT Slowly turn in the adj u ster and find out the a dj u ster is seat ed . From that position , turn back and find out first click that is 1 -position then turn back and count the specified position as follows.
Need help?
Do you have a question about the DR350 and is the answer not in the manual?
Questions and answers