Sign In
Upload
Manuals
Brands
Intel Manuals
Server Board
SR1670HV - Server System - 0 MB RAM
Intel SR1670HV - Server System - 0 MB RAM Manuals
Manuals and User Guides for Intel SR1670HV - Server System - 0 MB RAM. We have
2
Intel SR1670HV - Server System - 0 MB RAM manuals available for free PDF download: Service Manual, Technical Product Specification
Intel SR1670HV - Server System - 0 MB RAM Service Manual (157 pages)
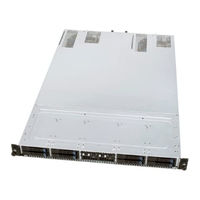
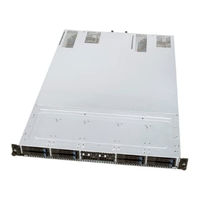
Server System
Brand:
Intel
| Category:
Server
| Size: 3.73 MB
Table of Contents
About this Manual
4
Manual Organization
4
Additional Information and Software
5
Table of Contents
6
1 Product Introduction
16
System Package Contents
16
System Features
16
Table 1. System Package Contents List
16
Table 2. System Feature Set
16
Front Panel Features
17
Rear Panel Features
18
Internal Features
18
Figure 1. Server System Features
18
Figure 2. System Features - Back Panel
18
Figure 3. System Component Identification
19
Figure 4. Server Node Connectors and Components
20
System LED Information
21
Front Control Panel Leds
21
Figure 5. Front Control Panel Leds
21
Table 3. Server Node Connectors and Components Descriptions
21
Table 4. Front Panel Leds Descriptions
21
LAN Ports 1 and 2 Leds
22
HDD Status LED
22
Cable Connections
22
Figure 6. RJ-45 Ports 1 and 2 Leds
22
Figure 7. HDD Status LED
22
Table 5. RJ-45 Ports 1 and 2 Leds Descriptions
22
Table 6. HDD LED Status Definitions
22
Figure 8. Cable Connections
23
Pre-Connected System Cables
23
2 Hardware Setup
24
Chassis Cover
24
Removing the Chassis Cover
24
Central Processing Unit (CPU)
24
Figure 10. Sliding the Chassis Cover
24
Figure 9. Rear Panel Thumbscrews
24
Figure 11. LGA1366 Socket
25
Installing the Processor
25
Figure 12. Retention Tab and Load Lever
26
Figure 13. Load Plate
26
Figure 14. Pnp Cap
26
Figure 15. CPU Notch and Alignment Key
27
Figure 16. Applying Thermal Paste
27
Figure 17. Closing the Load Plate
28
Installing the Processor Heatsink
28
Figure 18. Installing the Heatsink (Passive Heatsink Shown)
29
Removing the Processor Heatsink
29
System Memory
30
Overview
30
Figure 19. Removing the Heatsink
30
Memory Support
31
Figure 20. DDR3 DIMM Sockets Location
31
Table 7. Maximum Memory Allocation Using Rdimms
31
Table 8. Supported RDIMM Configurations
32
Table 9. Supported UDIMM Configurations
32
Installing a DIMM
33
Table 10. Memory Population Table
33
Removing a DIMM
34
Figure 21. Unlocked Retaining Clips
34
Figure 22. Locked Retaining Clips
34
Figure 23. DIMM Notch
34
Installing a PCI Express* Add-In Card to the Riser Bracket
35
Figure 24. Riser Card Bracket
35
Figure 25. Removing the Screw from Slot Bay
35
Figure 26. PCI Express* X 16 Card
35
Figure 27. Pressing Rising Card Bracket for Golden Connectors to Fit
36
Installing the BMC Management Module
37
Figure 28. BMC_FW1 Header
37
Figure 29. Orienting the Management Module Card
37
Figure 30. Server Management LAN Port
37
Hard Disk Drives
38
Figure 31. Hard Disk Drives
38
Figure 32. Releasing the Drive Tray
38
Figure 33. Placing a SATAII/SAS Hard Disk Drive on the Tray
38
Figure 34. Pushing the Tray Lever
39
3 Installing the Rackmount Rail Kit
40
Attaching the Rails to the Server
40
Figure 35. Rackmount Rail Kit Items
40
Figure 36. Screw Positions on the Rail
40
Attaching the Rack Rails
41
Figure 37. Attaching the Front End of the Server Rail to Side of Chassis
41
Figure 38. Sliding the Server Rail
41
Figure 39. Securing the Server Rail with Screws
41
Rackmounting the Server
42
Figure 40. Positioning the Rack Rail to 1U Space on Rack
42
Figure 41. Mounting Ear
42
4 System Service
43
Replacing Power Supply Units (Psus)
43
Figure 42. Holding and Pressing the PSU Latch
43
Figure 43. Pulling out the Failed PSU
43
Figure 44. Pushing the New PSU into the Chassis
43
Replacing System Fans
44
Figure 45. Disconnecting System Fan Cable
44
Figure 46. Lifting System Fan
44
Figure 47. Inserting Fan into the Fan Cage
44
SATA/SAS Backplane Replacement
45
Figure 48. Restoring the Chassis Cover
45
Figure 49. Screws on Hard Disk Drive Bay Module
45
Figure 50. Sliding the Hard Disk Drive Bay Module
45
Figure 51. Connected Cables and Backplane Expose
46
Figure 52. Front Panel Cables
46
Figure 53. Cable Bundles in the Hard Disk Drive Bay Module
47
Figure 54. SATA Cable Connection Order
47
Front Control Panel Replacement
48
Figure 55. Aligning the Module with the Alignment Slots on the Chassis
48
Figure 56. Control Panel Module Screw
48
Figure 57
49
Figure 58 Detached Control Panel Module
49
5 Jumpers, Connectors, and Leds
50
Configuration and Support Jumpers
50
Clear RTC RAM (CLRTC1)
50
Figure 59. Clear RTC RAM
50
VGA Controller Setting (3-Pin VGA_SW1)
51
DDR3 Voltage Control Setting (4-Pin LVDDR3_SEL1, LVDDR3_SEL2)
51
Figure 60. VGA Controller Setting
51
LAN Controller Setting (3-Poin LAN_SW1, LAN_SW2)
52
Intel ® ICH10R SATA Port SW RAID Setting (3-Pin RAID_SEL1)
52
Figure 61. DDR3 Voltage Control Setting
52
Figure 62. LAN Controller Setting
52
Force BIOS Recovery Setting (3-Pin RECOVERY1)
53
Figure 63. Intel ICH10R SATA Port SW RAID Setting
53
Figure 64. Force BIOS Recovery Setting
53
Server Board Connectors
54
Serial ATA Connectors (7-Pin SATA1, SATA2, SATA3, SATA4)
54
Internal USB Connectors (A-Type USB4; 5X1 Pin USB3)
54
Figure 65. SATA Connectors
54
Figure 66. USB 2.0 Connectors
54
System Fan Connectors
55
Frnt_Fan4)
55
Serial General Purpose Input/Output Connector (6-1 Pin SGPIO1)
55
Figure 67. Front Fan Connectors
55
Figure 68. Serial General Purpose I/O Connector
55
BMC Management Module Header (BMC_FW1)
56
Power Supply Smbus Connectors (6X1 Pin JP1, JP2)
56
Figure 69. BMC Management Module Header
56
Figure 70. Power Supply Smbus Connectors
56
Main Power Connectors (20-Pin PWR1, 20-Pin PWR2)
57
Peripheral Power Connector (4-Pin PWR3)
57
System Panel Connector (20-Pin PANEL1)
57
Figure 71. Main Power Connectors
57
Figure 72. Peripheral Power Connector (4-Pin PWR3)
57
Figure 73. System Panel Connector
58
Auxiliary Panel Connector (20-Pin AUX_PANEL1)
59
Figure 74. Auxiliary Panel Connector
59
Internal Leds
60
Standby Power LED
60
CPU Warning LED (ERR_CPU1, ERR_CPU2)
60
Figure 75. Standby Power LED
60
Figure 76. ERR CPU LED
60
System Identification LED
61
Bmc Led (Bmc_Led1)
61
Figure 77. System Identification LED
61
Figure 78. BMC LED (BMC_LED1)
61
6 BIOS Updates and Configuration
62
Updating System BIOS
62
BIOS Recovery Process
63
Figure 79. Updating the BIOS in DOS
63
BIOS Setup Utility
64
Figure 80. Recovering the BIOS Using the Force BIOS Update Jumper
64
Accessing BIOS Setup Utility
65
BIOS Setup Features and Navigation
65
Figure 81. BIOS Menu Screen
65
Figure 82. Pop-Up Window
66
Main Menu
66
Figure 83. Main Menu
67
Figure 84. SATA1-4 Submenu
67
Figure 85. IDE Configuration Menu
69
Figure 86. AHCI Configuration Menu
70
Figure 87. Status of Auto-Detection of SATA Devices Menu
70
Figure 88. System Information Menu
71
Figure 89. System Memory Information Menu
71
Advanced Menu
72
Figure 90. Advanced Menu
72
Figure 91. CPU Configuration Menu
73
Figure 92. CPU Configuration Menu, Continued
73
Figure 93. Chipset Configuration Menu
76
Figure 94. CPU Bridge Chipset Configuration Menu
76
Figure 95. CPU Bridge Chipset Configuration Menu, Continued
77
Figure 96. North Bridge Chipset Configuration Menu
79
Figure 97. South Bridge Chipset Configuration Menu
79
Figure 98. Intel VT-D Configuration Menu
80
Figure 99. Legacy Device Configuration Menu
80
Figure 100. USB Configuration Menu
81
Figure 101. Pcipnp Configuration Menu
82
Figure 102. Power on Configuration Menu
83
Figure 103. Event Log Configuration Menu
84
Figure 104. Hardware Monitor Configuration Menu
85
Figure 105. Hardware Monitor Configuration Menu, Continued
85
Figure 106. PCI Express* Configuration Menu
86
Figure 107. ACPI Configuration Menu
86
Figure 108. Advanced ACPI Configuration Menu
87
Figure 109. Chipset ACPI Configuration Menu
87
Figure 110. General WHEA Configuration Menu
88
Figure 111. Server Menu
88
Server Menu
88
Figure 112. Remote Access Configuration Menu
89
Boot Menu
90
Figure 113. Boot Menu
91
Figure 114. Boot Device Priority Menu
91
Figure 115. Boot Settings Configuration Menu
92
Figure 116. Security Settings Menu
93
Figure 117. Security Menu after Supervisor Password Is Set
94
Exit Menu
95
Figure 118. Exit Menu
95
7 Embedded SATA RAID
96
Selecting a RAID Option
96
Figure 119. RAID Option Jumper Block
96
Enabling RAID in the BIOS Setup
97
SATA RAID Setup
97
LSI* Software RAID Configuration Utility
97
Figure 120. POST Screen Showing LSI* Megaraid Option ROM Display
98
Figure 121. Utility Main Window
98
Figure 122. Configuration Menu Options
99
Figure 123. Array Selection Menu
99
Figure 124. Selecting the Configurable Array on Easy Configuration Menu
100
Figure 125. Virtual Drive Menu
100
Figure 126. Selecting the RAID Level
101
Figure 127. Enabling the Disk Write Cache Setting
101
Figure 128. Accepting the Virtual Drive Configuration
101
Figure 129. Completing RAID Configuration
102
Figure 130. Initialize Command
102
Figure 131. Virtual Drives (Selection) Pulldown Menu
103
Figure 132. Initialize Confirmation Dialog Box
103
Figure 133. Initialization Progress Bar
104
Figure 134. Selecting the Disk WC Option
104
Intel Matrix Storage Manager Configuration Utility
105
Figure 135. Intel Matrix Storage Manager Configuration Utility
105
Figure 136. Create RAID Volume Menu
106
Figure 137. Select Disks Screen
106
Figure 138. Create Volume Warning Message
107
Figure 139. Intel Matrix Storage Manager Warning Message
107
8 Driver Installation
108
RAID Driver Installation
108
Creating a RAID Driver Disk
108
Figure 140. Makedisk Menu
108
Installing the RAID Controller Driver
109
Figure 141. Microsoft Windows Server* Setup Menu
109
Figure 142. Specifying an Additional Device
110
Figure 143. Insert RAID Driver Disk Screen
110
Figure 144. Intel ICH8R/ICH9R/ICH10R/DO SATA RAID Controller Item
111
Figure 145. Installing Red Hat* Enterprise
111
Figure 146. Driver Disk Y/N Screen
112
Figure 147. Driver Disk Source
112
Figure 148. Insert Driver Disk Screen
112
Figure 149. more Driver Disks? Screen
112
Figure 150. Selecting the Suse* Installation
113
Figure 151. Initializing the Suse* Installation
113
Figure 152. Installation Option Selected on the Boot Options Screen
113
Intel Chipset Device Installation
114
Figure 153. Driver Update Medium Screen
114
Figure 154. Intel Chipset Device Software Option
114
Figure 155. Intel Chipset Device Software Window
115
Figure 156. License Agreement Window
115
Figure 157. Readme File Information Window
115
LAN Driver Installation
116
Figure 158. Setup Complete Window
116
Figure 159. Intel Network Connections Software Option
116
Figure 160. Intel Network Connections Software Window
117
Figure 161. Intel(R) Network Connections-Installshield Wizard
117
Figure 162. License Agreement Terms
117
VGA Driver Installation
118
Figure 163. Intel(R) Proset for Windows Device Manager Option
118
Figure 164. Beginning the Installation
118
Figure 165. Drivers Menu
119
Figure 166. Install Wizard for Aspeed* VGA Driver
119
Figure 167. Updating the VGA Driver
119
Management Applications and Utilities Installation
120
Running the Resource CD
120
Drivers Menu
120
Figure 168. Completing the VGA Driver Installation
120
Figure 169. Drivers Menu
120
Utilities Menu
121
Make Disk Menu
121
Contact Information
121
Figure 170. Utilities Menu
121
Figure 171. Make Disk Menu
121
9 Intel Server Issue Report Form
122
10 Getting Help
127
Warranty Information
127
11 Safety Information
128
Server Safety Information
129
Safety Warnings & Cautions
129
Intended Application Uses
130
Site Selection
130
Equipment Handling Practices
130
Power and Electrical Warnings
130
System Access Warnings
131
Rack Mount Warnings
132
Electrostatic Discharge (ESD)
133
Caution
133
Other Hazards
134
Caution
134
Sicherheitshinweise für den Server
135
Sicherheitshinweise und Vorsichtsmaßnahmen
135
Zielbenutzer der Anwendung
136
Standortauswahl
136
Handhabung von Geräten
136
Warnungen zu Netzspannung und Elektrizität
136
Warnhinweise für den Systemzugang
137
Warnhinweise für Racks
138
Elektrostatische Entladungen (ESD)
139
Vorsicht
139
Andere Gefahren
139
Vorsicht
140
Consignes de Sécurité Sur Le Serveur
141
Sécurité : Avertissements Et Mises en Garde
141
Domaines D'utilisation Prévus
142
Sélection D'un Emplacement
142
Pratiques de Manipulation de L'équipement
142
Alimentation Et Avertissements en Matière D'électricité
142
Avertissements Sur L'accès Au Système
144
Avertissements Sur Le Montage en Rack
144
Décharges Électrostatiques (ESD)
145
Attention
145
Autres Risques
145
Attention
146
Información de Seguridad del Servidor
147
Advertencias y Precauciones sobre Seguridad
147
Aplicaciones y Usos Previstos
148
Selección de la Ubicación
148
Manipulación del Equipo
148
Advertencias de Alimentación y Eléctricas
148
Advertencias el Acceso al Sistema
149
Advertencias sobre el Montaje en Bastidor
150
Descarga Electrostática (ESD)
151
Precaución
151
Otros Riesgos
151
Precaución
152
安全警告与注意事项
153
服务器安全信息
153
预期应用使用
153
场地选择
154
电源与电气警告
154
设备操作规范
154
系统使用警告
155
其他危险
156
机架固定件警告
156
静电放电 (Esd)
156
注意事项
156
注意事项
157
Advertisement
Intel SR1670HV - Server System - 0 MB RAM Technical Product Specification (92 pages)
Brand:
Intel
| Category:
Server Board
| Size: 1.1 MB
Table of Contents
Table of Contents
3
1 Introduction
10
Chapter Outline
10
Server Board Use Disclaimer
10
2 Intel Server Board S5500HV Overview
11
Intel Server Board S5500HV Feature Set
11
Table 1. Intel Server Board S5500HV Feature Set
11
Server Board Layout
13
Figure 1. Intel Server Board S5500HV
13
Figure 2. Intel Server Board S5500HV Layout
14
Server Board Connector and Component Layout
14
Server Board Rear I/O Layout
15
Table 2. Major Board Components
15
3 Functional Architecture
16
Processor Support
16
Figure 3. Intel
16
Figure 4. Intel
16
Intel Xeon Processor 5500 Series and 5600 Series
17
Figure 5 Processor Architecture
18
Processor Population Rules
20
Unified Retention System Support
20
Intel ® Quickpath Memory Controller and Memory Subsystem
21
Figure 6. Unified Retention System and Unified Backplate Assembly
21
Figure 7. Conceptual Memory Layout Diagram
22
Intel ® Server Board S5500HV Memory Support
22
Figure 8. DIMM Slot Nomenclature
23
Figure 9. Intel Server Board S5500HV Memory Slot Layout
23
Table 3 Supported RDIMM Configurations
24
Table 4 Supported UDIMM Configurations
25
Table 5 Memory Population Table
26
Figure 10. Mirror Channel Mode Memory Population
27
Intel 5500 Chipset IOH
28
Intel 82801Jx I/O Controller Hub (ICH10R)
28
Table 6. Supported Mirrored DIMM Population
28
Figure 11. RAID Option Jumper Block
29
Keyboard and Mouse Support
30
USB 2.0 Support
30
Network Interface Controller (NIC)
30
Figure 12. Internal USB Port Locations
30
Figure 13. NIC Enable/Disabled Jumper Block
31
Table 7. NIC Status Leds
31
ASPEED* AST2050 Graphics and Remote Management Processor
32
Video Support
32
Baseboard Management Controller & BMC Module
32
Figure 14. Video Enable/Disable Jumper Block
32
Figure 15. Baseboard Management Module
33
Figure 16. Management NIC
34
4 Platform Management
35
System Fan Control
36
On-Board/System Sensor Information
36
Figure 17. System Fan Connector Locations
36
Figure 18. System Fan Connector Pin-Out Definition
36
Table 8. System Sensors
38
Table 9. Led/Power Module Sensors
39
Table 10. Backplane Sensors
39
Table 11. Power Module Sensors
39
Table 12. System Fan Sensors
39
Error Handling and Messaging
40
Table 13. FRU Sensors
40
Table 14. BIOS Error Messages and Checkpoints
40
5 Connector/Header Locations and Pin-Outs
45
Power Connectors
45
Serial ATA Connectors
45
Figure 19. 20-Pin ATX Main Power Connector Pin-Out and Location
45
Figure 20. 4-Pin Peripheral Power Connector Pin-Out and Location
45
Front Panel Headers
46
Figure 21. SATA Connector Location and Pin-Out
46
Figure 22. Front Panel Header Location and Pin-Out
46
Figure 23. AUX Front Panel Header Location and Pinout
47
System Management Headers
48
SGPIO Header
48
Power Supply Smbus Connectors
48
Figure 24. SGPIO Header Location and Pin-Out
48
I/O Connectors
49
VGA Connector
49
NIC Ports
49
Figure 25. Power Supply Smbus Connector Location and Pin-Out
49
Table 15. VGA Connector Pin-Out
49
Serial Port Connector
50
USB Connectors
50
Table 16. RJ-45 10/100/1000 NIC Connector Pin-Out
50
Table 17. Serial Port Pin-Out
50
Fan Headers
51
Table 18. External USB Connector Pin-Out
51
Table 19. 4-Pin System Fan Connector Pin-Out
51
6 Configuration Jumpers
52
Clear RTC RAM (CLRTC1) Jumper
52
Figure 26. Clear RTC Jumper Block
52
VGA Controller Enable/Disable Jumper
53
NIC 1 & NIC 2 Enable/Disable Jumper
53
Figure 27. Video Enable/Disable Jumper
53
Embedded RAID Option Select Jumper
54
Figure 28. NIC1 & NIC2 Enable/Disable Jumper
54
Figure 29. Embedded RAID Option Select Jumper
54
DDR3 Voltage Control Jumpers (**Future Support Only)
55
BIOS Recovery Jumper
56
Figure 30. BIOS Recovery Jumper
56
7 Intel Light-Guided Diagnostics
57
Standby Voltage LED
57
CPU Fault LED
57
Figure 31. Stand-By Voltage LED
57
Figure 32. CPU Fault LED
57
System Identification LED
58
Bmc Led
58
Figure 33. System ID LED
58
Figure 34. BMC LED
58
8 Intel ® Server System SR1670HV Overview
59
Figure 35. Intel Server System SR1670HV
59
Front Panel Features
60
Rear Panel Features
61
Figure 36. Intel
61
Figure 37. Intel
61
System LED Overview
62
Front Control Panel Leds
62
LAN Port Leds
62
Figure 38. Intel Server System SR1670HV - Front Control Panel Leds
62
Figure 39. LAN Port LED Identification
62
Hard Drive Status Leds
63
System Storage
63
Figure 40. Hard Drive LED Identification
63
Figure 41. Hard Drive Assembly
63
System Cooling
64
Figure 42 Har Driver Bay Assembly
64
Figure 43. System Fan Assembly
64
Figure 44. System Fan Removal
64
System Power
65
Figure 45. Intel Server System SR1670HV - Power Sub-System
65
Table 20. Intel
65
Figure 46. Power Module Removal
66
Power Supply Module Specification
66
Table 21. Power Supply Module Specification
66
Table 22. over Current Protection Limits
66
Table 23. over Voltage Protection Limits
66
AC Power Cord Specification Requirements
67
Add-In Card Support
67
Figure 47. AC Cord Specification
67
Table 24. AC Cord Specification
67
9 Environmental Specifications
68
Intel Server Board S5500HV Environmental Specifications
68
Processor Power Support (Server Board Only)
68
Table 25. Server Board Environmental Limits Summary
68
Table 26. Intel Xeon Processor TDP Guidelines
68
Intel Server System SR1670HV Environmental Specifications
69
Processor Power Support (Integrated System)
69
Table 27. Server System Environmental Limits Summary
69
10 Regulatory and Certification
70
Intel ® Server Board S5500HV Regulatory and Certification
70
Figure 48. Intel
70
Table 28. Server Board Product Safety & Electromagnetic (EMC) Compliance
70
Electromagnetic Compatibility Notices
71
Europe (CE Declaration of Conformity)
72
FCC Verification Statement
72
ICES-003 (Canada)
72
Japan EMC Compatibility
72
BSMI (Taiwan)
73
RRL (Korea)
73
Intel Server System SR1670HV Regulatory and Certification
73
Product Regulatory Compliance
73
Use of Specified Regulated Components
74
Table 29. Server System Product Safety & Electromagnetic (EMC) Compliance
75
Electromagnetic Compatibility Notices
76
10.3 Product Ecology Compliance
78
10.4 Other Markings
80
Component Regulatory Requirements to Support System And/Or Baseboard Level Certifications
81
11 Product Safety Information
83
11.1 Safety Warnings & Cautions
83
11.2 Site Selection
83
11.3 Equipment Handling Practices
84
11.4 Power and Electrical Warnings
84
Replacing the Back up Battery
84
Power Cord Warnings
85
11.5 System Access Warnings
86
11.6 Rack Mount Warnings
86
11.7 Cooling and Airflow
87
11.8 Laser Peripherals or Devices
87
Appendix A: Product Usage Tips
88
Glossary
89
Reference Documents
92
Advertisement
Related Products
Intel SR1690WB - Server System - 0 MB RAM
Intel SR2400
Intel SR1400SYS - Server Platform - 0 MB RAM
Intel SR1475NH1 - Server Platform - 0 MB RAM
Intel Chassis SR1450
Intel SR1475NH1-E
Intel SR1400
Intel SR1300
Intel S5000PSLSATA
Intel SE7320SP2 - 800MHZ Ecc Ddr Xeon
Intel Categories
Motherboard
Computer Hardware
Server
Server Board
Desktop
More Intel Manuals
Login
Sign In
OR
Sign in with Facebook
Sign in with Google
Upload manual
Upload from disk
Upload from URL