Sign In
Upload
Manuals
Brands
Extreme Networks Manuals
Switch
BlackDiamond 10808
Extreme Networks BlackDiamond 10808 Manuals
Manuals and User Guides for Extreme Networks BlackDiamond 10808. We have
4
Extreme Networks BlackDiamond 10808 manuals available for free PDF download: Hardware Installation Manual, Installation Manual
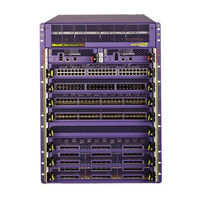
Extreme Networks BlackDiamond 10808 Hardware Installation Manual (424 pages)
Consolidated ExtremeXOS
Brand:
Extreme Networks
| Category:
Switch
| Size: 11.32 MB
Table of Contents
Hardware Installation Guide
1
Table of Contents
3
Preface
15
Introduction
15
Conventions
16
Related Publications
16
Part 1: Site Preparation
19
Chapter 1: Site Preparation
21
Planning Your Site
22
Meeting Site Requirements
22
Evaluating and Meeting Cable Requirements
22
Meeting Power Requirements
22
Operating Environment Requirements
23
Building and Electrical Codes
23
Temperature
24
Wiring Closet Considerations
24
Blackdiamond Family Chassis Airflow Requirements
25
Blackdiamond Family Chassis Spacing Requirements
25
Summit Family of Switches Spacing Requirements
25
Electrostatic Discharge
27
Humidity
27
Rack Specifications and Recommendations
27
Mechanical Recommendations for the Rack
28
Protective Grounding for the Rack
28
Securing the Rack
29
Space Requirements for the Rack
29
Evaluating and Meeting Cable Requirements
30
Cabling Standards
30
Cable Labeling and Record Keeping
30
Installing Cable
31
Cable Distances
33
Fiber Optic Cable
33
RJ-45 Connector Jackets
34
Radio Frequency Interference
35
Making Network Interface Cable Connections
35
Meeting Power Requirements
36
LAN Systems
36
Power Supply Requirements
36
Poe Devices
37
AC Power Cable Requirements
37
Replacing the Power Cable
37
Uninterruptible Power Supply Requirements
37
Calculating Amperage Requirements
38
Selecting a UPS
38
UPS Features
38
UPS Transition Time
38
Applicable Industry Standards
39
Part 2: Blackdiamond Switches
41
Chapter 2: Overview of the Blackdiamond Switches
43
Supported Features
43
Full-Duplex Support
44
Management Ports
44
External Compact Flash Memory Card
44
Blackdiamond 8806 Switch Chassis
44
Overview of the Blackdiamond Switches
44
Blackdiamond 8810 Switch Chassis
46
Blackdiamond 12804 Switch Chassis
47
Blackdiamond 12802 Switch Chassis
49
Blackdiamond 10808 Switch
50
Chapter 3: Blackdiamond 8800 Modules
53
Management Switch Modules (MSM)
53
Slots for Blackdiamond 8800 Msms
53
MSM Activity
54
MSM-G8X and MSM-48 Modules
54
MSM Leds
56
I/O Modules
56
Blackdiamond 8800 Original Series I/O Modules
57
G24X I/O Module
57
10G4X I/O Module
58
G48P I/O Module
59
G48T I/O Module
59
Blackdiamond 8800 A-Series I/O Modules
61
G48Ta I/O Module
61
G48Xa I/O Module
62
10G4Ca I/O Module
63
10G4Xa I/O Module
63
Blackdiamond 8800 E-Series I/O Modules
64
G48Te I/O Module
64
G48Pe I/O Module
65
I/O Module Leds
66
Module Leds
66
Port Leds on Non-Poe Modules
66
Port Leds on Poe Modules (G48P and G48Pe)
67
Chapter 4: Blackdiamond 12800 Series Modules
69
About Blackdiamond 12800 Series Modules
69
Blackdiamond 12800 Series Msms
70
Redundant MSM Activity
71
MSM Leds
71
MSM-5 and MSM-5R Modules
72
Blackdiamond 12800 Series I/O Modules
73
I/O Module Leds
73
I/O Port Leds
74
GM-20T I/O Module
74
GM-20T Leds
75
GM-20XT and GM-20XTR I/O Modules
75
GM-20XT and GM-20XTR Leds
76
XM-2X and XM-2XR I/O Modules
76
XM-2X and XM-2XR Leds
77
Distinguishing a Blackdiamond 12800 Series MSM from an I/O Module
77
Module Slot Assignments
77
Chapter 5: Blackdiamond 10808 Series Modules
79
About the Blackdiamond 10808 Msms
79
MSM Activity
80
MSM Leds
81
About the Blackdiamond 10808 I/O Modules
82
G60T Module
83
G60T Leds
83
G60X Module
84
Mini-GBIC Ports
84
G60X Leds
85
G20X Module
85
G20X Leds
86
Mini-GBIC Ports
86
10G6X Module
86
10G6X Leds
87
XENPAK Ports
87
10G2X Module
88
XENPAK Ports
88
10G2X Leds
89
10G2H Module
89
10G2H Leds
90
Mini-GBIC Ports
90
XENPAK Ports
90
I/O Module Leds
91
Part 3: Installing Blackdiamond Switches and Modules
93
Chapter 6: Installing the Blackdiamond 8810 Chassis
95
Safety Information
95
Unpacking the Blackdiamond 8810 Chassis
96
Pre-Installation Requirements
99
Attaching the Blackdiamond 8810 MID-Mount Rack Brackets
100
Rack Mounting the Blackdiamond 8810 Chassis
101
Grounding the Blackdiamond 8810 Chassis
103
Initial Management Access
104
Chapter 7: Installing the Blackdiamond 8806 and Blackdiamond 12804 Chassis
105
Unpacking the Blackdiamond 8806/12804 Chassis
106
Pre-Installation Requirements
109
Attaching the Blackdiamond 8806/12804 MID-Mount Brackets
109
Rack-Mounting the Blackdiamond 8806/12804 Chassis
110
Grounding the Blackdiamond 8806/12804 Chassis
112
Initial Management Access
113
Chapter 8: Installing the Blackdiamond 12802 Chassis
115
Unpacking the Blackdiamond 12802 Chassis
115
Rack-Mounting the Blackdiamond 12802 Chassis
117
Required Tools and Equipment
117
Front-Mounting a Blackdiamond 12802 Chassis
117
MID-Mounting a Blackdiamond 12802 Chassis
118
Grounding the Blackdiamond 12802 Chassis
119
Initial Management Access
120
Chapter 9: Installing a Blackdiamond 10808 Chassis
121
Safety Information
121
Required Tools and Resources
122
Unpacking the Chassis and Preparing the Rack
122
Checking the Shipping Status Indicators
122
Removing the Accessories Box
124
Removing the Carton from the Chassis
126
Installing the Chassis
128
Standard Rack Installation
129
MID-Mount Rack Installation
132
Grounding the Blackdiamond 10808 Chassis
134
Initial Management Access
136
Chapter 10: Extreme Networks Power Supply Units for Blackdiamond Switches
137
Safety
137
Blackdiamond PSU Compatibility
138
Extreme Networks 1200 W DC PSU
139
Minimum Software Required
139
Pre-Installation Requirements
140
Installing the DC Wiring
140
Installing an Extreme Networks 1200 W DC PSU
141
Removing an Extreme Networks 1200 W DC PSU
144
Front Panel Leds
145
Extreme Networks 700/1200 W AC PSU
146
Pre-Installation Requirements
146
Installing an Extreme Networks 700/1200 W AC PSU
147
Removing an Extreme Networks 700/1200 W AC PSU
149
Front Panel Leds
150
Power Supply Cords
150
Fuse
151
Specifications
151
Extreme Networks 600/900 W AC PSU
152
Minimum Software Required
153
Pre-Installation Requirements
153
Installing an Extreme Networks 600/900 W AC PSU
154
Removing or Replacing an Extreme Networks 600/900 W AC PSU
155
Front Panel Leds
156
Power Supply Cords
156
Fuse
157
Specifications
157
Extreme Networks 325 W DC Power Supply
158
Minimum Software Required
158
Pre-Installation Requirements
159
Installing the DC Wiring
159
Installing an Extreme Networks 325 W DC PSU
160
Removing an Extreme Networks 325 W DC PSU
163
Leds
164
Fuse
164
Specifications
164
Extreme Networks 325 W AC Power Supply
165
Pre-Installation Requirements
165
Installing an Extreme Networks 325 W AC PSU
166
Installing Retaining Brackets and Connecting Power
168
Removing an Extreme Networks 325 W AC PSU
170
Front Panel Leds
170
Power Supply Cords
171
Fuse
171
Specifications
171
Chapter 11: Installing Blackdiamond Series Modules
173
Module Slot Assignments
173
Distinguishing a Blackdiamond 8800 or 12800 MSM from an I/O Module
174
Installing a Blackdiamond 8800 or 12800 Series Module
175
Connecting and Disconnecting Cables on the 10G4Ca Module
178
Installing a Blackdiamond 10808 Series Module
179
Installing a Backup MSM
182
Verifying the Module Installation
182
Displaying Slot Status Information
182
Removing a Blackdiamond 8800 or 12800 Series Module
183
Removing a Blackdiamond 10808 Series Module
184
Blackdiamond Series Blank Front Panels
185
Installing a Blank Front Panel
185
Removing a Blank Front Panel
186
Installing or Removing an External Compact Flash Memory Card
188
Part 4: Installing Blackdiamond Switch Accessories
189
Chapter 12: Blackdiamond AC Power Cord Retaining Brackets
191
Blackdiamond 8810 AC Power Cord Retaining Bracket
191
Installing the Blackdiamond 8810 AC Power Cord Retaining Bracket
191
Disconnecting a Blackdiamond 8810 AC Power Cord
193
Blackdiamond 8806/12804 AC Power Cord Retainer Channel
194
Pre-Installation Requirements
194
Installing the Blackdiamond 8806/12804 AC Power Cord Retainer Channel
194
Removing the Blackdiamond 8806/12804 AC Power Cord Retainer Channel
196
Chapter 13: Blackdiamond Cable Management
197
About Blackdiamond Cable Management
197
Installing the Blackdiamond 10808 Cable Manager
197
Using the Cable Holders and Cable Clips
202
Connecting Cable Holders
203
Connecting Cable Clips
204
Part 5: Blackdiamond Maintenance Procedures
207
Chapter 14: Replacing the Blackdiamond 12802 Psu/Fan Controller and Fan Tray
209
Safety Information
209
Pre-Installation Requirements
209
Replacing the Blackdiamond 12802 Fan Tray
209
Replacing a Blackdiamond Psu/Fan Controller
211
Chapter 15: Replacing a Blackdiamond 8800 Series/Blackdiamond 12804 Psu/Fan Controller
213
Pre-Installation Requirements
213
Removing a Blackdiamond 8800/12804 Psu/Fan Controller
213
Installing a Blackdiamond 8800/12804 Spare Psu/Fan Controller
216
Chapter 16: Replacing a Blackdiamond 12804 or 8800 Series Fan Tray
217
Pre-Installation Requirements
217
Removing the Fan Tray
217
Installing the Blackdiamond 8810 Spare Fan Tray
219
Chapter 17: Replacing the Blackdiamond 10808 Switch Fan Tray, Air Filter, and Power Supply Controller
221
Replacing a Blackdiamond 10808 Switch Fan Tray
221
Removing the Fan Tray
221
Installing the Replacement Fan Tray
222
Replacing the Blackdiamond 10808 Air Filter
223
Replacing the Blackdiamond 10808 Power Supply Controller
224
Pre-Installation Requirements
225
Removing a Power Supply Controller
225
Installing a Power Supply Controller
226
Verifying a Successful Installation
226
Chapter 18: Repacking a Blackdiamond Chassis
227
Safety Information
227
Repacking the Blackdiamond 8810 Chassis
228
Repacking the Blackdiamond 8806/12804 Chassis
231
Repacking the Blackdiamond 12802 Chassis
234
Repacking the Blackdiamond 10808 Chassis
235
Part 6: Summit Family of Switches
239
Chapter 19: Summit Family of Switches
241
Overview of the Summit Switches
241
Summit X250E Series Switches
242
Summit X250E-24T Switch
242
Summit X250E-24T Switch Front Panel
242
Summit X250E-24T Switch Rear Panel
243
Summit X250E-24P Switch
244
Summit X250E-24P Switch Front Panel
244
Summit X250E-24P Switch Rear Panel
245
Summit X250E-48T Switch
245
Summit X250E-48T Switch Front Panel
246
Summit X250E-48T Switch Rear Panel
246
Summit X250E-48P Switch
247
Summit X250E-48P Switch Front Panel
248
Summit X250E-48P Switch Rear Panel
248
External Power Supplies
249
Internal Power Supply
249
Summit X250E-48P Power Supplies
249
Summit X250E Series Switch Leds
250
Summit X450 Series Switches
252
Summit X450-24T Switch
252
Summit X450-24T Switch Front Panel
252
Summit X450-24T Switch Rear Panel
253
Summit X450-24X Switch
254
Summit X450-24X Switch Front Panel
254
Summit X450-24X Switch Rear Panel
255
Summit X450A Series Switches
256
Summit X450A-24T Switch
256
Summit X450A-24T Switch Front Panel
257
Summit X450A-24T Switch Rear Panel
257
Summit X450A-24Tdc Switch
259
Summit X450A-24Tdc Switch Front Panel
259
Summit X450A-24Tdc Switch Rear Panel
260
Summit X450A-24X Switch
261
Summit X450A-24X Switch Front Panel
261
Summit X450A-24X Switch Rear Panel
262
Summit X450A-24Xdc Switch
263
Summit X450A-24Xdc Switch Front Panel
264
Summit X450A-24Xdc Switch Rear Panel
264
Summit X450A-48T Switch
265
Summit X450A-48T Switch Front Panel
266
Summit X450A-48T Switch Rear Panel
266
Summit X450A-48Tdc Switch
267
Summit X450A-48Tdc Switch Front Panel
268
Summit X450A-48Tdc Switch Rear Panel
269
Summit X450E Series Switches
270
Summit X450E-24P Switch
270
Summit X450E-24P Switch Front Panel
271
Summit X450E-24P Switch Rear Panel
271
Summit X450E-48P Switch
272
Summit X450E-48P Switch Front Panel
273
Summit X450E-48P Switch Rear Panel
274
External Psus
275
Internal PSU
275
Summit X450E-48P Power Supplies
275
Summit X450, X450A, and X450E Series Switch Leds
276
Chapter 20: Installing Summit Family Switches
279
Safety Information
279
Building a Summitstack Configuration
280
Slot Numbers
280
About Redundancy
281
Placing Summit Family Switches for Stacked Operation
281
Connecting the Switches to Form the Stack Ring
281
Connecting a Stacking Cable to a Stacking Port
283
Connecting the Console Port
284
Management Port Cabling
284
Stacking Port Leds
284
Installing a Summit Family Switch
285
Rack-Mounting a Summit Switch
285
Free-Standing and Desktop Mounting of Multiple Switches
286
Removing a Summit Switch from a Rack (AC Units Only)
286
Installing and Removing Summit X450A Series DC-Powered Switches
286
Connecting the Internal DC Power Supply to the DC Source Voltage
287
Grounding the Summit X450A-48Tdc Switch
287
Connecting the DC Wiring Harness to the DC Source Voltage
288
Attaching the DC Wiring Harness to the DC Power Socket on the Switch
290
Removing a Summit X450A-48Tdc Switch from a Rack
291
Initial Management Access
292
Chapter 21: Summit Option Cards
293
Overview
293
Safety Information
294
XFP and XENPAK Safety Specifications
294
Summit XGM-2Xn Option Card
295
Mixing ZR Xenpaks with Other Types
295
Installing the Summit XGM-2Xn Option Card
296
Summit XGM2-2Xn Option Card
297
Installing the Summit XGM2-2Xn Option Card
298
Installing or Removing XENPAK Modules
300
Installing a XENPAK Module
300
Removing a XENPAK Module
301
Summit XGM2-2Xf Option Card
302
Installing the Summit XGM2-2Xf Option Card
303
Installing or Removing XFP Modules
304
Installing an XFP Module
305
Removing an XFP Module
306
Chapter 22: Summit External Power Supplies (EPS)
307
Overview
307
Safety
308
External Power Module (with EPS-T)
309
Installing an EPS-160 External Power Module
310
Rack Mounting the EPS-T
310
Connecting the EPS-160
311
Installing an EPS-160 into an EPS-T
311
Removing an EPS-160 from an EPS-T
312
EPS-LD External Power Supply Unit
313
Installing an EPS-LD
313
Rack-Mounting the EPS-LD
313
Connecting the EPS-LD to the Switch
314
Connecting the EPS-LD to Power
316
Removing an EPS-LD
316
External Power Supply Unit
317
Installing and Removing an EPS-500
318
Rack-Mounting an EPS-500 Unit
318
Connecting the EPS-500
319
Removing an EPS-500 Unit
321
EPS-150DC External Power Module (with EPS-T2)
321
Installing an EPS-T2
321
Pre-Installation Requirements
322
Rack Mounting the EPS-T2
322
Installing an EPS-150DC
322
Connecting the DC Wiring Harness to the DC Source Voltage
323
Installing an EPS-150DC Unit into an EPS-T2
324
Connecting the DC Wiring Harness to the DC Power Socket on the EPS-150DC
325
Connecting the EPS-150DC to a Switch
325
Removing an EPS-150DC
327
EPS-600LS External Power Module
328
Power Supply Overview
328
Single 600-LS Module Configuration: Redundant Poe Power
328
Active Internal PSU with Single 600-LS Module Failure
329
Dual 600-LS Module Configuration: Full Power
329
External to Internal PSU Transfer
329
Inactive Internal PSU with a Dual EPS-600LS Configuration and Module Failure
329
Internal PSU Failure with Single EPS-600LS Module
329
Internal-To-External PSU Transfer
329
Triple 600-LS Module Configuration: Full Redundant Power
329
Two or Three EPS-600LS Modules
329
Disconnecting the EPS-C/EPS-600LS
330
Installing an EPS-C Chassis
330
Pre-Installation Requirements
330
Rack-Mounting the EPS-C
330
Installing an EPS-600LS
332
Removing an EPS-600LS
334
Part 7: Optics
335
Chapter 23: Extreme Networks Optics
337
Safety
337
GBIC, Mini-GBIC, XENPAK, and XFP Regulatory Compliance
338
Mini-GBIC Interfaces
338
Mini-GBIC Types and Specifications
338
SX Mini-GBIC
338
LX Mini-GBIC
339
ZX Mini-GBIC
341
Dual-Speed 100FX/1000LX Mini-GBIC
342
100FX Mini-GBIC
343
1000BX Mini-GBIC
345
LX100 Mini-GBIC
346
Preparing to Install or Replace a Mini-GBIC
346
Installing and Removing a Mini-GBIC
347
100FX/1000LX Mini-GBIC
348
Connecting Fiber Cables
348
LX100 Mini-GBIC
348
XFP Interfaces
349
LR XFP Module
349
SR XFP Module
350
Installing an XFP Module
350
Removing an XFP Module
353
XENPAK Interfaces
354
Sr Xenpak
354
Lr Xenpak
355
Er Xenpak
356
Zr Xenpak
357
Lx4 Xenpak
358
Lw Xenpak
359
Transmitter Clock Locking Mode
360
Installing and Removing a XENPAK Module
361
Part 8: Initial Management Access
363
Chapter 24: Initial Management Access
365
Connecting Equipment to the Console Port
365
Logging in for the First Time
367
Appendix A: Safety Information
371
Considerations before Installing
371
Installing Power Supply Units
372
Maintenance Safety
373
General Safety Precautions
373
LAN Systems
374
Poe Devices
374
Uninterruptible Power Supply Requirements
374
UPS Features
374
Calculating Amperage Requirements
375
UPS Transition Time
375
Power Supply Cords Selection
375
Battery Replacement and Disposal
377
Fiber Optic Ports-Optical Safety
377
GBIC, Mini-GBIC, XENPAK, and XFP Regulatory Compliance
377
Hinweise zur Installation
379
Installation von Netzteilen
380
Allgemeine Sicherheitsvorkehrungen
381
Appendix B: Technical Specifications
385
Blackdiamond 10808 Switch
385
Blackdiamond 8810 Switch
388
Blackdiamond 8806/12804 Switch
390
Blackdiamond 12802 Switch
393
Power Supplies for the Blackdiamond Family of Switches
395
Summit Family of Switches
398
Summit X250E Series Switches
398
Summit X450 Series Switches
402
Summit X450A Series Switches
404
Summit X450E Series Switches
408
Summit External Power Supplies
411
Index
415
Advertisement
Extreme Networks BlackDiamond 10808 Hardware Installation Manual (144 pages)
Extreme BlackDiamond 10808: Installation Guide
Brand:
Extreme Networks
| Category:
Switch
| Size: 4.24 MB
Table of Contents
Table of Contents
3
Blackdiamond 10808 Switch
1
Hardware Installation Guide
1
Preface
7
Introduction
7
Conventions
8
Related Publications
8
Part 1: about the Blackdiamond 10808 Switch
11
Chapter 1: Overview of the Blackdiamond 10808 Switch
13
Overview of the Blackdiamond 10808 Switch
13
Full-Duplex Support
13
Management Ports
14
External Compact Flash Memory Card
14
Blackdiamond 10808 Switch Chassis
14
Chapter 2: Blackdiamond 10808 Series Modules
17
Overview of the Blackdiamond 10808 Modules
17
Management Switch Modules (Msms)
17
MSM Physical Features
18
Redundant MSM Activity
18
MSM Leds
19
I/O Modules
20
G60T Leds
21
G60T Module
21
G60X Module
22
SFP (Mini-GBIC) Ports
22
G20X Module
23
G60X Leds
23
10G6X Module
24
G20X Leds
24
SFP Ports
24
10G6X Leds
25
XENPAK Ports
25
10G2X Module
26
XENPAK Ports
26
10G2H Module
27
10G2X Leds
27
10G2H Leds
28
SFP Ports
28
XENPAK Ports
28
I/O Module Leds
29
Chapter 3: Power Supply Units for the Blackdiamond 10808 Switch
31
Overview of Blackdiamond 10808 Power Supplies
31
Extreme Networks 700/1200 W AC PSU
31
Leds
32
Power Supply Cords
32
Fuse
33
Specifications
33
Extreme Networks 1200 W DC PSU
33
Leds
35
Minimum Software Required
35
Chapter 4: Site Preparation
39
Planning Your Site
39
Meeting Site Requirements
40
Building and Electrical Codes
40
Operating Environment Requirements
40
Temperature
41
Wiring Closet Considerations
41
Chassis Airflow Requirements
42
Chassis Spacing Requirements
42
Humidity
42
Electrostatic Discharge
43
Mechanical Recommendations for the Rack
44
Protective Grounding for the Rack
44
Rack Specifications and Recommendations
44
Securing the Rack
45
Space Requirements for the Rack
45
Evaluating and Meeting Cable Requirements
46
Cable Labeling and Record Keeping
46
Cabling Standards
46
Installing Cable
47
Fiber Optic Cable
48
Cable Distances
49
RJ-45 Connector Jackets
50
Radio Frequency Interference
51
Meeting Power Requirements
51
Poe Devices
51
Power Supply Requirements
51
AC Power Cable Requirements
52
Replacing the Power Cable
52
Calculating Volt-Amperage Requirements
53
Selecting a UPS
53
Uninterruptible Power Supply Requirements
53
UPS Transition Time
54
Applicable Industry Standards
54
Chapter 5: Installing a Blackdiamond 10808 Chassis
55
Required Tools and Resources
56
Unpacking the Chassis
56
Checking the Shipping Status Indicators
56
Removing the Accessories Box
58
Removing the Carton from the Chassis
60
Installing the Chassis
62
Standard Rack Installation
63
MID-Mount Rack Installation
66
Grounding the Chassis
68
Initial Management Access
69
Chapter 6: Installing Power Supply Units in the Blackdiamond10808 Switch
71
Safety
71
Blackdiamond PSU Compatibility
72
Minimum Software Requirements
72
Installing an Extreme Networks 700/1200 W AC PSU
72
Installing the 700/1200 W AC PSU
73
Required Tools and Equipment
73
Removing or Replacing an Extreme Networks 700/1200 W AC PSU
74
Leds on the 700/1200 W AC PSU
75
Power Supply Cords
75
Installing an Extreme Networks 1200 W DC PSU
76
Installing the DC Wiring
77
Minimum Software Required
77
Pre-Installation Requirements
77
Installing a 1200 W DC PSU
78
Removing an Extreme Networks 1200 W DC PSU
81
Leds on the 1200 W DC PSU
82
Module Slot Assignments
83
Chapter 7: Installing Blackdiamond 10808 Modules
83
Module Slot Assignments
83
Installing a Blackdiamond 10808 Series Module
83
Module Slot Assignments
84
Installing a Blackdiamond 10808 Series Module
85
Connecting Equipment to the Console Port
86
Initial Management Access
86
Making Network Interface Cable Connections
86
Logging in for the First Time
87
Displaying Slot Status Information
88
Installing a Backup MSM
88
Verifying the Module Installation
88
Blank Front Panels
89
Removing a Blackdiamond 10808 Series Module
89
Installing a Blank Front Panel
90
Installing or Removing an External Compact Flash Memory Card
91
Removing a Blank Front Panel
91
Part 3: Installing Blackdiamond Switch Accessories
93
Chapter 8: Blackdiamond Cable Management
95
About Blackdiamond Cable Management
95
Installing the Blackdiamond 10808 Cable Manager
95
Phillips Screwdriver
95
Using the Cable Holders and Cable Clips
100
Connecting Cable Holders
101
Connecting Cable Clips
102
Part 4: Blackdiamond Maintenance Procedures
105
Chapter 9: Replacing Blackdiamond 10808 Switch Chassis Components
107
Replacing a Blackdiamond 10808 Switch Fan Tray
107
Removing the Fan Tray
107
Installing the Replacement Fan Tray
108
Replacing the Blackdiamond 10808 Air Filter
109
Replacing a Blackdiamond 10808 Power Supply Controller
110
Pre-Installation Requirements
111
Removing a Power Supply Controller
111
Installing a Power Supply Controller
112
Verifying a Successful Installation
112
Chapter 10: Repacking a Blackdiamond 10808 Chassis
113
Safety Information
113
Required Tools and Equipment
114
Repacking the Blackdiamond 10808 Chassis
114
Appendix A: Safety Information
121
Considerations before Installing
121
Installing Power Supply Units
121
Maintenance Safety
122
General Safety Precautions
123
Cable Routing for LAN Systems
123
Poe Devices
124
Selecting Power Supply Cords
124
Battery Replacement and Disposal
125
Fiber Optic Ports-Optical Safety
125
GBIC, SFP (Mini-GBIC), XENPAK, and XFP Regulatory Compliance
126
Hinweise zur Installation
127
Installation von Netzteilen
128
Allgemeine Sicherheitsvorkehrungen
129
Appendix B: Technical Specifications
133
Blackdiamond 10808 Switch
133
Power Supplies for the Blackdiamond 10808 Switch
135
Connector Pinouts
136
Index
139
Extreme Networks BlackDiamond 10808 Installation Manual (106 pages)
Brand:
Extreme Networks
| Category:
Switch
| Size: 2.22 MB
Table of Contents
Table of Contents
3
Preface
7
Introduction
7
Conventions
8
Related Publications
9
About this Guide
9
How to Use this Guide
10
Chapter 1 Blackdiamond 10808 Switch Overview
11
Summary of Features
11
Full-Duplex Support
12
Management Ports
12
Mini-GBIC Type and Hardware/Software Support
12
Mini-GBIC Types and Specifications
12
Safety Information
14
Preparing to Install or Replace a Mini-GBIC
14
Installing and Removing a Mini-GBIC
15
XENPAK Module Installation
16
Chapter 2 Site Preparation
19
Planning Your Site
20
Step 1: Meeting Site Requirements
20
Step 2: Evaluating and Meeting Cable Requirements
20
Step 3: Meeting Power Requirements
20
Meeting Site Requirements
20
Operating Environment Requirements
20
Rack Specifications and Recommendations
26
Evaluating and Meeting Cable Requirements
28
Cabling Standards
28
Cable Labeling and Record Keeping
28
Installing Cable
29
RJ-45 Connector Jackets
32
Radio Frequency Interference
32
Making Network Interface Cable Connections
33
Meeting Power Requirements
33
Power Supply Requirements
33
AC Power Cable Requirements
34
Uninterruptable Power Supply Requirements
35
Applicable Industry Standards
36
Chapter 3 Blackdiamond 10808 Switch Chassis
37
Blackdiamond 10808 Switch Architecture
37
Blackdiamond 10808 Switch Front View
37
Blackdiamond 10808 Switch Rear View
39
Blackdiamond 10808 Switch Leds
40
Power Socket
40
Installing the Chassis
40
Standard Rack Installation
41
MID-Mount Rack Installation
49
Grounding the Blackdiamond 10808 Switch
51
Installing the Blackdiamond Cable Manager
52
Chapter 4 Blackdiamond 10808 Switch Management Module
59
MSM Activity
60
MSM Leds
61
Installing Msms
62
Verifying the MSM Installation
64
Removing Msms
64
Chapter 5 Blackdiamond 10808 I/O Modules
67
Configuring I/O Modules
67
G60T Module
68
G60X Module
69
10G6X Module
70
I/O Module Leds
71
Installing I/O Modules
72
Verifying the I/O Module Installation
74
LED Indicators
74
Displaying Slot Status Information
74
Removing I/O Modules
75
Installing a Blank Front Panel
76
Chapter 6 Blackdiamond 10808 Switch Power Supplies and Power Supply Controllers
80
Power Supply Overview
80
Installing the Power Supplies
83
Removing the Power Supplies
84
Power Supply Controller Overview
85
Installing the Power Supply Controllers
86
Verifying a Successful Installation
86
Chapter 7 Blackdiamond 10808 Switch Fan Tray and Filter
87
Blackdiamond 10808 Switch Fan Tray
87
Removing the Blackdiamond 10808 Switch Fan Tray
88
Installing the Fan Tray
90
Replacing the Filter
91
Chapter 8 Initial Switch and Management Access
93
Connecting Equipment to the Console Port
93
Logging in for the First Time
95
Appendix A Safety Information
97
Important Safety Information
97
Power
97
Power Cable
98
Connections
99
Lithium Battery
99
Safety Information
97
Switch Technical Specifications
101
Appendix B Switch Technical Specifications
103
Index
103
Advertisement
Extreme Networks BlackDiamond 10808 Installation Manual (186 pages)
Extreme BlackDiamond 10808: Installation Guide
Brand:
Extreme Networks
| Category:
Switch
| Size: 3.97 MB
Advertisement
Related Products
Extreme Networks ReachNXT 100-8t
Extreme Networks BlackDiamond 10K Series
Extreme Networks BlackDiamond 12800 Series
Extreme Networks BlackDiamond 12802
Extreme Networks 16801
Extreme Networks 16802
Extreme Networks 16804
Extreme Networks ExtremeSwitching 5420M-16MW-32P-4YE
Extreme Networks 16519
Extreme Networks 16520T
Extreme Networks Categories
Switch
Wireless Access Point
Software
Network Hardware
Network Router
More Extreme Networks Manuals
Login
Sign In
OR
Sign in with Facebook
Sign in with Google
Upload manual
Upload from disk
Upload from URL