Sign In
Upload
Manuals
Brands
EMC Manuals
Gateway
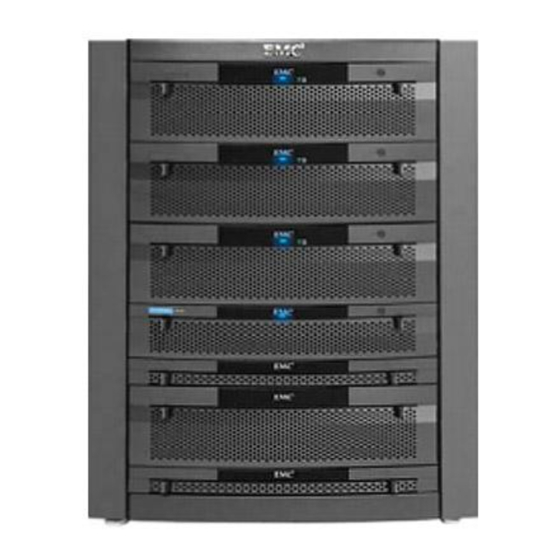
VNX VG2
EMC VNX VG2 Manuals
Manuals and User Guides for EMC VNX VG2. We have
1
EMC VNX VG2 manual available for free PDF download: Setup Manual
EMC VNX VG2 Setup Manual (318 pages)
Brand:
EMC
| Category:
Gateway
| Size: 11 MB
Table of Contents
Table of Contents
3
Phase 1 Installation
17
Chapter 1 Introduction
19
Product Introduction
20
Setup Process Overview
21
Phase 1: Planning and Data Collection
21
Phase 2: Physical Installation and Initial Configuration
22
Phase 3: Final Configuration
23
How Setup Works
24
Factory Configuration
24
Boot Array
24
Installing Software in the Field
25
PXE Booting Blades
25
Assigned Blade Identifiers
25
Configuring the Private (Internal) LAN
25
Zoning FC Switches
27
Zoning Fcoe Switches
28
Creating Host Luns
28
Copying NAS Software to the Boot Array
28
Understanding the Network Block Service
29
Configuring Dual Control Stations
29
Booting Blades from the Array
30
Remaining Setup Steps
30
Unisphere Interface
30
VNX Gateways and Domain Support
30
Additional Information
31
Chapter 2 Before Installing
33
Step 1: Check Components
34
Verifying Components on Site
34
VG2 Components
36
VG8 Components
38
VG2/VG8 Control Station
39
VG2/VG8 CPU and Power Supply/ Cooling Modules
39
Identifying Blades and I/O Modules
40
Direct- or Fabric-Connected
45
Step 2: Confirm Site Preparation
47
EMC Factory-Installed Cabinet
47
Customer's Cabinet
47
All Systems
47
Systems with Symmetrix Arrays
48
Fabric-Connected Systems with VNX Arrays
48
Direct-Connected Systems with VNX Arrays
49
Access Logix
49
Step 3: Collect Configuration Information
50
Part 2 Phase 2 Installation
51
Chapter 3 Install Components in Customer's Cabinet
53
Installing Components
54
Component Layout
55
System Cabling
56
Chapter 4 Connect Cables for a Fabric-Connected VG2
57
Step 1: Blade Fibre Channel Cables
58
Step 2: Array Fibre Channel Cables
60
Connecting a Symmetrix Array
60
Connecting a VNX7500 Array
62
Connecting a VNX5700 Array
64
Connecting a VNX5500 Array
66
Connecting a VNX5300 Array
68
Connecting a VNX5100 Array
70
Connecting Additional Arrays
71
Step 3: Serial Cables
72
Step 4: Optional Tape Backup Device Cables
73
Step 5: Private LAN Cables
74
Step 6: External Network Cables
76
Chapter 5 Connect Cables for a Direct-Connected VG2
80
Step 1: Blade Fibre Channel Cables
80
Connecting a VNX5300 or VNX5500 Array
81
Connecting a VNX5700 or VNX7500 Array
82
Step 2: Serial Cables
83
Step 3: Optional Tape Backup Device Cables
84
Step 4: Private LAN Cables
85
Step 5: External Network Cables
87
Chapter 6 Connect Cables for a Fabric-Connected VG8
90
Step 1: Blade Fibre Channel Cables
90
Step 2: Array Fibre Channel Cables
93
Connecting a Symmetrix Array
93
Connecting a VNX7500 Array
95
Connecting a VNX5700 Array
97
Connecting a VNX5500 Array
99
Connecting a VNX5300 Array
101
Connecting a VNX5100 Array
103
Connecting Additional Arrays
104
Step 3: Serial Cables
105
Step 4: Optional Tape Backup Device Cables
106
Step 5: Private LAN Cables
107
Step 6: External Network Cables
110
Chapter 7 Connect Cables for a Direct-Connected VG8
113
Step 1: Blade Fibre Channel Cables
114
Connecting a VNX5300 or VNX5500 Array
115
Connecting a VNX5700 or VNX7500 Array
116
Step 2: Serial Cables
118
Step 3: Optional Tape Backup Device Cables
119
Step 4: Private LAN Cables
120
Step 5: External Network Cables
123
Chapter 8 Configure the Boot Array
125
Step 1: Verify Power Cables Are Disconnected
126
Step 2: Power up the Boot Array
126
Step 3: Verify VNX Array Software Versions
127
Using Unisphere
128
Using Navisphere CLI
129
Step 4: Verify VNX Array Read and Write Cache Settings
130
Using Unisphere
131
Using Navisphere CLI
132
Step 5: Verify Domain Security Is Configured
132
Using Unisphere
133
Using Naviseccli
133
Chapter 9 Install and Configure EMC NAS Software
136
Step 1: Power up the VNX Gateway System
136
Power up the VNX Cabinet
136
Step 2: Install Latest File OE on CS 0
139
Changing IP Addresses
139
Auto-Config Option
139
Procedure
140
Step 3: Install Latest File OE on CS 1
141
Procedure
141
Step 4: Configure Connecthome
142
Step 5: Check System Status
143
Step 6: Enable Licensed Features
143
Step 7: Complete the Hand-Off Worksheet
144
Step 8: Final Configuration
144
Phase 3 Installation
145
Chapter 10 Complete Phase 3 Installation
147
Introduction
148
Phase 3: Preparation Checklist
148
Phase 3 Setup Tasks
149
Add Additional Arrays
150
Adding an Array
150
Adding a Symmetrix Array
154
Create User Luns
155
Prepare for Customer Data
157
The Setup Celerra Wizard
157
Prerequisites
157
Log in to Unisphere
158
Launch the Setup Celerra Wizard
159
Create NFS Exports
160
Create Netgroups
161
Create Users
161
Appendixes
163
Appendix A Change Connecthome Dialing Configuration
165
When to Change the Connecthome Dialing Configuration
166
Disabling Dial Tone Detection
167
Setting the Country Code on the MT5634ZBA Modem
168
Windows-Based PC Instructions
168
Manual Instructions for Setting the Country Code
170
Appendix B Change IP Addresses
173
Change Private IP Addresses
174
Change Primary Subnet
176
Change Secondary Subnet
180
Appendix C Backend Storage Requirements Check Failed Error
186
Introduction
186
Backend Storage Requirements Check Failed
186
This Appendix Describes How to Correct the Following Error by Upgrading the Software
186
Upgrade the Operating Environment
187
Sample Error Message
187
Remedy
187
Prior to Arriving on Site
187
Problems During the Procedure
187
Online Update Procedure
188
Commit the Operating Environment
193
Sample Error Message
193
Remedy
193
Enable Read and Write Cache
194
Sample Error Message
194
Remedy
194
Using Unisphere
194
Using Navisphere CLI
196
Appendix D Resolve Blade Boot Failures
197
Manually Set the Blade Fibre Speed
198
Verify Fibre Channel Port Link Lights
199
Appendix Enas Install Options
202
Express Install for File OE Release 7.0 or Lower
202
Express Install for File OE Release 7.1 or Higher
217
Using the Kickstart Installation Option (File OE Release 7.0 or Lower)
228
If the Software Installation Fails
229
For a VNX Boot Array
229
For a Symmetrix Boot Array
229
Manually Zone Switches and Configure System Luns
231
Appendix F Manually Zone Switches and Configure System Luns
232
Zone the Fc/Fcoe Switches by WWN
232
Collecting Blade Wwns
232
Collecting Backend Wwns
233
Zoning the Fc/Fcoe Switch
234
Create Control Luns on VNX Array
237
Create Storage Group
238
Create RAID Group for Control Luns
239
Create Control Luns
240
Add Control Luns to Storage Group
242
Create Hot Spare Disk
245
Verify Blade Port Registration
246
Add Gateway Hostname to Storage Group
249
Return to File OE Installation
250
Cable Connections from Fibre Channel Switch to Storage Array
251
Appendix G Cable Connections from Fibre Channel Switch to Storage Array
252
Connecting a Clariion CX300 or CX500 Array
252
Connecting a Clariion CX700 Array
254
Connecting a Clariion CX3-10 Array
256
Connecting a Clariion CX3-20 or CX3-40 Array
258
Connecting a Clariion CX3-80 Array
260
Connecting a Clariion CX4-960 Array
262
Connecting a Clariion CX4-480 Array
264
Connecting a Clariion CX4-240 Array
266
Connecting a Clariion CX4-120 Array
268
Setup Worksheets
271
Appendix H Setup Worksheets
272
Site Preparation Worksheet
272
Fc/Fcoe Cabling Worksheet
273
VNX Boot Array Worksheet
276
Control Station 0 Networking Worksheet
277
Control Station 1 Networking Worksheet
278
Private LAN Worksheet
280
Primary Private LAN
280
Backup Private LAN
281
IPMI Private LAN
281
Phase 2 Completion Hand-Off Worksheet
282
Setup Celerra Wizard Worksheets
283
Begin Celerra Setup Worksheet
283
Set up Data Mover Worksheet
284
Set up DM Network Services Worksheet
285
Create DM Network Interface Worksheet
293
Create a File System Worksheet
294
Create a CIFS Share Worksheet
295
Iscsi Wizard Worksheets
296
Create an Iscsi Target Worksheet
296
Create an Iscsi LUN Worksheet
296
Connecthome Configuration Worksheet
298
Navisphere Manager Procedures
301
Appendix I Navisphere Manager Procedures
302
Collecting Backend Wwns
302
Creating Control Luns on Clariion Array
303
Create Storage Group
303
Register Blade Ports
303
Add Blades to Storage Group
306
Create RAID Group
306
Bind Luns
307
Add Control Luns to Storage Group
307
Create Hot Spare Disk
309
Verify LUN Creation
309
Verifying Clariion Array Software Versions
310
Verifying Clariion Array Read and Write Cache Settings
311
Verifying Navisphere Domain Security Is Configured
313
Advertisement
Advertisement
Related Products
EMC VNX VG8
EMC VNX5300 Block
EMC VNXe3200
EMC VNX Series
EMC VNX8000
EMC VNX5500
EMC VNXe3100
EMC EMC VNX VNX5200
EMC VNXe
EMC VNX5100 DP25
EMC Categories
Storage
Switch
Server
Enclosure
Network Hardware
More EMC Manuals
Login
Sign In
OR
Sign in with Facebook
Sign in with Google
Upload manual
Upload from disk
Upload from URL